Home Improvement
20 Stair Landing Decor Ideas That Designers Always Notice
By Anna Wells · · 21 min read
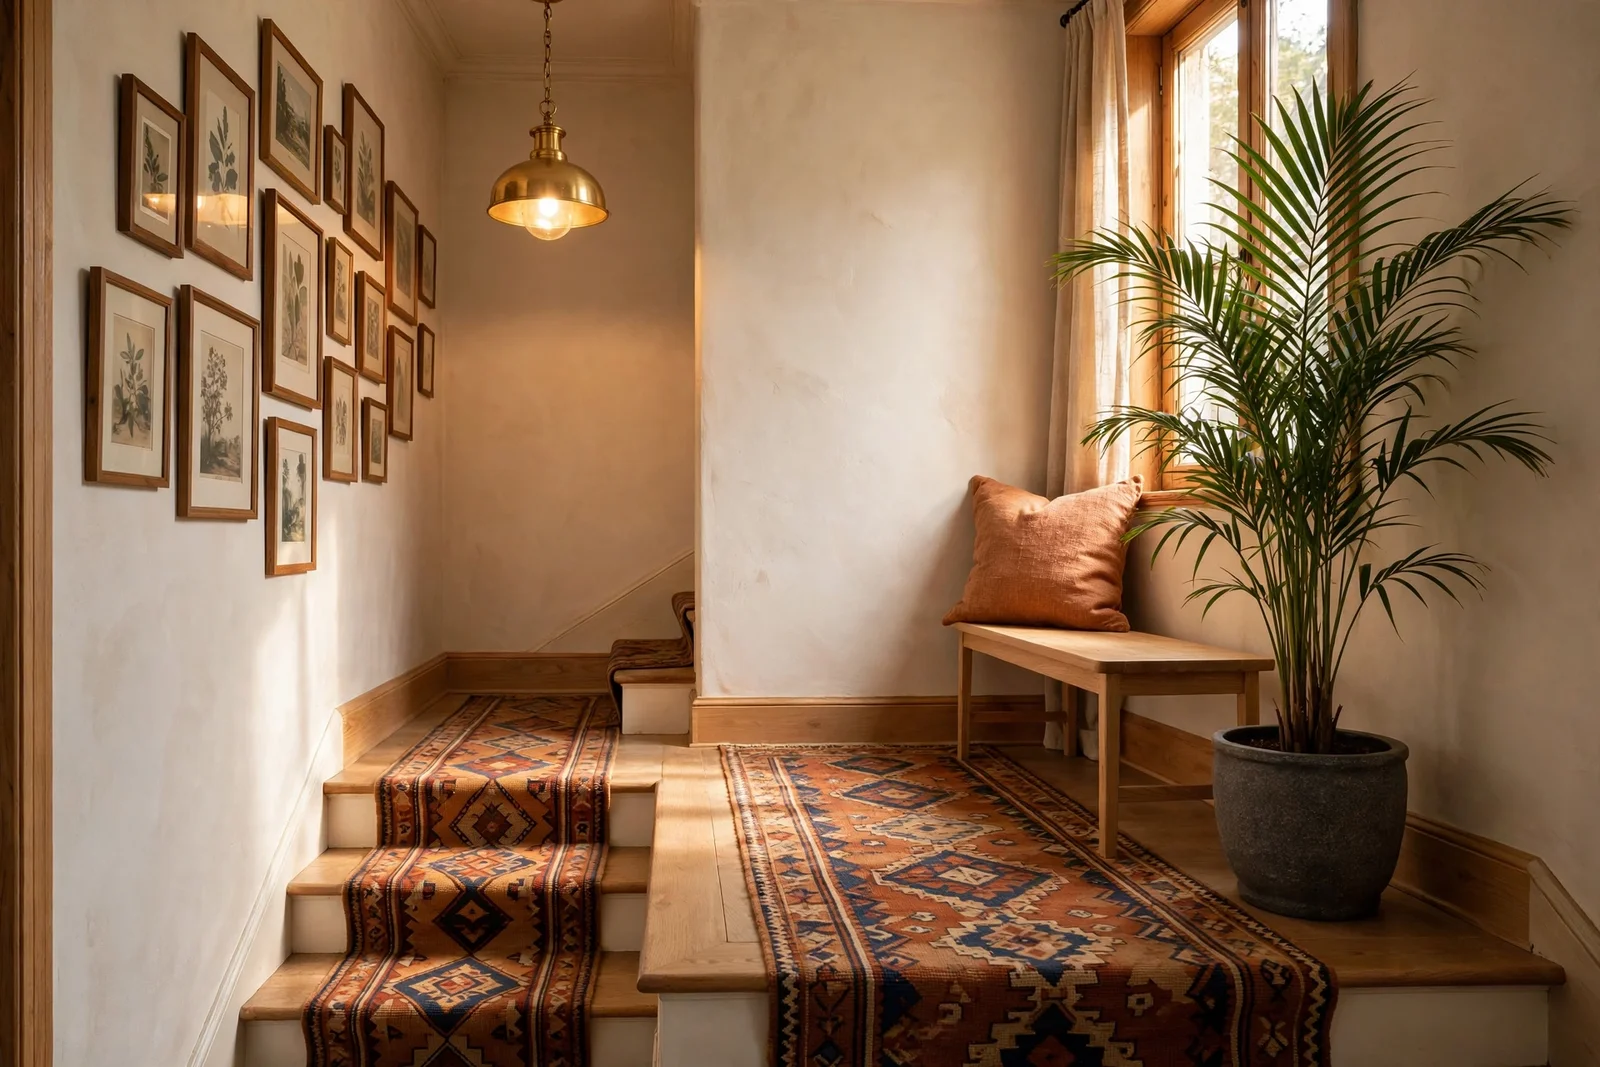
Twenty designer-approved ideas that turn a forgotten stair landing into a warm, intentional little room, with real measurements, honest budgets and safety notes.
Late afternoon light pauses on the landing, the one corner of the staircase that nobody designed. Dust drifts in the sunbeam, the handrail feels smooth under your palm, and for a moment the turn between floors is the quietest room in the house.
Most landings are treated as leftovers, a patch of carpet between two flights of stairs. Designers see them differently: a small room with its own walls, its own light and its own job, deserving of furniture, art and intention like any other space.
This collection gathers twenty concrete ideas, from a slim bench and a climbing gallery wall to lighting that marks the turn and safety rules that keep every step sure. Each idea comes with real measurements, honest budgets and one mistake to avoid.
Start wherever your landing is emptiest, and treat the turn as a room at last.
1. Set a Slim 30-Inch Bench Along the Landing Wall With a Cushion
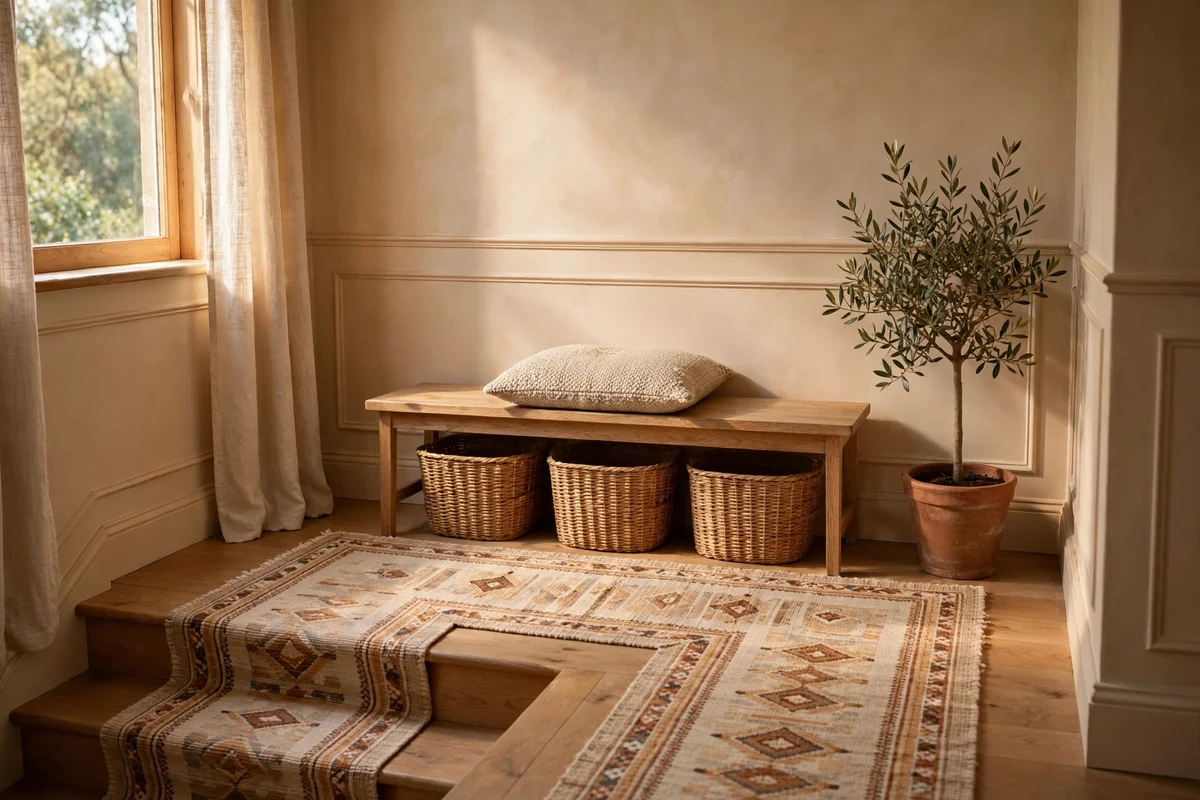
A bench between 75 and 90 cm wide (about 30 to 36 inches) fits most landings without crowding the walk line. Push it fully against the wall, leaving at least 90 cm of clear floor in front so two people can pass while someone carries a laundry basket. Choose a bench 40 to 45 cm tall so it sits below a typical handrail and doubles as a safe perch for tying shoes. Solid beech, oak or painted pine all read calm and classic, and a bench with a lower shelf adds hidden storage for spare throws.
Top the bench with a single firm cushion 8 to 10 cm thick in a washable fabric such as cotton twill or wool blend, because landings collect dust from stair traffic. A single cushion looks more tailored than three small ones and never slides off while someone passes. Budget around 60 to 90 pounds or dollars for a simple wooden bench plus cushion, or hunt second-hand for under 40. The mistake to avoid is choosing a bench deeper than 35 cm on a narrow landing; depth is what pinches the walkway, not width.
2. Tuck a Single Armchair Into the Landing Corner With a Folded Wool Throw
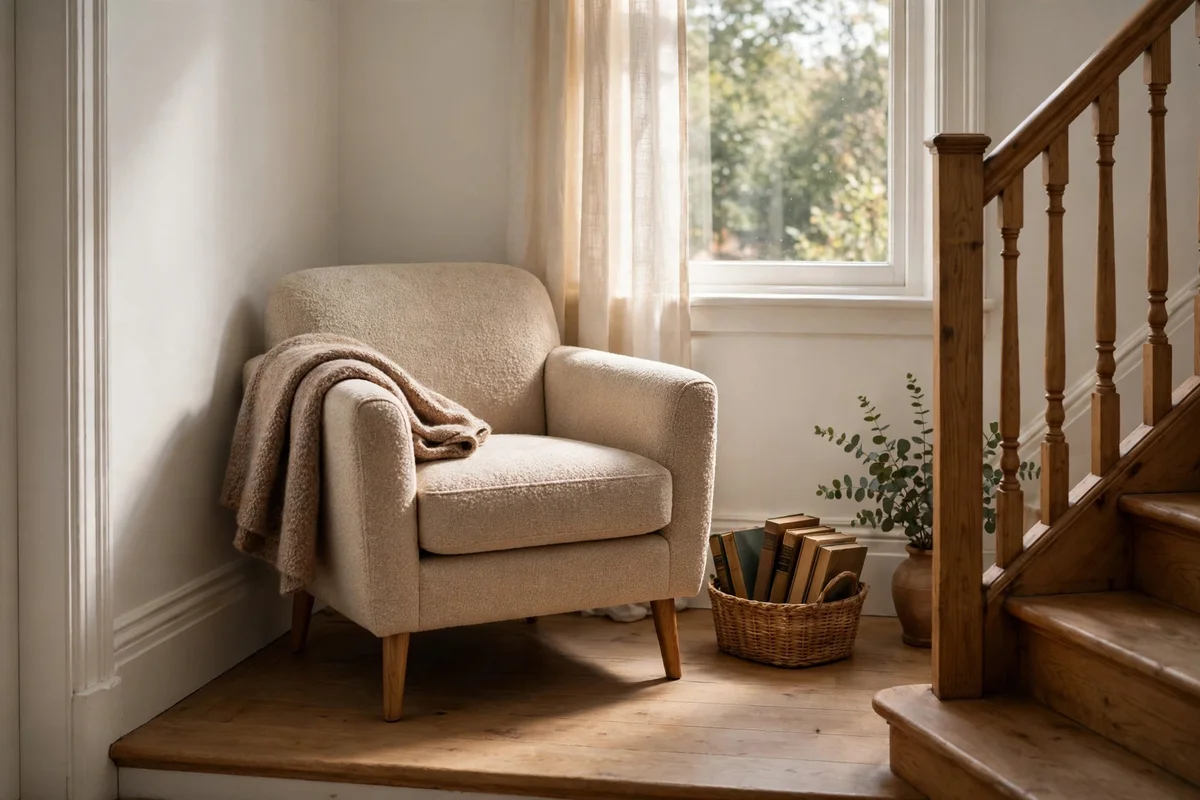
On a landing at least 150 cm square, one compact armchair of 65 to 75 cm width creates a true sitting nook without swallowing the space. Angle it 45 degrees into the corner so the chair faces both the window and the stair turn, which makes the corner feel claimed rather than leftover. Keep 80 cm of clear floor between the chair front and any balustrade so knees never graze the rail. Choose sturdy hardwood legs and a washable seat fabric; landings get more dust and brushing past than a sitting room does.
Fold a wool or wool-blend throw into a neat rectangle and lay it across one arm, which adds texture without the fuss of loose cushions that fall when someone squeezes past. A throw in oatmeal, forest green or burgundy ties the landing to the rooms above and below. Skip small side tables here; a floor-level basket holding two books keeps surfaces clear of elbows. The mistake to avoid is choosing a recliner or rocking chair, since moving mechanisms need floor clearance you cannot spare on a landing.
3. Stack Two Woven Baskets Under the Bench for Laundry and Throws
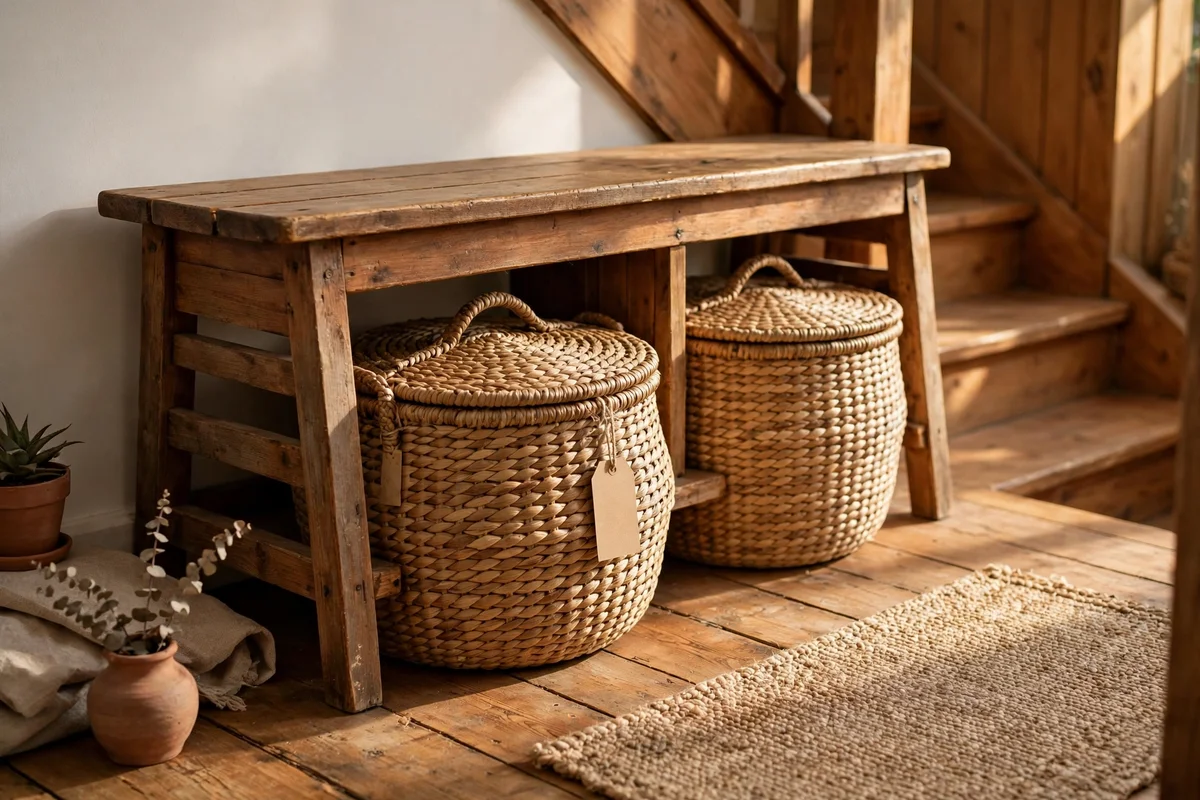
Two lidded baskets of 35 to 45 cm width slide neatly under a standard bench and turn dead space into honest storage. Use one for the laundry run that passes this way daily and one for spare throws and seasonal cushions, so each has a job and neither becomes a dumping ground. Natural seagrass or rattan suits the warm palette and stays light enough to lift out for cleaning. Leave a 5 cm air gap above each lid so baskets slide freely even when the bench cushion compresses.
Label each basket with a small hanging tag, since a landing basket without a label fills with clutter within a month. Keep the laundry basket emptied twice a week so damp clothes never sit long enough to smell. Budget 25 to 50 pounds or dollars for two sturdy baskets; avoid the flimsiest market-stall weaves, which snag sleeves and unravel at the handles. The mistake to avoid is placing baskets outside the bench footprint, because anything beyond the bench line narrows the walkway and trips feet in dim evening light.
4. Hang a Gallery Row That Climbs the Stair Wall at the Same Angle
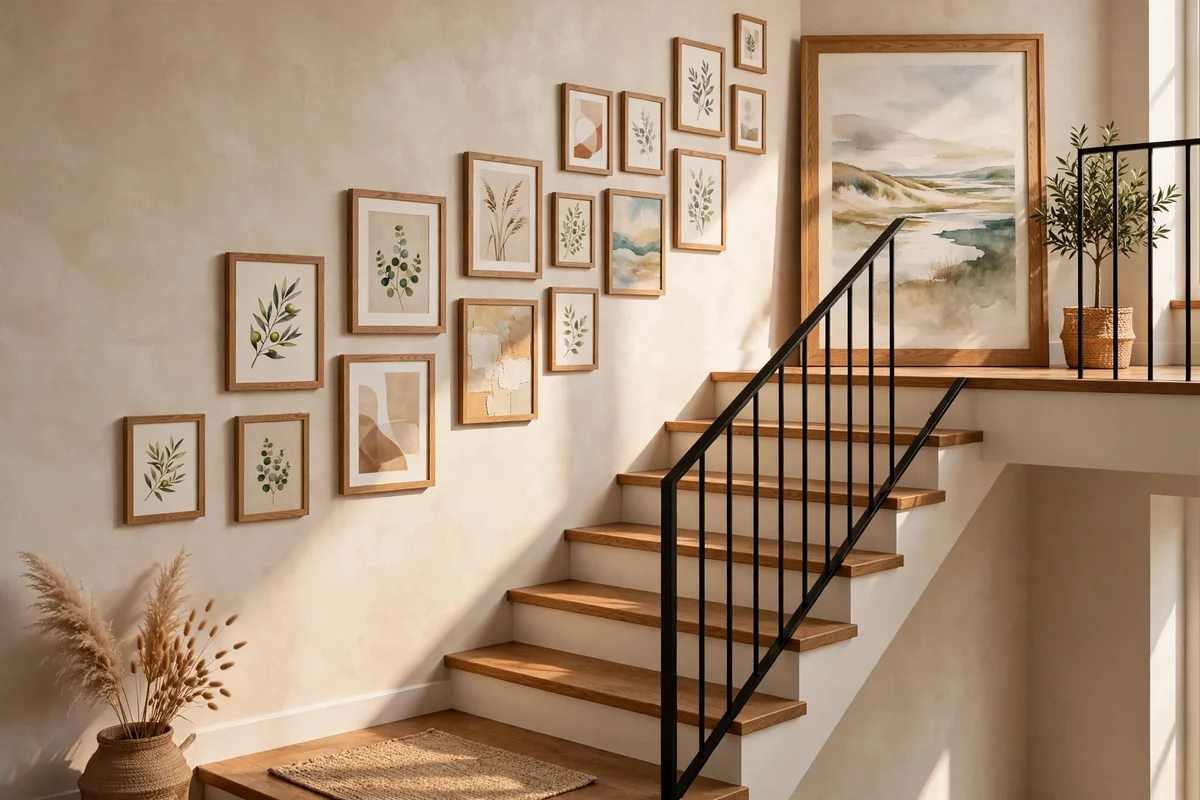
A gallery that rises with the staircase turns a blank stair wall into a deliberate feature. Measure the stair slope, usually 30 to 37 degrees, and keep the centre of each frame on a line parallel to that slope, roughly 150 cm above the nearest tread nosing. Five to seven frames of mixed sizes, from 20 by 25 cm up to 40 by 50 cm, give rhythm without clutter. Hang the largest frame at the landing level where eyes naturally rest, and keep all frame depths under 5 cm so nobody brushes them on the way up.
Use one frame finish, such as natural oak or slim black, with matching mounts so the collection reads as one composition. Secure each frame with two fixings rather than one nail, because stair walls take constant vibration from footfall. Plan the layout on the floor first, photograph it, then transfer the arrangement to the wall with paper templates and painter’s tape. The mistake to avoid is hanging frames level while the stairs climb; a level row above a sloped staircase looks like an error and fights the architecture.
5. Frame Six Botanical Prints in Matching Oak Along the Climb
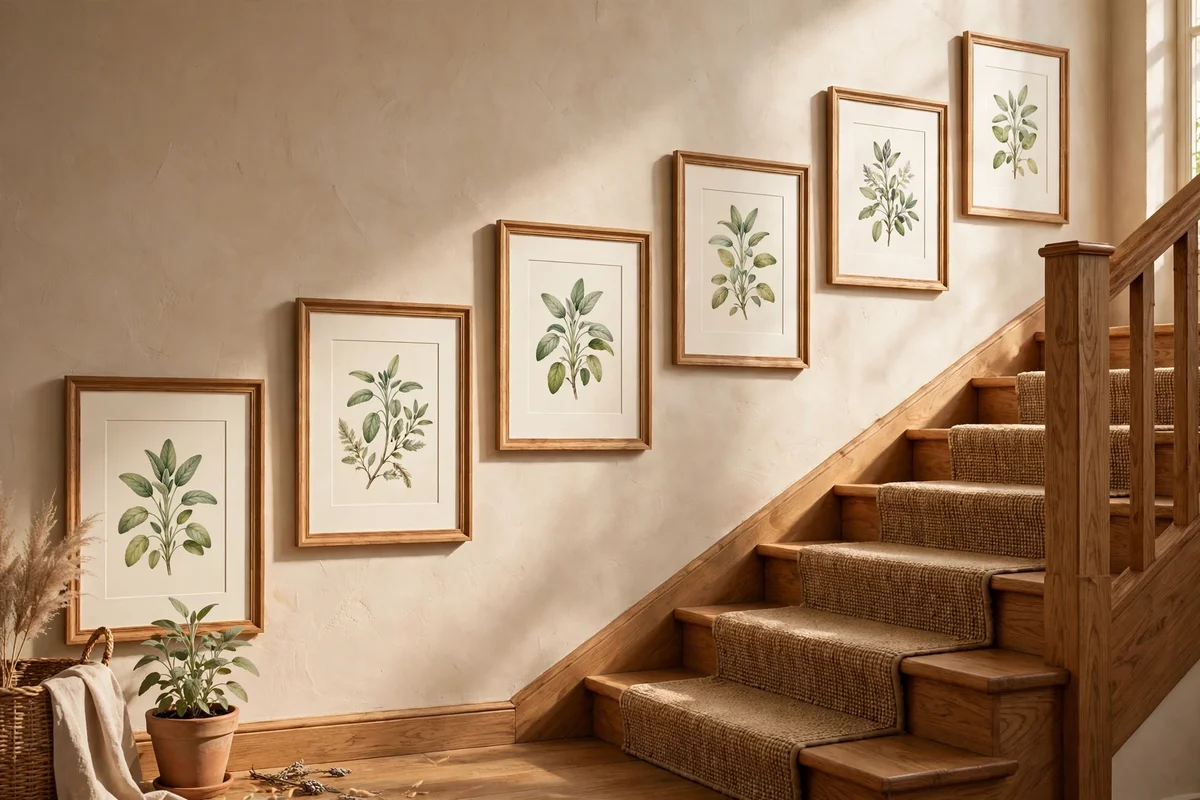
Six matching oak frames with botanical prints give a landing gallery instant calm, because repetition reads as order. Choose prints of 25 by 30 cm in frames of 30 by 40 cm, leaving a generous mount that keeps the image airy. Line them along the climbing wall with 8 to 10 cm gaps between frames, centres following the stair slope. Botanical subjects suit the timeless palette and never clash with whatever hangs in the rooms above or below the stairs.
Print on matte archival paper rather than glossy, since stair lighting often comes from one harsh bulb that glares across shine. Keep the palette to two inks, for example sage and charcoal on cream, so six frames feel unified. Budget 40 to 80 pounds or dollars for frames, mounts and prints if you shop ready-made, or halve that with digital downloads printed locally. The mistake to avoid is mixing frame styles here; one odd frame in black among five oak ones will pull every eye, and not in a good way.
6. Add One Brass Picture Light Above the Climbing Gallery
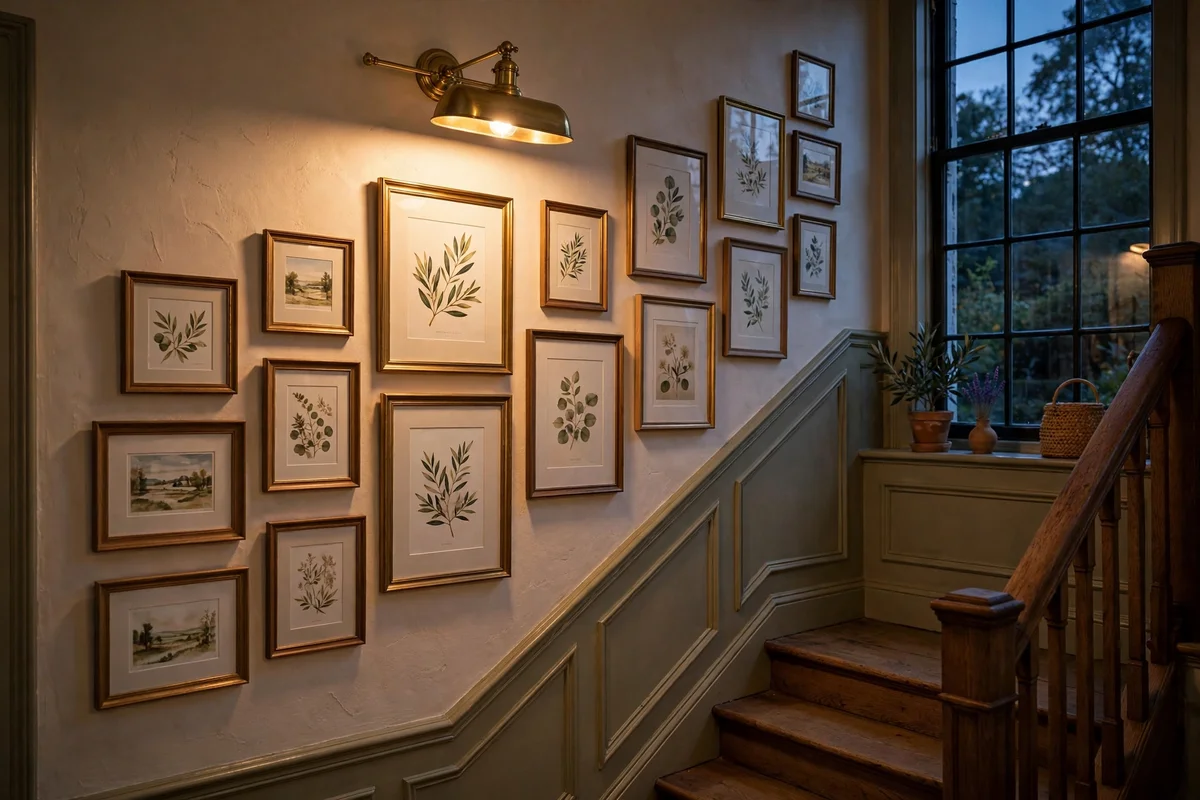
A single battery-powered brass picture light mounted 15 to 20 cm above the centre frame of the gallery gives the whole wall a soft, gallery-like glow after dark. Choose a warm 2700K LED bar of 30 to 40 cm, which washes three to four frames without hot spots. Battery models avoid chasing wires through a stair wall and now run three to four months on a set of cells with nightly use. Clip it on the frame moulding itself if drilling the wall feels too permanent.
Angle the light head down at about 30 degrees so light grazes the glass evenly instead of bouncing straight back at eyes. Dust the light bar monthly, since warm fixtures near stairwells gather dust that dulls the beam. Budget 25 to 60 pounds or dollars for a good battery model in brushed or aged brass. The mistake to avoid is choosing cool-white light for artwork; 4000K and above turns cream mounts grey and makes botanical greens look sour, undoing the gallery’s calm.
7. Run the Stair Runner Across the Landing in a Single Line
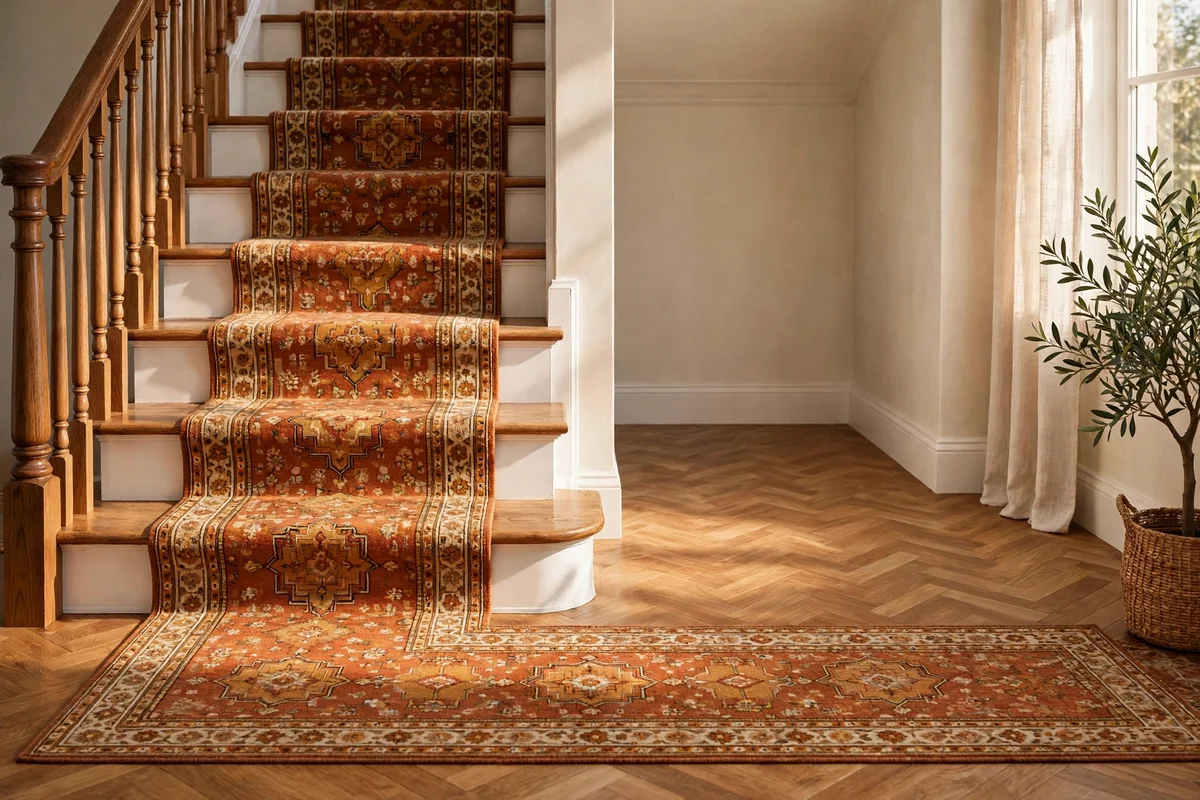
Letting the runner continue across the landing turns stairs and landing into one intentional line rather than two chopped sections. Order the runner in one continuous length or have a carpet fitter join sections on the landing with a discreet seam under the turn. Keep the runner centred with equal borders of 8 to 12 cm of bare stair on each side, and carry that same border across the landing so the eye reads one unbroken path. A flatweave or low-pile runner grips better and cleans faster than deep pile.
Secure the runner with proper stair rods or a full underlay and gripper system, never loose on polished boards. Underlay adds 6 to 10 mm of cushion and stops the runner creeping, which matters most on the landing where feet pivot at the turn. Budget 15 to 30 pounds or dollars per metre for quality runner fabric, plus fitting. The mistake to avoid is stopping the runner at the last tread; a bare landing after a dressed staircase looks unfinished and makes the turn feel colder underfoot.
8. Lay a Flatweave Rug on a Carpeted Landing With Pattern Following the Turn
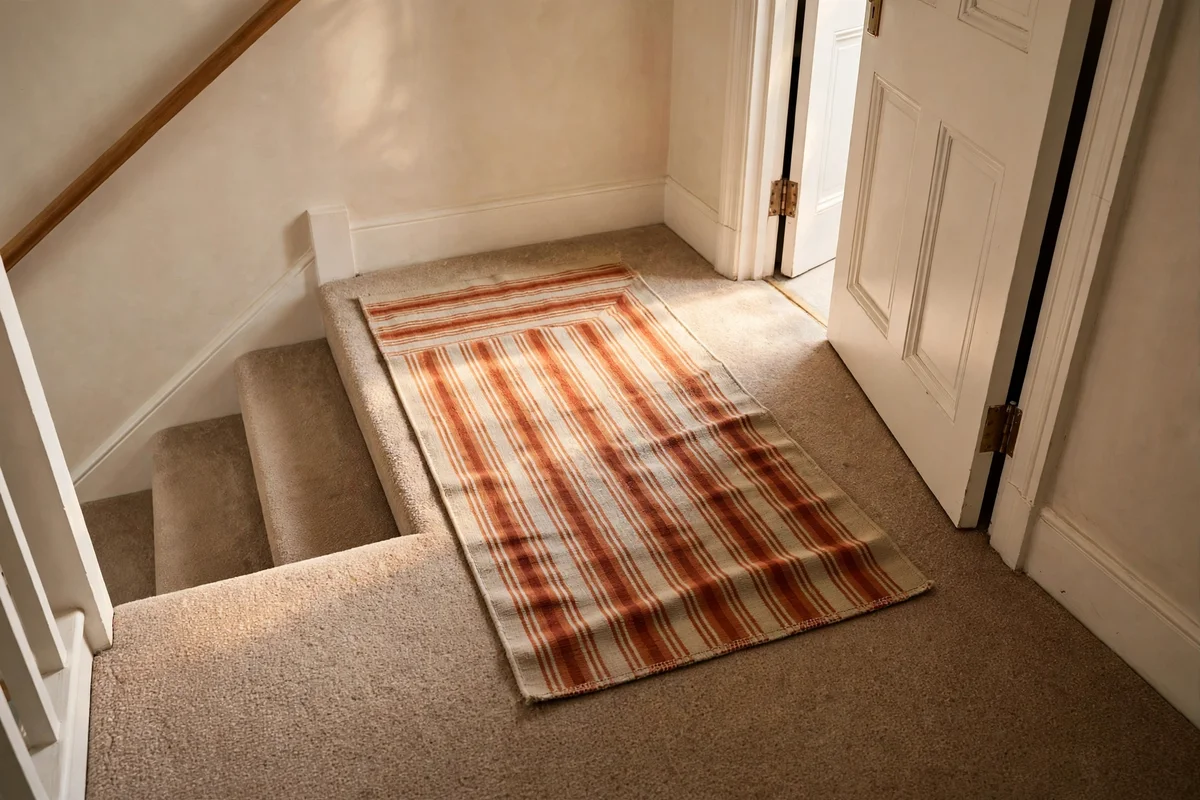
If the stairs are already carpeted, a flatweave rug of 80 by 150 cm laid across the landing adds pattern without bulk. Turn the rug so its stripes or border run with the direction of travel, which lengthens the space instead of chopping it. Choose a thin flatweave under 8 mm thick so the landing door, if there is one, still swings freely above it. A non-slip underlay pad cut 5 cm smaller than the rug on all sides keeps it anchored where feet pivot.
Pick a washable cotton or recycled PET rug, since landings take the same dirt as hallways and need regular washing. Patterned designs in terracotta, cream and charcoal hide footprints between cleans far better than plain cream. Budget 30 to 70 pounds or dollars for a good washable flatweave in this size. The mistake to avoid is a thick shaggy rug here; deep pile on a landing wrinkles at the pivot point and curls at the edges, creating exactly the trip hazard the walk line must never have.
9. Hang a Pendant Over the Landing Well Where the Stairs Turn
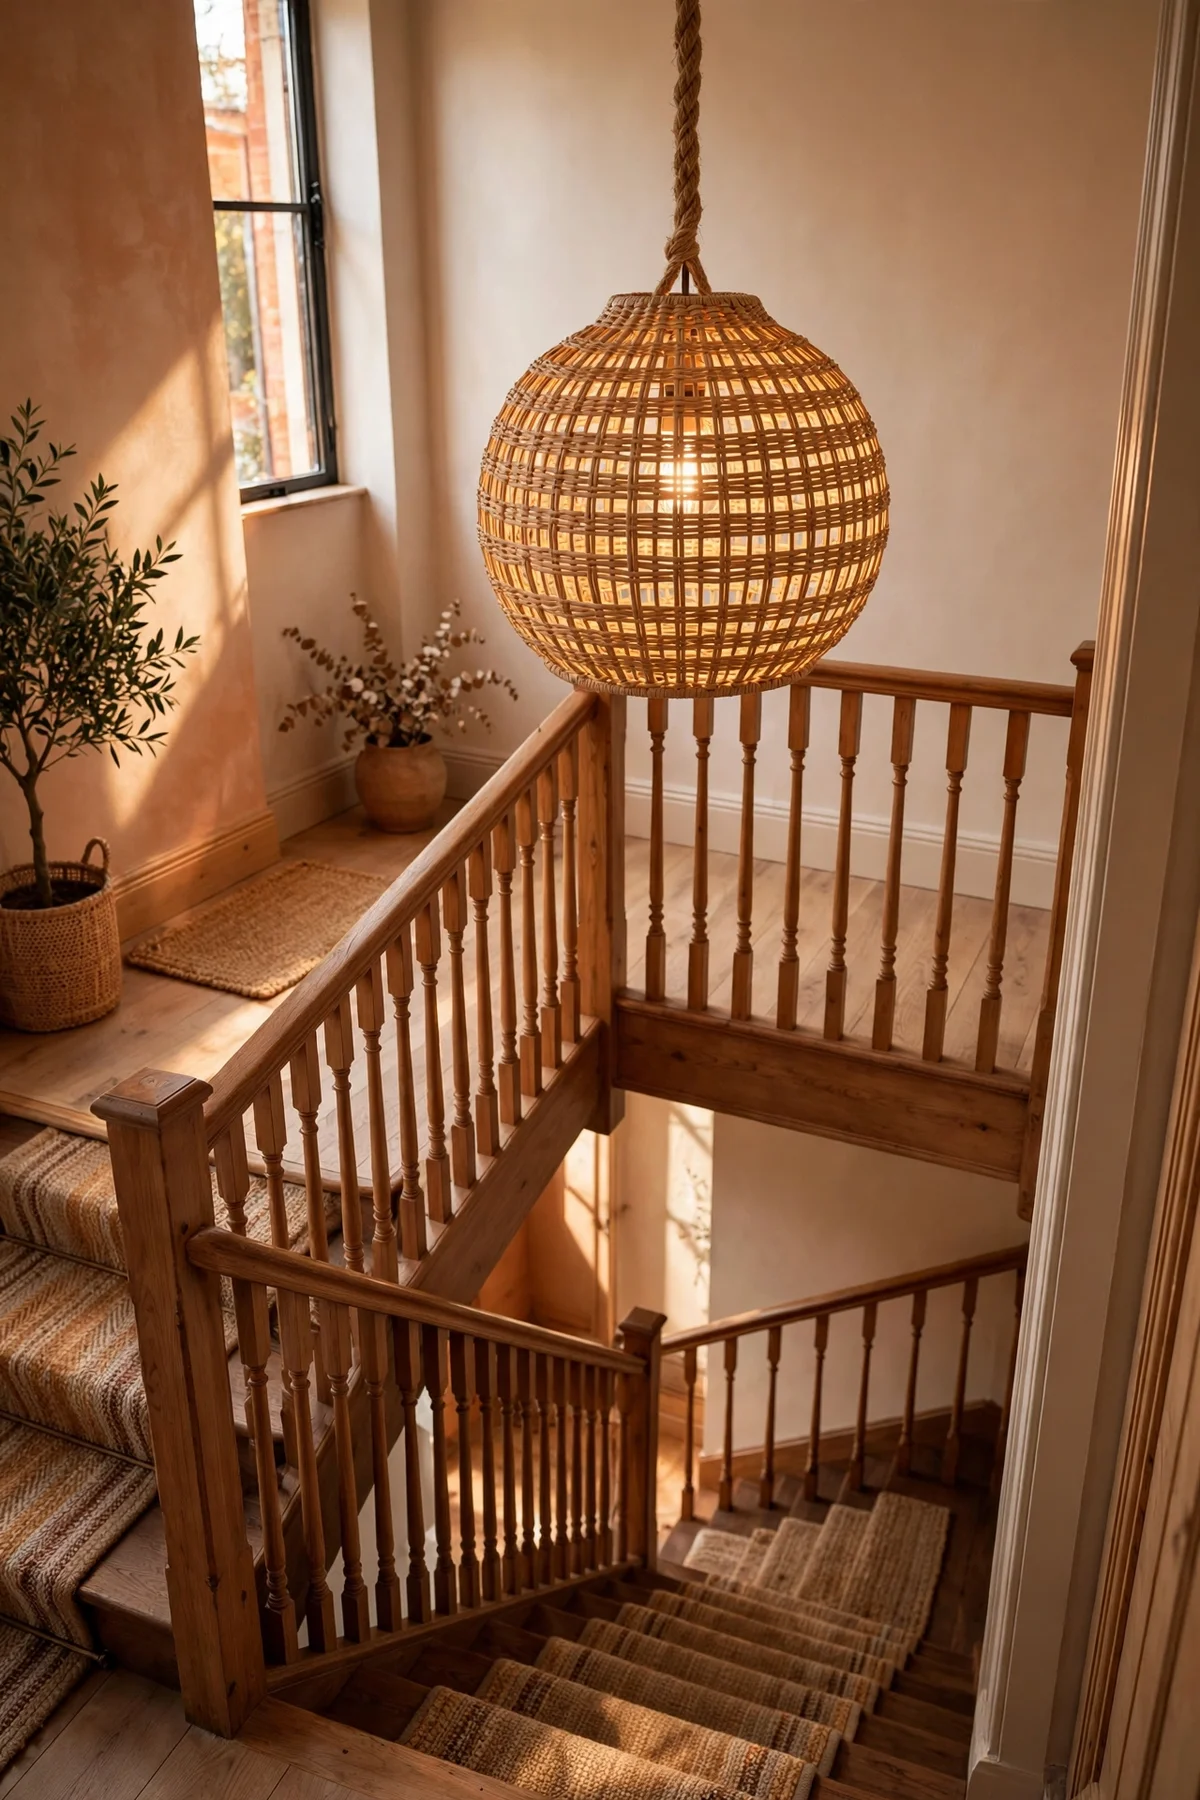
A pendant hung over the open stairwell at the landing turn makes the whole junction feel considered. Hang it so the bottom of the shade sits at least 210 cm above the highest tread it crosses, which keeps heads clear on the climb. A woven rattan or linen drum shade of 35 to 45 cm diameter softens the light and suits the warm palette. Wire it to a dimmer if you can, since landings need bright light for safe footing and soft light for evening calm.
Centre the pendant over the well rather than over the walkway, so it lights the void without hanging in anyone’s path. Choose a warm 2700K bulb of 800 to 1000 lumens for a landing without windows. Budget 50 to 120 pounds or dollars for a quality pendant plus an electrician’s hour for safe fitting. The mistake to avoid is a pendant with an exposed filament that glares when you look up the stairwell; always fit a shade or diffuser on a light you will see from below.
10. Mount a Brass Wall Sconce at the Turn to Mark It Intentional
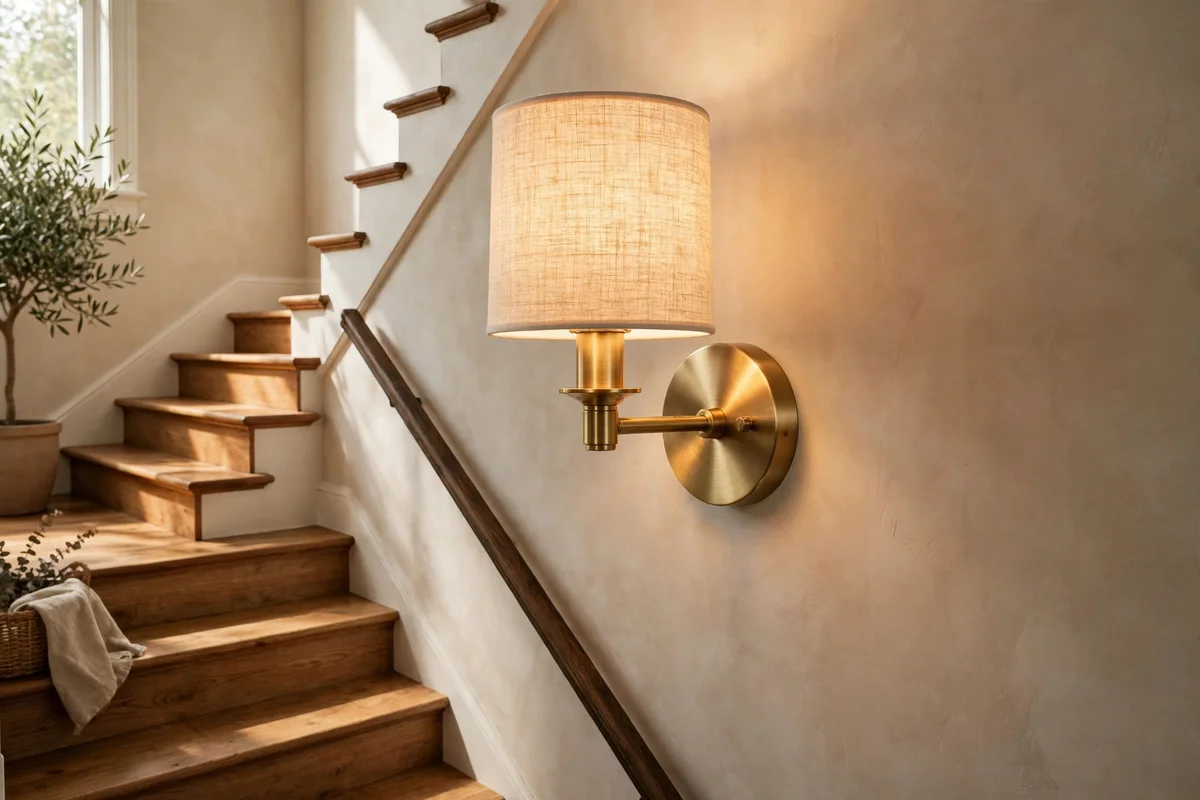
A single brass sconce on the wall where the stairs change direction turns a dim corner into a deliberate moment. Mount it 150 to 160 cm above the landing floor so the glow sits at eye level without shining directly into eyes on the climb. A swing-arm or fixed shade in brushed brass pairs with cream, sage and walnut palettes and costs less than a pendant with wiring already in the wall. If no wiring exists, choose a rechargeable battery sconce with a warm 2700K globe.
Keep the sconce on the wall opposite the balustrade so hands on the rail never reach toward heat, even from a cool LED. Fit a frosted or linen shade to soften the beam, since bare bulbs at eye level create hard shadows on the stairs. Budget 30 to 70 pounds or dollars for a brass sconce, plus fitting if wiring is involved. The mistake to avoid is mounting the sconce where the door swing or a carried laundry basket will strike it; map the swing of everything before drilling.
11. Place a Tall Kentia Palm in a Weighted Pot Where Light Allows
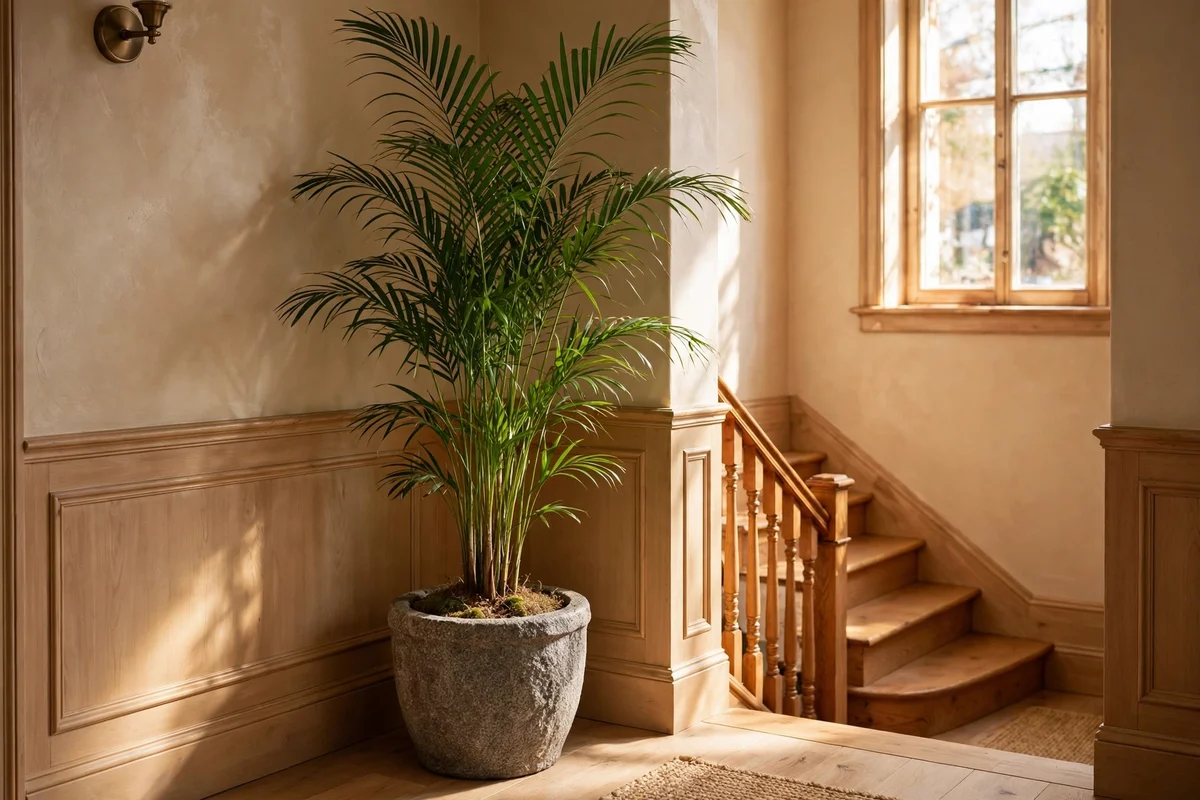
A kentia palm of 120 to 150 cm brings living height to a landing corner without the fuss of fiddle-leaf figs. It tolerates the lower light of a north-facing landing window and forgiving watering, roughly every 10 to 14 days in winter. Choose a weighted ceramic or stone pot of at least 30 cm diameter so the plant cannot topple if a shoulder brushes past on the stairs. Keep it 60 cm back from the walk line and 50 cm from the balustrade so fronds never snag clothing.
Water only when the top 4 cm of soil feels dry, and wipe the fronds with a damp cloth every month to keep dust from dulling them. Feed with a balanced liquid feed monthly from March to September, then rest the plant through winter. Budget 40 to 80 pounds or dollars for a mature palm and a heavy pot. The mistake to avoid is choosing a spiky plant like a yucca for a stair landing; sharp leaves at hand height are an accident waiting to happen where people pass carrying things.
12. Set a Trailing Pothos on a High Shelf for Softness Without Floor Space
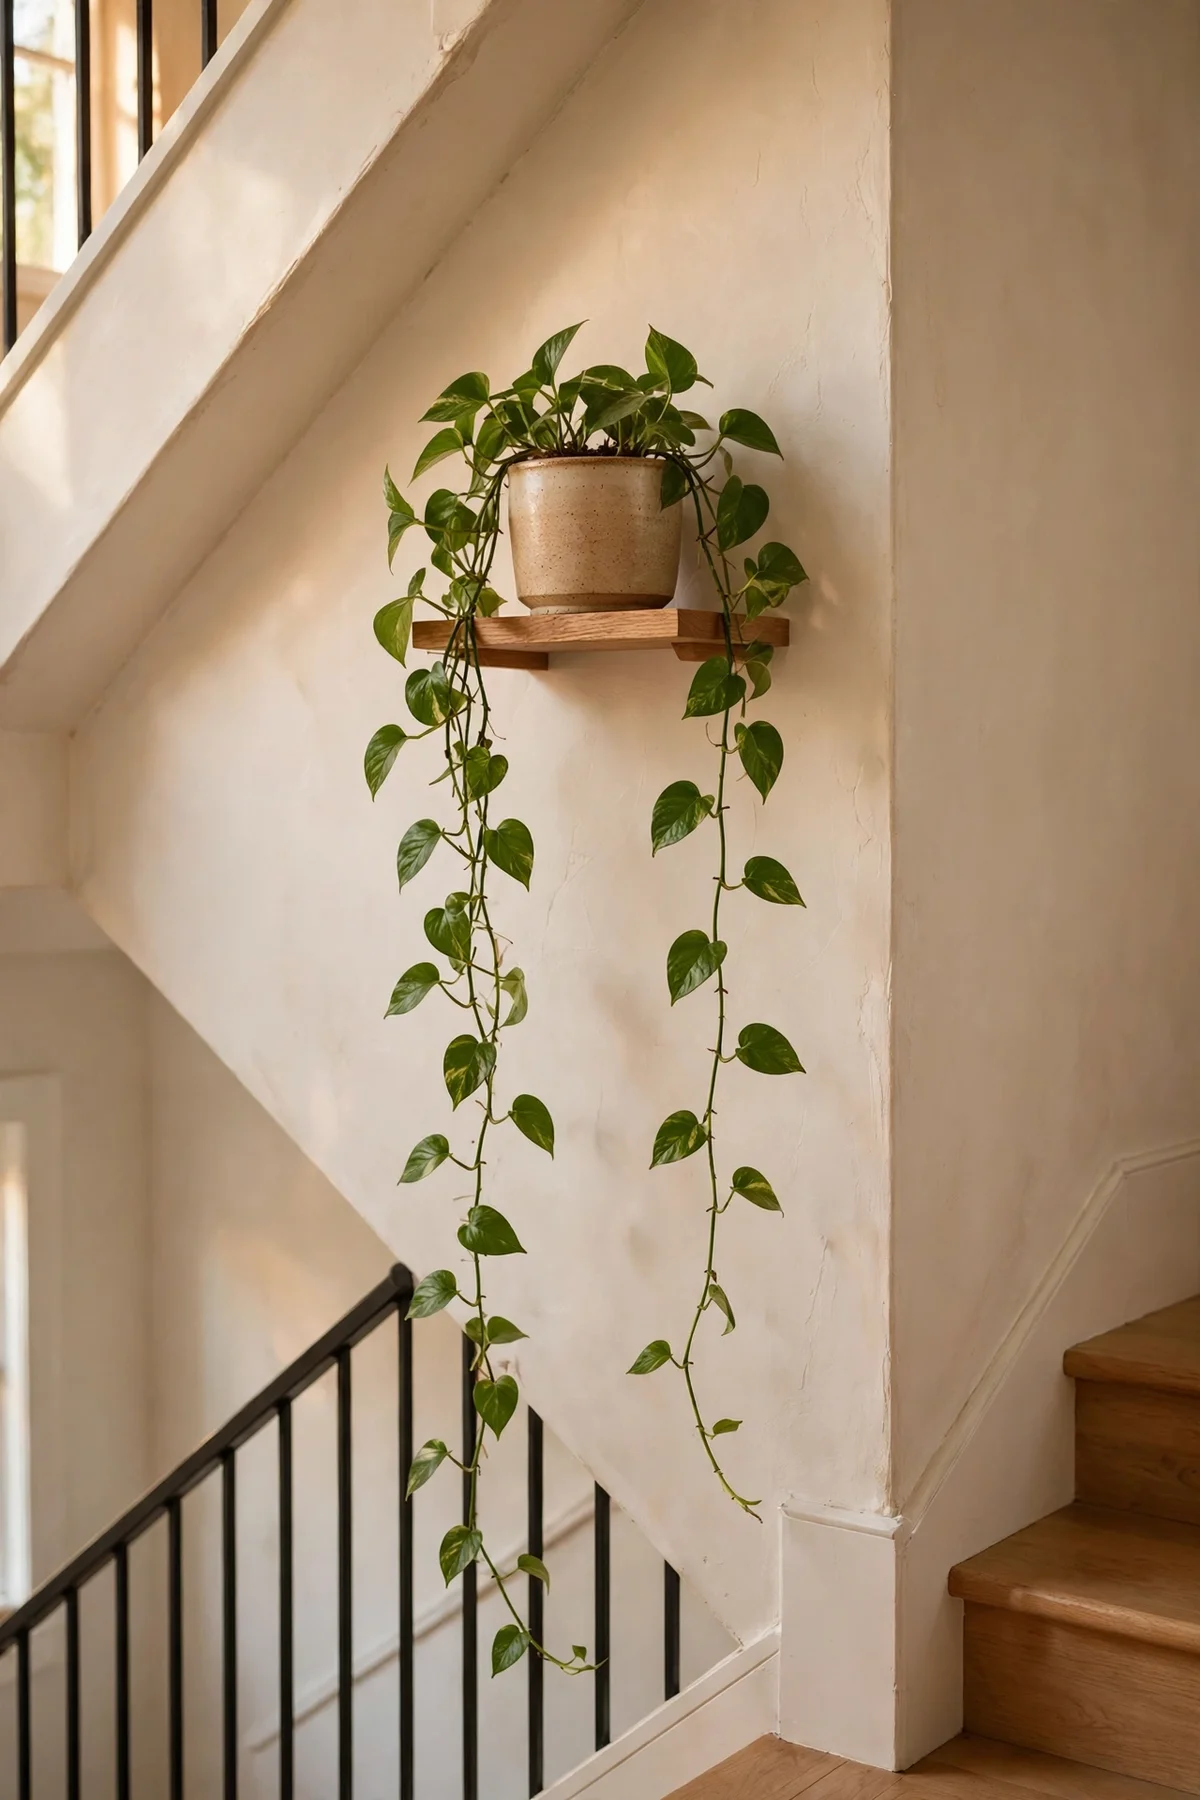
A small floating shelf of 40 to 60 cm mounted 180 cm up the wall holds a trailing pothos that softens the landing without using a centimetre of floor. Pothos tolerates low light and irregular watering, and its vines trail 60 to 120 cm over a year, which drapes beautifully down a stair wall. Fix the shelf into studs or proper anchors, since a watered pot plus soil can weigh 5 to 8 kg. Keep the shelf clear of the head path so vines never brush faces on the climb.
Water the pothos when the top 3 cm of soil dries, roughly weekly, and trim vines back to a leaf node if they reach hand-rail height. A ceramic pot with a saucer catches drips so water never runs down the wall. Budget 20 to 40 pounds or dollars for shelf, brackets and plant together. The mistake to avoid is a shelf above the handrail line where watering means leaning over the stairs; always place it where you can reach the pot with both feet on the landing.
13. Fit a Low Two-Shelf Bookcase Against the Wall for a Reading Corner
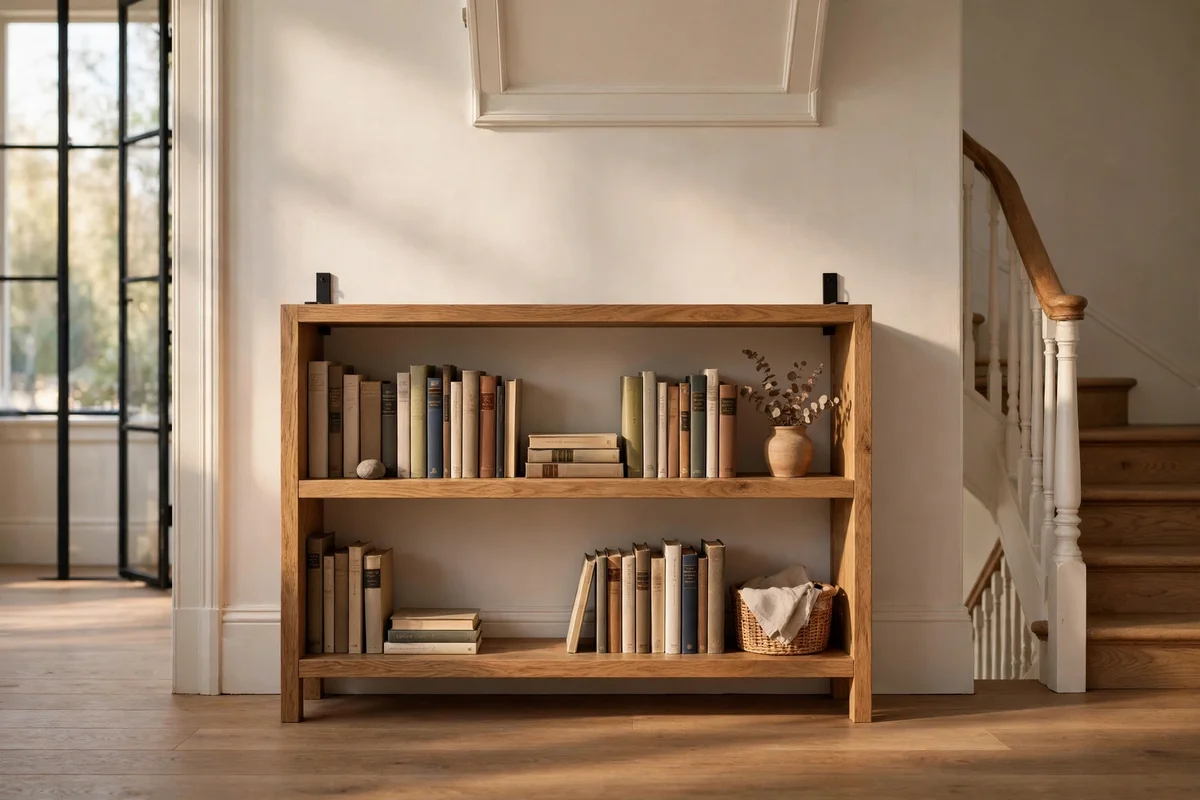
A bookcase of 60 to 80 cm wide and no more than 90 cm tall fits a wide landing and invites quiet reading without blocking sight lines. Anchor it to the wall with the straps or brackets supplied, because a bookcase on a landing can take a knock from a carried basket. Arrange books spine-out with a few stacked horizontally, leaving 10 cm of breathing space on one shelf for a small clock or framed print. Keep the top clear of anything that could slide off toward the stairs.
Leave at least 90 cm of walkway in front of the bookcase so someone can browse while another passes behind. Choose solid pine or painted MDF for a budget build of 50 to 100 pounds or dollars, or a hardwood piece as an investment. The mistake to avoid is loading the top shelf with heavy books while leaving the base empty; a top-heavy bookcase near stairs is unstable, so keep the heaviest volumes on the bottom shelf and light decor up top.
14. Build a Window Reading Perch With a Box Cushion and Two Bolsters
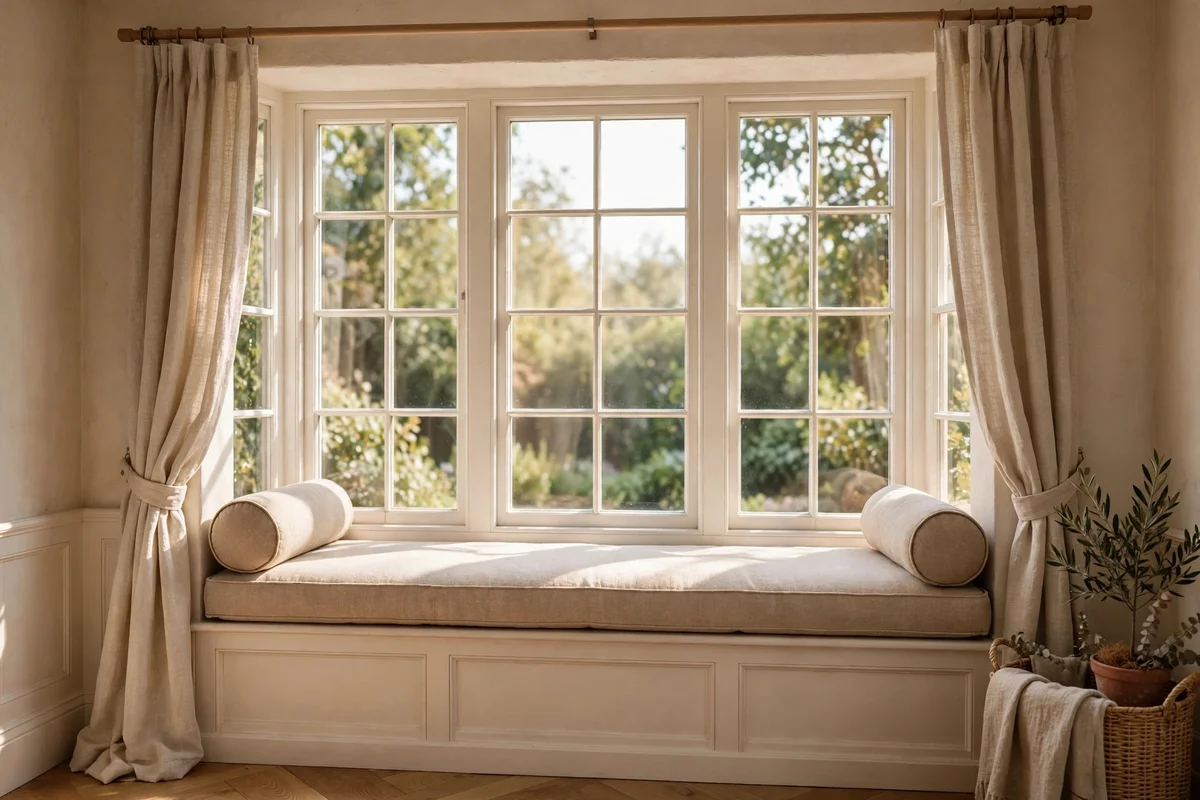
A wide landing window with a sill at least 45 cm deep becomes a reading perch with a custom box cushion. Order the cushion 5 to 8 cm thick in a firm outdoor-grade foam wrapped in washable cotton, cut 2 cm narrower than the sill so the cover fits without bunching. Two cylindrical bolsters of 15 cm diameter at each end turn the sill into a daybed-like nook. This works best where the window glass is double-glazed, since single glazing feels cold against a reader’s back.
Add a small wall-mounted reading light above one end so the perch works after dark without a trailing lamp cord. Keep the walk line in front of the window at least 80 cm clear, because readers tuck their feet and passers-by need room. Budget 80 to 150 pounds or dollars for cushion, covers and bolsters from a local upholsterer. The mistake to avoid is a feather-filled cushion here; feathers flatten under daily sitting within months, while firm foam holds its shape for years.
15. Dress the Landing Window With Linen Curtains on a Slim Brass Rod
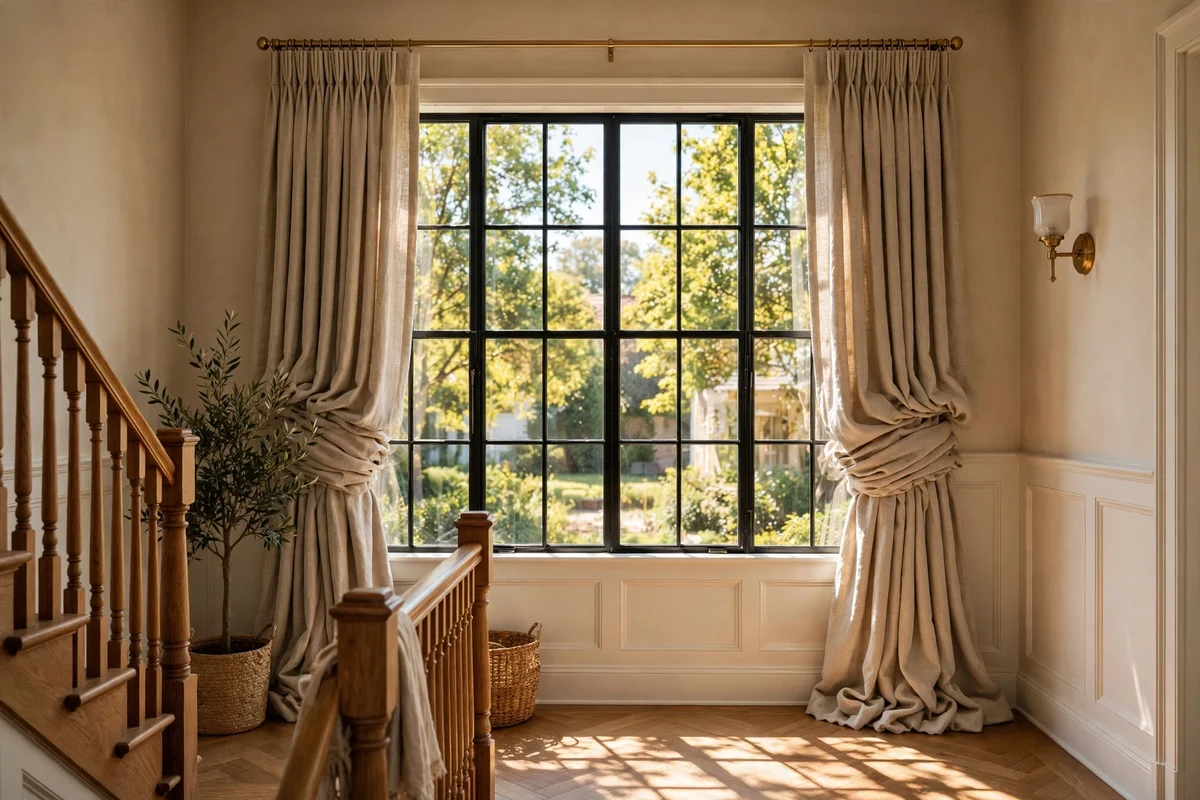
Floor-skimming linen curtains on a slim brass rod of 16 to 19 mm diameter give a landing window softness and old-world grace. Hang the rod 10 to 15 cm above the frame and extend it 15 cm past each side so the stacked curtains clear the glass fully by day. Choose a natural or oatmeal linen that filters light without darkening the stairwell. Two panels of 130 to 150 cm width each gather nicely on a standard 120 cm window.
Hem curtains to finish 1 cm above the sill on a perch window, or to skim the floor where the window runs low, so fabric never trails where feet pass. Linen wrinkles are part of its charm, but a quick steam once a season keeps panels crisp. Budget 60 to 120 pounds or dollars for rod, brackets and two linen panels. The mistake to avoid is heavy blackout curtains on a landing window; they swallow the daylight the stairs need and make the turn feel like a corridor instead of a room.
16. Style the Window Sill With Two Small Herbs and a Glass Carafe
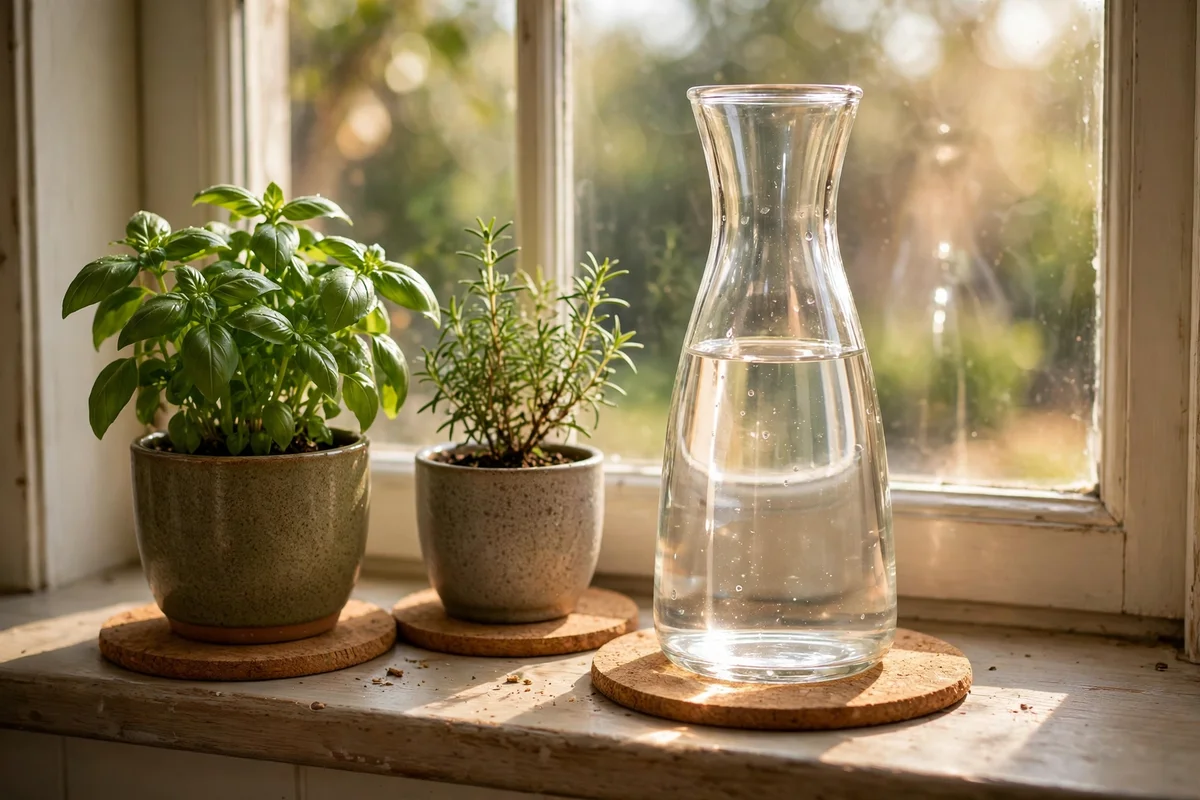
A landing window sill comes alive with two small potted herbs, such as mint and thyme, plus a glass carafe that catches the light. Keep pots under 12 cm diameter so the sill still works as a perch or display ledge, and set them on cork mats to protect the paint from watering rings. Herbs suit a landing because they forgive a missed watering better than flowers and reward a daily pinch for tea. Turn the pots a quarter turn each week for even growth.
Water herbs lightly when the top 2 cm of soil dries, and empty the saucers so roots never sit wet. A clear glass carafe of 500 ml beside the pots doubles as a watering can and a light-catcher. Budget under 25 pounds or dollars for pots, herbs and carafe together. The mistake to avoid is crowding the sill with five or six pots; two herbs and one carafe leave room for the curtain panels to stack and for hands to open the window without knocking anything over.
17. Set a Narrow Console With a Small Lamp, a Tray and One Book Stack
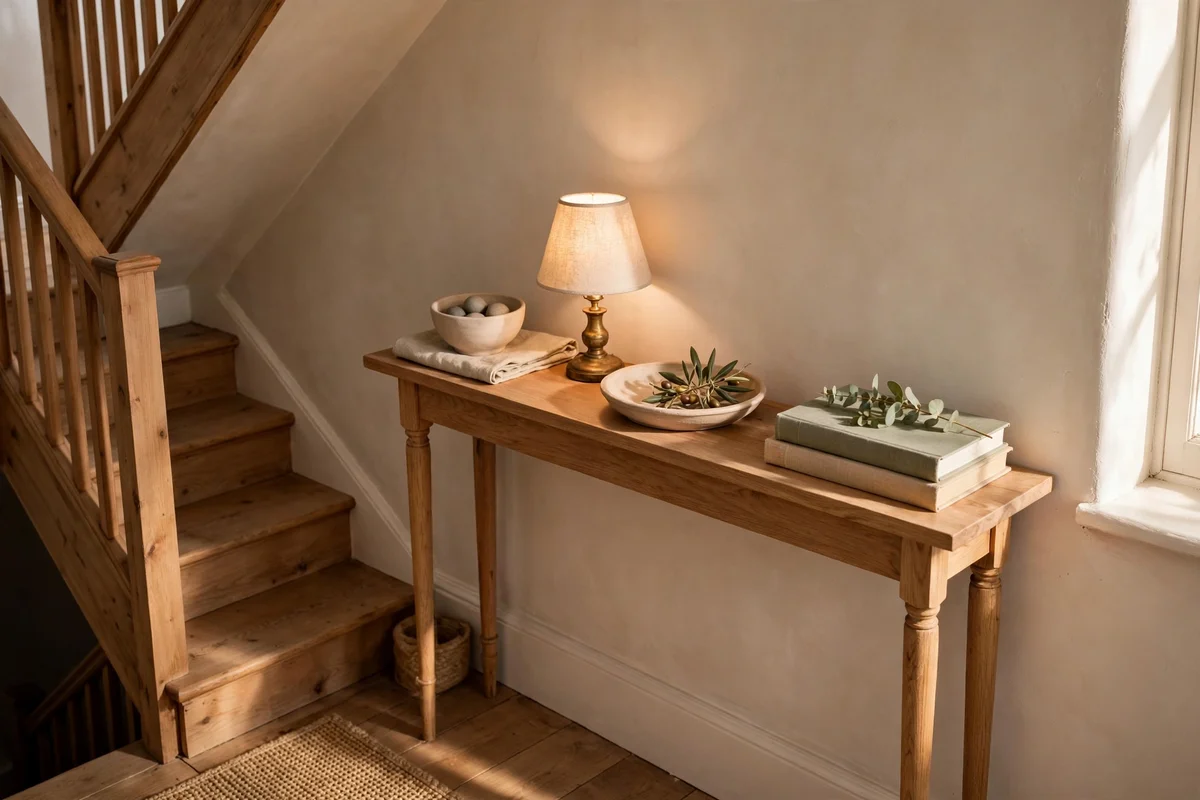
A console of 25 to 30 cm deep and 80 to 100 cm long fits a landing wall where a bench would block the walk line. Style it in three zones: a small table lamp of 30 to 40 cm at one end, a shallow tray in the centre for keys, and a stack of two books at the other end. The lamp gives the landing its evening glow at 2700K, while the tray keeps small items from migrating onto the stairs. Anchor the console to the wall if it wobbles.
Keep everything on the console under 45 cm tall so the arrangement never looms over the handrail or blocks the view up the stairs. A battery lamp avoids cords trailing near the walk line entirely. Budget 50 to 110 pounds or dollars for console, lamp and tray, or far less second-hand. The mistake to avoid is using the console as a drop zone for mail and chargers; one week’s clutter turns an intentional vignette into a junk shelf, so clear it every Sunday evening.
18. Hang a Round Mirror Opposite the Window to Bounce Daylight In
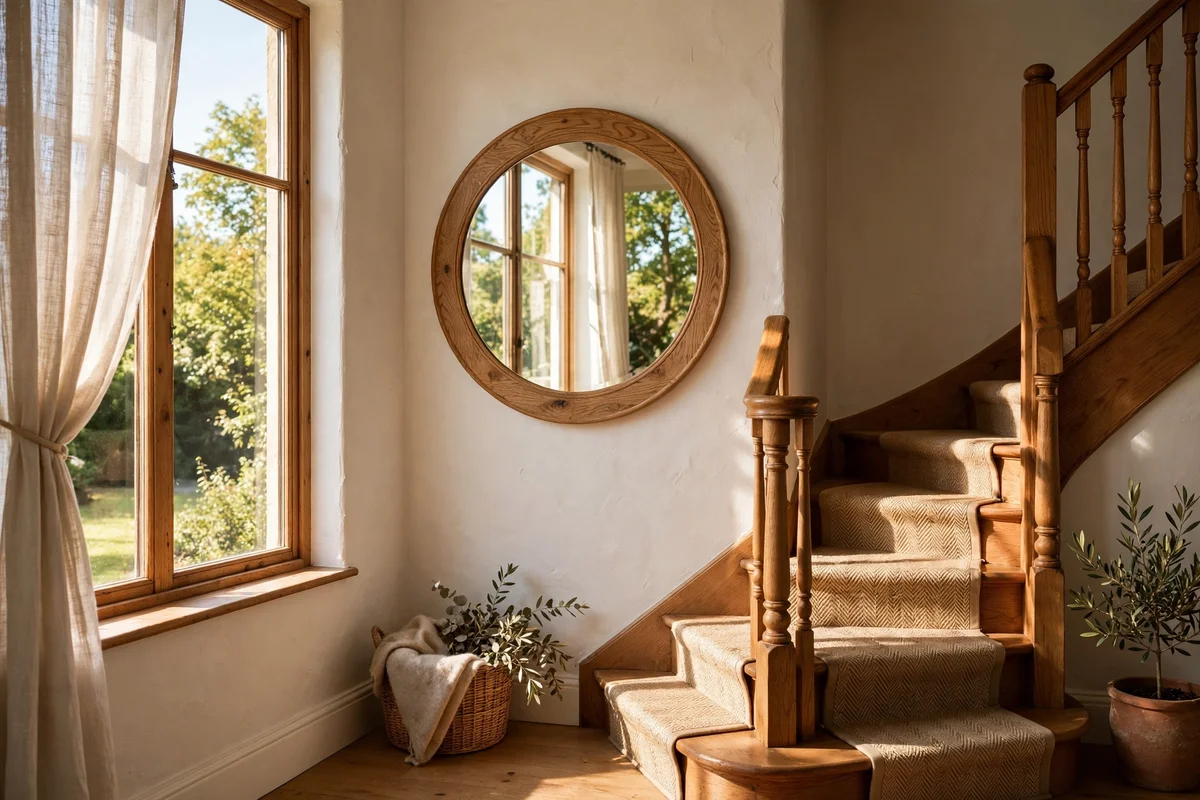
A round mirror of 60 to 80 cm diameter hung on the wall opposite the landing window doubles the daylight at the turn. Centre it at 150 cm from the floor so it catches the window’s light and the view of the stairs rather than the ceiling. Choose a slim frame in oak, brass or rattan no deeper than 4 cm so it sits close to the wall and clear of passing shoulders. One mirror reads calm; two or three small ones fragment the light and the wall.
Fix the mirror with a proper wall anchor rated for at least twice its weight, since stair walls vibrate and a falling mirror near stairs is dangerous. Clean it monthly with a damp microfibre cloth to keep the reflection bright. Budget 40 to 90 pounds or dollars for a quality round mirror. The mistake to avoid is hanging the mirror where it reflects a bare bulb or the pendant filament; check the reflection from the top and bottom of the stairs before you commit to the fixing.
19. Anchor Every Frame, Pot and Lamp So a Hand Cannot Knock It Loose
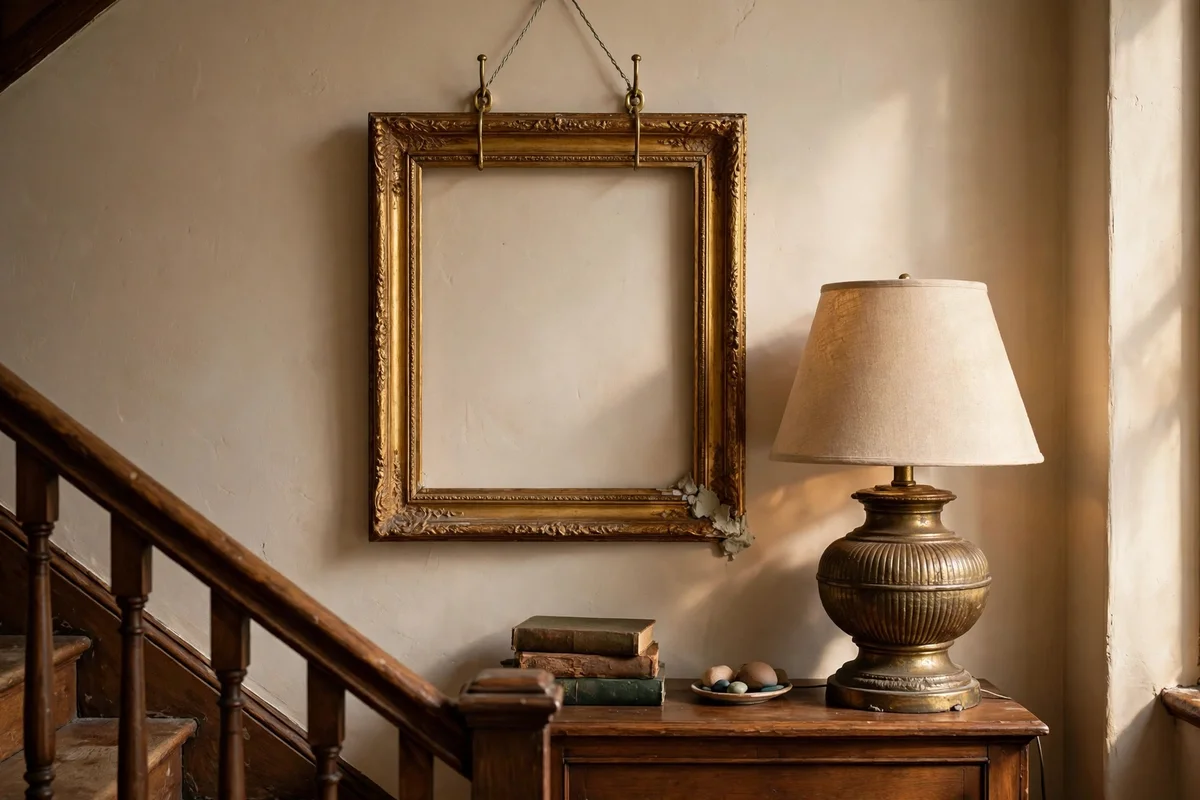
Stair landings are collision zones, so every decorative object needs a fixing that survives a bump from a carried basket. Hang frames on two hooks each with wire rated for double the frame’s weight, and use museum putty on the bottom corners of light frames to stop rattling. Choose heavy-based lamps of at least 1.5 kg for consoles, or fix lighter lamps with adhesive pads. Test each piece with a firm nudge before you call the styling finished.
Keep all decor at least 30 cm inside the balustrade line so a hand reaching for the rail never meets a pot or frame first. Corded lamps need cable clips that pin the wire tight to the wall or console back, since a snagged cord on stairs is a fall risk. Avoid tall thin vases anywhere on a landing; their centre of gravity invites exactly the knock you are guarding against. The mistake to avoid is trusting gravity alone on a stair landing, because vibration and daily bumps defeat it within weeks.
20. Keep the Walk Line Clear and Respect Balustrade Clearances Everywhere
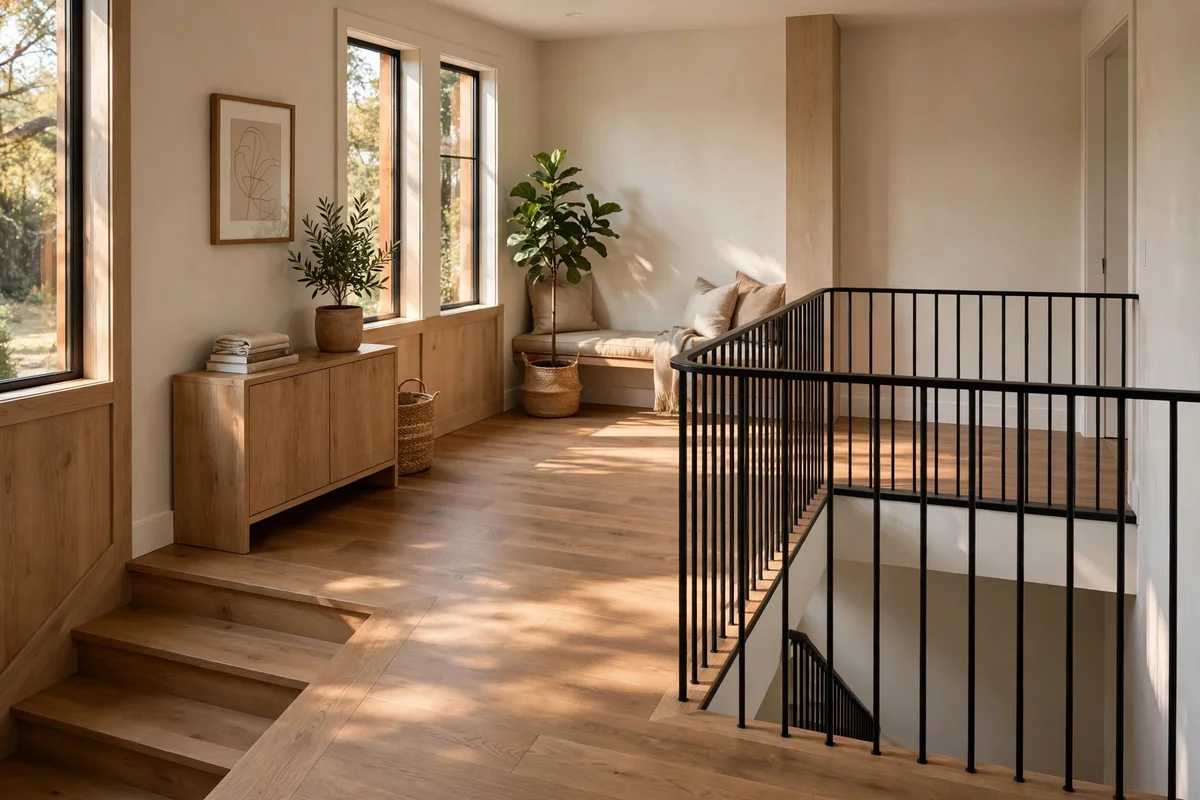
The walk line is the natural path feet take across the landing, usually the centre of the turn, and it must stay completely clear. Keep a minimum of 90 cm of unobstructed floor along it, measured from the nosing of the last tread to the first tread of the next flight. Push benches, baskets and bookcases fully against the wall, and never let rug corners lift into the path. Walk the line yourself carrying a full laundry basket before you judge it clear.
Respect the balustrade by keeping a 10 cm clear zone beside the rail where hands grip, with no pots, frames or fabric intruding. Never rest anything on the handrail or hang items from the balusters, since a rail must take a person’s full weight in a stumble. Check clearances again after dark, because evening shadows shrink how wide a passage feels. The mistake to avoid is judging clearance by daylight alone; test the landing at night with the actual lighting before calling it safe.
A landing asks for very little and gives back a great deal: one bench, one row of frames, one pool of warm light, and the turn between floors becomes a place you notice instead of pass through. The ideas here share one spirit, which is to treat this small space with the same care as any room, measured, anchored and lit with intention. Choose the pieces that suit your landing’s size and light, and let the rest wait for another season.
If you do one thing this week, place a slim bench against the landing wall with a single cushion on top. It takes ten minutes, costs less than most home updates, and instantly gives the landing a purpose and a place to pause. Once the bench is there, the gallery row, the plant and the light will follow naturally, because the space will finally be asking for them.
Frequently Asked Questions
How much does it cost to decorate a stair landing?
A thoughtful landing refresh costs 80 to 250 pounds or dollars for most homes. A slim bench with a cushion and two baskets runs about 100, while a six-frame gallery with prints adds 40 to 80. Lighting is the variable: a battery sconce costs 30, a wired pendant with an electrician nearer 150. Buy the bench first, live with it a month, then add frames and light.
What size bench fits a standard stair landing?
Choose a bench 75 to 90 cm wide and 30 to 35 cm deep, which suits most landings while keeping 90 cm of clear walkway. The bench should sit 40 to 45 cm tall, just below handrail height. Measure your landing’s narrowest point first, then subtract 90 cm for the walk line; whatever remains is your bench zone. On landings under 120 cm deep, a 25 cm console works better than any bench.
How do I decorate a landing without blocking the walkway?
Keep furniture fully against the wall and protect a clear path at least 90 cm wide along the natural walk line. Choose shallow pieces: benches under 35 cm deep, rugs under 8 mm thick, frames under 5 cm deep. Test the layout by carrying a full laundry basket across the landing; if you adjust your grip or step sideways, something needs moving. Wall decor is the safest decoration on a narrow landing.
What is the best lighting for a dark stair landing?
Layer two sources: a pendant or ceiling light for safe footing and a warm sconce or picture light for atmosphere. Use 2700K bulbs throughout so the light feels like evening sun, with 800 to 1000 lumens at the turn for safe steps. A mirror opposite any window doubles whatever daylight exists. Avoid cool-white bulbs, which make stairwells feel clinical, and always shade bulbs at eye level to stop glare.
Can I decorate a stair landing in a rented home?
Yes, with renter-friendly fixings. Use adhesive strips rated for the frame weight for galleries, a battery-powered sconce or picture light instead of wired lighting, and freestanding pieces like benches, baskets and plants for everything else. Keep original hardware in a labelled bag for move-out day. A rug and a mirror on a leaning stand change the whole landing without a single drilled hole.