Crafts
21 Mason Jar Painting Ideas That Turn Plain Glass Into Charming Cottage Decor
By Anna Wells · · 21 min read
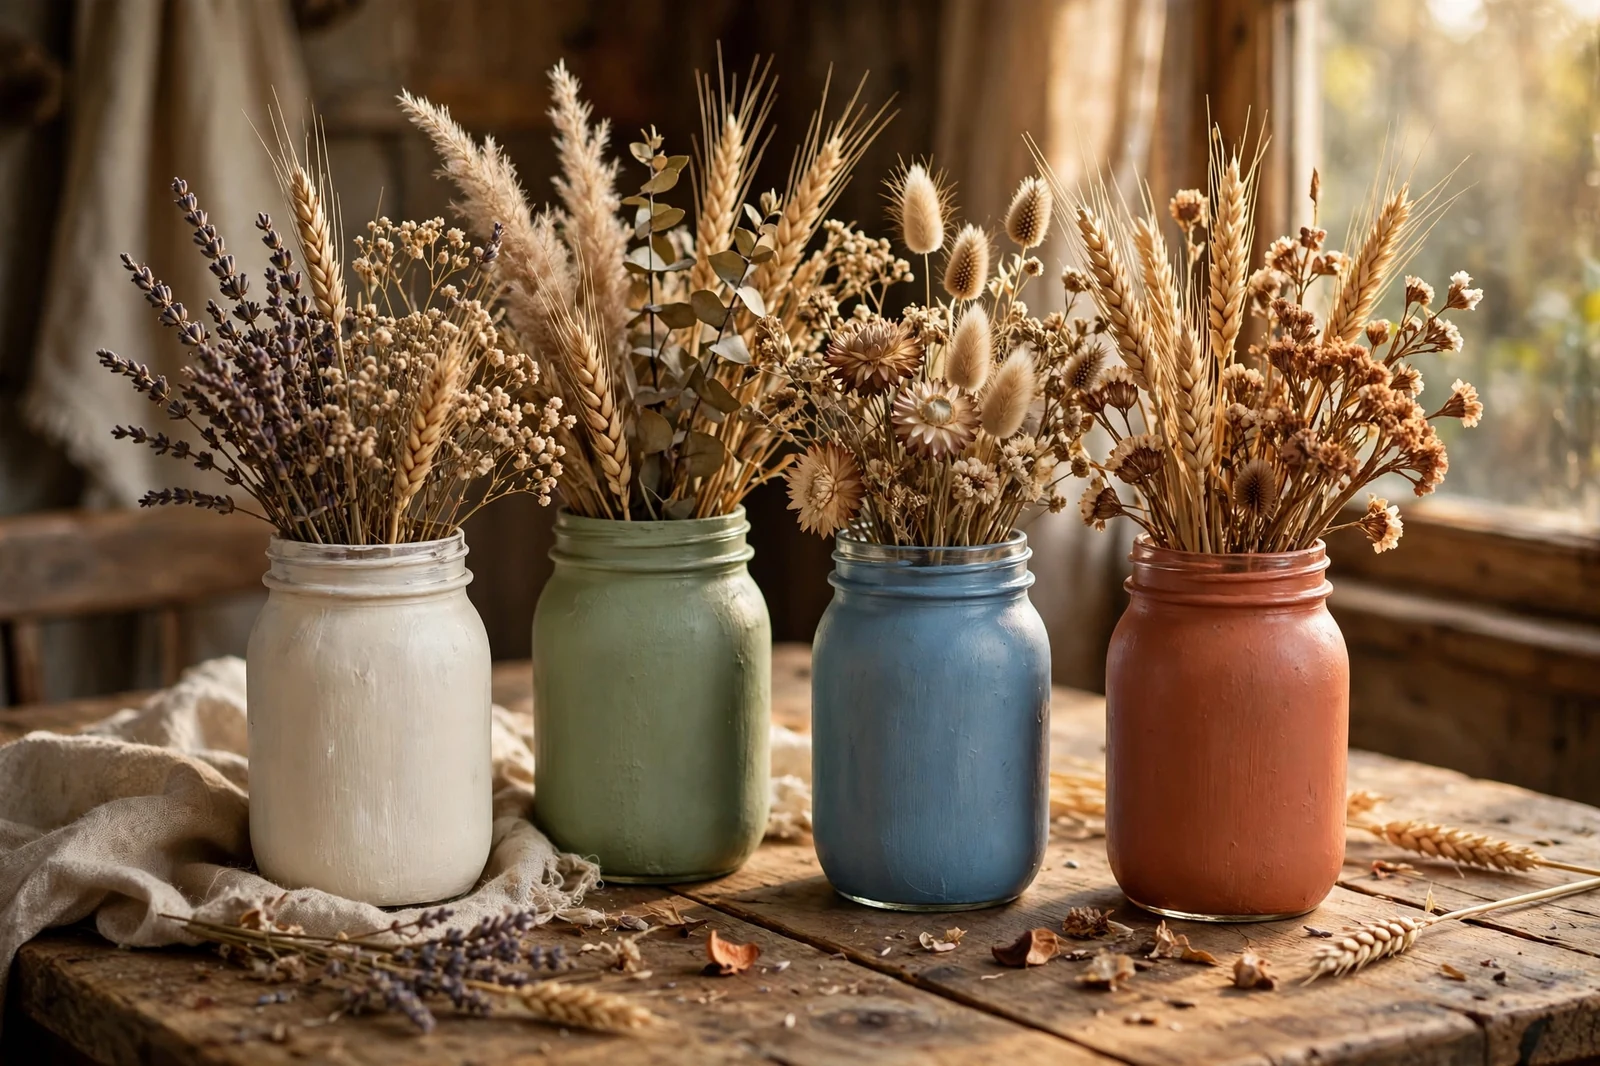
A plain glass mason jar rarely looks exciting on the craft table, but paint changes everything surprisingly fast. These 21 ideas cover distressed finishes, botanicals, checks, florals, and textured effects, each with practical painting and styling notes.
A plain glass mason jar rarely looks exciting on the craft table, but paint changes everything surprisingly fast. With the right finish, one jar becomes a farmhouse flower vase, a cottage-style bathroom holder, a seasonal centerpiece, or a sweet container for brushes and supplies. The slightly nostalgic shape already leans rustic, so a little paint goes a long way.
This collection gathers 21 mason jar painting ideas that move well beyond plain white: distressed finishes, botanical designs, gingham and buffalo check, tiny florals, woodland motifs, muted seasonal palettes, and textured stone effects. Each idea includes practical notes on paint types, brushes, drying times, and styling, plus the mistakes to avoid. Before you begin any project, wash the jar thoroughly, remove all label adhesive, let it dry completely, and wipe the outside with rubbing alcohol so the paint grips the glass.
Use paint formulated for glass, or a suitable glass primer beneath craft paint, for decorative jars. Keep paint away from food-contact surfaces, and do not assume a painted jar is dishwasher-safe unless your products say so. Now pick a jar and a design that speaks to you.
1. Gently Distressed Ivory Farmhouse Jar
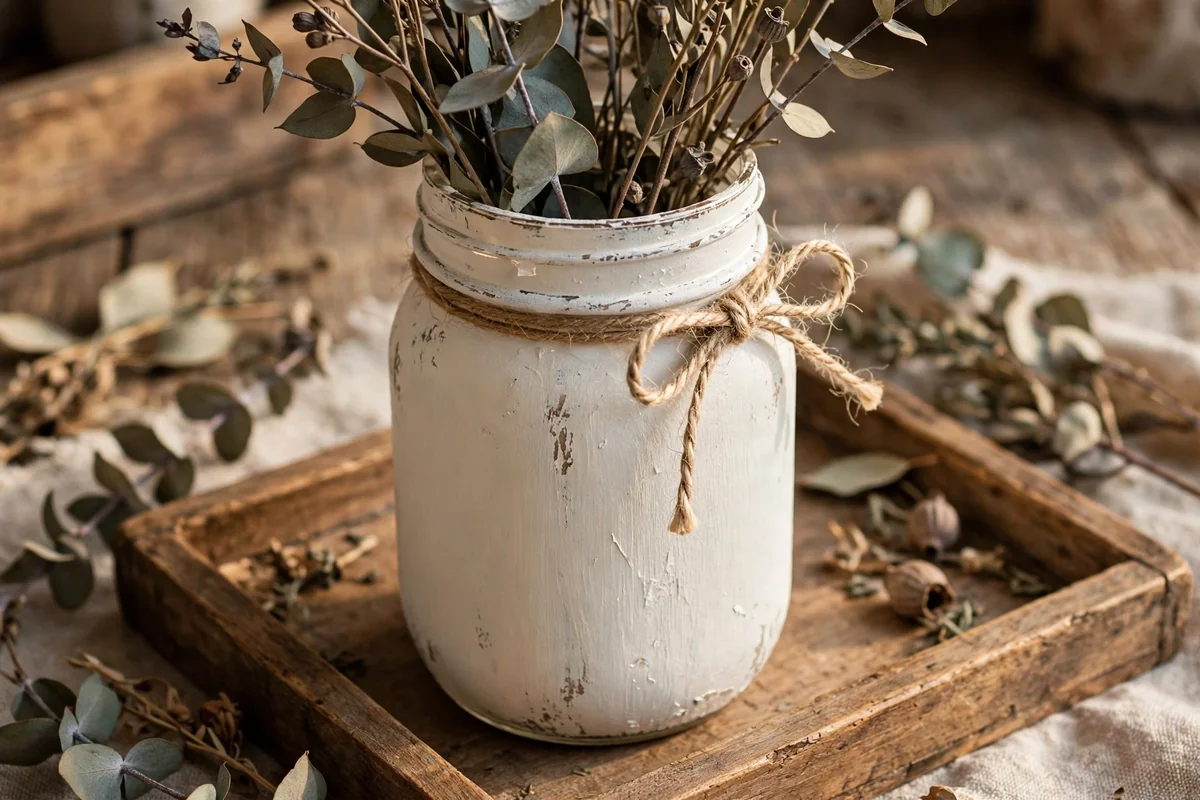
Start with a spotlessly clean jar: wash it in hot soapy water, remove every trace of label adhesive with oil or rubbing alcohol, and let it dry fully. Brush on two thin coats of matte ivory paint made for glass, or use a glass primer beneath regular craft paint, allowing each coat to dry for at least an hour. Thin coats prevent drips and give the distressing step a smooth, even surface to work with.
Once the paint has cured for 24 hours, lightly sand the raised areas where natural wear would occur: the embossed lettering, the shoulder, and the rim edges. Use 220-grit sandpaper with a feather touch, since it is easy to overdo. Fill the jar with dried eucalyptus or wheat stems and tie jute twine loosely around the neck. A common mistake is distressing flat middle panels, which looks artificial rather than authentically aged.
2. Soft Sage Jar With Hand-Painted Botanicals
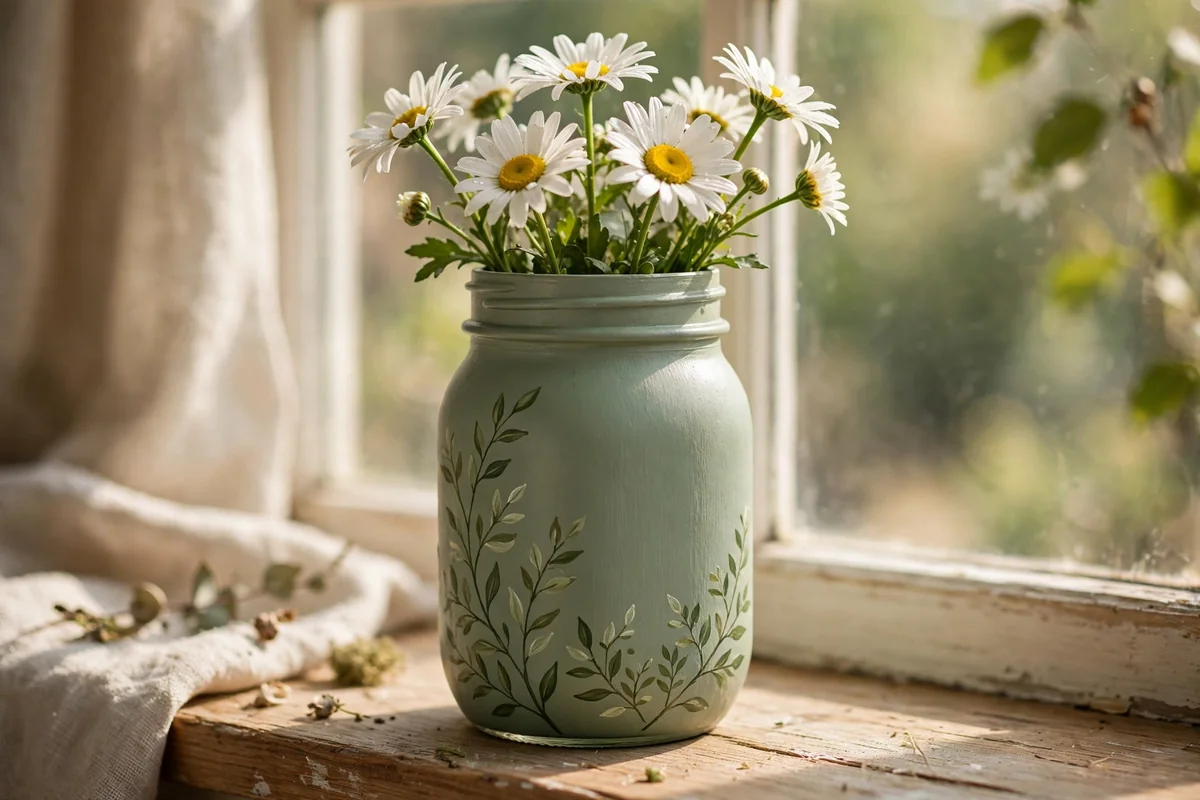
Sage green flatters almost any room because it reads as a neutral with personality. Apply two to three thin coats of matte sage paint to the outside of the jar, letting each coat dry completely. Then, using a small round brush and a slightly darker green, paint loose leafy branches climbing from one bottom corner. Keep the strokes relaxed and imperfect; botanical sprigs look more handcrafted when they are not botanically precise.
This design doubles as a vase because the painted greenery becomes part of any arrangement you place inside. White daisies, baby’s breath, or simple leafy stems all look lovely against the muted green. If you paint a set of three for a centerpiece, vary the branch placement on each jar so they feel related but not factory-made. Seal decorative jars with a clear matte sealer if they will be handled often, but keep paint away from any food-contact surface.
3. Dusty Blue Jar Sprinkled With Wildflowers
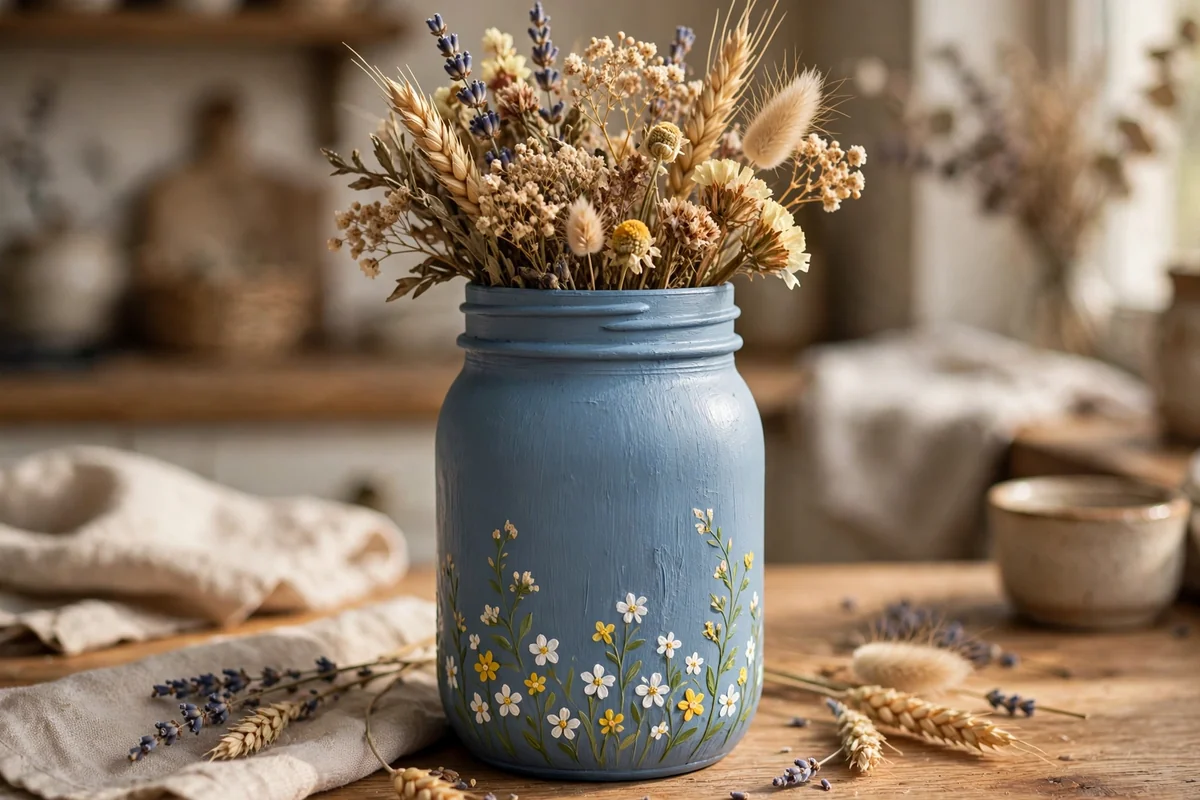
A dusty blue base recalls old painted farmhouse furniture and makes a wonderful backdrop for wildflowers. After your base coats have dried, use a fine detail brush to dot simple white petals with muted yellow centers, clustering them near the bottom of the jar and letting a few thin green stems reach upward. Leave plenty of blue showing around the flowers so the design breathes instead of crowding the glass.
Place the finished jar on a kitchen windowsill with wooden spoons or on a bedside table with dried blooms, and finish with a thin strand of natural twine around the neck. If your lines wobble slightly as they wrap around the curve, embrace it: small irregularities are exactly what make hand-painted florals charming. For a cohesive shelf display, repeat the same dusty blue on two plain jars without flowers.
4. Cream and Charcoal Gingham Check Jar
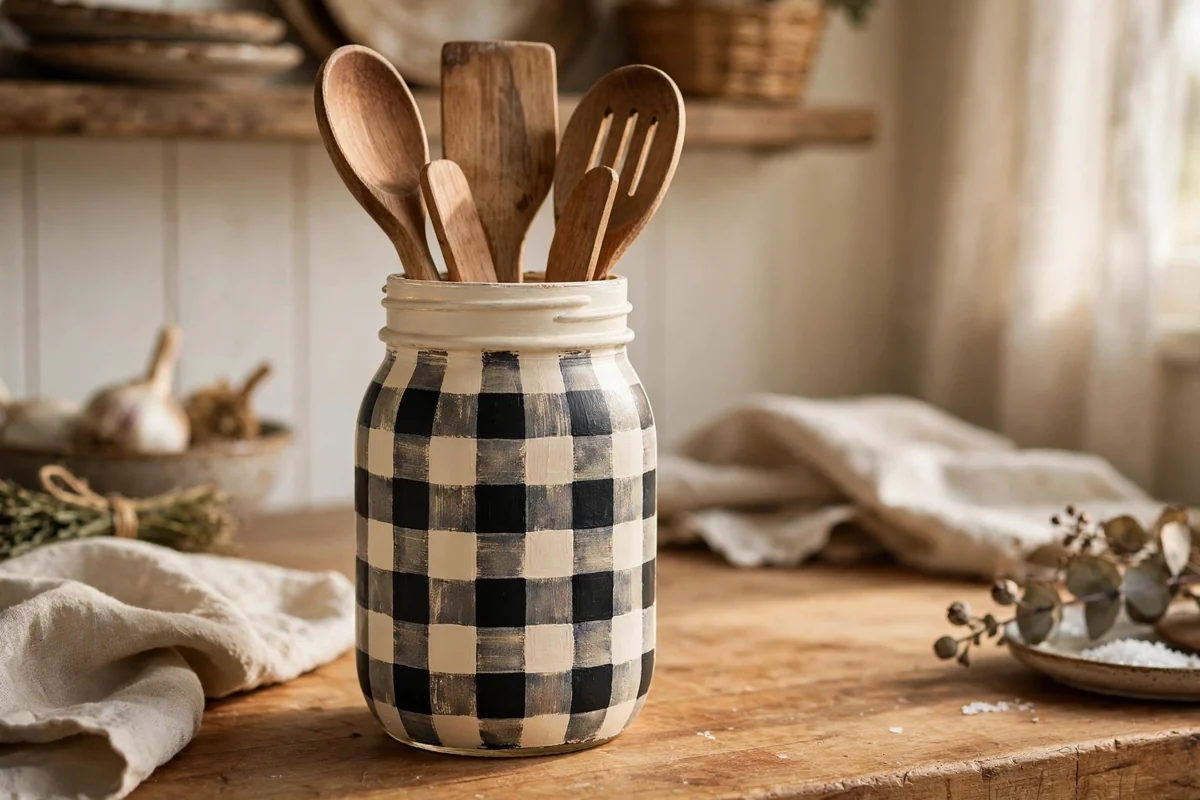
Gingham turns busy fast on curved glass, so work large. Paint the jar soft cream first, then sketch light pencil guidelines for wide vertical and horizontal bands in charcoal. Where the bands cross, add a second pass of charcoal to create the classic woven gingham effect. Painting one section at a time and letting it set prevents smudging as you rotate the jar in your hand.
This cozy country-kitchen jar is perfect for holding utensils, faux stems, or seasonal flowers. Consider leaving the threaded neck unpainted for a little breathing room between the pattern and the rim. Accept that the checks will not look mechanically perfect around a curve; a slightly uneven hand-painted check suits rustic decor far better than a pattern that looks machine-printed. Pair it with a solid cream jar so the display does not feel overwhelmed.
5. Warm Terracotta Jar With a Pottery Feel
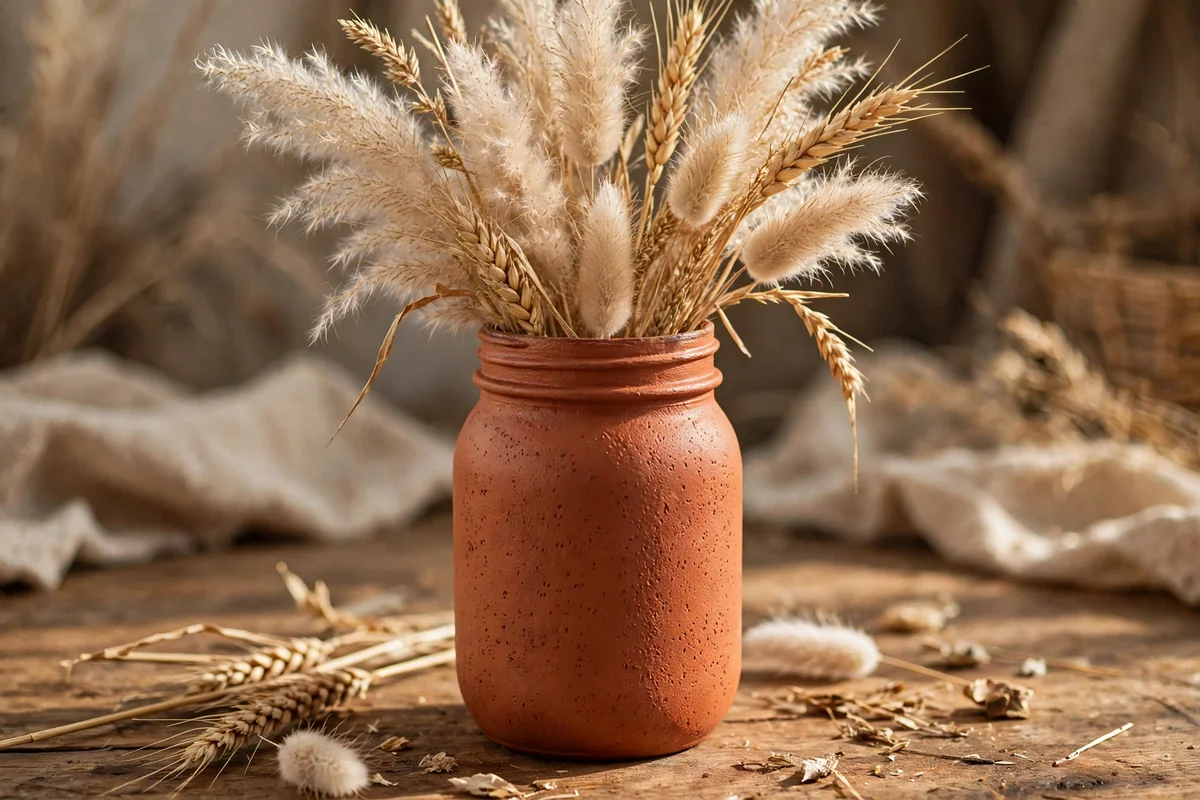
Matte terracotta paint transforms ordinary glass into something that reads as handmade pottery from across the room. Apply three thin coats of a warm clay-inspired color, using a stippling or pouncing motion with the final coat instead of smoothing every brushstroke away. That subtle texture is what sells the earthenware illusion. Let the jar cure fully before handling, since thick-looking finishes chip easily when rushed.
Style it with dried seed heads, pampas grass, wheat, or olive-like greenery rather than bright artificial flowers, so the warm finish stays the star. A group of three jars in slightly different clay shades makes a beautiful centerpiece with real depth. These jars cost only paint and jars you already own, yet they look like boutique pottery. Avoid glossy sealers here; a matte finish keeps the earthen character intact.
6. Scattered Daisy Jar on a Pastel Base
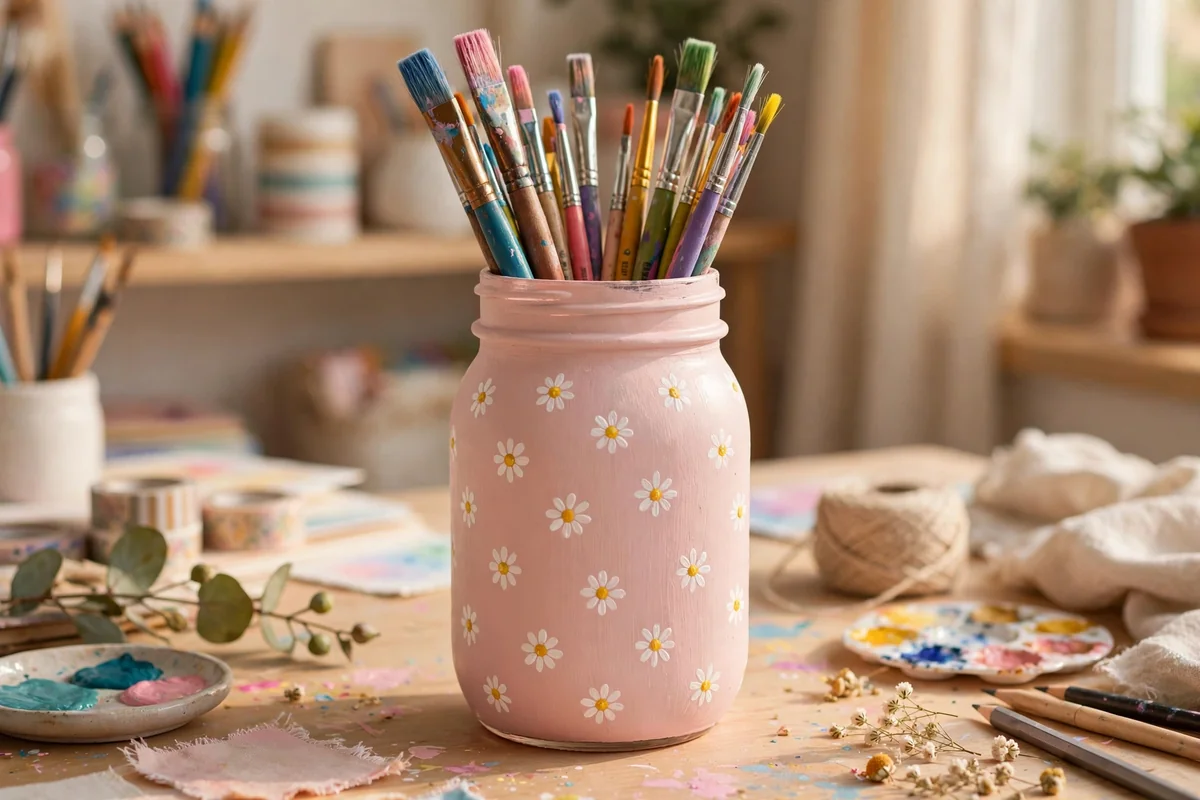
This is the project to choose when you want cheerful without complicated. Start with a soft pastel background such as pale blue, blush, or cream, applied in two smooth coats. Then scatter tiny white daisies across the surface using a small round brush or dotting tool: five short petals and a warm yellow center per flower. Vary the spacing and direction deliberately instead of arranging them in neat rows.
The finished jar is ideal for holding makeup brushes, paintbrushes, or pencils, and it makes a sweet small bouquet vase. For a child’s room or craft area, you can brighten the background color while keeping the flowers simple so the design never looks cluttered. A clear matte sealer protects the dots from chipping during daily use. Make a matching pair in different pastels for a delightful desk set.
7. Dusty Rose Jar With Vintage-Style Blooms
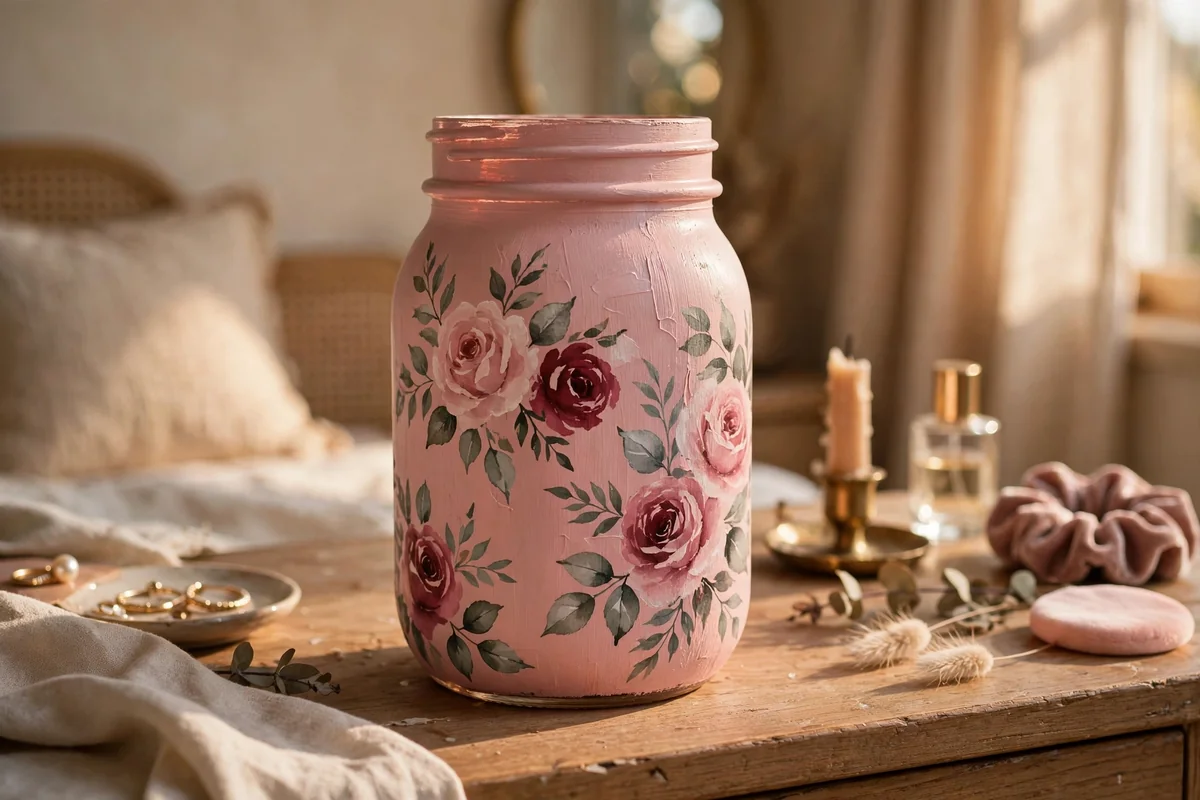
For a romantic, vintage-inspired jar, begin with a muted cream or dusty blush base. Paint several loose roses around the lower half using irregular curved strokes in dusty pink, muted burgundy, and soft ivory, building each bloom from layered crescents rather than outlining petals. Tuck small gray-green leaves between the flowers and leave the upper portion simple so the design feels balanced.
Once dry, lightly distress the raised glass lettering to give the base a gently worn, aged feel. This style suits bedrooms, vanities, and vintage-inspired wedding centerpieces because it feels decorative without turning formal or shiny. Fill it with blush garden roses or dried blooms in matching tones. The key restraint: stop before adding lace, charms, and bows all at once, and let the painted roses carry the design.
8. Cheerful Sunflower Jar for Late Summer
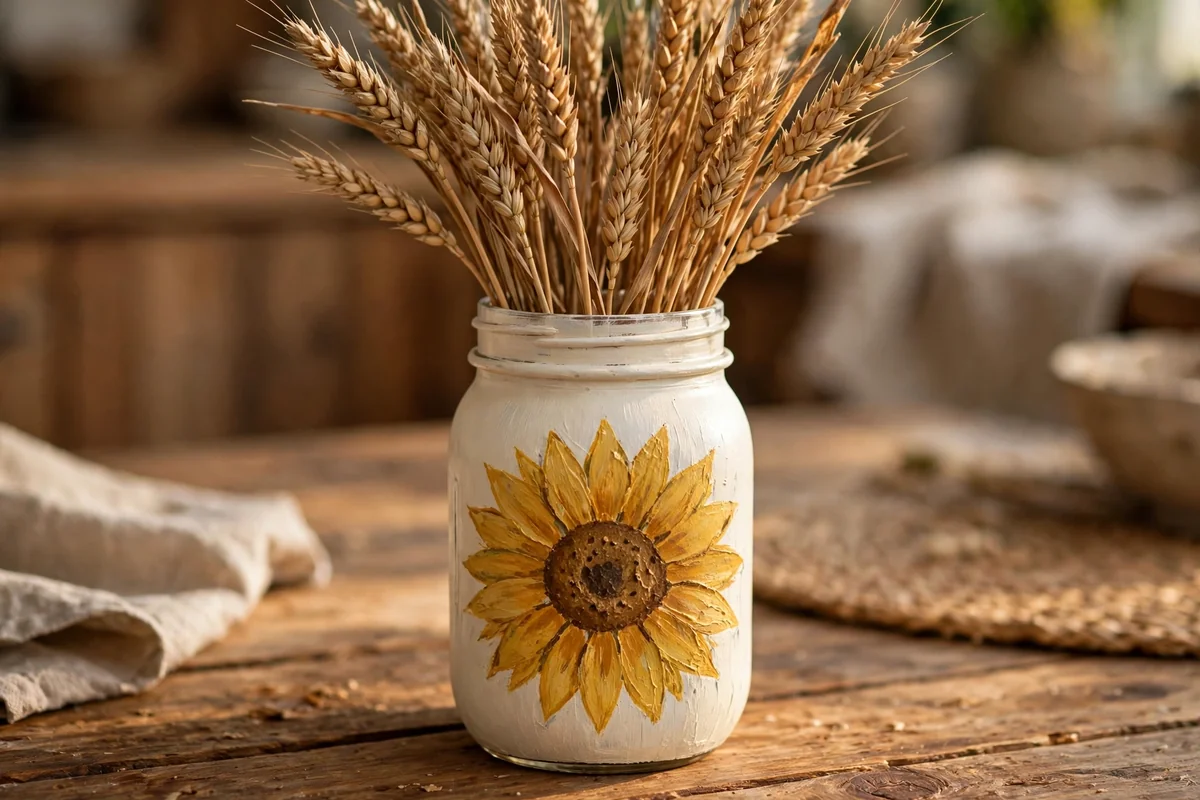
Keep sunflowers restrained so the jar reads rustic rather than novelty. Paint the base creamy off-white, then add one or two medium sunflowers on the front in warm ochre yellow, which looks softer than neon yellow. Build a textured brown center with dabs of darker paint and add muted green leaves for dimension. One confident bloom beats five crowded ones on a jar this size.
This design bridges late summer and early autumn beautifully. Fill it with real greenery, small sunflowers, or dried wheat and set it on a wooden kitchen table. If you make three jars, paint a different portion of the sunflower on each one instead of repeating the identical design; the variation looks intentional and artistic. A thin coat of matte sealer keeps the yellow from scuffing when the jar is moved around.
9. Calm Lavender Sprig Jar for Quiet Corners
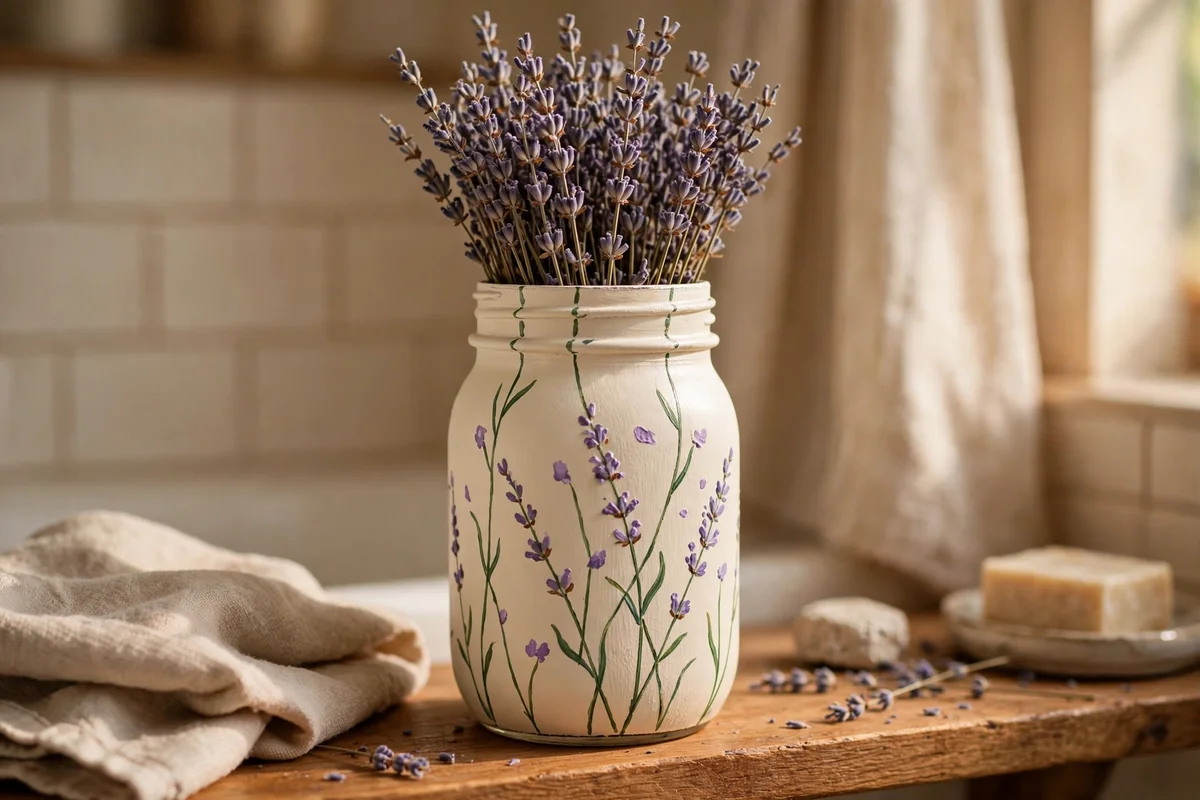
Lavender sprigs bring a quiet, pretty feeling that suits bathrooms and bedrooms perfectly. Start with a warm ivory or pale gray background, then paint thin green stems rising from the bottom with a liner brush. Add small lavender-purple dabs along each stem, keeping the flower heads loose and slightly irregular. Fewer, well-placed sprigs look more elegant than a jar crowded with stems.
A bundle of real dried lavender inside makes the painted design feel even more intentional, and the gentle scent is a lovely bonus. Wrap a narrow strand of jute around the neck if you like, but resist piling on extra embellishments; the delicate painted stems deserve to remain the main detail. This is also a wonderful gift jar: simple, calming, and useful as a vase or brush holder.
10. Bold Buffalo Check Jar in Seasonal Colors
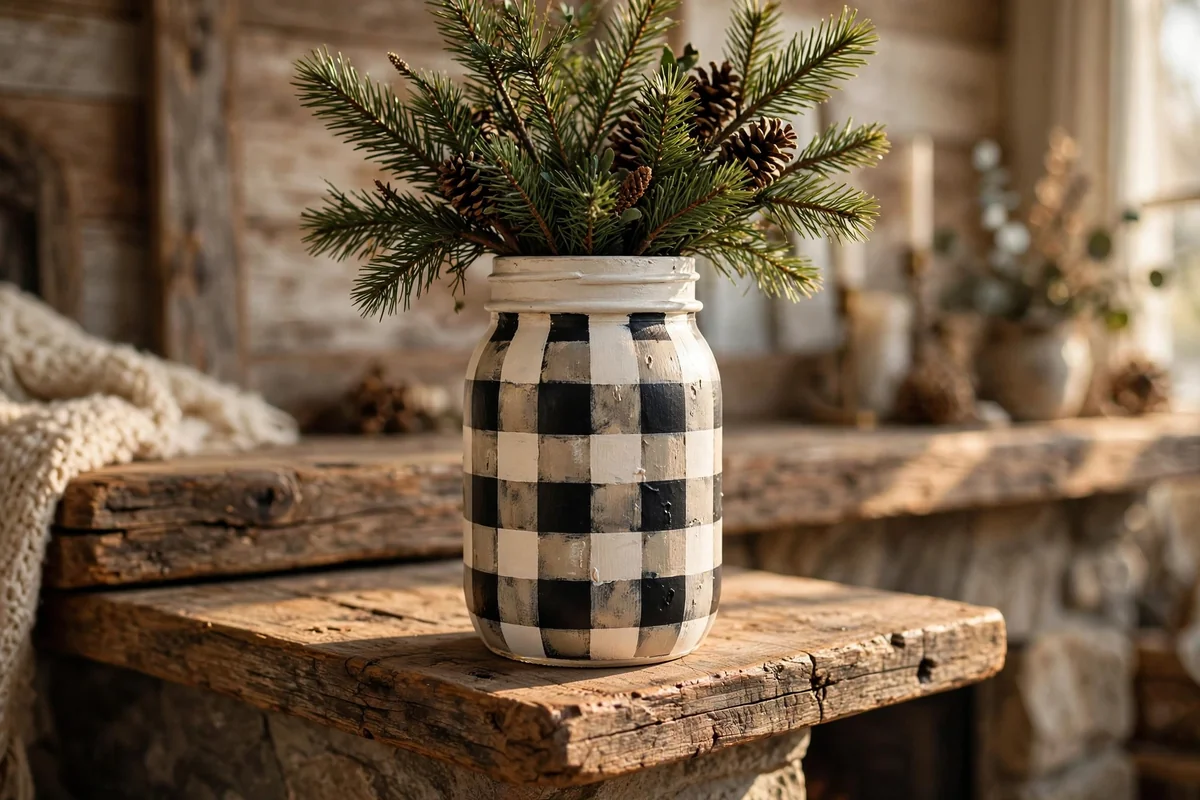
Buffalo check delivers a bolder farmhouse statement than fine gingham. Paint the jar warm white or cream, then create large checks in charcoal, muted red, or forest green depending on the season. Work one section at a time, letting each dry enough that your hand does not smudge the previous area as you rotate the jar. The oversized pattern stays readable from across a room, which makes it ideal for centerpieces.
A black-and-cream version works nearly year-round, while muted red feels cozy for winter and forest green transitions into the holidays without needing snowflakes or lettering. Pair the patterned jar with a solid-colored companion so the display stays balanced. Fill it with pine branches, cotton stems, or dried hydrangeas. The most common mistake is making the checks too small; on a jar, bigger reads better.
11. Sweet Strawberry Jar for a Cottage Kitchen
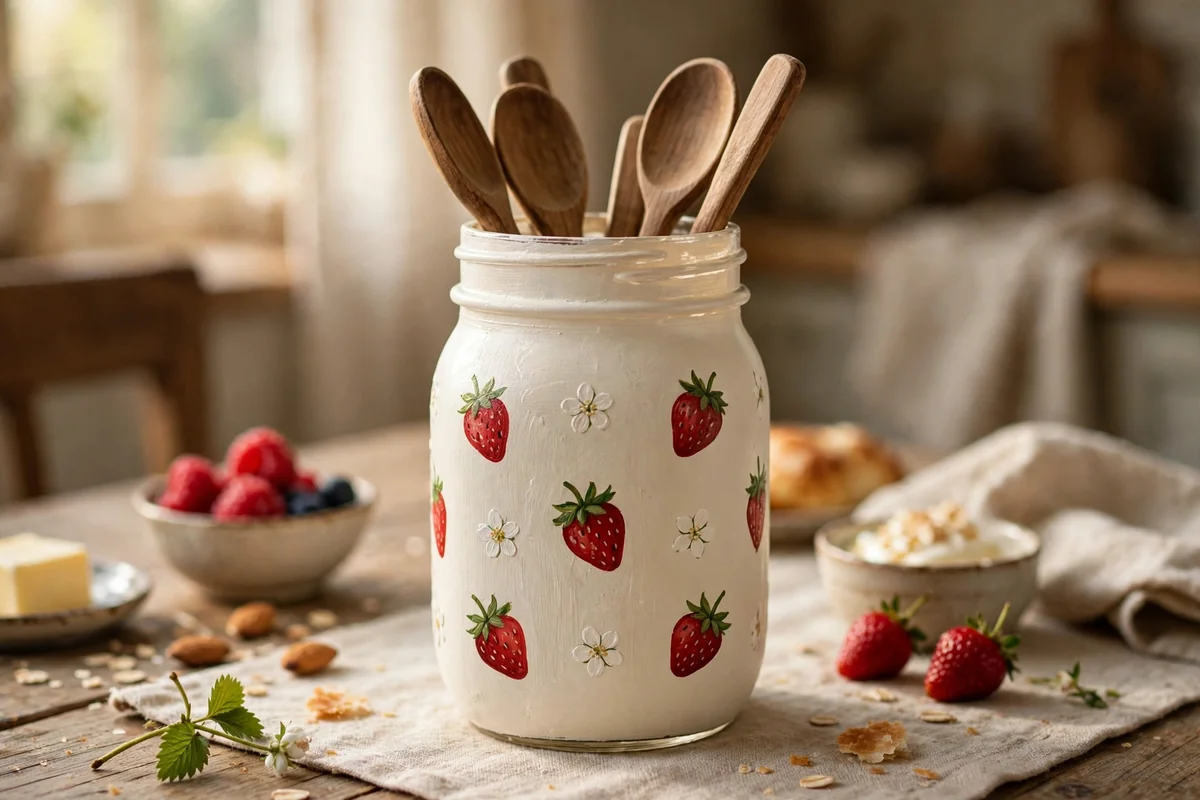
Tiny strawberries on creamy white create an irresistible cottage-kitchen look. Paint small, irregular red berry shapes, add little green leafy tops, and scatter a few tiny white blossoms between them. Keep each berry small so the pattern reads as delicate rather than cartoonish, and vary them: some face sideways, some are smaller, and a few hide partially behind leaves so the design never looks like repeated clip art.
This jar is perfect for holding wooden spoons, reusable straws, or fresh flowers on a breakfast table, especially beside natural wood and red gingham fabric. Seal it with matte sealer since kitchen jars get handled daily. For a set, paint one jar with strawberries, one with just blossoms, and one plain cream; the trio looks collected over time rather than bought as a matching set.
12. Woodland Mushroom Jar in Earthy Tones
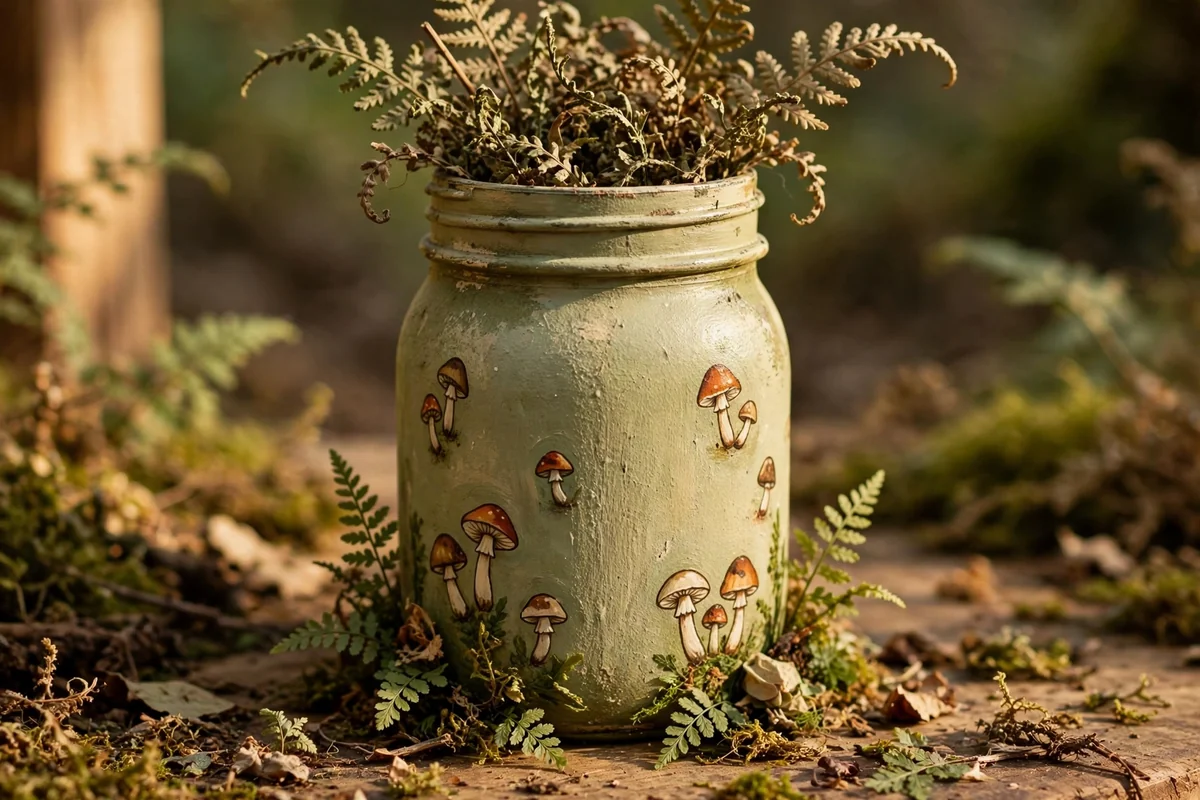
For a cozy woodland feel, paint the jar muted beige or mossy green and add a handful of small mushrooms around the base in warm rust, brown, cream, and muted red. Connect them with tiny grasses, leaves, and fern-like marks to suggest a forest floor. Leave generous negative space between the motifs; the individual mushrooms stand out far more when they are not crowded.
Fill it with dried ferns, bare branches, or autumn foliage to complete the woodland story. This jar fits beautifully into cottagecore shelves and nature-inspired decor, and it is wonderfully forgiving: woodland objects are not supposed to look uniform, so imperfect brushwork actually helps. It also makes a charming gift for foragers and gardeners when filled with seed packets or small garden tools.
13. Honeybee and Blossom Jar for Summer
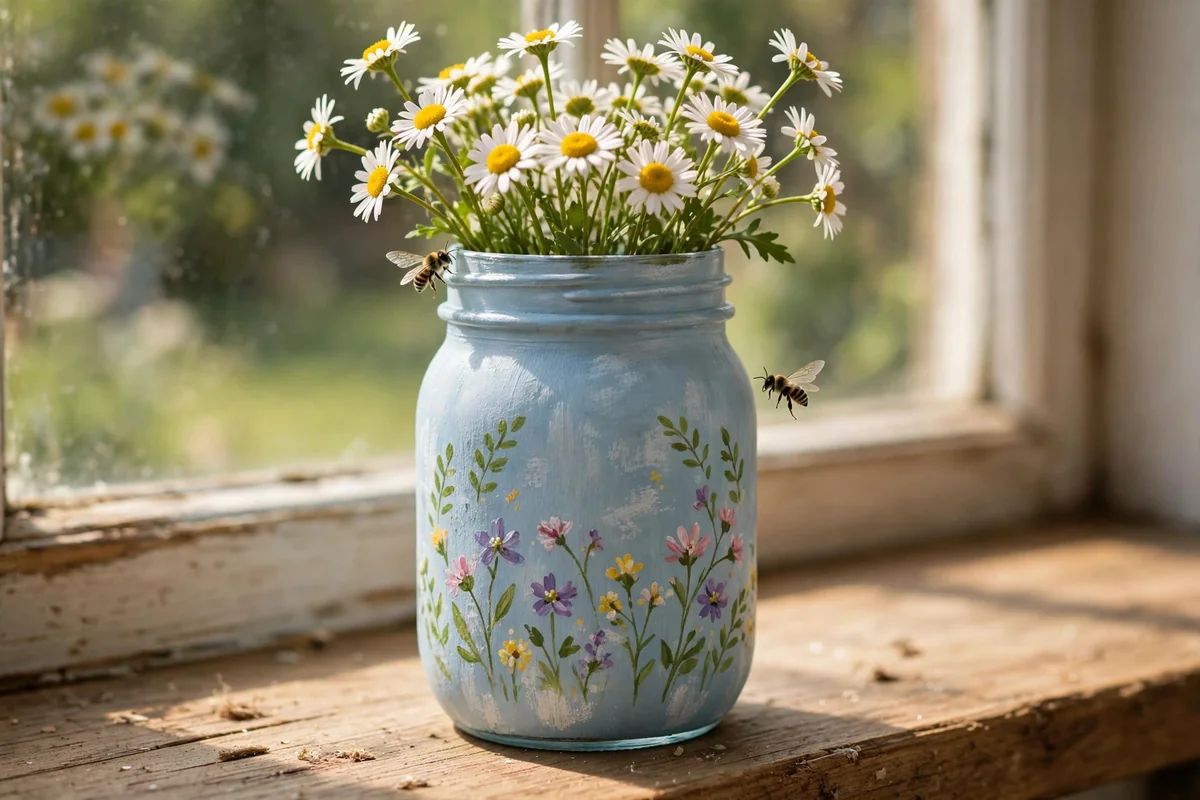
Tiny bees paired with simple wildflowers feel cheerful without turning childish. Use a soft sky-blue, sage, or ivory background, paint a few loose blossoms first, then add two or three small bees with oval bodies and delicate translucent wings. Space the bees well apart so they appear to drift through the flowers rather than forming a repeated pattern.
The finished jar makes a wonderful summer flower vase, especially with daisies or fresh garden clippings. A thin jute tie around the neck reinforces the rustic feeling while everything else stays simple. This is a lovely hostess gift in summer: fill it with blooms from your garden and it looks thoughtful without costing much. Keep the bee count low; restraint keeps the design sweet instead of busy.
14. Charcoal Botanical Silhouettes on Warm White
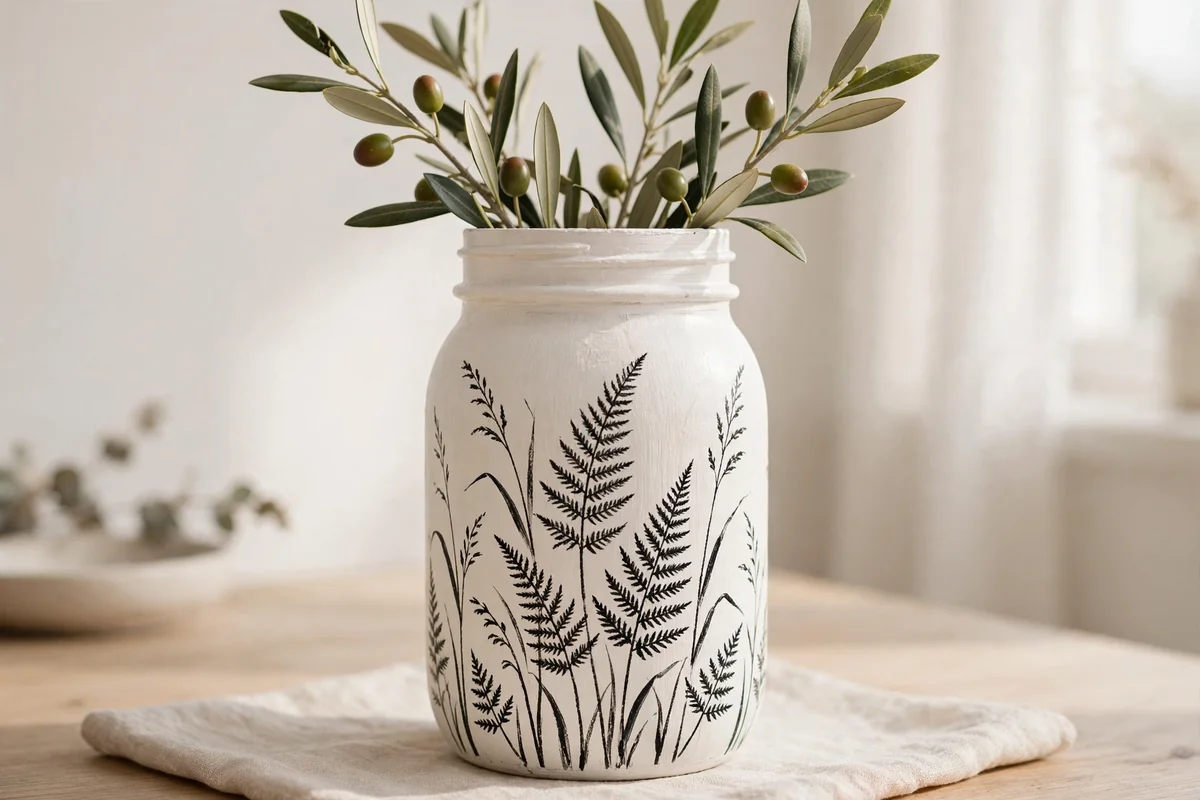
A limited palette can produce the strongest result. Paint the entire jar warm white, then use charcoal-black paint and a fine liner brush to create thin botanical silhouettes: ferns, grasses, olive branches, or simple leafy stems rising vertically around the jar. Against the white ground, even a few narrow stems make a striking graphic statement.
This is a favorite for modern farmhouse decor because it feels handcrafted without relying on distressed lettering or burlap. It pairs beautifully with eucalyptus or olive branches inside. The technique is beginner-friendly since silhouettes forgive wobbly lines, yet the result looks sophisticated. Make sure the white base is fully opaque first; patchy white undermines the crisp contrast that makes this design work.
15. Muted Rainbow Arches in Dusty Pastels
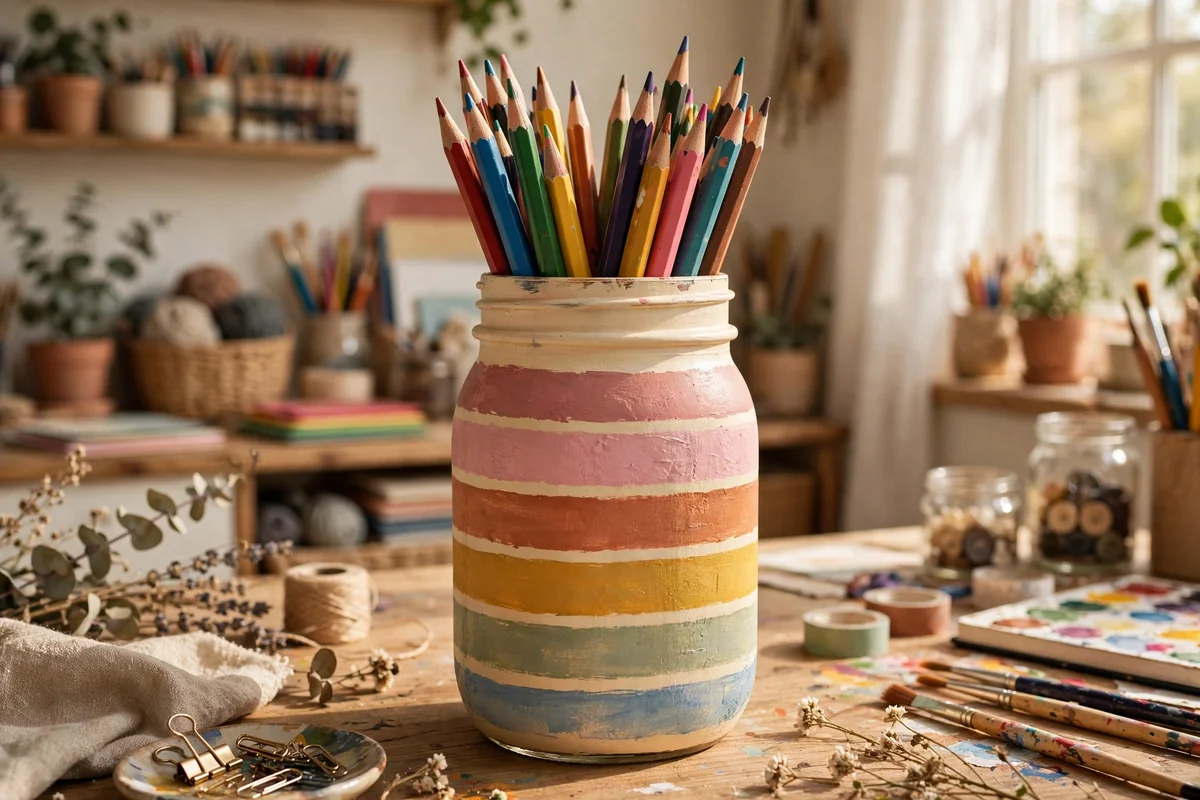
A rainbow jar can still feel rustic when you skip the primaries. Over a warm cream background, paint wide curved arches in dusty rose, terracotta, mustard, sage, and faded blue. Let tiny brush variations show rather than chasing perfectly smooth arcs; the handmade finish keeps the rainbow from looking commercially printed. Two thin coats per color give clean coverage without ridges.
Use this design for craft-room storage, where it brings cheerful color without overwhelming the space, or as a sweet vase for a nursery or casual table. It also makes a delightful pencil holder. For visual calm, keep the rest of the shelf neutral so the jar becomes the color moment. Children love this one, and it is simple enough for older kids to paint themselves with supervision.
16. Speckled Stone-Effect Jar Like Rustic Pottery
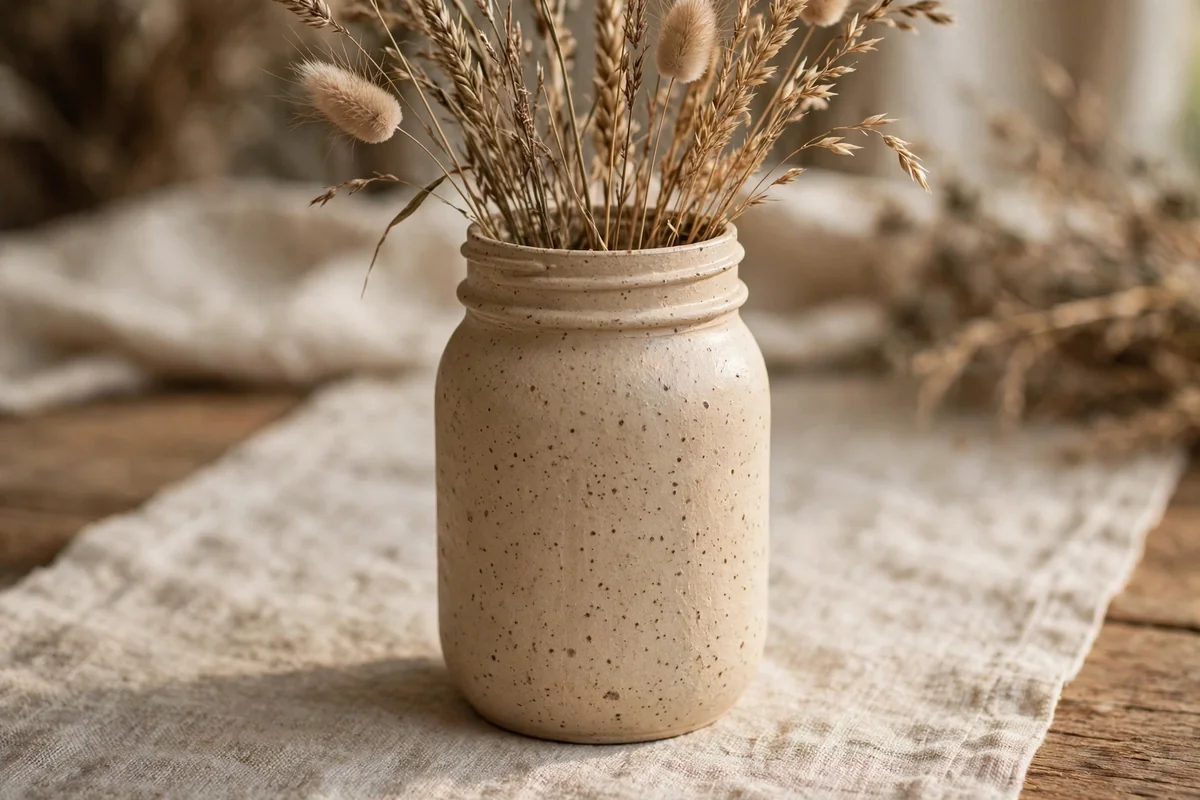
For a jar that reads as handmade stoneware, start with a warm beige, putty, or off-white matte base. Once dry, flick tiny darker speckles across the surface with a stiff brush or old toothbrush, protecting your workspace first because enthusiastic speckling travels farther than you expect. Keep the speckles small and irregular rather than obvious polka dots.
The finished jar looks beautiful with simple dried grasses or bare branches because it resembles rustic pottery from a distance. This is an excellent choice if detailed hand painting is not your favorite; the texture and tonal variation do most of the decorative work. It also hides fingerprints well, which makes it practical for everyday use. Group three in graduated sizes for a pottery-like vignette.
17. Dusty Blue Hydrangea Cluster Jar
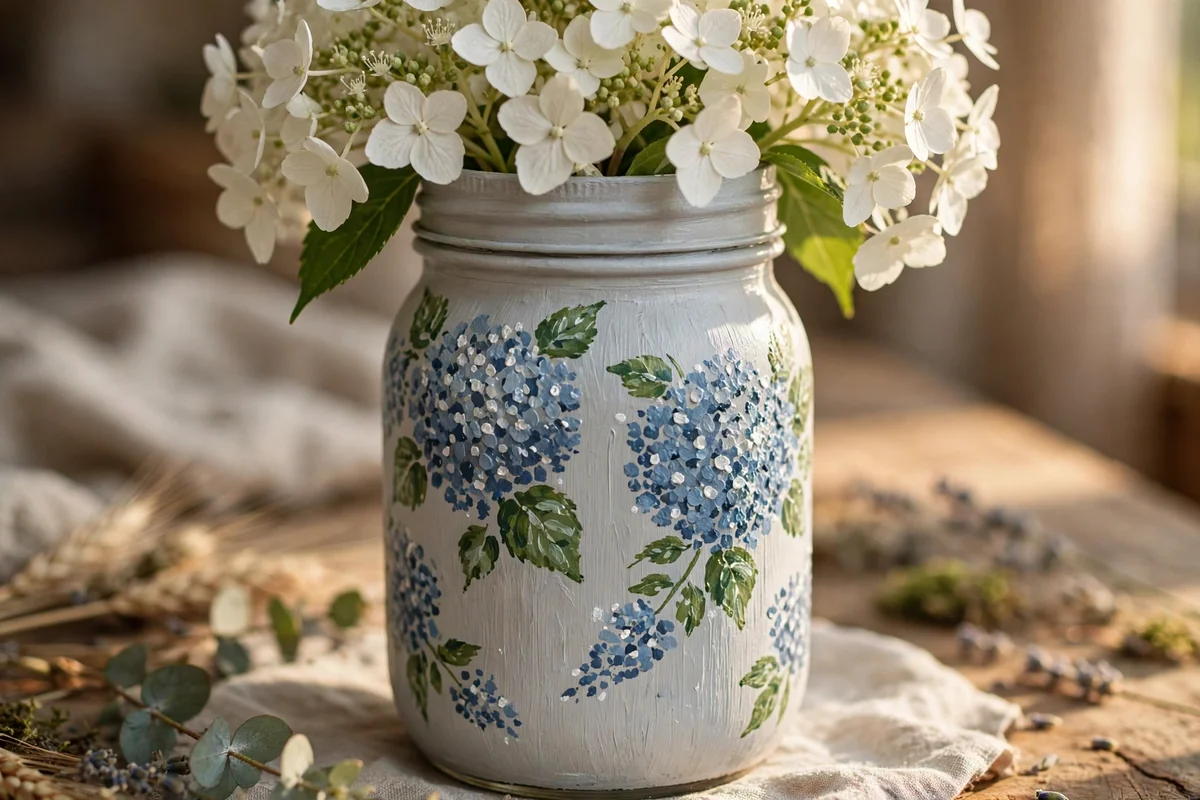
Hydrangeas look complicated but are surprisingly forgiving as painted clusters of tiny dabs. Over a pale gray or creamy base, build each flower head from several shades of dusty blue, adding touches of white for highlights and muted green for leaves. Concentrate two or three blooms on one side of the jar and let a few leaves trail around the edges rather than covering every inch.
Fill it with white blooms or dried hydrangeas to echo the painted flowers. This jar suits entryways, living rooms, and anywhere you want a soft traditional touch. The dabbing technique is meditative and beginner-friendly; a round pouncer brush makes the petals even easier. Let each color layer dry before adding highlights so the shades stay distinct instead of muddying together.
18. Deep Navy Jar With Cream Wildflower Dabs
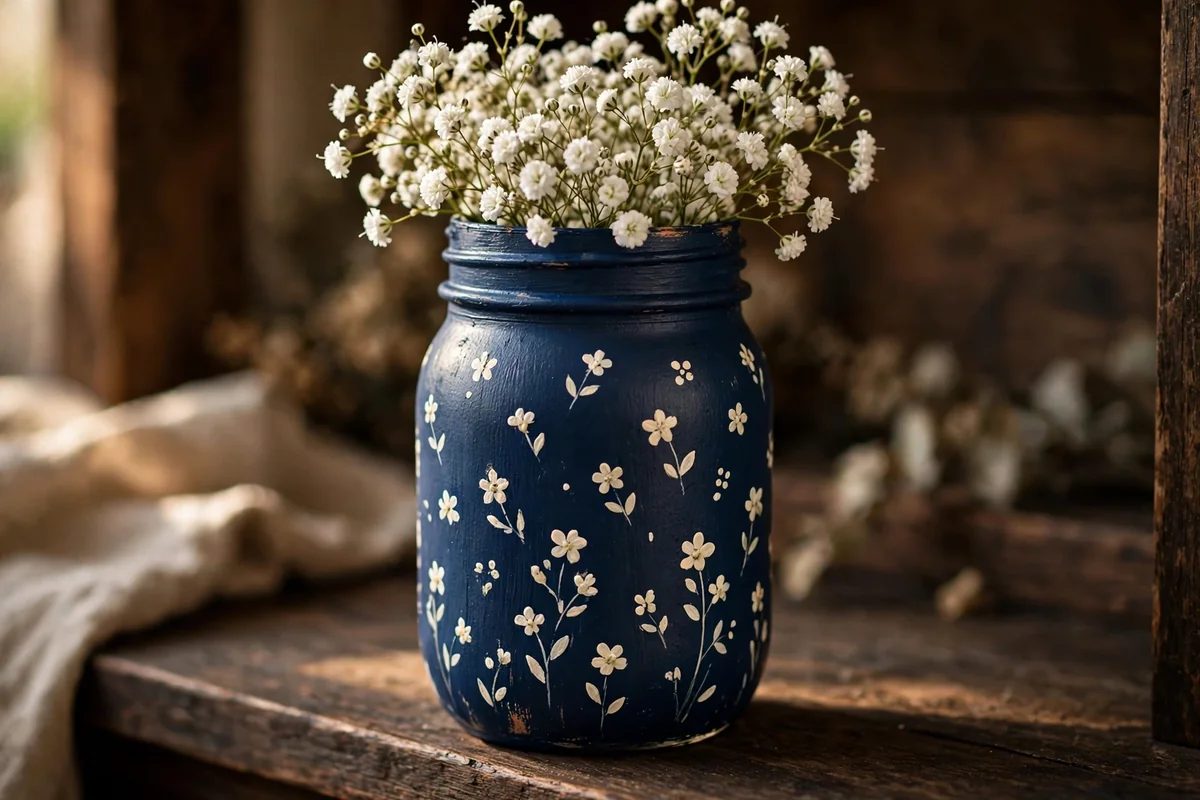
Deep navy gives mason jars a moody, collected feel that stands out on a shelf of pastels. Apply two to three thin coats for rich, even coverage, since dark paint shows thin spots easily. Once cured, scatter small cream and soft-white wildflower dabs across the surface with a dotting tool, keeping the motifs tiny so the navy remains the dominant color.
Fill it with white baby’s breath, cotton stems, or dried gypsophila for striking contrast. This jar works beautifully in autumn and winter displays and pairs well with brass or wood tones. Because navy is dramatic, one jar is usually enough per arrangement; let it be the anchor among lighter companions. A matte finish keeps the look sophisticated rather than glossy.
19. Oatmeal Jar With a Hand-Tied Kraft Tag
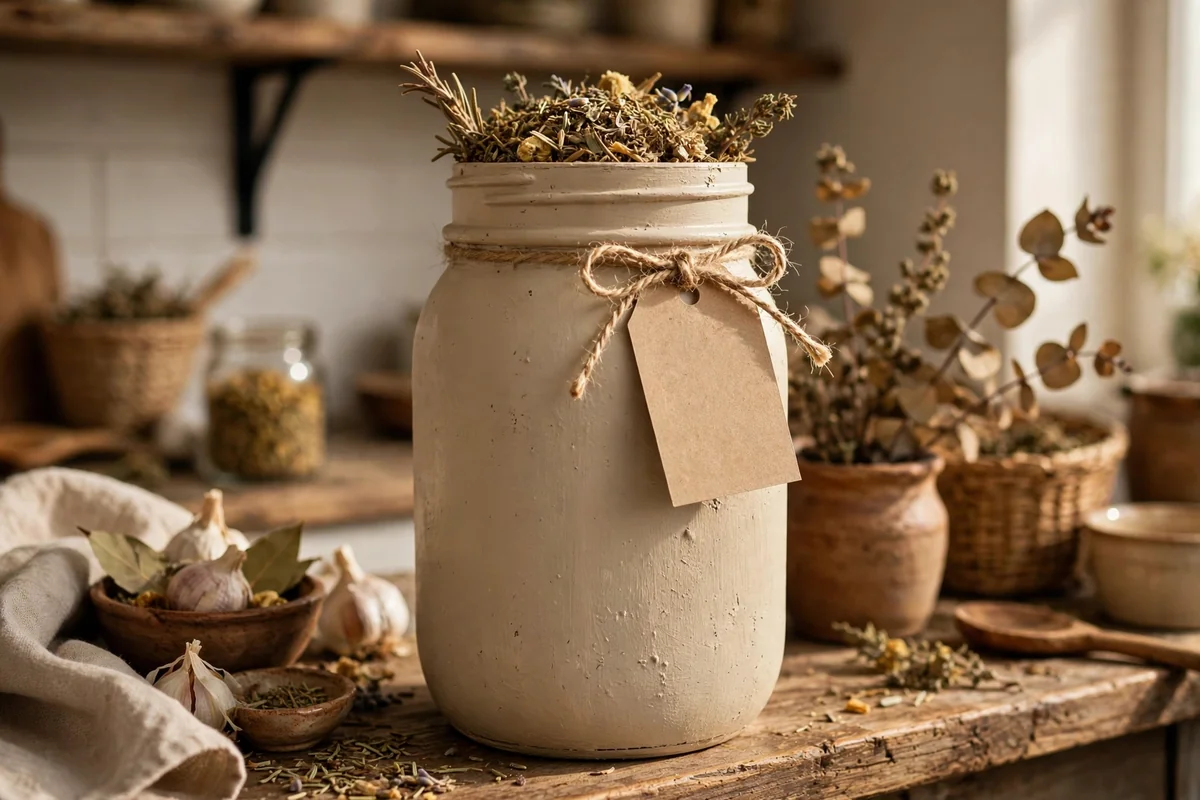
Sometimes the simplest jar is the most useful. Paint the jar warm oatmeal beige in two smooth matte coats, then tie a blank kraft paper tag around the neck with natural twine. The tag can be left plain for a minimalist look or labeled later with a handwritten herb or pantry name. This design puts the focus on beautiful utility rather than decoration.
Use these jars for dried herbs, pantry staples like lentils and rice, cotton balls in the bathroom, or craft supplies. The neutral oatmeal tone disappears gracefully into any decor style, from farmhouse to modern. Make a matching row in pint and quart sizes for open shelving; the uniformity looks calm and intentional. Keep paint on the outside only, and never store food directly against a painted interior.
20. Weathered Cream Jar With Exposed Glass Lettering
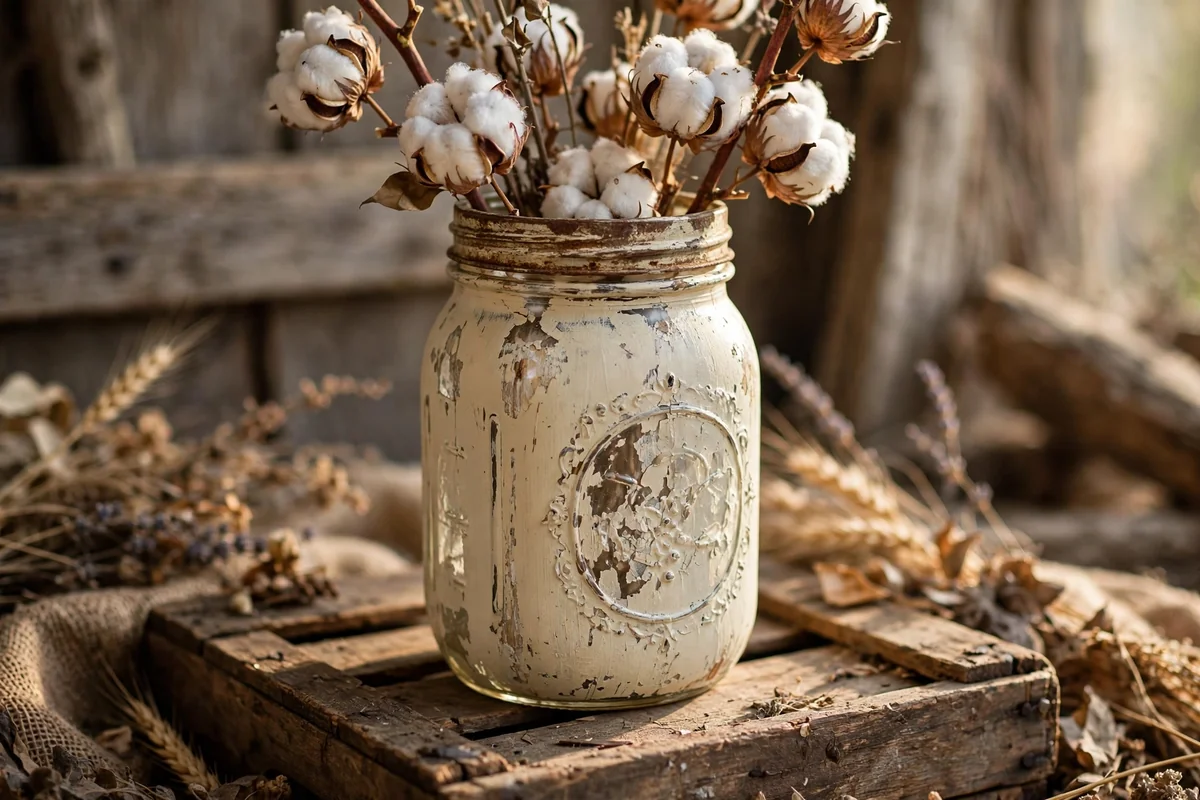
Let the jar’s own embossed lettering become the decoration. Paint the jar weathered cream in thin coats, then carefully sand the paint back from the raised brand lettering and measurement markings so the clear glass shows through. This selective distressing looks authentically aged because it follows the jar’s natural high points instead of random patches.
Fill it with cotton stems, dried baby’s breath, or simple white blooms and set it on a vintage crate or stack of old books. The exposed lettering catches light beautifully and gives the jar a genuine antique feel. This technique also rescues jars with imperfect paint jobs: strategic sanding turns mistakes into character. Handle the sanded areas gently, as the exposed edges can be slightly rough.
21. Coordinated Trio of Jars in Tonal Clay Shades
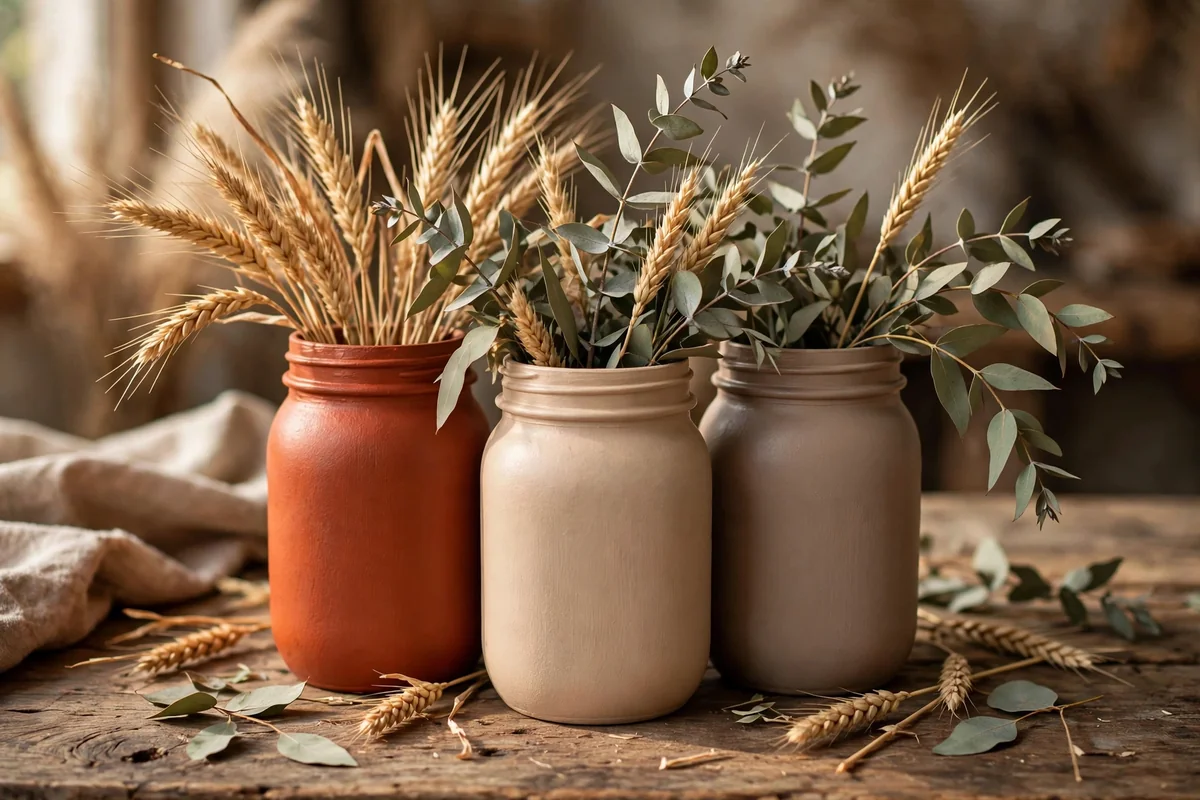
A group of jars in tonal clay shades makes an instant centerpiece with almost no painting skill required. Choose three colors from the same warm family, such as terracotta, sand, and warm taupe, and paint one jar in each using two smooth matte coats. The tonal gradation creates depth and looks far more designed than three identical jars.
Arrange them on a wooden tray or runner with dried wheat, eucalyptus, and a small candle holder, varying the heights with pint and quart jars. This is the fastest way to get a styled, cohesive look for a dining table or mantel. Because the colors are related, the grouping works in any season; just swap the fillers from spring blooms to autumn grasses to winter greens.
Closing Thoughts
Painted mason jars prove that the most charming decor often starts with the humblest materials. A little paint, a few brushes, and an afternoon are all it takes to turn plain glass into pieces you will actually keep on display. Start with one simple design, learn how the paint behaves, and soon you will have a whole shelf of handmade jars, each with its own quiet personality.
Frequently Asked Questions
What kind of paint should I use on mason jars?
Use paint formulated to adhere to glass, such as multisurface or glass-specific craft paint, or apply a glass primer first beneath regular acrylic craft paint. Apply thin coats and let each dry fully. For jars that will be handled often, finish with a clear matte sealer, and keep paint on the outside only, away from food-contact surfaces.
How do I get paint to stick to glass without peeling?
Preparation matters most. Wash the jar in hot soapy water, remove all label adhesive, dry it completely, and wipe the outside with rubbing alcohol to remove fingerprints and oils. Use a primer or glass-specific paint, apply thin coats, and let the jar cure for the full time on the product label, usually 24 hours, before handling.
Can I wash painted mason jars?
Treat them as hand-wash only and wash gently, or better yet, wipe the outside with a damp cloth. Most craft paints are not dishwasher-safe, and heat plus harsh detergents will cause chipping. If the jar holds flowers, change the water carefully without scrubbing the painted exterior.
How do I fix drips or mistakes in my painted design?
While the paint is still wet, wipe the mistake away with a damp cloth or cotton swab. If it has dried, let it cure, then lightly sand the spot with fine sandpaper and repaint with thin coats. Distressing techniques can also turn small flaws into intentional-looking character.
Are painted mason jars safe for food storage?
Only if paint stays strictly on the outside and you use products rated food-safe where relevant. Never paint the inside of a jar that will hold food, and do not assume a decorative painted jar is food-safe. For pantry storage, paint the exterior and consider using a separate inner container for direct food contact.