Home Improvement
21 Rustic Fall Porch Decor Ideas Full of Harvest Warmth
By Anna Wells · · 21 min read
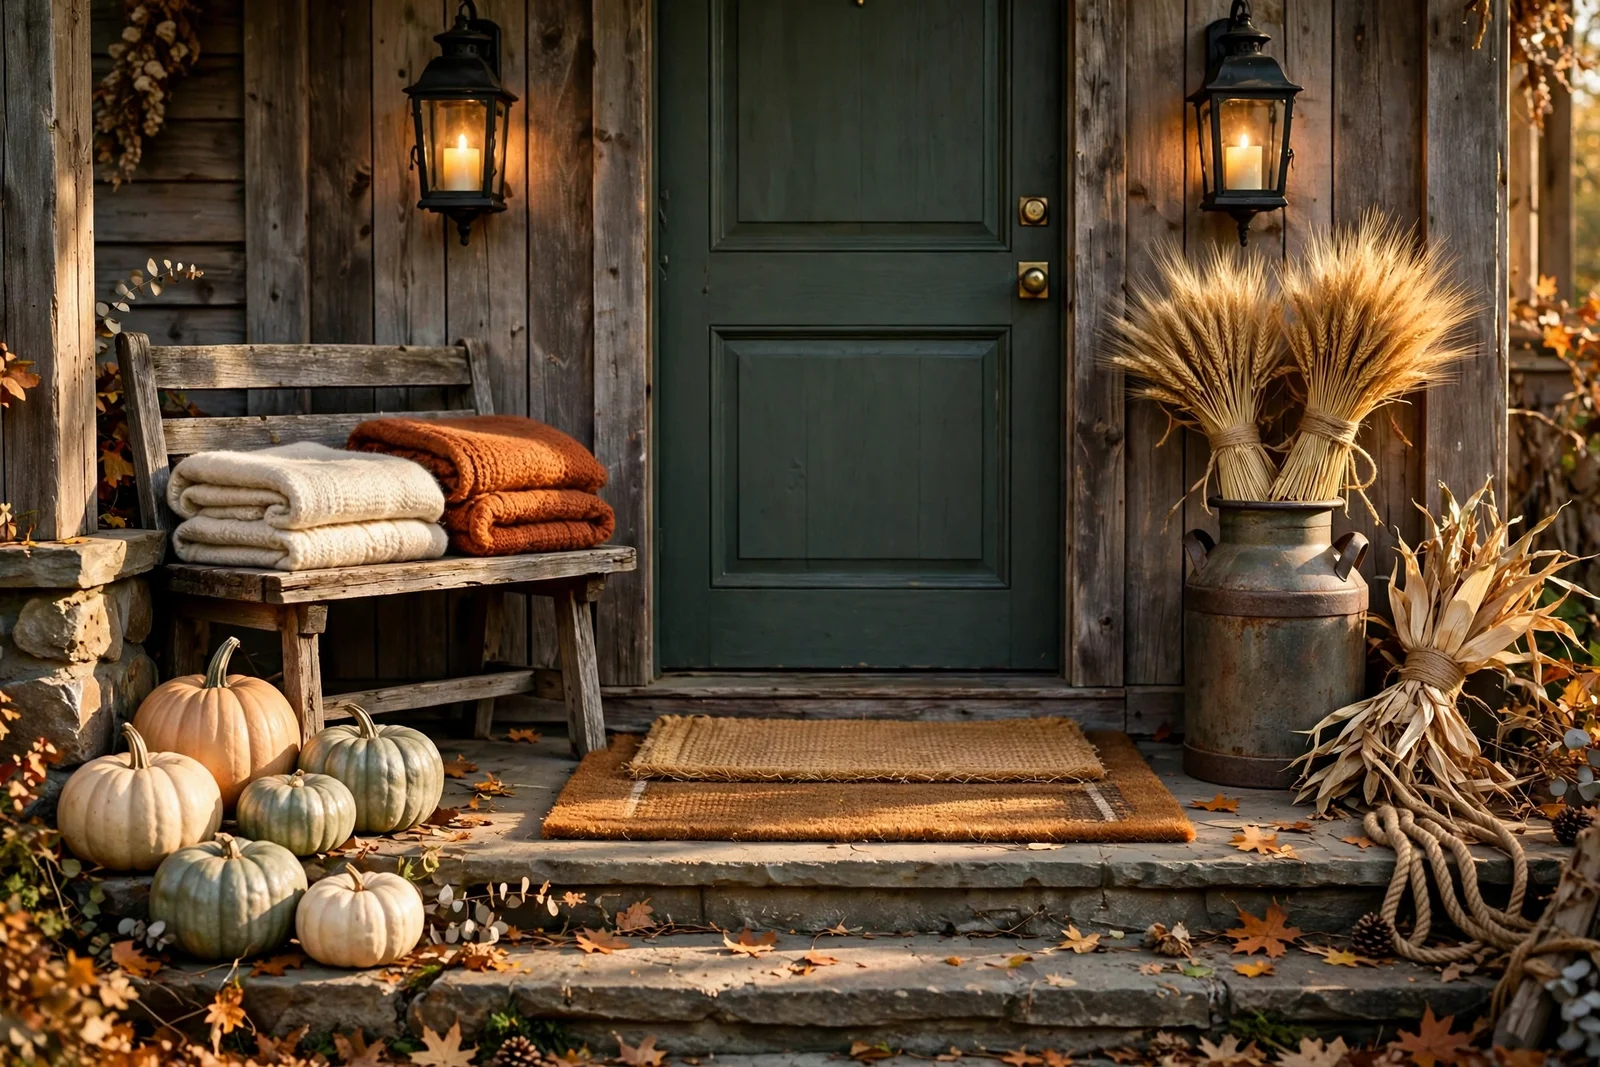
Weathered wood, iron, straw and harvest gold: 21 rustic fall porch ideas that build a warm, heritage welcome at your front door.
There is a particular light on October afternoons, low and gold, that turns a plain front porch into the warmest room of the house without a single wall. Straw crunches softly underfoot, iron lanterns stand ready by the door, and the smell of dried wheat drifts in on the breeze. Rustic fall porch decor begins with that light, and everything you add should honour it.
This style leans on honest materials with a harvest past: weathered wood that has earned its grey, black iron with a soft patina, straw, jute and wheat that smell of the field. The palette stays calm and muted, cream, sage and soft orange, so the porch feels gathered rather than decorated. Nothing here needs carving or glitter; the beauty is in the raw materials themselves.
What follows is a set of twenty one concrete ideas that build this look layer by layer, from the layered doormats at your feet to the wheat sheaves by the door frame. Each one names real materials, real sizes and real prices, plus the small mistakes that trip people up. You can try one this weekend or restyle the whole porch in an afternoon; the ideas work alone or together.
Start where every guest starts: at the bottom of the steps, looking up at your door. The first ideas build that welcome from the ground up.
1. Layer a Straw Mat Over a Coir Doormat at the Front Door
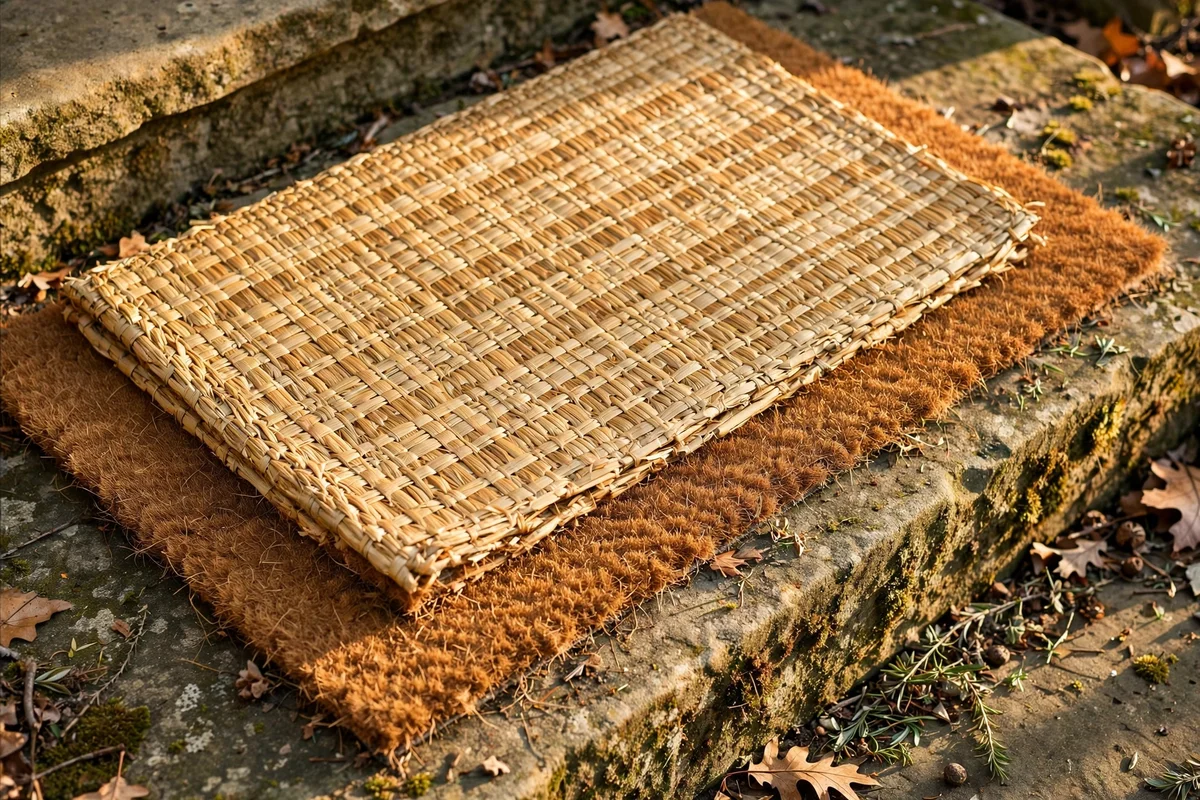
Start with a coarse coir doormat in a natural tan tone, roughly 45 by 75 cm, placed directly on the step in front of the door. Layer a smaller straw mat on top at a slight angle so the texture underneath peeks out around the edges. The double layer reads warm and handmade, and the coir catches mud while the straw mat can be shaken out in seconds. Choose mats without rubber backing on the straw layer so rainwater drains through freely.
A common mistake is buying mats wider than the doorway, which looks crowded and blocks the door swing. Keep the layered stack at least 10 cm narrower than the door frame on each side. For budget shoppers, plain coir mats from a hardware store cost very little and age into a softer colour with wear. Replace the straw mat every autumn since sun and rain fade it, and store the coir mat upright in a dry shed over winter to prevent mildew underneath.
2. Style a Weathered Wood Bench With Folded Wool Blankets
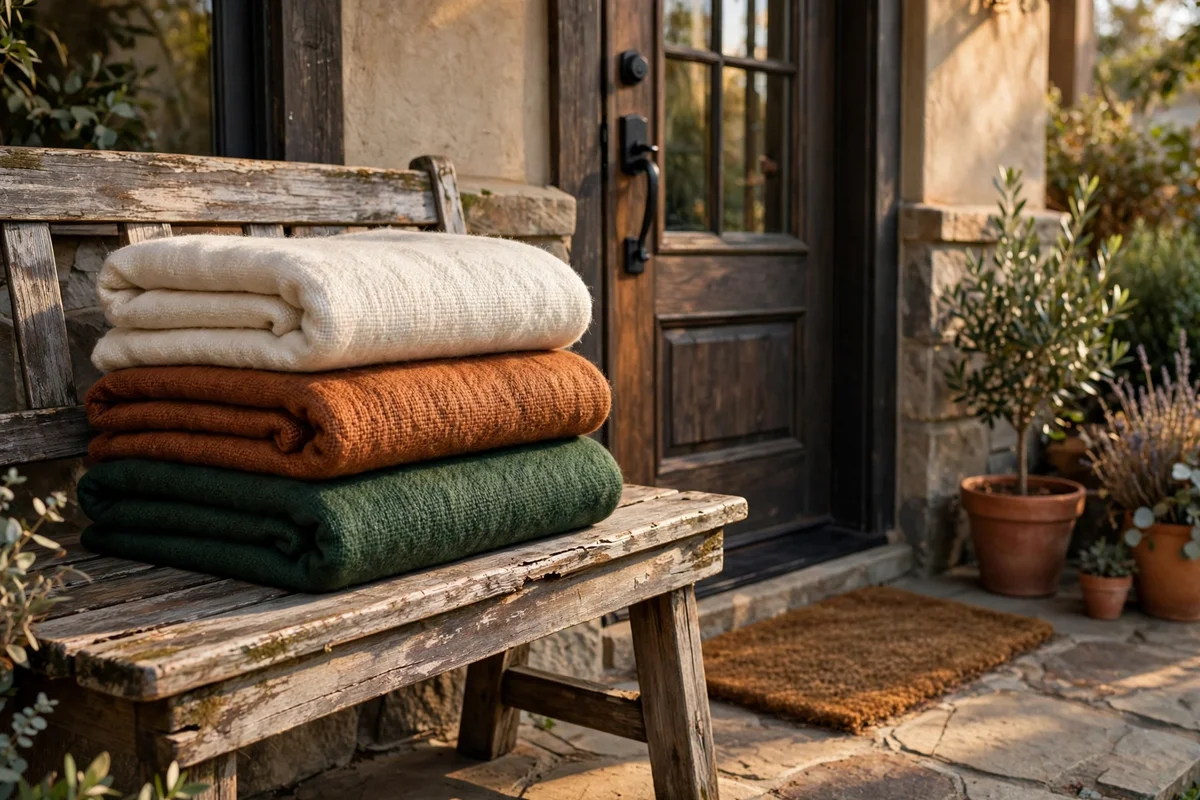
A weathered wood bench between 90 and 120 cm long gives the porch its harvest heart and doubles as a display shelf. Place it against the wall beside the door, leaving at least 15 cm from the frame so the door opens fully. Fold two or three wool blankets into neat thirds and stack them on the seat, alternating cream, rust and forest tones for a layered look. The folded edges facing forward keep the display tidy even on windy days.
Source the bench from a salvage yard or second-hand market, since new distressed wood costs two to three times more than a genuine old piece. Seal raw wood once a year with a clear outdoor oil so autumn rain beads off instead of soaking in. The mistake to avoid is piling blankets so high that nobody could ever sit down; keep the stack under 25 cm tall. Tuck a lavender sachet between the folds to keep stored blankets fresh between seasons.
3. Group Pumpkins in Odd Numbers Along the Step Edge
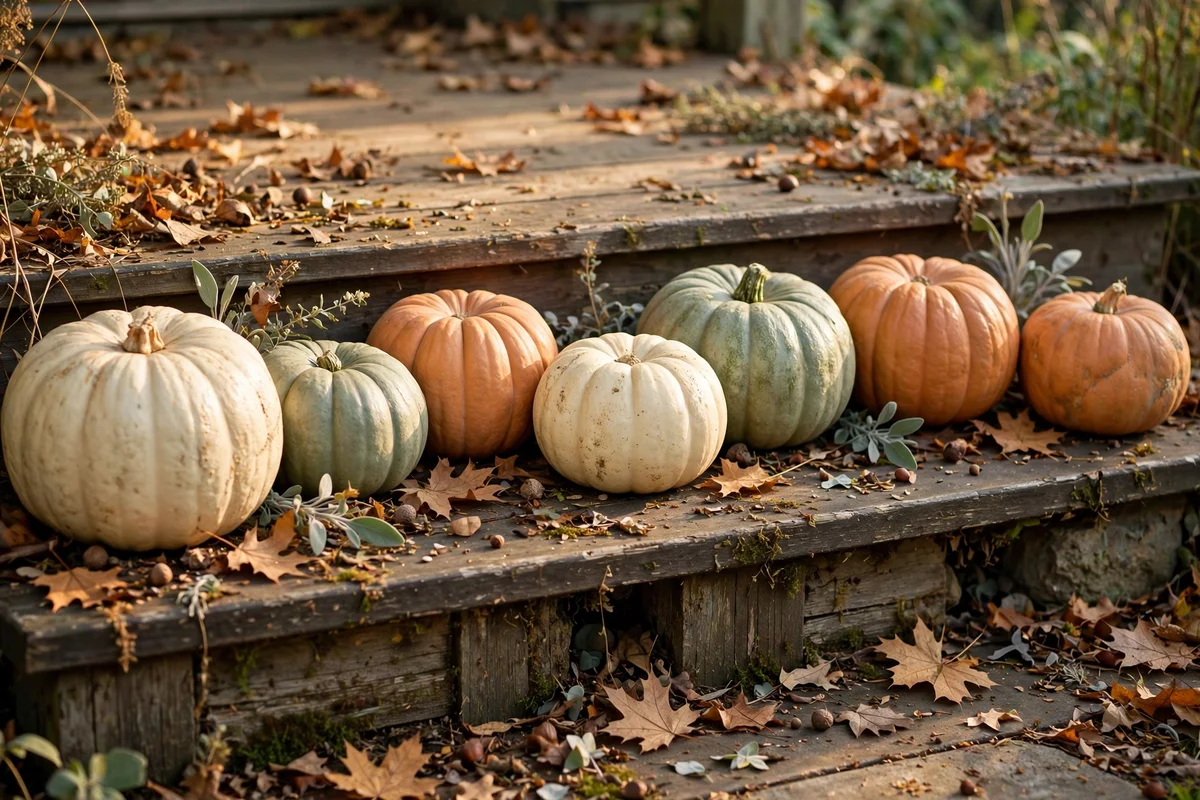
Group pumpkins in odd numbers, three, five or seven, along the step edge for a natural, gathered feel that even numbers rarely achieve. Mix sizes from small 10 cm minis up to one large 25 cm anchor pumpkin, keeping cream, sage and muted orange tones in roughly equal measure. Place the tallest pumpkin slightly off centre and let smaller ones spill forward down one step. This loose triangle arrangement photographs beautifully from the garden path.
Buy pumpkins a week before your main display date so they cure and harden in a cool garage first. Real pumpkins on stone steps can leave sap stains, so set each one on a small square of burlap about 15 cm wide. A budget trick is to mix two real pumpkins with inexpensive faux ones in matching tones; nobody notices at dusk. Skip the shiny orange carving pumpkins entirely, since their colour clashes with the muted harvest palette.
4. Set Iron Lanterns With LED Candles on Both Door Sides
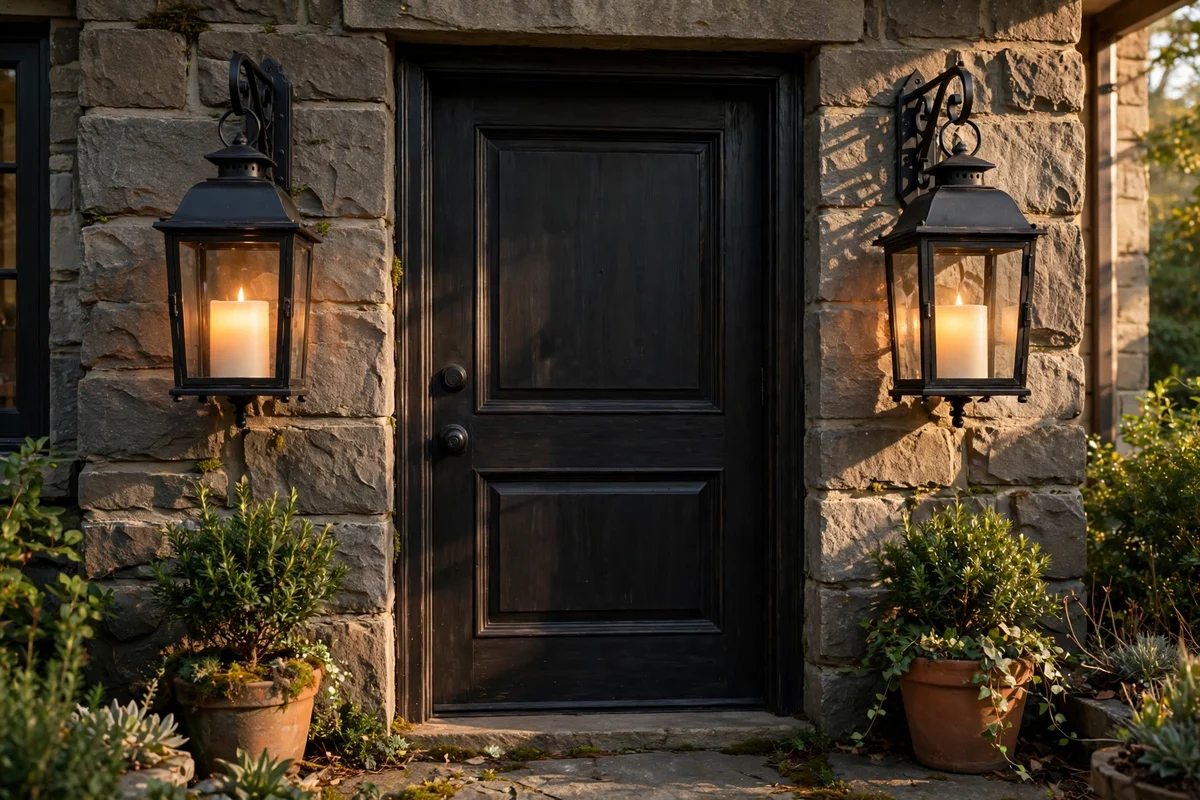
Place one iron lantern on each side of the door for the classic balanced welcome that never dates. Lanterns between 25 and 35 cm tall suit most porches; taller than 40 cm can crowd a narrow entrance. Fill each with a warm white LED candle rather than a real flame, since open flames near dried straw and blankets are unsafe. The black iron frames read beautifully against cream siding and weathered wood alike.
Choose LED candles with a flicker mode and a timer so they switch on at dusk automatically for four or six hours. Rust is the main enemy of iron lanterns, so spray the frames with a clear rust inhibitor each September before display season. The common mistake is setting lanterns where the door swings open; measure the swing arc first and keep lanterns 20 cm clear of it. Weighted lantern bases or a few pebbles inside stop them tipping in autumn gusts.
5. Tie Dried Corn Husks Into a Simple Door Frame Swag
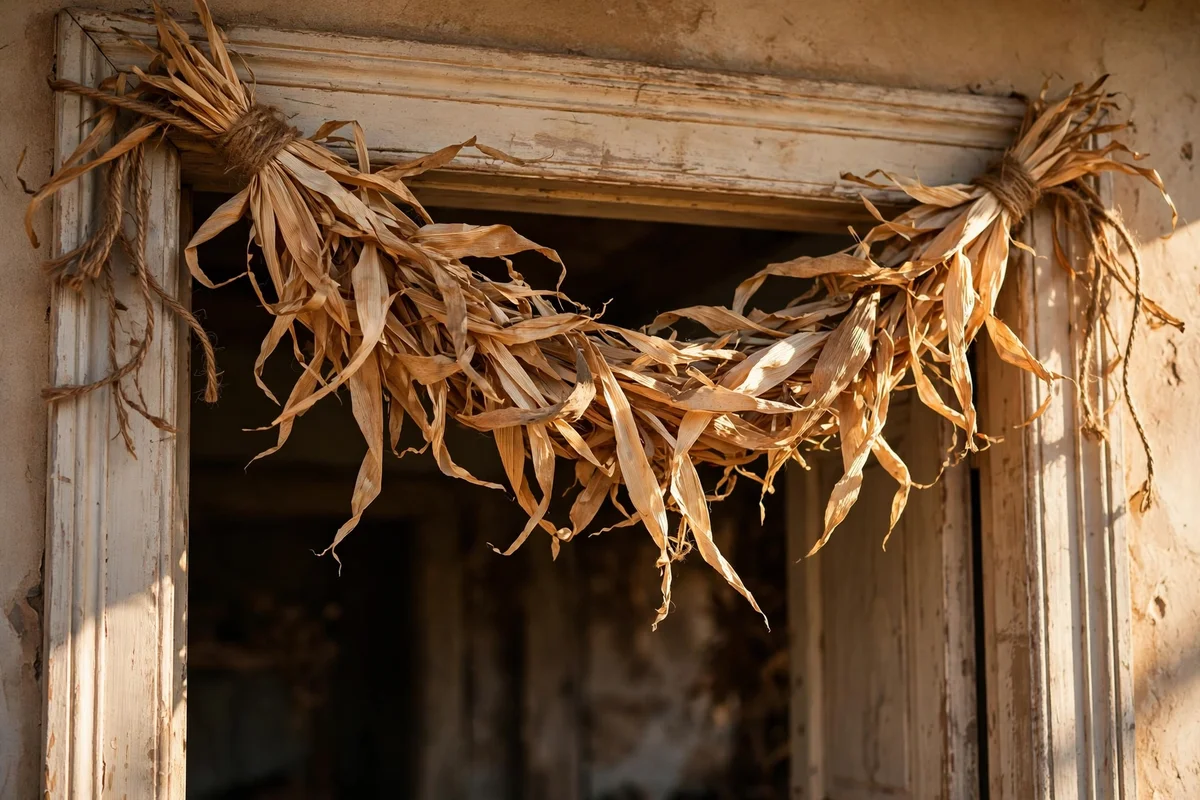
Gather six to eight dried corn husks and tie them into a loose swag across the top of the door frame with natural jute twine. Fan the husks so the wide ends overlap in the centre and the tapered ends point outward toward the frame corners. Secure the twine to two small clear adhesive hooks rated for at least 500 g each, so the plaster or brickwork stays undamaged. The pale gold husks glow softly against dark green or black doors.
Dry your husks fully in a warm shed for a week before hanging, since damp husks turn grey and smell musty outdoors. The mistake to avoid is hanging the swag too low, where it blocks the door or brushes visitors’ hair; keep the lowest husk at least 190 cm from the step. At season’s end the husks compost beautifully, making this one of the cheapest harvest ideas. Refresh the twine each year, as old twine weakens and can drop the swag in heavy rain.
6. Stack Wheat Sheaves in a Vintage Iron Milk Can
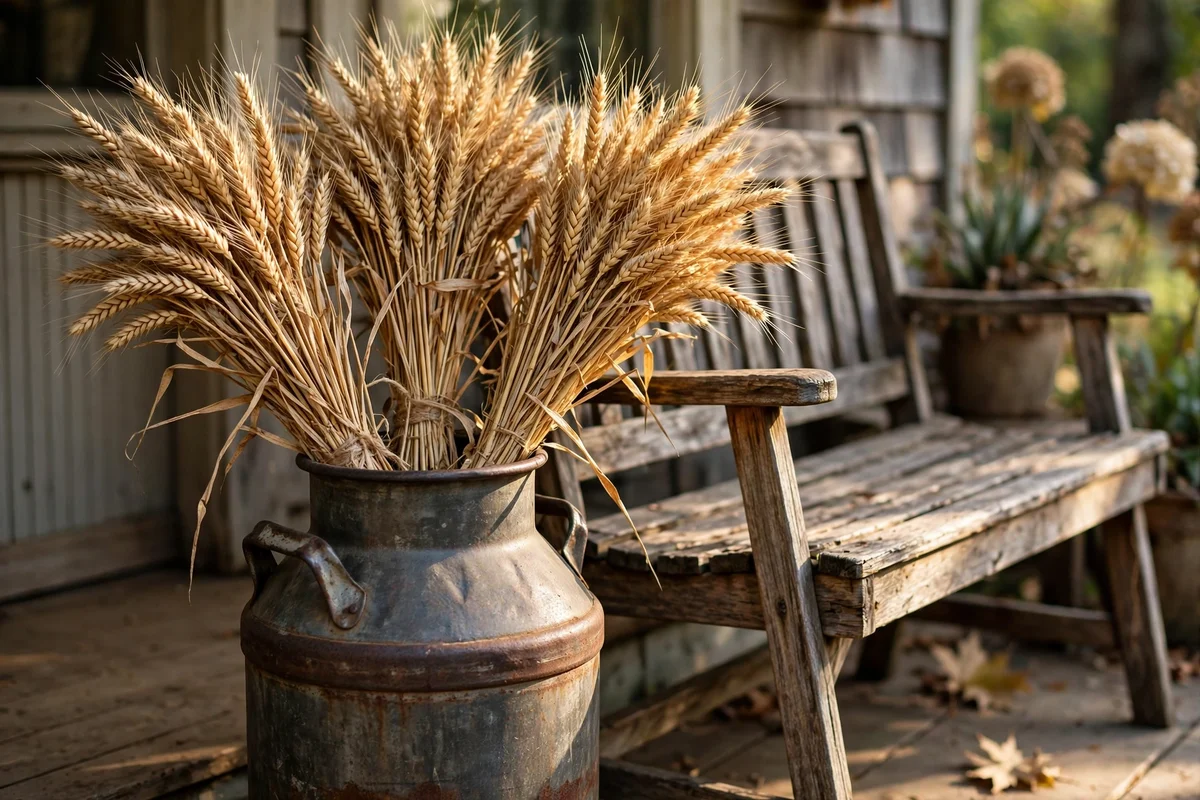
Stand a vintage iron milk can between 40 and 55 cm tall beside the bench and fill it with three dried wheat sheaves for instant harvest heritage. Wrap each sheaf with a short band of jute about 8 cm wide to hold the stalks together, then trim the stems to one even height before arranging. Fan the sheaves slightly so the wheat heads arch outward like a small fountain. The tall silhouette balances low pumpkin groupings perfectly on a wide porch.
Milk cans from antique shops usually cost 20 to 50 pounds or dollars, far less than new reproduction planters. Line the can with a plastic nursery pot before adding wheat so trapped rainwater cannot rust the iron from inside. The mistake to avoid is leaving the can directly on soil or grass, where moisture wicks upward; set it on a flat stone slab or wooden offcut. Shake the wheat sheaves outdoors each week to release loose chaff before it blows across the porch.
7. Lean a Reclaimed Wood Ladder With a Draped Plaid Throw
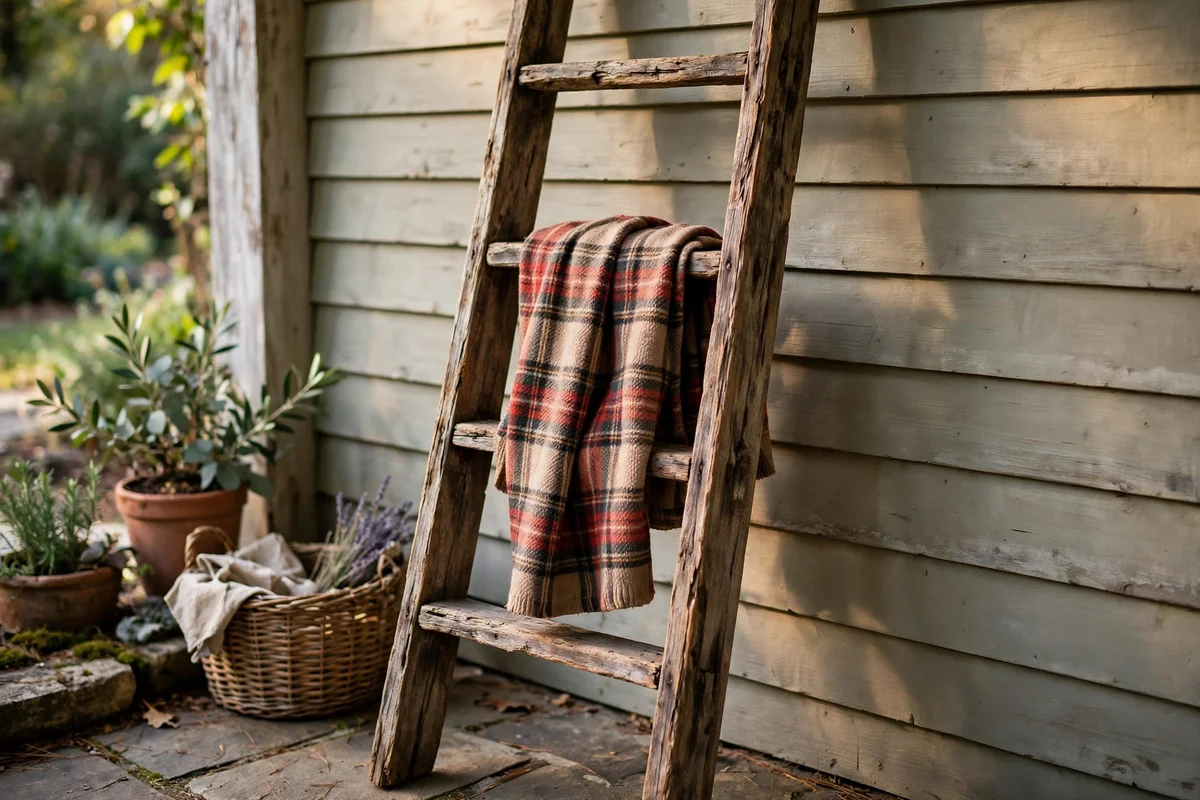
Lean a reclaimed wood ladder about 150 to 170 cm tall against the porch wall at a gentle 15 degree angle for sturdy stability. Drape one plaid throw over the third rung from the top so the fabric hangs in an even U shape, keeping the pattern visible on both sides. The ladder’s rungs become ready-made hangers for small hanging planters or string lights too. Test the lean by pressing firmly; the ladder should not shift on smooth painted concrete.
Sand any splintered rungs lightly and seal the ladder with outdoor oil before the first rain, since reclaimed wood soaks up water fast. Budget shoppers can find old wooden ladders at farm auctions for a fraction of styled decor-shop prices. The mistake to avoid is placing the ladder where children could climb it unsupervised; anchor the base with a rubber mat or wedge it behind the bench. Store the ladder flat in a garage over winter so the joints never loosen from frost.
8. Fill a Galvanised Bucket With Cream and Sage Pumpkins
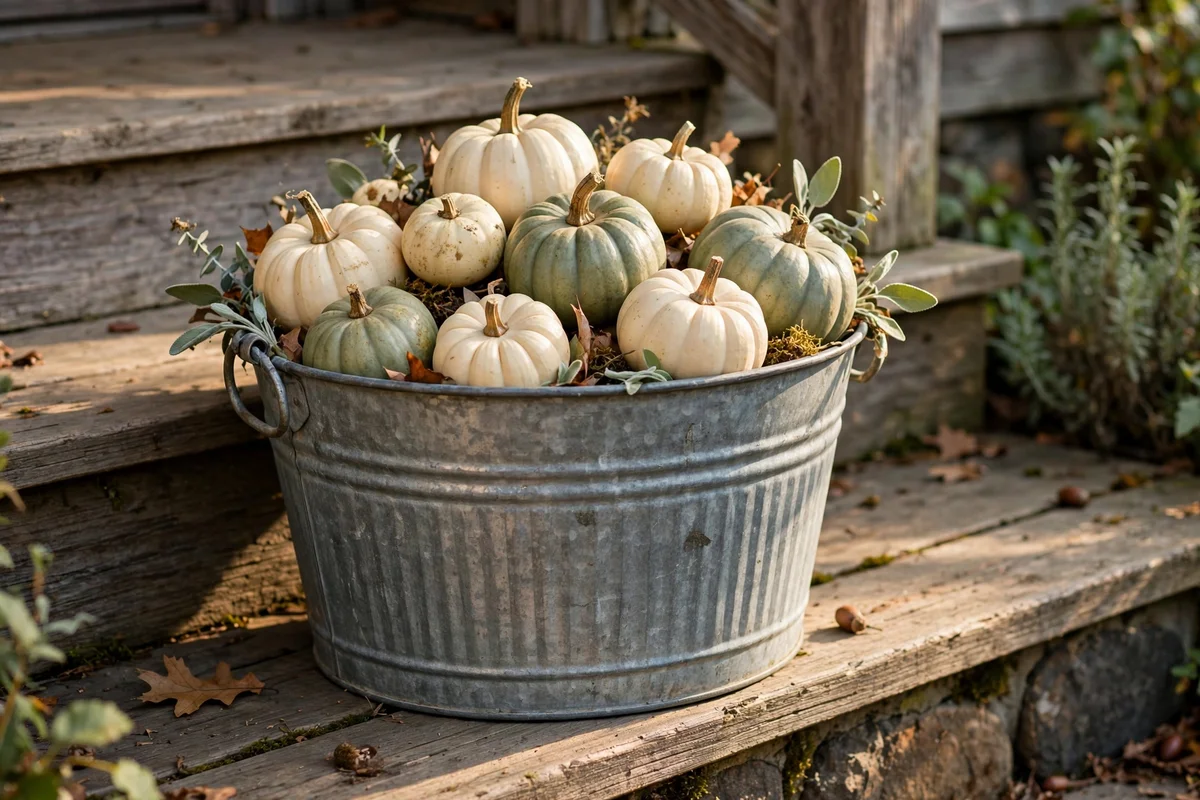
Fill a galvanised bucket about 30 cm wide and 28 cm tall with cream and sage pumpkins for a neat, portable harvest display. Line the bucket with crumpled newspaper so the pumpkins sit high and visible above the rim rather than sinking out of sight. Arrange five or six mini pumpkins, alternating the pale colours so no two neighbours match. The zinc finish develops a soft grey patina outdoors that suits the rustic palette beautifully.
Drill three small drainage holes in the bucket base so autumn rain never pools around the pumpkin stems and rots them. Galvanised buckets cost little at farm supply shops and outlast painted versions by years outdoors. The mistake to avoid is overloading the bucket; more than seven pumpkins presses the lower ones flat and shortens their display life. Move the bucket under the porch roof edge during heavy storms, then return it to the steps when the sun comes out.
9. Place a Straw Bale Beside the Steps as a Display Platform
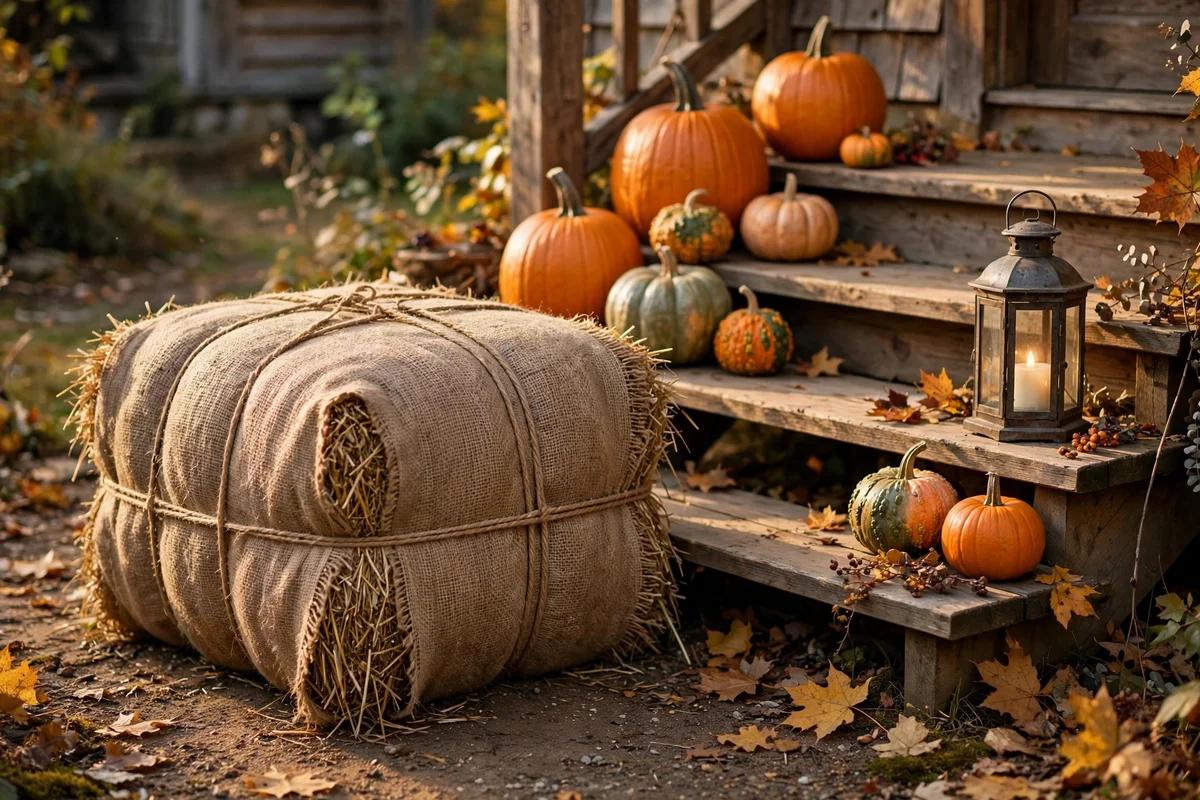
Set a straw bale beside the porch steps as a sturdy platform for a layered harvest display. A standard small bale measures roughly 45 by 35 by 90 cm and supports pumpkin groupings, lanterns and a small potted mum without bowing. Wrap the bale in a strip of burlap tied with twine to slow shedding and give the straw a finished look. Place it on a waterproof mat so damp ground never soaks upward into the bale.
Straw bales from a farm supplier cost only a few pounds or dollars each in autumn, making them the cheapest riser you can buy. The mistake to avoid is buying a hay bale instead of straw; hay holds seed heads that sprout and stain the porch green. At season’s end, untie the bale and spread the straw over garden beds as mulch, so nothing goes to waste. Keep the display under the porch overhang during rainy spells to double the bale’s working life.
10. Hang a Grapevine Wreath With Mini Pumpkins on the Door
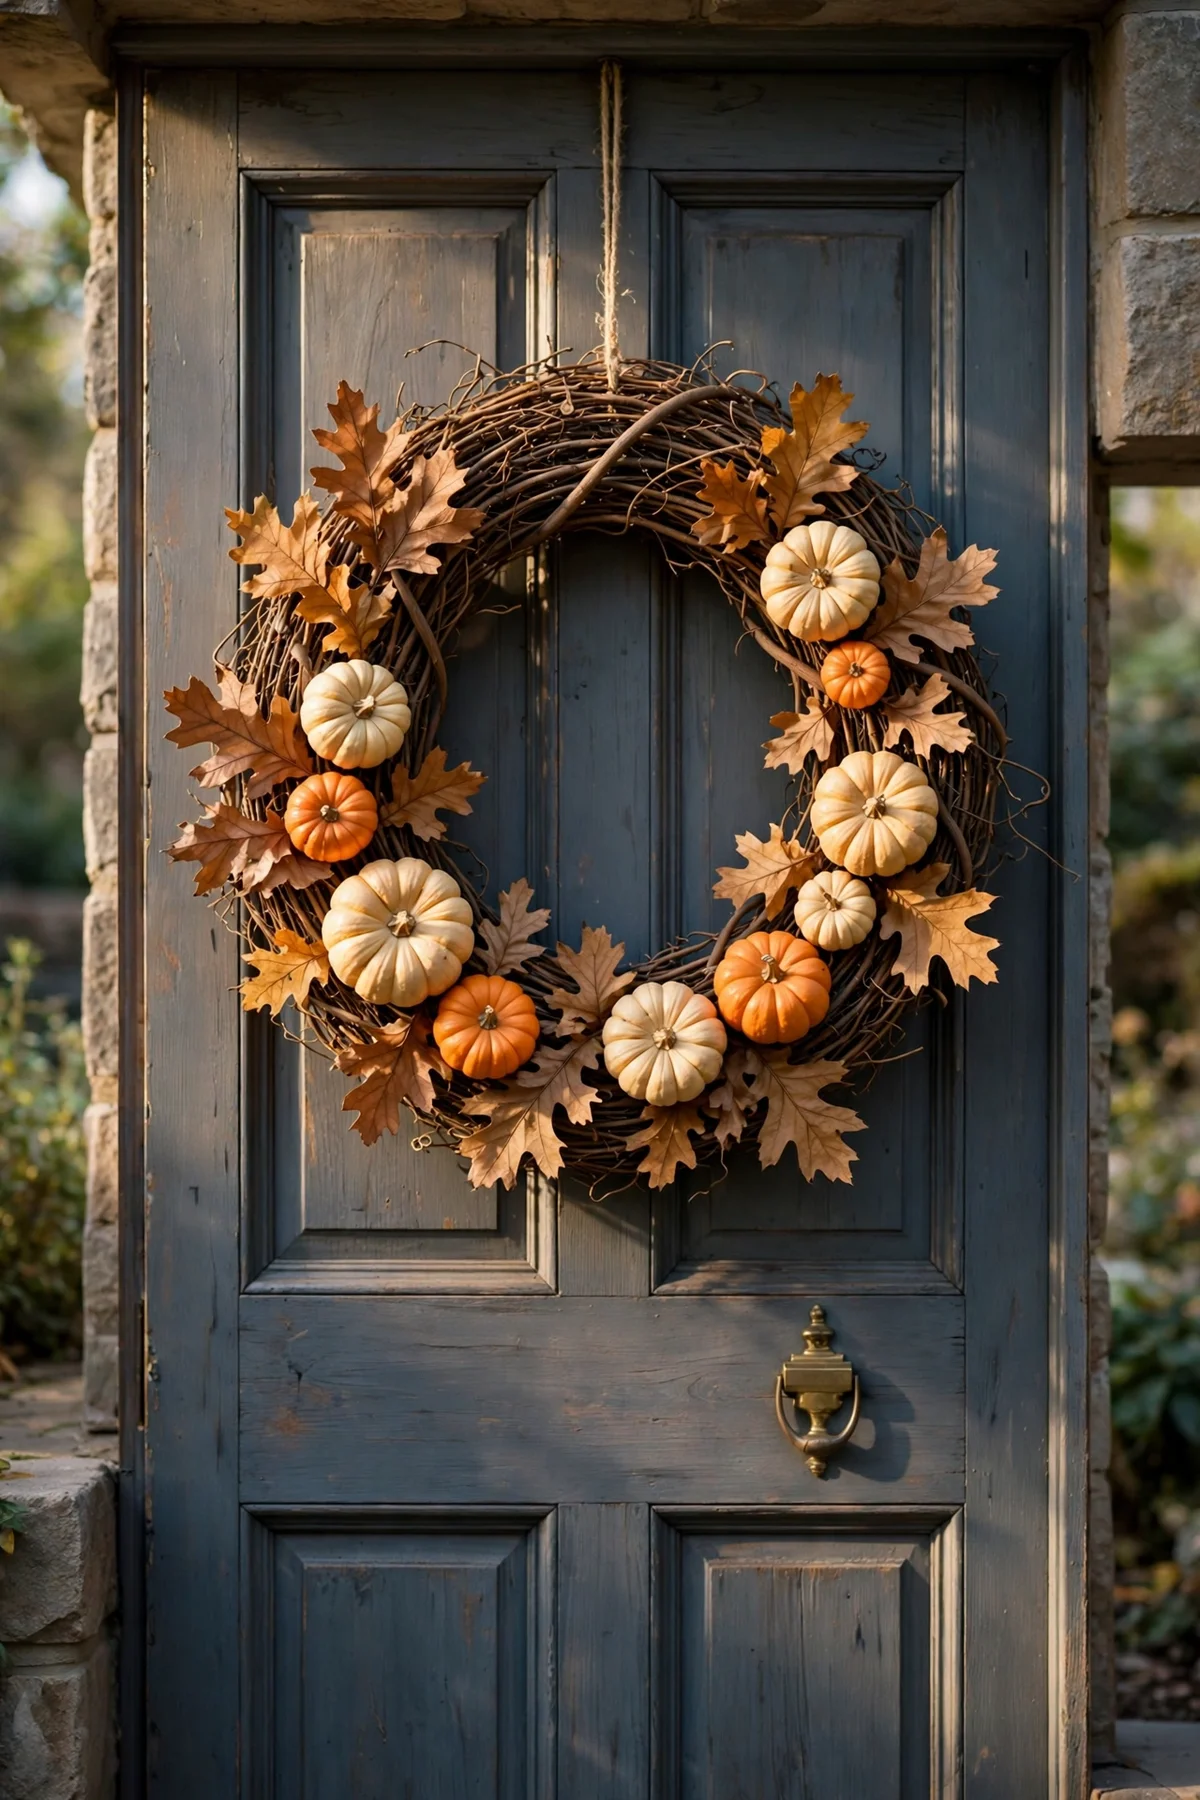
Hang a grapevine wreath about 45 cm across on the door at eye level, roughly 150 cm from the step, so it greets every visitor face on. Weave five or six mini pumpkins in cream and muted orange into the twigs with short wire picks, spacing them evenly around the ring. Tuck a few dried oak leaves behind the pumpkins to soften any gaps. Hang the wreath on an over-door hook so the paint and varnish stay untouched.
Grapevine wreath bases last for many seasons if you store them in a breathable cotton bag in a dry loft. Budget crafters can twist pruned vine cuttings into a ring and bind them with twine for a nearly free base. The mistake to avoid is wiring pumpkins only at the front, which leaves the wreath hanging lopsided; thread each wire pick through the twigs to the back. Spray the dried leaves with a clear craft sealant so they stay intact through November winds.
11. Line the Porch Rail With Small Pumpkins in Muted Orange
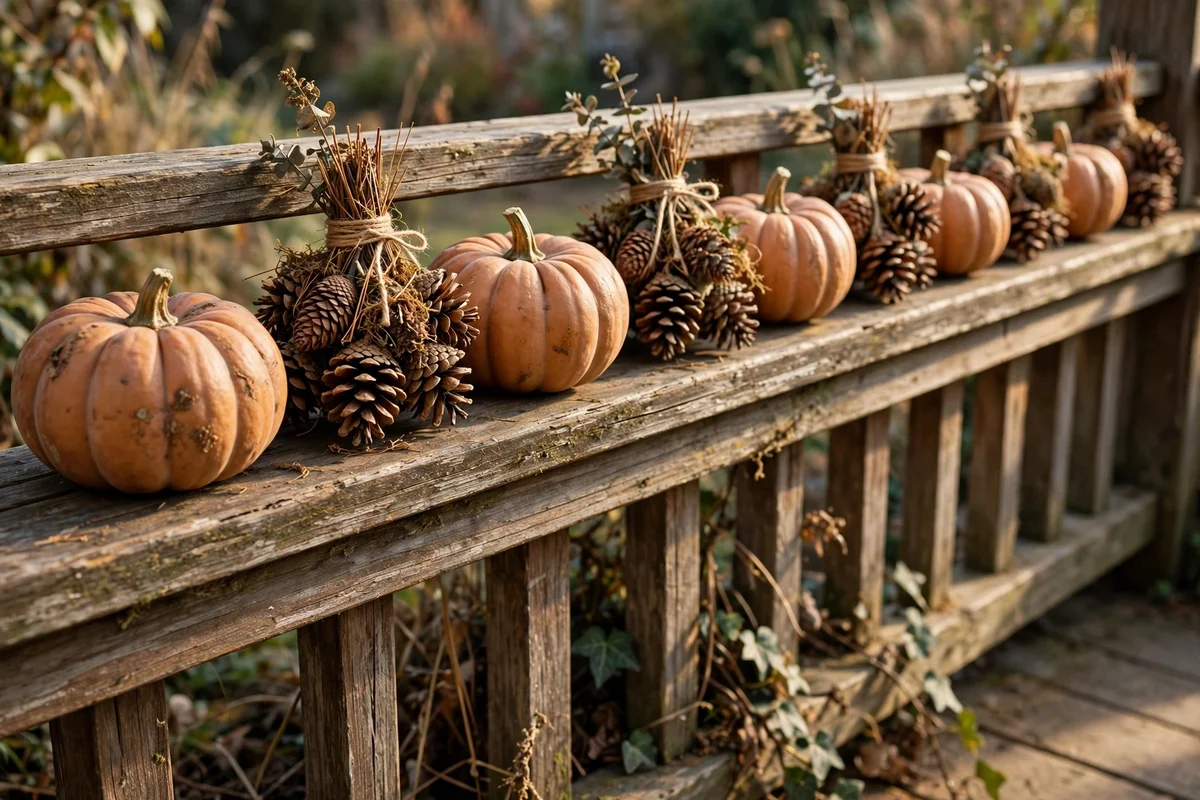
Line the porch rail with small pumpkins in muted orange, spacing them 15 to 20 cm apart so the rail still reads as a line rather than a heap. Choose pumpkins no wider than 12 cm so they sit steady on the rail top without rolling in the wind. Alternate each pumpkin with a small pinecone bundle wired to the rail for texture between the orange notes. This rhythm of fruit and cone draws the eye along the whole porch length.
Wire each pumpkin to the rail with a short loop of garden wire through the stem, hidden underneath, to stop gusts toppling them. Faux pumpkins work well here since they weigh less and never rot on painted wood. The mistake to avoid is crowding the rail so thickly that the handrail cannot be gripped safely; keep the walking side clear. In wet weeks, wipe the rail dry after rain so standing water never lifts the paint beneath the display.
12. Add a Black Iron Plant Stand With Harvest Greenery
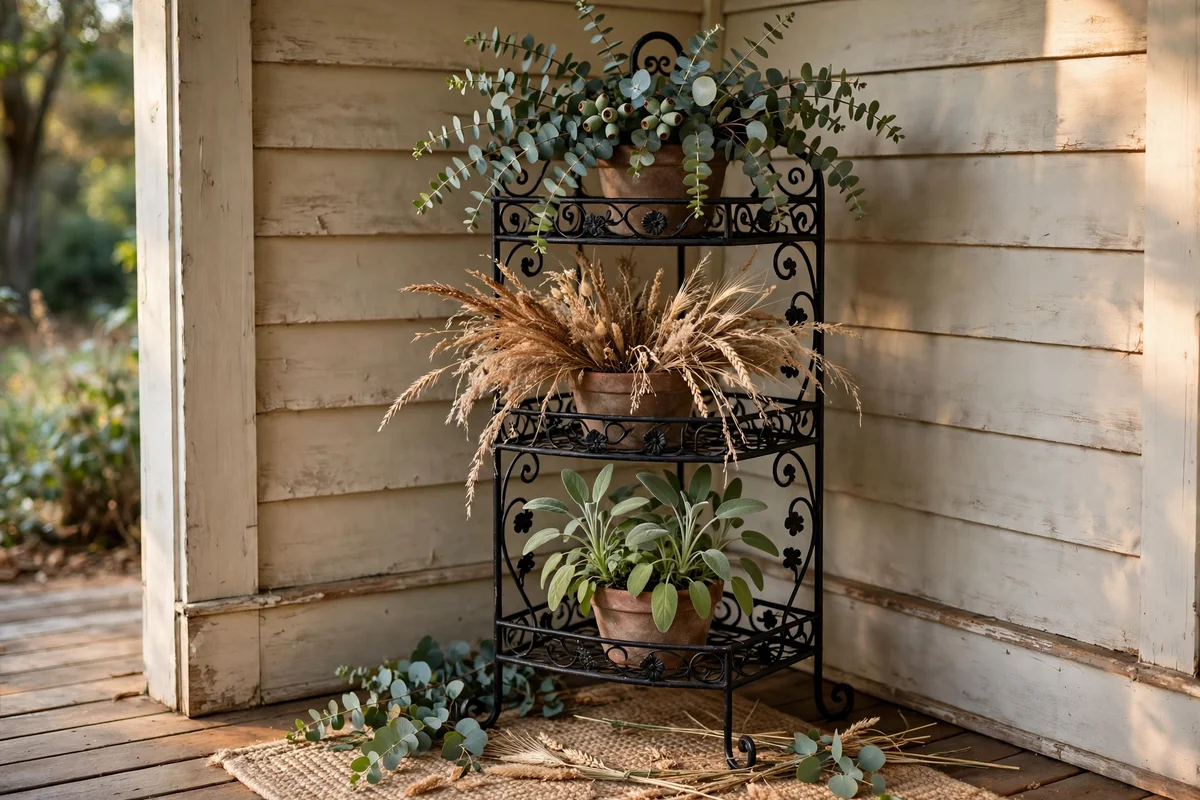
Place a black iron plant stand about 70 to 90 cm tall in the porch corner and fill its tiers with harvest greenery. Eucalyptus sprigs, dried grasses and small potted sage plants suit the muted palette without any bright summer colour. The open ironwork lets light pass through, so the corner never looks heavy despite the height. Position the stand where the morning sun catches the foliage for the warmest first impression.
Three-tier iron stands from garden centres cost 25 to 60 pounds or dollars and serve year round with seasonal swaps. The mistake to avoid is overwatering potted plants on an iron stand; the tray overflow rusts the shelves below within weeks. Set each pot on a small cork coaster and water sparingly. Spray the frame with rust inhibitor each autumn, and the stand will outlast a decade of harvest displays without a single wobble.
13. Spread a Woven Straw Runner Across a Wide Porch
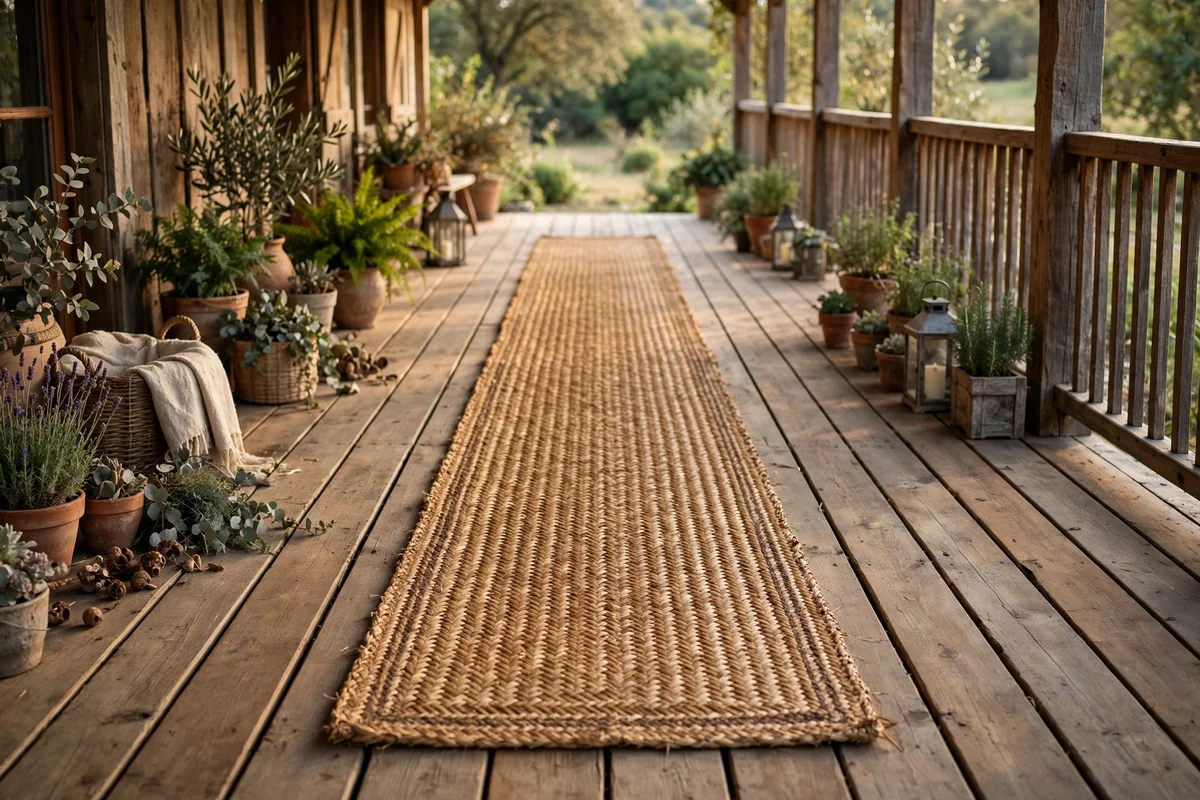
Spread a woven straw runner about 60 cm wide and 180 cm long down the centre of a wide porch for instant harvest texture underfoot. The natural weave softens hard concrete and ties together the bench, bucket and bale displays into one calm composition. Choose a tightly woven runner with bound edges so it resists fraying where shoes turn. Lay it straight from the steps to the door for the strongest welcome line.
Shake the runner out every few days, since straw weaves trap dust and small leaves faster than flat mats. The mistake to avoid is leaving a straw runner fully exposed to driving rain; roll it up during stormy nights and it will last three seasons. For renters, a runner needs no fixings and rolls away in minutes on moving day. Pair it with a matching straw mat at the door for a layered look that costs far less than a custom coir design.
14. Cluster LED Lanterns at Different Heights on the Steps
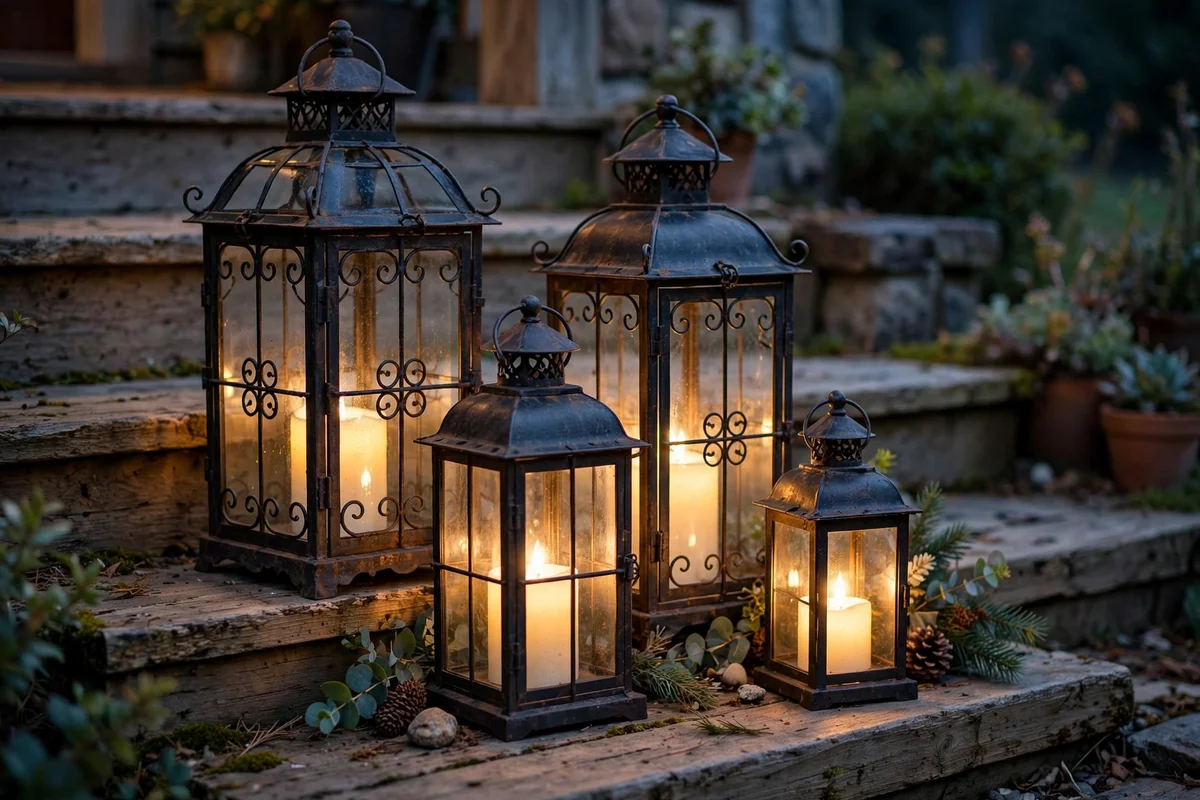
Cluster LED lanterns at different heights on the steps for a warm glow that rises like harvest candlelight. Place the tallest lantern, around 30 cm, on the top step and step the sizes down to a 12 cm lantern on the lowest step. Odd clusters of three or five look most natural, with about 25 cm between each lantern. The graded heights lead the eye upward to the door in the friendliest possible way.
Use only LED candles inside step lanterns, since a gust can tip a real flame onto dry leaves and straw in seconds. Set every lantern on the same timer schedule so the whole staircase lights together at dusk. The mistake to avoid is lining lanterns in a straight soldier row, which looks stiff; stagger each lantern a few centimetres forward or back. Store the lanterns nested together in a box over winter to keep the glass panels scratch free.
15. Mount a Weathered Wooden Crate as a Rustic Planter Box
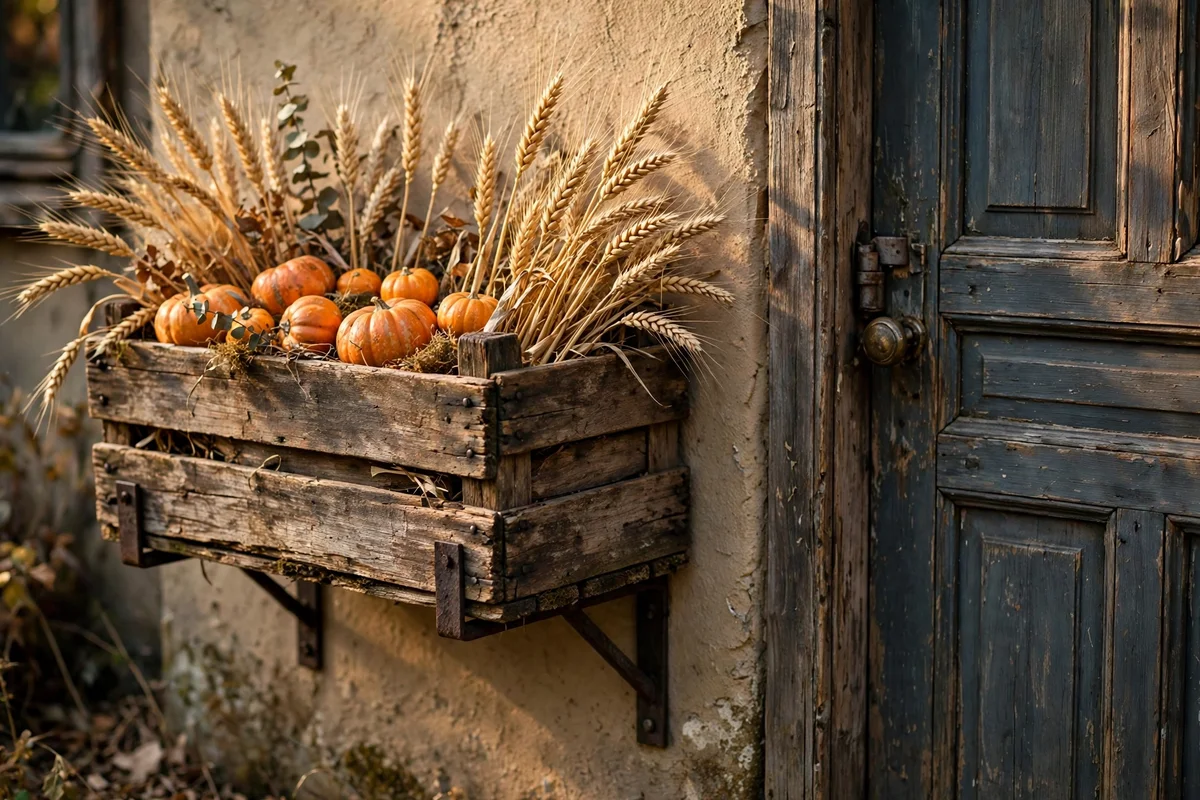
Mount a weathered wooden crate about 50 cm wide and 30 cm deep on sturdy L brackets beside the door as a rustic planter box. Fill it with dried wheat stems, cream mini pumpkins and a trailing bunch of dried hops for height and texture. The crate’s open slats allow rainwater to drain naturally, protecting the contents from rot. Position it 100 cm from the ground so it sits comfortably beside the door handle.
Fix the brackets into wall studs or use masonry anchors, since a filled crate can weigh 8 kg or more. Second-hand fruit crates cost almost nothing at markets and carry more character than new boxes. The mistake to avoid is planting live flowers in an unlined crate; soil moisture rots the wood within one season. Line it with a cut-to-size plastic tray if you ever mix in living plants. Sand the crate edges smooth so sleeves never catch when brushing past.
16. Drape a Harvest Garland of Dried Leaves Along the Rail
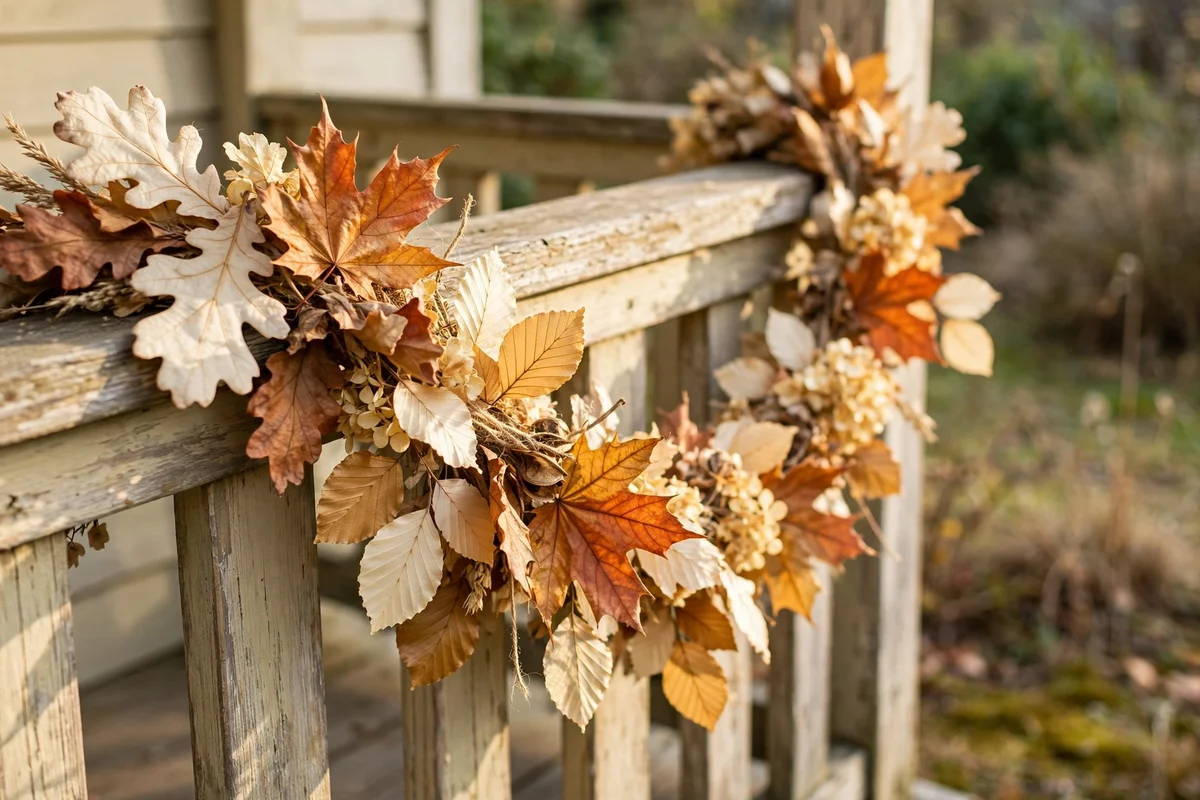
Drape a harvest garland of dried leaves along the porch rail, fixing it every 40 cm with short loops of twine. Build the garland on a jute cord base about 3 metres long, layering oak, maple and beech leaves in cream, rust and deep gold. Overlap the leaves so the cord never shows, and let a few strands hang slightly longer for a natural drape. The garland softens the hard line of the rail with genuine autumn texture.
Press freshly gathered leaves between book pages for three days so they lie flat and last longer on the garland. The mistake to avoid is building the garland only from one leaf type, which looks flat; mix at least three shapes and sizes for depth. After heavy rain, shake the garland gently and let it dry before the next shower to prevent mould. Coil the finished garland into a box for storage, and it will serve two or three autumns.
17. Set Out a Ceramic Pitcher With Dried Wheat Stems
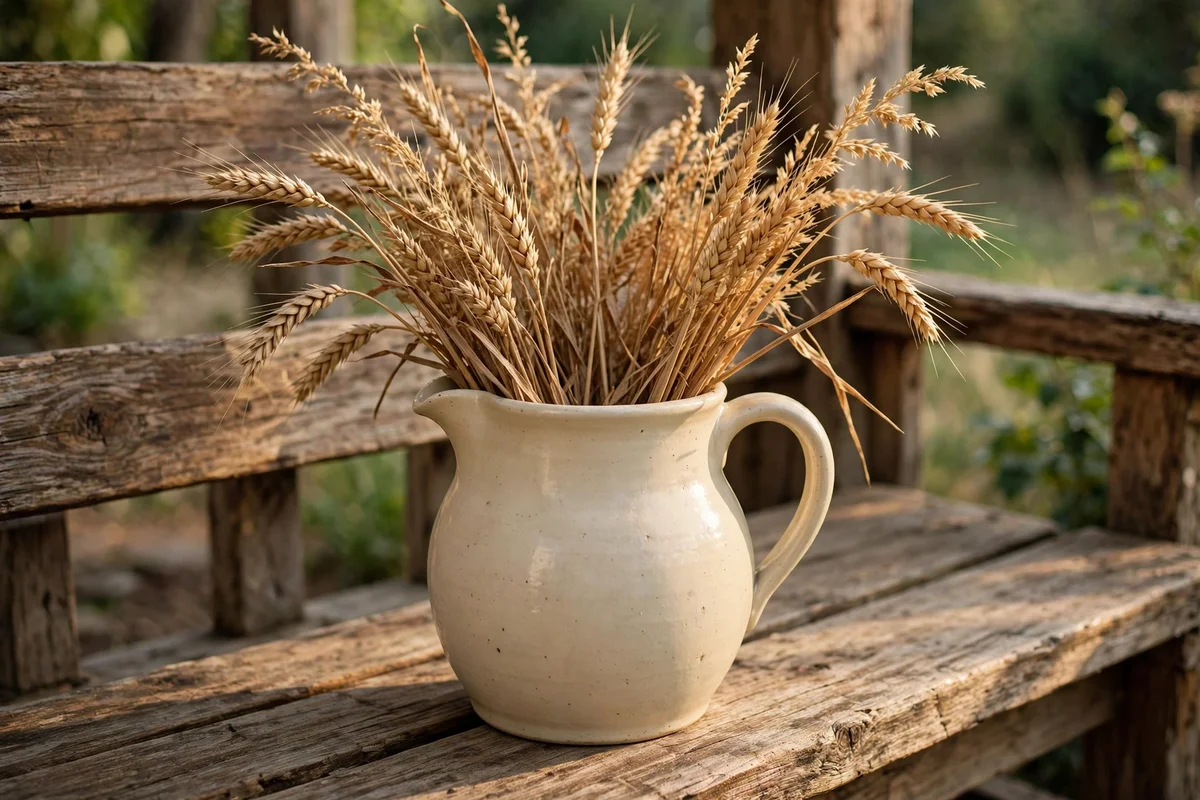
Set a ceramic pitcher about 25 cm tall on the bench or a side table and fill it with dried wheat stems for quiet harvest height. Choose a pitcher in cream, warm grey or soft sage so it blends with the muted pumpkin tones rather than competing with them. Arrange twelve to fifteen stems, trimming them to staggered heights between 40 and 55 cm for a full, rounded shape. The pitcher’s weight keeps the tall stems steady in porch breezes.
Thrifted ceramic pitchers cost 5 to 15 pounds or dollars and add handmade character no new vase can match. The mistake to avoid is overfilling the pitcher; more than twenty stems look crowded and shed chaff everywhere. Keep the arrangement indoors during the wettest weeks if your pitcher is unglazed, since porous clay darkens with rain. A small cork coaster under the pitcher protects painted wood benches from water rings.
18. Add a Cast Iron Doorstop Shaped Like a Pumpkin
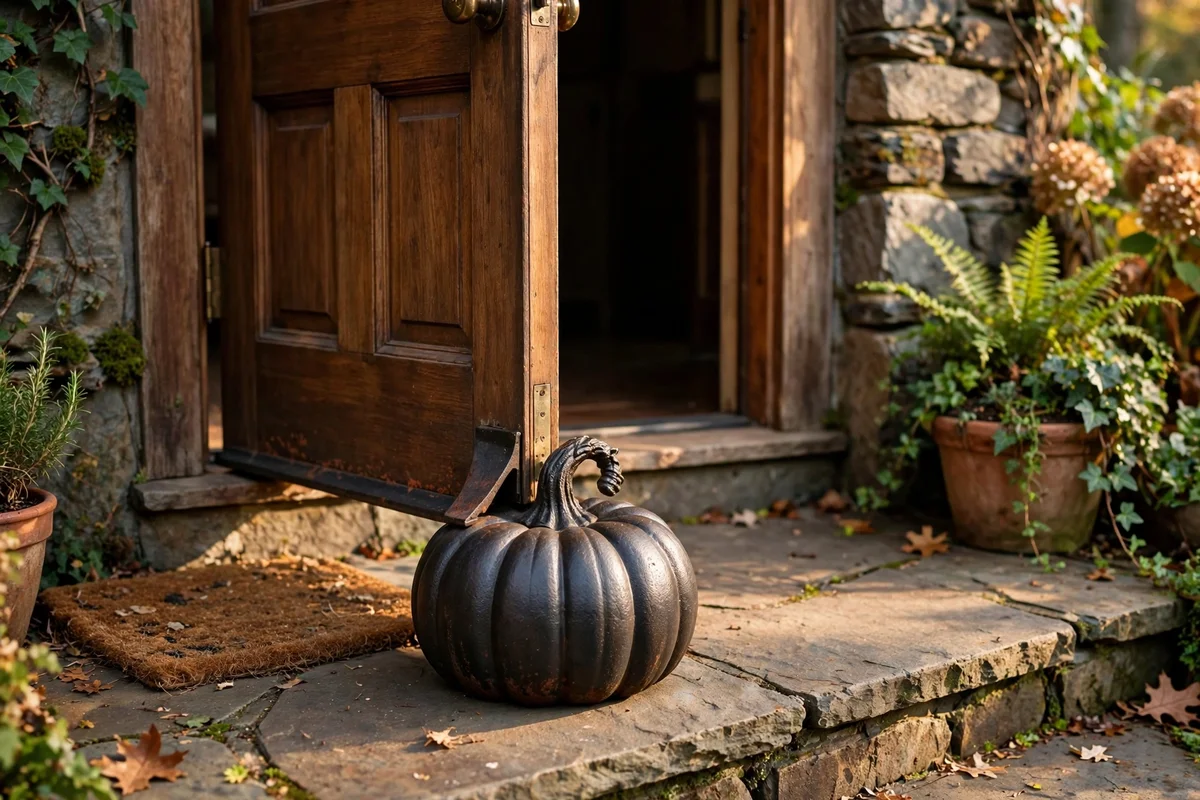
Add a cast iron doorstop shaped like a pumpkin beside the door to keep the entrance open on crisp autumn afternoons. A doorstop of 2 to 3 kg holds most porch doors steady against a normal breeze without scratching the floor. Choose a simple unpainted iron finish so it matches the lanterns and milk can rather than the pumpkins. Position it 15 cm from the door edge where the door’s weight rests fully on the stop.
Stick-on felt pads under the doorstop protect stone and tile from the iron’s rough base. The mistake to avoid is buying a lightweight decorative stop under 1 kg; it slides and scratches instead of holding. Cast iron doorstops cost 12 to 25 pounds or dollars and last indefinitely with no maintenance. Bring the stop indoors over winter so salt from icy paths never pits the iron surface before next autumn.
19. Seal Wood and Straw Pieces With Weatherproof Spray
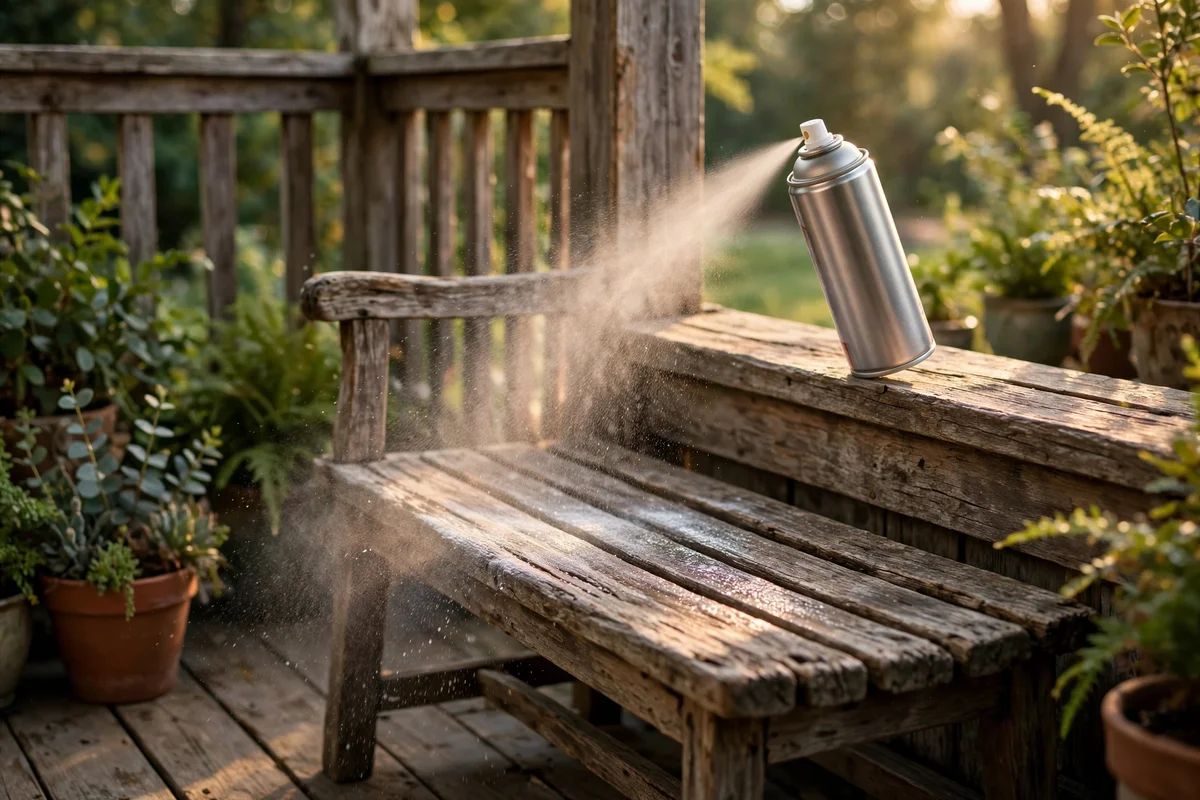
Seal wood and straw pieces with a clear weatherproof spray before the autumn rains arrive in earnest. Hold the can 20 to 25 cm from the surface and apply two thin coats, allowing four hours of drying time between them. The spray beads water on contact and slows the grey weathering that straw mats and raw wood suffer outdoors. Treat the bench, ladder, crates and runner in one session each September for a full season of protection.
Outdoor fabric guard sprays work on blankets and cushions too, keeping wool throws shower-proof for weeks. The mistake to avoid is spraying on a damp day; trapped moisture under the sealant causes mildew faster than no treatment at all. One large can covers roughly 3 square metres, enough for a bench, two crates and a runner. Budget for 10 to 18 pounds or dollars per can, and always spray outdoors in a ventilated space away from children and pets.
20. Anchor Light Decor With Sand-Filled Iron Bases
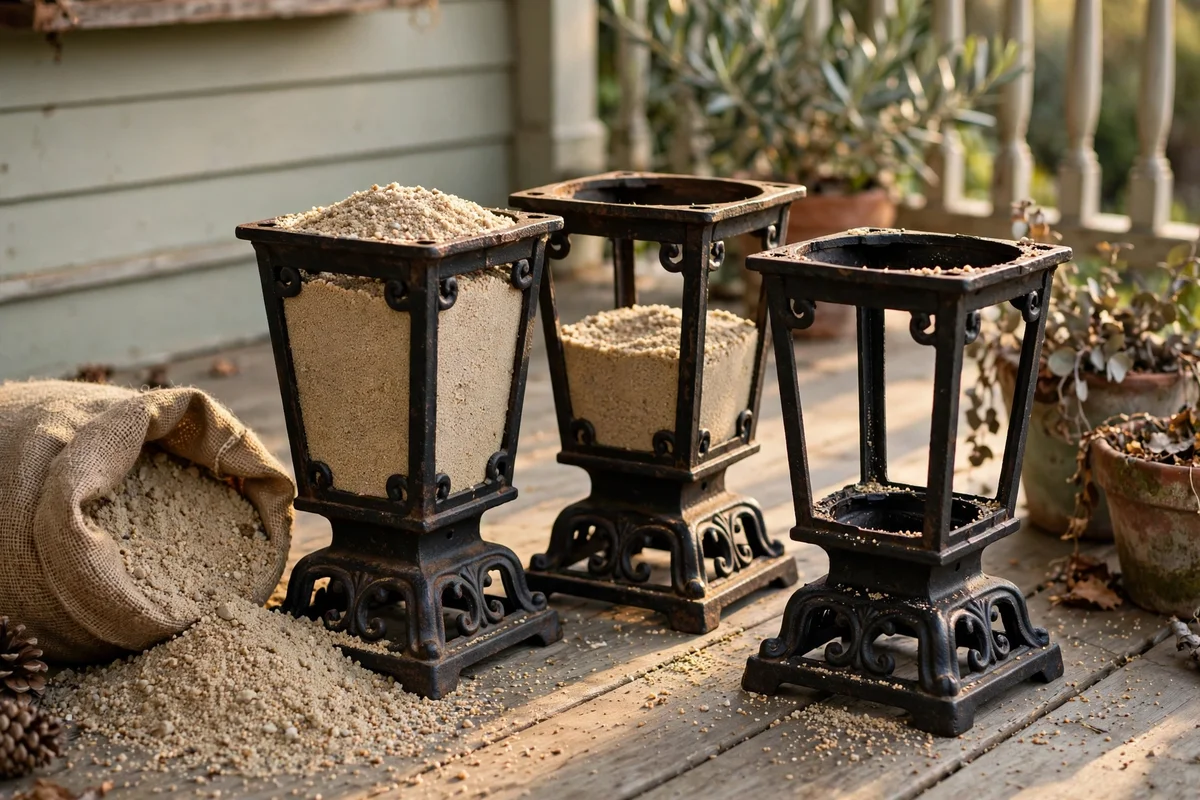
Anchor light decor with sand-filled iron bases so autumn winds never scatter your harvest display across the garden. Fill each hollow iron base with 2 to 3 kg of dry play sand through the stopper hole, then seal the plug with waterproof tape. The added weight steadies lanterns, wheat sheaves and light planters on exposed porches. Choose bases with a diameter of 20 to 25 cm so they hide neatly beneath buckets and baskets.
Umbrella-style iron bases from garden centres adapt perfectly and cost 15 to 30 pounds or dollars each. The mistake to avoid is using wet beach sand, which clumps, smells and can rust the base from inside within one season. Pour the sand out each spring and store the bases dry so they never corrode. For a quicker fix, a flat sandbag tied with twine behind a pumpkin grouping works on calm porches where iron bases feel like overkill.
21. Refresh Straw and Fabric Pieces After Autumn Rain
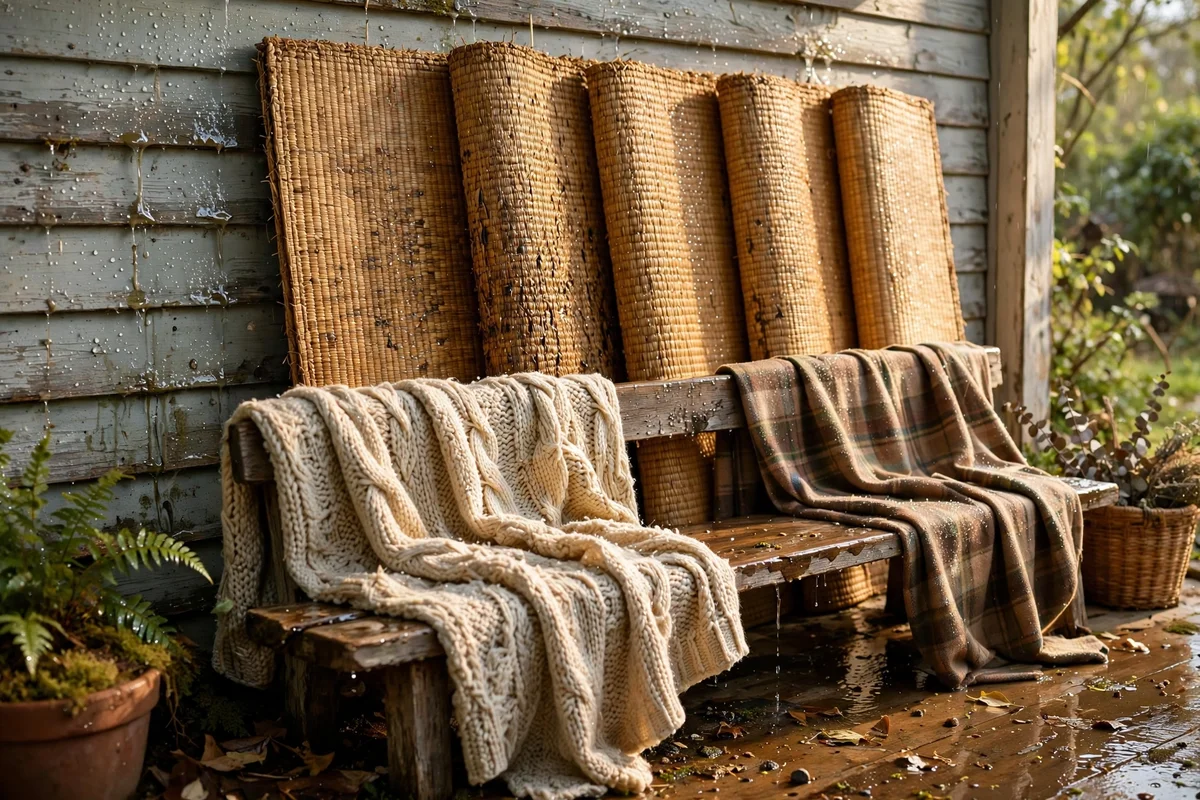
Refresh straw and fabric pieces after autumn rain by bringing them under cover within a day of each storm. Stand straw mats and the runner upright against the porch wall so air reaches both sides, and they dry fully in about six hours. Shake blankets outdoors and hang them over the bench back for an hour of breeze before refolding. Regular drying stops the musty smell that ruins straw displays by late October.
Keep a small storage box by the back door for storm duty, holding folded blankets, the garland and spare twine ready to rescue. The mistake to avoid is leaving damp straw in a sealed plastic bag, where it rots in days; always use breathable cotton bags. Check iron pieces for early rust spots after wet weeks and touch them up with a dab of inhibitor. Ten minutes of care after each storm keeps the whole porch fresh until the first frost.
The heart of this style is restraint: a few honest materials, a calm muted palette and the patience to let weathered wood and iron do the talking. Every idea here earns its place because it is useful, sturdy or quietly beautiful, and most of them cost less than a takeaway dinner. When the porch feels gathered rather than staged, you have found the harvest warmth this look promises.
If you try just one thing this week, layer the doormats and set a single iron lantern with an LED candle beside the door. That small change costs little, takes ten minutes and transforms the evening welcome immediately. Add the pumpkins and wheat sheaves next weekend, and your porch will carry harvest warmth all the way to the first frost.
Frequently Asked Questions
How much does a rustic fall porch refresh usually cost?
Between 60 and 200 pounds or dollars for a full rustic porch, depending on what you already own. Straw mats, pumpkins and twine cost very little, while a weathered bench or iron lanterns are the bigger spends. Start with the doormat layer and three pumpkins for under 40, then add one feature piece each week. Buying second-hand wood and iron cuts the total nearly in half.
How do I keep straw and pumpkins from rotting in the rain?
Keep everything under the porch overhang where possible and bring straw pieces indoors during long storms. Set pumpkins on burlap squares rather than directly on wet stone, and drill drainage holes in any bucket display. A clear weatherproof spray on straw and wood adds weeks of life. After rain, stand mats upright to dry both sides; straw that dries within a day rarely develops mildew.
Are LED candles really better than real ones on a porch?
Yes, for any porch with straw, dried wheat, blankets or leaves, LED candles are the only safe choice. Modern flicker LEDs look convincingly warm and many run on timers that light them at dusk. Real flames near dry harvest materials are a genuine fire risk, especially in wind. Save real candles for indoor tables well away from anything flammable.
What colours work best for a rustic harvest porch?
Cream, sage green and muted orange form the classic harvest trio, with weathered grey wood and black iron as grounding neutrals. Avoid bright orange carving pumpkins and glossy finishes, which clash with the calm palette. Pale gold wheat and natural straw add light without shouting. If your door is dark green or black, the pale tones glow beautifully against it.
Can I decorate a small porch or just the steps?
A small porch works beautifully with this style; simply scale down. Use the layered doormats, three small pumpkins on the steps and one iron lantern beside the door, which together need barely a square metre. Hang the corn husk swag and grapevine wreath on the door itself, since vertical space is free. Skip the straw bale and bench, and keep every piece weatherproofed since small porches catch more rain.