Home Improvement
22 Basement Storage Ideas That Tame Clutter Fast
By Anna Wells · · 12 min read
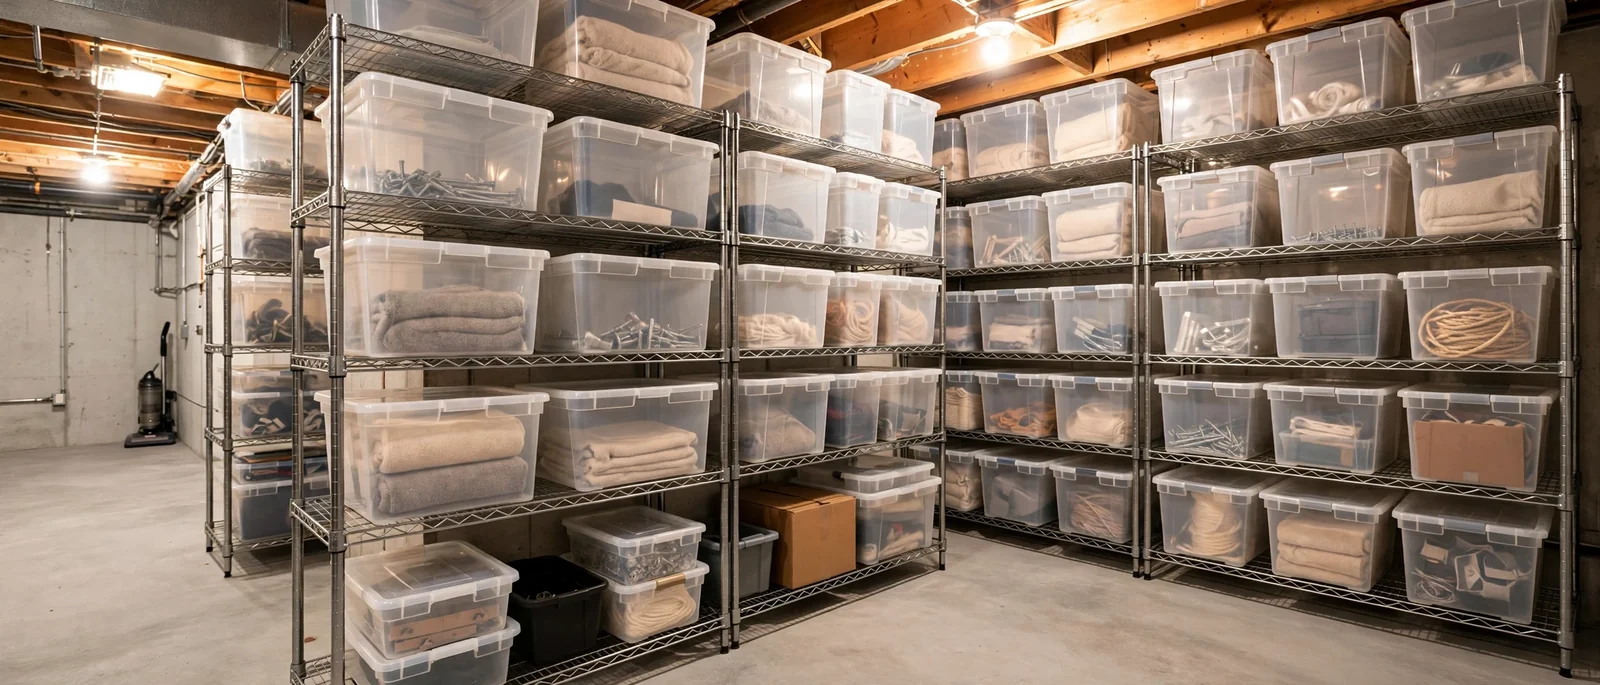
A basement can either be the hardest working room in your home or the place where clutter goes to hide. These 22 practical storage ideas will help you reclaim every square foot with sturdy shelving, smart zones and simple habits that last.
A basement can quietly become the most frustrating room in the house. Boxes pile up, holiday decorations scatter across every shelf, and finding one simple tool turns into a twenty minute hunt. The good news is that most basement chaos comes from missing systems, not from missing space.
The ideas below will help you build those systems step by step. Each one focuses on practical storage that is easy to maintain long after the big organizing weekend ends. Start with whichever zone bothers you most and work outward from there.
1. Install Heavy-Duty Adjustable Shelving
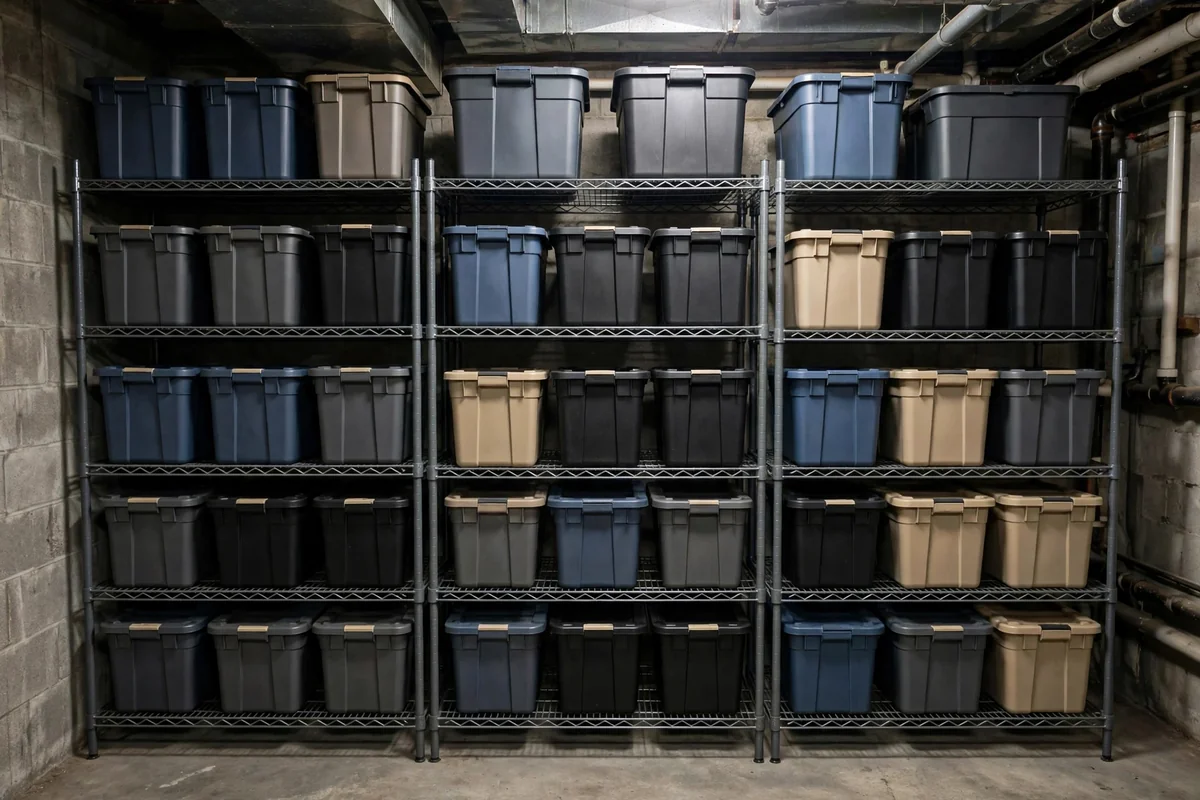
A sturdy adjustable shelving unit is the backbone of any organized basement. Look for steel uprights rated for at least 300 to 500 pounds per shelf, with shelf heights you can move in small increments. Standard units run about 48 inches wide, 24 inches deep and 72 inches tall, which fits most basement walls while leaving comfortable walking room. Always anchor tall units to wall studs with brackets so they cannot tip forward.
Place the heaviest bins on the lowest shelves to keep the center of gravity low and protect your back during lifting. Leave the bottom shelf four to six inches off the floor for airflow, which matters a great deal in damp basements. Group similar items together on each level so holiday totes, paint supplies and bulk paper goods each have a permanent home. This single change makes every future organizing task noticeably easier.
2. Switch to Clear Matching Bins
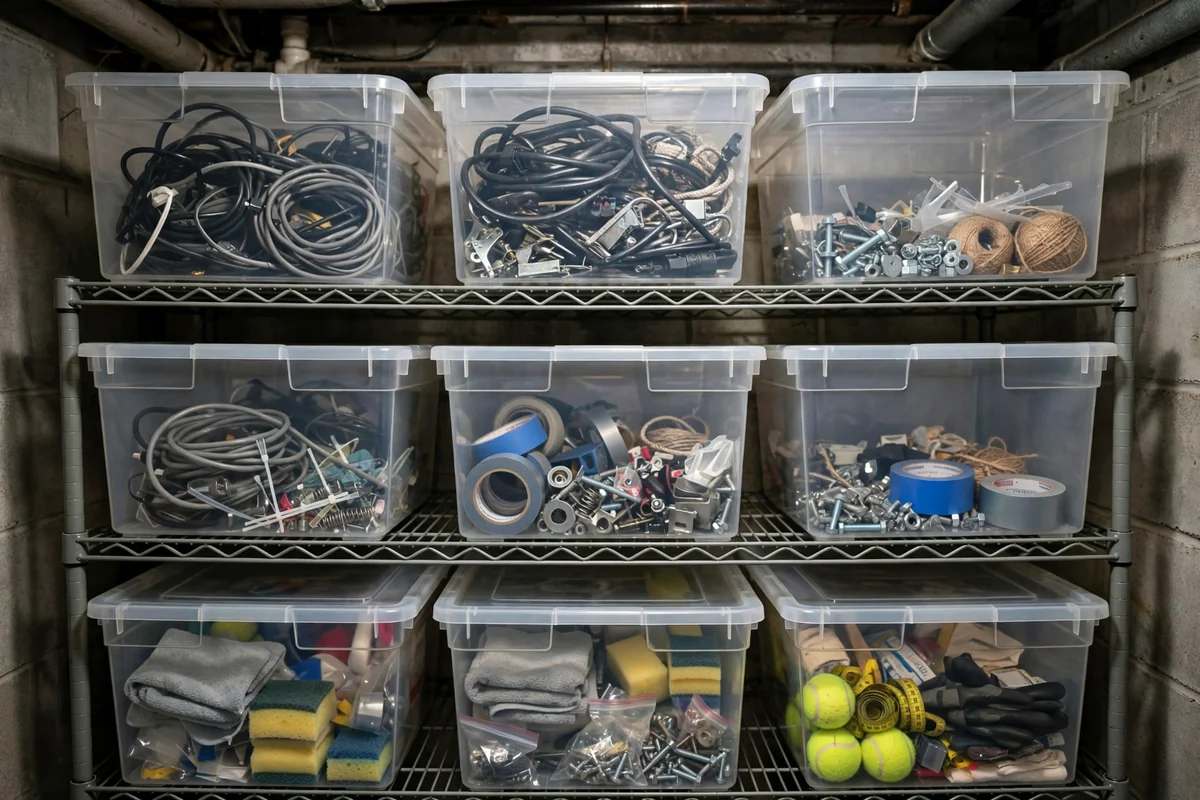
Cardboard boxes hide their contents and collapse in humidity, so replacing them with clear plastic bins is one of the fastest upgrades you can make. Choose stackable bins in a few standard sizes, such as 27 quart containers for small items and 66 quart totes for bulky gear. Transparent walls let you see exactly what is inside without opening lids, which saves real time during busy decorating seasons.
Matching bins also look calmer than a jumble of random boxes. When every container shares the same footprint, they line up neatly and stack safely without wobbling or sliding. Add simple adhesive labels to the short end of each bin so you can read them from the aisle. Buy a few more bins than you think you need, because storage categories always seem to expand over time.
3. Create a Holiday Decoration Zone
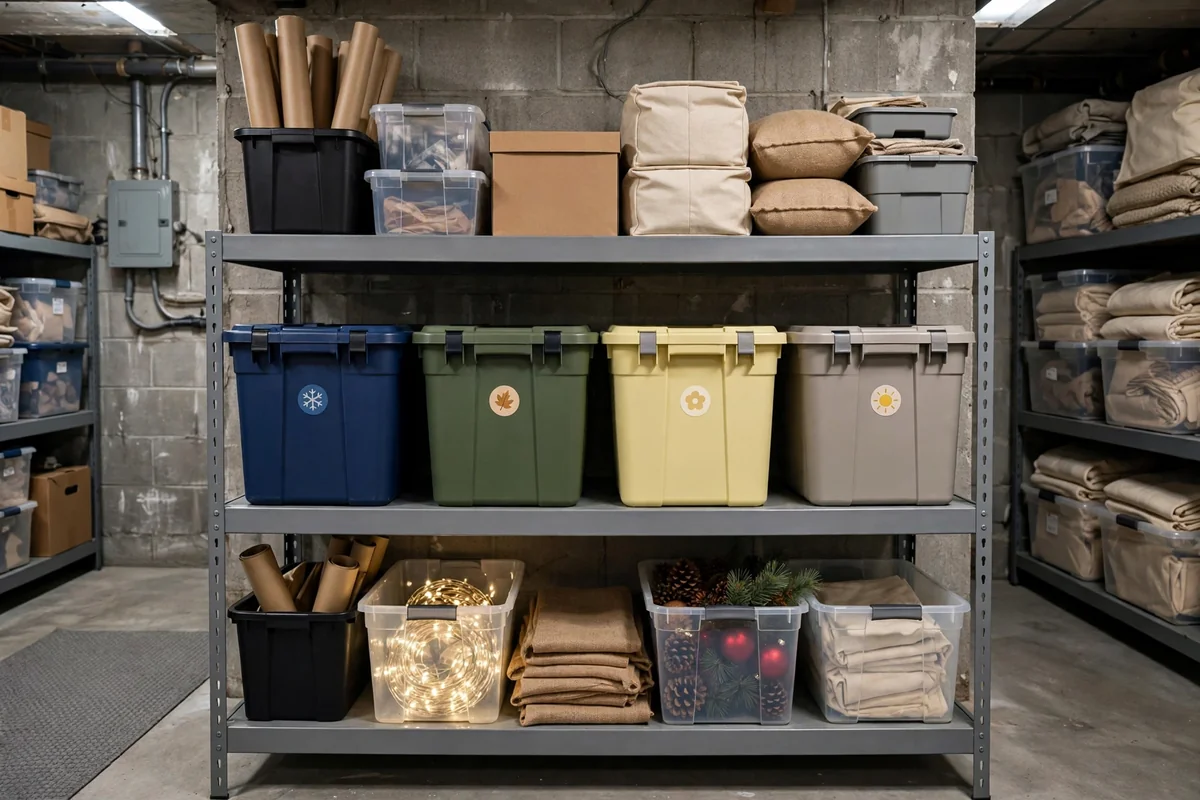
Holiday decorations multiply every single year, so give them a dedicated zone instead of scattering them across the basement. Reserve one full shelving bay for celebrations, grouping Christmas, autumn, spring and summer items into separate labeled sections. Store the largest boxes at waist height where they are comfortable to lift, and place smaller holidays on the higher shelves.
Keep wrapping supplies, spare lights, extension cords and ornament hooks in the same zone so decorating day requires only one trip upstairs. Use red and green bins for Christmas and neutral bins for everything else to spot each category at a glance. When the season ends, return every item to its labeled bin before the decorations come down, which keeps next year’s setup remarkably simple.
4. Build a Sports Equipment Station
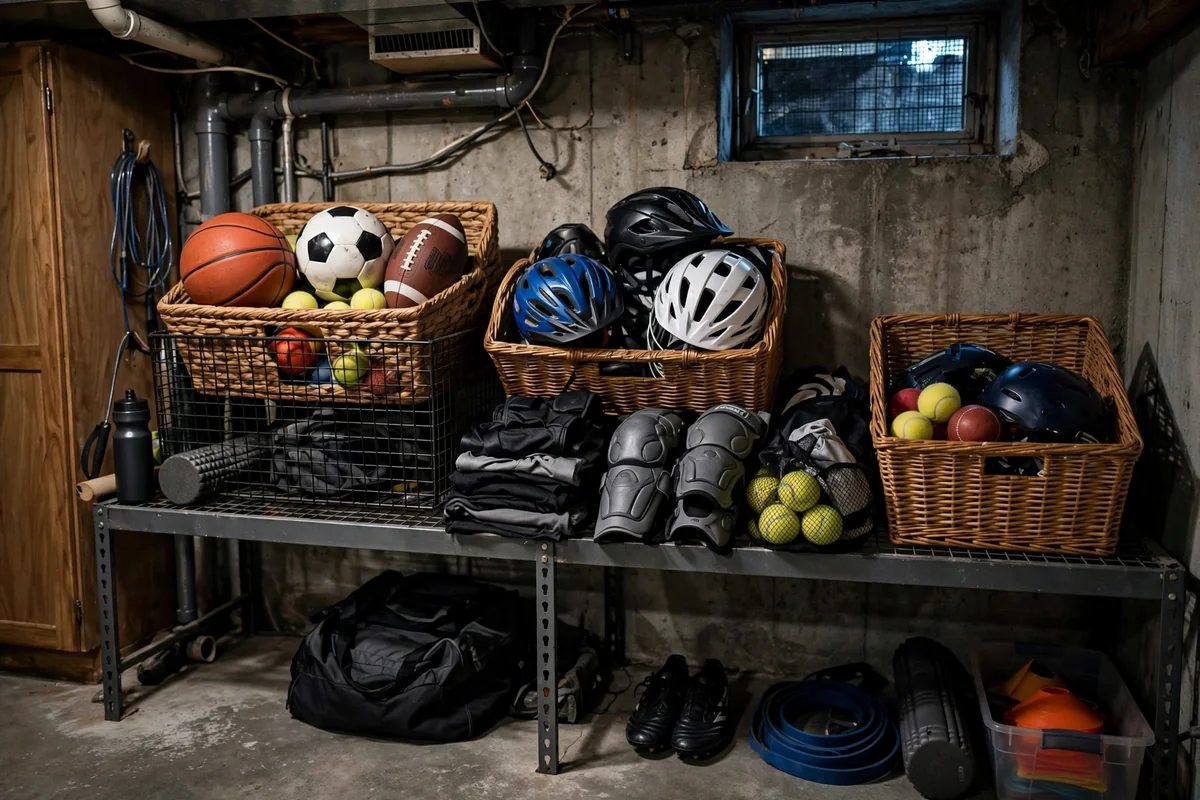
Balls, helmets, cleats and rackets seem to breed in dark corners, so corral them into one dedicated sports station. A wide shelf with deep bins handles bulky gear, while heavy duty wall hooks hold bikes, bats and bags off the floor. Mesh laundry bags work wonderfully for muddy cleats because they contain the dirt while still allowing airflow around the shoes.
Put the gear your family uses every week at arm level and move seasonal equipment to higher shelves. Label each bin by sport so kids can return items without needing to ask. A quick monthly check keeps the station honest, because outgrown gear should move to the donation zone instead of crowding the shelves. Order here saves many frantic searches before practice.
5. Use Overhead Ceiling Storage
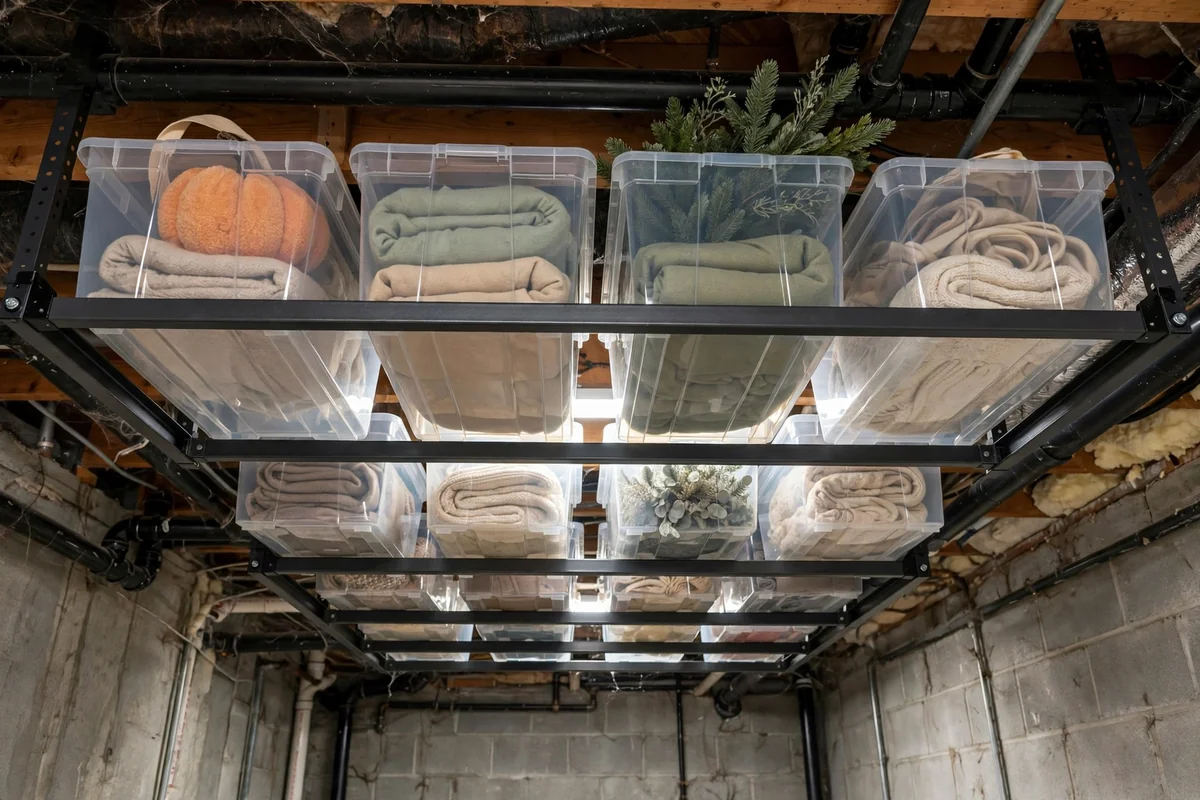
The ceiling is the most overlooked storage real estate in a typical basement. Overhead racks that bolt directly into ceiling joists hold lightweight seasonal items like empty luggage, camping gear and spare bins without using any floor space. Most residential racks support 250 to 600 pounds in total when mounted correctly, but always verify your joist spacing and follow the manufacturer instructions carefully.
Store only bulky, light and rarely used items overhead, never anything heavy or needed on a weekly basis. Keep a sturdy step stool nearby and never balance on a wobbly chair to reach up high. Leave several inches of clearance below ducts and pipes for safety. Used wisely, ceiling storage frees an impressive amount of floor and shelf space below for everyday household supplies.
6. Lock Cleaning Supplies in One Cabinet
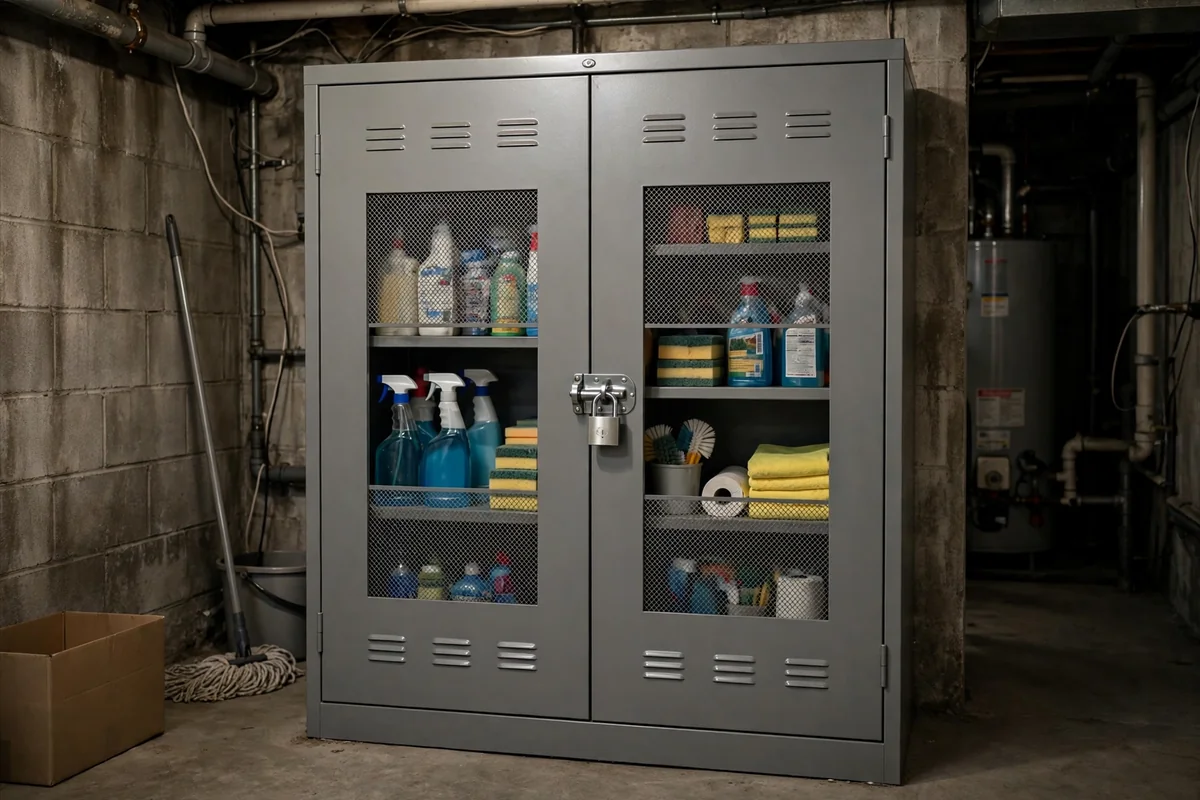
Cleaning products scattered through the house get forgotten and duplicated, so gather them into one lockable basement cabinet. A 36 inch wide utility cabinet with adjustable shelves holds spray bottles, concentrates, microfiber cloths, mop refills and vacuum accessories with room to spare. Locking the cabinet matters in homes with curious children or pets, since many common cleaners are genuinely hazardous.
Group products by task rather than by brand, keeping bathroom cleaners, floor care and laundry boosters together in their own sections. Write the purchase date on each bottle with a permanent marker so older products get used before newer ones. Check the cabinet before every shopping trip to avoid buying duplicates. This single habit reduces clutter and saves real money over the course of a year.
7. Add Rolling Utility Carts
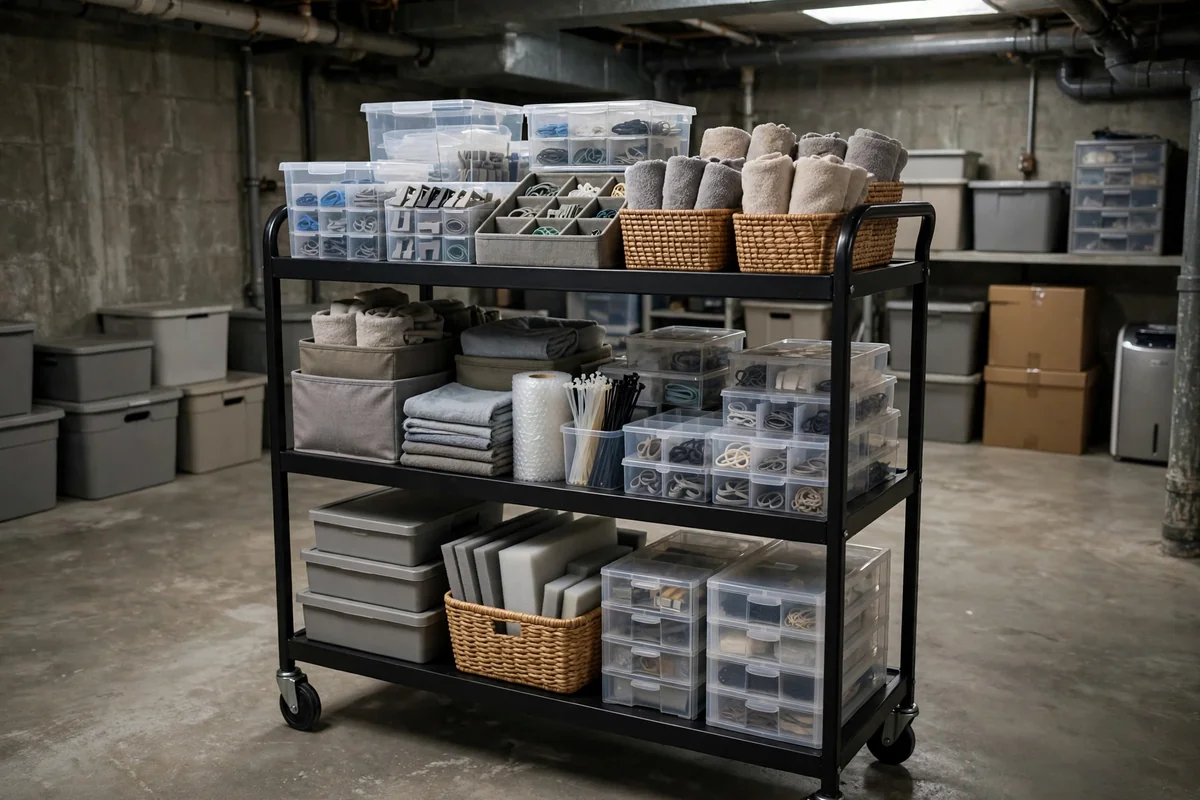
A rolling utility cart brings supplies directly to your project instead of forcing endless trips across the basement. Three tier metal carts, roughly 18 by 30 inches, roll smoothly and tuck neatly beside shelving when idle. Dedicate the top tier to the tools you grab constantly and reserve the lower tiers for bulkier supplies that you need less often.
Consider keeping two carts if your space allows, one for household projects and one for crafts or gift wrapping. Lock the caster wheels whenever you start working so the cart stays firmly in place. Because the cart moves so easily, it also doubles as a portable donation collector during decluttering sessions. Few storage tools earn their footprint as well as a good rolling cart.
8. Set Up a Gift-Wrapping Corner
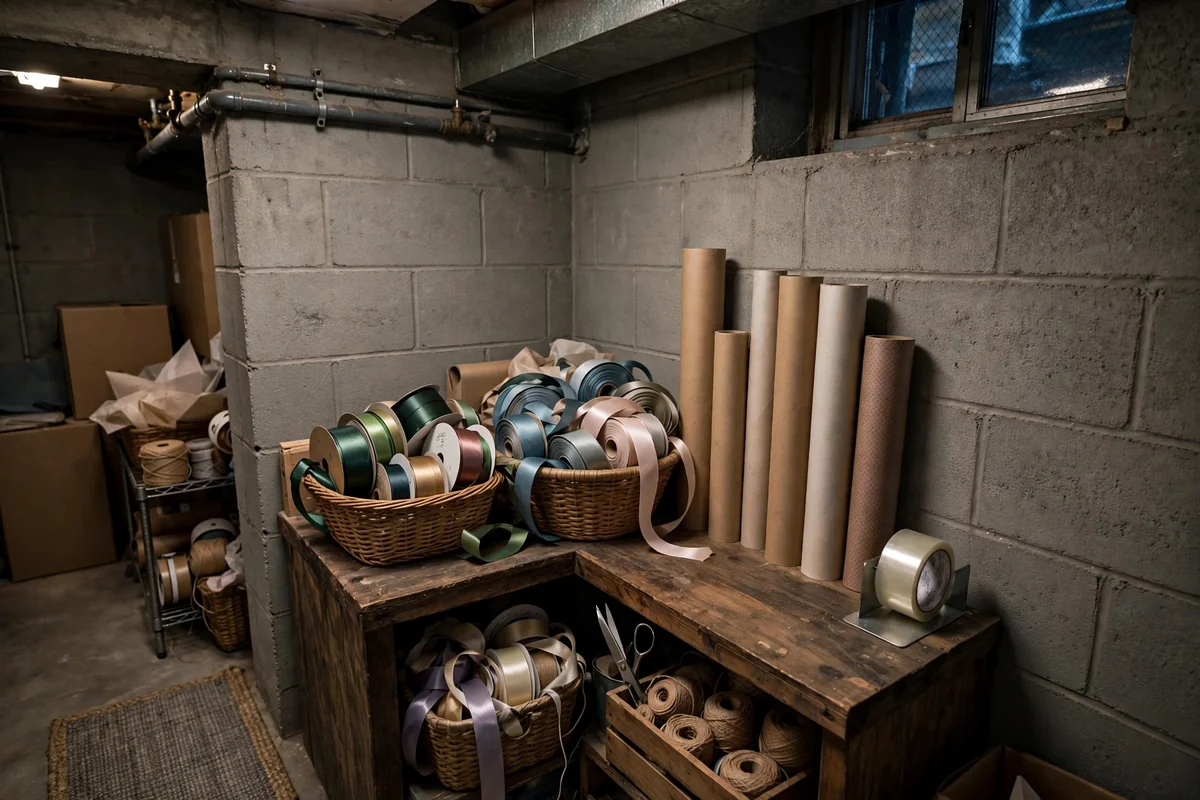
An unused basement corner, even one just four feet wide, makes a perfect gift wrapping station. A narrow bookcase holds rolls of paper standing upright inside a tall bin, while small baskets organize ribbon, tape, scissors, tags and gift bags within easy reach. Keeping paper stored vertically prevents the bent edges and tears that come from shoving rolls into crowded closets.
Add a fold down table or a sturdy board laid across two sawhorses to create a wrapping surface that disappears when you finish. Store scissors and tape in a caddy that lifts out easily for upstairs wrapping sessions. When every supply lives together in one corner, birthdays and holidays stop scattering clutter through the entire house.
9. Organize a Laundry Supply Wall
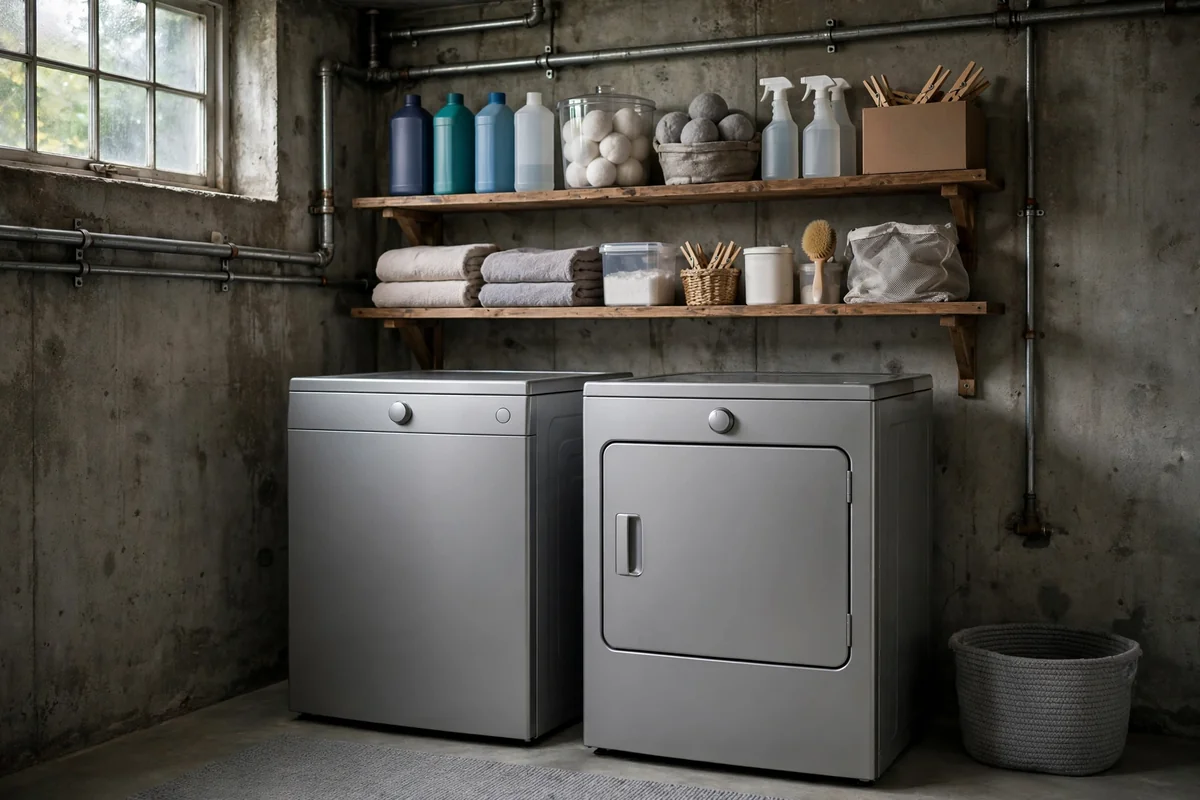
If your washer and dryer live in the basement, treat the surrounding wall as a complete laundry station. Mount two or three sturdy shelves above the machines for detergent, stain removers, dryer sheets and clothespins, keeping everything within comfortable arm’s reach. Use sealed containers for powdered products so basement humidity cannot turn them into solid bricks.
Add hooks beside the shelves for drying racks, mesh wash bags and a small bin for lint and empty bottles. Keep a laminated stain removal chart on the wall for quick reference during tricky loads. When the busiest corner of your basement runs smoothly, the entire space feels more under control and laundry day becomes far less chaotic.
10. Create a Bulk Pantry Overflow Area
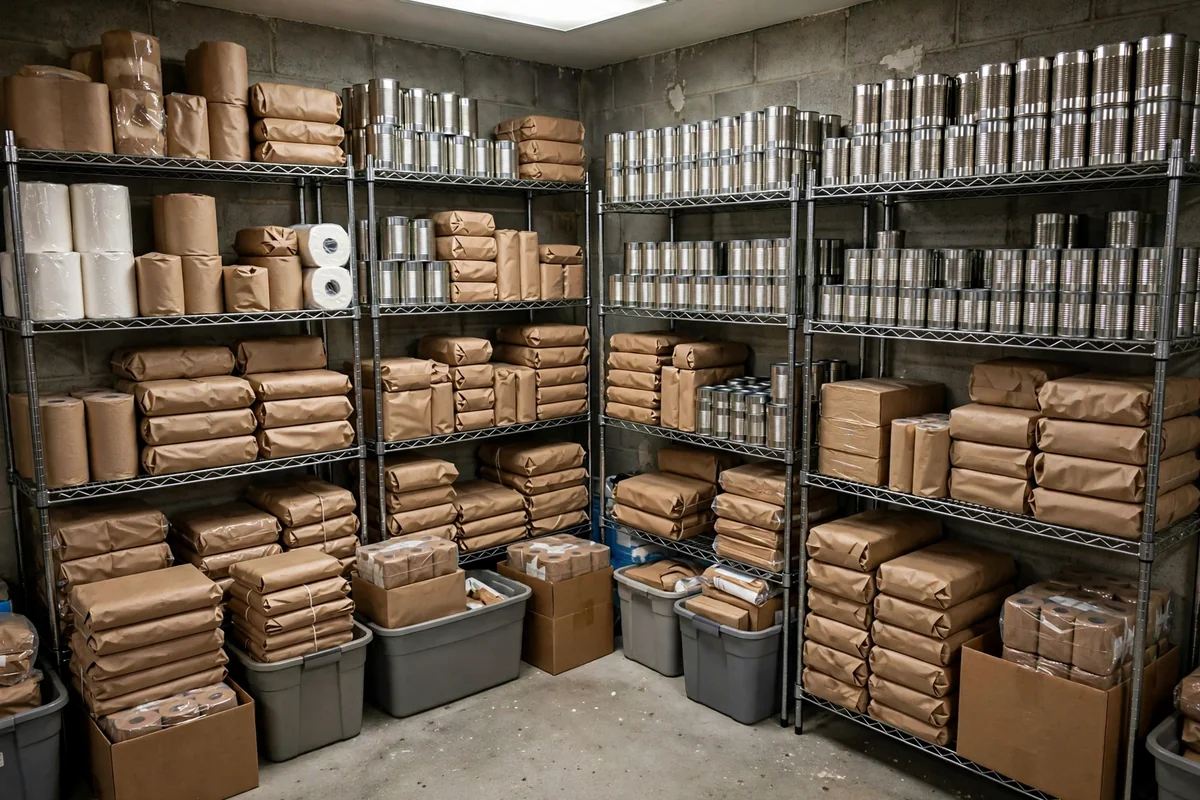
Bulk buys save money but quickly overwhelm kitchen cabinets, so dedicate sturdy basement shelving to pantry overflow. Heavy duty shelves hold canned goods, bottled water, paper products and dry staples with ease. Store cans no more than two deep so older stock stays visible, and always place new purchases behind existing ones so the oldest items get used first.
Keep this area cool, dry and well away from furnaces or water heaters. Check expiration dates twice a year and donate surplus food before it expires rather than after. A simple clipboard inventory clipped to the shelf edge prevents overbuying on grocery runs. When the kitchen runs low, you simply shop your own basement first, which stretches every grocery trip further.
11. Hang a Pegboard Tool Wall
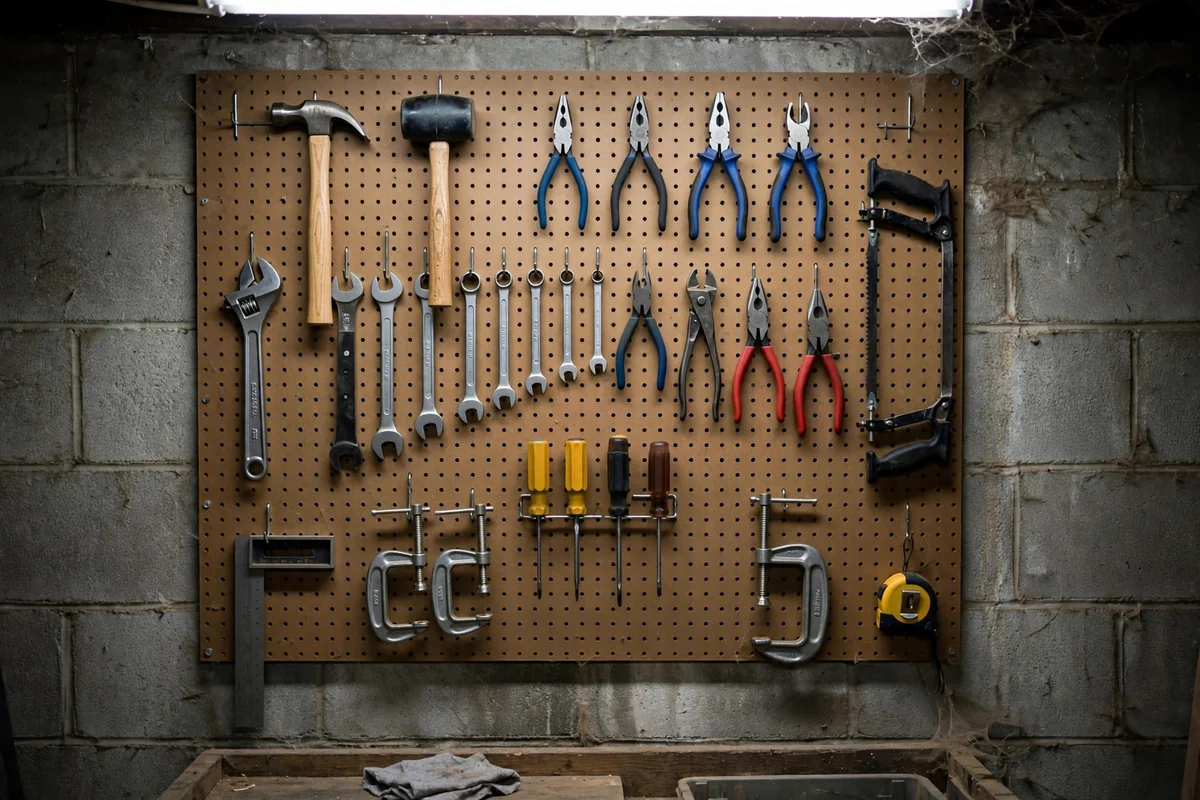
Digging through a deep toolbox for one screwdriver wastes precious time, so mount a pegboard for the tools you reach for every week. A four by four foot panel of tempered hardboard with metal hooks holds hammers, pliers, wrenches, tape measures and levels exactly where you can see them. Outlining each tool’s spot with paint means a missing silhouette instantly shows what is still out.
Mount the board directly into wall studs, not just drywall, because a loaded pegboard becomes surprisingly heavy. Keep sharp tools at adult eye level and well out of children’s reach. Return every tool to its painted outline after each project, which takes only seconds and prevents the slow drift back into cluttered drawers. Visibility creates accountability that drawers never can.
12. Sort Keepsakes Into Clear Categories
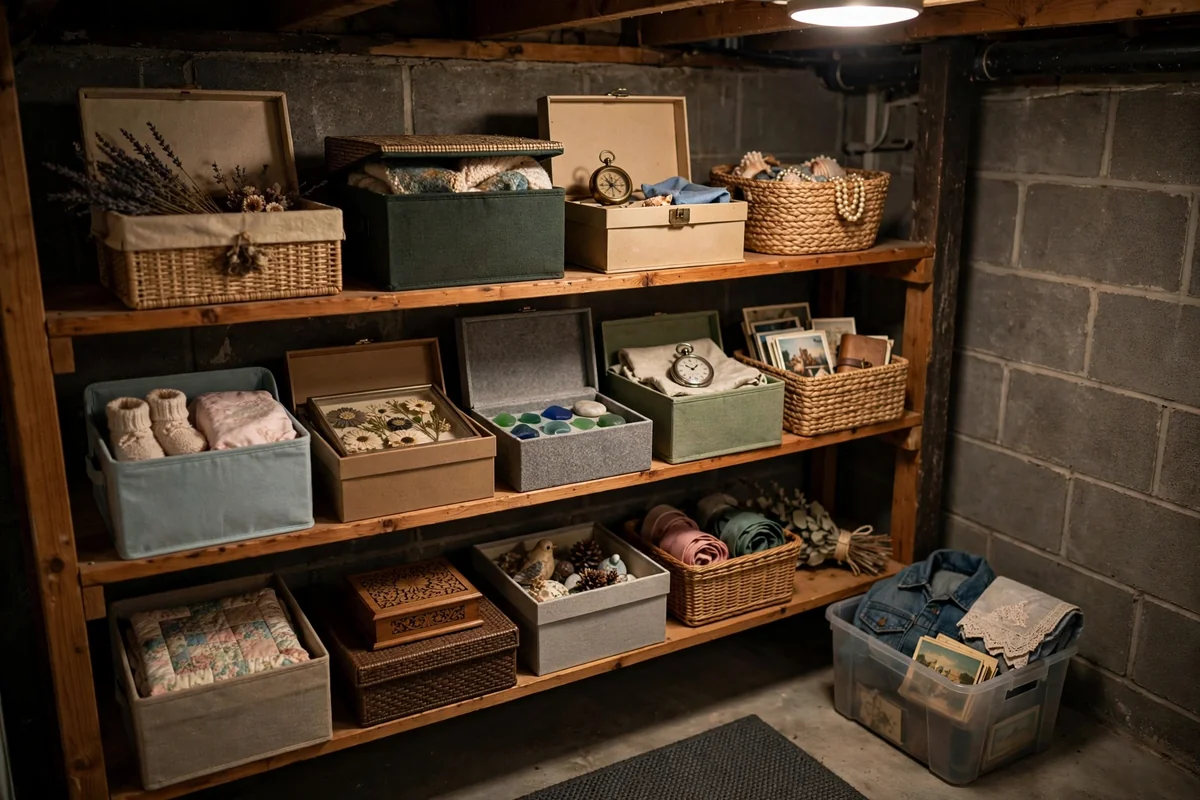
Sentimental boxes quietly become some of the worst clutter when everything mixes together, so sort keepsakes into meaningful categories like childhood memories, family photos, school papers and travel mementos. Give each category its own sturdy labeled bin instead of maintaining a dozen mystery boxes. Acid free tissue paper protects delicate items that will sit in storage for many years.
Limit yourself to a fixed number of keepsake bins so the collection stays curated instead of sprawling across every shelf. Photograph bulky mementos you want to remember but cannot reasonably keep, then let the originals go with gratitude. Review the bins once a year, because what felt precious five years ago may honestly feel like clutter today.
13. Dedicate a Home Improvement Shelf
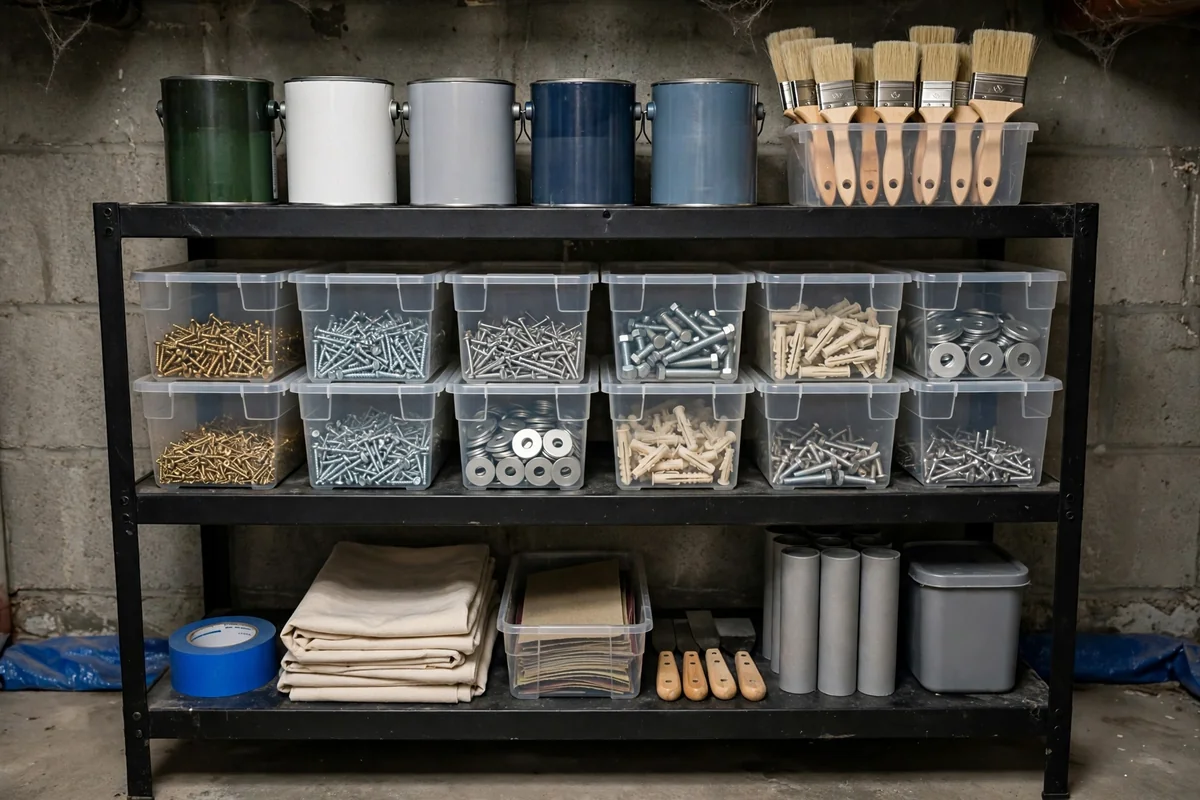
Leftover paint, caulk, brushes, screws and sandpaper accumulate after every project, so gather them all onto one dedicated shelf. Divide the supplies into small bins by category and throw away anything dried out or damaged before it earns precious shelf space. Keep paint cans sealed tightly and stored upright to prevent slow leaks from ruining the shelf below.
Label each can lid with the room name and date using a paint marker, which saves you from opening five cans to find the right touch up color. Store this shelf away from heat sources and out of reach of children. When the next repair comes up, everything you need is already organized, visible and waiting for you.
14. Keep a Donation Drop Zone
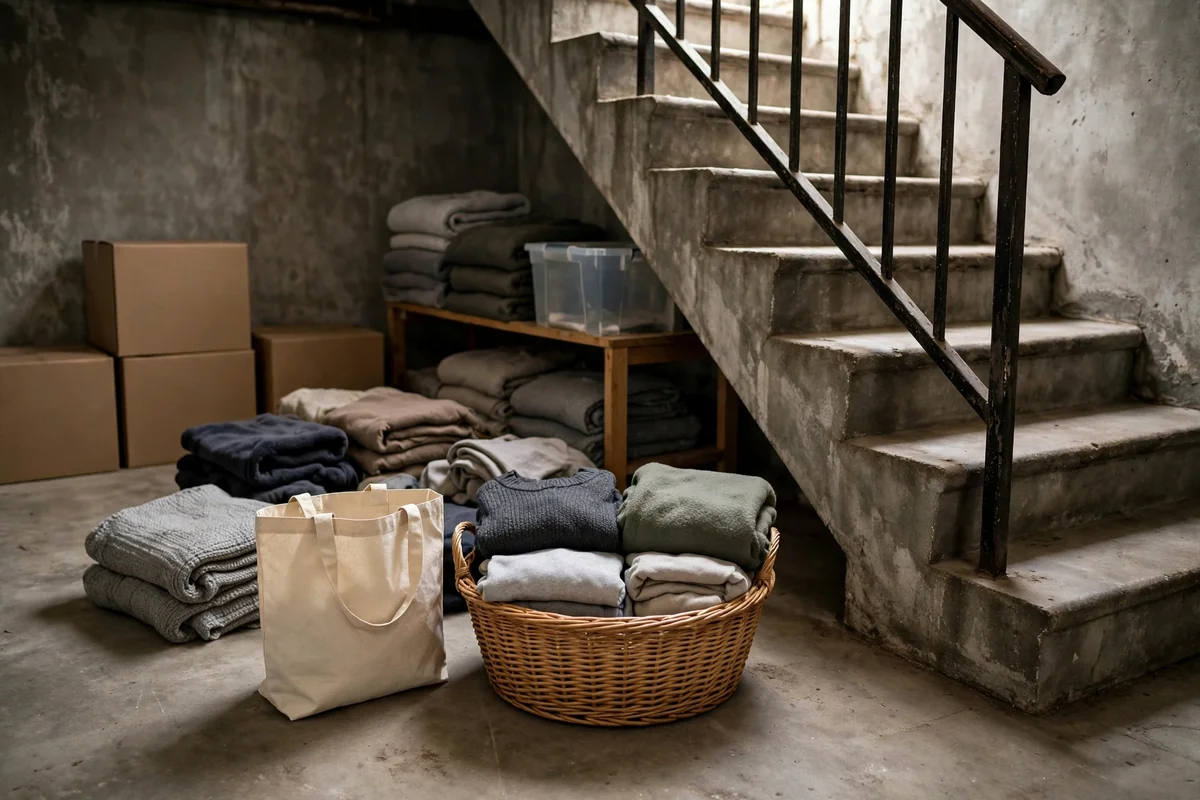
Clutter leaves your home fastest through a permanent donation zone near the basement stairs. Place one large basket and one sturdy tote in that spot, and drop in outgrown clothes, unused gadgets and decor you no longer love the very moment you notice them. When the containers fill up, schedule a donation run before they have a chance to overflow.
Keep a simple written log of donated items for tax purposes if your region allows deductions for charitable giving. Involve the whole family in the habit so everyone learns to release what they have outgrown. This routine prevents unwanted things from migrating back into closets and keeps clutter moving out all year instead of during one exhausting weekend.
15. Claim the Space Under the Stairs
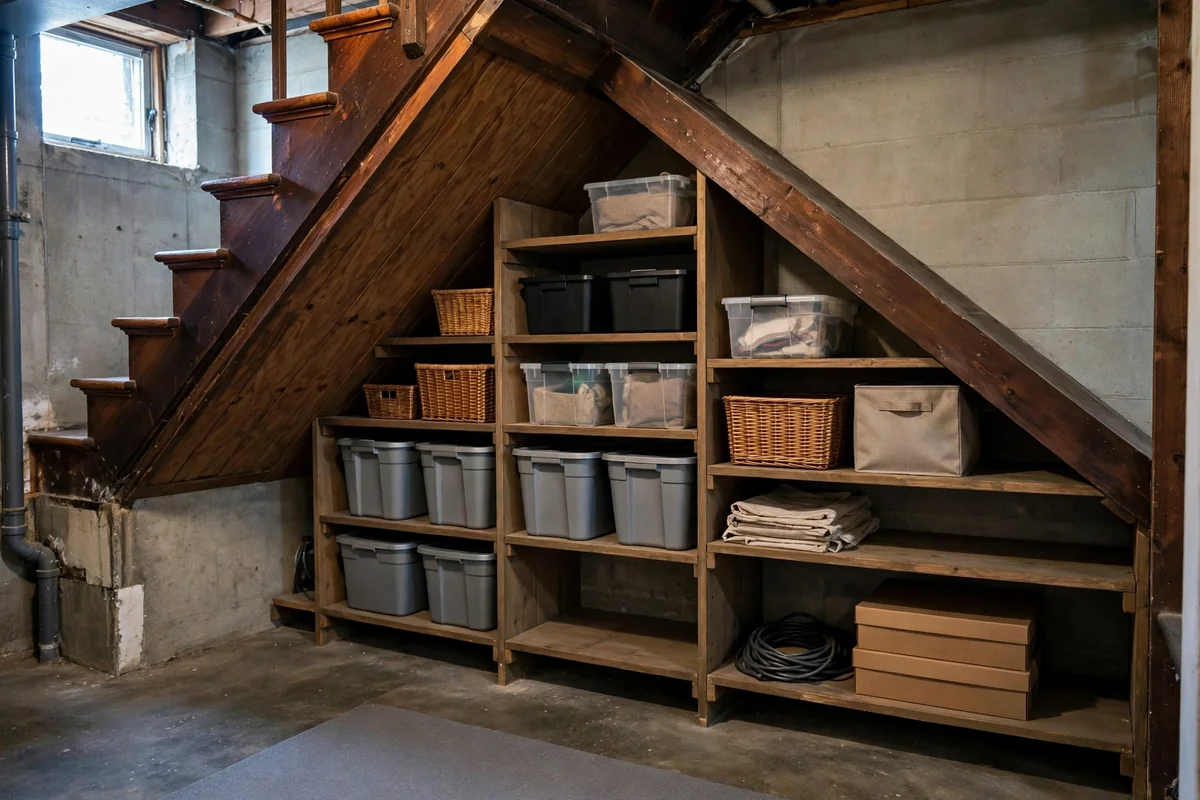
The awkward triangle beneath basement stairs can become genuinely useful storage with a little planning. Low rolling bins slide neatly into the shortest section, while taller shelving fits comfortably near the high side. Measure the changing ceiling height carefully before buying anything, because standard shelves rarely match the slope of a staircase.
Use this spot for items you need monthly rather than daily, such as coolers, folding chairs and seasonal gear. Add a battery operated motion sensor light so the deep corners stay visible instead of swallowing small items. Keep the path to electrical panels and shutoff valves completely clear at all times, since blocked access creates real safety problems during emergencies.
16. Compress Seasonal Clothing in Vacuum Bags
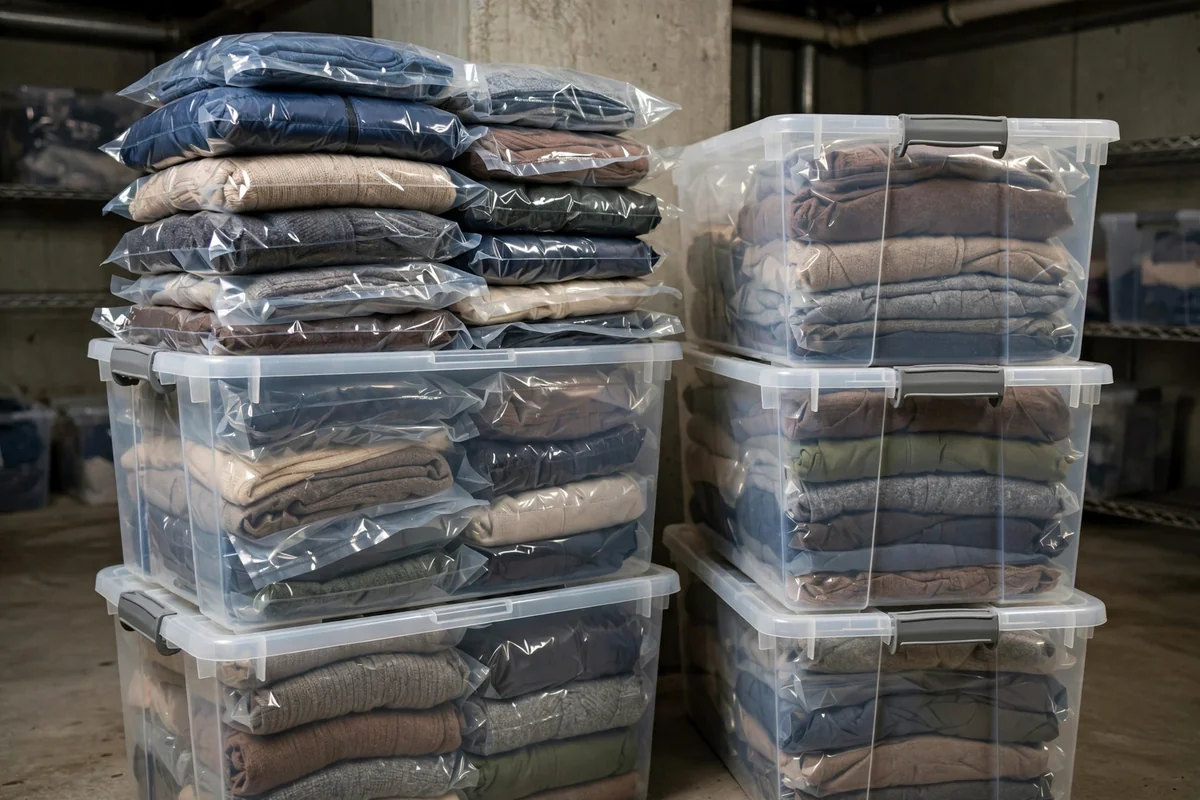
Bulky winter coats and thick blankets devour shelf space, so compress them in vacuum storage bags before shelving. Removing the air can shrink a puffy comforter to a third of its original size while protecting fabrics from dust and moisture. Always wash everything before sealing, because trapped odors only intensify during months of storage.
Label each bag clearly with its contents and season, then stack the flat bags inside labeled totes for double protection. Check the seals after the first week, since a slow leak will puff the bag right back up. When seasons change, rotating wardrobes takes only minutes because every off season item is already grouped, compressed and easy to find.
17. Hang Cords and Cables on Wall Hooks
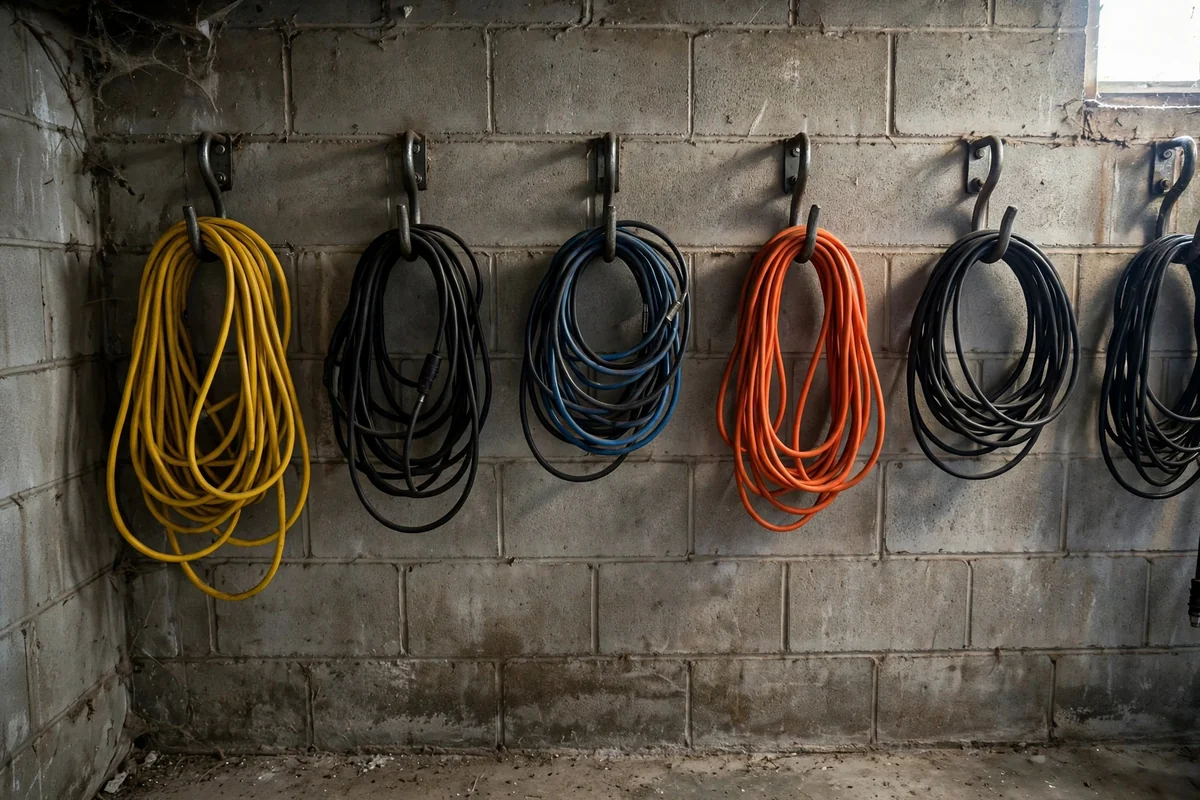
Extension cords tossed loosely into a bin become tangled nests within weeks, so hang each one on its own heavy duty wall hook. Coil cords loosely in wide loops to avoid stressing the insulation, then secure each coil with a simple Velcro strap. Label the hook with the cord length so you grab the right one on the first try.
Use the same system for garden hoses, rope and holiday light strings that otherwise knot themselves into frustration. Mount the hooks at a comfortable height on a plywood backer board screwed firmly into studs. Keeping cords visible and separated extends their working life and ends the annoying ritual of untangling knots before every single project.
18. Design a Craft Supply Station
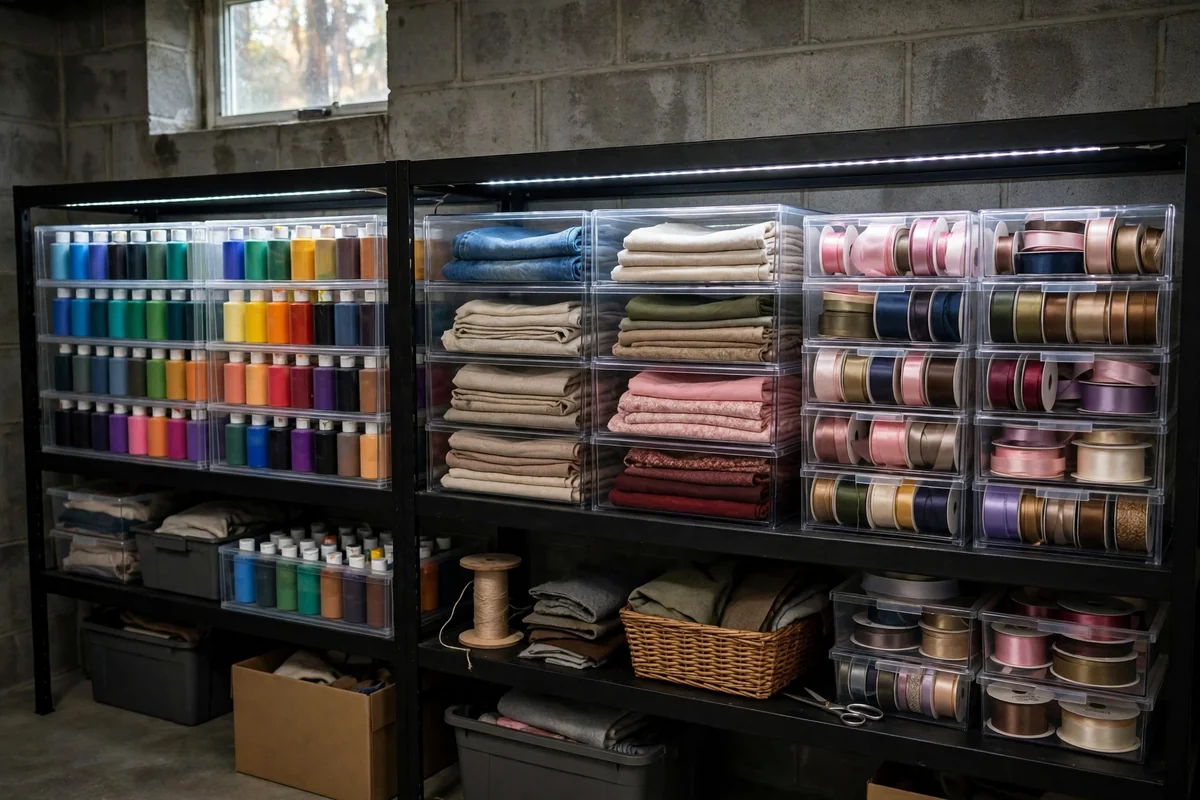
Craft supplies scattered across several rooms quietly kill creativity, so gather them into one dedicated basement station. Clear stackable drawers sort paint, fabric, ribbon, yarn and adhesives by material type rather than by project, which makes everything easy to find. Seeing every color and texture at once sparks ideas that hidden supplies never inspire.
Dedicate a small table as a permanent project surface so you can pause and resume work without packing everything away. Store sharp tools and hot glue guns out of children’s reach, ideally inside a latched box on a high shelf. When supplies have a visible and logical home, starting a new project takes minutes instead of an hour of frustrating hunting.
19. Use Open Wire Baskets for Daily Items
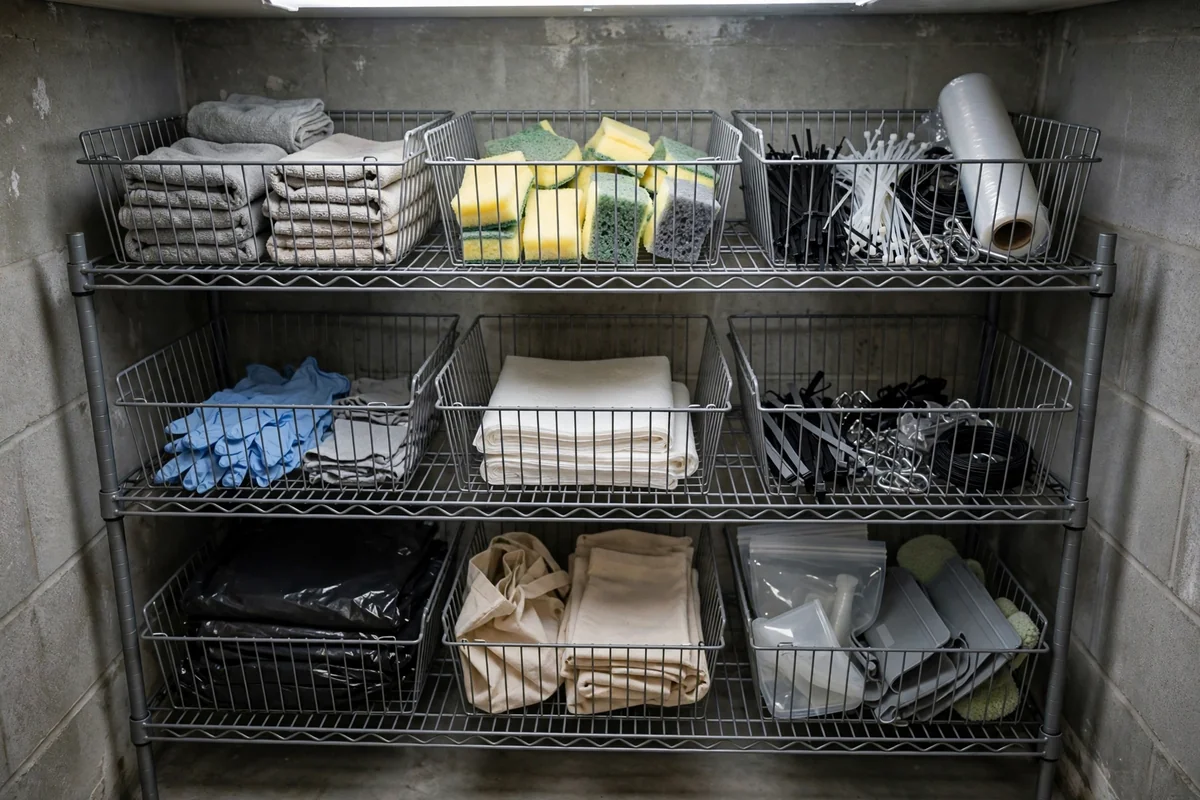
Not every storage solution needs a lid. Open wire baskets keep grab and go items like flashlights, batteries, work gloves and reusable shopping bags visible and within easy reach. Mount them on shelf edges or stack them on low shelves where the whole family can access them without needing to ask.
The open design also improves airflow around stored items, which genuinely helps in damp basement environments. Limit each basket to a single category so they stay useful instead of slowly becoming junk drawers. A quick weekly tidy keeps the baskets honest, because open storage shows clutter immediately and invites fast, easy correction.
20. Carve Out a Small Workbench Zone
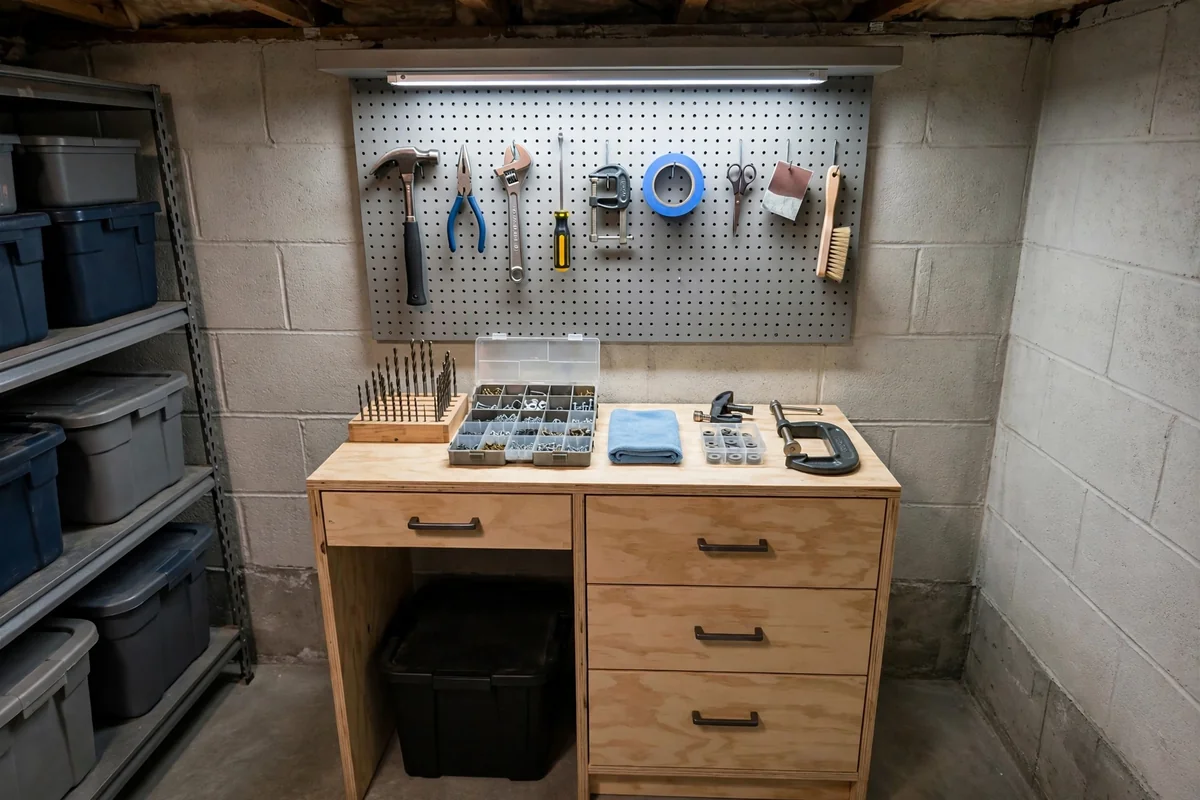
Even a compact workbench completely transforms how you handle household repairs. A sturdy bench about 48 by 24 inches, paired with a pegboard above and drawers below, creates a complete project station for painting, small builds and seasonal decorating. Choose a bench rated for at least 500 pounds so it stays rock solid during heavy work.
Keep only your essential tools at the bench itself and store the rest on the nearby pegboard wall. Wipe the work surface clean after every session so it is always ready, which makes starting the next repair feel easy instead of overwhelming. Bright task lighting above the bench prevents mistakes, reduces eye strain and makes detailed work far more pleasant.
21. Switch to a Uniform Labeling System
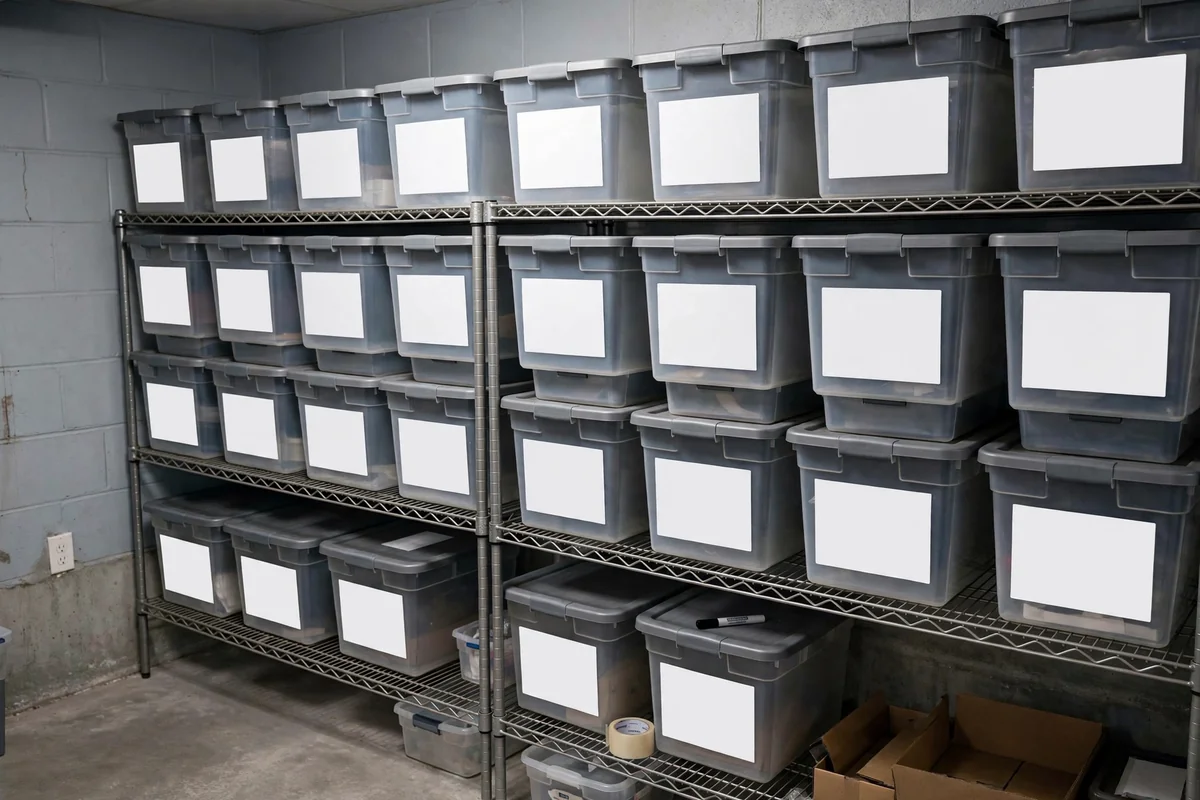
Mismatched tape scribbles make even tidy shelves look chaotic, so switch to one consistent labeling system throughout the basement. Use the same label size, font and placement on every bin, positioning each label on the short end facing the aisle. Simple wording beats clever wording every time, because “Holiday Lights” helps far more than a vague “Misc.”
A basic label maker costs very little and produces waterproof labels that survive basement humidity for years. Include the packing date on seasonal bins so you always know when the contents were stored. When every label looks the same, the entire basement feels intentional, and finding anything you need takes only seconds.
22. Protect Against Moisture and Stay Consistent
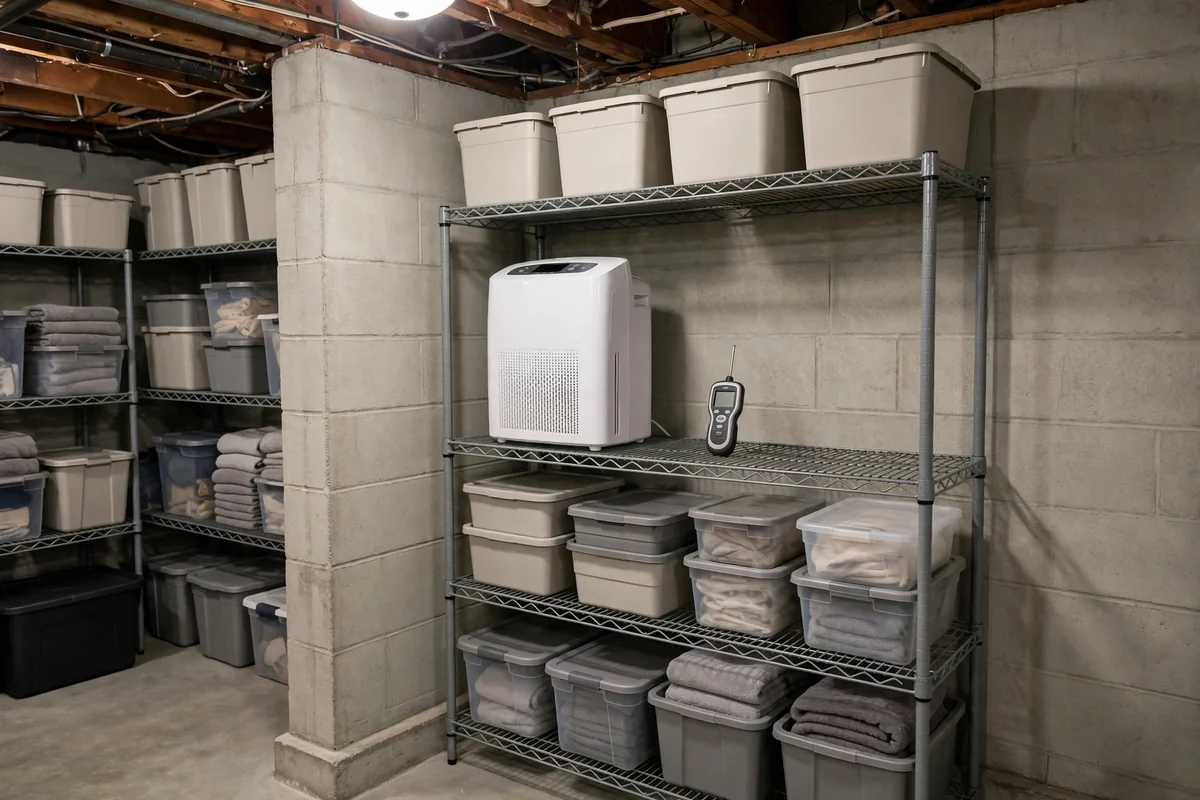
Basements and moisture go hand in hand, so protect your storage before problems have a chance to start. Keep bins and shelves four to six inches off the concrete floor, run a dehumidifier to hold humidity below 50 percent, and inspect walls seasonally for seepage or white mineral deposits. Never store photographs, documents or fabric directly against foundation walls where dampness collects.
Consistency matters more than any single product you buy. Schedule a fifteen minute monthly reset to return stray items, wipe down shelves and check for moisture or pests. Once a year, walk through every zone and release what your family no longer needs. These small regular habits keep the basement functional for years instead of letting it slide back into chaos.
A Calmer Basement Is Closer Than You Think
You do not need a bigger basement, just a smarter one. Pick the zone that frustrates you most, set up one solid system there, and let the momentum carry you forward. Small steady improvements will transform the whole space before you know it.
Frequently Asked Questions
What is the best shelving for a damp basement?
Powder coated steel shelving resists rust far better than raw metal or wood in damp conditions. Choose units with adjustable shelves rated for your heaviest bins, anchor them to studs, and keep the lowest shelf several inches off the floor so air can circulate underneath.
How do I store items safely overhead?
Use only racks designed for ceiling mounting, bolt them into joists according to the instructions, and respect the stated weight limit. Store lightweight seasonal items up high, keep a sturdy step stool handy, and never place heavy boxes where they could fall on someone.
What containers work best for basement storage?
Clear stackable plastic bins with locking lids are the most practical choice. They resist moisture, let you see contents at a glance, and stack securely. Avoid cardboard for anything you plan to keep longer than a few months.
How do I keep track of what is stored where?
A uniform labeling system plus a simple master list works best. Label every bin identically on the end facing the aisle, and keep a notebook or phone note listing which zone holds each category. Update the list during your monthly reset.
Can I store food in the basement?
Yes, if the area stays cool, dry and dark. Use sealed containers for dry goods, rotate stock so oldest items get used first, and check dates twice a year. Keep food away from furnaces, chemicals and any area with past moisture problems.