Home Improvement
22 Painted Stair Ideas That Change the Whole Hallway
By Anna Wells · · 23 min read
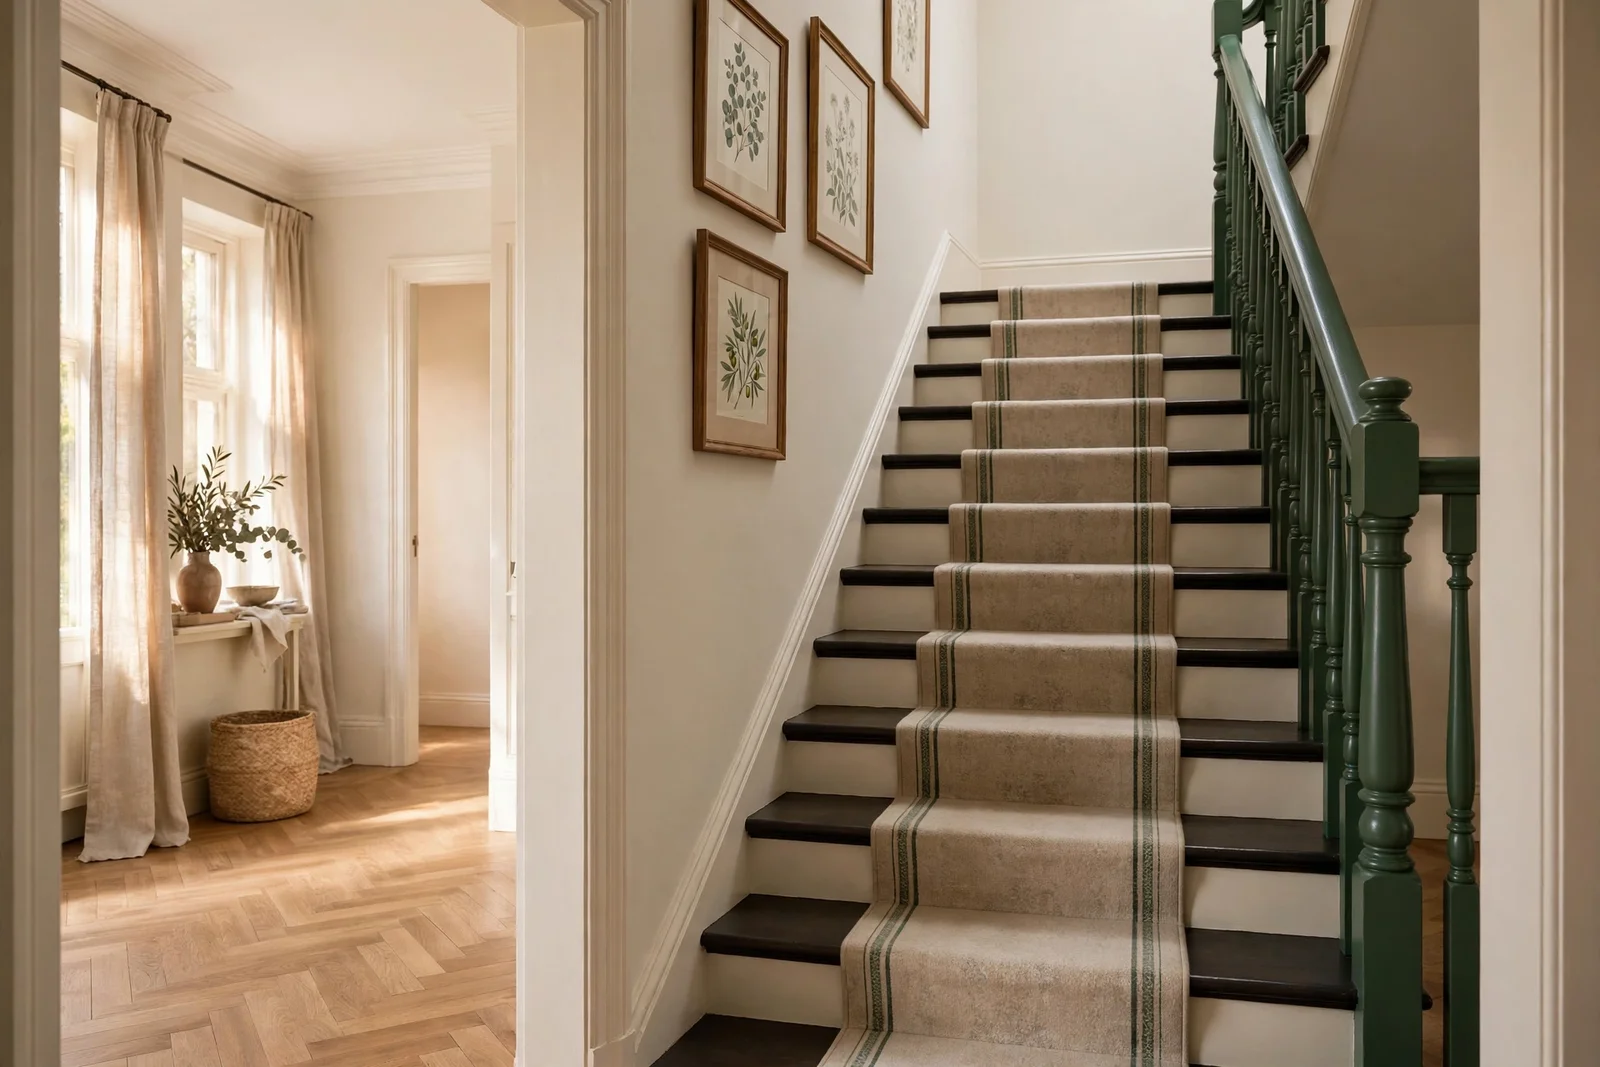
A painted staircase can transform the whole hallway: 22 original ideas, from dark treads with cream risers to painted runners, ombre shades and honest slip-safe finishes.
Morning light falls across the stair treads, and suddenly the hallway feels like the heart of the house rather than a passage between rooms. Paint has that power: a few careful coats can turn tired varnished stairs into a crafted feature that welcomes everyone who climbs them.
This guide gathers 22 painted stair ideas built for real family homes. Dark treads with cream risers, a measured painted runner, ombre shades in one colour family, and tile style stencil patterns on risers, all paired with honest safety advice on slip resistance, clear nosing lines and proper preparation.
Every idea includes the practical detail that makes it work: paint types, measurements, drying times and the mistakes worth avoiding. Whether you take on a full weekend project or one quiet afternoon detail, the hallway will feel calmer, brighter and more considered.
Work from the top of the stairs downward, keep the household off wet coats, and enjoy the slow transformation. Let us begin with the classic two-tone scheme that never fails.
1. Paint the Treads Espresso and the Risers Warm Cream for Contrast
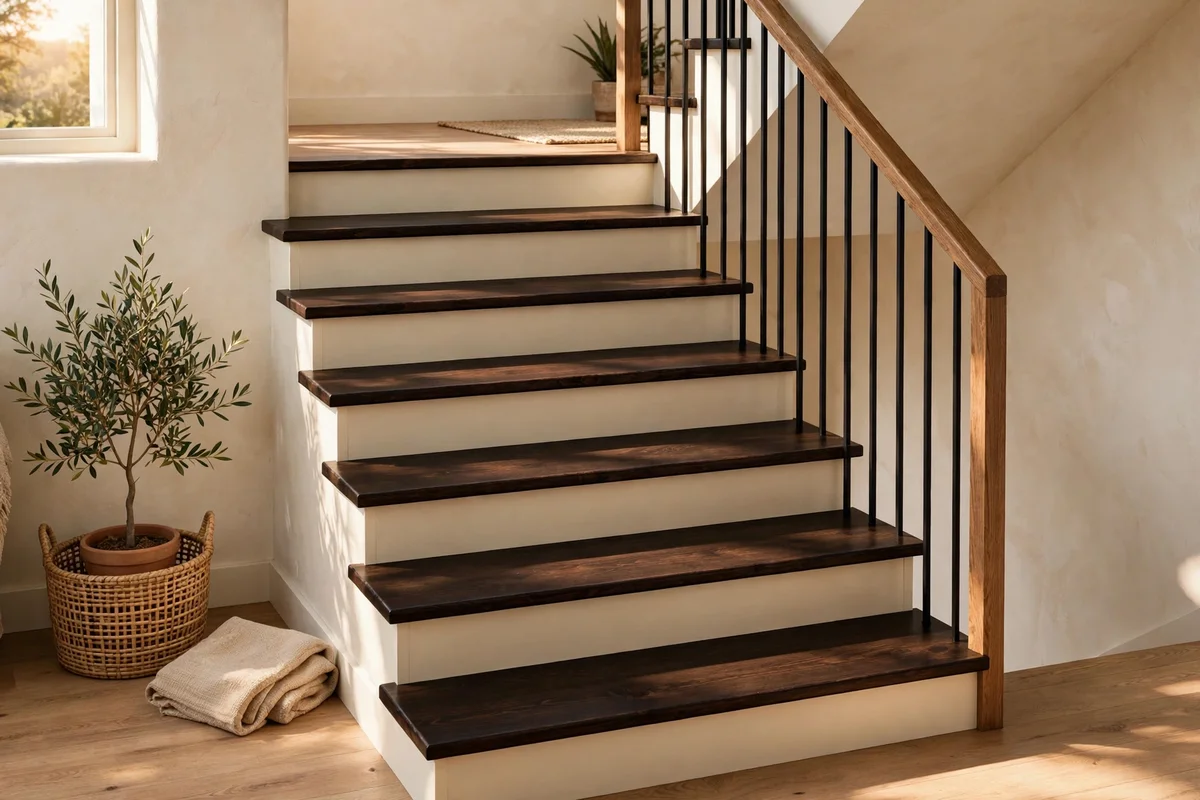
A dark tread with a cream riser is the most dependable stair makeover because it separates the walking surface from the vertical face so each step reads clearly in low evening light. Choose a rich espresso floor paint or a deep chocolate wood stain rated for foot traffic, then match risers to a warm cream such as ivory or clotted cream emulsion. Clean, sand and prime every surface first, and allow each coat a full 24 hours of drying before the next coat goes on.
Work from the top of the flight downward so you never step on wet paint, and tape the risers with low-tack painter tape before brushing the treads. A litre of quality floor paint covers roughly 8 to 10 square metres, which suits two coats on twelve to fourteen treads. Budget roughly 60 to 90 pounds or dollars for paint and primer for an average straight flight. The common mistake is skipping primer on previously varnished pine; without it the espresso topcoat scratches off within months of daily use.
2. Measure a Painted Runner 70 cm Wide Down the Centre of Each Stair
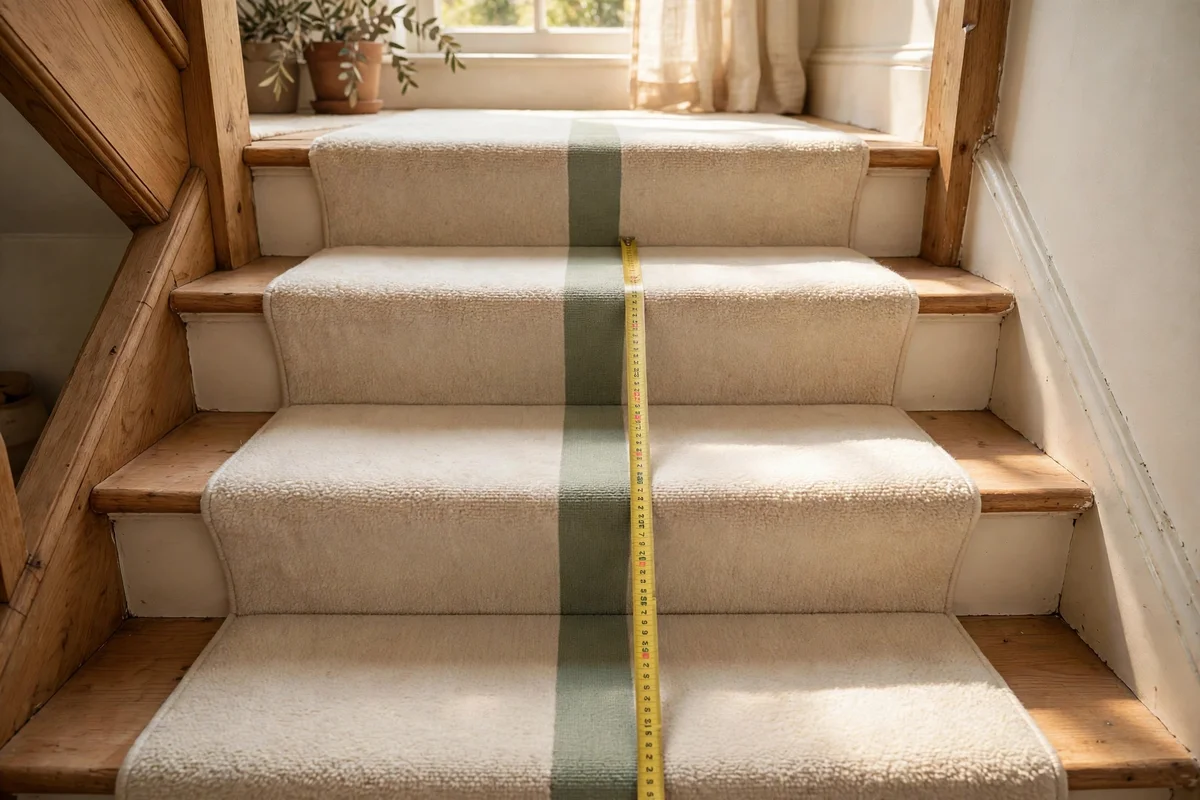
A painted runner gives the look of a fitted carpet runner at a fraction of the cost, and a 70 cm wide band suits most domestic staircases between 90 and 100 cm across. Mark the centre of each tread with a pencil, then measure 35 cm to each side and run painter tape along both marks for perfectly straight edges. Choose a colour that contrasts gently with the tread base, for example a soft sage band on cream treads or terracotta on warm white, so the hallway keeps its calm heritage feel.
Paint two coats of the runner colour inside the taped lines, remove the tape while the second coat is still slightly tacky for a clean edge, and let the paint cure for 48 hours before heavy foot traffic. Stir anti-slip granules into the runner paint so the decorative band does not become the slippery strip; this is essential because smooth decorative bands in the walking line cause most stair slips. Budget tip: one 2.5 litre tin of floor paint plus a roll of tape usually finishes the whole flight for under 50 pounds or dollars.
3. Shade Risers in a Single-Colour Ombre From Pale to Deep Blue
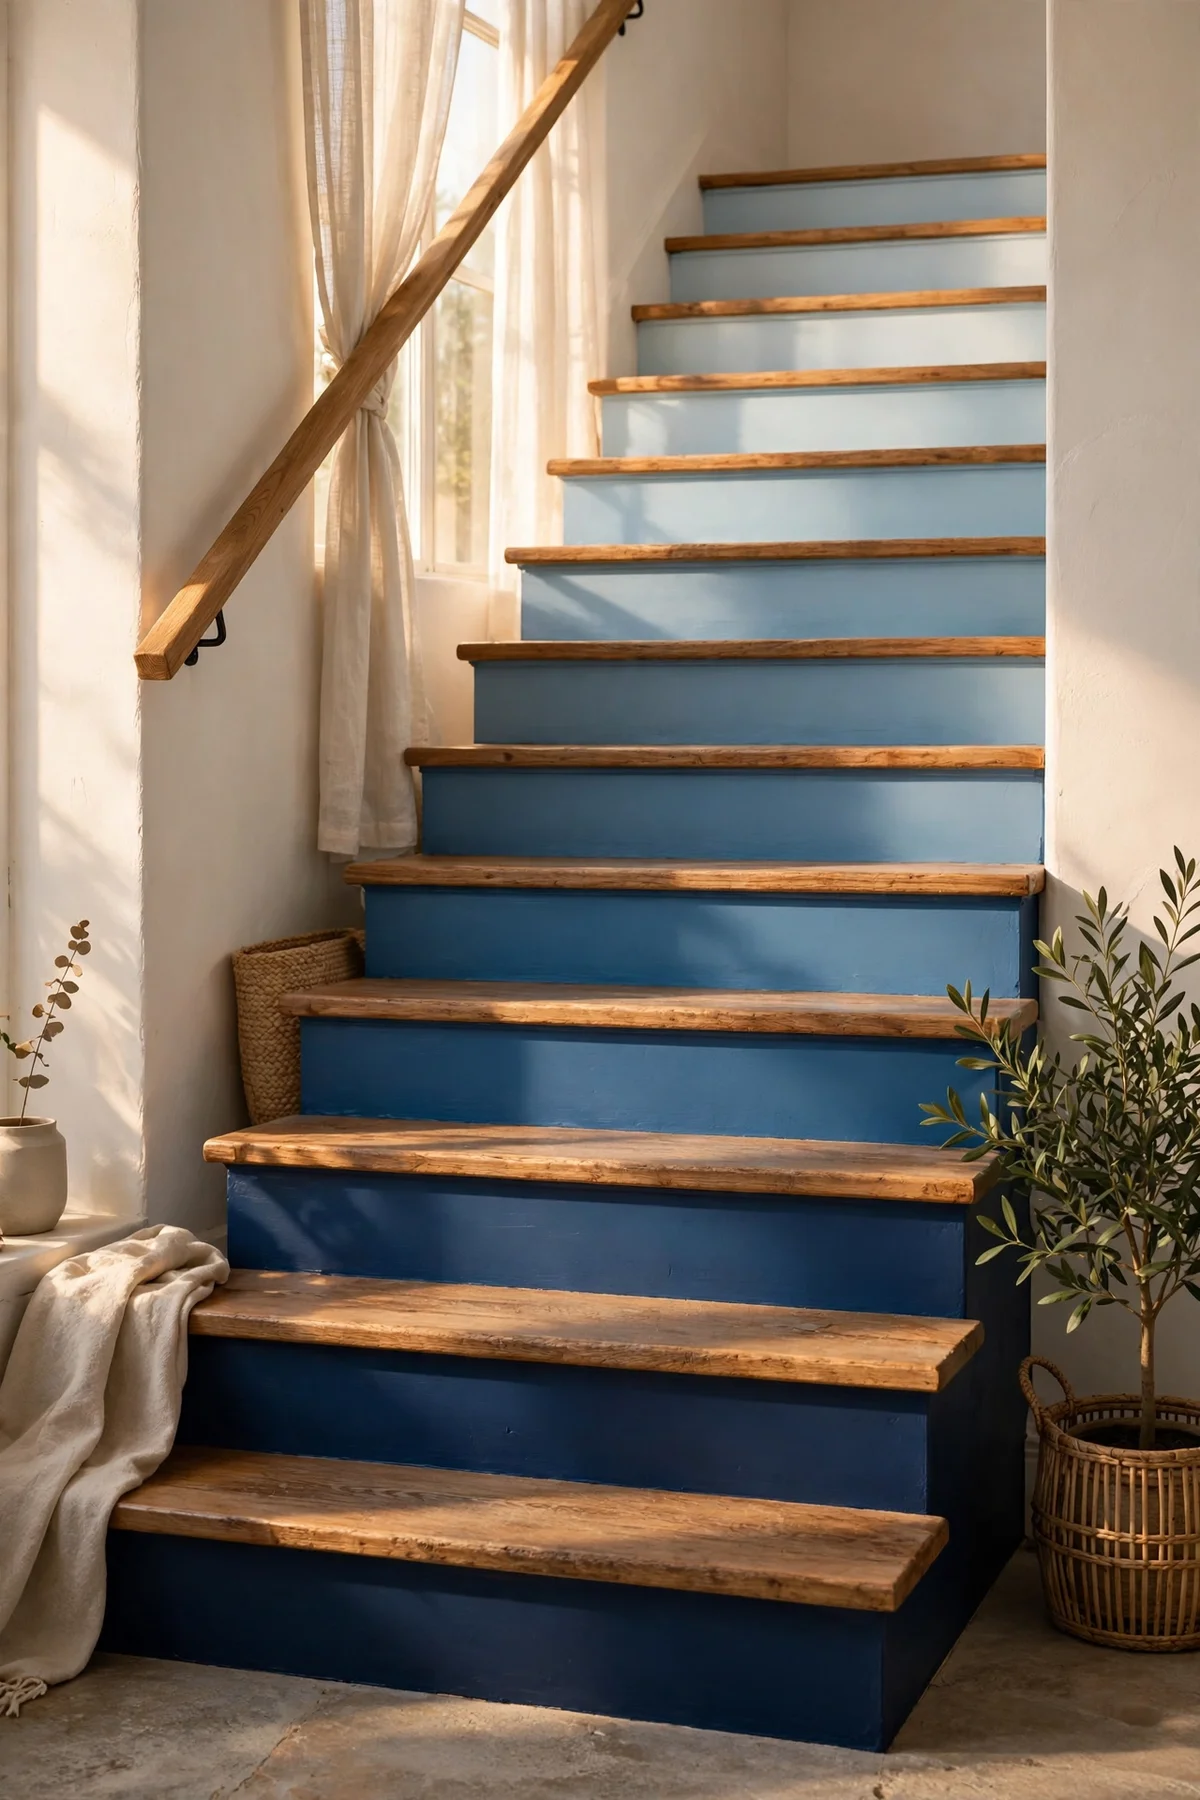
An ombre sequence shades each riser one step deeper along a single colour family, so the staircase reads like a colour chart flowing from the hall floor to the landing. For a classic look choose five or six graduated blues, from the palest powder blue at the bottom tread to a deep inky navy at the top, spacing the shades evenly across the riser count. Ask the paint shop to mix one base blue and then lighten it in measured steps, recording the recipe for each shade so future touch-ups match exactly.
Test the full sequence on card strips taped to the risers before opening a tin, because adjacent shades can look muddy in dim hallway light. Keep treads a single dark tone through the ombre, such as espresso or charcoal, so the gradient stays the star and footing stays simple. The mistake to avoid is painting the gradient in a random order; label each tin with its position number, bottom to top, before you start. Expect to buy small sample tins rather than full litres, which keeps the project to a mid budget of roughly 70 to 110 pounds or dollars.
4. Stencil Tile Style Motifs on Risers in One Calm Colour
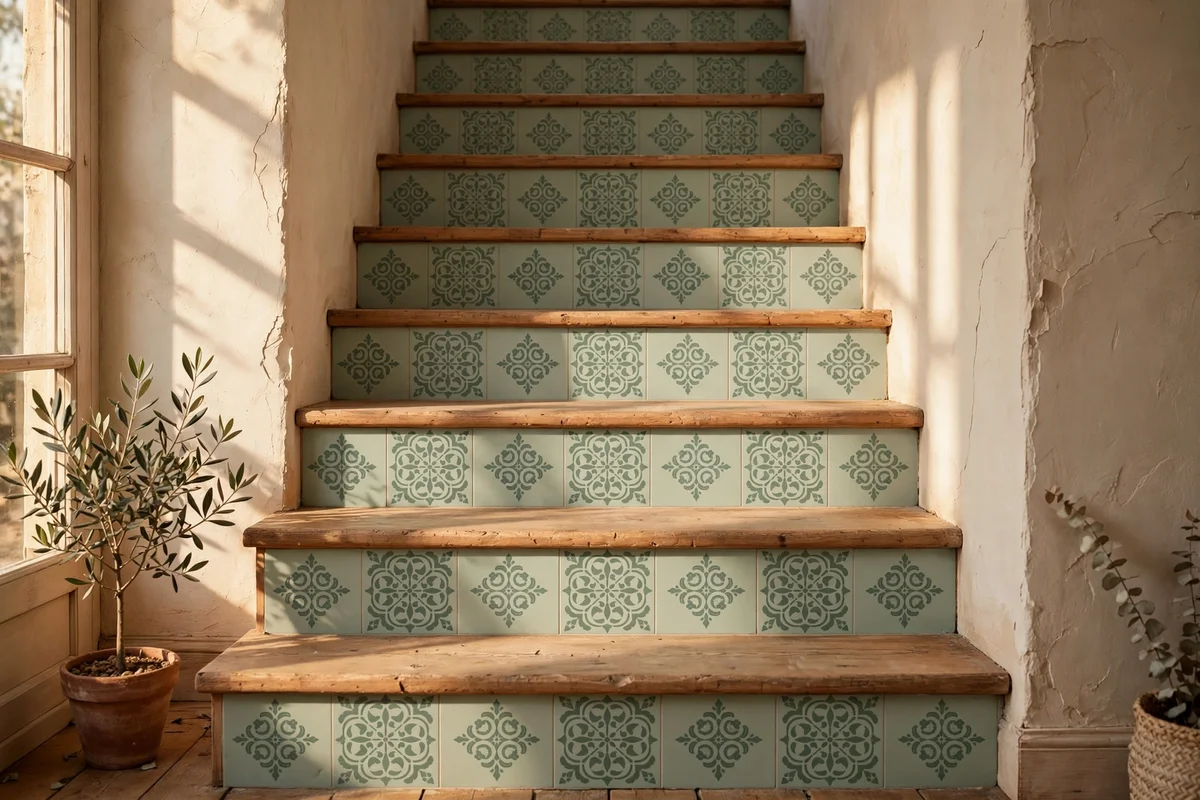
Stencilled risers mimic encaustic tiles with paint alone, and keeping every motif in one calm colour, for example soft sage or dusty blue on cream risers, stops the staircase from feeling busy. Buy a single reusable riser stencil with a simple geometric tile motif, roughly 15 cm square, and a small dense foam roller that leaves no brush marks. Position the stencil centrally on each riser, tape it firmly, and offload excess paint onto paper before rolling so the pattern stays crisp without bleed.
Move the stencil from the bottom riser upward so any drying paint never gets brushed by a sleeve, and clean the stencil with warm water every three risers to stop paint building up in the cut edges. Practice the motif on lining paper first, because the first attempt almost always needs lighter pressure. One stencil and two small tins of acrylic floor paint usually cost 30 to 45 pounds or dollars, a true budget project. The mistake to avoid is lettering or words; choose motifs without script, monograms or numbers, keeping the design to patterns only.
5. Paint the Banister and Newel Post in Deep Forest Green
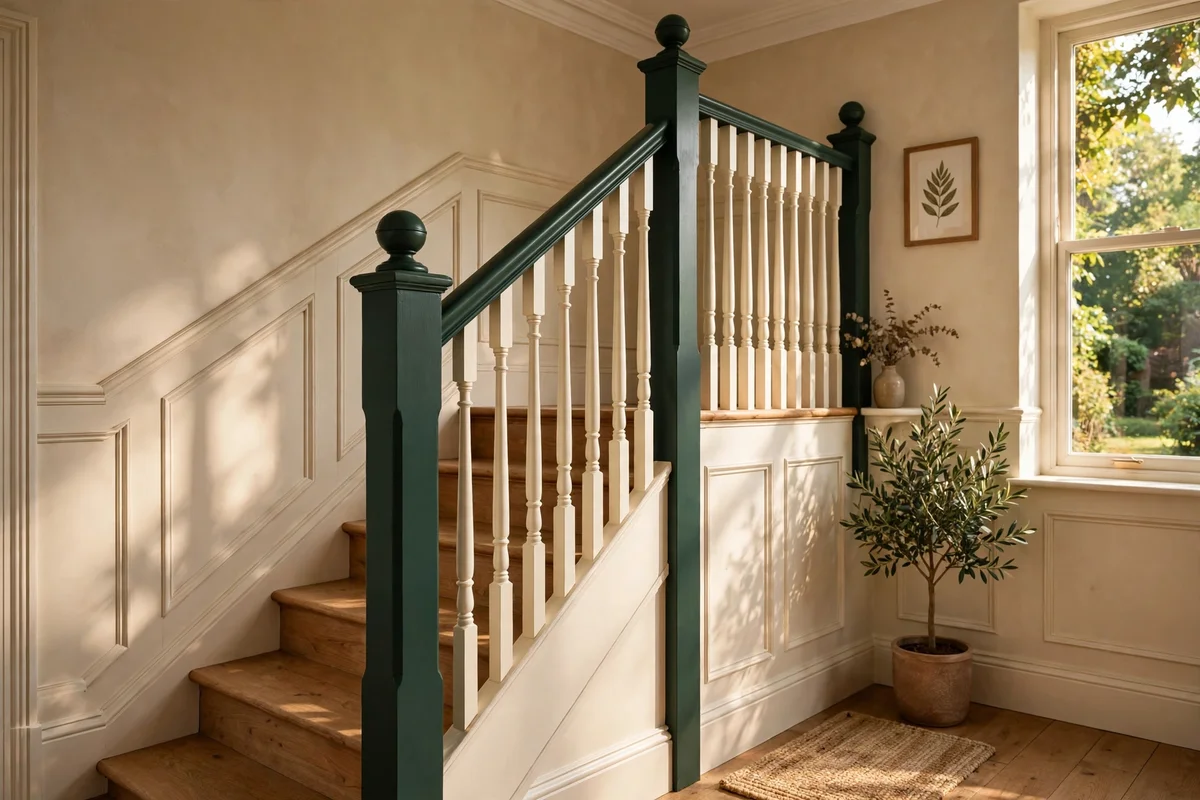
A banister painted in deep forest green anchors the whole hallway and gives the stairs the feel of heritage joinery without replacing a single baluster. Sand the handrail, newel posts and base rail to a smooth key, wipe away dust with a tack cloth, and apply a bonding primer before two coats of satinwood in the green. A satin sheen suits handrails because it resists the shine of daily hand contact better than gloss while still wiping clean with a damp cloth.
Keep spindles and risers cream so the green banister reads as one confident line rather than a heavy block of colour, and repeat the green once nearby, for example on the front door interior or a console table, for a considered look. Allow three full days of curing before the rail takes daily hand pressure, and keep a small tin labelled with the exact shade for scuff repairs. The mistake to avoid is painting over a waxy old finish without degreasing; sugar soap first, or the new paint will peel within the year.
6. Stir Slip Resistant Granules Into Every Tread Coating
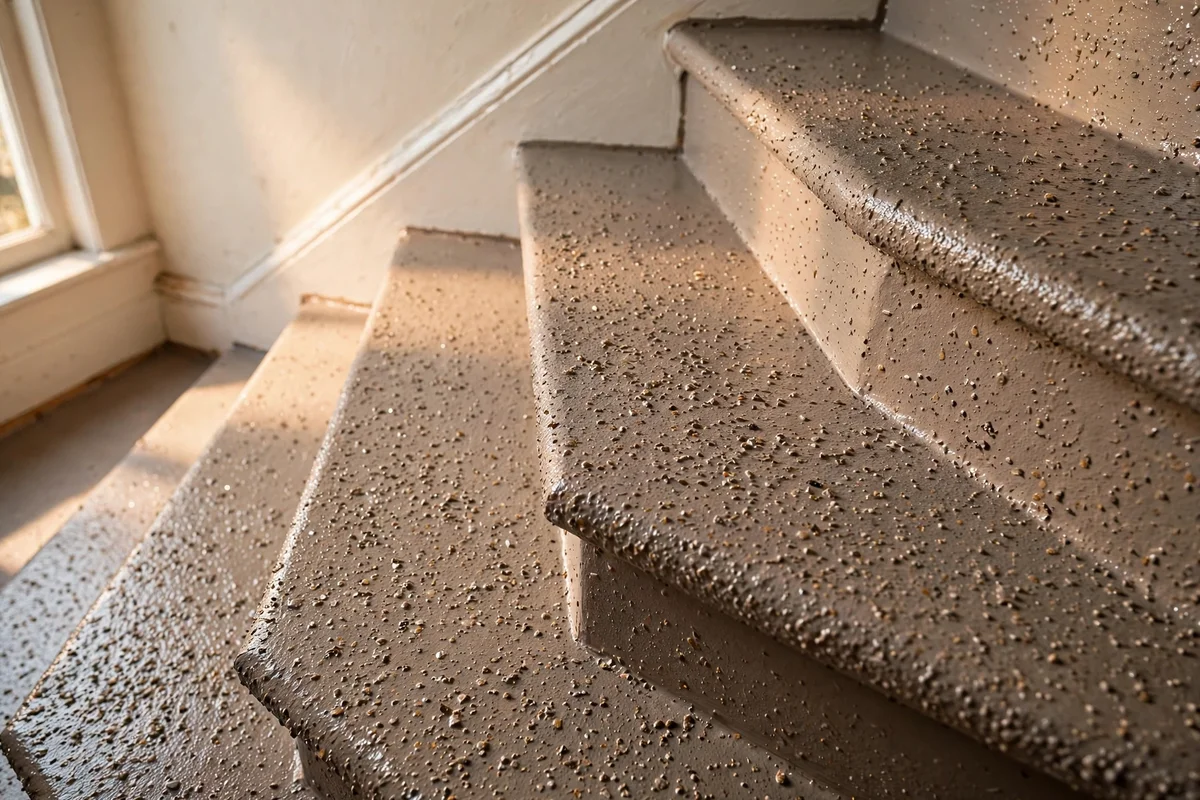
Slip resistance is the safety heart of a painted staircase, and fine anti-slip granules stirred into the tread paint create grip without changing the colour or sheen. Buy granules graded for domestic floors, not industrial aggregate, and dose exactly as the tin directs, usually one 250 g pouch per 2.5 litre tin, stirred thoroughly and re-stirred every fifteen minutes as you work. Apply with a short-pile roller in two even coats, rolling in one direction so the texture settles uniformly across every tread.
Never thin the tread paint beyond the manufacturer’s limit, because excess thinner leaves the granules stranded on the surface where feet polish them smooth within weeks. Test the finished grip with a dry shoe sole before the household uses the stairs, and add a second coat of granule mix on the centre of each tread where foot traffic concentrates. A pouch of granules costs around 8 to 12 pounds or dollars, the cheapest safety upgrade in this whole project. The mistake to avoid is sprinkling granules onto wet paint, which creates gritty islands that shed under daily wear.
7. Seal Treads With Two Clear Polyurethane Coats for Long Wear
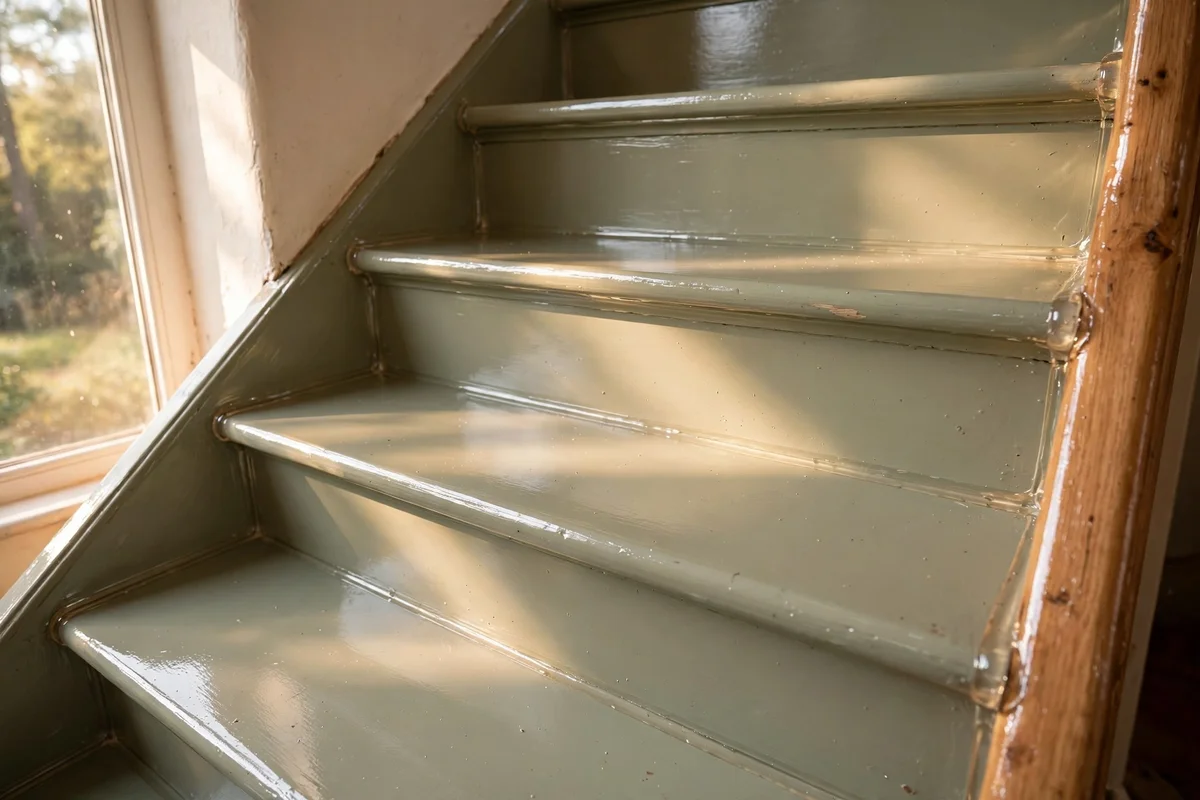
A clear polyurethane topcoat protects painted treads from scuffs, moisture and the daily shuffle of shoes, and two coats give noticeably longer life than one. Choose a water-based polyurethane with a satin finish so the tread keeps its colour depth without turning glassy, and check the tin says suitable for floors. Apply with a foam roller in thin coats, sanding lightly with 220 grit between coats to give the second coat a key, and keep windows open for airflow without letting dust settle on wet varnish.
Allow the full cure time printed on the tin, often seven days for floor varnishes, before rugs or runner mats go back on the stairs. If the treads already contain anti-slip granules, the polyurethane locks them in and the combination is the toughest domestic finish this guide recommends. Budget roughly 20 to 35 pounds or dollars for a litre of quality water-based polyurethane, enough for two coats on a standard flight. The mistake to avoid is recoating too early in cold weather; below 10 degrees the film clouds and stays soft for weeks.
8. Add a Contrasting Nosing Line So Every Step Edge Reads Clearly
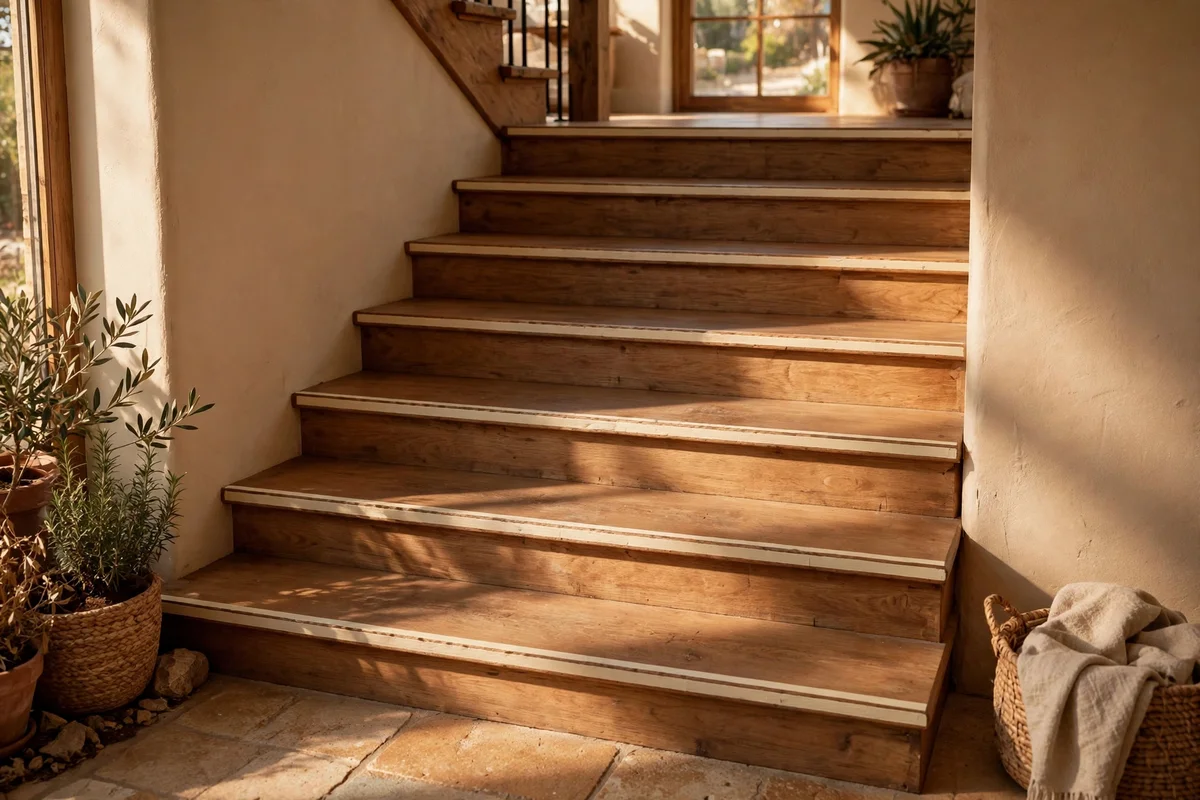
The nosing, the rounded front edge of each tread, is the most important visual cue on a staircase, and a contrasting line painted along it helps every foot land safely. Measure a band 25 to 40 mm wide along the full front edge of each tread and paint it in a colour that stands clearly against the tread base, for example cream on espresso or charcoal on sage. Use low-tack tape and a small artist brush, and paint nosings after the tread field is fully dry so the line stays razor sharp.
A visible nosing line matters most for grandparents, young children and anyone carrying laundry down the stairs, because edges blur in evening light. Keep the line colour consistent on every step; changing shades between treads confuses the eye and defeats the purpose. The line needs one maintenance check a year, since the nosing takes the most wear and the contrast fades first there. The mistake to avoid is making the band wider than 40 mm, which reads as a stripe rather than an edge marker and steals attention from the runner design.
9. Repair Loose Boards and Fill Every Hole Before Painting Begins
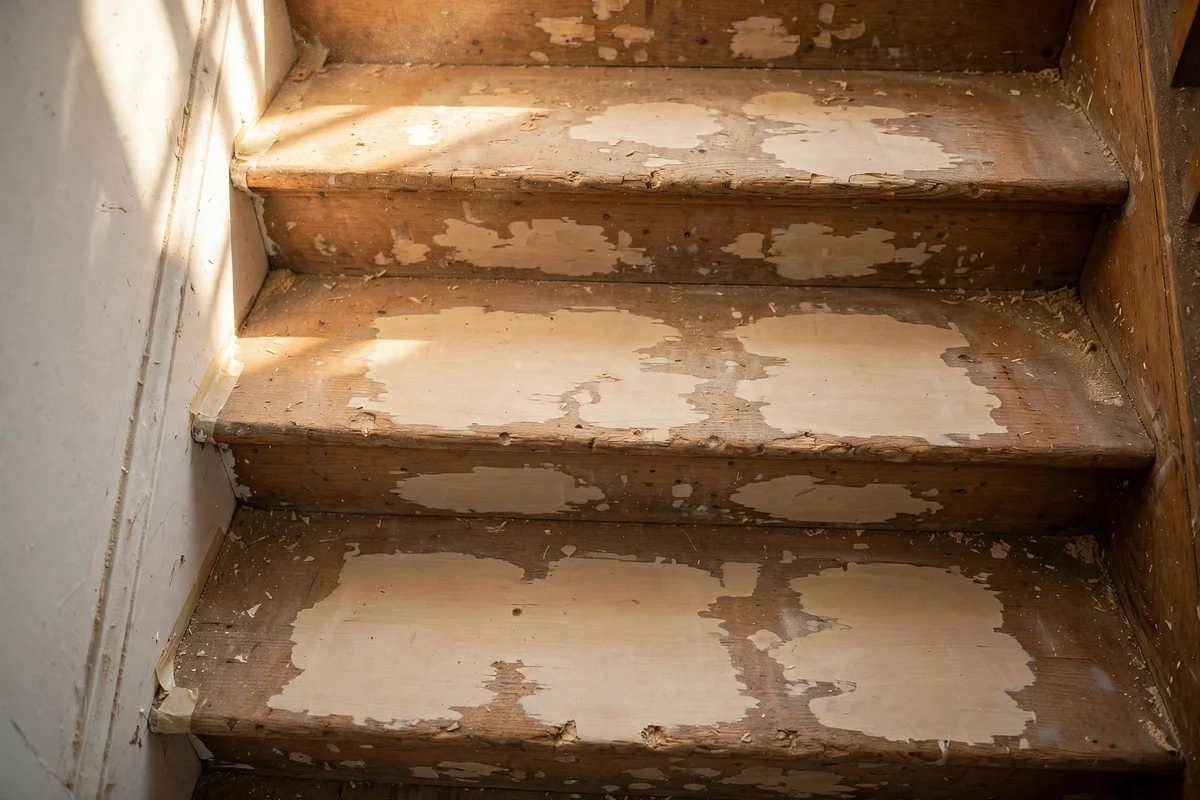
Paint never fixes movement, so every loose tread must be refixed before a brush comes out of the tin. Walk the flight slowly and mark each creaking or shifting tread with tape, then drive screws through the tread into the riser and the stringer, countersinking the heads 3 mm below the surface. Fill every screw hole, knot and old carpet tack hole with two-part wood filler, pressing it in firmly and overfilling slightly so it can be sanded flush once fully hard.
Allow filler 24 hours to cure, sand it flush with 120 grit, then vacuum and wipe every surface with a cloth so dust never gets trapped under primer. Check that no tread rocks when pressed at its front corner; a rocking tread needs wedges glued into the housing joints beneath, best done from the understair cupboard. The mistake to avoid is painting over a spongy, rotten tread end; cut it out and splice in new timber, because paint hides decay while the board keeps weakening. Budget 15 to 30 pounds or dollars for screws, filler and a pack of sandpaper.
10. Choose a Matte Finish for Risers and Satin for Treads
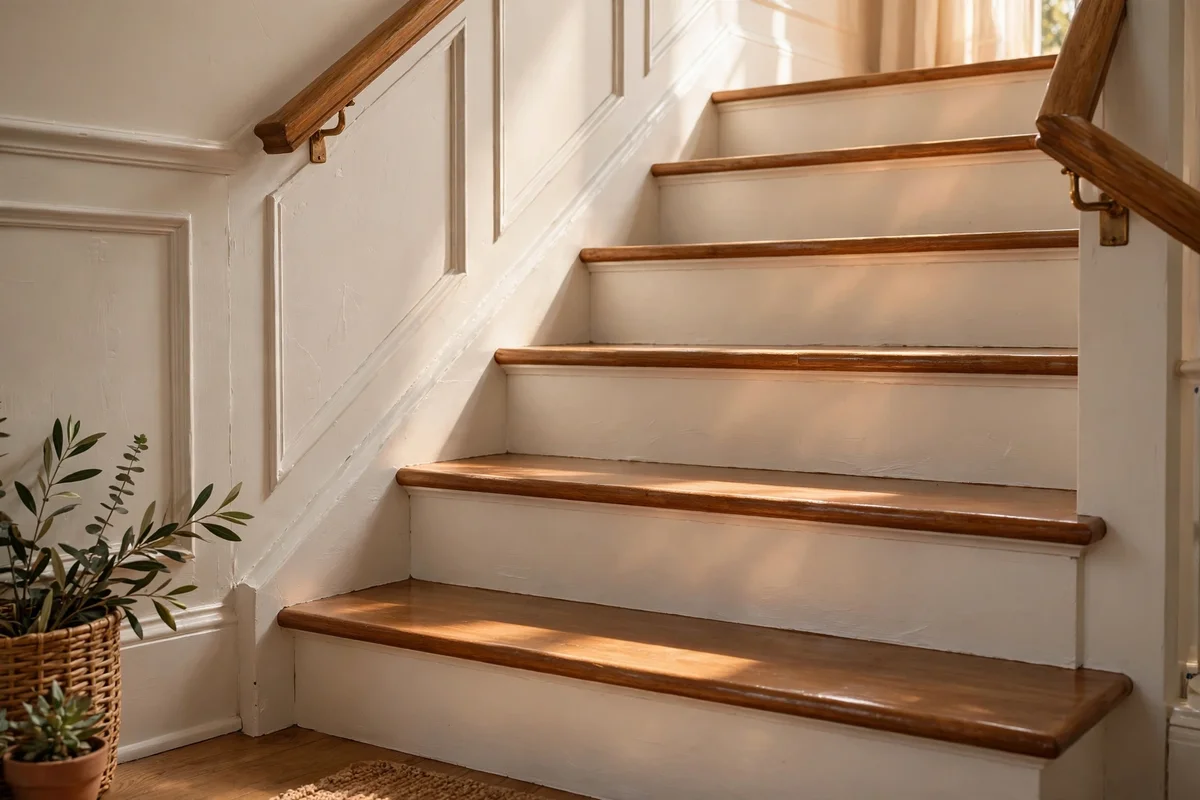
Different sheens on different parts of the staircase is a professional trick that looks intentional and wears better. Risers take no foot traffic, so a matte or eggshell emulsion keeps them calm and hides the brush texture, while treads need a satin floor paint that resists scuffs and wipes clean after muddy shoes. Buy the same colour family in both finishes, for example matte cream risers with satin cream treads, and the staircase reads as one elegant unit rather than two competing paints.
Never use full gloss on treads, because a glossy walking surface turns slippery when dust settles and shows every scratch within weeks. Label each tin clearly with a marker, riser or tread, since matte and satin look identical in the can and mixing them up means repainting. The two-finish approach adds no cost beyond buying the right tins in the first place, roughly the same 60 to 90 pounds or dollars as any standard stair paint job. The mistake to avoid is a chalky flat paint on treads; it marks permanently the first time anyone walks up in damp socks.
11. Paint the Stringer Board a Deep Tone to Frame the Flight
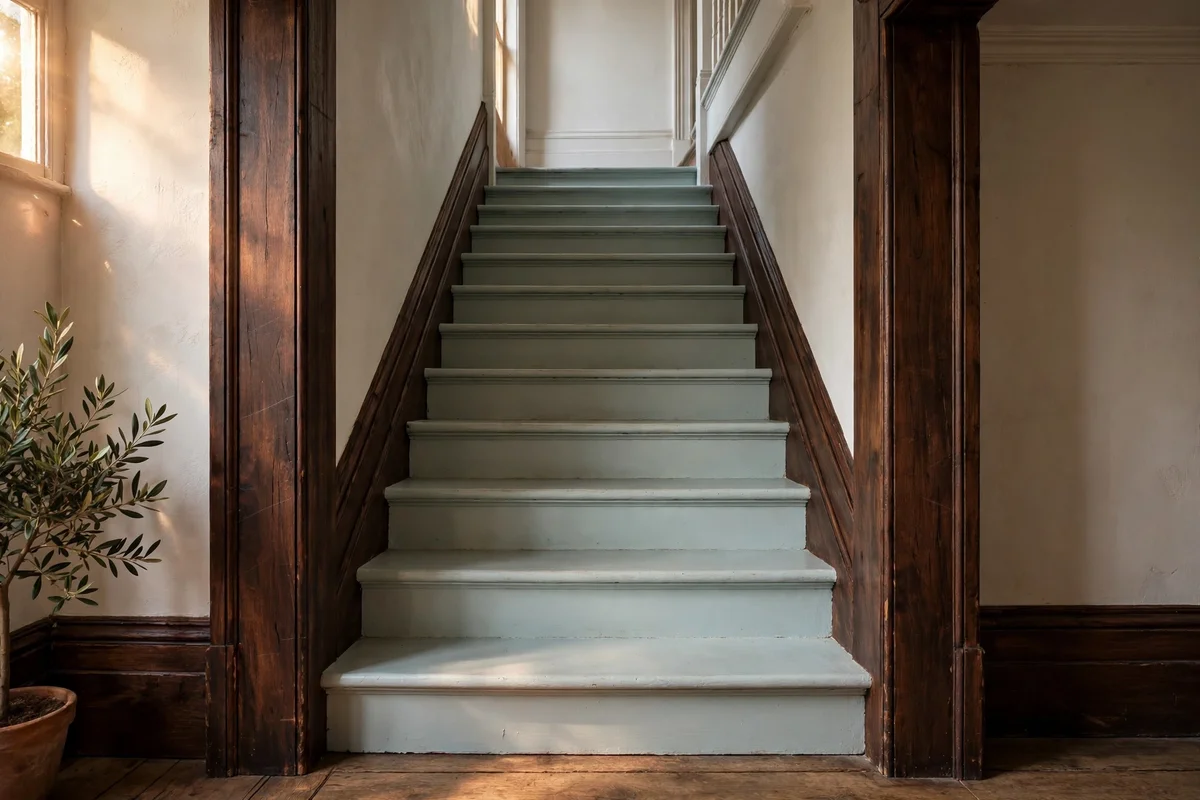
The stringer, the long diagonal board that carries the ends of the treads, becomes a picture frame for the staircase when painted in a deep tone such as charcoal, forest green or inky navy. Two coats of satinwood over primer are enough, applied with a 50 mm angled brush that follows the stepped edge neatly. A dark stringer hides the shadow line where tread meets wall, making a narrow staircase look wider and every step more defined.
Continue the stringer colour onto the skirting boards that run alongside the stairs so the frame reads as one continuous line up the flight. Keep treads and risers lighter than the stringer for contrast; a dark stringer against cream risers is the classic pairing that suits heritage and modern hallways alike. The mistake to avoid is leaving the wall edge of the stringer uncaulked; run a thin bead of decorator caulk along the top edge first, or the dark paint will highlight every gap against the wall.
12. Carry the Runner Colour Onto the Hallway Floor in One Line
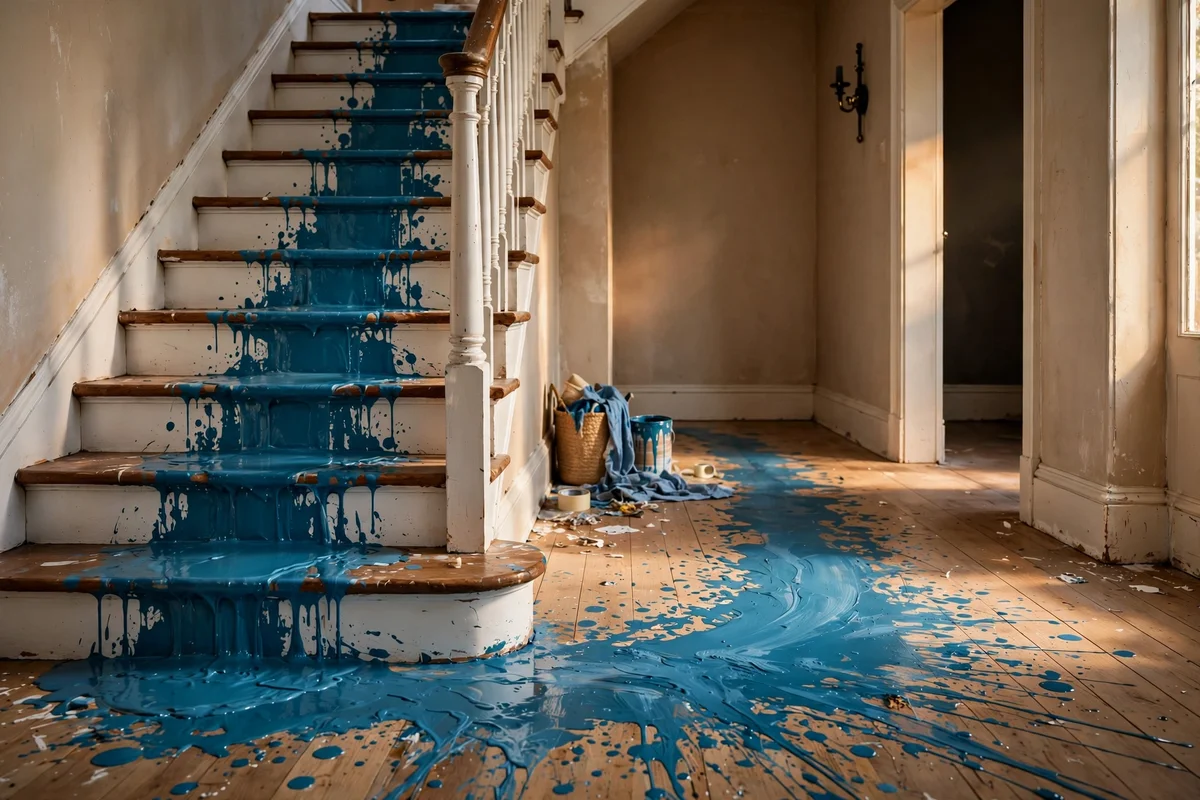
Extending the painted runner beyond the last step and across the hallway floor turns the staircase into a path that guides guests from the front door to the stairs. Mark a band the same 70 cm width as the stair runner on the hallway floorboards or on a plain painted floor, using a chalk line for a straight run of several metres. Tape both edges, apply two coats of the same floor paint used on the stairs, and stir in the same anti-slip granules so the whole path shares one safe finish.
Stop the floor line at a natural boundary such as a doorway threshold or the edge of a rug, never mid-floor where it looks unfinished. Let the floor paint cure a full week before placing furniture on it, since hallway floors take constant traffic. The mistake to avoid is painting the runner over loose vinyl or lifting tiles; secure or remove the old covering first, because paint follows every bubble and edge underneath. This extension usually needs one extra litre of paint, adding about 15 to 25 pounds or dollars to the project.
13. Alternate Riser Motifs in a Gentle Two Colour Rhythm
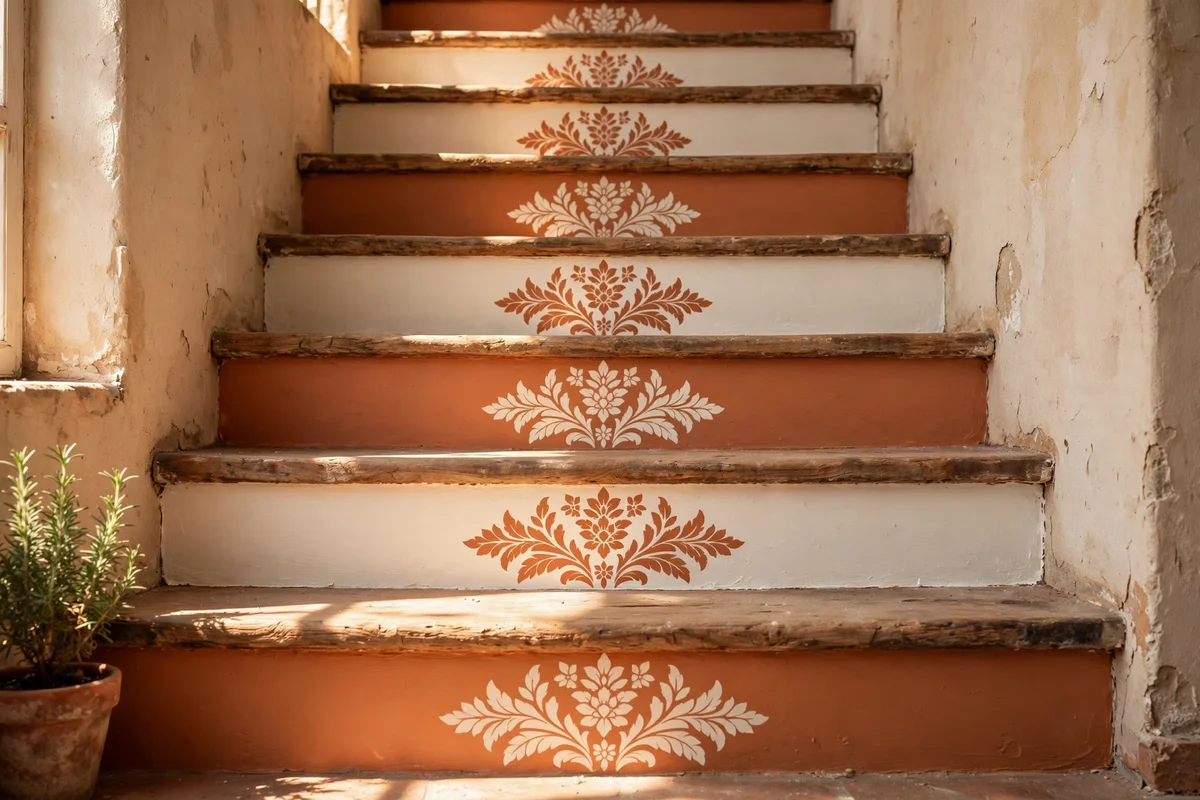
Alternating two stencil motifs, or one motif in two colours, gives risers a handcrafted tile rhythm without the fuss of matching real tiles. Stencil the odd-numbered risers in soft sage and the even-numbered risers in warm cream on a shared neutral base, or swap two different geometric patterns on alternating steps. Keep the shapes simple, diamonds or quarter circles work beautifully, so the pattern reads clearly from the hallway and never turns dizzying on a long flight.
Plan the rhythm on paper first, numbering risers from the bottom and marking which motif each one takes, because one misplaced stencil breaks the whole pattern. Clean the stencil between colours so sage never smudges into cream, and let each riser dry fully before stencilling its neighbour. The mistake to avoid is choosing colours too close in tone; neighbours need clear contrast to read as a rhythm rather than a blur. Two small tins and one stencil keep this a budget project at 35 to 55 pounds or dollars.
14. Use a Stair Gauge and Painter Tape for Crisp Runner Borders
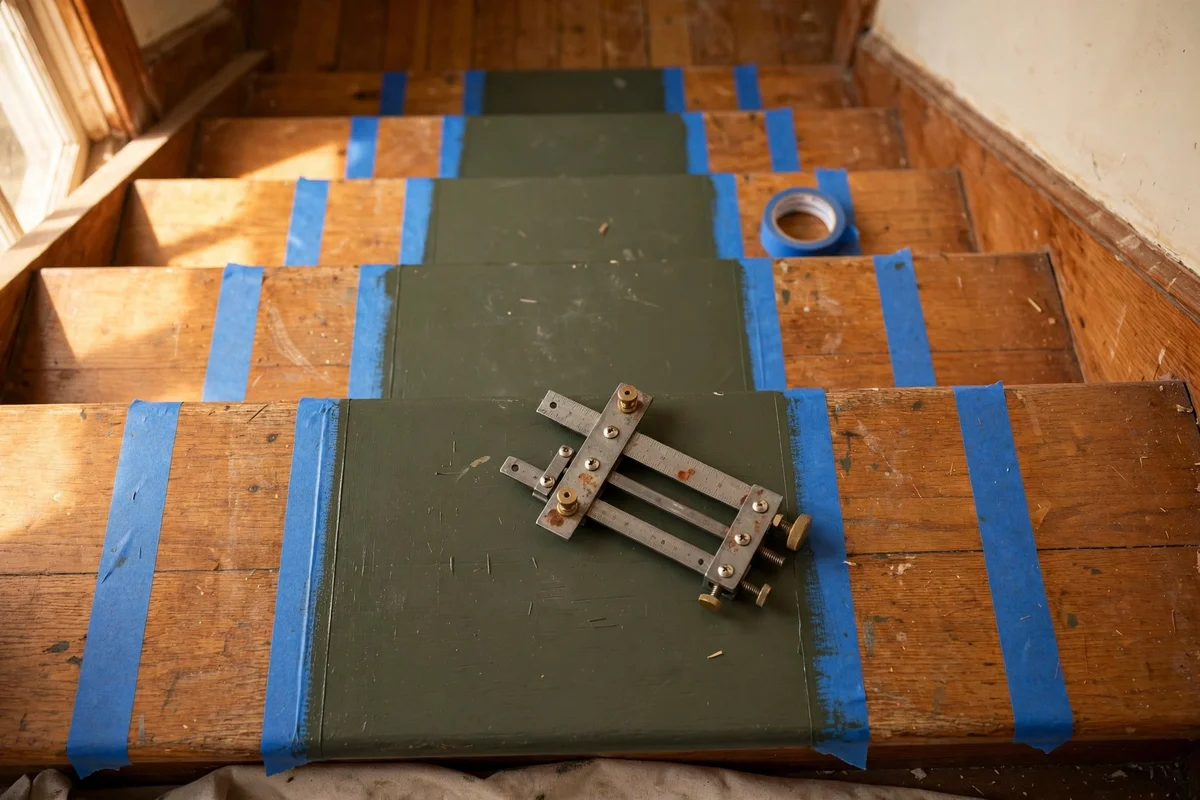
Crisp runner borders come from careful measuring, not a steady hand, so make a simple stair gauge from two pieces of batten screwed into an L shape that hooks over each tread nosing. Set the gauge once at 35 cm from the centre line, then slide it along every step to mark identical border positions in seconds. Press low-tack painter tape firmly along the marks and burnish the inner edge with a credit card so paint cannot creep underneath.
Remove the tape while the final coat is tacky, pulling it back on itself at a sharp angle for the cleanest line. If a small bleed still appears, touch it up with the base colour on a fine artist brush once everything is dry; no one will spot the repair from standing height. The gauge and a roll of quality tape cost under 15 pounds or dollars and save hours of remeasuring. The mistake to avoid is cheap masking tape on freshly painted treads; it lifts the base coat, so only low-tack painter tape touches cured paint.
15. Sand Treads to 120 Grit and Apply Bonding Primer First
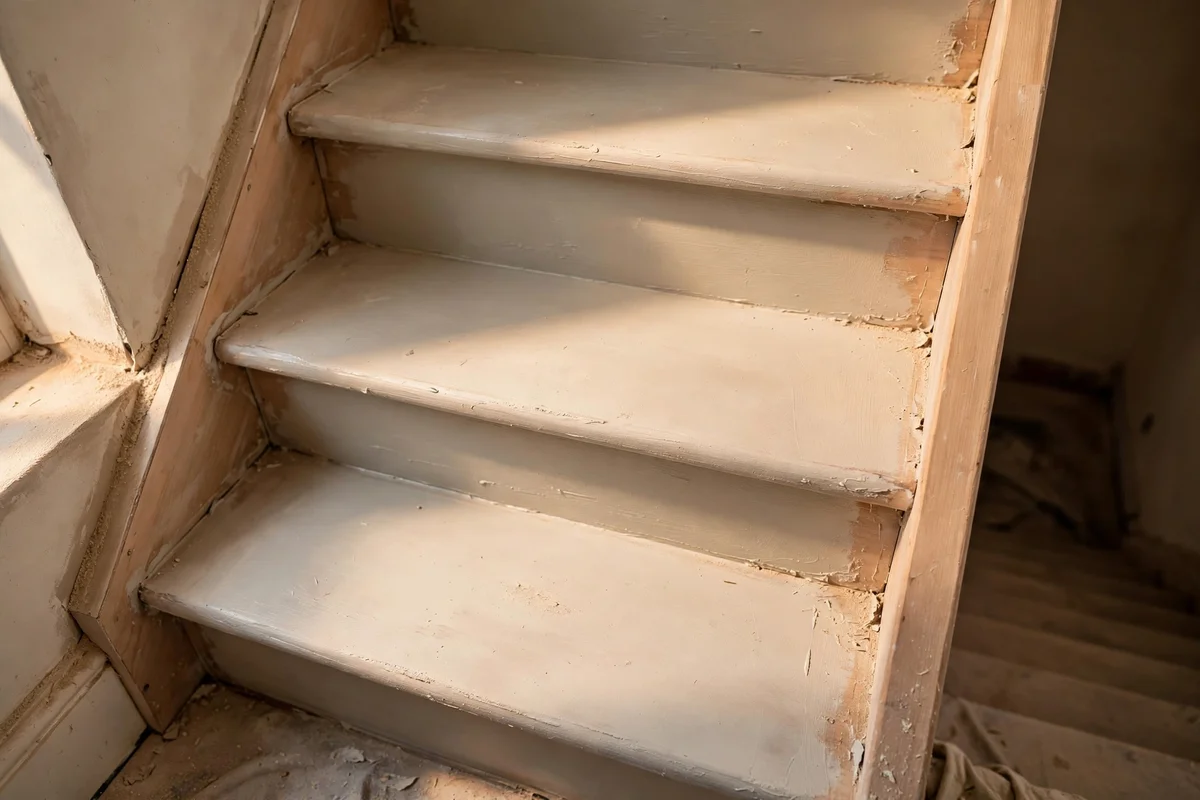
Paint sticks only to a properly prepared tread, so sand every walking surface to 120 grit to remove old varnish shine and open the wood grain. Use a detail sander for the flat field and fold sandpaper around a sanding block for the nosing curve, then vacuum thoroughly and wipe with a tack cloth until the cloth comes away clean. Brush on one even coat of bonding primer, which grips glossy old finishes far better than standard undercoat and stops the topcoat peeling under shoe pressure.
Let the primer cure for the full time on its tin, usually 24 hours, before the first colour coat, because rushing this step causes the most common stair paint failure. Wear a dust mask and open windows while sanding, and keep pets and children off the stairs until every coat is hard. A bonding primer tin, sandpaper and a tack cloth cost about 20 to 30 pounds or dollars together. The mistake to avoid is sanding against the grain on the final pass; scratches show straight through dark paint and spoil the whole finish.
16. Paint the Understair Door to Match the New Stair Scheme
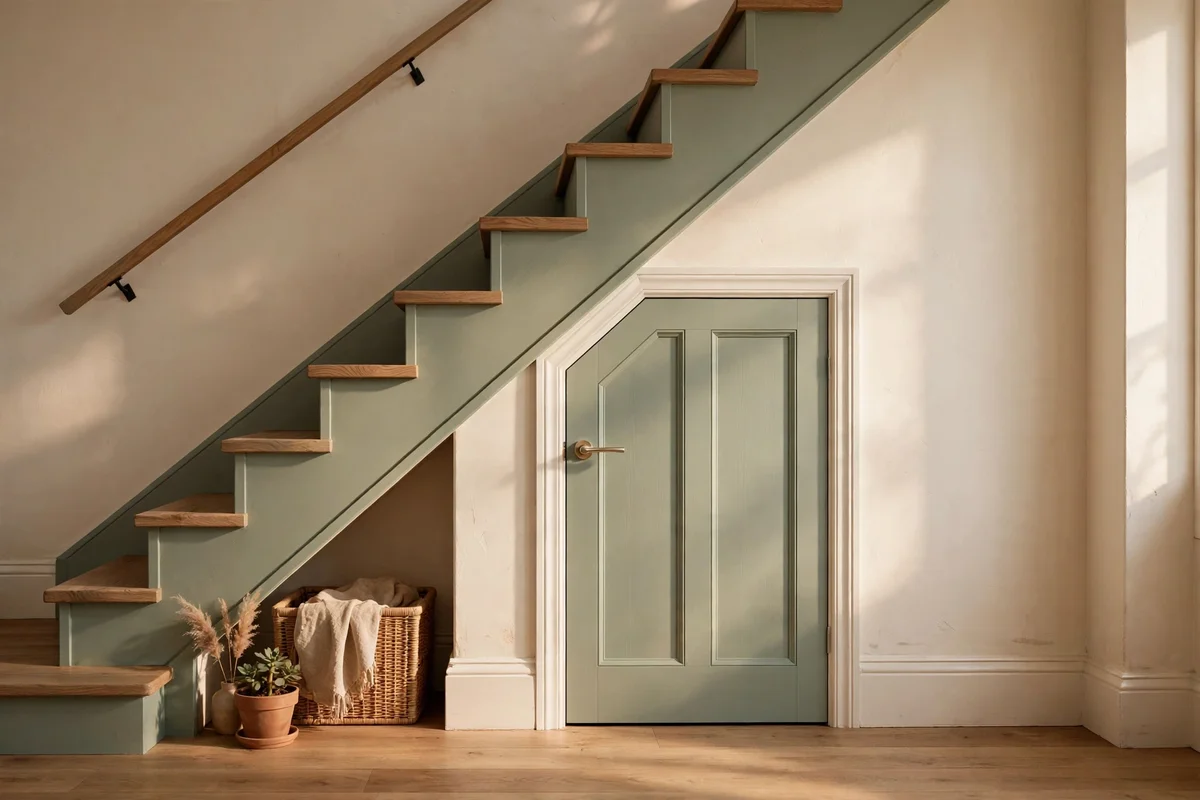
The little door under the stairs often gets forgotten, yet it sits at eye level beside the flight and spoils the scheme when left in old white gloss. Paint it to match the risers or the stringer colour, using the same primer and topcoat system so the sheen matches the staircase exactly. Remove the handle and hinges first, or tape them neatly, and paint the door flat on sawhorses so drips cannot run down the face.
While the door is off, paint the inside of the understair cupboard in a light wipeable colour so stored shoes and cleaning things stay visible in the dark space. Refit the handle after the paint has cured for at least 48 hours, tightening screws gently so the fresh finish does not crack. This finishing touch costs nothing extra, just leftover paint from the stair tins. The mistake to avoid is painting the door shut in its frame; always remove it, or the door glues itself closed with a ring of paint that tears the finish when forced open.
17. Brighten a Dark Hallway With Pale Grey Risers and Soft White Treads
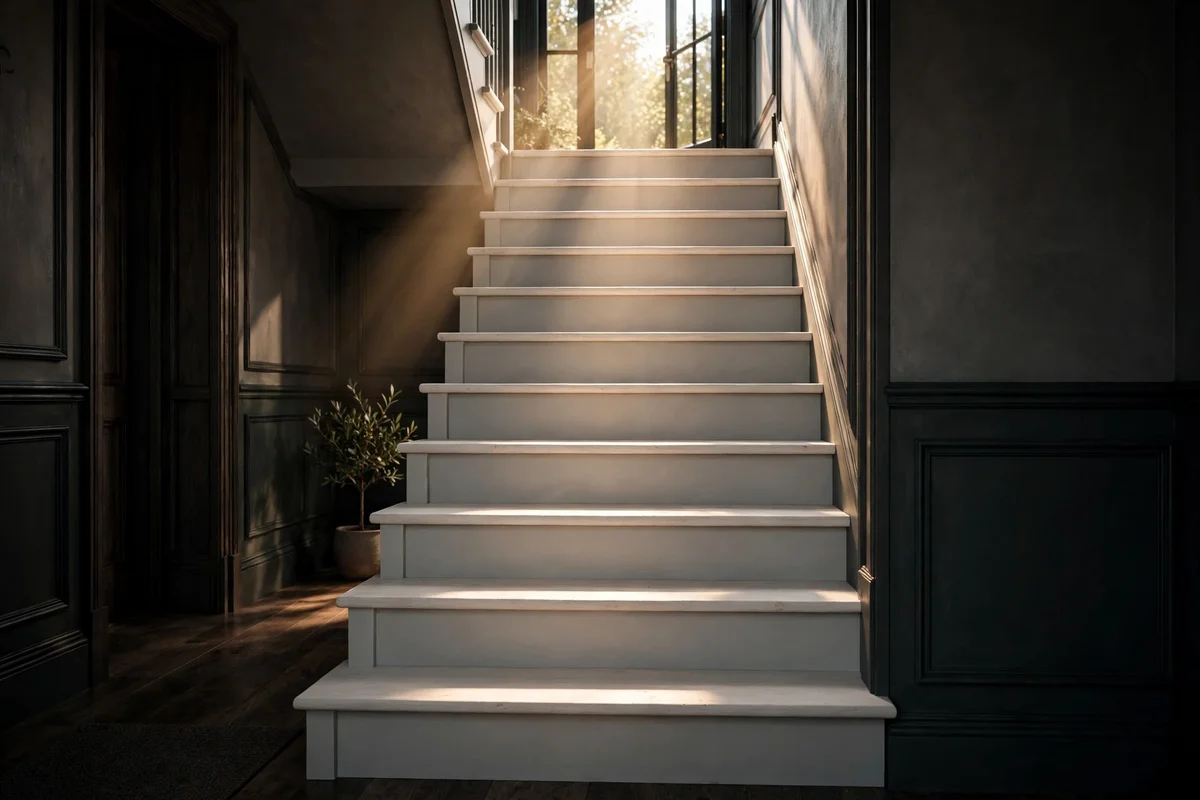
A hallway with no windows can feel like a tunnel, but pale grey risers with soft white treads bounce every scrap of available light up the flight. Choose a warm grey with a hint of beige, such as greige, so the scheme stays welcoming rather than cold, and pair it with an off-white tread that hides dust better than brilliant white. Paint the ceiling and the far wall in the same off-white to keep light moving, and add a warm 2700K stair light if the budget allows.
Keep the nosing line crisp even in this pale scheme, using a mid grey band on white treads so each edge still reads clearly for safe footing. Matte risers and satin treads suit this light scheme best, hiding marks on the risers while the treads wipe clean. Expect the full light scheme to use one extra tin of white compared with a darker design, adding about 20 pounds or dollars. The mistake to avoid is brilliant white everywhere; it glares under hallway lighting and shows every scuff from shoe edges within days.
18. Paint the Handrail Dark and Keep the Spindles Cream
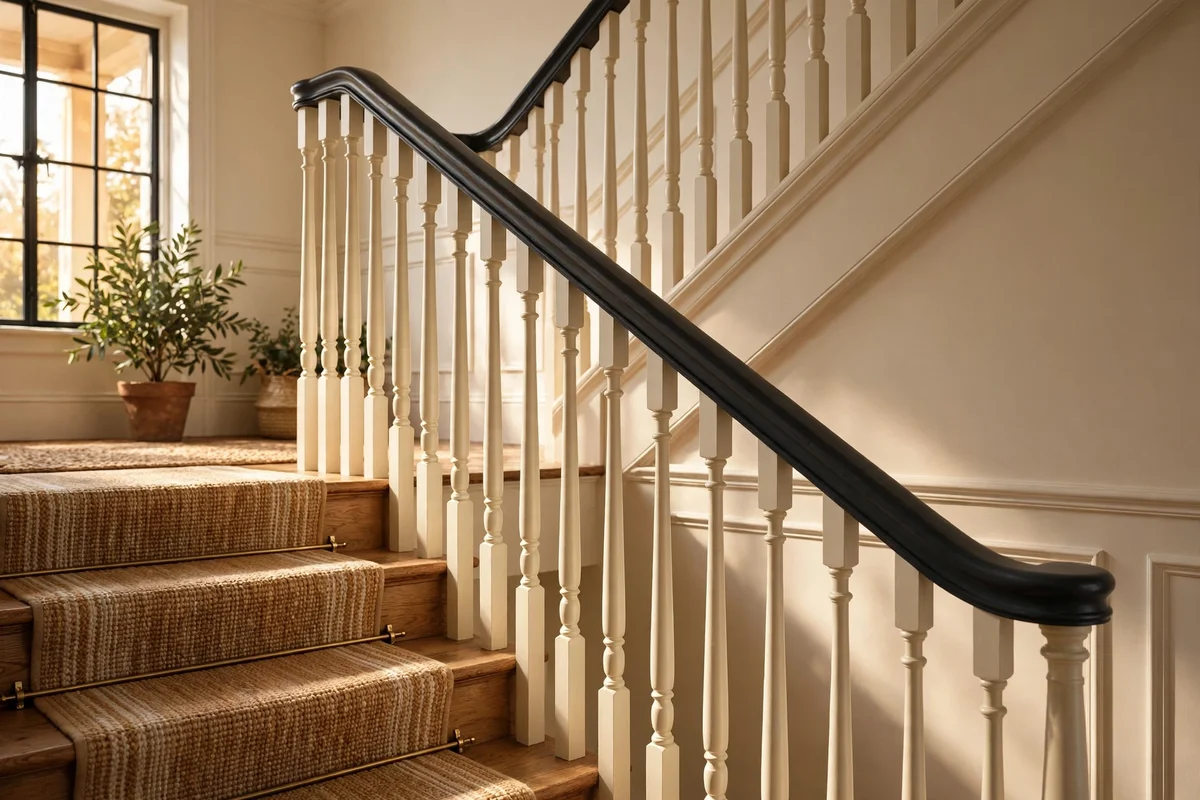
Painting only the handrail in a deep tone, such as charcoal or deep navy, while keeping spindles cream creates a two-tone banister that feels tailored and timeless. Sand the handrail smooth along its length, since hands find every rough spot, and apply two coats of satinwood over bonding primer. Cream spindles need two coats of satin too, and painting them with a small roller sleeve speeds the job enormously compared with a brush on every spindle.
Tape the wall and the newel post caps before painting the handrail, and work from the top newel downward so drips land on unpainted wood rather than finished coats. Allow the handrail three full days of curing before daily hand contact, longer in damp weather. This partial paint job suits renters too, since a single handrail repaints easily at move-out. The mistake to avoid is painting spindles before the handrail; always finish the top rail first so brush marks from the rail work never land on clean cream spindles.
19. Let the Landing Carry the Deepest Shade of the Ombre Sequence
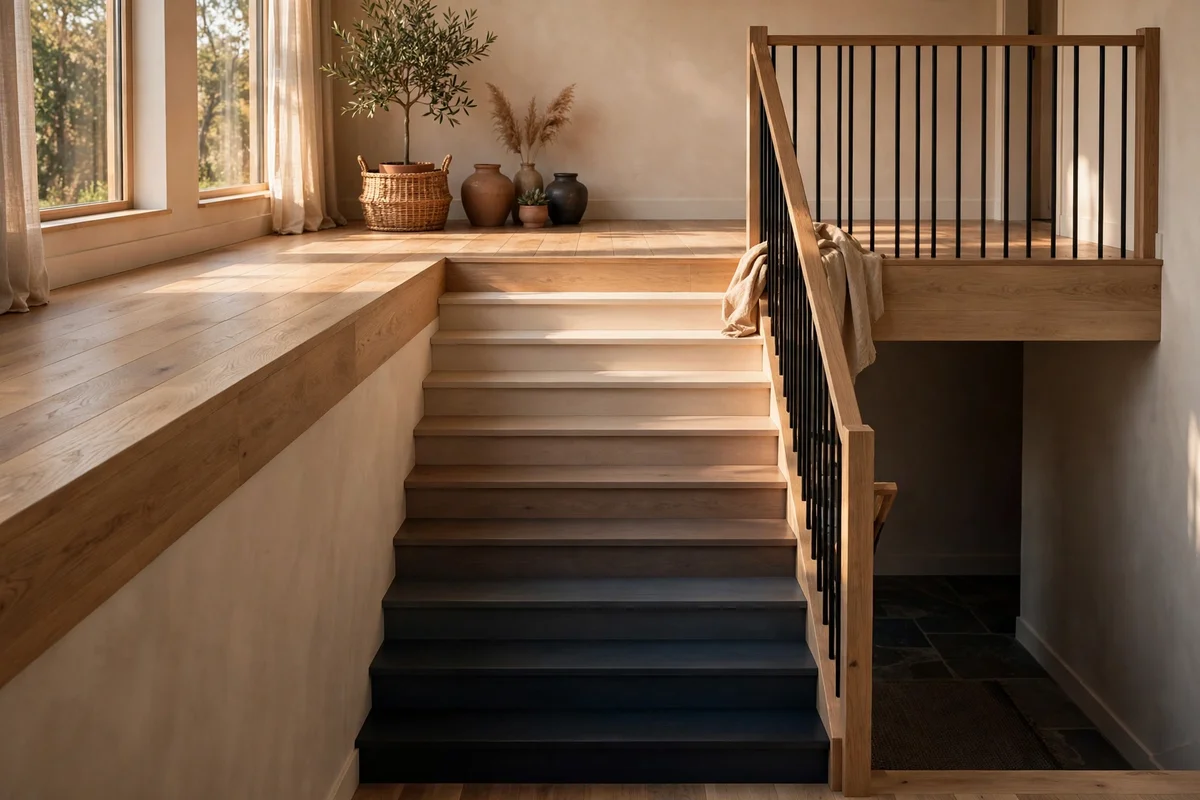
In an ombre staircase the landing deserves the deepest shade of the sequence, grounding the whole composition like a full stop at the top of the flight. Paint the landing floorboards or landing carpet boards in the final dark tone, for example the inky navy from the blue ombre, and carry the same shade onto the landing skirting. This anchors the eye as it climbs and gives the upper hallway a confident, finished feeling that plain landings never achieve.
Protect the landing with the same anti-slip and polyurethane system as the treads, since the landing takes turning foot traffic that wears paint fastest. If the landing is large, consider painting a simple border in the mid ombre shade to frame the dark centre, echoing the runner borders below. The mistake to avoid is ending the ombre at the top riser and leaving the landing in old varnish; the sudden unfinished patch breaks the gradient and makes the whole sequence look like an accident rather than a design.
20. Add a Double Pinstripe Border Inside the Painted Runner
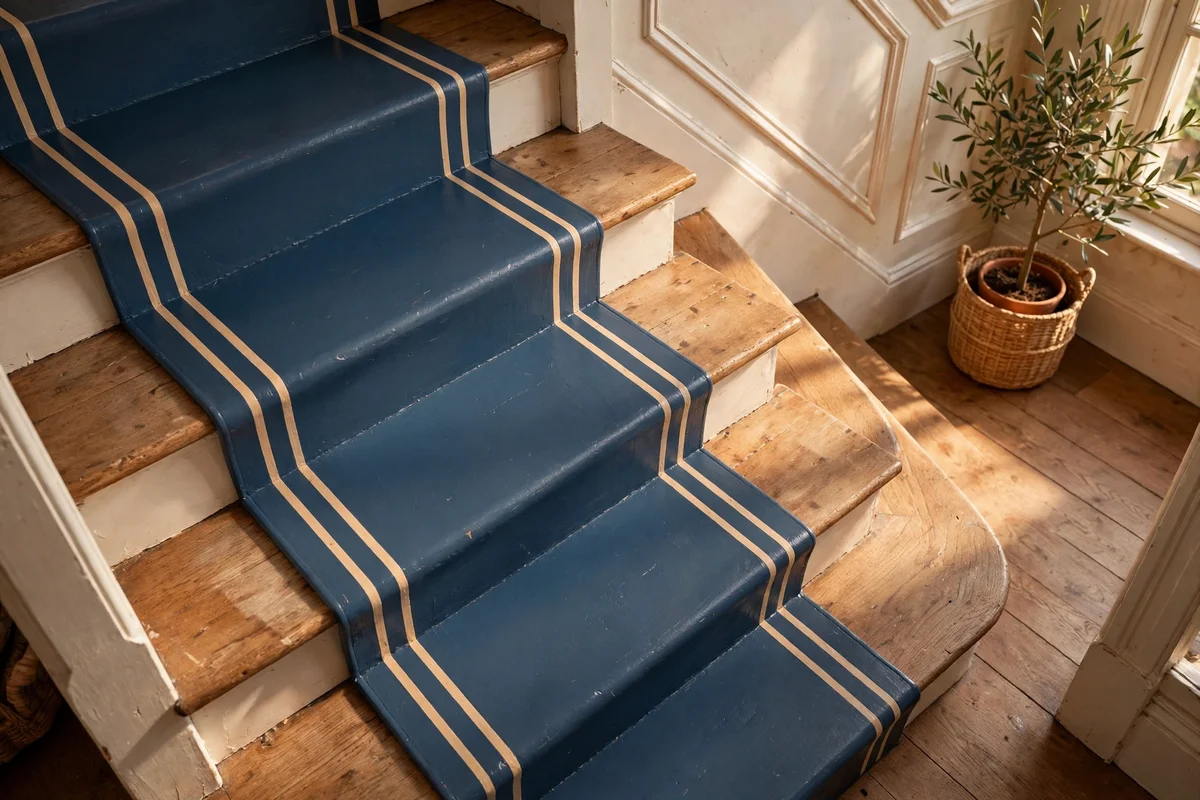
A double pinstripe border inside the painted runner adds a tailored, heritage detail that lifts a simple band into a crafted feature. After the runner base is dry, tape two parallel lines 8 mm apart just inside each outer border and paint them in the accent colour, for example cream pinstripes inside a sage runner. Use a 10 mm artist brush and steady the painting hand against the step; the short lines are forgiving and easy to keep straight over small distances.
Keep the pinstripes thin, because a border wider than 10 mm starts competing with the runner itself for attention. Mix anti-slip granules into the pinstripe paint as well so the whole runner surface shares one safe texture. One small tin of accent paint covers every pinstripe and costs roughly 10 to 15 pounds or dollars. The mistake to avoid is painting pinstripes before the runner base has fully cured; tape pulls the soft base colour straight off and ruins a morning of careful measuring.
21. Stencil a Diamond Lattice on the Stair Stringer in Cream
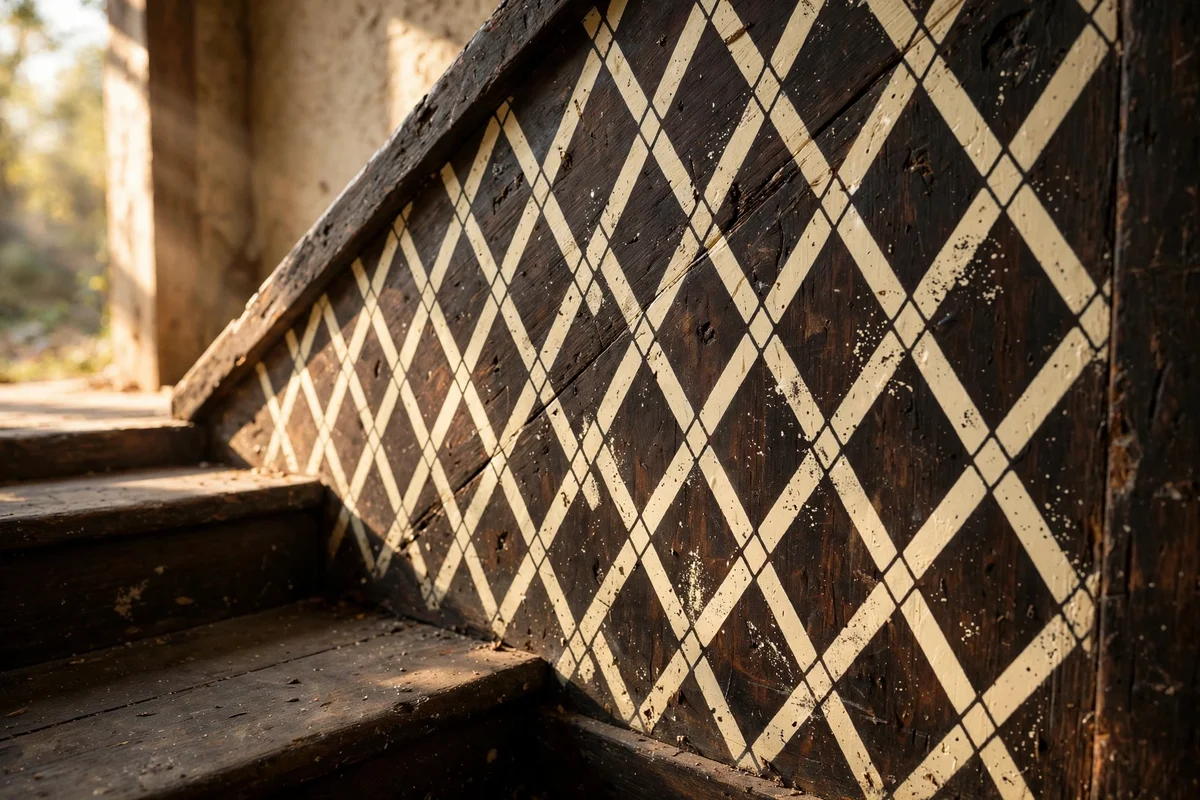
A diamond lattice stencilled along the stringer in cream over a deep tone adds quiet craftsmanship to the diagonal board most people ignore. Cut or buy a small diamond stencil about 10 cm tall, position the first diamond at the bottom of the stringer, and step the pattern evenly up the slope using the stencil edge as a spacing guide. Cream over charcoal or forest green gives the clearest contrast, and the lattice reads as woven heritage detail from the hallway.
Keep the stringer the only patterned surface when the risers are already stencilled, since two competing patterns make the staircase feel restless. A small tin of cream satinwood and the stencil cost under 20 pounds or dollars, and the job takes one relaxed afternoon. The mistake to avoid is a stencil with lettering or words; keep this lattice to pattern only, so check the stencil design carries no script, numbers or brand marks before buying.
22. Number Every Step on Tape Before Stripping the Old Carpet
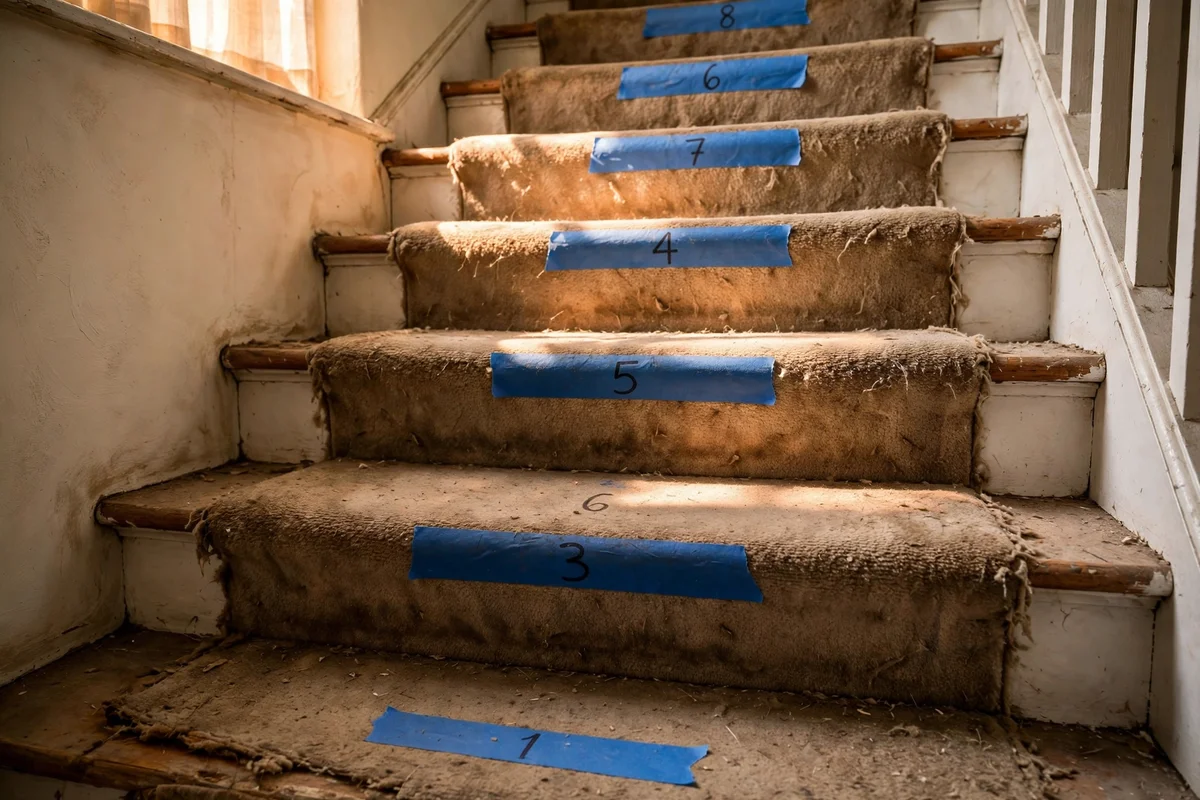
Before stripping old carpet, press a strip of painter tape on each tread and number it from the bottom, because treads removed for sanding or repair must return to their exact positions. Photograph the numbered flight from two angles as a backup record, and bag the fixings from each tread in a labelled sandwich bag. This ten-minute habit prevents the classic disaster of a tread that almost fits its housing but rocks because it belongs two steps higher.
Pull carpet staples with pliers rather than a screwdriver to avoid gouging the tread nosing, and collect every staple in a jar so bare feet never meet a missed one. Check the tread wood under the carpet before buying paint; stained or damaged boards may need replacing, which changes the budget and the schedule. The mistake to avoid is ripping up carpet on painting day; strip and prepare one weekend, then paint the next, because dust from stripping ruins fresh paint and rushing both jobs invites loose boards to go unnoticed.
A painted staircase changes the hallway more than almost any other single project, because every trip up and down passes through the new colours. Start with the easiest win this week, which is the painted runner down the centre; one afternoon of measuring and taping gives the whole flight a crafted look for under 50 pounds or dollars. Keep the safety rules front of mind, anti-slip granules in the tread paint, a clear nosing line, and no painting over loose boards.
Once the runner is dry and the nosing lines are crisp, step back and enjoy the hallway before deciding the next project, perhaps the ombre risers or the deep green banister. Painted stairs reward patience more than speed, so let each coat cure fully and fix loose boards properly the first time. The hallway will thank you with years of calm, heritage colour that welcomes everyone who climbs it.
Frequently Asked Questions
How much does it cost to paint a staircase?
Between 80 and 200 pounds or dollars for a standard straight flight, covering primer, two coats of floor paint, tape and brushes. Adding anti-slip granules and polyurethane topcoat pushes the total toward 250. Labour is the real cost if you hire a decorator, often 300 to 600 for the same job. Doing it yourself over two weekends keeps the project firmly in budget territory.
What is the best paint for stair treads?
A dedicated floor paint or a porch and floor enamel, since wall emulsion scuffs within weeks under shoe traffic. Look for tins marked suitable for wood floors with a satin finish, and always use the matching primer from the same range. Stir in fine anti-slip granules made for domestic floors. Avoid full gloss on treads; it turns slippery when dusty.
How do I make painted stairs less slippery?
Stir fine anti-slip granules into the tread paint at the dose printed on the pouch, usually one 250 g pouch per 2.5 litre tin, and re-stir every fifteen minutes while painting. Seal with a floor-rated clear coat, keep a contrasting nosing line so edges read clearly, and wipe dust off treads weekly. Never rely on smooth gloss paint alone on a walking surface.
Can I paint stairs in a rented home?
Often yes with the landlord’s written permission, especially when you choose a classic scheme such as cream risers and dark treads that improves the property. Keep the original carpet or boards stored safely if you remove them, and photograph everything before you start. Avoid bold personal colours that the next tenant may dislike. A painted runner that matches the hallway is usually the easiest sell to a landlord.
How long does painted staircase paint take to cure?
Most floor paints feel dry in 4 to 6 hours but need 48 hours before normal foot traffic and a full 7 days before rugs or mats go back down. Polyurethane topcoats need the same week to harden fully. Plan the project so the household can use an alternative route, and paint alternate treads on different days if the stairs must stay in use. Cold rooms below 10 degrees slow every stage.