Home Improvement
25 Built In Cabinet Ideas That Add Storage, Craft and Character to Every Room
By Anna Wells · · 25 min read
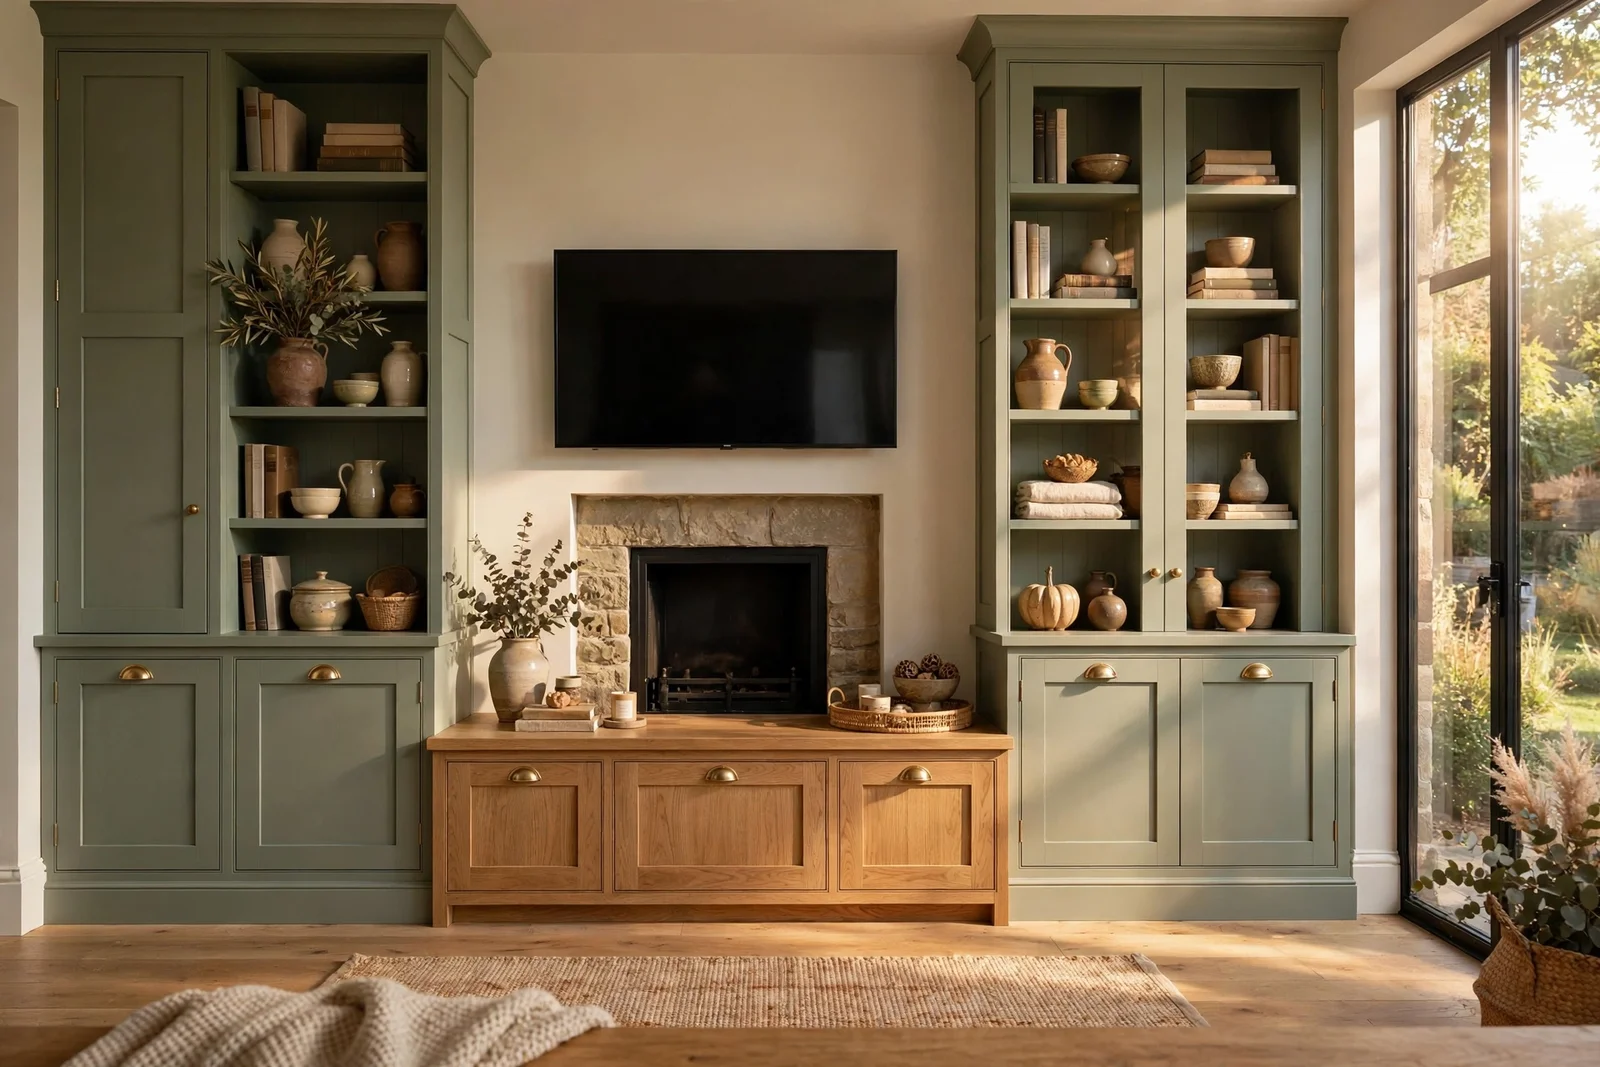
Every home has that one corner where clutter lands and never leaves: the hallway table buried under post, the living room shelf of tangled cables, the bedroom chair that holds clothes instead of people. Built in cabinets answer this quiet frustration better than any freestanding piece, because they turn dead wall space into storage that belongs to the room.
Every home has that one corner where clutter lands and never leaves: the hallway table buried under post, the living room shelf of tangled cables, the bedroom chair that holds clothes instead of people. Built in cabinets answer this quiet frustration better than any freestanding piece, because they turn dead wall space into storage that belongs to the room.
The beauty of a built in is that it works twice as hard as ordinary furniture. A media wall hides the tangle of television wires while displaying the books you love. A window seat gives the family a reading perch while swallowing the toy overflow. Each piece is planned once, built properly, and then simply serves the household for decades.
This collection gathers 25 built in cabinet ideas room by room, from living room media walls and dining room serving cabinets to hallway drop zones and bedroom wardrobe walls. You will find door styles, hardware choices and paint colours that suit cabinetry, plus honest guidance on measurements, clearances and budgets.
Whether you commission bespoke joinery or dress flat pack carcasses with custom fronts, the principles stay the same. Measure carefully, choose materials that forgive daily life, and finish each project properly. Let us begin with the room where most families spend their evenings.
1. Build a Living Room Media Wall With Deep Closed Storage Below
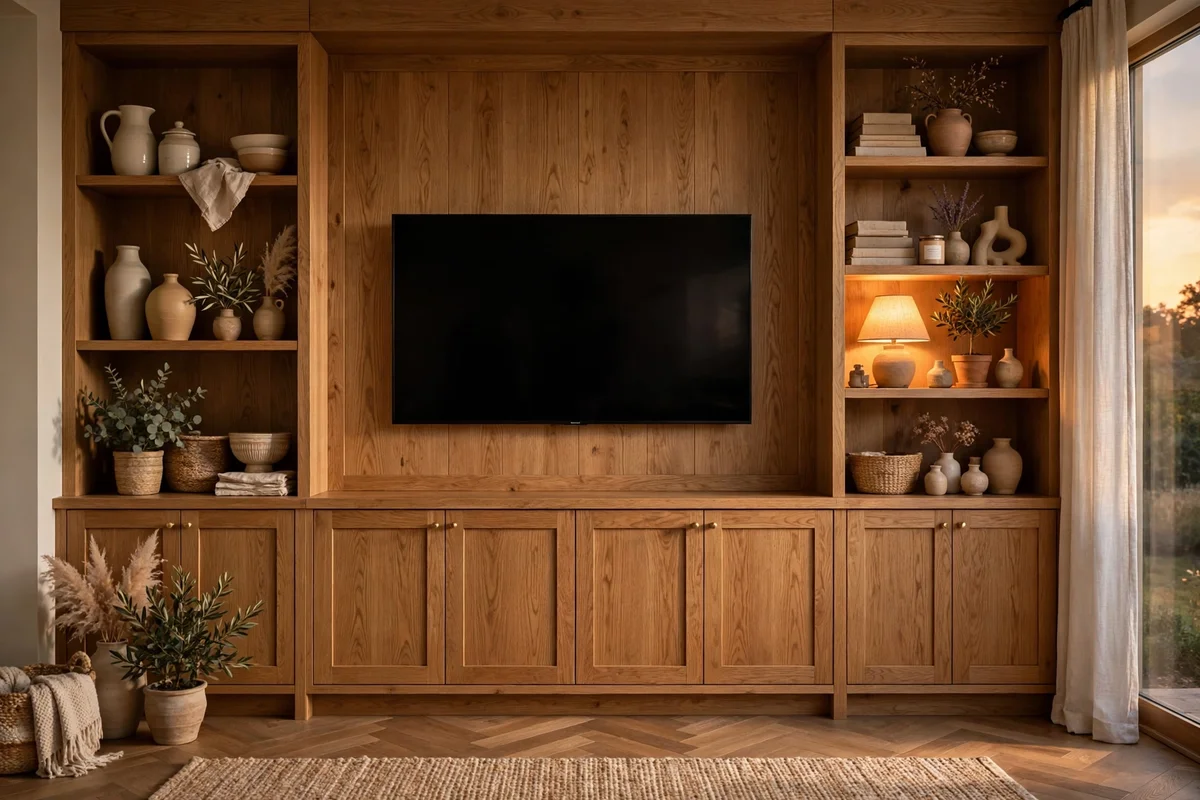
A media wall earns its place when the television sits centred above a run of closed cabinetry that hides every cable, remote and console. Keep the base 45 to 60 cm deep so equipment fits with about 5 cm of airflow behind each unit, and leave a 10 cm service gap at the back for cable runs. Centre the screen 105 to 115 cm from the floor, which is seated eye height for most sofas. Flanking full height cupboards can hold blankets, board games and seasonal decor in labelled baskets.
Choose doors with soft close hinges and a discreet finger rail or small knobs so the run reads as furniture, not a wall of panels. A ventilated shelf behind a mesh panel or a louvred door keeps a set top box cool without showing it. The mistake to avoid is sealing equipment inside airtight cupboards, which shortens its life through heat. Budget tip: two 80 cm flat pack base carcasses plus one 160 cm oak worktop create a handsome media run for a mid range spend.
2. Flank the Fireplace With Symmetrical Shaker Bookcase Towers
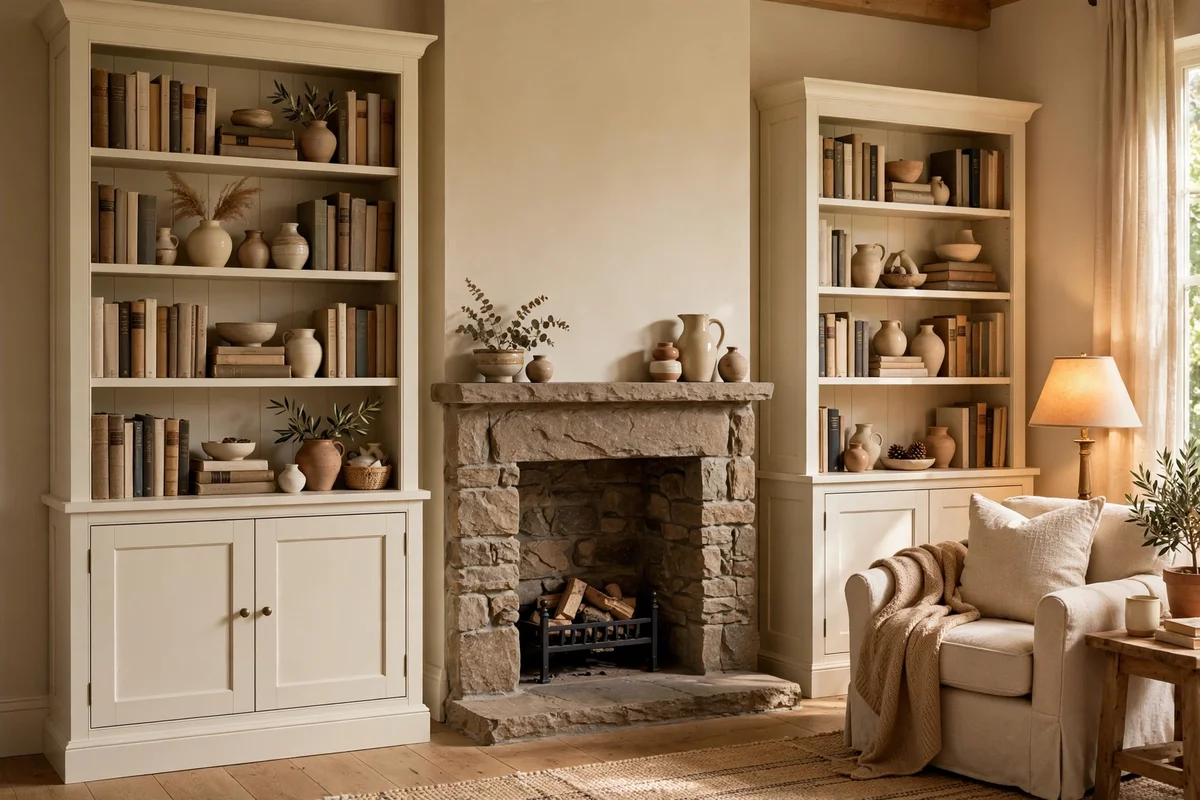
A pair of matching towers each side of a fireplace gives a living room instant architecture and a home for books, vases and family photographs. Make each tower 60 to 90 cm wide and 30 to 35 cm deep, with adjustable shelves on 32 mm hole centres so paperback rows and taller art books both sit comfortably. Align the top of the bookcases with the mantel or run them floor to ceiling for a library wall effect. Paint them the same colour as the chimney breast so the whole composition reads as one built piece.
Add a small picture light or warm LED strip under the top pelmet of each tower to wash the shelves in evening light. Keep the styling ratio at roughly two thirds books and one third objects, grouped in odd numbers for calm. The mistake to avoid is packing every shelf edge to edge, which makes the fireplace feel crowded instead of framed. Budget tip: one 80 cm tall bookcase stacked under an 80 cm wall unit per side reads as a custom tower.
3. Fit a Dining Room Serving Cabinet With a Tall Crockery Hutch
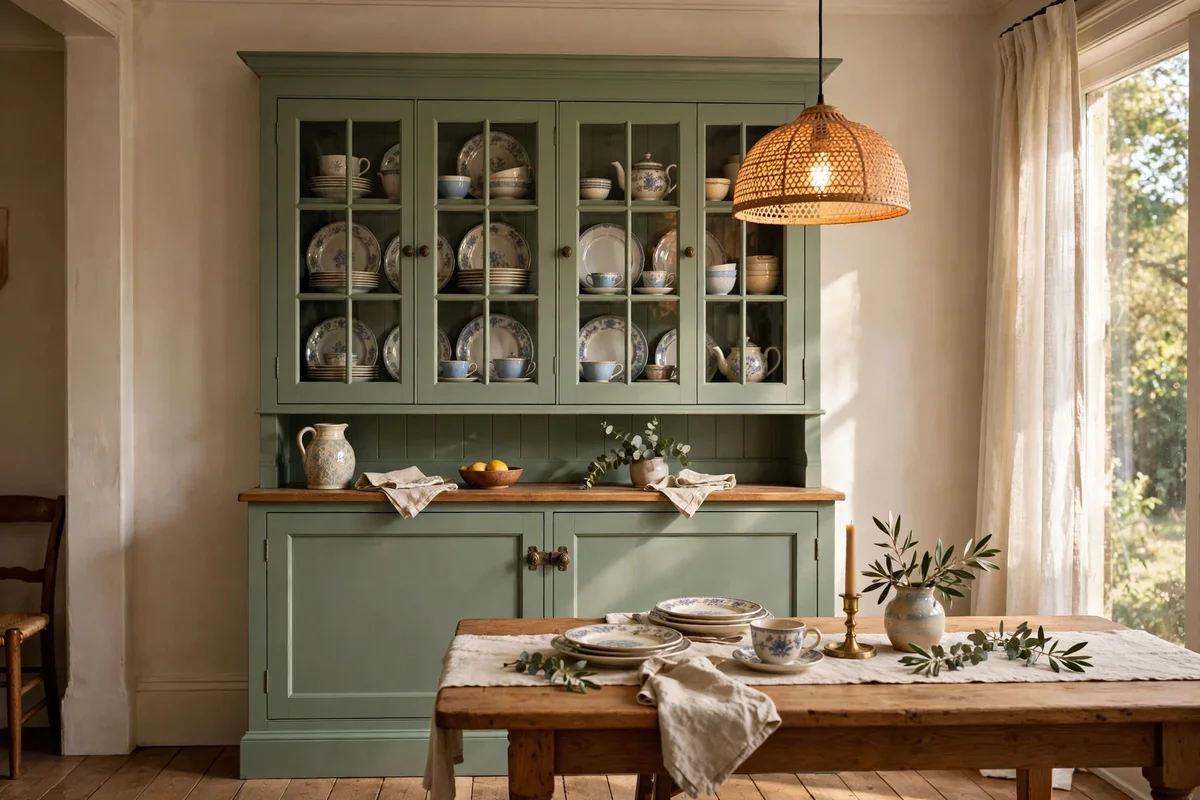
A serving cabinet with a glazed hutch above turns the dining room into a room that hosts properly. Keep the base 90 to 105 cm high, which is a comfortable serving height, and 45 cm deep so large platters slide in easily. The hutch above should be 28 to 30 cm deep with two adjustable shelves and a plate groove routed into one shelf for upright display. Glass doors on the hutch show off everyday crockery while keeping dust off, and closed doors below hide table linen, candles and serving boards.
Line the hutch back in a slightly deeper shade than the cabinet body, such as sage behind cream, to give displayed dishes a gallery backdrop. Warm 2700K LED strips under the hutch top make evening serving feel generous. The mistake to avoid is hanging the hutch so high that the top shelf needs a step stool for daily cups; keep everyday pieces below shoulder height. Budget tip: a second hand dresser plus a painted wall mounted top cupboard creates the same look.
4. Create a Window Seat Base With Deep Drawers in the Family Room
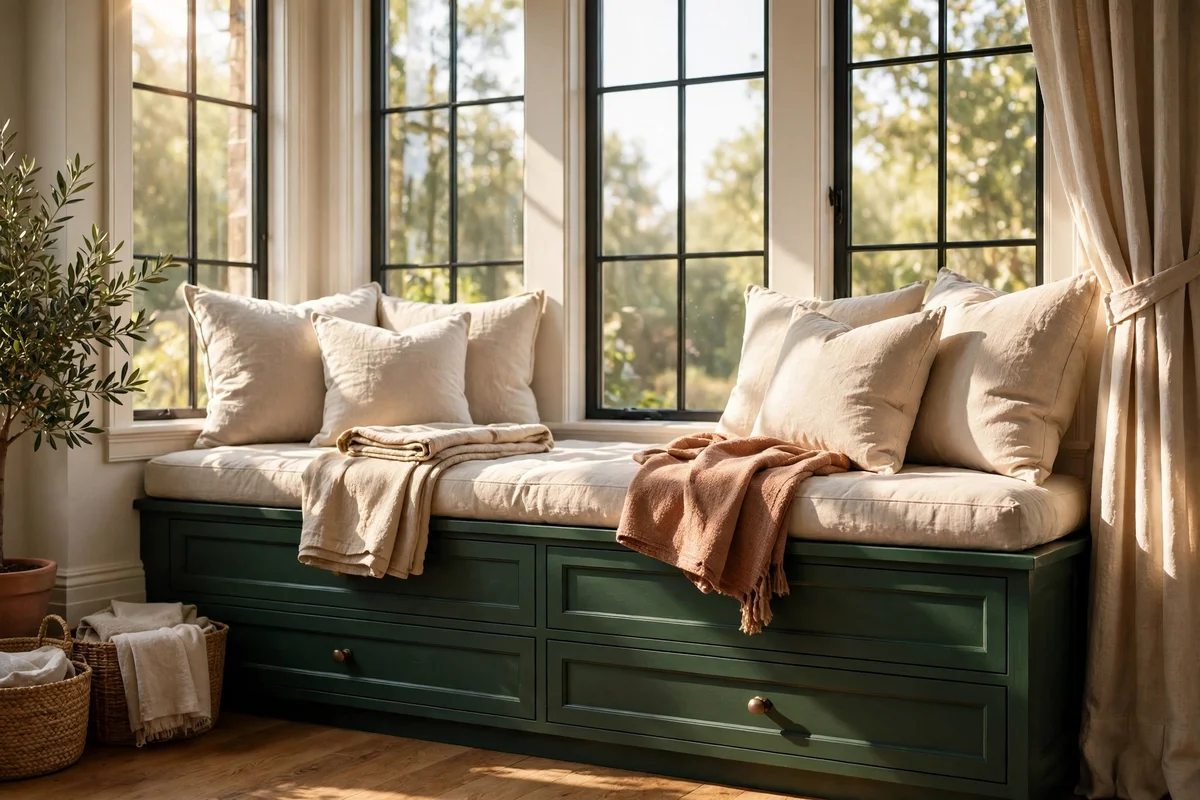
A window seat base 45 to 48 cm high turns an ordinary window into the most fought over seat in the house. Build the carcass 50 to 60 cm deep so an adult can sit back against cushions comfortably, and fit two or three drawers per 100 cm of width, since drawers wider than 80 cm sag under heavy loads. A 10 cm foam cushion in a washable linen cover makes it a reading nook, while the drawers swallow toys, throws and board games. Paint the base to match the skirting boards so it reads as part of the room.
Add a 5 cm overhanging oak lid or a hinged top instead of drawers if you prefer lift up storage for bulky items like spare bedding. Radiator pipes often run under windows, so leave a 10 cm vented gap or a grille front if the seat sits over one. The mistake to avoid is building the seat so deep that shorter family members cannot touch the floor while seated. Budget tip: three 60 cm drawer carcasses side by side make a 180 cm seat base in a weekend.
5. Add a Bathroom Linen Tower Between Studs Beside the Vanity
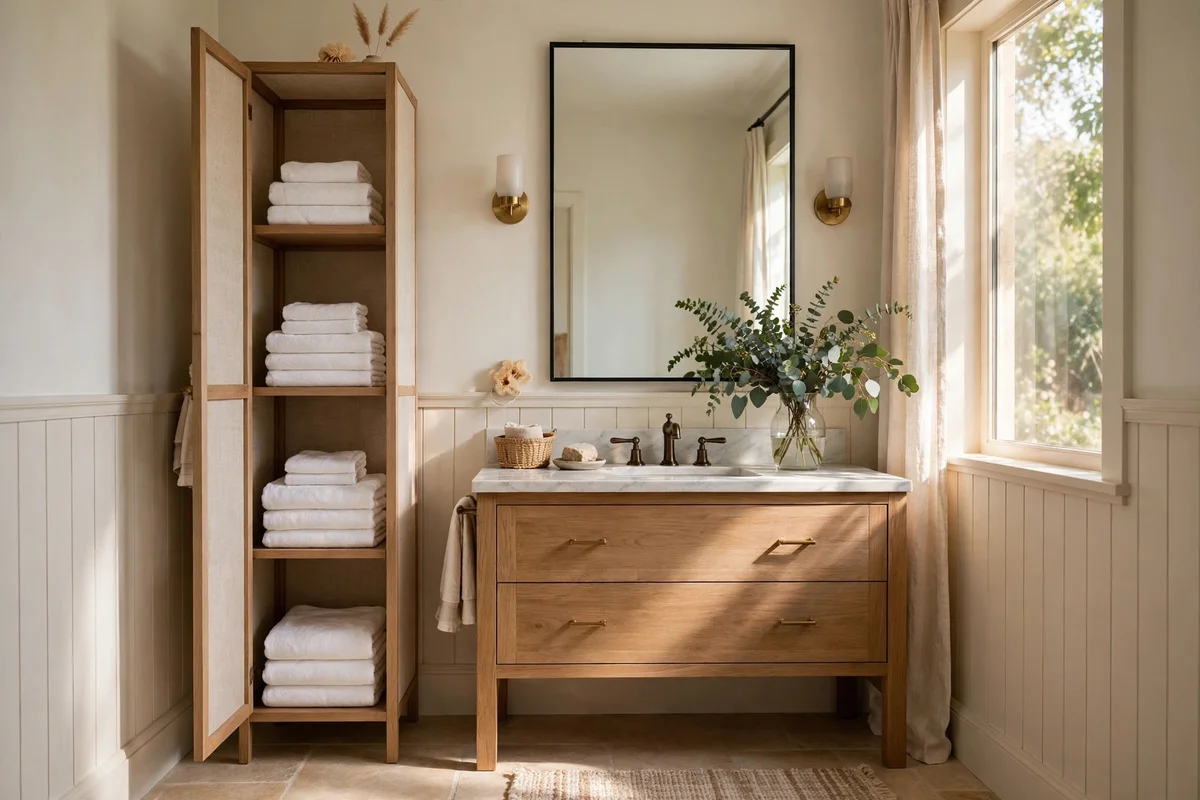
A slim full height linen tower beside the vanity puts fresh towels exactly where they are needed. A 40 to 50 cm wide tower, 30 cm deep, fits folded towels two deep with room to spare, and floor to ceiling height uses space a freestanding cabinet never reaches. Choose moisture resistant MDF or plywood with an exterior grade primer and a satin finish paint, since bathroom humidity tests every joint. Ventilated or louvred doors keep air moving around folded linen so it stays fresh.
Fit the middle shelf at waist height for daily towels and reserve the top for spare toiletries and first aid supplies. Small baskets on the lowest shelf corral cleaning products out of sight. The mistake to avoid is placing raw timber shelving in a steamy bathroom without sealing every edge, which leads to swelling within a year. Budget tip: a single tall kitchen wall carcass, 40 cm wide, painted in bathroom grade paint, makes a convincing linen tower.
6. Design a Hallway Drop Zone Cabinet With Bench, Hooks and Shoe Store
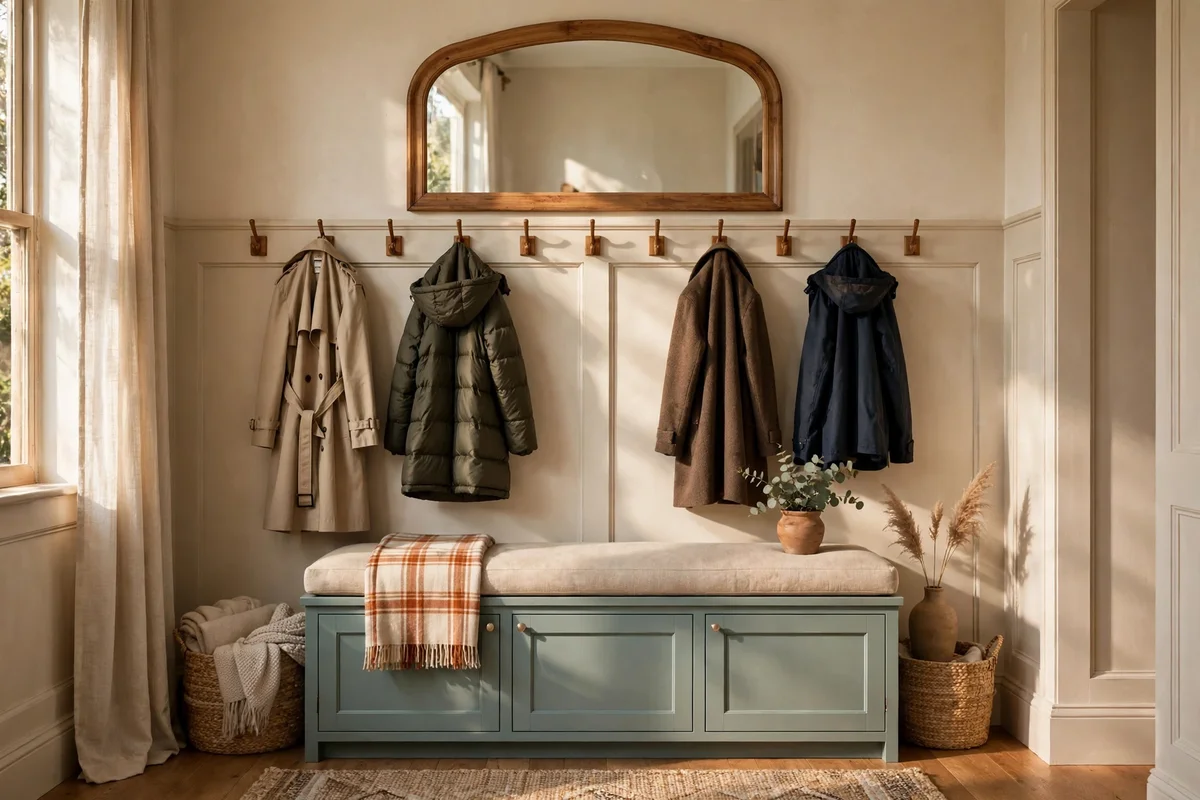
A drop zone cabinet by the front door ends the daily scramble of keys, bags and shoes. Build a bench 45 cm high and 35 to 40 cm deep, with a shoe cabinet below using tilted shelves spaced 20 cm apart for adult shoes. Above the bench, fix sturdy hooks at 120 cm for children and 150 cm for adults, with one cabinet or shelf above the hooks for hats, gloves and the post tray. Keep the whole run 90 to 120 cm wide so it fits a typical hallway without blocking the path.
Choose closed shoe storage rather than open cubbies, since tidy doors make a narrow hall feel twice as calm. A washable cushion on the bench and a small mirror above the hooks turn the corner into a last look station. The mistake to avoid is fixing hooks into plasterboard without proper anchors, because a winter coat can pull a weak fixing straight out. Budget tip: a 120 cm shoe cabinet plus a wall mounted shelf and a row of five hooks costs very little.
7. Run a Bedroom Wardrobe Wall Floor to Ceiling in One Colour
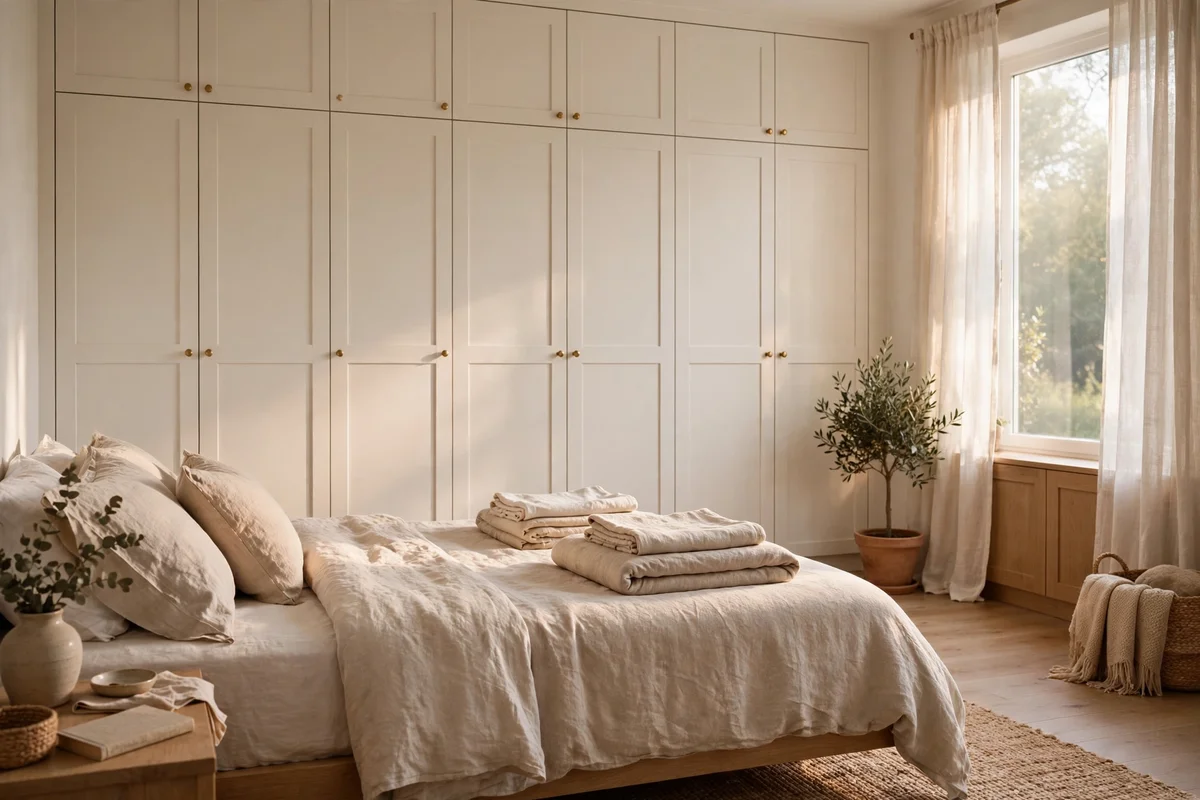
A full wardrobe wall painted in one colour, walls included, makes even a modest bedroom feel designed rather than furnished. Allow 60 cm depth for hanging rails, 40 cm for shelving sections, and plan roughly 100 cm of hanging per person for daily clothes plus one 60 cm double rail section for shirts. Run the carcasses floor to ceiling and bridge the gap above the doors with a 30 cm bulkhead cupboard for luggage and out of season bedding. Handleless doors or small round knobs keep the long run quiet and calm.
Inside, mix one full length hang, one double hang and three shelves per 60 cm bay, with a top shelf 25 cm deep for boxes. Soft LED strips on a door sensor make early mornings easier. The mistake to avoid is ordering doors before the ceiling line is checked; old ceilings can dip 2 to 3 cm across a wall, so scribe a filler panel to the ceiling instead. Budget tip: standard 60 cm flat pack wardrobes with custom fronts cost a fraction of bespoke.
8. Tuck a Reading Alcove Cabinet Under the Stairs With Lit Shelves
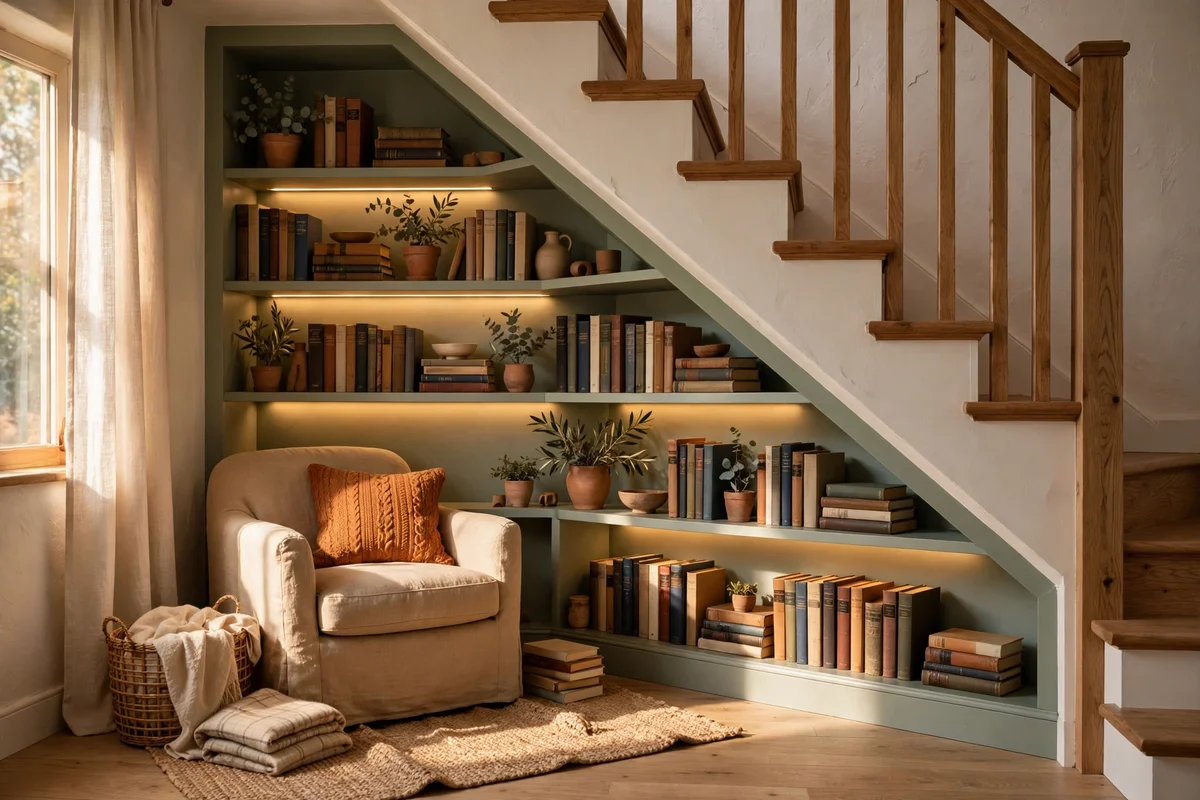
The space under a staircase is often wasted, yet it fits a shallow cabinet that holds a small library beautifully. Build shelves 25 to 30 cm deep to follow the stair slope, with the tallest section at least 100 cm high for art books. Use push to open latches on angled doors so there are no handles to catch passing shoulders, and scribe each door to the sloping ceiling line for a fitted look. A warm 3000K LED strip under each shelf makes the alcove glow like a bookshop corner.
Keep the lowest 20 cm as a plinth rather than storage, since dust and mops gather at floor level under stairs. Style one shelf with books spine out and the next with a small stack and a ceramic piece. The mistake to avoid is sealing the understair space completely without checking for pipe or meter access first, which causes expensive rework later. Budget tip: adjustable shelf standards hidden behind a painted pelmet give the built in look cheaply.
9. Choose Flat Front Slab Doors for a Calm Modern Kitchen Look
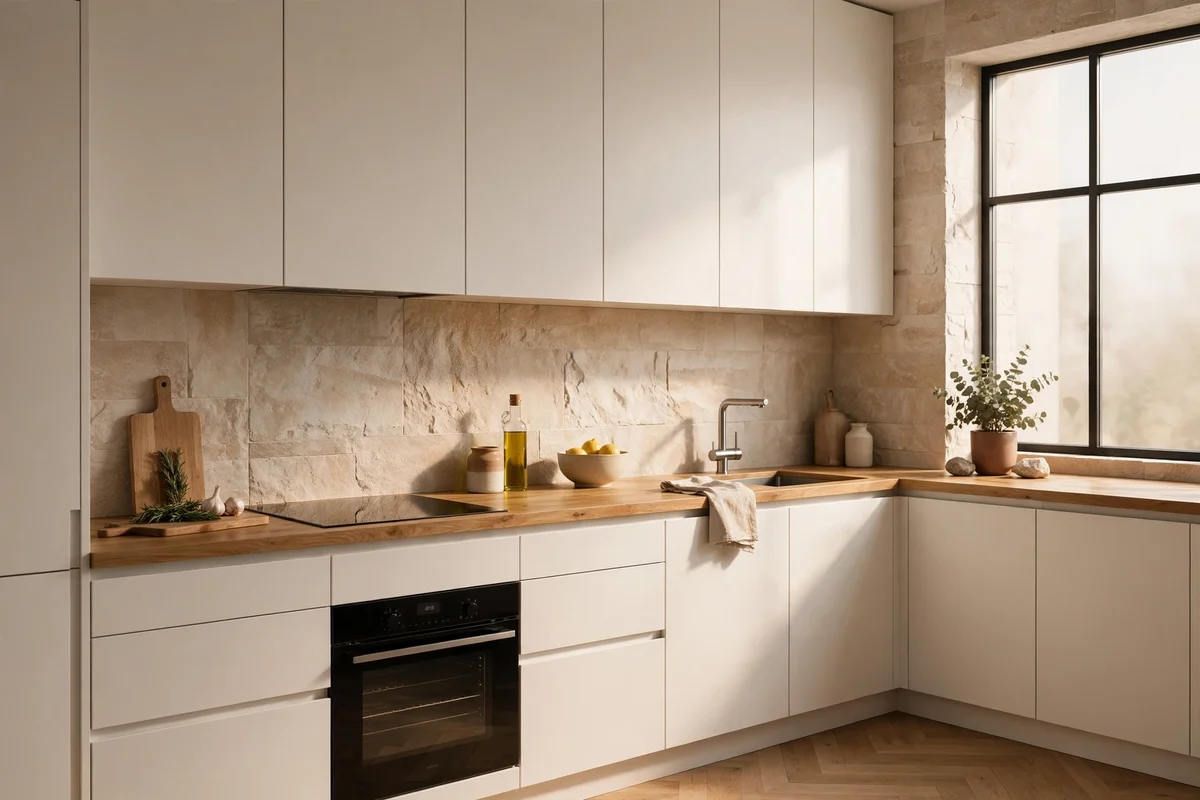
Flat front slab doors give a kitchen the quiet, seamless look of custom European cabinetry. Use 18 to 20 mm moisture resistant MDF or birch plywood fronts with a sprayed or factory finish, since hand painting flat panels shows every brush mark. Keep a consistent 3 mm shadow gap between doors for crisp lines, and choose push to open mechanisms or a routed finger rail along the top edge for handleless opening. Slab fronts suit small kitchens especially well because fewer visual lines make the room feel larger.
Pair slab doors with one warm material, such as an oak worktop or a stone splashback, so the kitchen does not feel cold. Limit wall cabinets to one wall and use drawers below the counter, since deep drawers hold more than cupboards at the same width. The mistake to avoid is mixing slab doors with ornate handles, which fights the minimal intent. Budget tip: flat pack slab kitchens are among the cheapest ranges, leaving budget for better worktops.
10. Choose Shaker Five Panel Doors for a Timeless Classic Feel
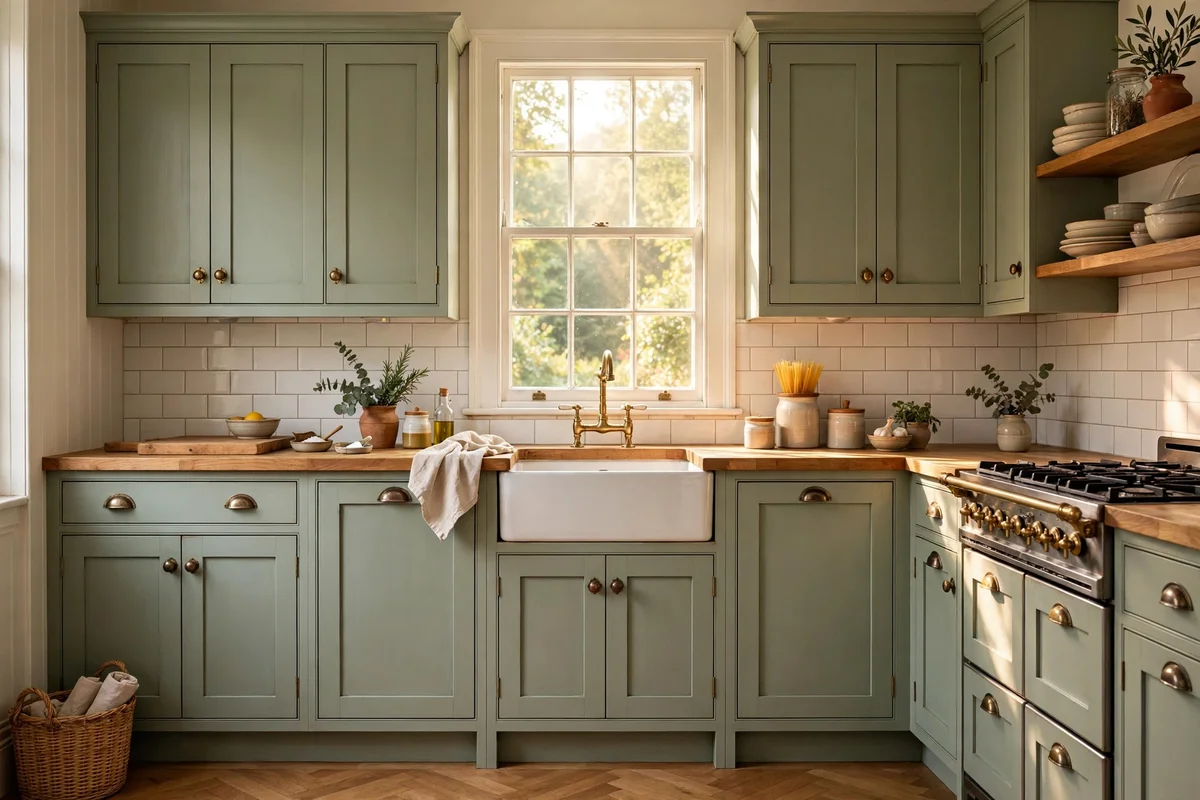
Shaker style doors, with a flat centre panel framed by four rails, suit almost every home from cottage to new build. Choose a solid timber frame with an MDF centre panel, which resists the expansion and contraction that cracks painted solid panels. A modest 60 mm stile width looks refined on standard 40 to 60 cm doors, while wider doors suit a slightly broader frame. Shaker fronts forgive small imperfections and repaint beautifully, which is why they remain the safest choice for a first custom project.
Pair shaker fronts with cup pulls or round knobs in aged brass for a heritage feel, or slim black bars for a crisper look. Keep the same door style across adjoining rooms so the house reads as one design. The mistake to avoid is choosing a deep bevelled shaker profile in a hard working kitchen, where grease collects in the grooves and cleaning becomes a chore. Budget tip: paint grade shaker fronts on flat pack carcasses deliver the classic look at a mid range price.
11. Pick Hardware Last: Knobs Versus Cup Pulls and Bar Handles
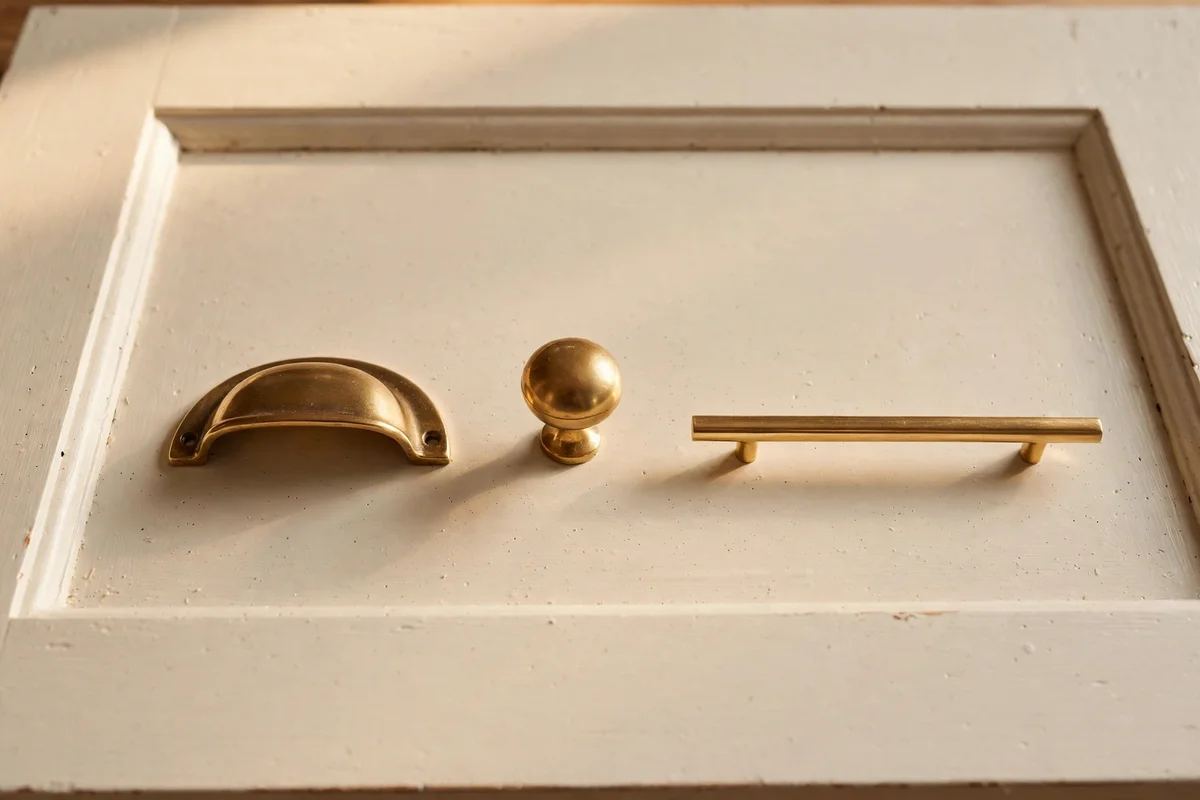
Hardware is the jewellery of cabinetry, so choose it after the doors are painted and fitted, when you can hold samples against the real colour. Cup pulls suit drawers and shaker fronts with a classic feel, round knobs work on small doors and wardrobes, and slim bar handles fit modern slab fronts. Follow the standard centre measurements of 96, 128 or 160 mm so replacements are easy to find later, and position pulls one third down from the top of drawers for comfortable grip.
Buy one sample of each finish and live with it for a week before ordering the full set, since brass looks different in morning and evening light. Unlacquered brass develops a soft patina that many people love, while lacquered brass stays bright with less care. The mistake to avoid is mixing three or four finishes across one room, which makes even expensive cabinetry look indecisive. Budget tip: 20 to 30 matching pulls from a trade supplier cost far less than designer pieces.
12. Paint Cabinetry in Warm White With a Contrasting Island Tone
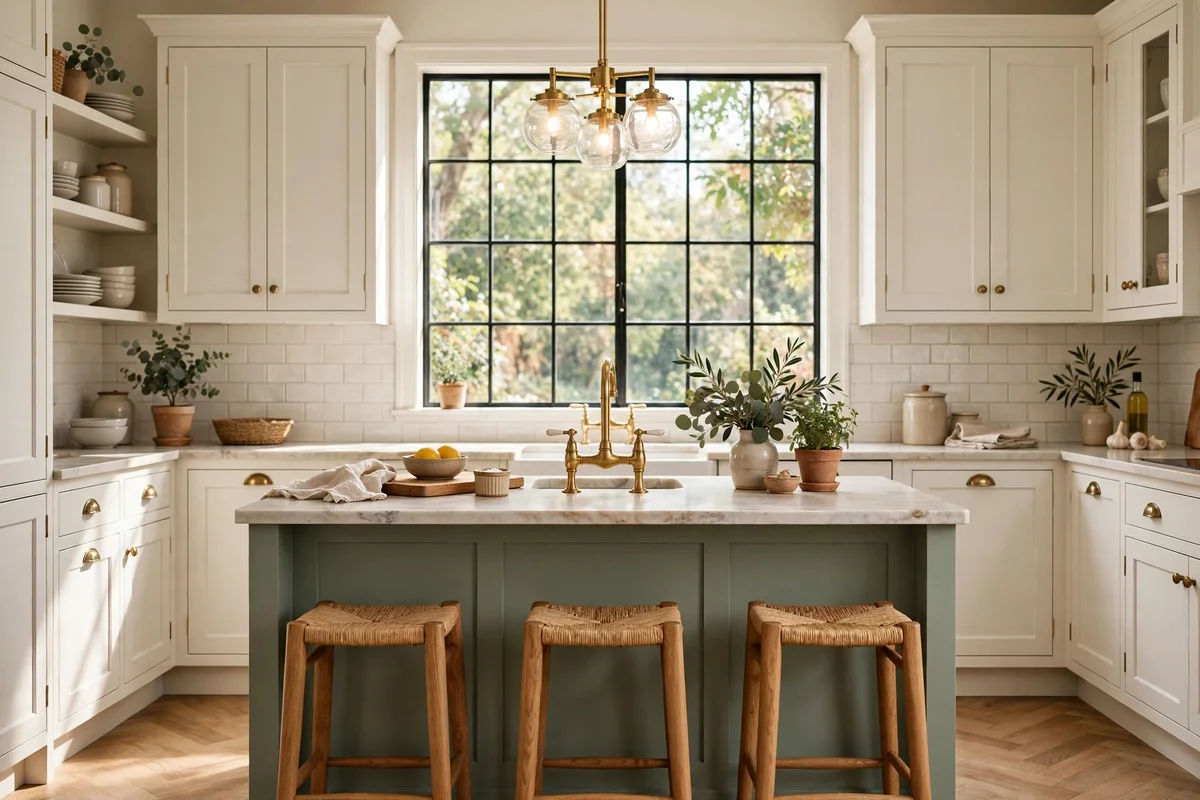
Warm white cabinetry keeps a kitchen bright while feeling softer than brilliant white, which can look stark under cool LEDs. Choose a white with a hint of cream or stone, then paint the island or a tall bank in a contrasting tone such as sage, inky blue or warm grey for quiet depth. Sample the paint on a large board and view it in the actual room at morning, noon and evening, since cabinetry paint shifts dramatically with light. Use an eggshell or satin finish, which wipes clean and hides small marks.
Keep walls a shade lighter than the cabinets so the cabinetry stands proud, and match the ceiling to the warm white for a seamless join. Two thin coats over a proper primer last far longer than one thick coat. The mistake to avoid is painting in high humidity or a cold room, which leaves a tacky finish that never fully hardens. Budget tip: painting existing sound cabinets in a quality eggshell transforms a kitchen for the price of paint and primer.
13. Use Deep Green Paint for Cabinetry That Grounds a Busy Room
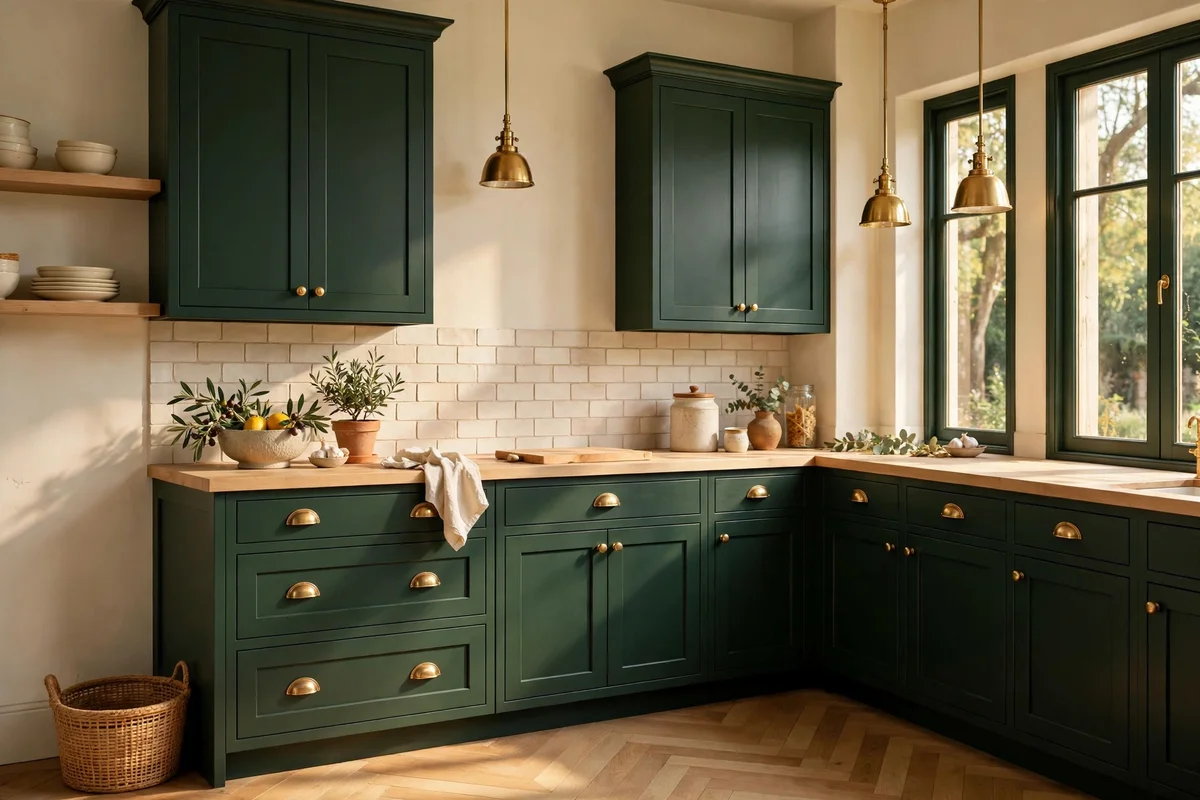
Deep green cabinetry, from forest to olive, brings a room down to earth and hides everyday marks better than pale paint. It suits rooms with plenty of natural light, where the colour reads rich rather than dark, and pairs beautifully with oak, brass and cream walls. Paint large sample boards at least A3 size and prop them against the cabinets for two full days before committing. A satin finish reflects just enough light to show the colour depth without glare.
Balance deep green with warm metallics and one natural texture, such as a woven rug or linen curtains, so the room feels layered rather than heavy. Keep worktops light, like honed stone or pale oak, to lift the composition. The mistake to avoid is pairing deep green with cool grey walls, which can make the whole room feel flat and tired. Budget tip: a deep green island among warm white cabinets gives the effect for the cost of one tin of paint.
14. Frame the Television With Open Shelves Above and Closed Doors Below
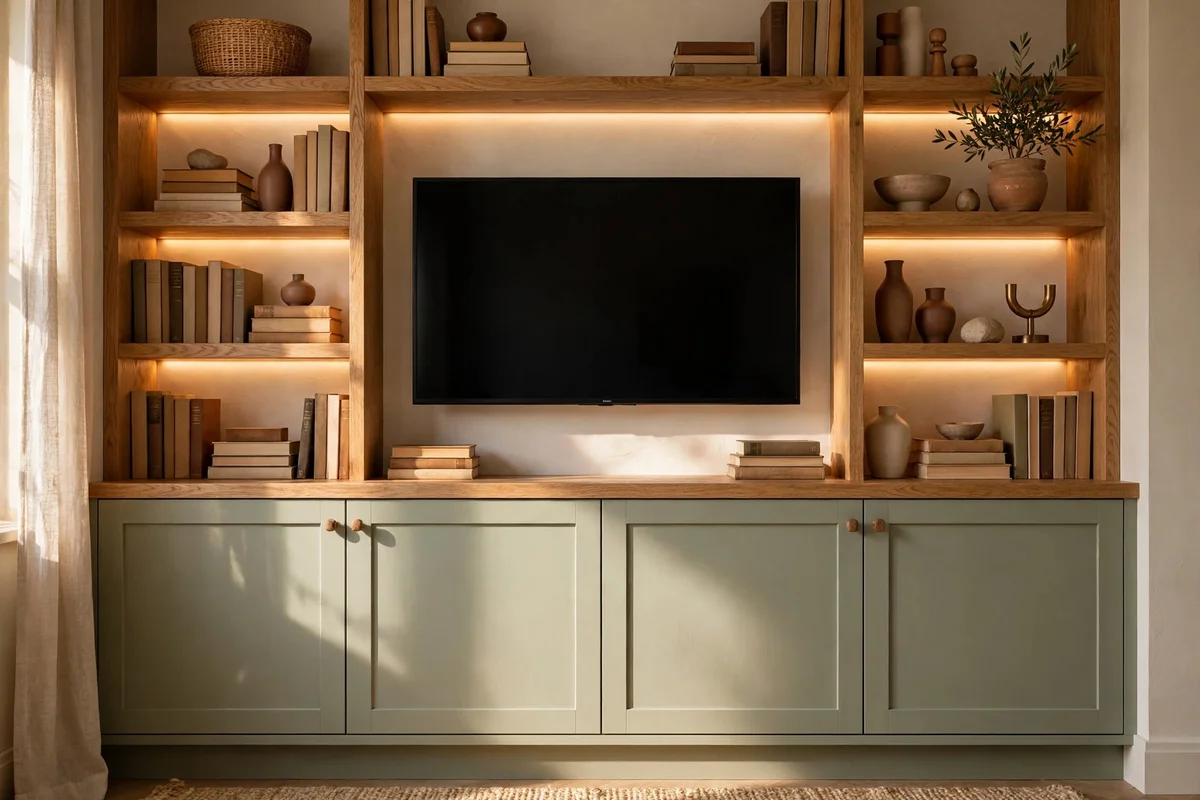
Framing the television with cabinetry turns a black rectangle into part of the room’s design. Build a low run of closed doors 45 to 50 cm deep below the screen for consoles and remotes, then fit two open shelves 25 cm deep above it for books, ceramics and small art. Keep the shelves at least 40 cm above the screen so the eye reads them as a separate layer, and align the outer edges of the shelves with the base for a crisp vertical line. This arrangement hides clutter while keeping display space honest.
Run warm LED strips under each open shelf to create a gentle halo in the evening. Style the shelves with a repeating rhythm of books, one object and a small plant pot to avoid a cluttered look. The mistake to avoid is placing the television inside a tight recess without ventilation, since heat shortens electronics life and voids some warranties. Budget tip: two 80 cm wall shelves above an existing sideboard achieve the framed look without a full rebuild.
15. Build a Home Office Wall With Full Height Filing and Book Cabinets
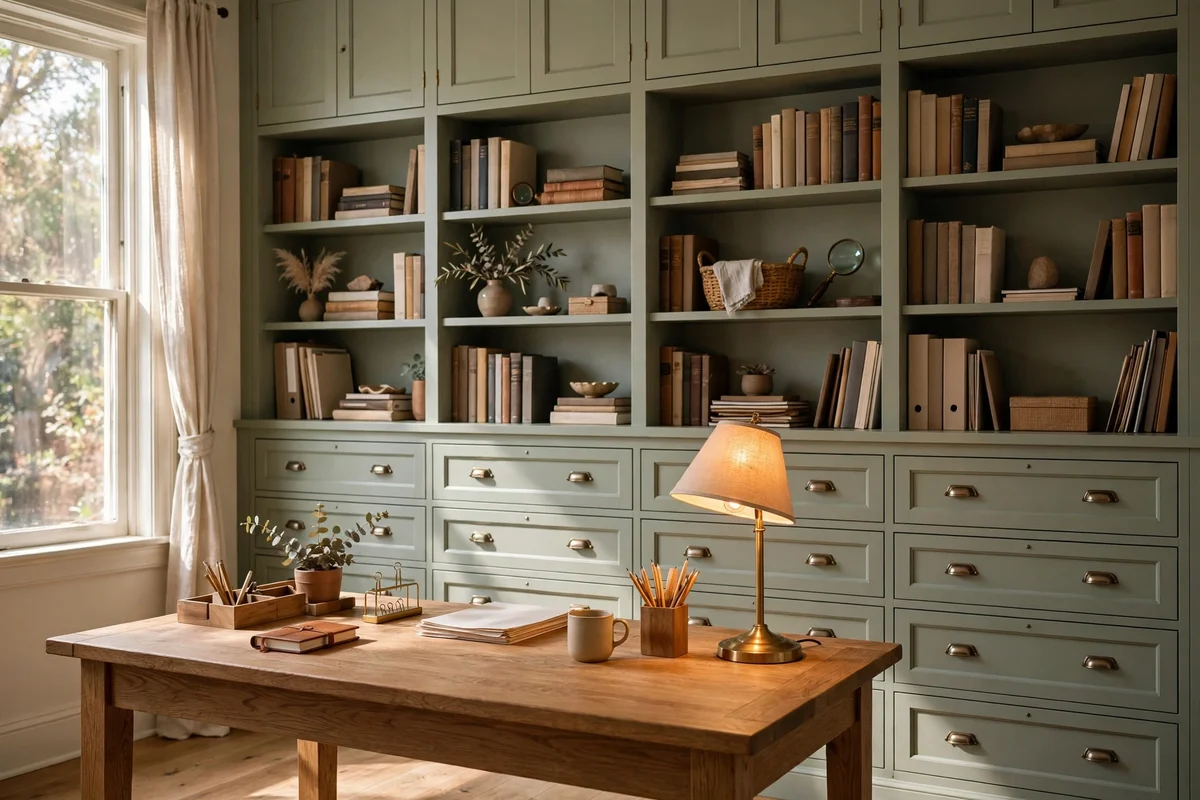
A full height office wall keeps paperwork, books and equipment in one place so the desk stays clear for work. Allow 45 cm deep drawers for A4 files with proper suspension rails, and 28 to 30 cm deep shelves for books and box files. Plan the desk height at 70 to 75 cm with at least 80 cm of clear knee space, and position one filing bay within arm’s reach of the chair. Closed doors on the lower half hide printers and cables, while open shelves above keep reference books visible.
Add a cable grommet and a power strip inside one cupboard so chargers and routers live out of sight. A task light under the shelf above the desk reduces eye strain in the evening. The mistake to avoid is building the desk against the only window without glare control, since screen reflections cause headaches by midday. Budget tip: two tall filing carcasses flanking a simple oak desktop on battens create a full office wall at a mid range price.
16. Add a Mudroom Cabinet Bank With One Locker per Family Member
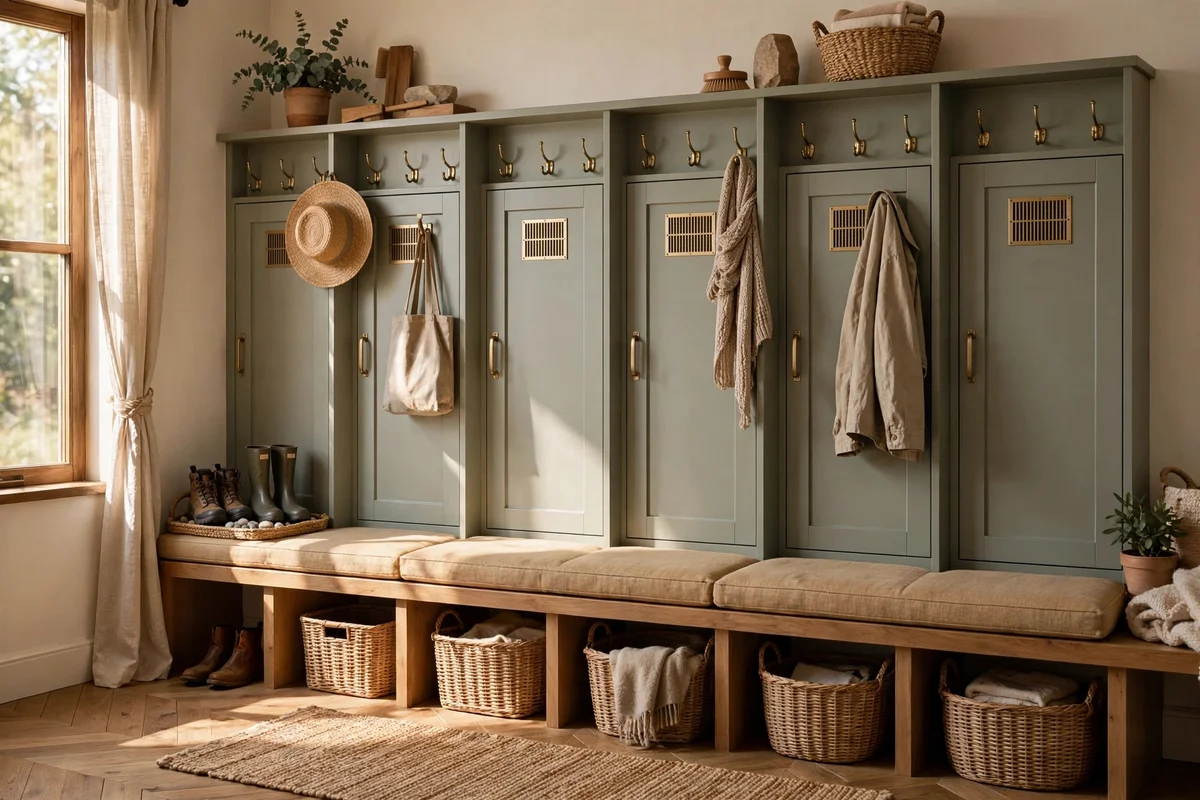
A mudroom bank with one locker per person ends the morning hunt for coats and shoes. Give each locker 40 cm of width with a double hook rail, one shelf above for hats and one below the bench for shoes. A continuous bench 45 cm high runs along the base so children can sit to change footwear, and vented or slatted doors let damp coats dry without mustiness. Number the lockers or fit small brass label holders so everyone knows their own bay.
Fit a washable mat or tiled threshold in front of the lockers, since muddy boots will test the floor daily. A high shelf across the top holds seasonal gear out of the way. The mistake to avoid is making lockers deeper than 40 cm, because items slide to the back and the space becomes a dark cave. Budget tip: open locker bays built from painted plywood cost far less than full doored versions and dry coats faster.
17. Fit a Narrow Hallway Cabinet Only 25 cm Deep for Keys and Post
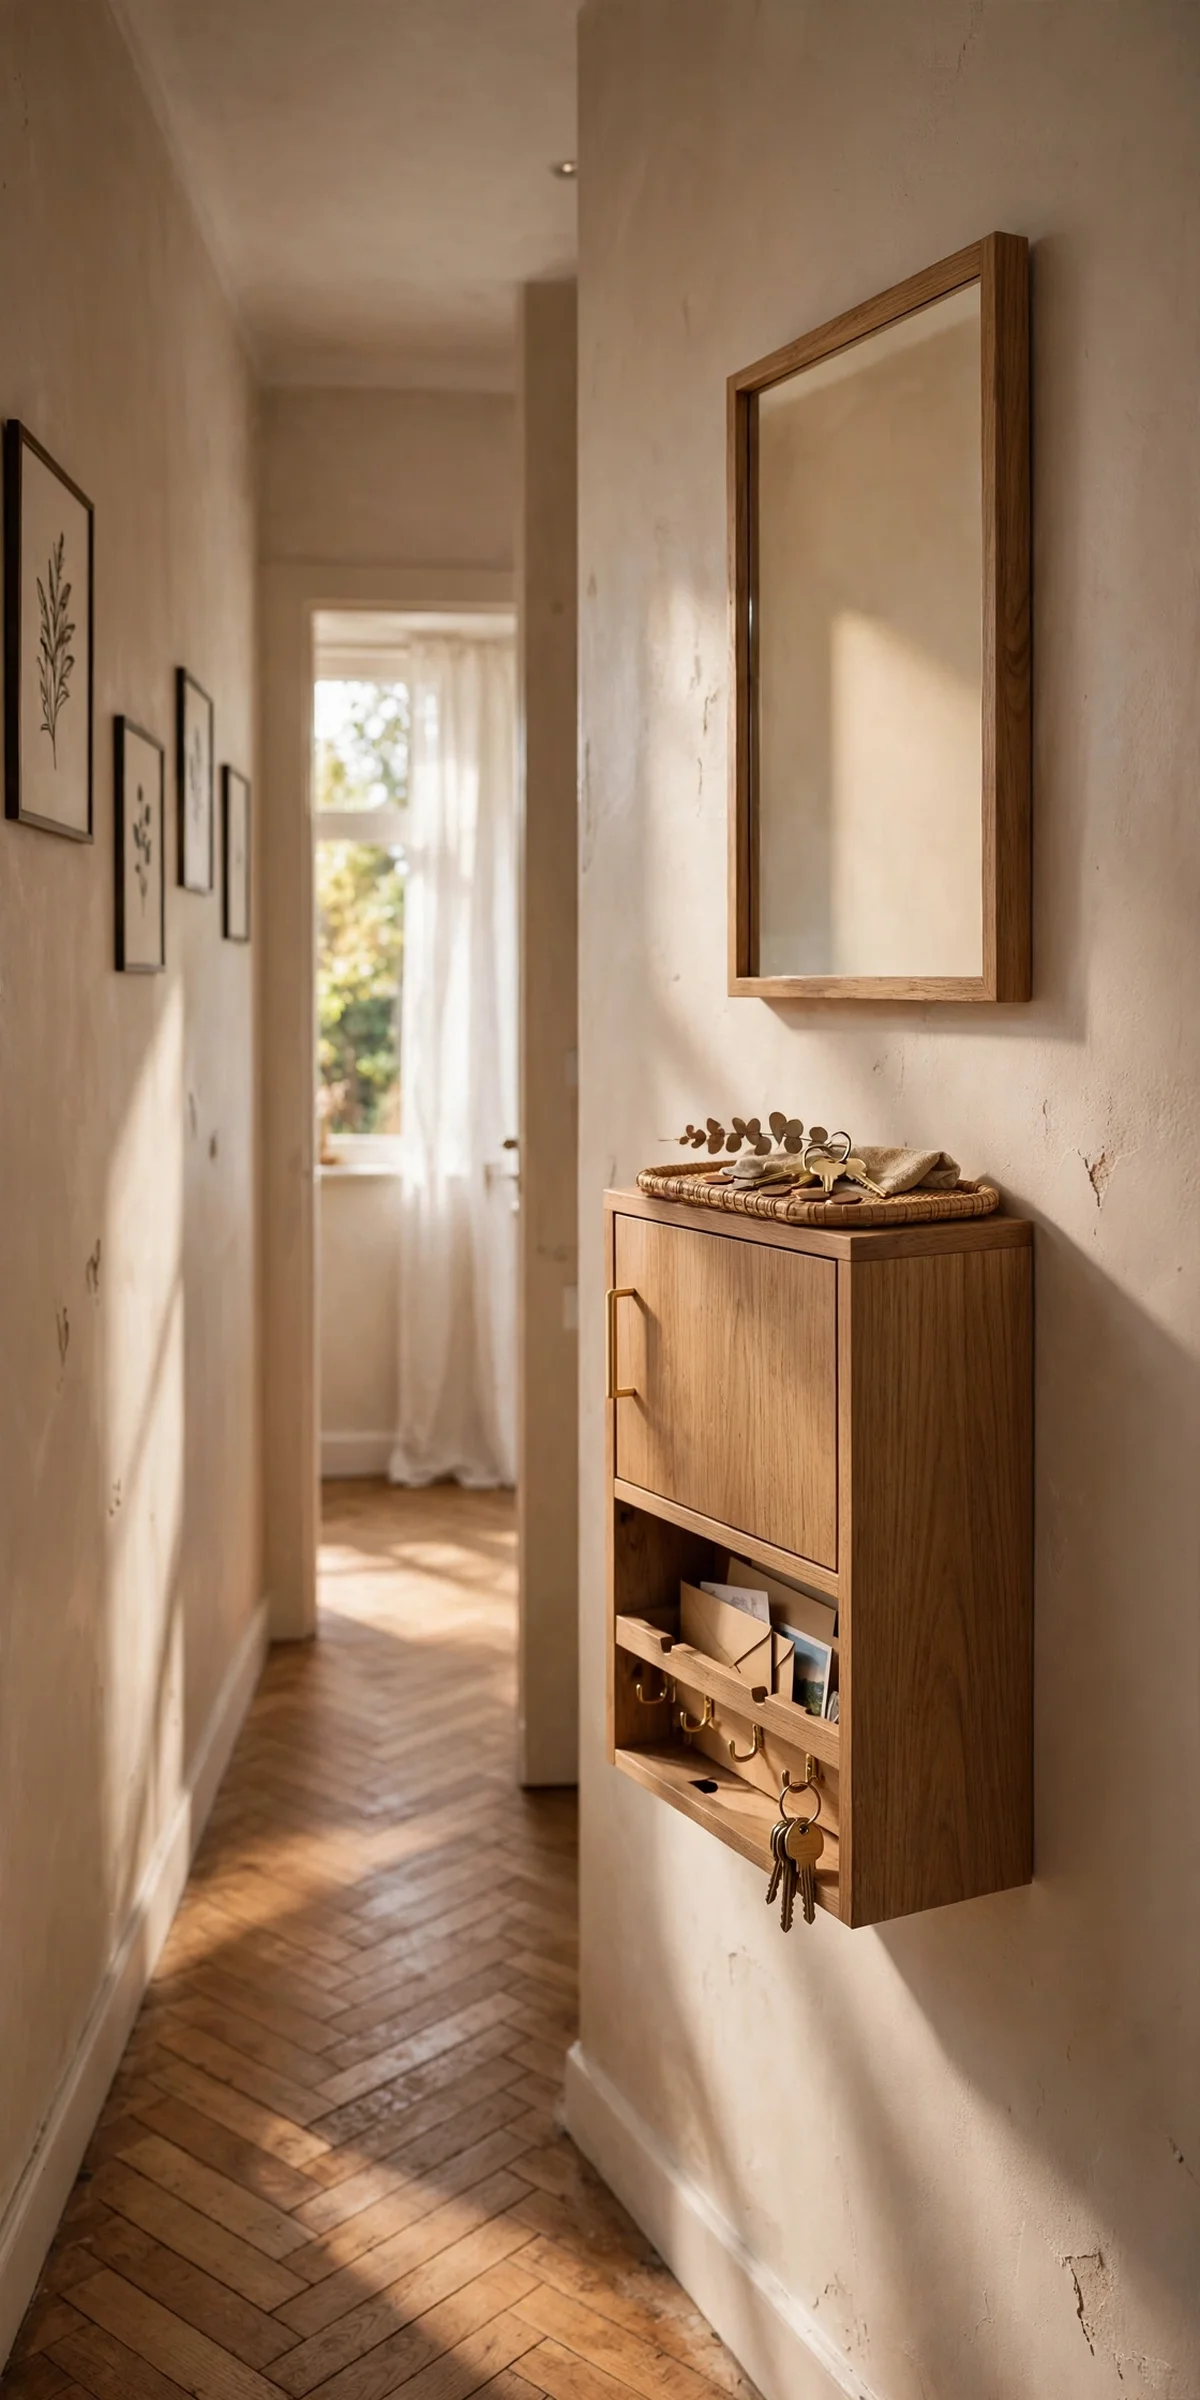
A hallway cabinet just 25 cm deep holds keys, post, sunglasses and small leads without stealing walking space. Wall mount it at 85 to 95 cm high so it works as a landing surface, and fix it firmly into studs or with proper cavity anchors, since even a slim cabinet becomes heavy when loaded. Inside, fit two shallow shelves and a row of small hooks on the door for keys. A closed front keeps the hall calm, which matters in the first space guests see.
Choose a cabinet with a slightly darker or contrasting colour than the walls so it reads as intentional furniture rather than a box. A small tray on top corrals the post before it spreads. The mistake to avoid is fitting doors that swing into the walking path, so use a lift up flap or sliding doors in narrow halls. Budget tip: a 25 cm deep bathroom wall cabinet, repainted, makes a perfect slim hall console.
18. Hide the Boiler and Meters Inside a Shallow Utility Cabinet
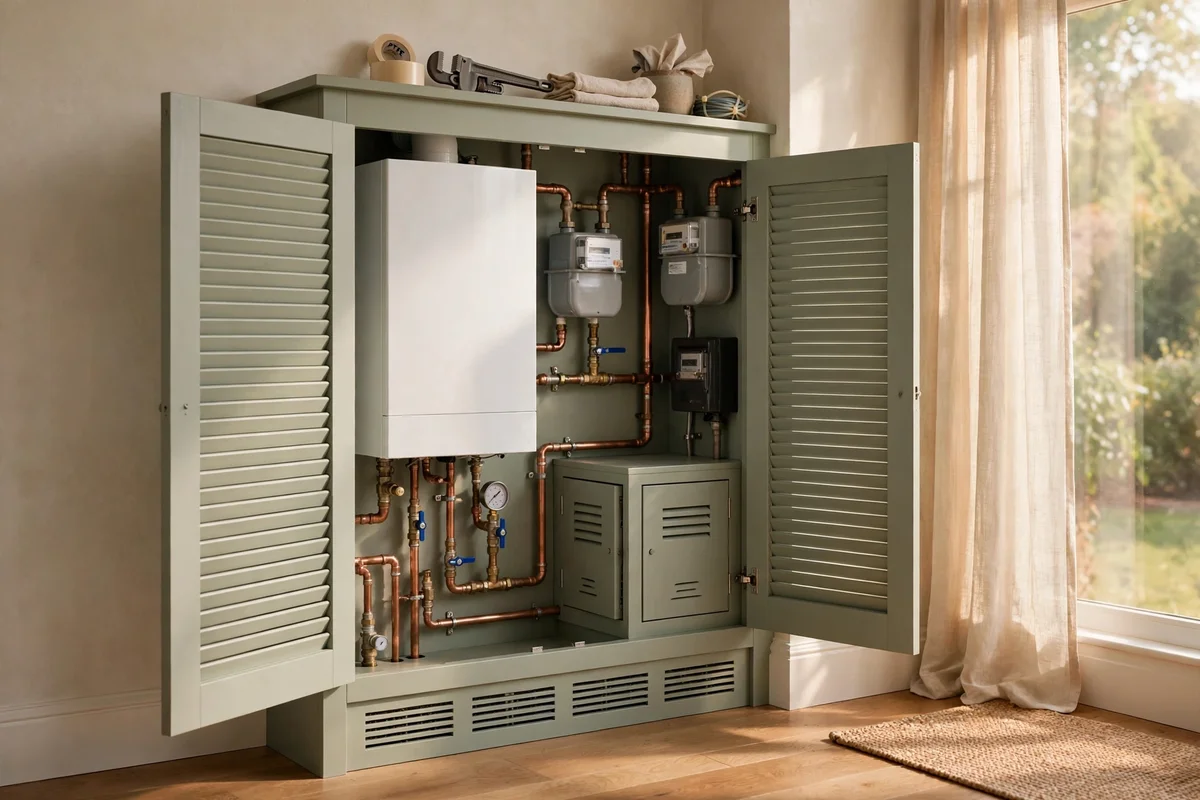
Boilers, meters and fuse boxes look far better behind ventilated cabinet doors than exposed on a wall. Build a shallow cabinet 60 cm deep around the boiler with louvred or slatted doors that allow airflow, and keep a clear 60 cm of service space in front so engineers can work. Fit removable side panels rather than fixed ones, since annual servicing needs full access. Leave the pressure gauge and controls reachable through a small hatch or an open section.
Label the fuse box and stopcock positions on the inside of the door so any adult in the house can find them quickly. Check local regulations before enclosing gas appliances, since clearances and ventilation rules vary by region. The mistake to avoid is sealing a boiler in an airtight cupboard, which risks overheating and breaches safety guidance. Budget tip: two tall ventilated wardrobe carcasses around the unit create a tidy utility wall cheaply.
19. Combine Open Oak Shelving With Closed Cabinets for Display Balance
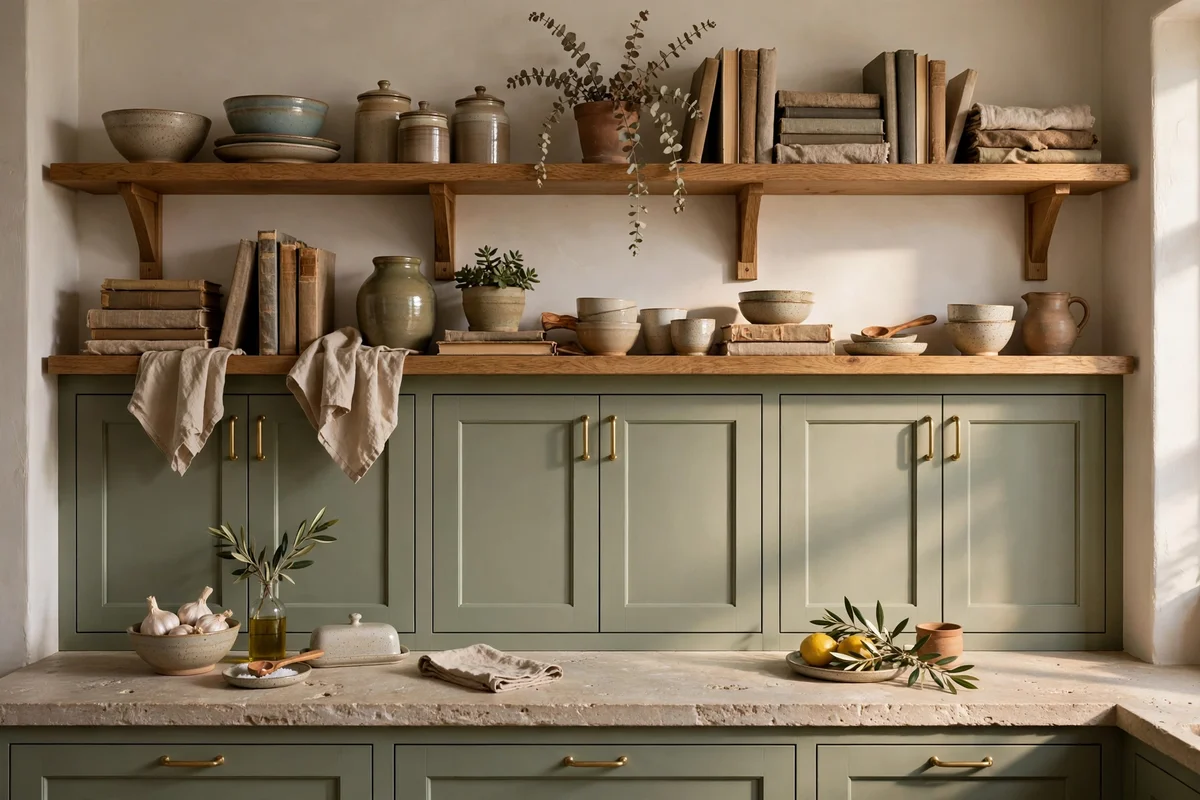
Mixing open oak shelves with closed cabinets gives a room both display space and hidden storage in one composition. Aim for roughly one third open to two thirds closed, so the eye enjoys styled objects while clutter stays behind doors. Use 28 mm thick oak shelves at 25 to 30 cm deep, fixed on concealed steel brackets rated for at least 15 kg per shelf. Space open shelves 35 to 40 cm apart so vases and stacks of bowls fit without crowding.
Repeat the oak tone in one other place, such as a worktop or a picture frame, so the shelves feel connected to the room. Style each shelf with a simple formula of books, one ceramic and a small trailing plant. The mistake to avoid is loading open shelves with tiny fiddly objects, which read as clutter from across the room. Budget tip: solid oak shelves on hidden brackets cost a fraction of full oak cabinetry.
20. Measure Door Swings and Walkways Before Fixing Any Cabinet Plan
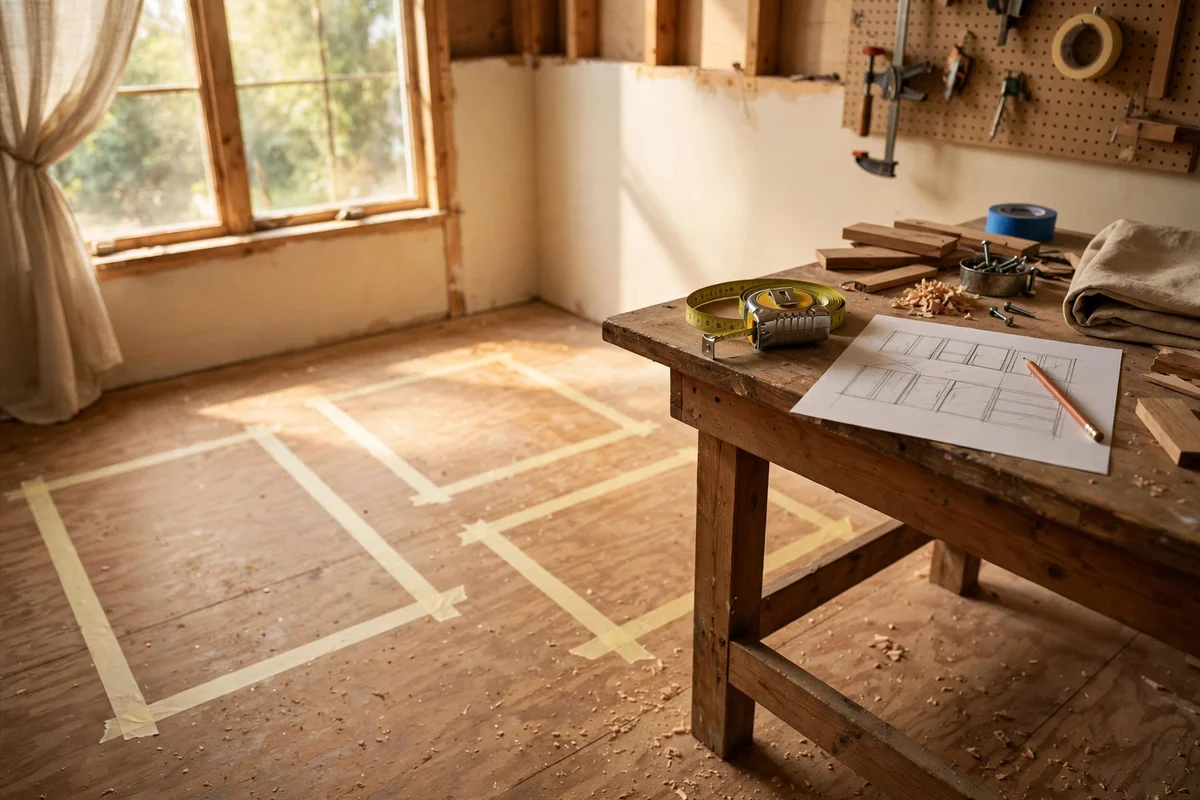
Every cabinet plan should start with a tape measure and a pencil sketch, because clearances decide whether built ins help or hinder. Allow 60 cm of clear space in front of drawers and dishwashers so they open fully, 90 to 110 cm for main walkways, and at least 50 cm for a door swing that passes a cabinet corner. Mark cabinet footprints on the floor with painter’s tape and live with the layout for a day or two before fixing anything. This one habit prevents most expensive mistakes.
Record the ceiling height at three points along each wall, since few ceilings are level, and note the position of sockets, radiators and light switches that cabinets might cover. Photograph the taped layout from the doorway to check the sightlines. The mistake to avoid is measuring once at the start and never again, because walls bow and floors slope. Budget tip: a 20 minute measuring session with a laser measure saves hundreds in wrongly ordered carcasses.
21. Use Flat Pack Carcasses With Custom Fronts to Halve the Budget
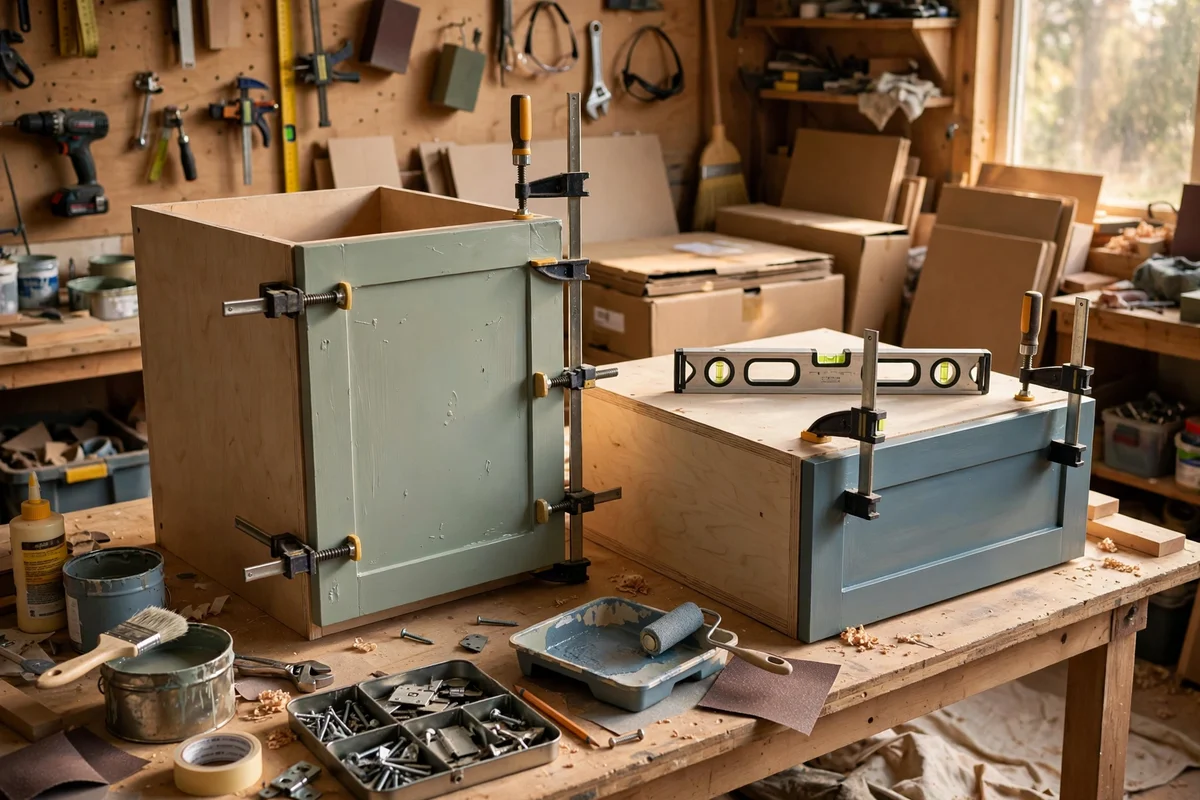
The cleverest budget route to a built in look is standard flat pack carcasses dressed with made to measure doors and side panels. Carcasses in 40, 60 and 80 cm widths from a mainstream supplier cost a fraction of bespoke joinery, while custom fronts in any colour give the fitted finish. Fix carcasses to the wall and to each other, then add a 7 to 10 cm plinth at the base and a cornice at the top so the run reads as built in. Scribe side panels to uneven walls for a seamless join.
Order fronts from a specialist maker that drills for your chosen hinges, which removes the hardest part of the job. Keep one spare front and a touch up pot of paint for future repairs. The mistake to avoid is skipping the wall fixing, because unsecured tall carcasses can tip when drawers are loaded. Budget tip: this approach typically saves 40 to 60 percent against full bespoke, often thousands on a whole wall.
22. Light Cabinet Interiors and Alcoves With Warm LED Strips
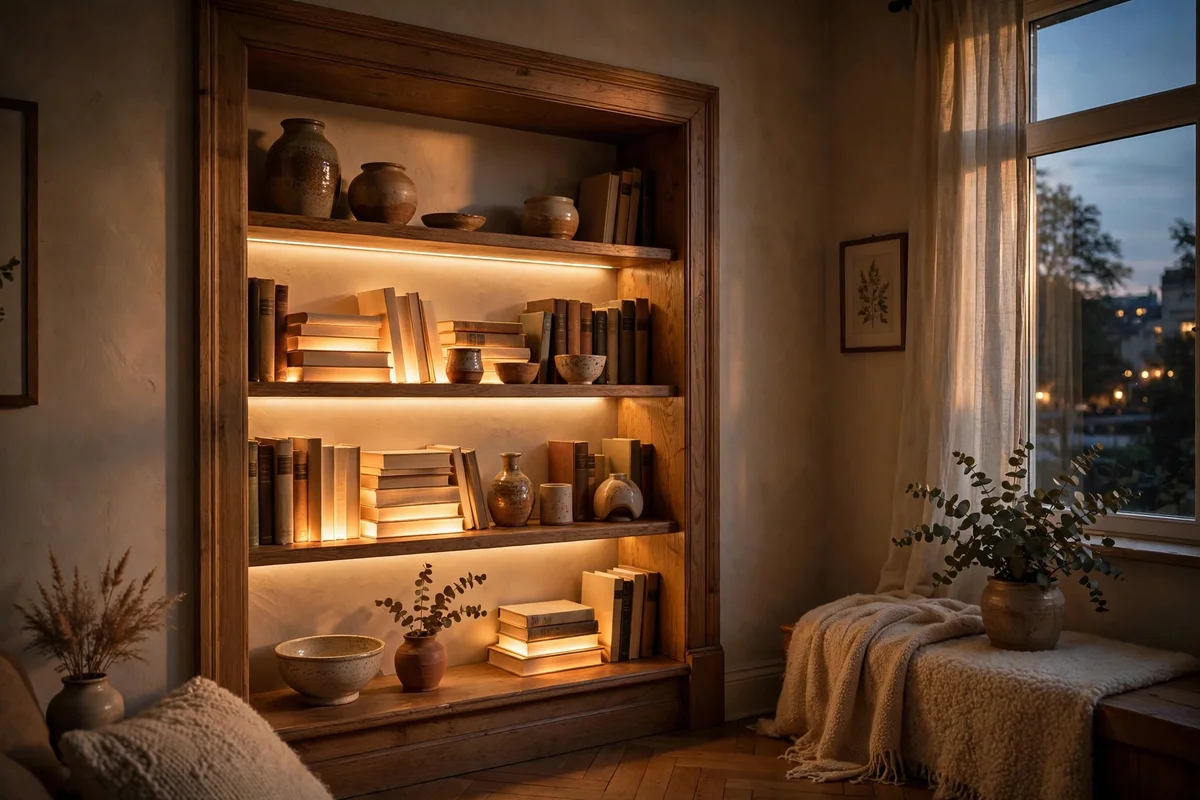
Warm LED strips turn dark cabinet interiors and alcoves into features rather than black holes. Choose 2700 to 3000K strips at 8 to 12 watts per metre, which gives a cosy glow without harsh spots, and mount them in an aluminium channel with a diffuser for an even line of light. Wire strips to a door sensor for wardrobes, or a simple rocker switch for display alcoves. Hide the driver in the top of the cabinet or behind a pelmet so no hardware shows.
Plan lighting before the cabinets are fixed, since retrofitting cables means removing shelves later. One strip per shelf bay is enough; more creates glare rather than glow. The mistake to avoid is choosing cool white 4000K strips in a living space, which makes wood and warm paint look grey and lifeless. Budget tip: battery powered motion sensor strips cost little and need no electrician for a first try.
23. Top Low Cabinets With Thick Oak or Stone to Double as Surfaces
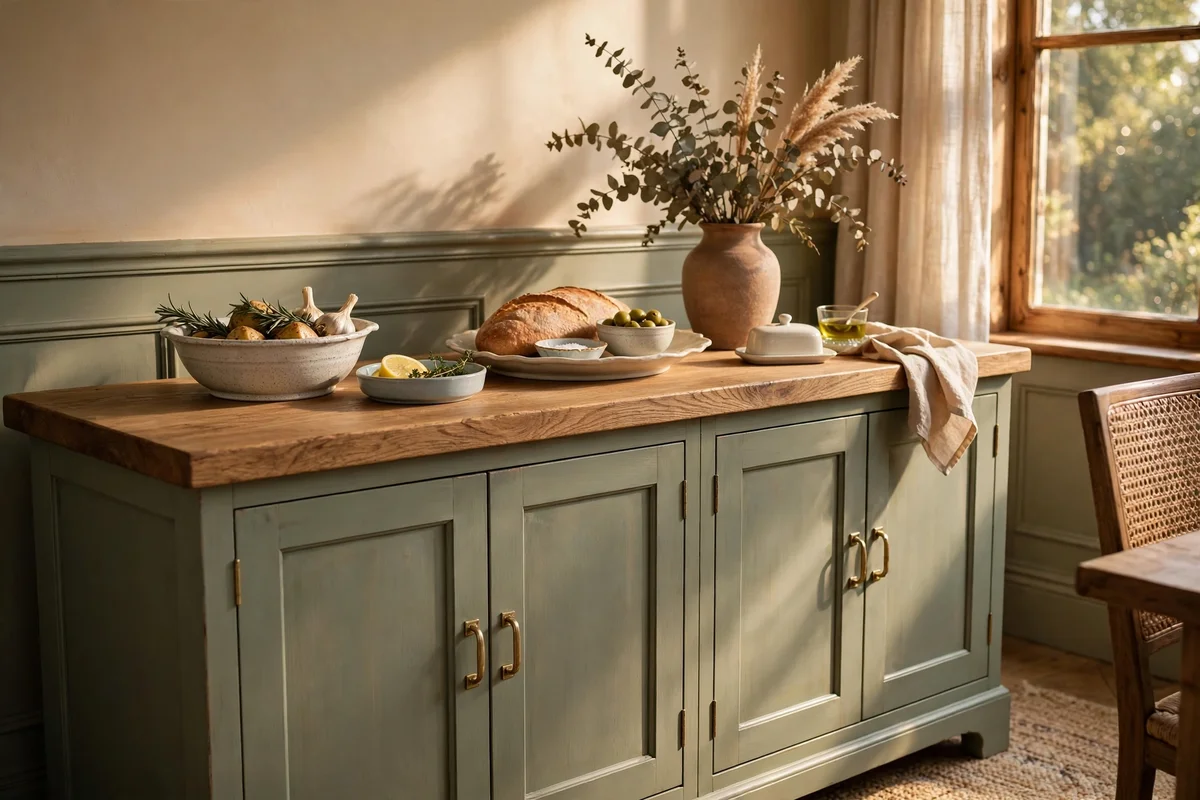
A thick worktop transforms low cabinetry into a useful surface for serving, display or a hallway landing strip. Choose oak or stone 30 to 40 mm thick with a 2 cm overhang on the front and sides, which protects the doors below from drips. In a dining room the top becomes a serving counter, in a hall it holds keys and post, and in a bedroom it works as a dressing surface. Seal oak with hardwax oil in three thin coats so it resists rings and spills.
Support any overhang deeper than 25 cm with hidden steel brackets, since stone and thick oak are heavy. Keep the top one material along the whole run for a calm line. The mistake to avoid is butting a timber top hard against a wall without a 3 mm expansion gap, which causes buckling in humid months. Budget tip: a 40 mm oak worktop offcut from a kitchen supplier often costs less than a custom stone piece.
24. Add Crown Moulding and a Plinth So Cabinets Read as Built In
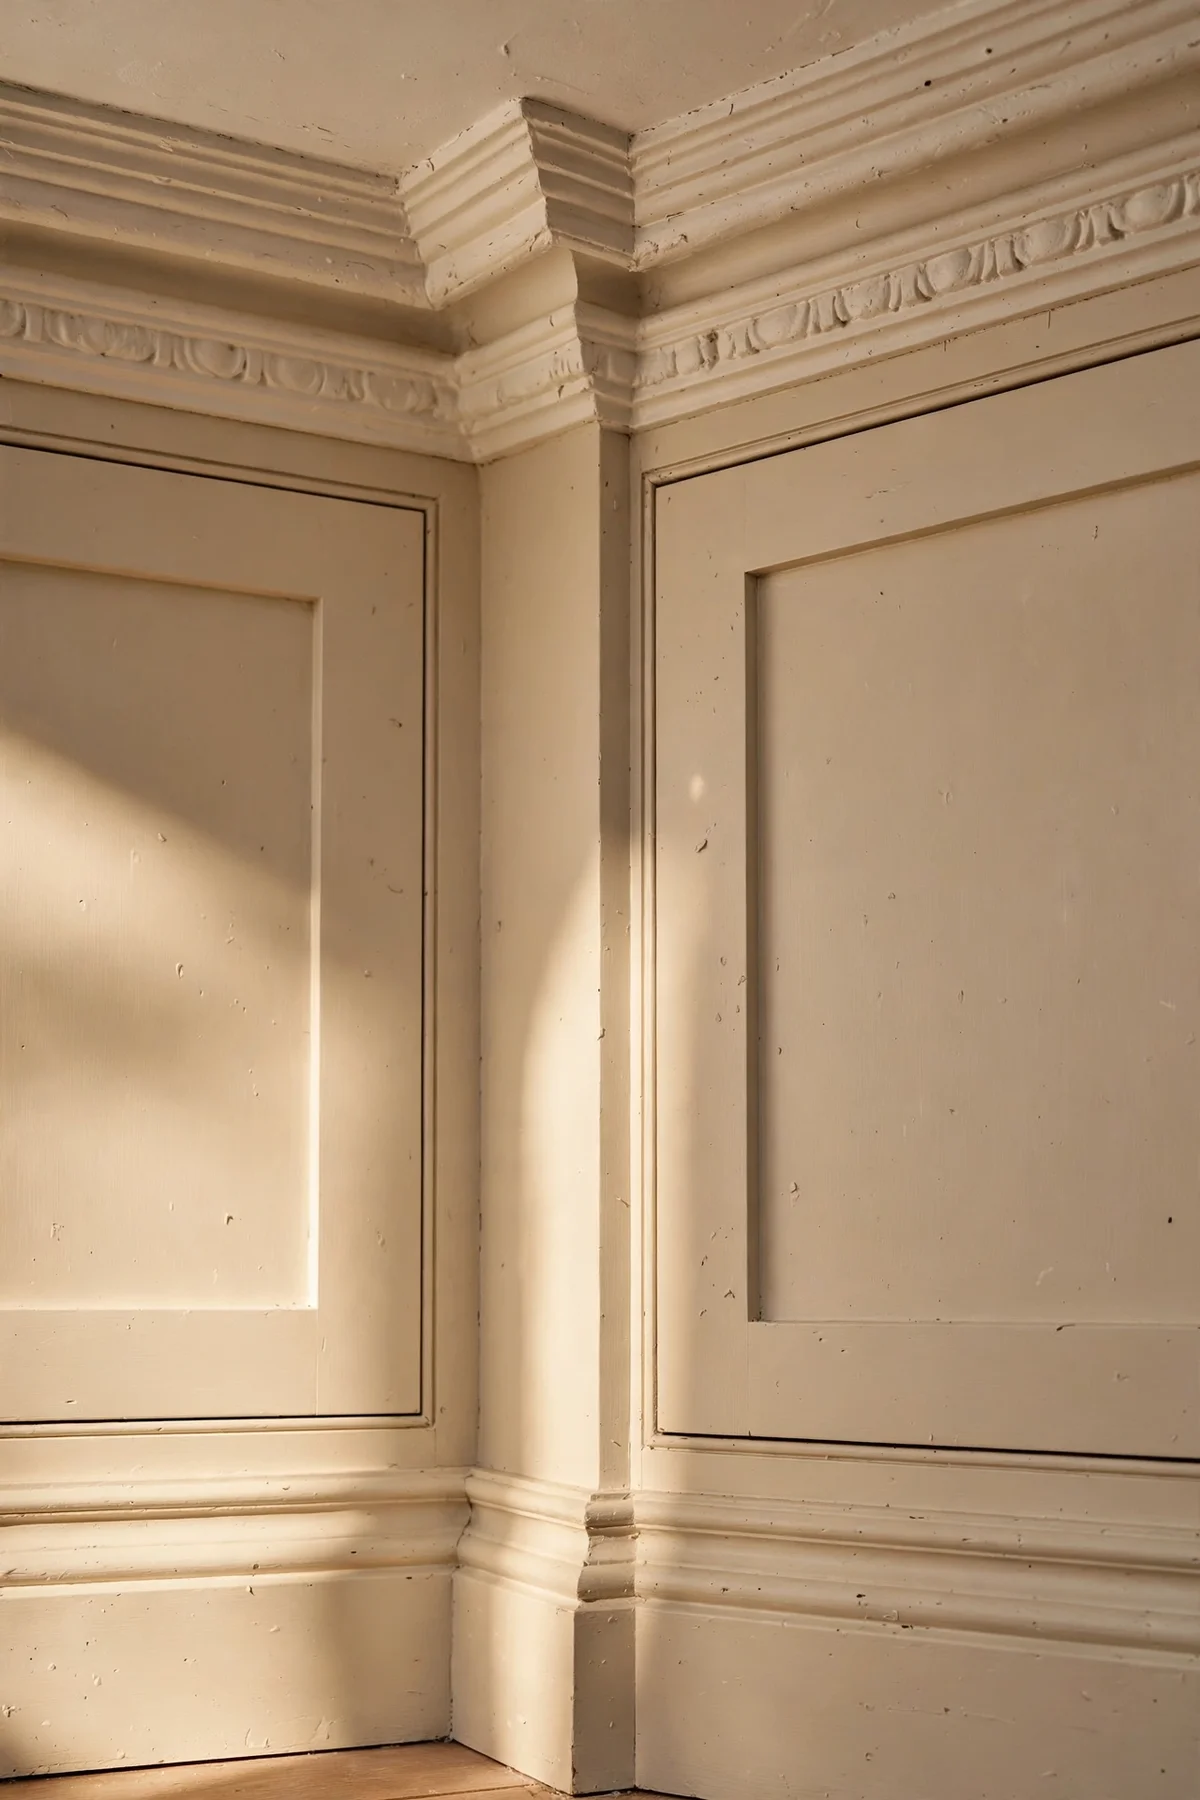
The difference between flat pack furniture and true built ins is often just the trim. Fit a 10 cm crown moulding or cornice along the top of the cabinets, mitred at corners and scribed to the ceiling, and a 7 to 10 cm plinth at the base set back 2 cm from the doors. Caulk the joints where trim meets walls and ceilings, then paint everything in one colour so the separate boxes disappear into a single composition. This simple framing makes standard carcasses look like original architecture.
Choose a cornice profile that matches or echoes existing skirting boards so the new work belongs to the house. Paint the plinth the same colour as the cabinets, never white against dark doors. The mistake to avoid is leaving a visible gap between the cabinet top and a sloping ceiling, which breaks the illusion instantly. Budget tip: primed MDF cornice and plinth cost little and paint beautifully with two coats of eggshell.
25. Plan One Wall at a Time and Finish Each Room Before Starting Next
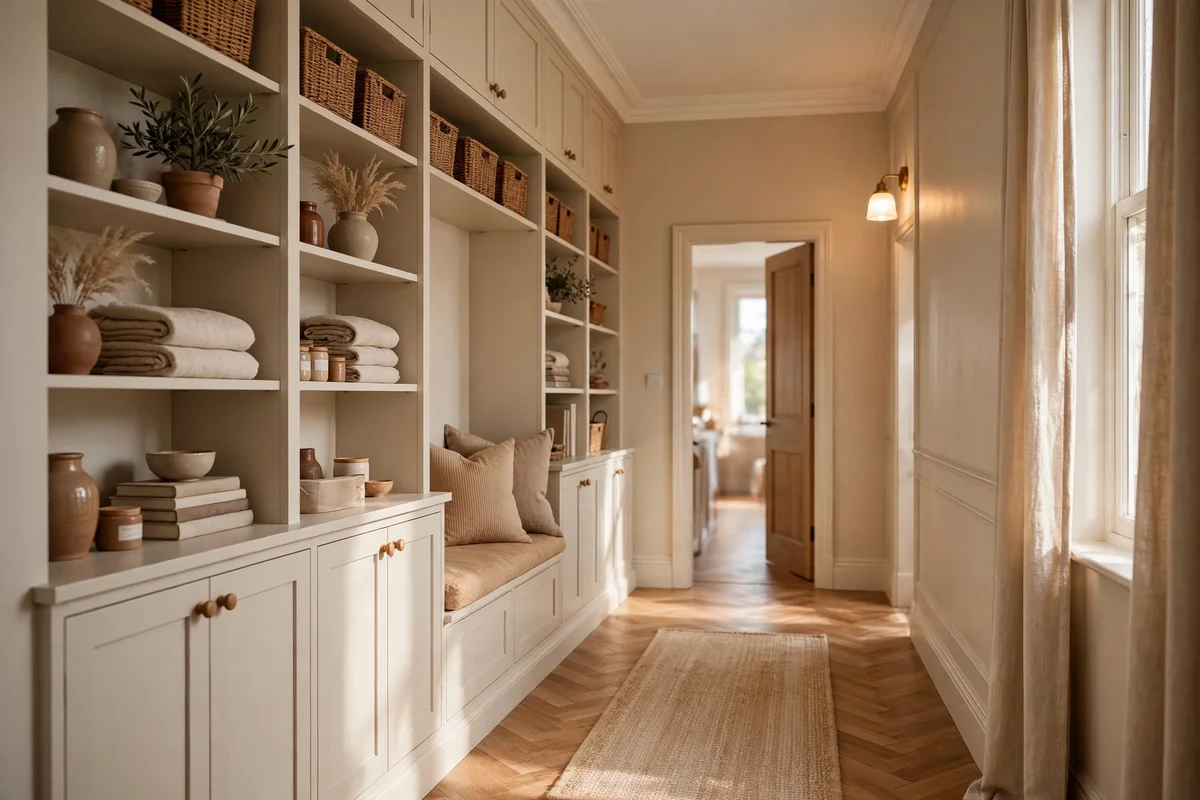
The calmest way to furnish a whole house with built ins is to plan one wall at a time and finish each room before moving on. Start with the room that causes the most daily friction, usually the hallway or kitchen, and complete it fully including paint, hardware and styling. Living with one finished room teaches you what you actually use, which sharpens the plan for the next. Rushing three rooms at once spreads the budget thin and leaves every space half done.
Keep a simple notebook of measurements, paint colours and hinge types from each project, since matching them later saves hours. Order all fronts and panels for one wall together to guarantee one batch colour. The mistake to avoid is buying storage for imagined future belongings instead of the things you own now, which fills cabinets with clutter on day one. Budget tip: finishing one wall per season spreads a large project across the year affordably.
Built in cabinets reward the patient planner. Each idea in this collection shares the same spirit: storage that is measured to the room, built from honest materials, and finished so carefully that it looks like part of the house itself. When every object has a home, rooms feel calmer, mornings run smoother, and the daily tidy takes minutes instead of stretching into an hour.
If the full list feels ambitious, start with the easiest win this week: the slim 25 cm hallway cabinet for keys and post. One small cabinet, fixed properly and painted to match your woodwork, will change how your entrance feels every single day. From that first finished piece, the rest of the house will quietly start asking for its turn.
Frequently Asked Questions
How much do built in cabinets cost per linear metre?
Bespoke built in cabinets typically cost 800 to 2000 per linear metre fitted, depending on materials and region. A mid range route using flat pack carcasses with custom fronts lands around 400 to 800 per metre. Painting existing cabinets costs a fraction of either. Always get three itemised quotes and check whether the price includes paint, hardware and lighting, which are often listed as extras.
Are flat pack carcasses with custom fronts a good compromise?
Yes, for most homes. Standard carcasses are square, strong and cheap, while made to measure fronts, side panels and trim give the fitted look. The result typically costs 40 to 60 percent less than full bespoke. The compromise is standard internal depths and widths, so very awkward alcoves may still need a joiner. Fix everything to walls properly for safety.
How deep should built in cabinets be in each room?
Match depth to the contents. Wardrobes need 60 cm for hanging, media units 45 to 60 cm for equipment, bookshelves 25 to 35 cm, hallway consoles 25 cm to protect walkways, and linen towers 30 cm for folded towels. Deeper is not always better; beyond 60 cm, items get lost at the back unless you fit pull out fittings.
Can renters install built in style storage?
Renters can get the look with freestanding pieces dressed as built ins. Use tall bookcases or wardrobes fixed with removable anti tip straps, add a painted pelmet and plinth that can be unscrewed later, and keep fixings minimal. Avoid drilling into tiles or cutting into walls. Choose pieces you can take with you, and photograph the original wall condition before you start.
What paint finish is best for painted cabinetry?
A satin or eggshell finish suits cabinetry best. It wipes clean, resists scuffs and shows fewer brush marks than gloss, while looking more refined than flat matt. Use a dedicated primer first and apply two thin coats rather than one thick one. Water based eggshells dry fast and keep odour low, which matters when painting in a lived in home.