Crafts
20 Fabric Storage Ideas That Keep Craft Rooms Calm, Neat and Ready to Create
By Anna Wells · · 22 min read
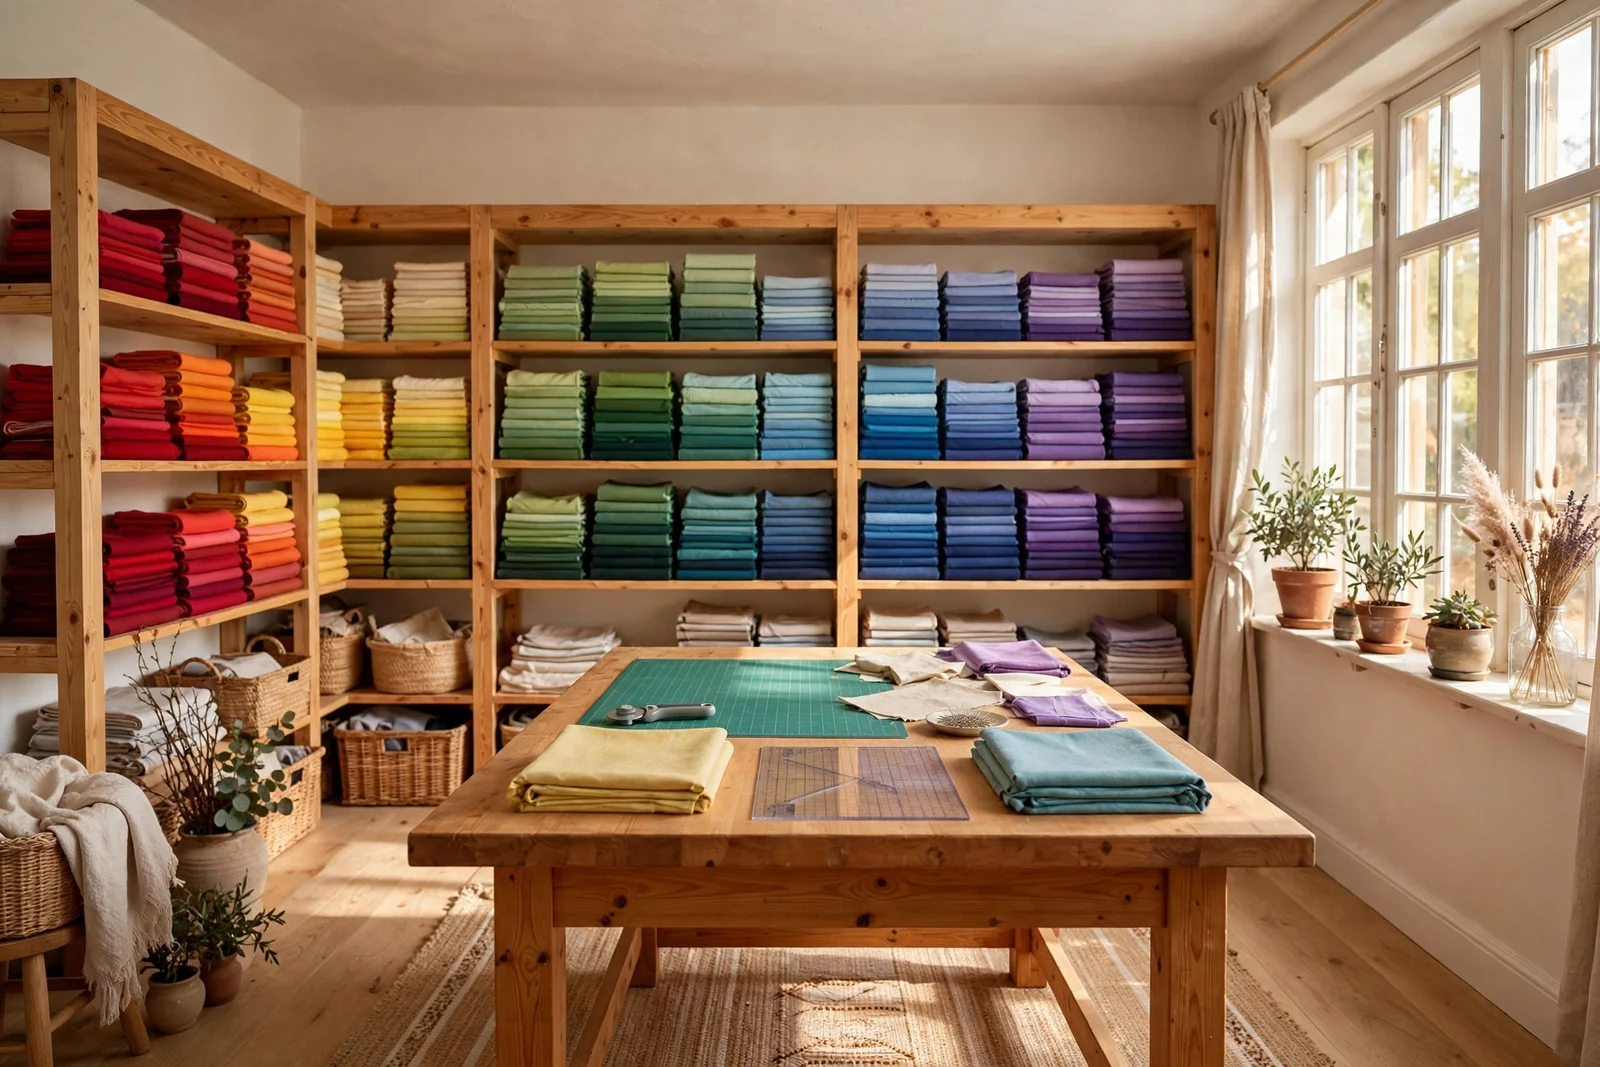
A fabric collection is a joy to sew from when every piece has a calm, visible home, and these twenty storage ideas help you fold, file and display your cloth so the room feels restful and ready for the next project.
A fabric stash should feel like a small, well-loved shop that you get to browse every day. When cloth is folded with care, sorted in a way that matches how you sew, and kept where light and dust cannot harm it, choosing materials becomes the happiest part of starting something new. The ideas below mix open display with hidden storage, so a room of any size can feel calm, neat and genuinely ready to create.
Start by taking everything out and grouping your fabric honestly: everyday cottons, treasured prints, awkward bulky pieces and the scraps you cannot bear to waste. Measure your shelves, closet and under-table space before buying a single box. Storage that fits the room you actually have will always beat a beautiful system designed for a bigger studio, and most of the best solutions below cost very little.
1. Rainbow-Ordered Bolts on Open Pine Shelving
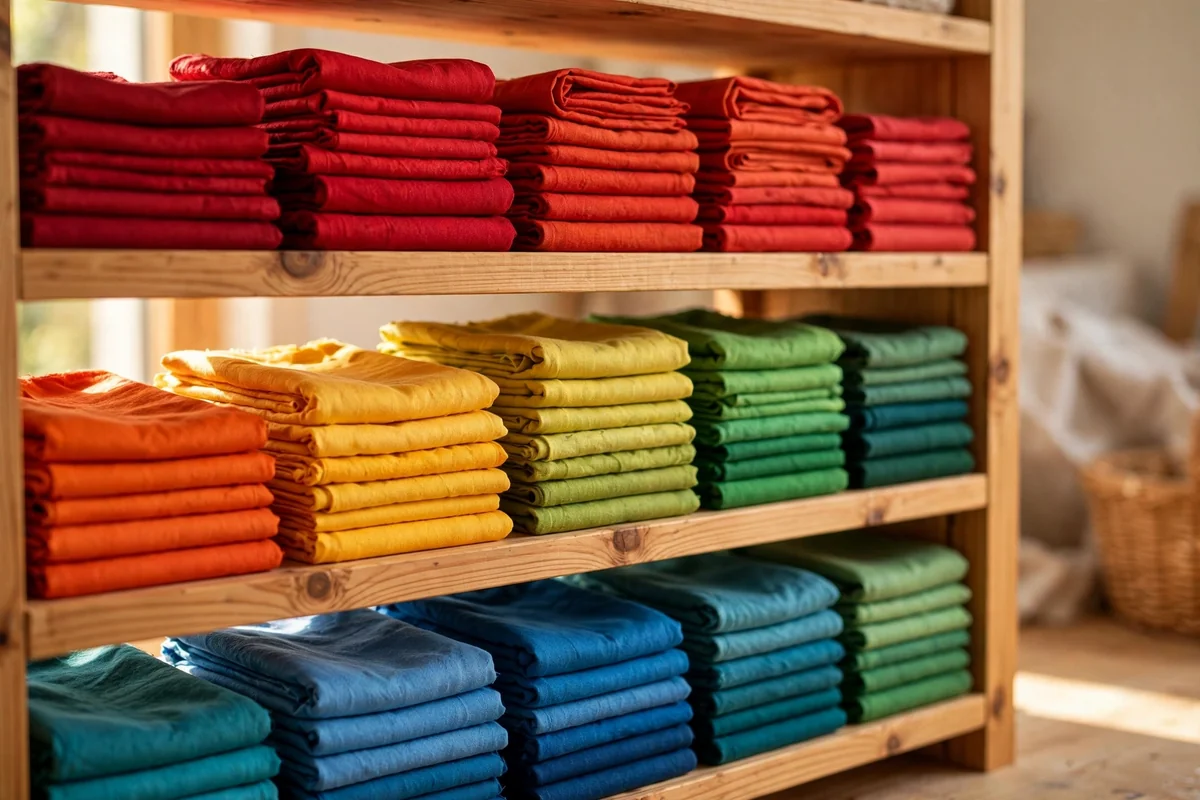
Open pine shelving turns your collection into the decoration of the room. Fold each cut to a consistent width of about 25 centimetres, using a book or card template, then arrange the stacks in colour order from warm reds and corals through to greens, blues and soft neutrals. Shelves around 30 centimetres deep suit most folded yardage without wasting space behind the stacks.
Keep everyday stacks no more than eight to ten pieces high so lower fabrics do not crease under the weight, and leave the eye-level shelf for the cottons you reach for weekly. A weekly dust with a dry cloth keeps open storage fresh. Avoid placing open shelves opposite a sunny window, because direct light fades prints unevenly over a single season.
2. Mini Bolts Wrapped on Sturdy Card for Uniform Rows
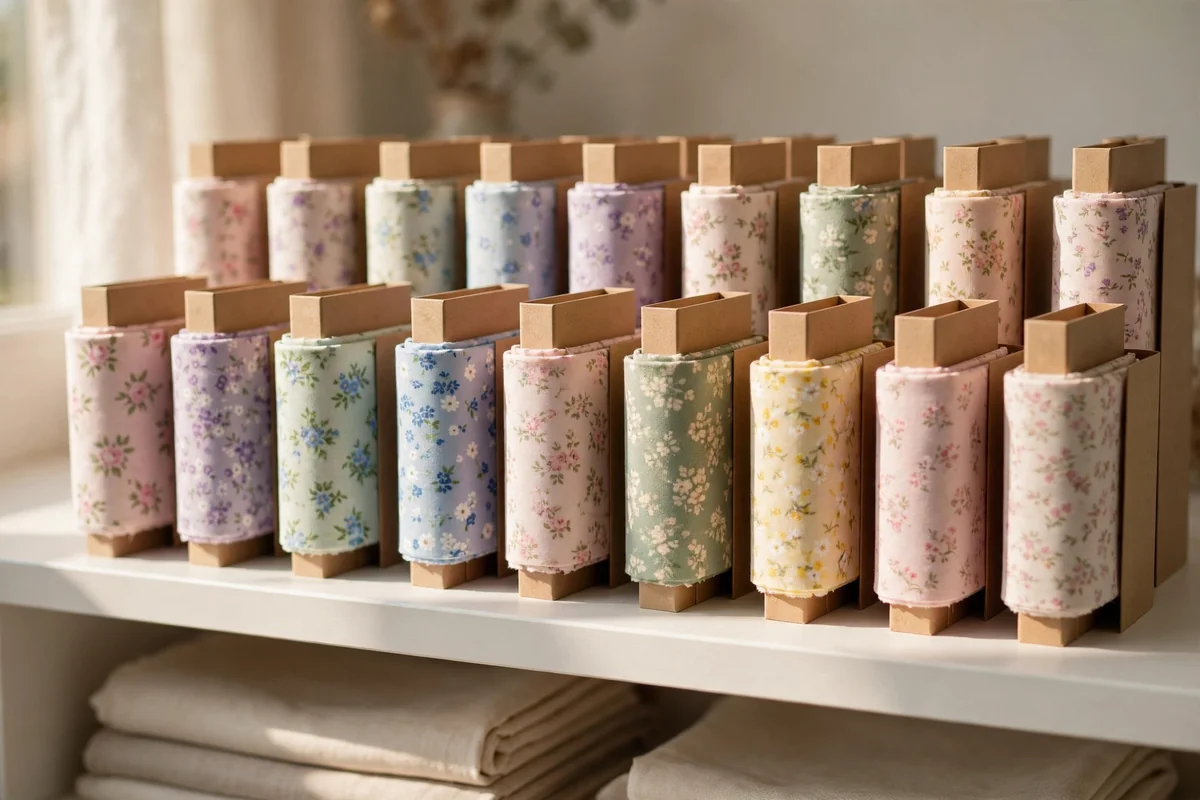
Wrapping fabric around stiff card rectangles creates mini bolts that stand in satisfyingly even rows. Cut acid-free board or clean recycled card to roughly 15 by 25 centimetres, fold the fabric selvedge to selvedge, then wrap it smoothly and secure the loose end with a single pin or a small clip. Pieces from half a metre to two metres suit this method best.
Stand the bolts upright on shelves or inside deep drawers, grouped by colour family, and you can flick through them like files in a cabinet. Because every bolt is the same height, nothing hides at the back. Avoid wrapping very heavy upholstery cloth this way, since the card can bow. For delicate vintage prints, choose acid-free board so the fibres stay sound over years of storage.
3. Glass-Front Armoire That Shows Colour While Blocking Dust
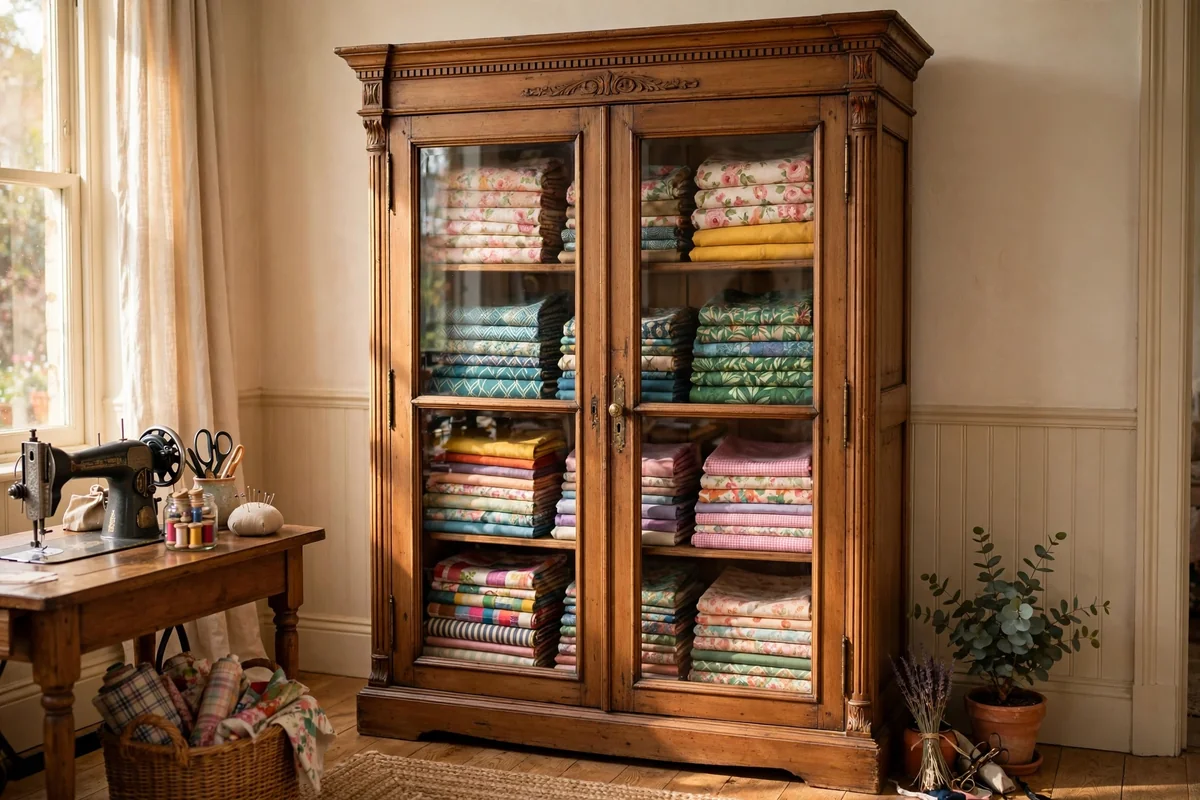
A glass-front armoire gives you the pleasure of seeing your fabric and the protection of closed doors at the same time. Old china cabinets and bookcases with glazed doors are easy to find secondhand, and a coat of warm white or sage paint plus new brass handles makes one feel made for a sewing room. Adjustable shelves let you set taller gaps for bulky stacks and shallow ones for fat quarters.
Arrange the contents in gentle colour gradients so the cabinet reads as one calm picture rather than a jumble. Keep the most light-sensitive treasures, such as hand-dyed cloth and old family textiles, on the lowest shelves where sun reaches least. Wipe the glass monthly, and line wooden shelves with plain cotton if the finish is rough, so nothing snags delicate weaves.
4. Clear Lidded Tubs Sorted by Fabric Family
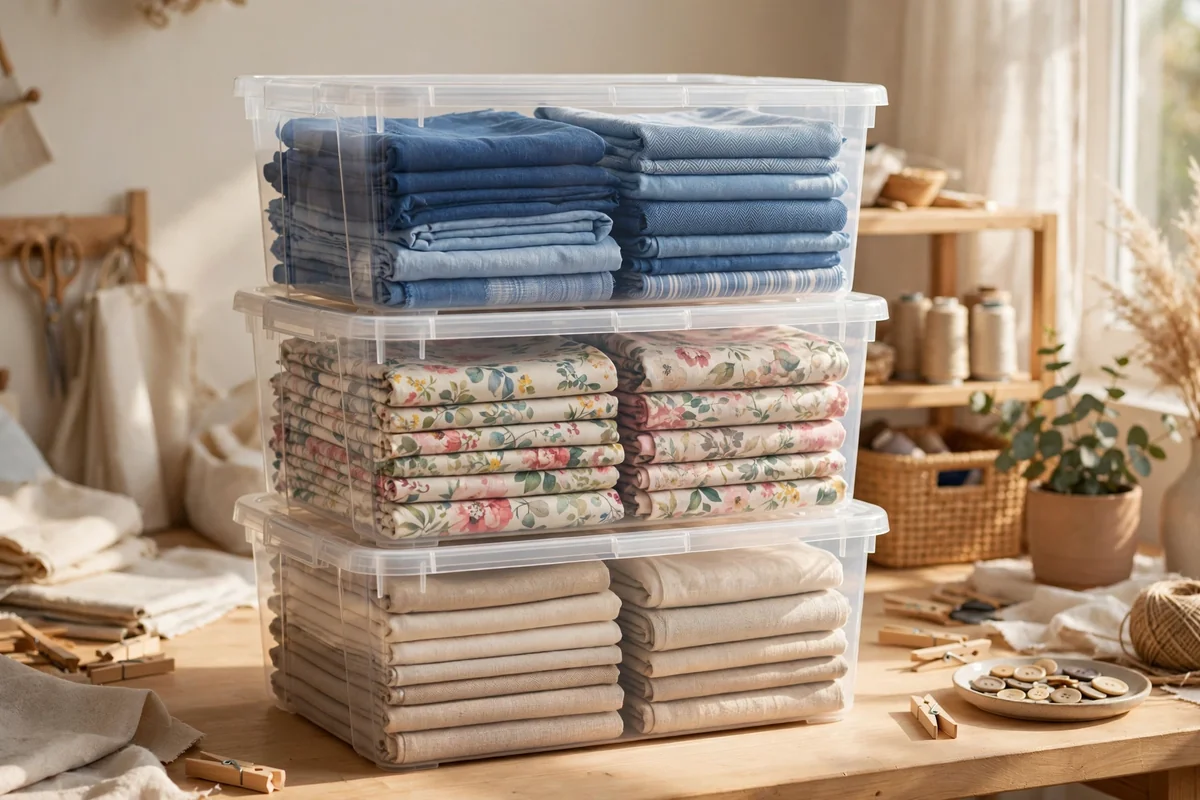
Transparent tubs are the workhorses of fabric storage, especially for seasonal prints and large yardage. Sort by family rather than by single colour: one tub for blues, one for florals, one for festive prints, one for plain linens. Sizes around 30 to 40 litres stack safely three high in a closet and still let you identify contents at a glance without lifting a lid.
Choose tubs with snug lids and smooth interiors, and fold fabric to the width of the box so pieces slide out without unfolding everything. Slip a plain card on top listing the contents if your collection is large. Store tubs away from radiators and damp exterior walls, and never seal fabric that feels even slightly damp, because trapped moisture invites mildew and musty smells.
5. A Painted Vintage Dresser With File-Folded Drawers
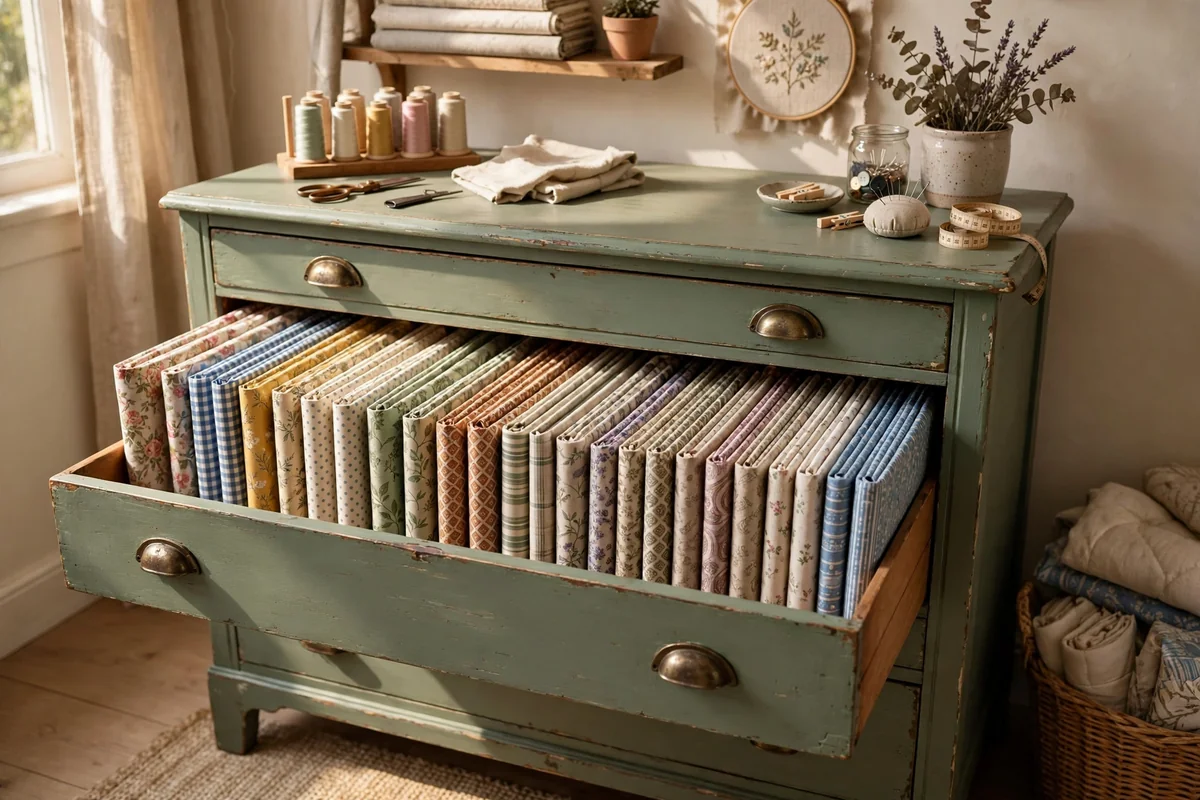
A sturdy old dresser holds a surprising amount of fabric while adding heritage charm to the room. Paint it in a soft, timeless shade, line the drawers with plain paper, then file-fold each piece: fold it into a rectangle slightly narrower than the drawer depth and stand the rectangles upright in rows, like files in a cabinet, so every folded edge shows at once.
Deep drawers suit yardage and fleece, while shallow top drawers are perfect for fat quarters and charm packs. Because the fabric is hidden, this is a kind answer for prints you love but find visually busy on open shelves. The dresser top doubles as a folding surface or a home for your machine. Avoid overpacking, since crushed rows crease and become hard to browse.
6. Three-Tier Rolling Trolley for the Project in Progress
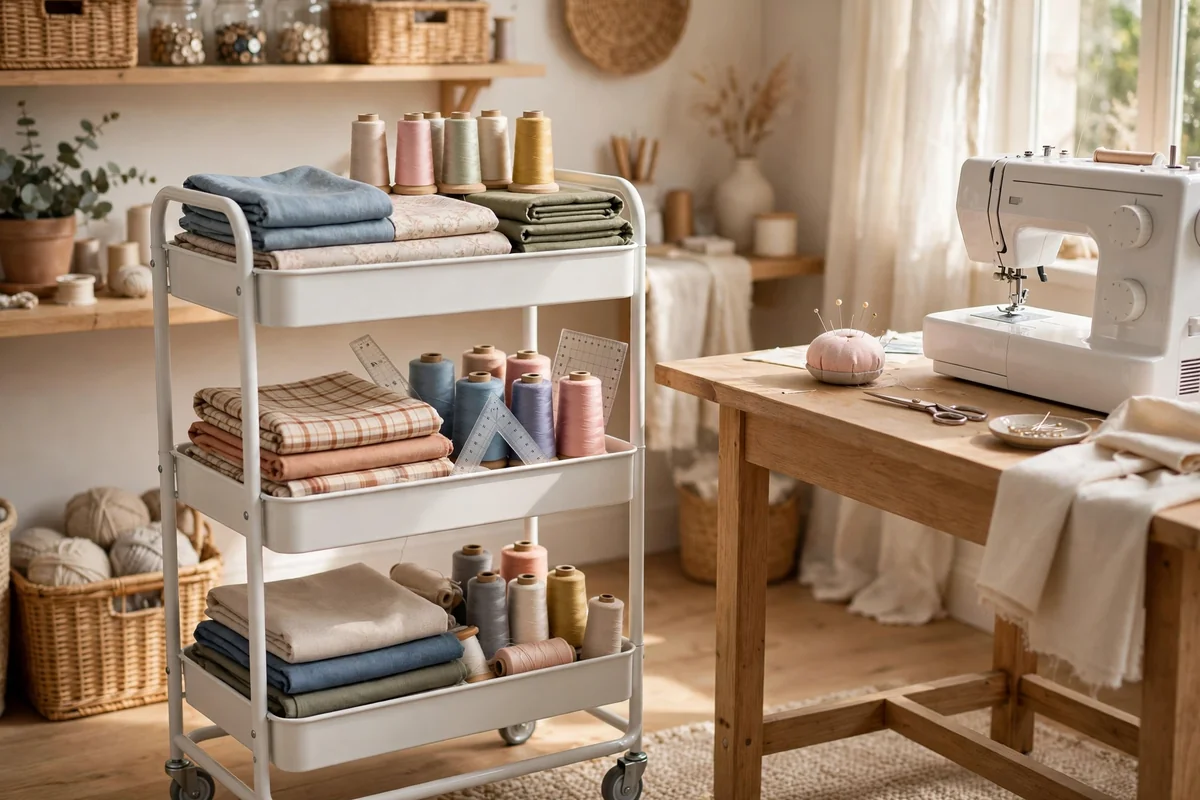
A slim three-tier trolley keeps the current project corralled and mobile. Give the top tier to the fabrics you are cutting this week, the middle to matching threads, pins and the pattern, and the bottom to tools such as rulers and spare bobbins. When you finish for the day, the whole project rolls into a corner or closet, leaving the table clear and welcoming.
Look for a trolley about 40 centimetres wide so it slips between a table leg and the wall, with wheels that roll smoothly over your floor type. Metal trolleys in cream, sage or soft grey blend quietly with most rooms. The common mistake is letting the trolley become a permanent home for five half-finished projects, so set a simple rule: one project per trolley, finished or parked before the next begins.
7. Cube Shelves Mixing Display Stacks and Hideaway Baskets
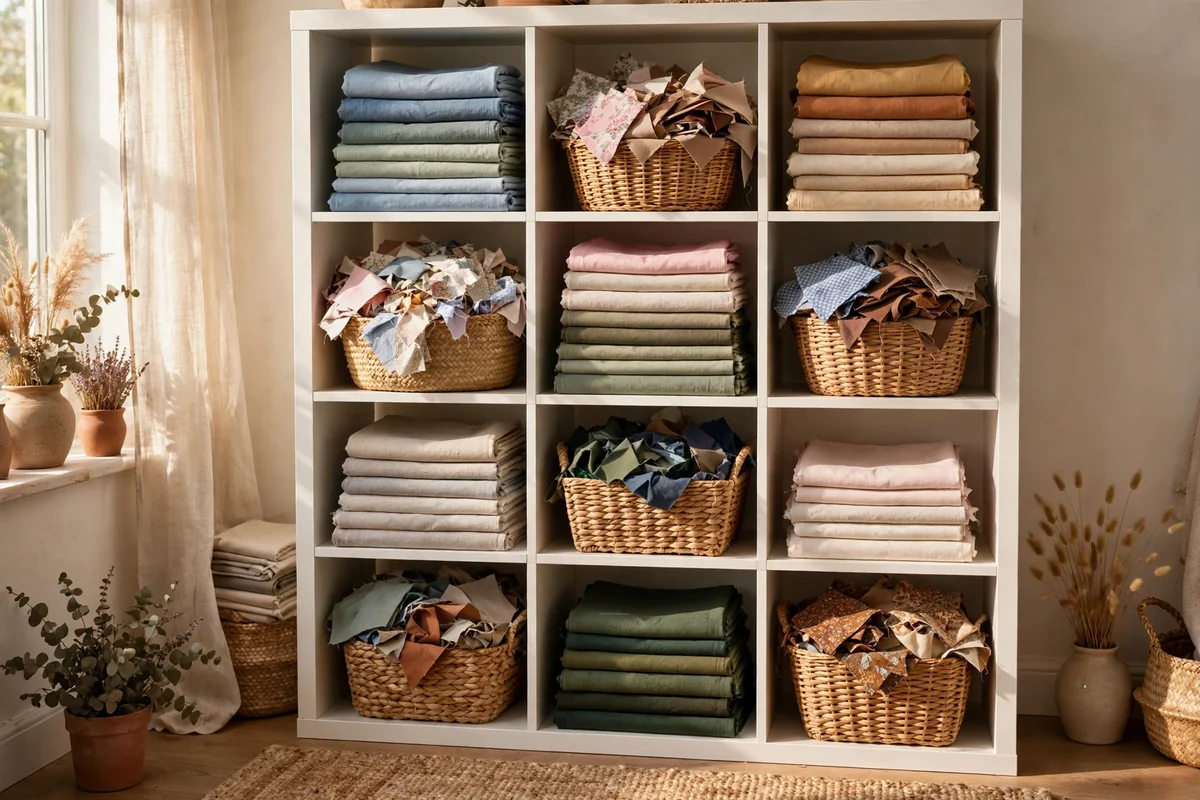
Cube shelving earns its place because every square can do a different job. Leave a few cubes open with pretty folded stacks as display, and fill the rest with fabric baskets that hide scraps, batting offcuts and works in progress. Standard cubes around 33 centimetres square accept most ready-made baskets, which makes the system easy to extend one cube at a time.
Place display cubes at eye level and basket cubes lower down, where heavier contents are safer to lift. Felt, denim and upholstery remnants that refuse to stack neatly behave well inside baskets. Keep basket colours within one calm family, such as natural linen and soft white, so the unit feels serene rather than patchy, and rotate which prints are displayed every season for a small, refreshing change.
8. Shallow Pull-Out Drawers Labelled by Material
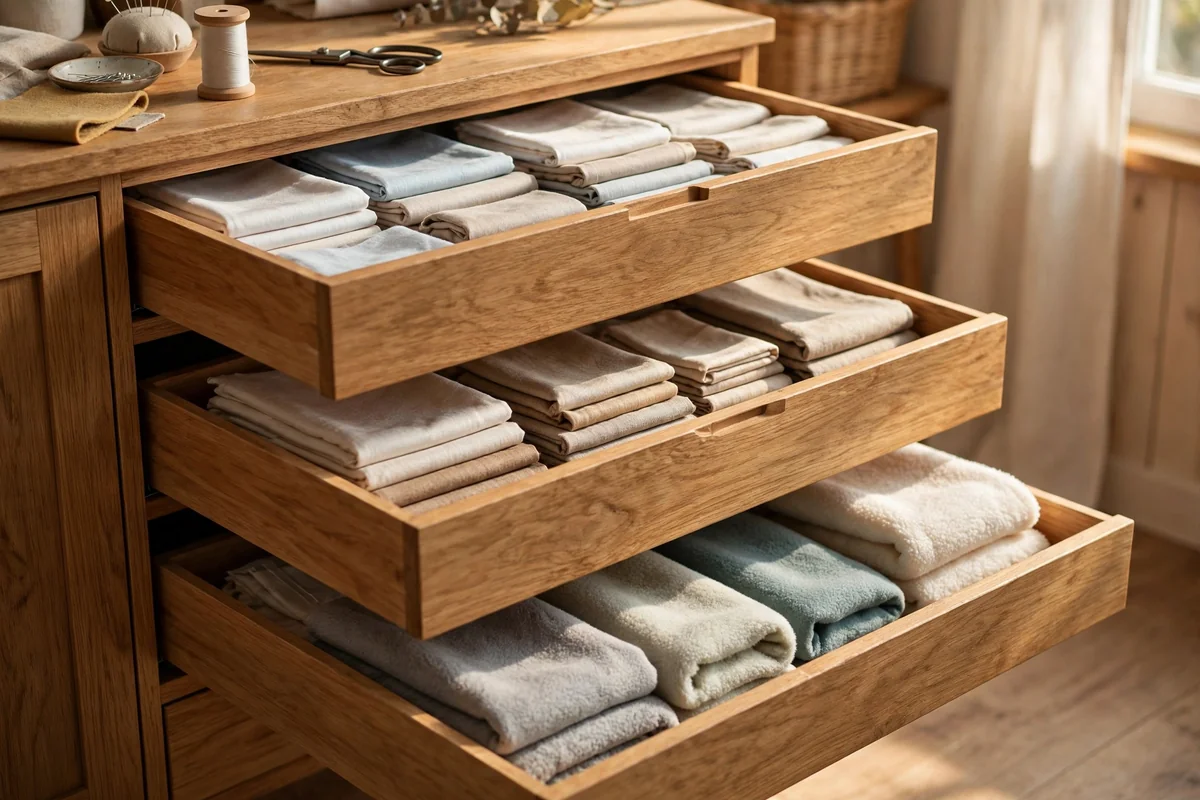
Shallow drawers solve the oldest storage problem of all: the piece you need is always at the bottom of the pile. Drawers around 10 to 15 centimetres deep hold a single layer of file-folded fabric, so everything is visible the moment you pull. Sort by material instead of colour here, with a drawer each for quilting cotton, linen blends, dress fabrics and stretch jersey.
Small, neat labels on the drawer fronts, written in one consistent style, make the system work for the whole household and save you re-sorting after every project. Full-extension runners are worth the small extra cost because they bring the back row within reach. Avoid very deep drawers for fabric; pieces vanish under each other, crease badly, and quietly turn into fabric you forget you own.
9. Pegboard Rail for Interfacing, Vinyl and Stabiliser Rolls
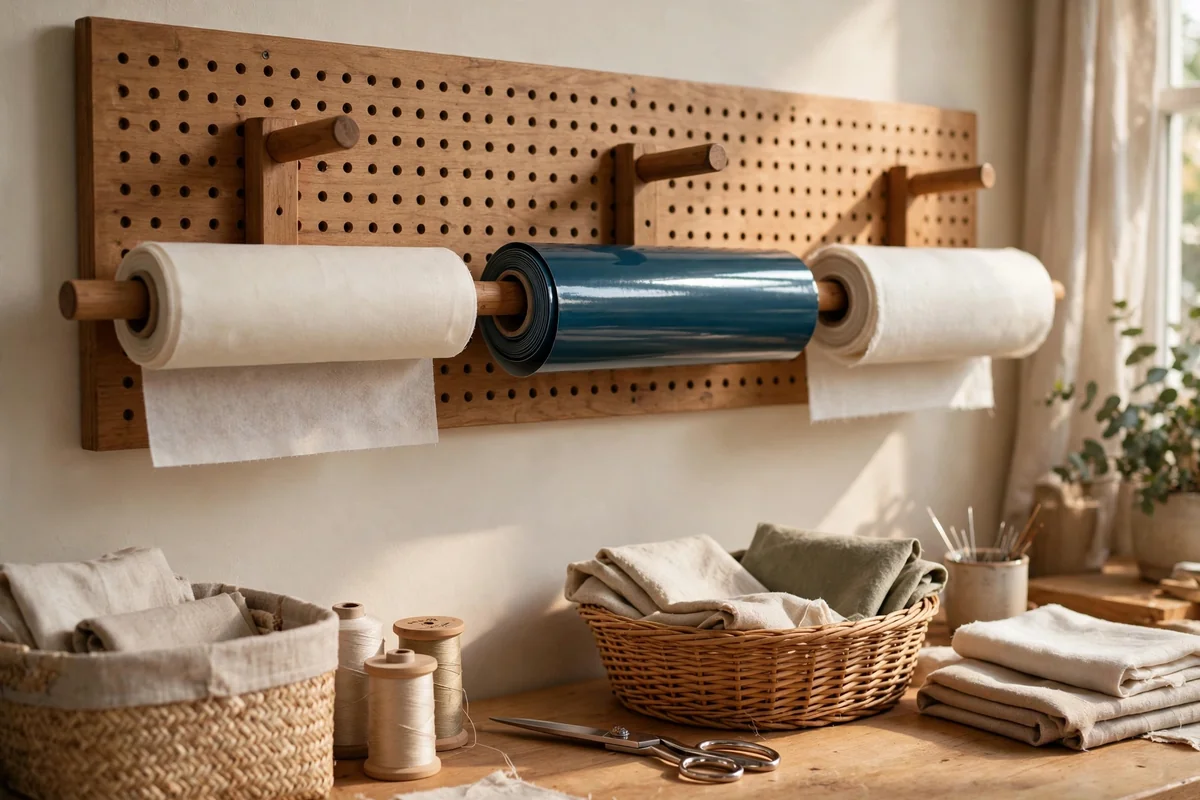
Rolls of interfacing, vinyl, cork fabric and stabiliser misbehave in drawers, leaning, unrolling and creasing. A pegboard rail gives each roll its own peg at a comfortable height. Use sturdy pegs at least 20 centimetres long, spaced roughly 25 centimetres apart so wider rolls do not rub, and hang the rolls you use weekly at waist to shoulder height for easy lifting.
A rail above the cutting table keeps these materials in sight, which prevents the classic mistake of buying a second roll while the first hides in a corner. Hanging also keeps vinyl smooth, since folding sets stubborn creases in it. Keep very heavy rolls on the lowest pegs, and dust the board monthly. If wall space is tight, fit the pegboard inside a closet door instead.
10. Wire Baskets Rolled Beneath the Cutting Table
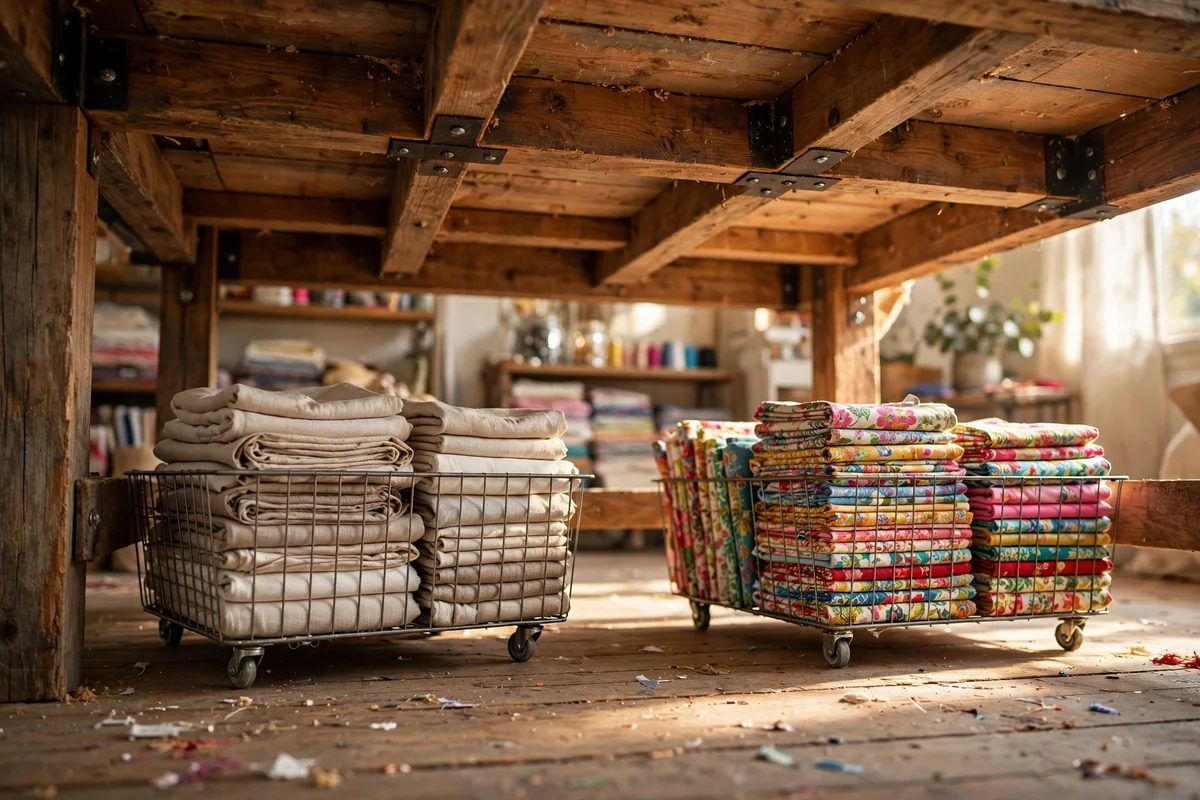
The hollow beneath a cutting table is prime storage that most rooms waste. Rolling wire baskets, roughly 40 by 60 centimetres, slide into that space and pull out fully, so nothing lurks at the back. Dedicate one basket to neutrals, one to colourful cottons and one to the project queue, and the open wire sides let air circulate around the cloth.
Measure the clearance under your table before buying, including any cross braces, and choose baskets whose handles do not catch the table edge. This spot suits larger cuts you use often but do not need on display. Avoid storing your most delicate or light-sensitive fabrics here if the room is bright, and give the baskets a quick shake-out monthly so dust does not settle through the open weave.
11. A Sewing Closet Fitted With Floor-to-Ceiling Shelves
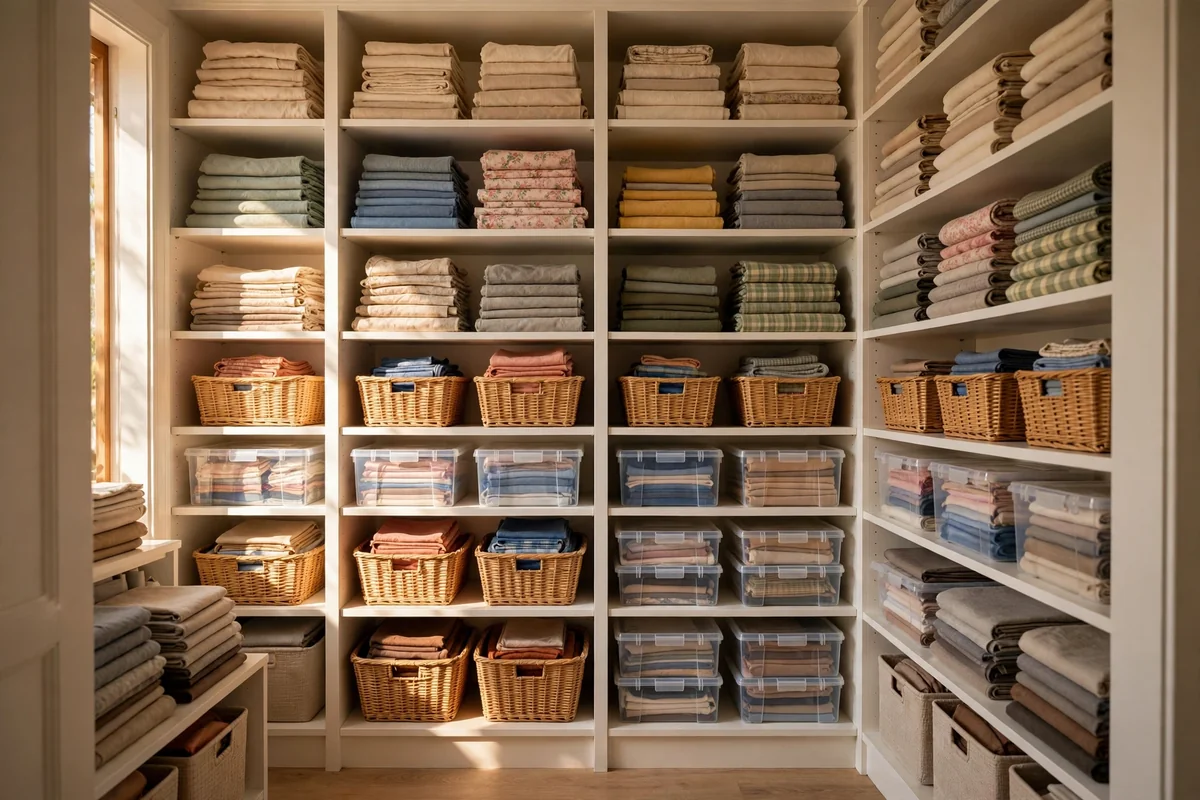
A spare closet can hold an entire collection if you replace the single hanging rail with shelves from floor to ceiling. Adjustable shelving boards, spaced 25 to 35 centimetres apart, let you mix folded stacks, tubs and baskets on one wall. Put weekly fabrics between waist and eye level, seasonal tubs up high, and heavy boxes at floor level where they are safe to lift.
Add a small battery light strip under one shelf if the closet is dim, because good light stops you pulling out the wrong shade. Keep the door area clear so you can step in and browse properly. The mistake to avoid is filling every centimetre at once; leave one shelf half empty as growing room, and your future fabric purchases will thank you.
12. Oversized Woven Baskets for Bulky Linen and Wool
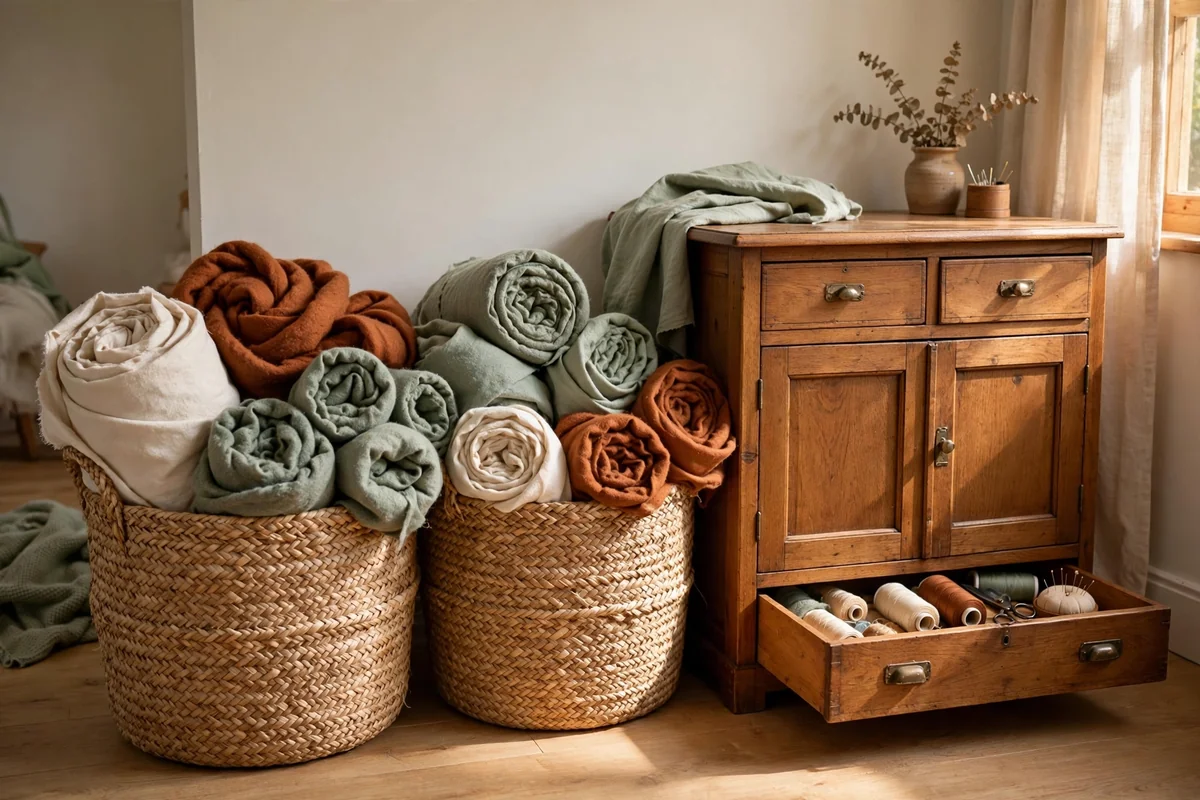
Some cloth simply refuses to fold into tidy stacks. Heavy linen, coating wool, chunky fleece and large upholstery remnants are happier loosely rolled and stood upright in oversized woven baskets. Seagrass, rattan and water hyacinth baskets around 45 to 55 centimetres across hold a generous amount while softening the room with natural texture that suits almost every style of decor.
Roll bulky pieces with the right side inwards to protect the surface, and stand rolls on end so you can see every colour at a glance. Place baskets beside the cabinet or under a window bench rather than in a damp corner. Because the storage is open, reserve it for sturdy fabrics you use regularly, and shake out and refold the contents each season to discourage dust and creases.
13. Magazine Files That Hold Fat Quarters Upright
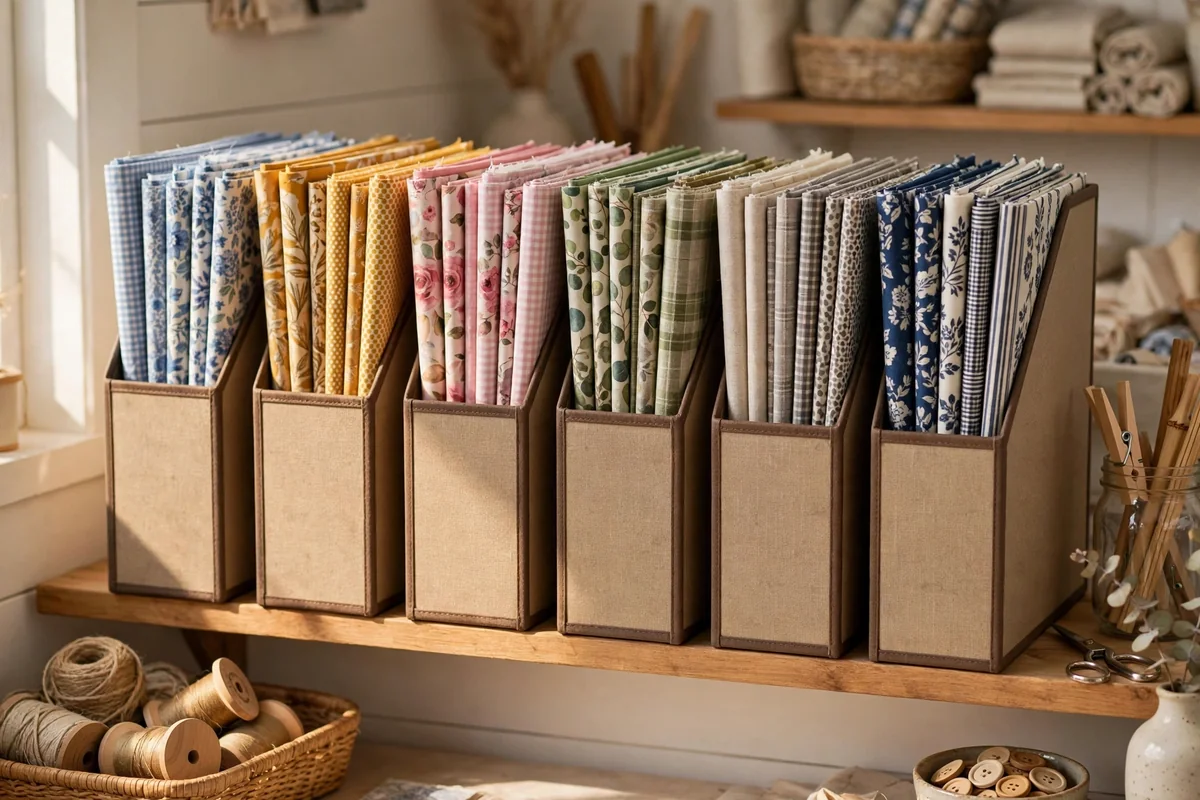
Sturdy magazine files are an inexpensive delight for fat quarters and small bundles. Fold each quarter to the height of the holder, stand a dozen or so upright inside, and you can browse prints the way you flick through files, pulling one out without disturbing the rest. A standard shelf holds five or six files, which is a full rainbow of quilting cotton in very little space.
Card holders are cheapest, but wooden or metal ones survive years of daily use and look calmer on open shelves. Group files by colour family or by collection, and keep a file for pre-cut squares near the cutting table. Avoid cramming files so tightly that fabrics crease against the edges, and keep paper holders away from anywhere damp, since softened card quickly sags.
14. Project Boxes That Keep Pattern, Cloth and Trim Together
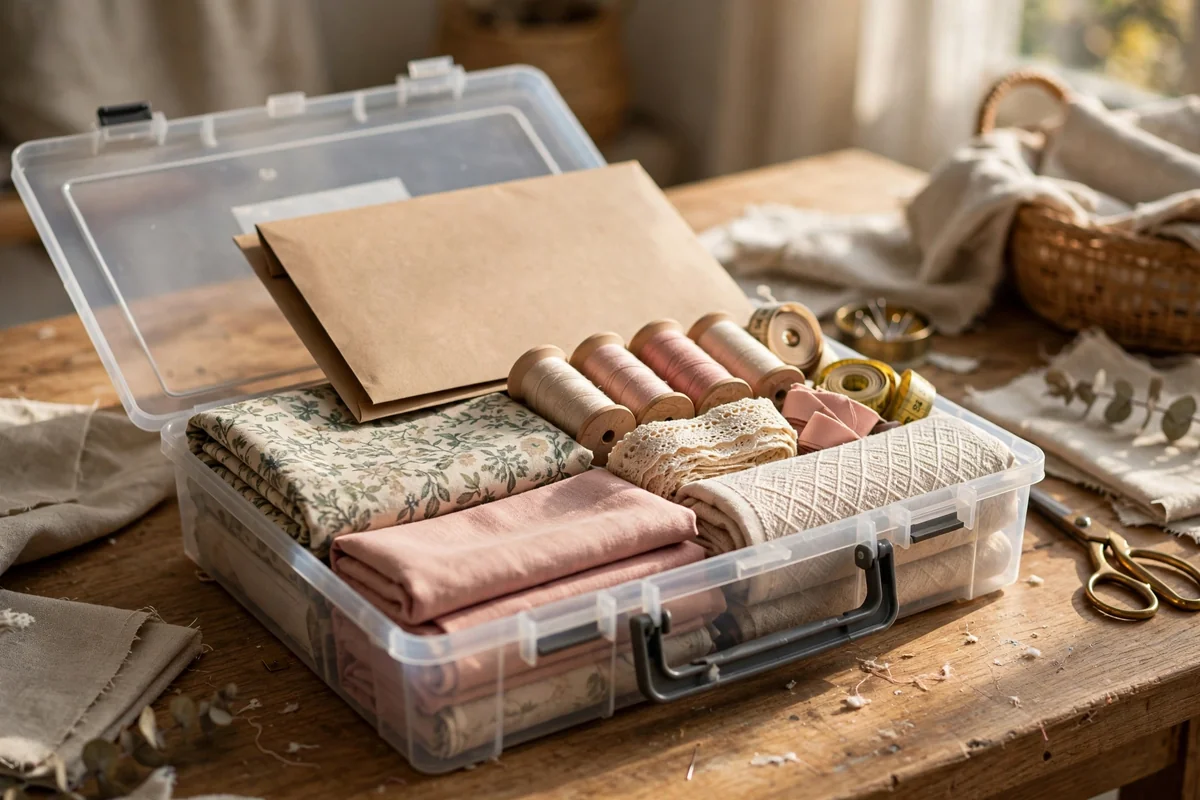
Storing fabric by project, rather than only by colour, saves remarkable amounts of time. When you plan a quilt, cushion set or garment, gather the chosen fabrics, the pattern, matching threads, buttons and interfacing into one lidded box of about 35 by 25 centimetres. Everything waits together, so a project paused for a month can restart in minutes instead of a fresh search through every shelf.
Clear boxes help you recognise the project at a glance, while plain boxes look calmer stacked. Note the project name and the date you gathered it on a card inside the lid. Keep active project boxes on the easiest shelf to reach, and retire finished ones promptly, returning leftover cloth to the main collection so half-used fabric does not disappear from your mental inventory.
15. Scrap Jars Sorted by Colour on the Worktop Shelf
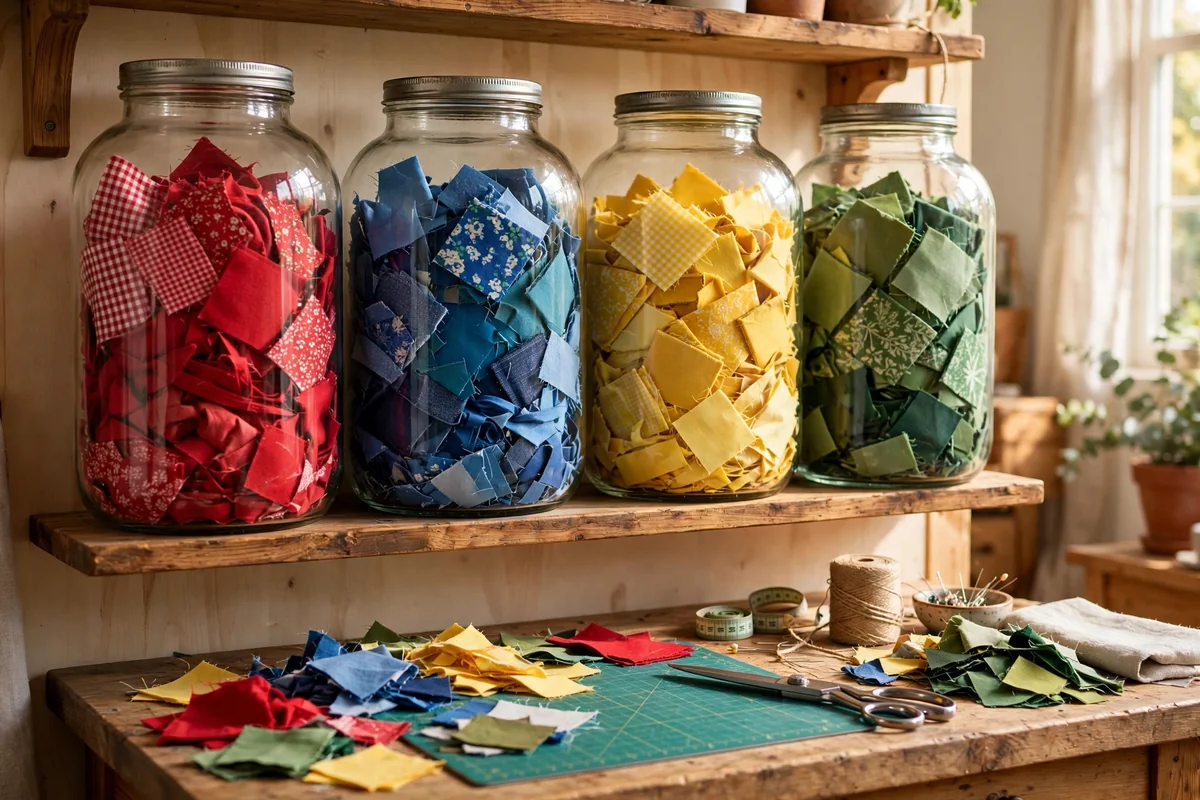
Even small scraps earn their keep in applique, patchwork and tiny gift projects, and glass jars keep them both tidy and pretty. Sort scraps into large clear jars, roughly one to two litres each, by colour family, and line them along a shelf near the cutting table. The layered colours look like jars of sweets and quietly decorate the room while staying genuinely useful.
Keep pieces bigger than about 5 centimetres square; anything smaller goes to stuffing or recycling, which stops the jars becoming cluttered. Press scraps flat before adding them so each jar holds more and stays easy to search. Because glass is heavy, use a sturdy shelf and keep jars away from the table edge. Empty and resort each jar once a year to remove pieces you will honestly never use.
16. Door-Back Canvas Pockets for Pre-Cuts and Small Bundles
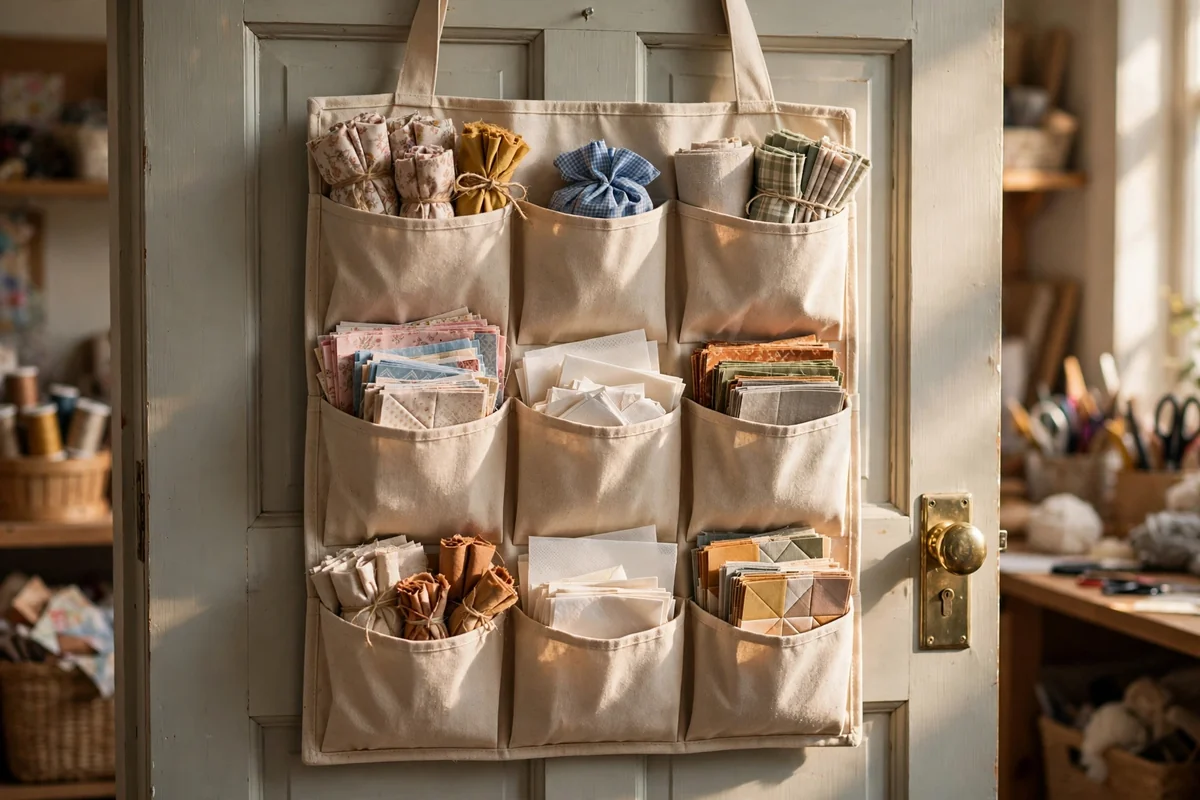
The back of the craft room door offers a full panel of storage that costs no floor space at all. A sturdy canvas organizer with deep pockets, hung from two strong hooks, holds pre-cut squares, small bundles, interfacing pieces and charm packs in plain sight. Soft pockets are gentle on folded cloth and stop small items vanishing into the bottom of deep boxes.
Choose an organizer with pockets at least 12 centimetres deep so bundles sit securely, and hang it where the door opens fully without the pockets brushing the wall. This is an excellent home for the fabrics you are using this month, since everything is visible at a glance. Avoid overloading thin organizers with heavy yardage, because sagging pockets stretch, tear at the seams and eventually dump their contents.
17. A Wooden Ladder Draped With Current Season Favourites
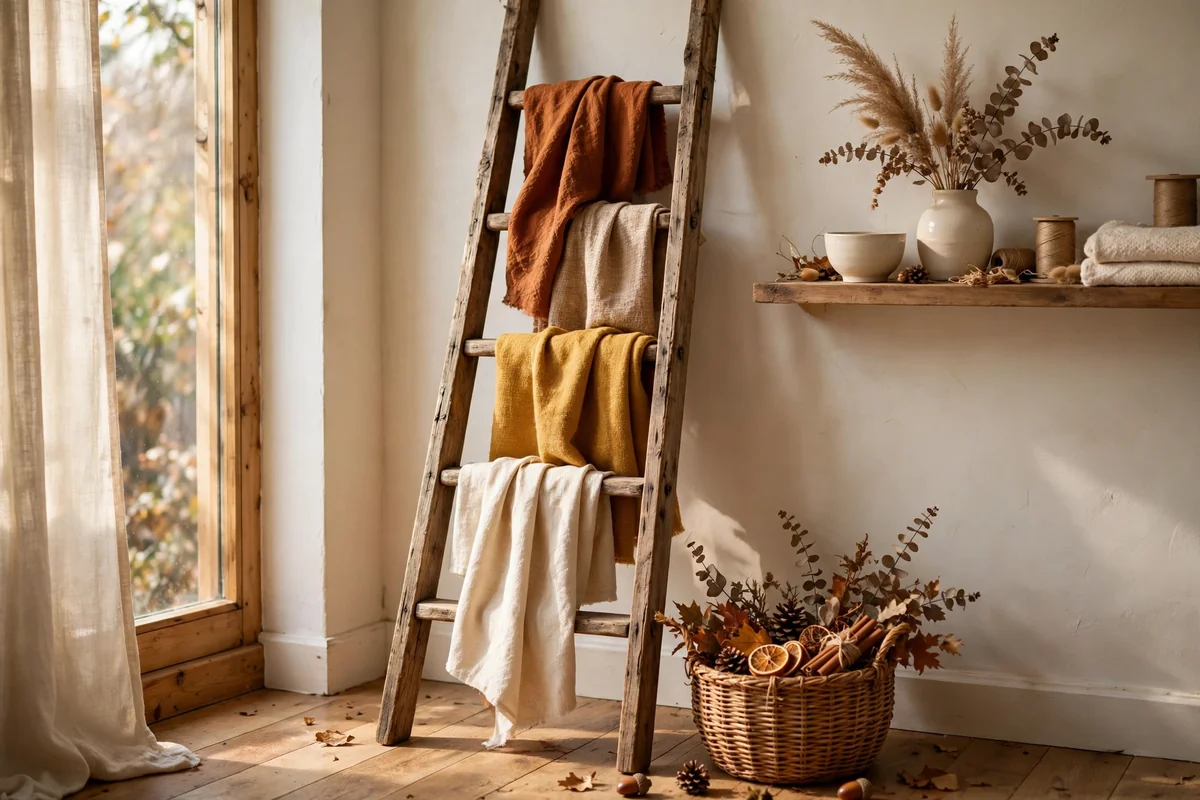
A simple wooden ladder turns a handful of favourite fabrics into a changing display. Drape folded lengths over the rungs, longest at the back, and the ladder becomes a soft banner of colour that reflects the season: fresh greens and florals in spring, warm rust and mustard tones in autumn. It takes minutes to restyle and keeps this month’s chosen cloth in mind while you plan.
Position the ladder where it will not be knocked, away from radiators and direct sun, and keep draped pieces to a light layer rather than a heavy pile. This is display, not deep storage, so rotate the selection every few weeks and return pieces to their shelves before they gather dust. A small basket at the ladder’s foot catches the matching threads and trims.
18. Floating Shelves Above the Sewing Machine Station
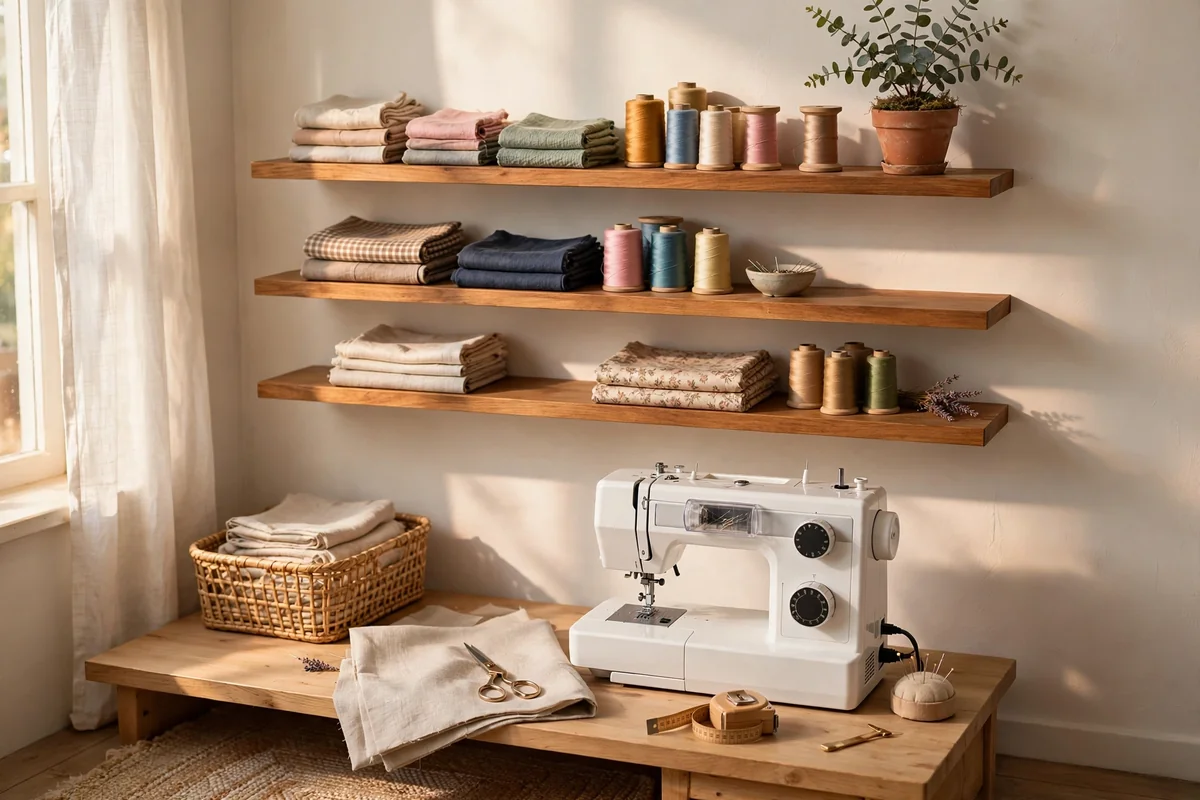
The wall above your machine is usually bare, yet it is exactly where small, quick storage helps most. Two floating shelves, each about 90 centimetres long and 20 deep, hold the fabrics for the current project, a row of thread spools and a jar of pins, all within arm’s reach while you sew. Fix shelves into studs or solid wall plugs, since fabric is heavier than it looks.
Keep the lower shelf at least 45 centimetres above the machine so fabric and hands move freely, and store only light, current items up high. A small plant or a framed swatch softens the arrangement. The mistake to avoid is creeping display, where every pretty object migrates upward until the shelves are decorative but useless; review them at each new project.
19. A Rotating Corner Tower for Awkward Nooks
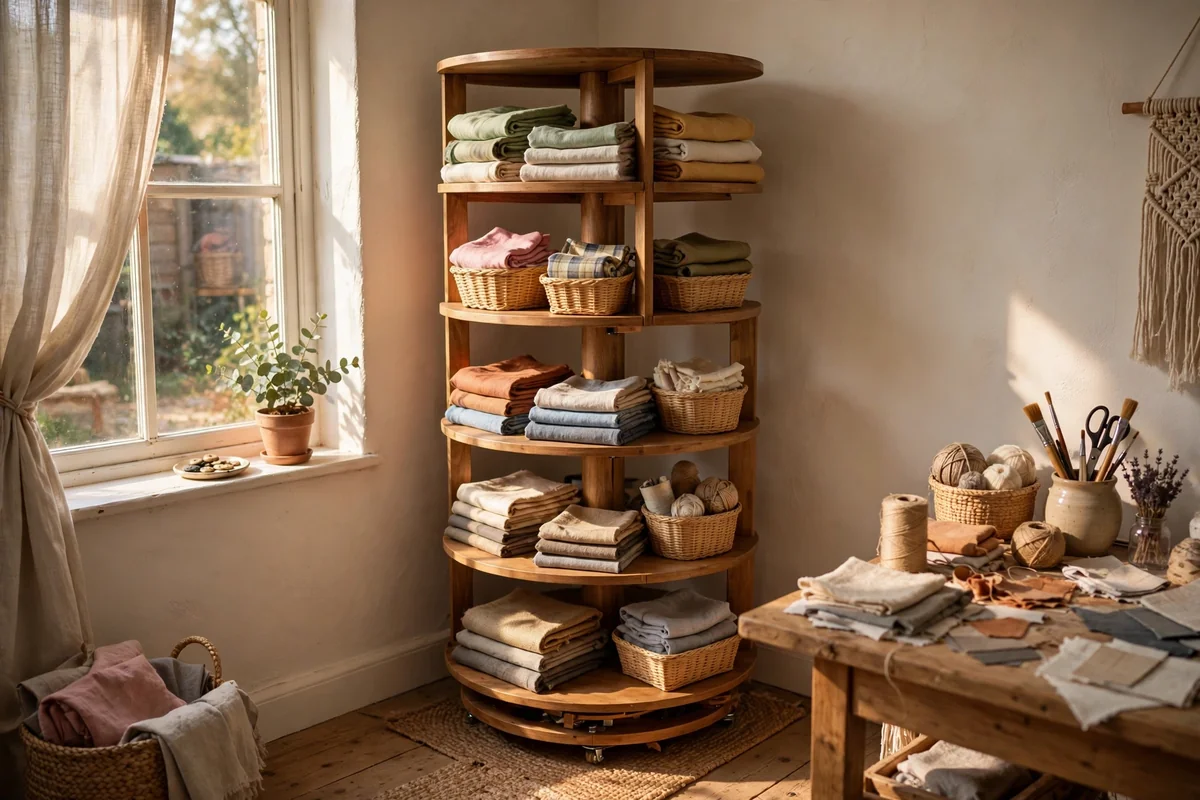
Most craft rooms have one corner that fits nothing standard, and a rotating corner tower was made for it. These tall, narrow units, often around 35 centimetres across, spin to bring each side within reach, and their stacked shelves suit folded fabric, small baskets and jars of notions. A corner that once collected bags of clutter becomes a tidy, deliberate part of the room.
Measure the diagonal swing before buying, because the tower needs clear space to turn without striking the wall or a table. Load heavier baskets at the bottom to keep the unit steady, and reserve the top shelf for light display pieces. Spin towers work best for small and medium items; keep long yardage on straight shelves where folds stay flat, and oil or tighten the turntable yearly if it begins to wobble.
20. An Inspiration Shelf of Swatches, Books and Finished Samples
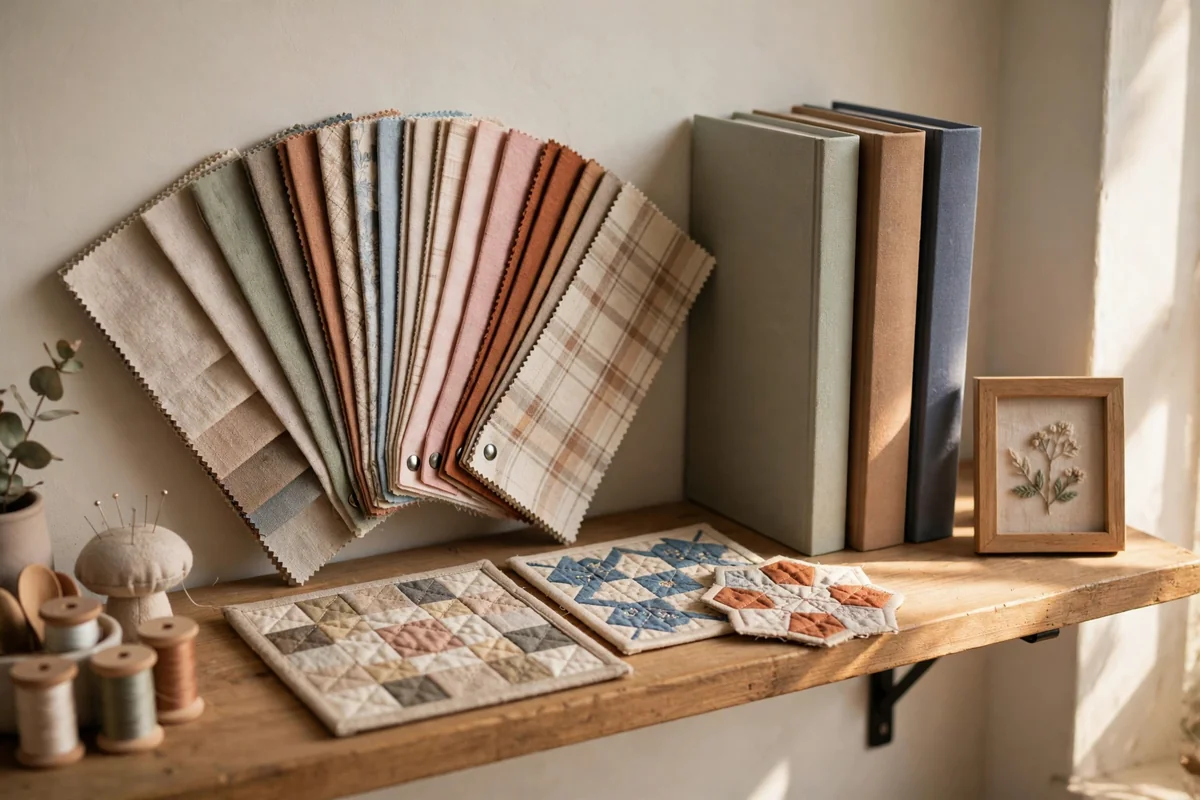
Finish your storage system with one shelf that stores ideas rather than yardage. Keep fabric swatch fans, favourite pattern books, colour cards and a few small finished samples together on a single shelf near where you plan projects. When everything visual lives in one place, matching new fabric to old, and choosing palettes, becomes quicker and far more enjoyable.
Rotate the samples with the seasons so the shelf keeps sparking fresh combinations, and add a small frame with a treasured textile fragment for quiet inspiration. Keep this shelf deliberately uncluttered; if a book or swatch set has not been opened in a year, pass it on. A calm inspiration shelf also reminds you how much your stored fabric can become, which is the finest reason to keep the whole collection in good order.
A Few Final Thoughts
Good fabric storage is not about owning the most containers. It is about seeing what you have, protecting it from light, dust and damp, and being able to lay a hand on the right piece in under a minute. Choose two or three ideas from this list that fit your room and habits, set them up properly, and live with them for a season before adding more. A calm, honest system you maintain will always serve your sewing better than a perfect one you abandon.
Frequently Asked Questions
What is the best way to store fabric long term?
Keep fabric clean, completely dry and folded loosely in a cool, dark place with gentle airflow. Acid-free boxes, cotton pillowcases and lidded tubs all protect cloth from dust and light. Avoid attics and damp garages, where heat and moisture damage fibres, and refold pieces along different lines once or twice a year so permanent creases do not set into treasured lengths.
How do I stop folded fabric stacks from toppling over?
Fold every piece to one consistent width using a card or book as a template, because even stacks stand far better. Keep piles modest, around eight to ten pieces, and use shelf dividers, bookends or the sides of baskets to hold groups upright. If a stack still leans, the fold widths are probably mixed, so a quick refold usually fixes it.
Should fabric be stored by colour or by type?
Both systems work, and many sewists blend them. Everyday quilting cottons are easiest to choose by colour, since projects usually begin with a palette. Materials that behave differently, such as fleece, vinyl, interfacing and stretch jersey, are better grouped by type so you can find the right weight and handling quickly. Pick the blend that matches how you actually start a project.
How can I store fabric in a very small sewing corner?
Think vertically and use hidden spaces. Door-back pockets, magazine files on a single shelf, jars for scraps and a rolling trolley that parks beneath the table can hold a surprising collection in one corner. Clear tubs stacked in a closet take the overflow. The key is giving small items strict homes, because tiny spaces look cluttered fastest when little things wander.
How do I protect fabric from dust and fading?
Closed storage is the simplest protection: glass-front cabinets, lidded tubs, drawers and baskets with liners all keep dust off the cloth. Keep open display shelves away from direct sunlight, and rotate displayed pieces every few months so any lightening happens evenly. A quick weekly dust of open shelves, and washing hands before handling pale fabrics, keeps a collection fresh for years.