Living Room
20 Farmhouse Fireplace Ideas That Make the Hearth the Heart Again
By Anna Wells · · 20 min read
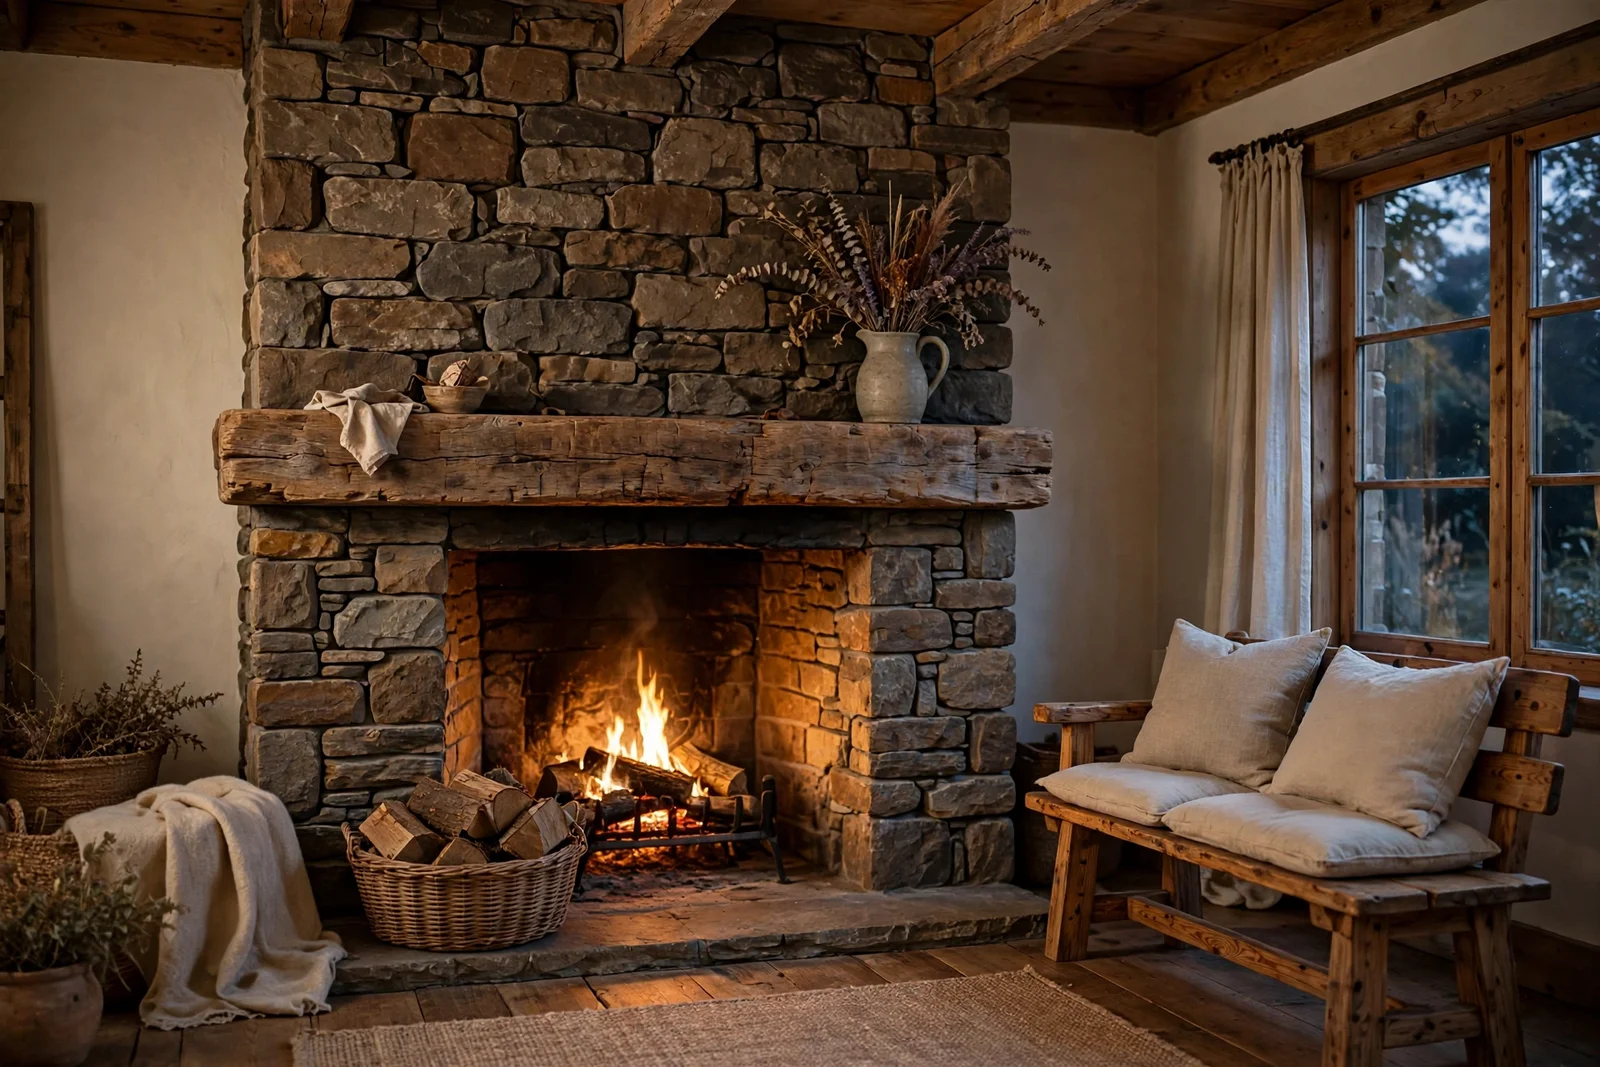
Bring back the glow of the family hearth with 20 farmhouse fireplace ideas: reclaimed timber mantels, painted brick, stone surrounds and gentle styling.
The kettle has just boiled and the evening light is fading to blue outside the window. Inside, the fireplace waits: a timber mantel, the faint smell of old woodsmoke, a basket of logs by the hearth. This is the corner of the house where everyone gathers without being asked, where conversations stretch past bedtime. The farmhouse fireplace was never just a heater; it was the quiet heart of family life.
These twenty ideas return that feeling with honest materials and simple craft. Reclaimed timber beams, painted brick, natural stone and honest iron all feature, alongside gentle styling for mantels, hearths and fireside corners. Every idea gives you real measurements, sensible budgets and the mistakes to sidestep. Whether your fireplace roars through winter or stands quietly unused, you will find a way to make it the heart of your home again.
Work through the list in any order. Start with the mantel and surround, move to the hearth styling, then finish with seating and safety. Many ideas cost less than 40 pounds or dollars and need only an afternoon. Keep reading, and choose the one that speaks to your room first.
1. Crown the Fireplace With a Reclaimed Timber Mantel Beam
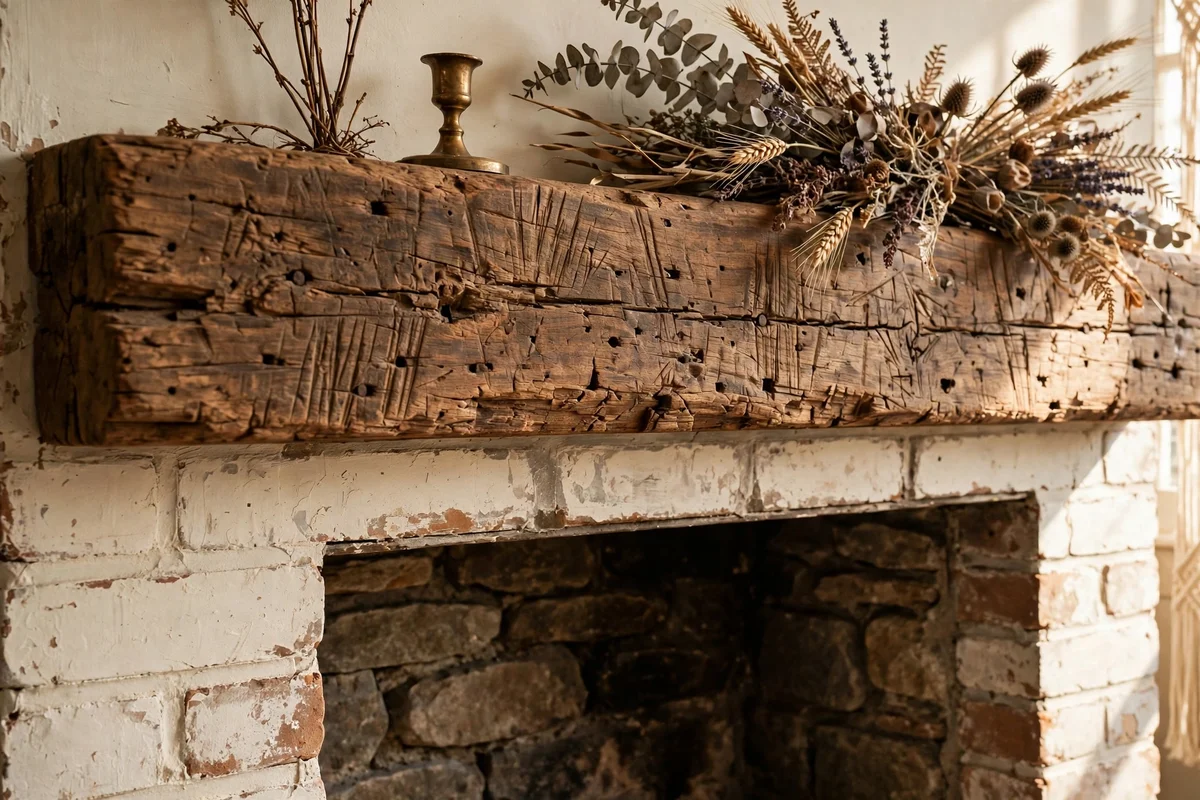
A solid reclaimed beam, roughly 15 to 20 cm deep and 10 to 15 cm thick, gives a farmhouse fireplace its anchor. Look for salvaged oak, elm or pine with visible saw marks and nail holes, then have it cut 30 to 60 cm wider than the firebox opening so it overhangs the surround. Sand lightly with 120-grit paper to remove splinters, but leave the character intact. Seal with clear hardwax oil for a satin finish that lets the grain glow.
Mount the beam on two or three heavy-duty concealed brackets, or set it on corbel stones if the surround is masonry. Check the mantel sits at least 30 cm above the firebox opening for working fires, following your stove or fireplace manual. The common mistake is choosing a beam that is too shallow; under 10 cm thick it reads as a plank rather than a mantel. Budget wise, reclaimed beams run 40 to 120 pounds or dollars depending on length.
2. Paint the Brick Surround in Warm Chalk White
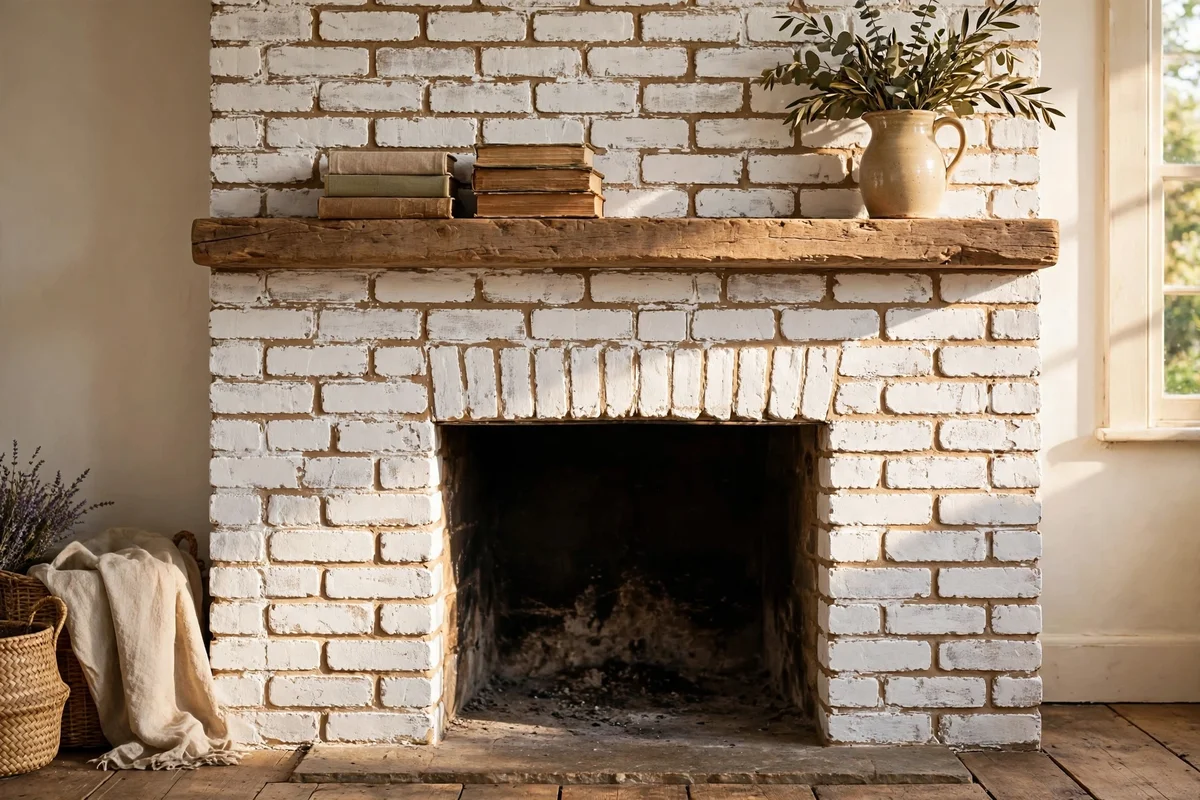
A coat of warm white paint turns a dark, heavy brick fireplace into a light focal point while keeping its texture. Choose a chalk or mineral paint in a warm shade such as ivory, linen or buttermilk, and thin the first coat slightly so mortar lines show through. Use a stiff brush to push paint into the crevices, then follow with a second full coat. The painted finish should look soft and slightly uneven, never glossy.
Scrub the brick first with sugar soap and a wire brush, and let it dry fully for 24 hours. If the fireplace works, confirm your paint is heat resistant to at least 200 degrees Celsius on the outer surround, and keep paint well away from the firebox interior. The mistake to avoid is sealing bricks with glossy varnish afterwards; it flattens the rustic texture you just paid to highlight. A mid-size surround needs about 2 litres of paint, roughly 25 to 40 pounds or dollars.
3. Set a Woven Basket of Logs on the Hearth for Decoration
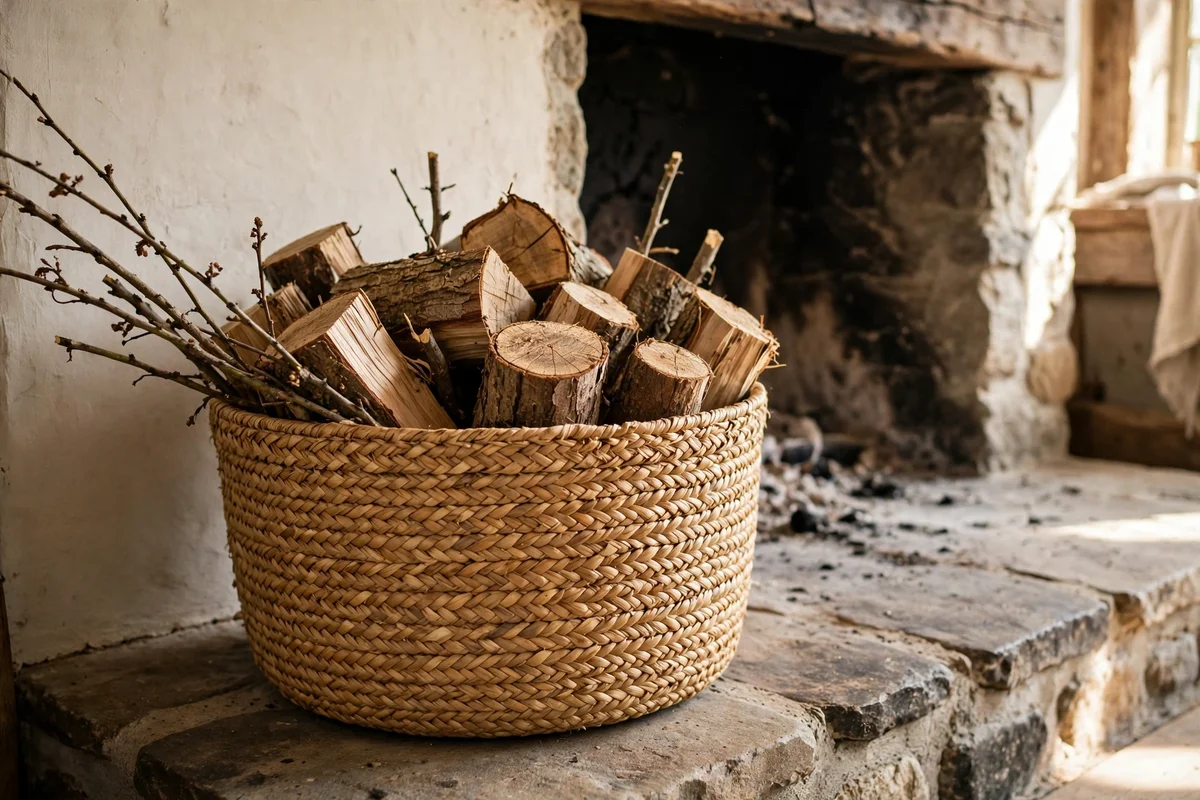
A deep woven basket filled with split logs instantly signals farmhouse warmth, even where the fire is never lit. Choose a round seagrass or willow basket about 45 cm wide and 40 cm tall, and fill it with clean, dry logs cut to 25 cm lengths. Arrange the largest pieces at the bottom and let three or four slim branches angle over the rim for a natural, slightly untidy look. Dust the logs occasionally so they stay fresh.
Place the basket to one side of the firebox, at least 60 cm from any working burner or lit candle. If your fireplace functions, treat these logs as pure decor and burn only properly seasoned firewood bought separately. The mistake to avoid is stacking bark-covered logs that crumble onto the hearth; knock loose bark off before arranging. A good basket costs 20 to 45 pounds or dollars, and a bag of decorative logs adds another 10 to 15.
4. Style the Mantel With a Stoneware Pitcher and Dried Stems
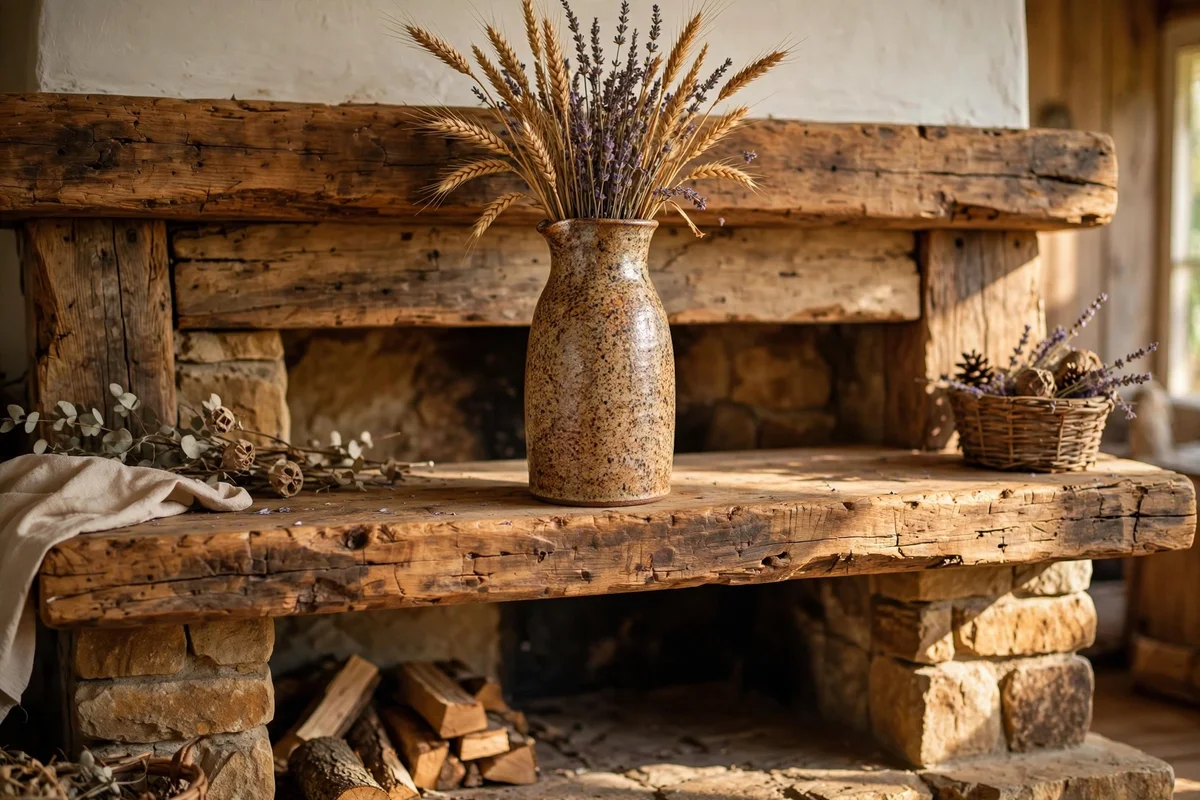
A tall stoneware pitcher in oatmeal or speckled grey anchors one end of the mantel beautifully. Pick a vessel 25 to 35 cm high and fill it with dried stems such as wheat, lavender or bleached ruscus, trimming them so the tallest rises about twice the pitcher height. The dried arrangement lasts for years and needs no water. Pair it with a shorter object on the other end of the mantel, like a stack of books, to keep the composition balanced.
Keep the pitcher away from the flue opening and never place dried stems within 45 cm of a lit candle or open flame, since dried material catches quickly. The mistake to avoid is overfilling the pitcher with ten or twelve thick stems; five to seven stems of varied heights look airy and intentional. A hand-thrown stoneware pitcher runs 18 to 40 pounds or dollars, while bunches of dried wheat or lavender usually cost 6 to 12.
5. Clad the Chimney Breast in Vertical Shiplap
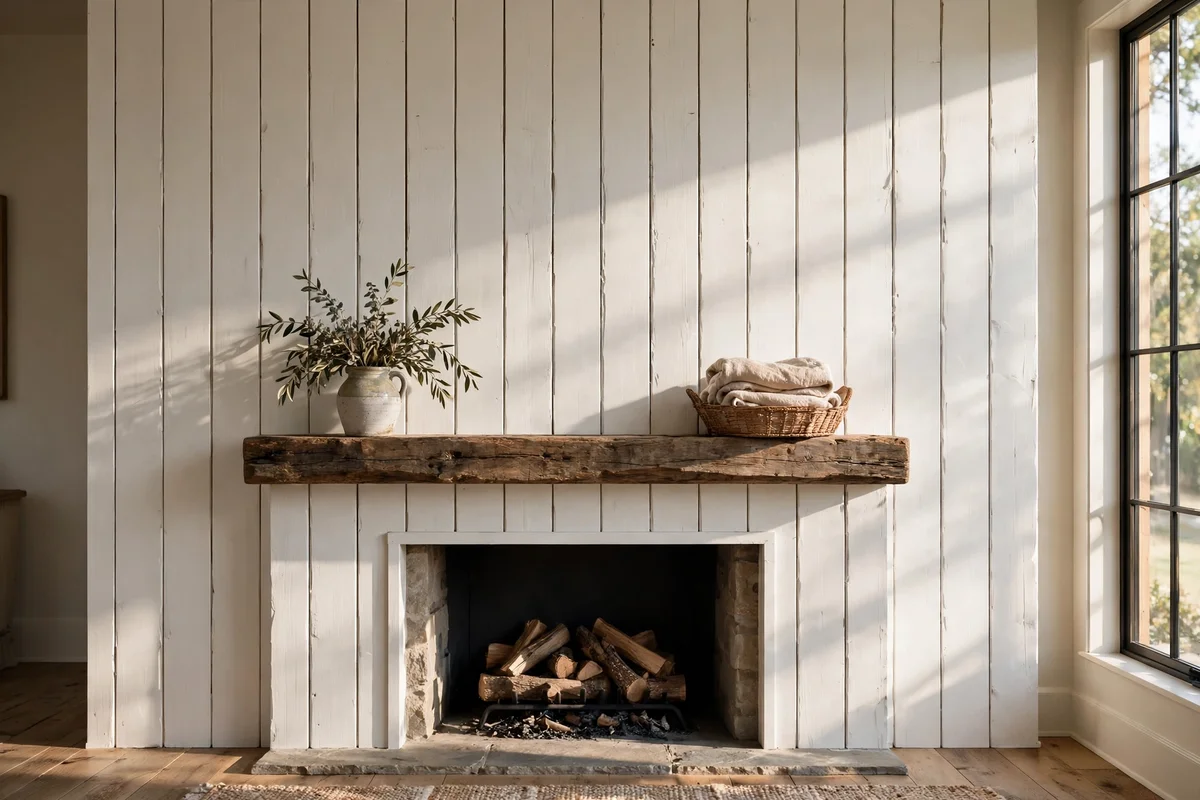
Vertical shiplap above the mantel draws the eye upward and gives the chimney breast a handcrafted farmhouse finish. Use 15 cm wide pine boards with a 5 mm shadow gap, running them floor to ceiling or from the mantel to the ceiling line. Paint them the same warm white as the surround, or leave the boards bare and sealed for contrast against painted brick. Fasten each board into studs or solid masonry plugs so the cladding sits flat and true.
Measure the wall and cut boards 5 mm short at each end to allow for expansion, then caulk the seams with flexible filler. Sand every board with 150-grit paper before painting to stop the grain raising under the first coat. The mistake to avoid is fixing boards horizontally across the chimney breast; horizontal lines cut the room visually and fight the tall farmhouse proportions. Budget about 8 to 14 pounds or dollars per square metre for pine boards and paint.
6. Fill an Unused Firebox With Flameless Pillar Candles
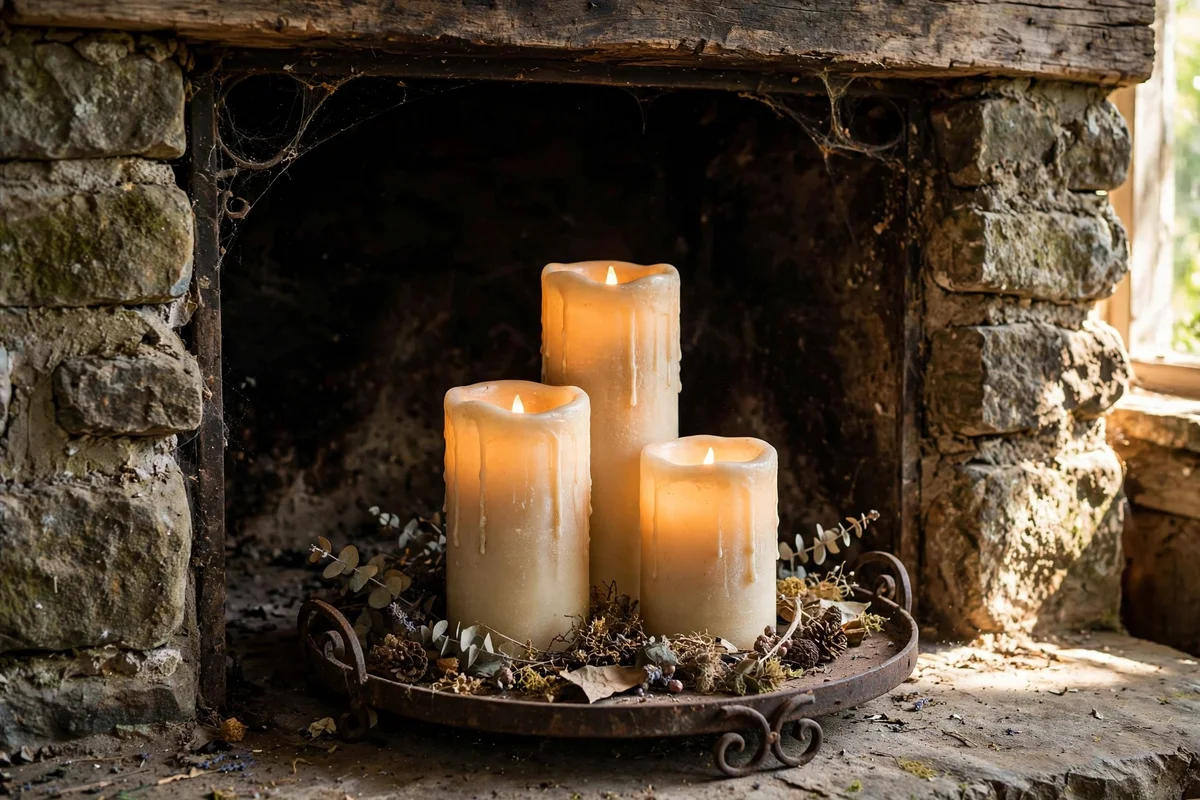
A cluster of flameless pillar candles turns a cold, unused firebox into a soft glowing feature with zero risk. Group five to seven battery candles in three heights, roughly 10, 15 and 20 cm tall, on a round iron tray or a bed of small pebbles inside the firebox. Choose warm white LED candles with a flicker setting rather than harsh white ones. A remote control lets you switch them all on together each evening without reaching into the dark firebox.
Use candles with built-in timers, ideally a six hour auto-off, so they never run the batteries flat overnight. Replace batteries every two to three months with the daily evening routine, and keep spare batteries in the kindling basket so you never hunt for them. The mistake to avoid is mixing cool white and warm white candles in one group; the colour clash looks accidental. A set of six good flickering candles with a remote usually costs 15 to 30 pounds or dollars.
7. Stack White Birch Logs Inside a Non-Working Fireplace
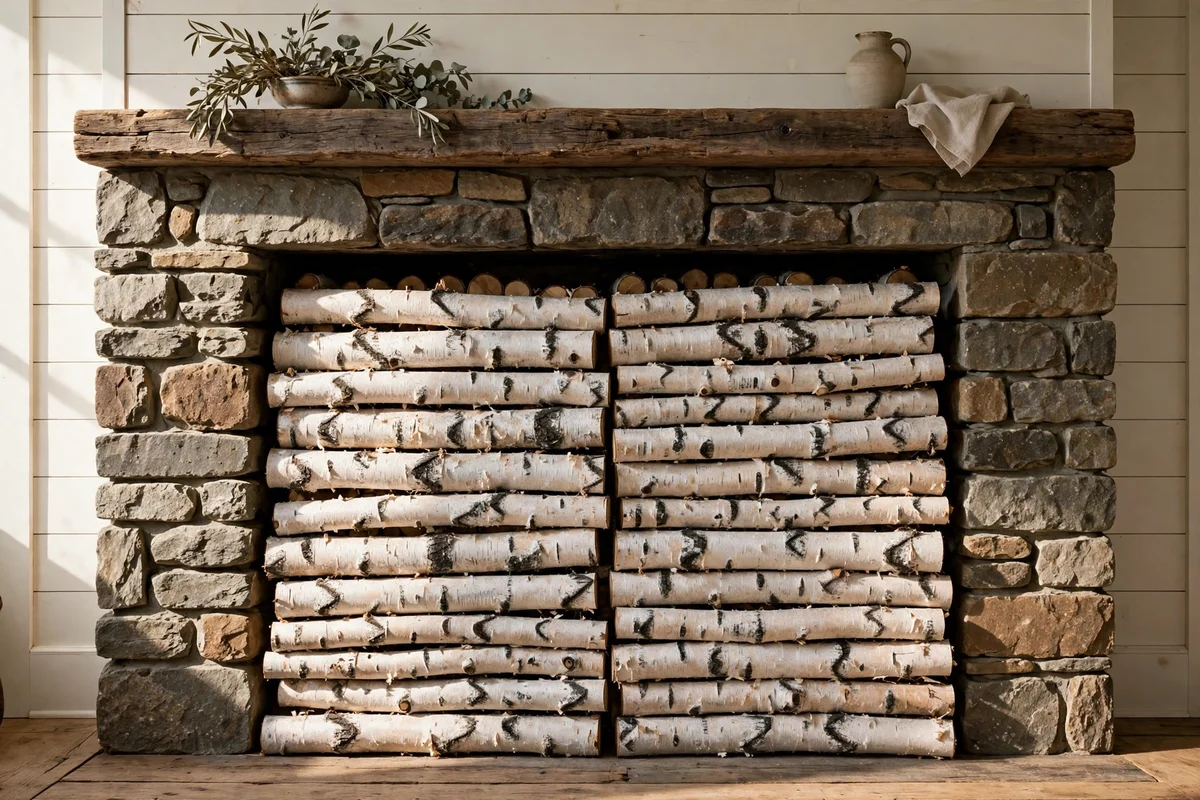
White birch logs stacked horizontally inside a non-working firebox add graphic contrast and lovely bark texture. Cut or buy logs at 20 to 25 cm lengths so they sit just behind the firebox opening without rolling out. Stack them in two layers, ends facing the room, filling the width snugly so the pile looks deliberate rather than dumped. Birch bark keeps its pale colour for years indoors, especially away from direct sun.
Shake each log clean and check for insects before bringing them indoors, since bark can harbour small beetles. Never stack logs in a fireplace that still gets lit; if there is any chance of a fire, use the flameless candle idea instead. The mistake to avoid is stacking damp logs that smell musty; buy them fully dried or air them in a garage for two weeks first. A net bag of decorative birch logs typically costs 12 to 22 pounds or dollars.
8. Lay a Handwoven Jute Runner Across the Hearth
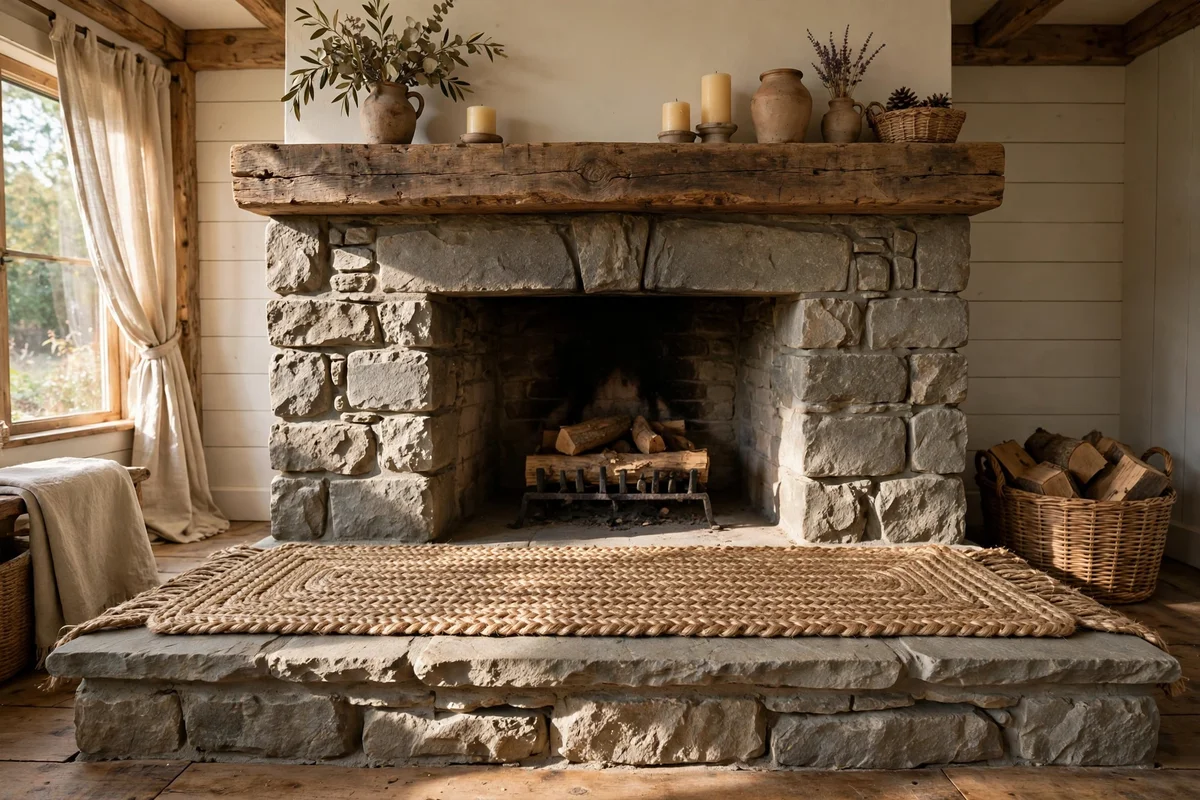
A handwoven jute runner laid across the hearth softens the stone or tile edge and adds honest farmhouse texture. Choose a runner 60 to 80 cm wide and long enough to extend 20 cm past the hearth on each side, so it reads as a deliberate layer rather than a scrap. Natural jute tones pair well with brick, stone and whitewashed surrounds alike. Shake it outside weekly to keep dust from settling into the weave.
For working fireplaces, check the runner lies fully outside the hearth spark zone and never overlaps the firebox opening. Use a thin non-slip underlay cut to size so the runner never creeps toward the heat. The mistake to avoid is choosing a synthetic shag runner; melted fibres and sparks are a dangerous mix near any fire. A good handwoven jute runner 150 cm long usually costs 25 to 50 pounds or dollars and lasts for years.
9. Place Two Plain Beeswax Candles on the Mantel Ends
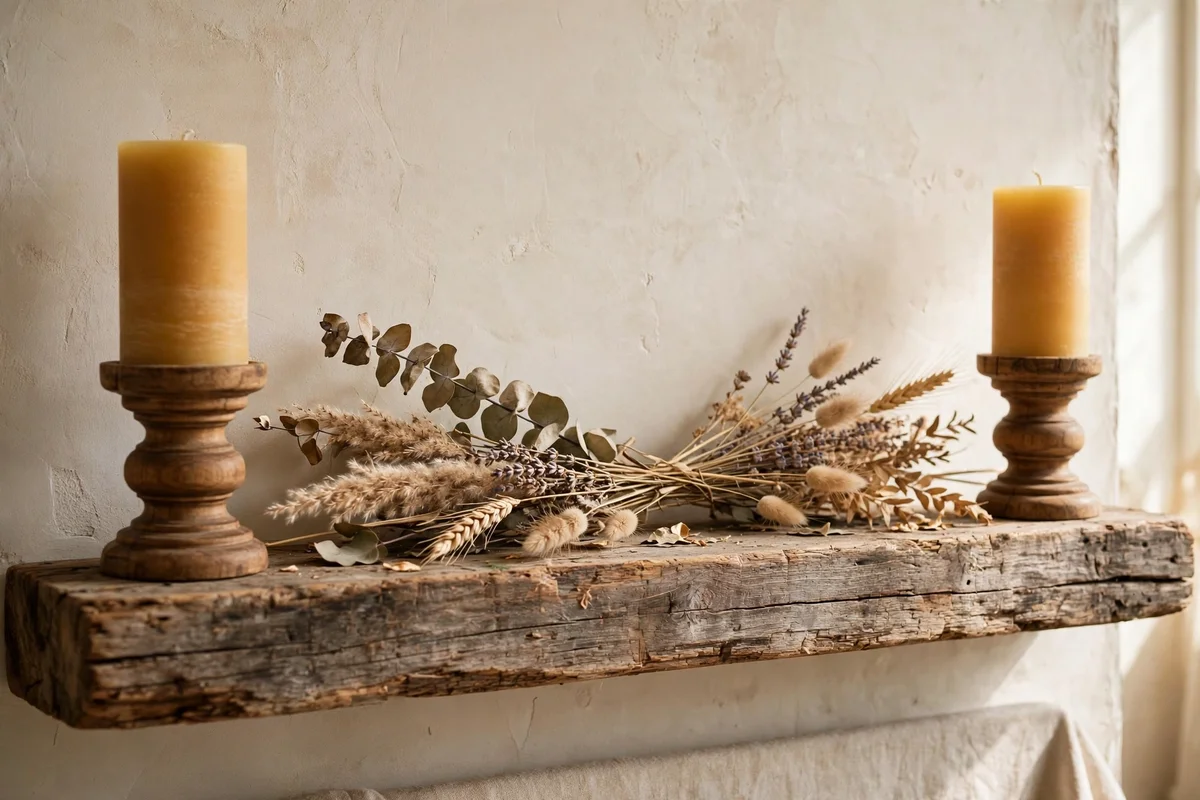
Two plain beeswax pillars, one at each end of the mantel, frame the whole display with quiet symmetry. Choose 20 to 25 cm tall candles in a natural honey tone, set on simple turned wood or iron holders. The honey colour echoes reclaimed timber and dried stems without competing with them. Trim the wick to 6 mm before each lighting so the flame stays small, steady and clean with minimal dripping.
Never leave lit candles unattended and keep them at least 50 cm from the chimney breast boards, dried stems and any curtains. A small ceramic snuffer beside each candle avoids smoke marks on the wall behind. The mistake to avoid is burning cheap paraffin candles that drip wax onto the mantel; beeswax burns slower and cleaner. Two quality beeswax pillars cost 12 to 25 pounds or dollars and give around 60 hours of light each.
10. Tuck a Pine Bench With Linen Cushions Beside the Fire
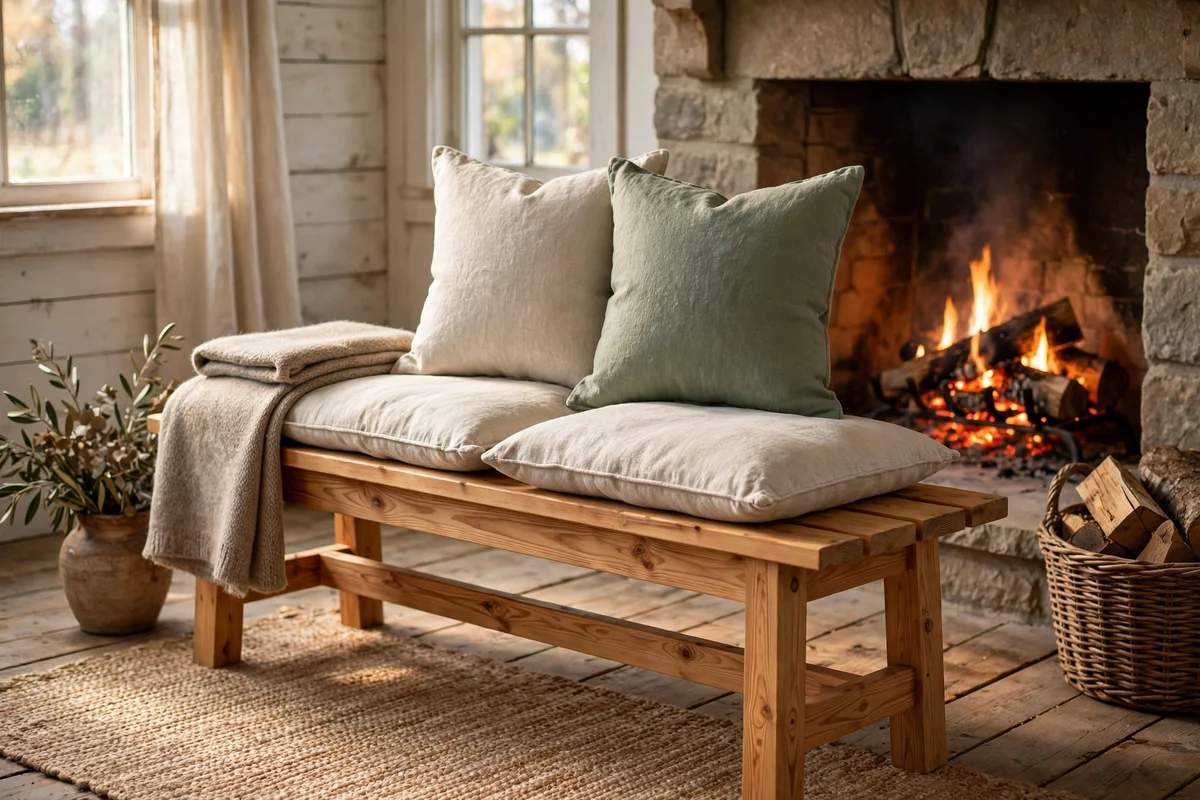
A simple pine bench set at right angles to the fireplace creates fireside seating that suits a farmhouse living room perfectly. Look for a bench 110 to 140 cm long with a seat height of 45 cm, roughly matching armchair height so sitters join the conversation comfortably. Top it with two or three linen cushions in oatmeal, sage or faded ticking stripe. A folded wool throw across one end invites guests to settle in on cold evenings.
Position the bench at least 90 cm from the firebox opening for working fires, and a little closer, around 60 cm, for decorative fireplaces. Fix felt pads under the legs to protect wood floors and stop the bench sliding. The mistake to avoid is choosing a bench with a high back that blocks the view of the fire from the rest of the room. A solid pine bench costs 60 to 130 pounds or dollars, with linen cushions 15 to 30 each.
11. Keep Natural Brick Bare and Seal It With a Matte Sealer
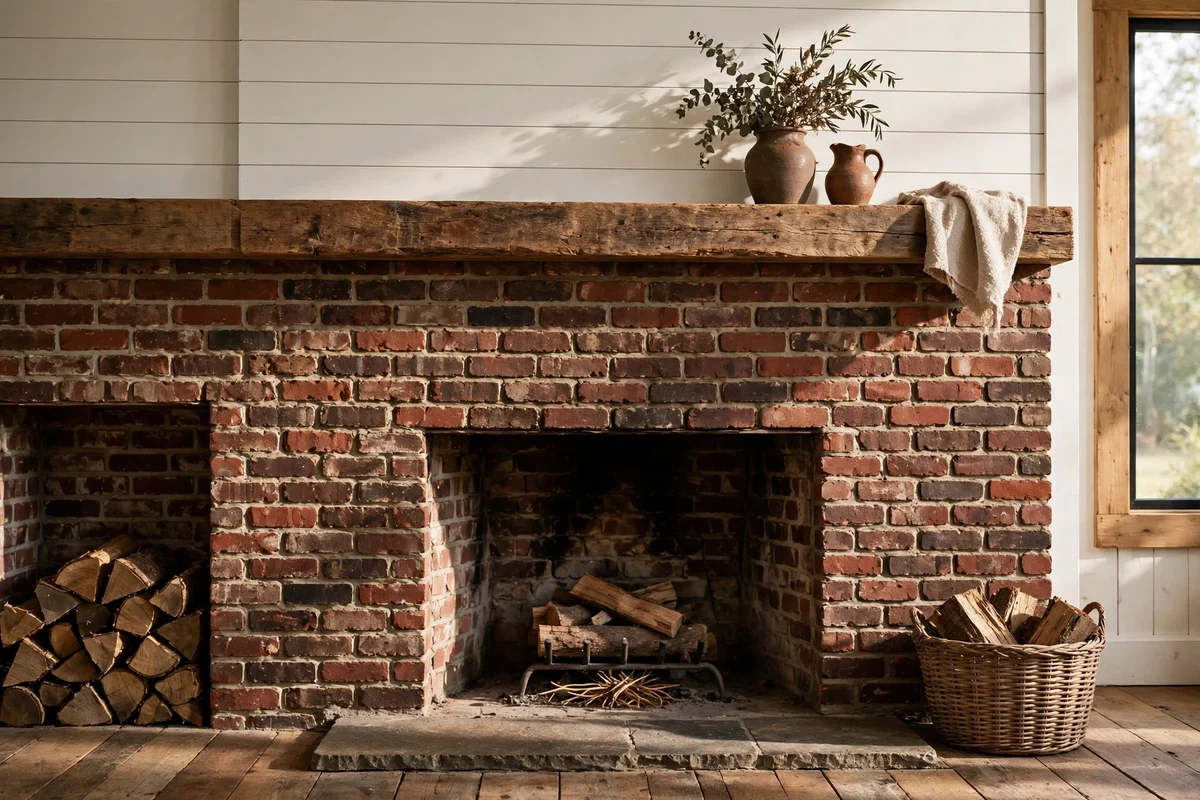
If your brick has lovely aged colour, leave it bare and protect it with a clear matte sealer instead of painting. Scrub the surface with a stiff brush and warm sugar soap, then apply two thin coats of a breathable masonry sealer with a roller, working from the top down. The sealer deepens the brick tones slightly and stops soot dusting off onto the mantel. Bare brick pairs beautifully with white shiplap and oak floors for a classic farmhouse balance.
Choose a sealer labelled breathable or vapour permeable so trapped moisture can escape the old brickwork. Test one brick first and wait 24 hours; some sealers darken red brick more than expected. The mistake to avoid is using a glossy patio sealer indoors; the plastic shine fights every other matte surface in the room. One litre of quality masonry sealer covers roughly 8 square metres and costs 15 to 30 pounds or dollars.
12. Arrange Stacked Books With a Brass Candlestick on the Mantel
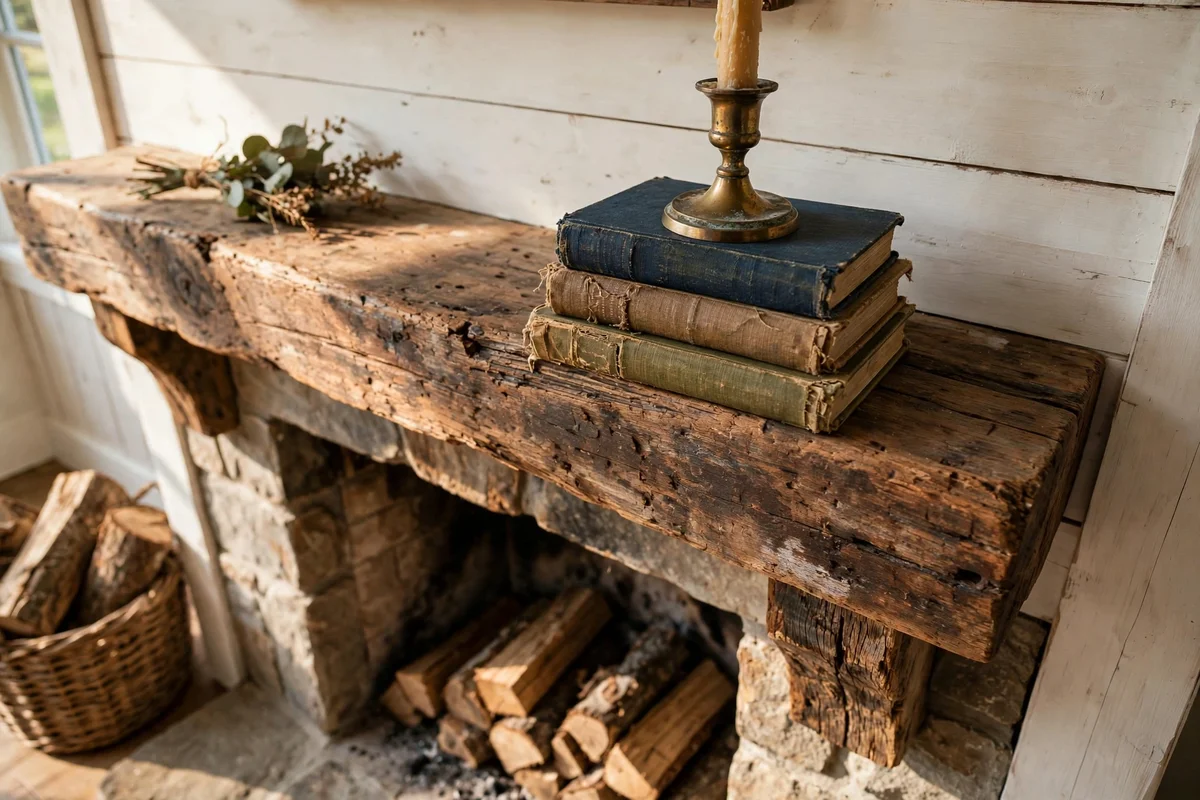
A short stack of old books topped with a brass candlestick adds height and heritage to one side of the mantel. Choose three or four hardbacks with cloth covers in muted tones, the largest about 25 cm wide at the bottom, tapering upward. Place a 15 to 20 cm brass candlestick on top and slightly off centre so the arrangement feels composed rather than stacked by accident. Second-hand bookshops sell suitable volumes for a pound or two each.
Keep the book stack away from the flue and at least 45 cm from any lit candle flame, since cloth covers scorch easily. Dust the stack monthly so the pages stay clean and the brass keeps its glow. The mistake to avoid is building the stack too tall; more than four books wobbles when someone brushes past. A small unlacquered brass candlestick costs 10 to 25 pounds or dollars and develops a lovely patina over the first year.
13. Hang a Round Oak Mirror Above a Low Mantel Shelf
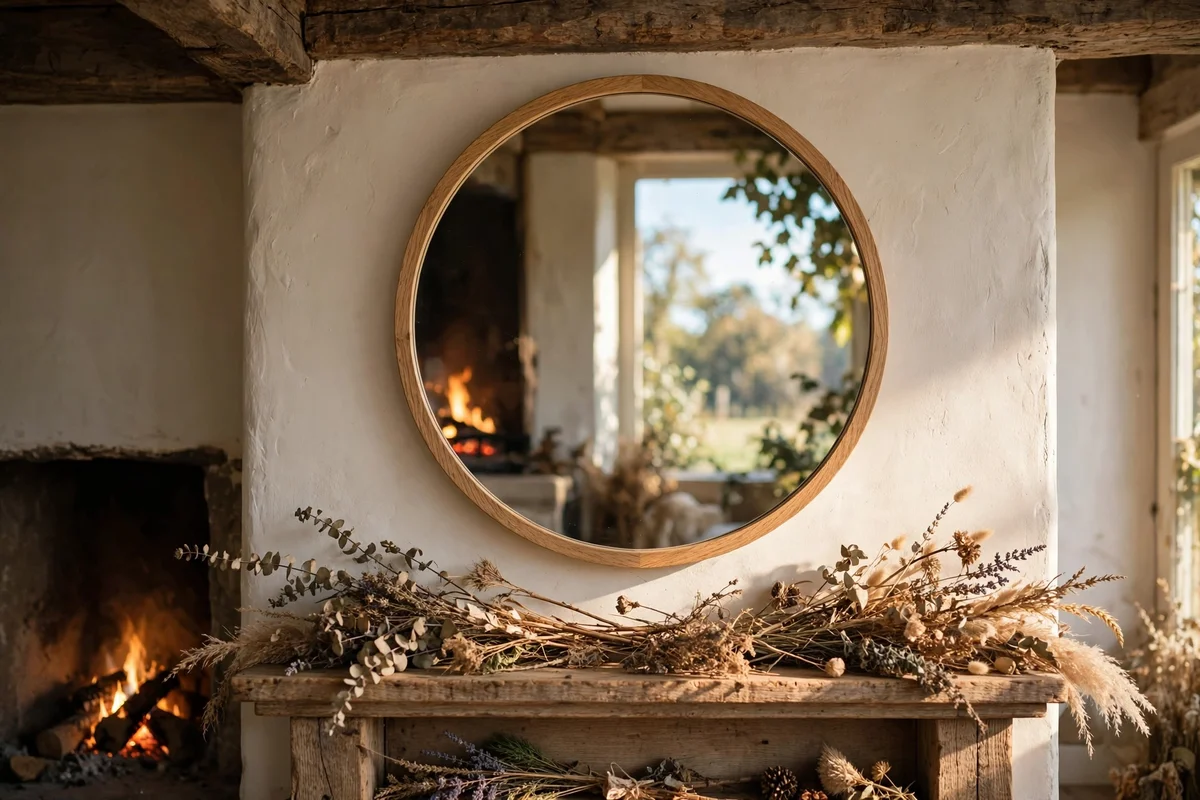
A round mirror in a slim oak frame hung above a low mantel bounces daylight around the room and doubles the firelight glow. Choose a diameter of 60 to 80 cm for a standard chimney breast, and hang it so its bottom edge sits 15 to 20 cm above the mantel shelf. Fix the bracket into a stud or masonry anchor, since even a modest mirror weighs 4 to 6 kg. The warm oak frame ties the mirror to timber mantels and pine furniture.
Centre the mirror on the chimney breast, not on the room, so it aligns with the fireplace below. Clean it with a damp microfibre cloth rather than spray cleaners, which can damage the oak frame finish. The mistake to avoid is hanging the mirror too high; a gap over 30 cm between shelf and mirror makes the two feel disconnected. A 70 cm oak-framed round mirror usually costs 45 to 90 pounds or dollars.
14. Stand a Wrought Iron Log Holder Beside the Firebox
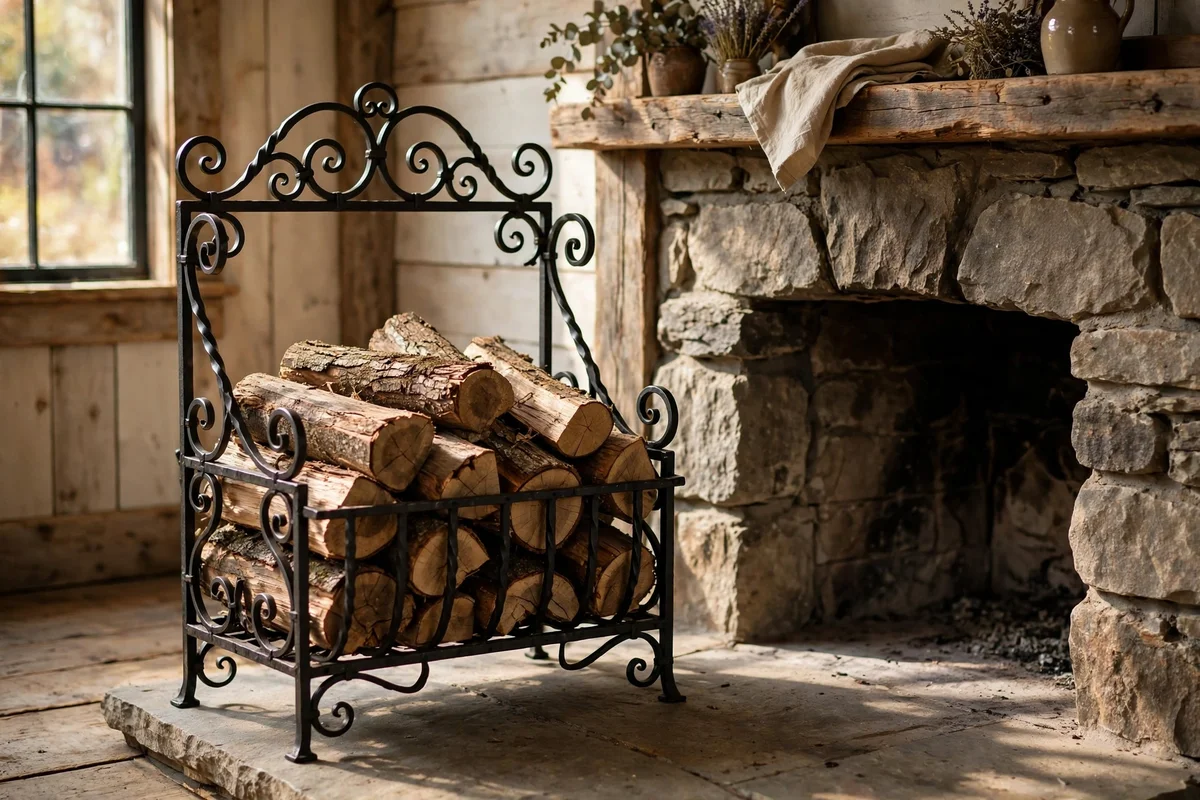
A wrought iron log holder keeps firewood tidy and close for working fireplaces. Choose a holder about 45 cm tall and 30 cm deep with an open front, standing just to the right or left of the firebox. A curved or scroll-top design suits farmhouse rooms better than sharp modern lines. Line the base with a small piece of leather or felt if the holder sits on a stone hearth, to prevent scratching. Keep it filled with five to eight logs, no more.
Burn only seasoned hardwood with moisture below 20 percent, and store overflow logs outside in a ventilated store rather than cramming the room. Empty the holder monthly and brush out bark dust so it never builds up. The mistake to avoid is placing the holder where it blocks the fire screen door or the sweeping brush route. A simple wrought iron holder costs 30 to 70 pounds or dollars, with handmade forged versions reaching 100 or more.
15. Line the Hearth With Small Terracotta Pots of Greenery
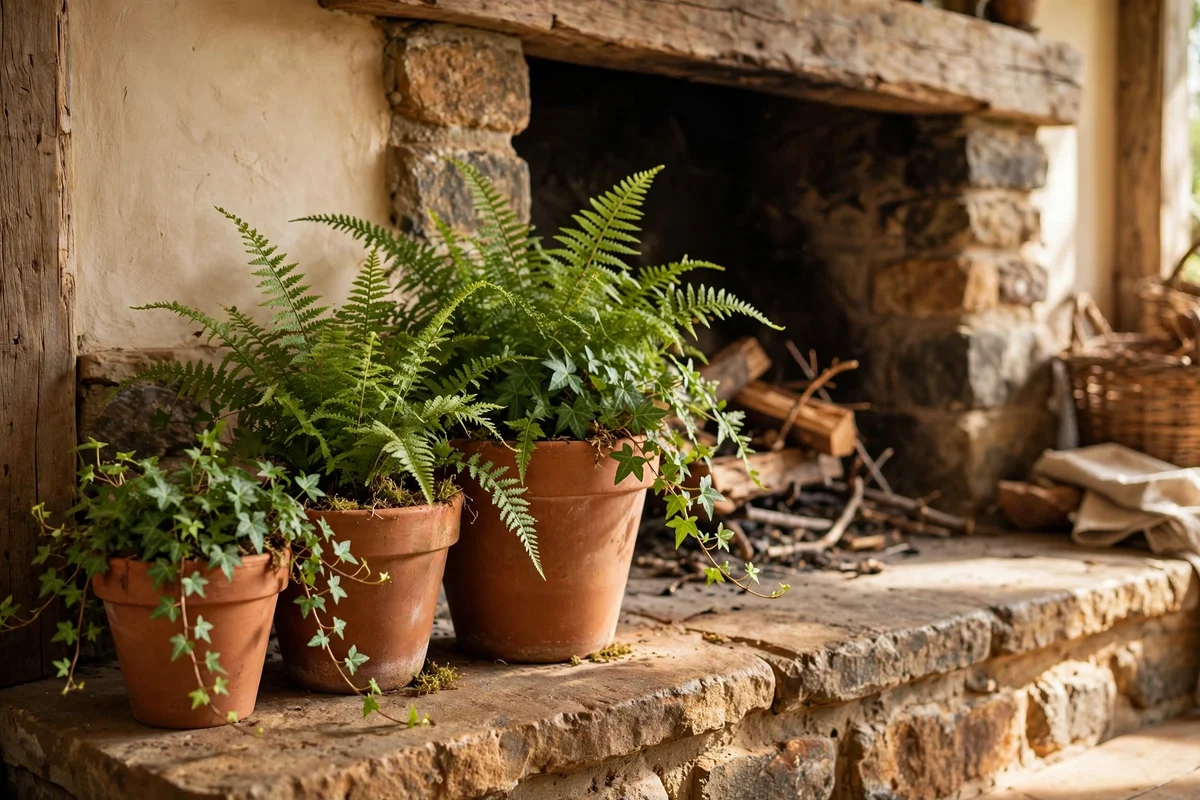
Three small terracotta pots in graduated sizes bring living green to the hearth without cluttering it. Choose pots 12, 16 and 20 cm wide, planted with forgiving greenery such as ivy, ferns or trailing pothos. Group them in a loose triangle on one side of the hearth, the tallest at the back. Water sparingly, since terracotta dries fast near a working fireplace; check the soil with a finger every three days.
Set each pot on a small terracotta saucer to catch drips and protect the hearth stone. Keep plants at least 60 cm from the firebox opening so heat never scorches the leaves. The mistake to avoid is using glazed ceramic pots here; plain terracotta breathes better and suits the farmhouse palette. Three pots with plants usually cost 18 to 35 pounds or dollars in total, and hardy ferns forgive the occasional missed watering.
16. Dress the Firebox With Natural Fieldstone Slips
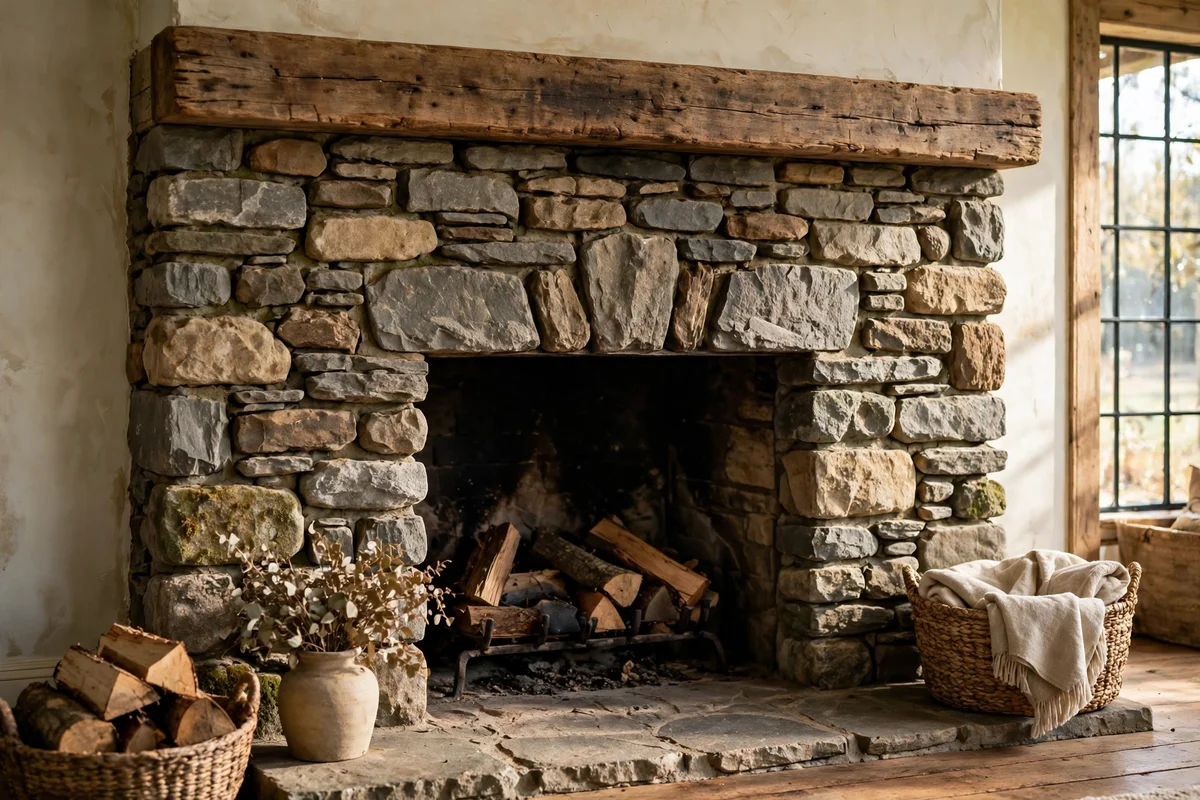
Natural fieldstone slips give the firebox surround an aged, gathered-over-time look without rebuilding the chimney. These thin stone veneers, usually 2 to 4 cm thick, fix to the existing surround with tile adhesive and cover 1 to 2 square metres per box. Choose a mix of soft grey, buff and warm brown stones, and butter the back of each slip fully so no hollow spots sound when tapped. The result reads as a genuine stone fireplace at a fraction of the weight.
Wear a dust mask and goggles when cutting slips with an angle grinder, and cut them outdoors. Seal the finished stone with a breathable stone sealer after 48 hours of curing. The mistake to avoid is fixing slips with ordinary wall adhesive; heat-rated tile adhesive holds firm where a working fireplace warms the surround. A box covering about 1.5 square metres costs 40 to 80 pounds or dollars, plus adhesive and grout.
17. Fit a Slim Reclaimed Ledge Shelf Above the Shiplap
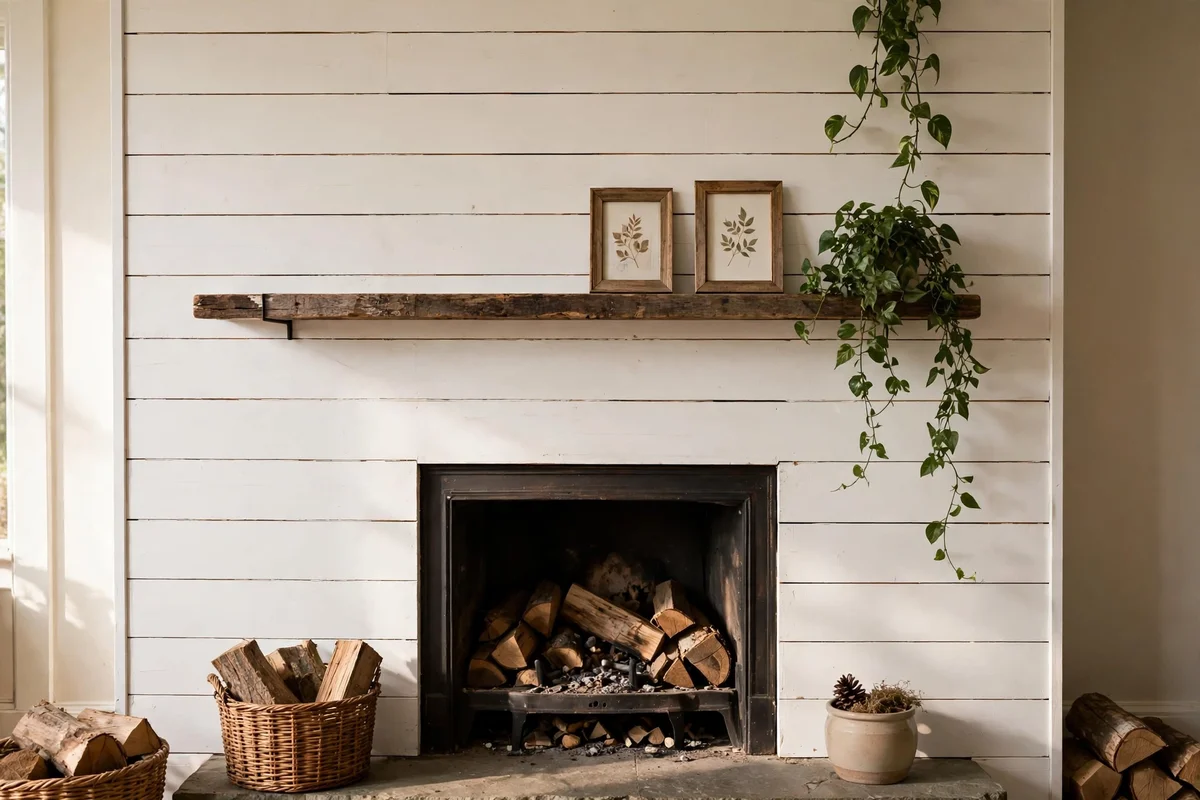
A slim reclaimed ledge shelf fixed above the shiplap creates a second display line for small treasures. Choose a board 8 to 10 cm deep and the full width of the chimney breast, or 20 cm shorter for a deliberately asymmetric look. Fix it with hidden metal brackets into studs, keeping it at least 30 cm above the mantel so the two layers breathe. Style it lightly with two or three small framed prints and one trailing plant.
Keep the shelf load light, under 3 kg total, since ledge shelves show every sag. Check it stays level each season, as timber moves with heating changes. The mistake to avoid is crowding the shelf with six or seven objects; the shiplap behind already gives plenty of texture, so restraint wins. A reclaimed shelf board of 120 cm costs 15 to 35 pounds or dollars at a salvage yard, with brackets 8 to 15.
18. Add a Low Oak Stool With a Folded Wool Throw Fireside
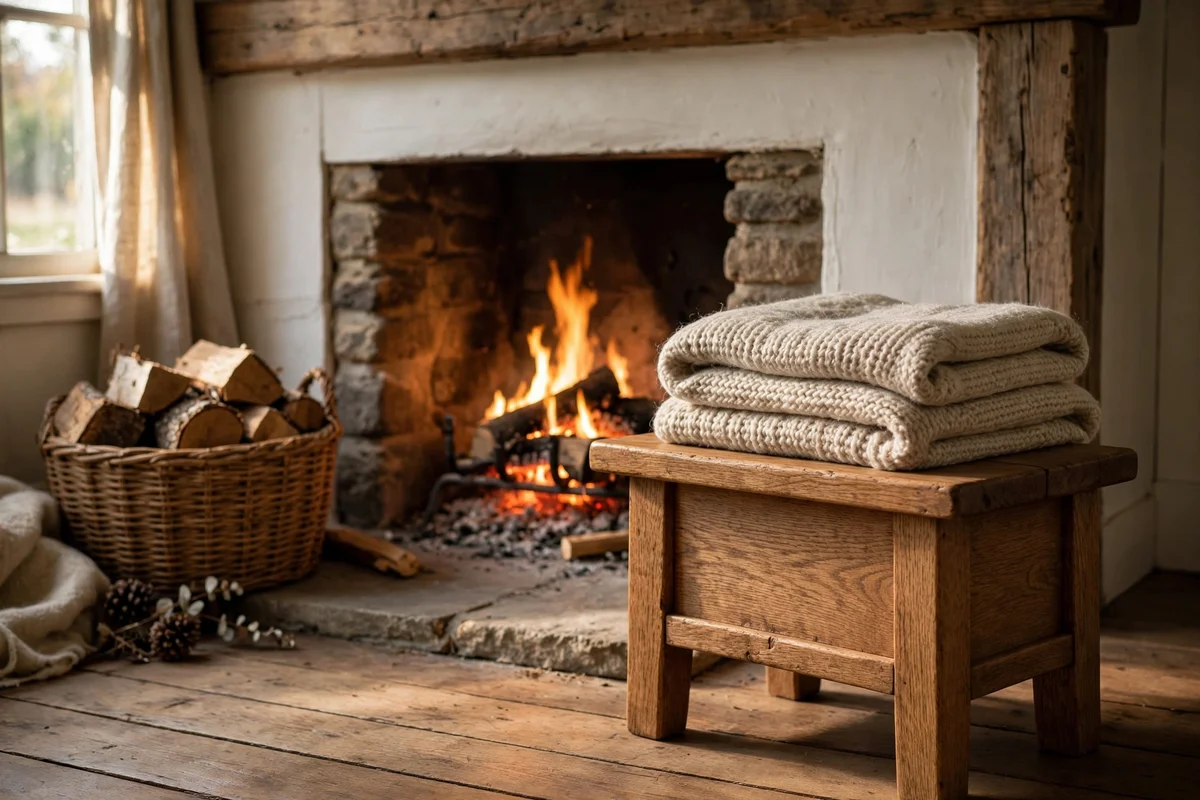
A low oak stool placed a metre from the fire makes a perfect perch for tea, a book or small feet. Choose a sturdy stool 35 to 40 cm high with a round or square top, and drape a folded wool throw in oatmeal, rust or forest check across it. The stool doubles as a side table when guests gather around the hearth. Solid oak construction means it can take daily use for decades without wobbling.
Pull the stool at least 90 cm back from a working fire when nobody sits on it, so sparks never reach the wool. Wash the throw twice a year in cool water and dry it flat to keep its shape. The mistake to avoid is using a rickety pine stool that rocks; check all joints are glued and screwed before buying. A solid oak stool costs 40 to 80 pounds or dollars, with a pure wool throw 25 to 50.
19. Keep a Slim Kindling Basket Within Arm’s Reach of the Fire
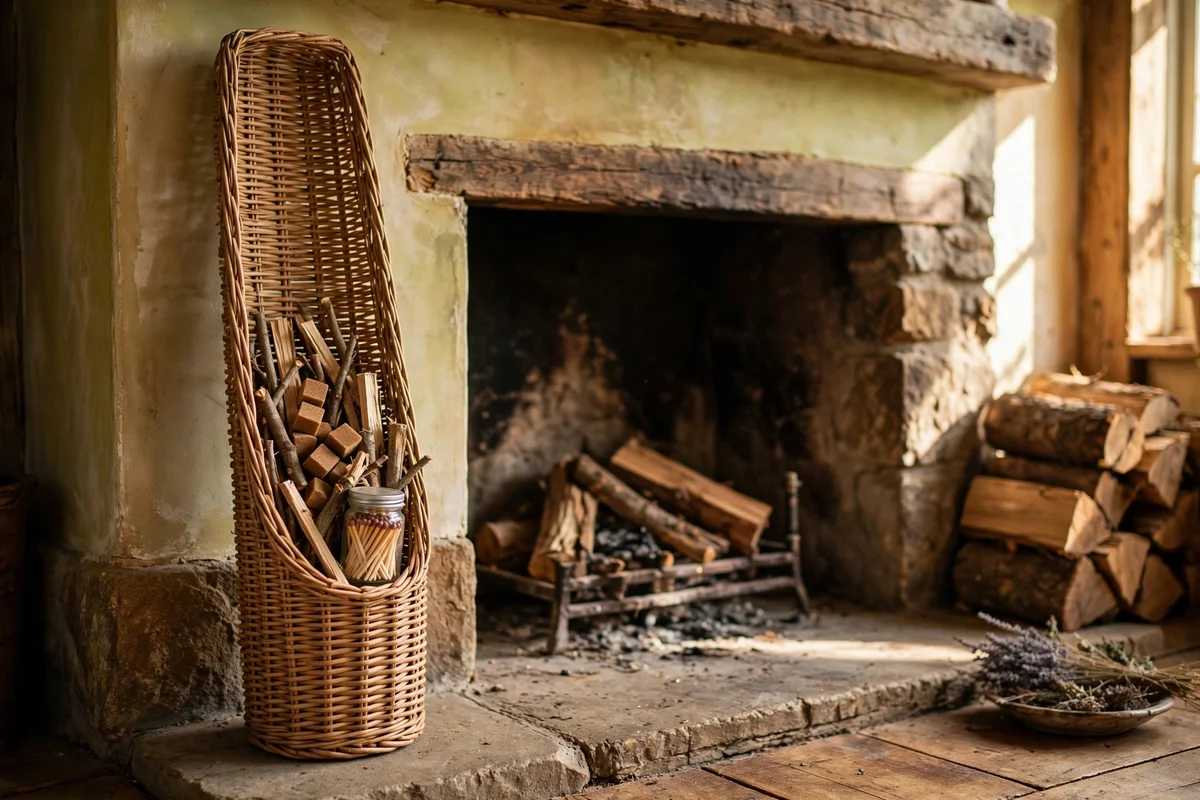
A slim kindling basket beside the fireplace keeps firelighters, matches and small sticks tidy and to hand. Choose a tall narrow basket about 50 cm high and 30 cm wide, so it slides into the gap between the firebox and the wall. Fill it with a layer of kindling, two firelighters and a long box of safety matches stored upright in a jar. Restock the basket every Sunday so it never runs empty on a cold evening.
Store the basket at least 60 cm from the firebox opening, and never let kindling lean against the surround where embers could reach it. Keep the match jar lidded and out of children’s reach. The mistake to avoid is piling kindling higher than the basket rim; loose sticks tumble out and clutter the hearth. A good tall basket costs 18 to 35 pounds or dollars, and a month’s worth of kindling adds 8 to 15.
20. Fit a Mesh Fire Screen and Respect Safe Clearances
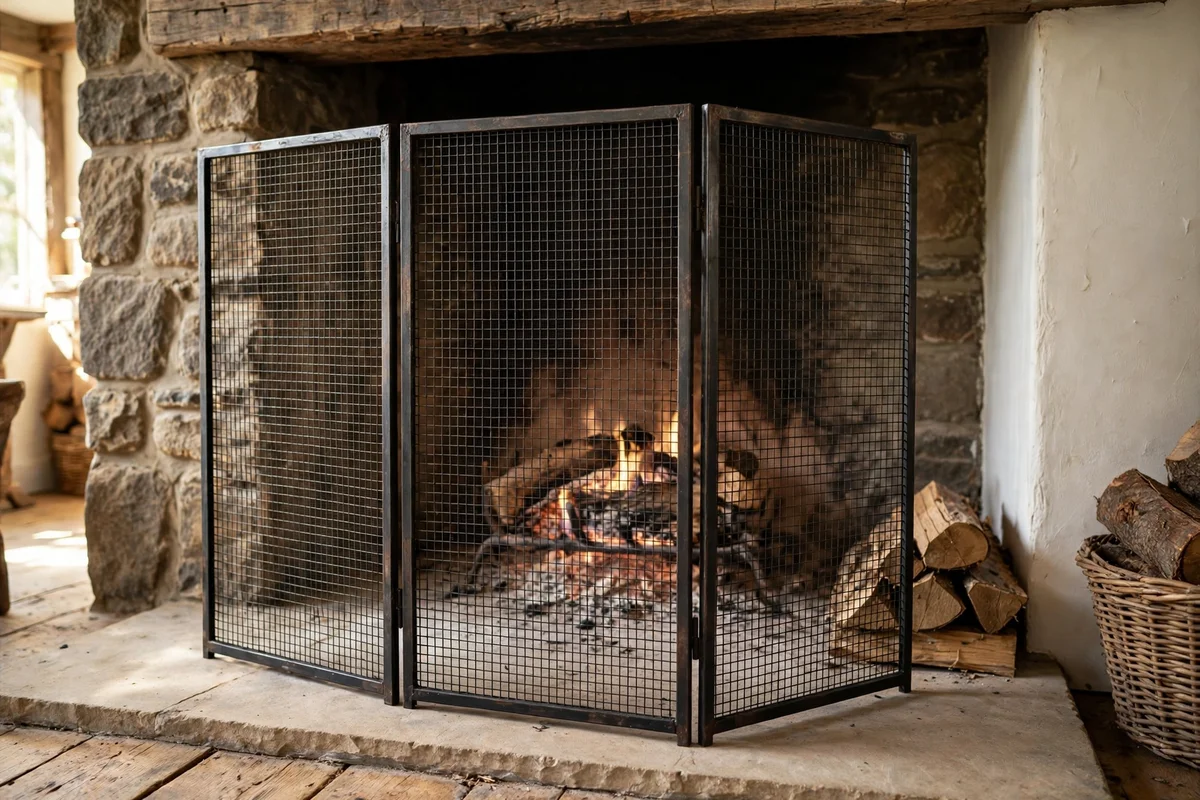
A mesh fire screen is the single most important accessory for any working farmhouse fireplace. Choose a three-panel screen in blackened steel or wrought iron, tall enough that its top sits at least 15 cm above the firebox opening. The mesh stops popping embers while the dark metal recedes visually against brick or stone. Keep rugs, baskets and throws at least 90 cm from the firebox, and hang nothing flammable within 1 metre above the opening.
Fit a working smoke alarm and a carbon monoxide alarm in the room, testing both on the first of every month. Sweep the chimney annually and let ashes cool for 48 hours before emptying them into a metal bin. The mistake to avoid is leaving the fire to burn low unattended; bank it down properly or let it die out before leaving the room or sleeping. A good three-panel screen costs 45 to 90 pounds or dollars, a small price for genuine peace of mind.
The farmhouse hearth asks for very little: honest timber, natural stone, plain candles and a place to sit nearby. Across these twenty ideas, the thread is restraint: a few well-chosen pieces, measured placements and materials that age gracefully. You do not need a renovation budget to begin. Most of these ideas need only an afternoon, a salvage yard visit or a charity shop stop. Pick the smallest change first, then live with it for a week.
This week, try the easiest idea of all: set two plain beeswax candles on the mantel and trim their wicks. Light them in the evening and let their honey glow remind you why the hearth mattered. Notice how the room gathers around that small light. Then choose your next idea from the list and keep going. One honest material at a time, the fireplace becomes the heart of the home again.
Frequently Asked Questions
How much does it cost to give a farmhouse fireplace a fresh look?
Between 50 and 200 pounds or dollars for most refresh ideas. Paint, a woven basket, candles and dried stems cover a full mantel restyle for around 80. Heavier upgrades like a reclaimed beam or fieldstone slips add 100 to 200 more. Start with the smallest change, live with it for two weeks, then decide whether the bigger spend earns its place.
Can I paint the brick on a fireplace that I actually use?
Yes, with the right paint. Scrub the brick clean, then use a heat-resistant paint rated to at least 200 degrees Celsius on the outer surround. Never paint inside the firebox, where real flames or intense heat strike directly. Let each coat cure fully, usually 24 to 48 hours, before lighting the first fire. Check your fireplace or stove manual for its own clearance guidance first.
What is the safest way to style a fireplace that never gets lit?
Treat it as decor only and keep everything at least 30 cm inside the firebox opening. Flameless candles on a tray give the warmest effect with zero risk, while stacked birch logs or a basket of decorative logs fill the space beautifully. Never mix real candles with dried stems, and remember that a future owner might light the fire, so keep all decor removable.
How do I match mantel decor to the rest of my living room?
Pull two colours from the room existing palette and repeat them on the mantel. If your sofa wears oatmeal linen and your rug carries rust tones, echo both in the pitcher, cushions or throw. Keep finishes consistent too: aged brass, blackened iron or pale oak should appear at least twice across the room. Photograph the mantel and check the picture, since the camera reveals clutter your eyes miss.
How do I keep a farmhouse fireplace looking good with little effort?
Dust the mantel weekly, shake the jute runner outside and trim candle wicks before lighting. Refresh dried stems once a year, since sun fades them, and wipe brass with a dry cloth monthly. Reseal bare brick every three to five years. The whole routine takes about fifteen minutes a week, and catching dust early stops soot and grime from building into a bigger job.