DIY Projects
20 Vintage Painted Furniture Ideas That Honour the Past Beautifully
By Anna Wells · · 19 min read
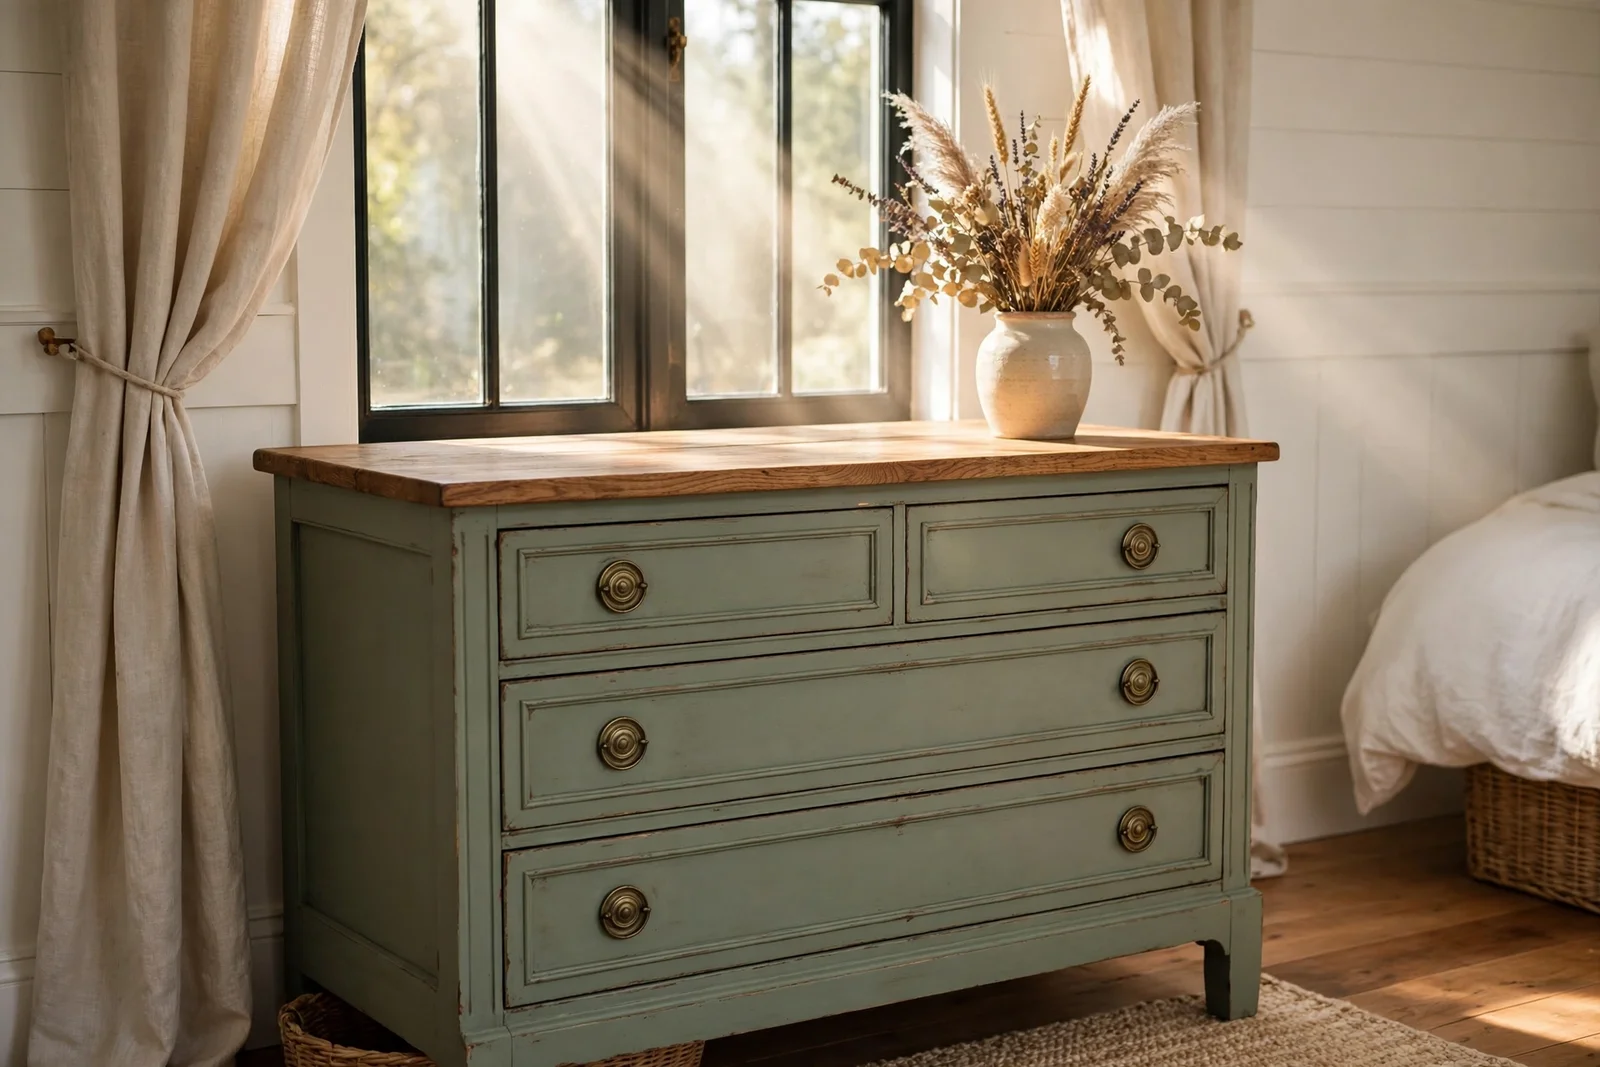
Rescue genuinely old pieces with painted finishes that honour their age, from two tone dressers and gentle distressing to heritage colours and hand painted motifs.
There is a particular quiet in a room that holds an old piece of furniture wearing its paint well. Morning light catches the softened edges of a dresser painted sage years ago, and you can see where hands have opened the same drawers a thousand times. That feeling is what this article is about.
Painted vintage furniture is not a complicated technique guide with fussy recipes. It is a rescue mission for genuinely old pieces: a farmhouse dresser, a washstand with wobbly legs, a sideboard rescued from a barn. With two tone finishes, gentle distressing and heritage colours, you can honour the age of the piece instead of hiding it.
Inside you will find 20 concrete ideas, from choosing heritage colours for different eras of furniture to hand painted stripes and simple botanical motifs. Every idea is practical, budget aware and shaped around family friendly, timeless rooms. The final idea tells you which antiques should never meet a paintbrush.
Pull up a chair and settle in. By the end of this guide you will know exactly which piece to start with, what paint to buy, and how to finish it so it looks like it has always belonged.
1. Paint the Frame Sage and Leave the Timber Top Bare
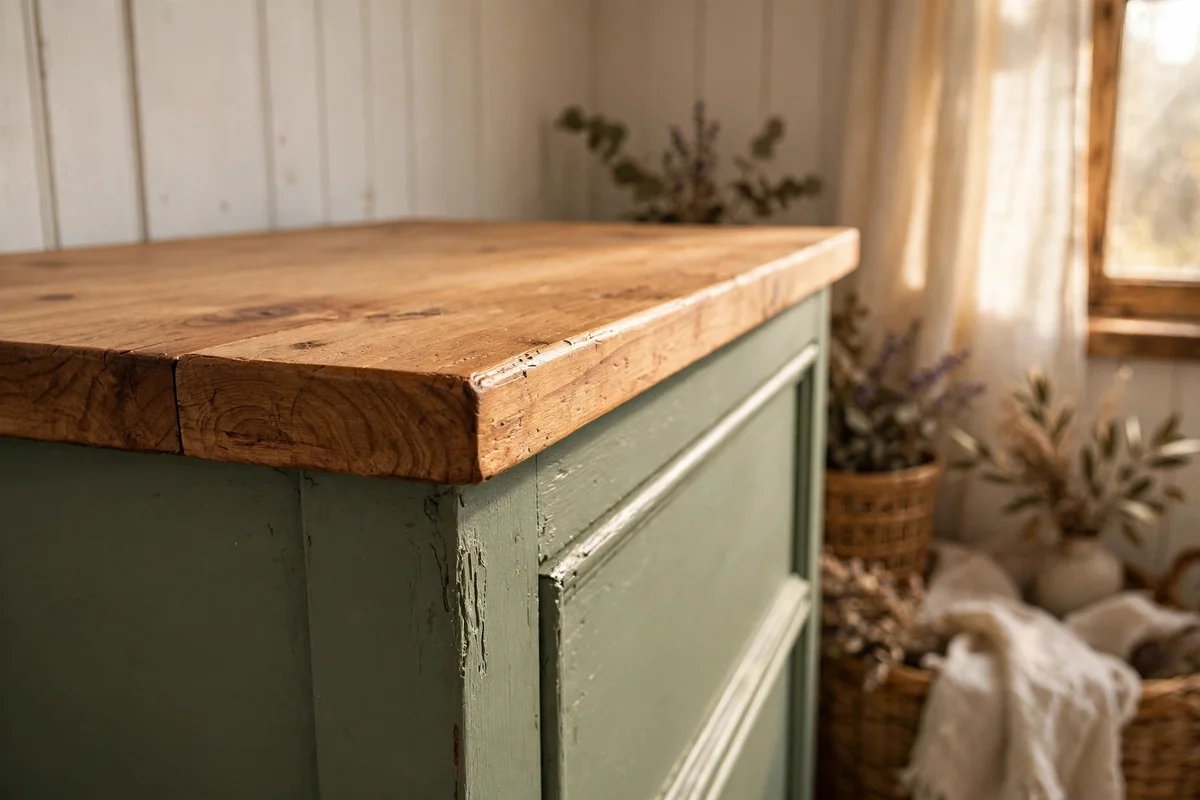
A dresser between 90 and 120 cm wide with a solid timber top is the ideal candidate for a two tone finish. Sand the whole frame with 120 grit paper, then tape off the top and feed it with two coats of hard wax oil instead of paint. Apply two thin coats of heritage sage to the frame, leaving four to six hours of drying time between coats. The contrast reads calm and farmhouse honest, and it costs one tin of paint.
The mistake to avoid is painting the top as well and then wishing you had not; stripping paint off a top later takes a full day of scraping. Mask the top edge with a crisp tape line 2 mm below the frame so no paint creeps onto the wood. Finish the sage frame with a thin coat of clear wax, buffed the next day. This project usually fits into a single weekend, with Sunday left for lining the drawers.
2. Rub Gentle Distress Marks Along Edges and Drawer Corners
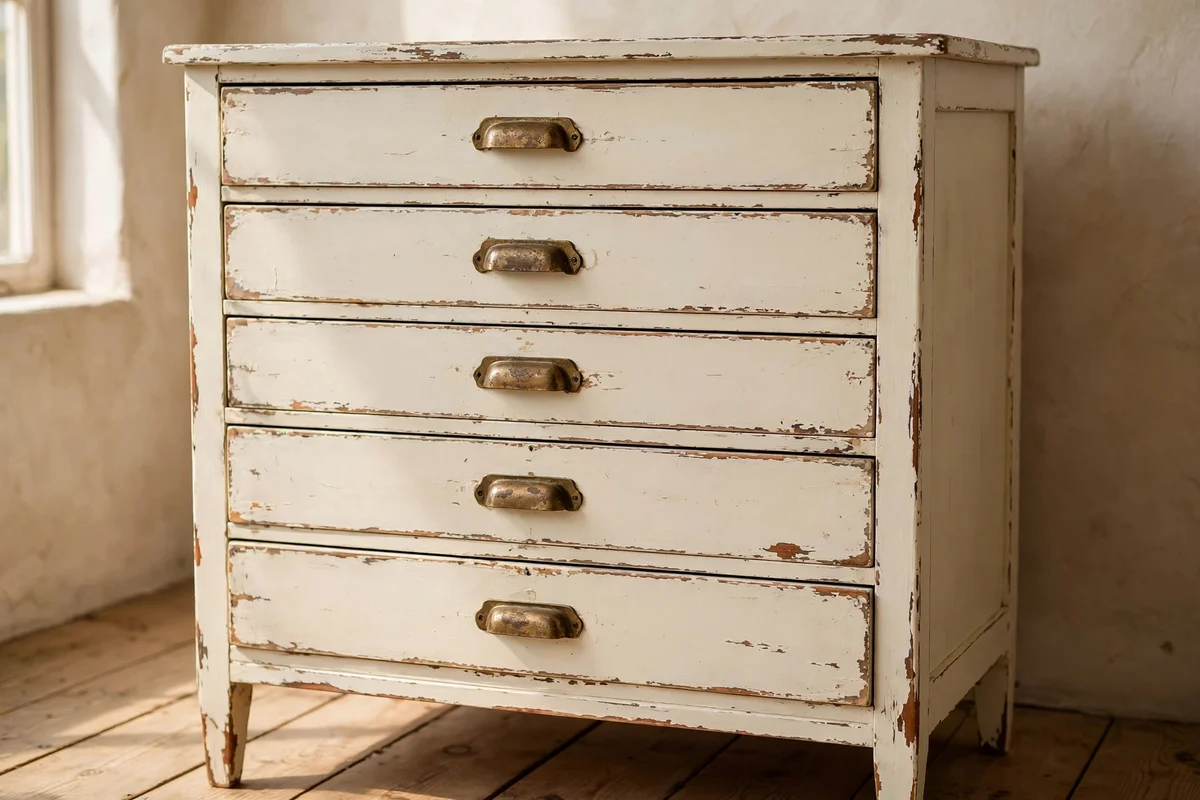
Wait a full 24 hours after your final coat before distressing, so the paint cures enough to sand in soft patches rather than flaking in chunks. Work with 220 grit paper folded into a small pad, and rub only the places a lifetime of use would wear: front edges, corners, the wood around drawer pulls, and raised moulding ridges. Check your progress from two metres away every few minutes so the wear stays balanced across the piece.
Keep the distressing light enough that the original wood shows in small patches, not large bare areas; you can always remove more paint but you cannot put it back without repainting. After sanding, dust the piece thoroughly and seal with clear wax, which softens the sanded edges and protects the worn spots. Avoid the centre of flat drawer fronts, where real wear never happens, since that is the giveaway of a fake finish.
3. Match Heritage Green to an Edwardian Oak Chest

Edwardian oak furniture, made roughly between 1901 and 1915, often has straight clean lines that suit deep heritage greens like Brunswick or studio green. These colours echo the Edwardian taste for rich, dark rooms and look right against warm brass or aged bronze hardware. Before painting, check that the oak top is solid rather than thin veneer over softwood; a solid top can be sanded bare and oiled while the painted carcass stays green.
Buy a sample pot first and brush a 20 cm square on the back of the piece, then look at it in morning and evening light, since heritage greens shift dramatically between warm and cool daylight. Two thin coats usually cover oak, which can bleed tannins, so use a stain blocking primer on knots. The common mistake is choosing a modern bright green that fights the furniture’s age; keep it deep, muted and historic.
4. Paint Hand Stripes Along Old Sideboard Drawer Fronts
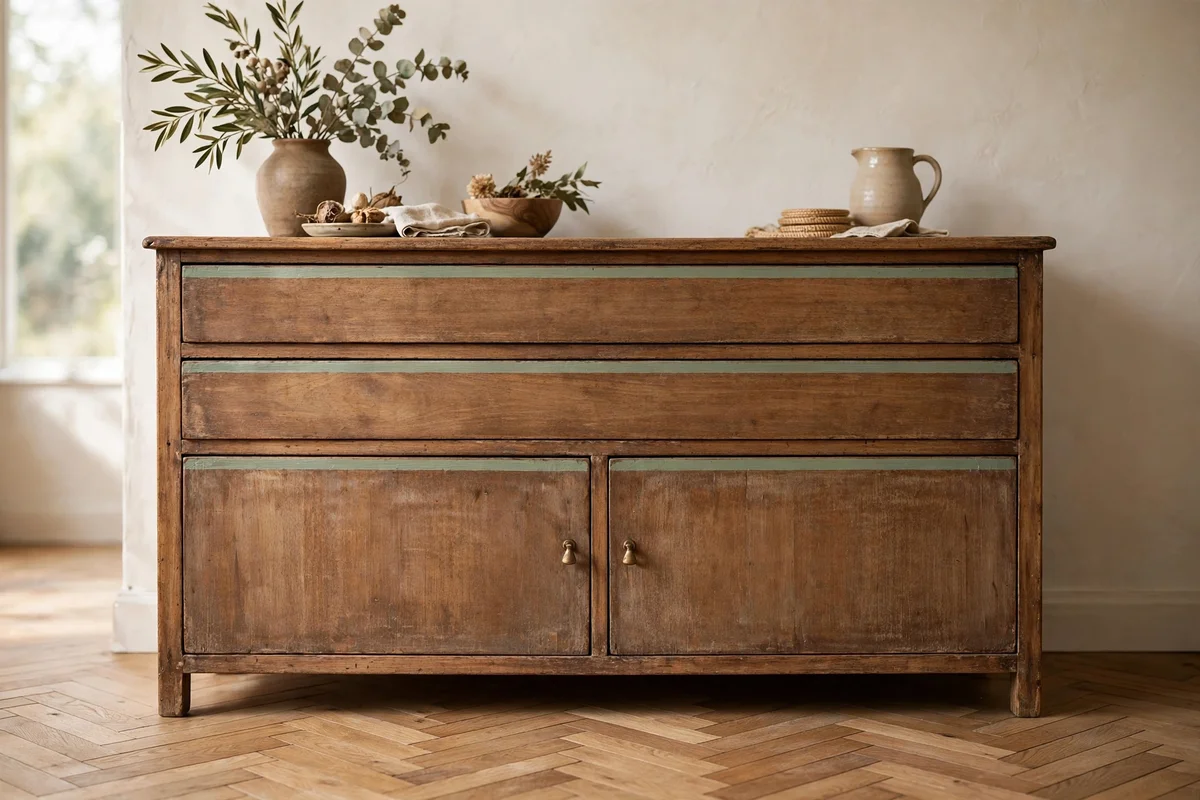
Plain hand painted stripes are one of the oldest ways to decorate a piece of furniture, and they need no artistic training. Choose a sideboard with flat, unmoulded drawer fronts at least 40 cm wide so the stripes have room to breathe. Paint the fronts in your base colour, let them dry fully, then mark stripe lines with a soft pencil and a ruler. Use a 1 to 2 cm flat artist brush and a steady hand, pulling each stripe in one pass.
Keep stripes simple: one band in a contrasting tone along the top edge of each drawer front, or two slim lines framing the centre. Load the brush lightly so the paint goes on thin; thick stripes look heavy and modern. Let stripes dry for six hours before touching them, and finish with wax. The mistake to avoid is taping the stripes, because the tape edge always looks machine made and defeats the hand painted charm.
5. Add Simple Botanical Motifs to a Pine Wardrobe’s Panels
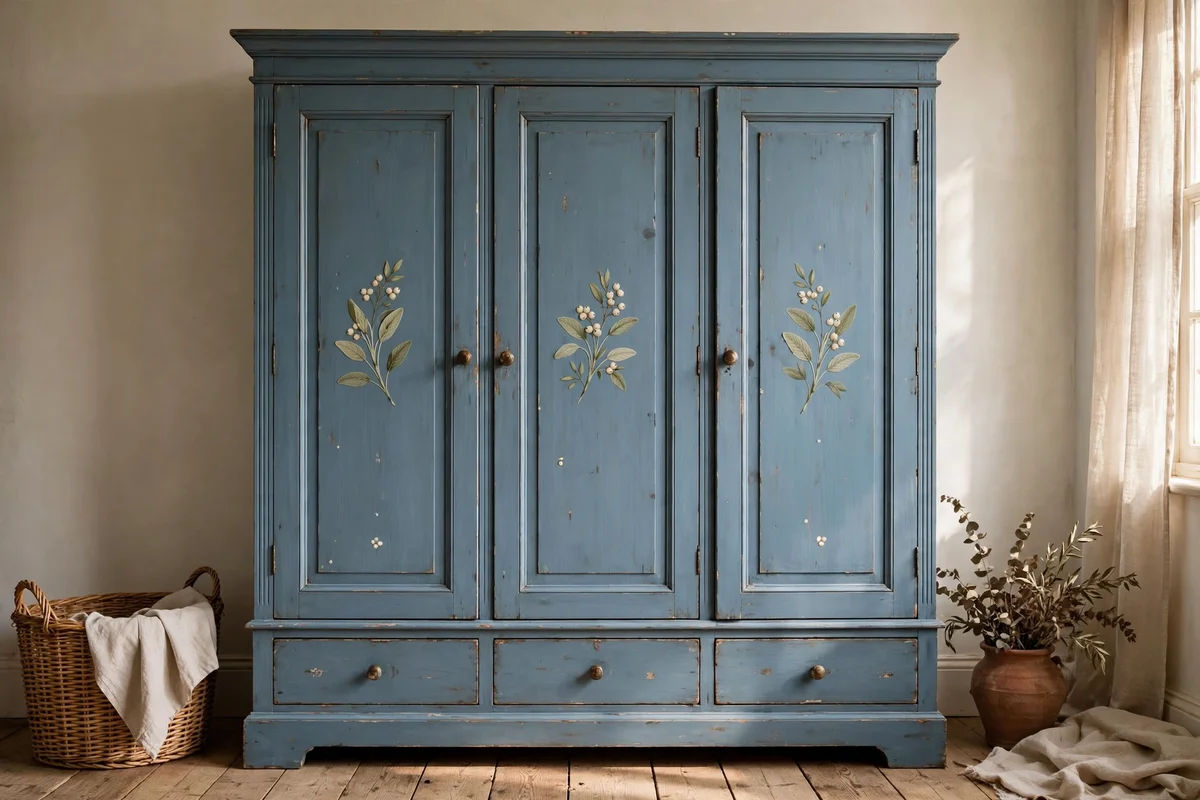
A plain pine wardrobe with flat recessed panels is a wonderful canvas for small hand painted botanical shapes: single leaves, simple sprigs, or a spray of berries in each panel corner. Sketch the motif on paper first until you can paint it in five strokes, then work directly on the painted panels with a round brush. Keep every motif the same size, about 8 to 12 cm tall, so the wardrobe looks decorated rather than doodled.
Choose motif colours drawn from nature rather than bright modern shades: sage leaves with cream berries, or soft gold stems on a dusty blue ground. Keep the panels purely pictorial, with no lettering or words anywhere on the furniture. After the motifs dry, seal the whole wardrobe with clear wax. The mistake to avoid is painting motifs on every panel; leave alternate panels plain so the eye has somewhere to rest.
6. Line Dresser Drawers With Pretty Paper Before Refilling
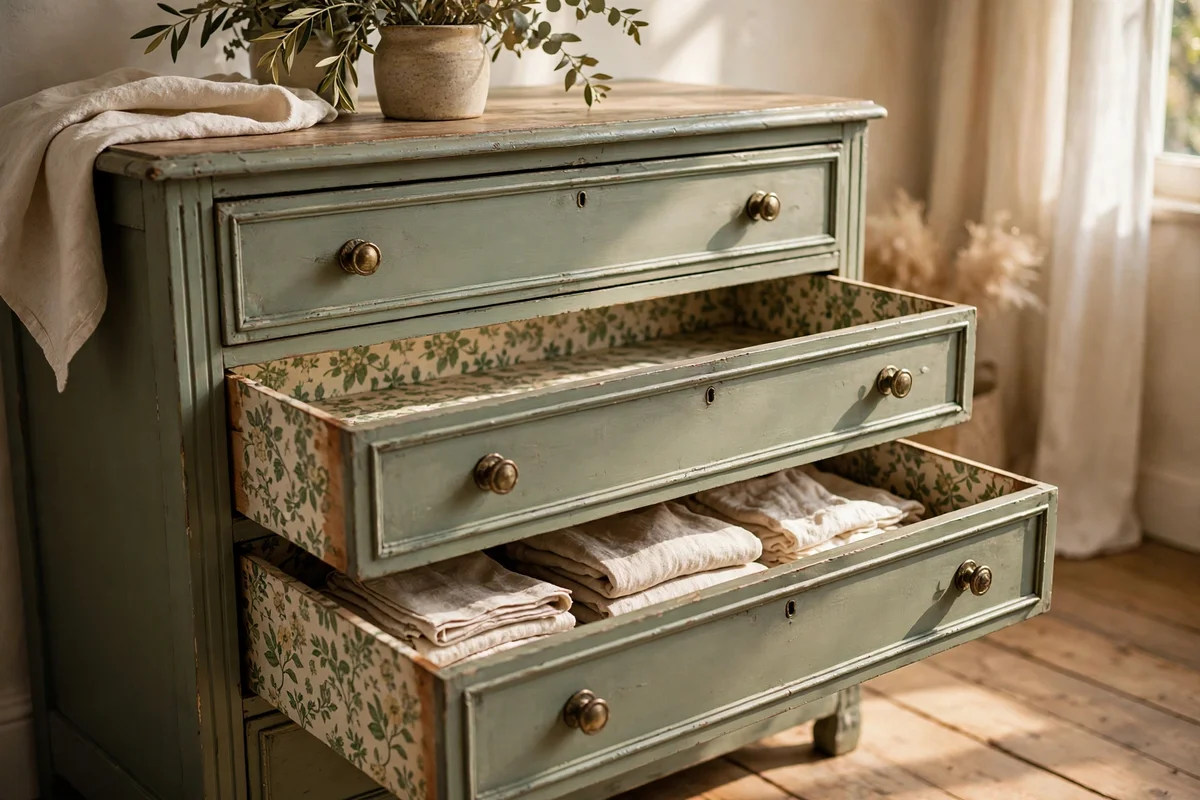
Refreshed drawer interiors turn a painted dresser from a pretty object into a pleasure to use. Measure each drawer and cut lining paper 5 mm smaller on all sides so it lies flat without bunching. Thick wrapping paper, wallpaper offcuts or washable oilcloth all work well, costing almost nothing. Press the paper down with a thin smear of wallpaper paste or double sided tape at the corners only, so future owners can lift it out easily.
Choose a lining that echoes the outside colour: floral paper with green leaves inside a sage dresser, or striped ticking inside a cream one. Replace liners every two or three years, since drawers collect dust and the paper dulls. The mistake to avoid is gluing paper down permanently with strong adhesive; a future restorer will thank you for removable corners. This small job takes under an hour for six drawers.
7. Sand and Oil the Bare Top of a Two Tone Farmhouse Table
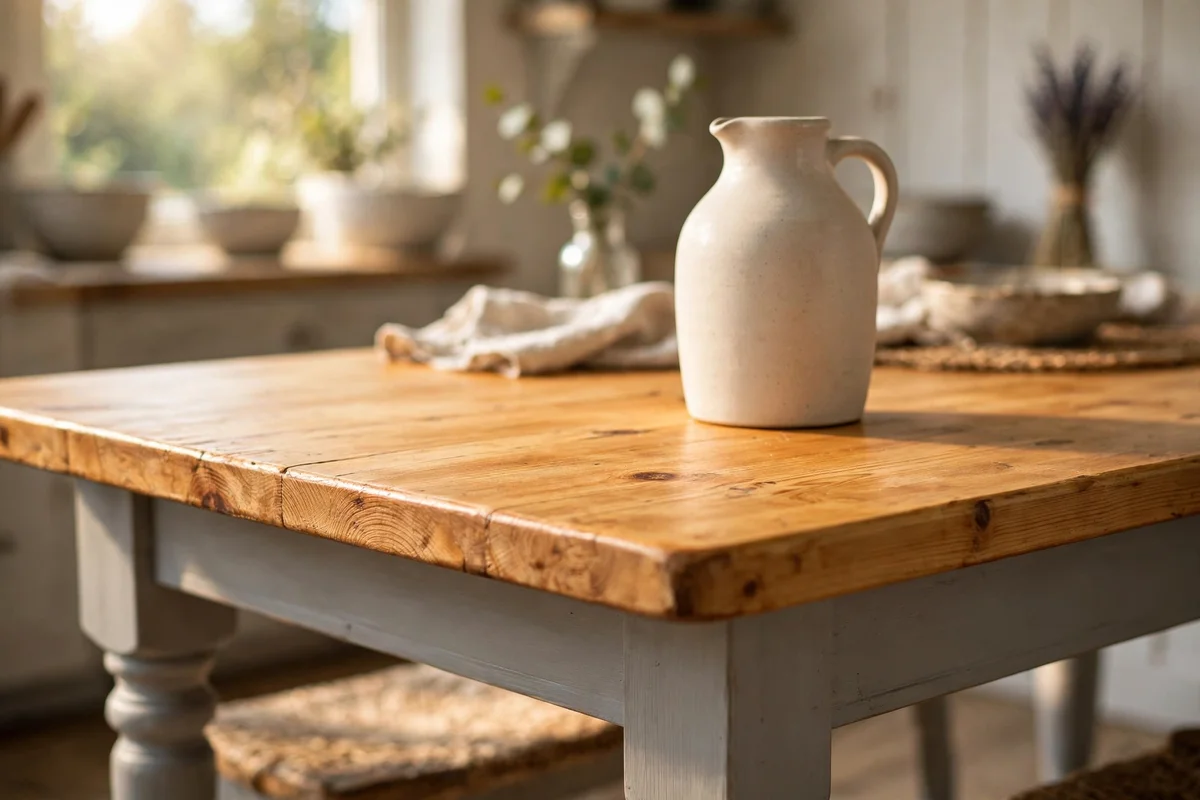
A farmhouse table with a scrubbed pine top and painted legs is a classic two tone pairing. Sand the top through 80, then 120, then 180 grit paper, always working with the grain, until it feels smooth to the palm. Wipe away dust with a damp cloth, let it dry, then apply two coats of food safe hard wax oil, waiting 24 hours between coats. The oil darkens the pine slightly and protects it against daily cups and plates.
Keep the painted legs a soft colour like putty or pale sage so the bare top stays the star. Reoil the top once a year, or when water stops beading on the surface, which takes about thirty minutes. The mistake to avoid is using varnish on a working table top; varnish scratches white and looks tired within a year, while oiled wood wears gracefully and can be reoiled without sanding.
8. Keep Original Brass Pulls Against a Fresh Paint Finish
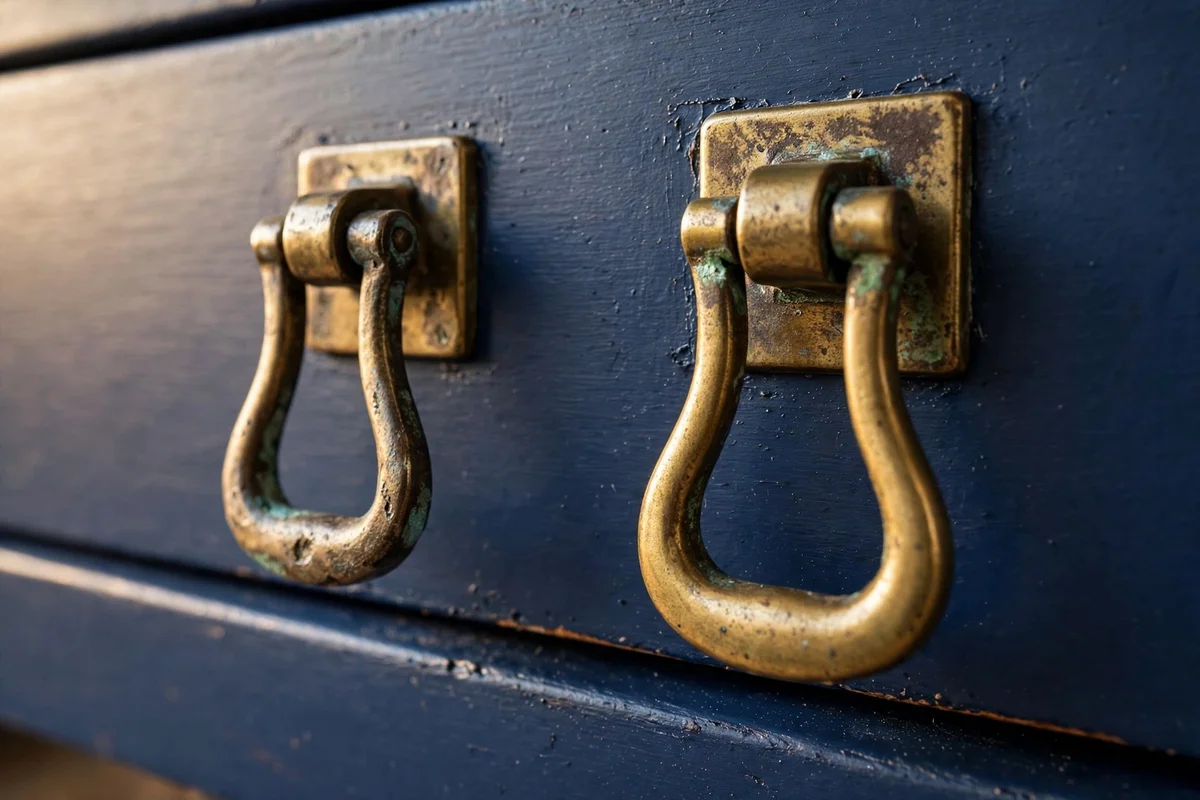
Old brass bail pulls or wooden knobs are part of a piece’s history, so keep them whenever the paint goes on fresh. Remove the hardware before painting, soak brass pulls in warm soapy water, and rub gently with a paste of baking soda and lemon juice to lift grime. If the brass is thinly plated, stop at cleaning and accept a soft patina; over polishing can wear through to the base metal. Refit the originals against the new paint for instant character.
Measure the distance between screw holes before discarding anything, since antique pulls often sit on non standard centres, typically 60 to 96 mm, that modern handles will not match. If a pull is missing, search second-hand shops for one close relative rather than replacing the whole set; a near match looks more honest than a new matching set. The mistake to avoid is drilling new holes for modern handles, which scars the drawer fronts forever.
9. Match Heritage Blue Grey to a Victorian Washstand
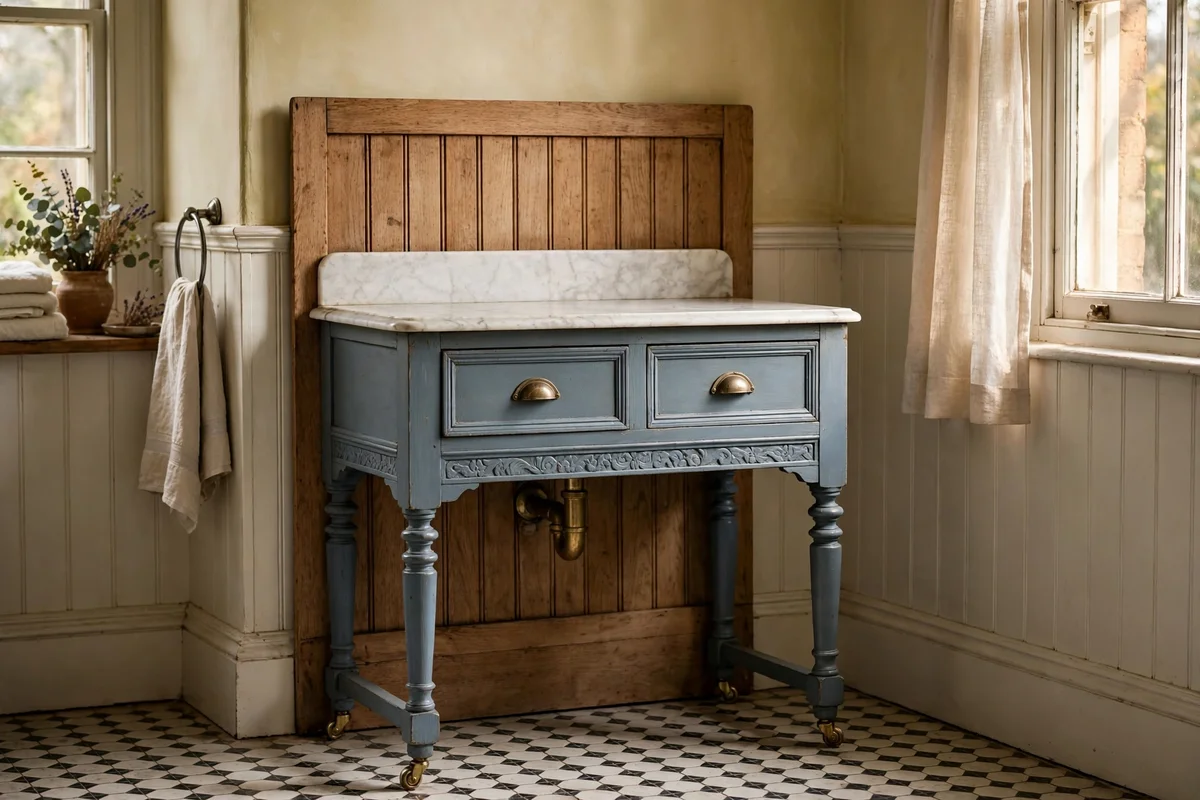
Victorian washstands with their marble or wooden splash backs suit heritage blue greys like de Nimes or Hague blue, colours that echo slate and sea. Paint the body in two thin coats over a stain blocking primer, because Victorian mahogany and pine bleed resin through paint. Leave the original marble top untouched and polish it with a damp cloth; a painted wooden top can be oiled for contrast. The result feels properly period rather than themed.
Washstands are small, usually 75 to 90 cm wide, so one litre of paint is plenty, and the whole project fits in a weekend. Replace the old castors with new rubber ones of the same size, about 25 to 30 mm, so the piece rolls without marking floors. The mistake to avoid is removing the original splash back to modernise the silhouette; it is the feature that makes a washstand a washstand, and painted blue grey it looks wonderful.
10. Freshen Drawer Interiors With Warm White Paint
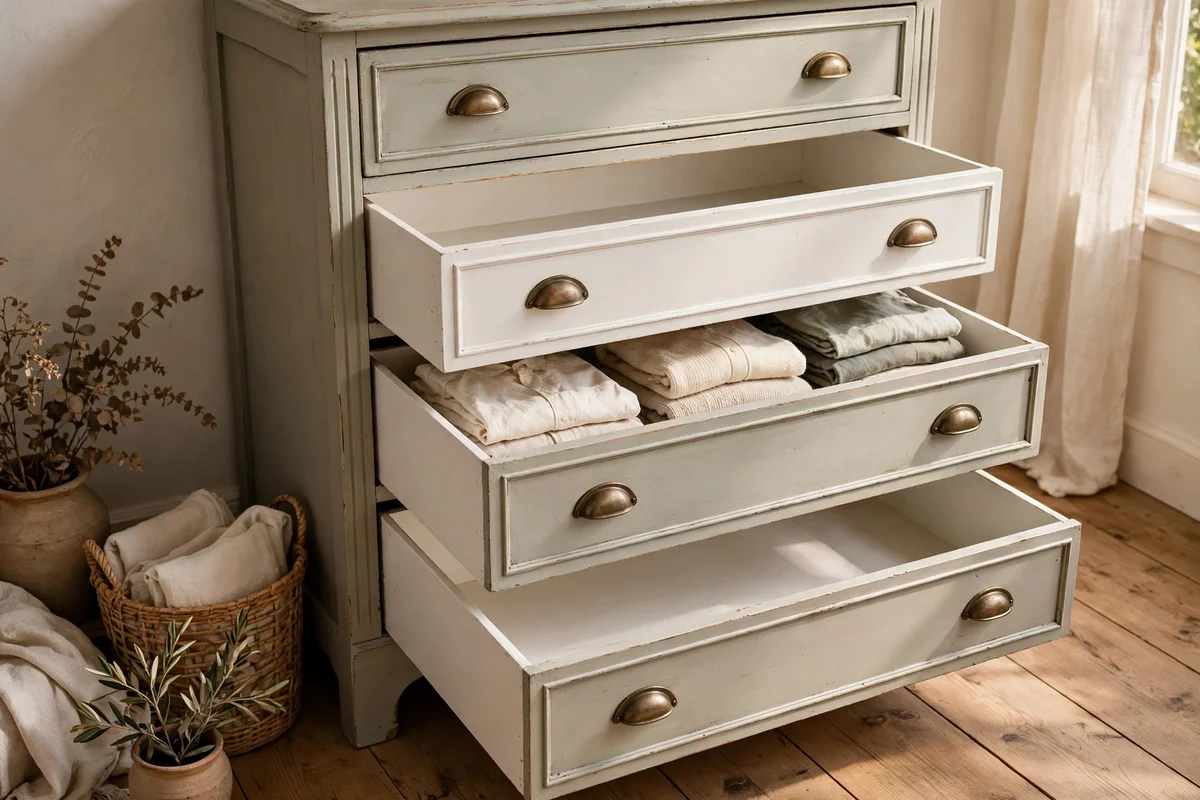
Drawer interiors on old dressers are often stained, musty or covered in shelf paper from decades past. After removing old paper and vacuuming, sand lightly with 150 grit and paint the inside with two coats of warm white eggshell. Warm white hides stains without looking clinical, and eggshell wipes clean with a damp cloth. Let each drawer air for 48 hours before lining or refilling, so the musty smell clears and the paint cures.
If the musty smell persists after painting, place a small bowl of baking soda inside each drawer overnight before filling; it absorbs lingering odours without perfuming clothes. Paint the drawer runners too, but sand them back lightly once dry so the drawers still slide. The mistake to avoid is using strongly scented paints or oils inside drawers, since the smell transfers to stored clothes and linens and takes months to fade.
11. Distress Only the Natural Wear Points of a Bed Frame
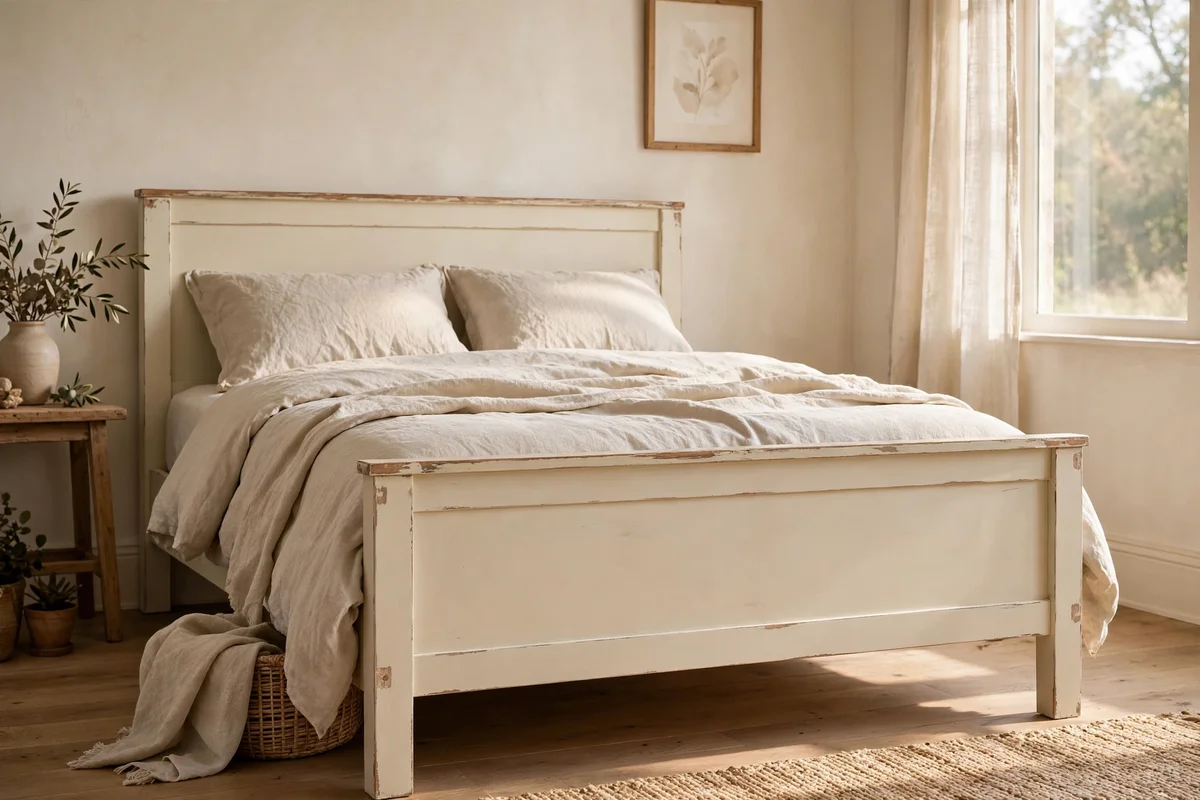
A painted bed frame wears in very specific places: the top rail where hands grip it, the corners of the footboard, and the edges of the posts. After the paint has cured for 24 hours, sand these spots lightly with 220 grit paper until the wood beneath just shows. Leave every other surface untouched, because a bed is a large object and overall distressing makes it look uniformly tired instead of naturally aged.
Because a bed frame is handled and leaned on daily, seal the whole frame with two coats of clear wax and buff it well; unsealed distressed paint rubs onto bedding over time. Work the distressing symmetrically on both sides of the headboard so it reads as balanced wear. The mistake to avoid is distressing the inside faces of the rails, which no hand ever touches, since that is where fake looking wear always gives itself away.
12. Paint a Rocking Chair Muted Cream With a Bare Wood Seat
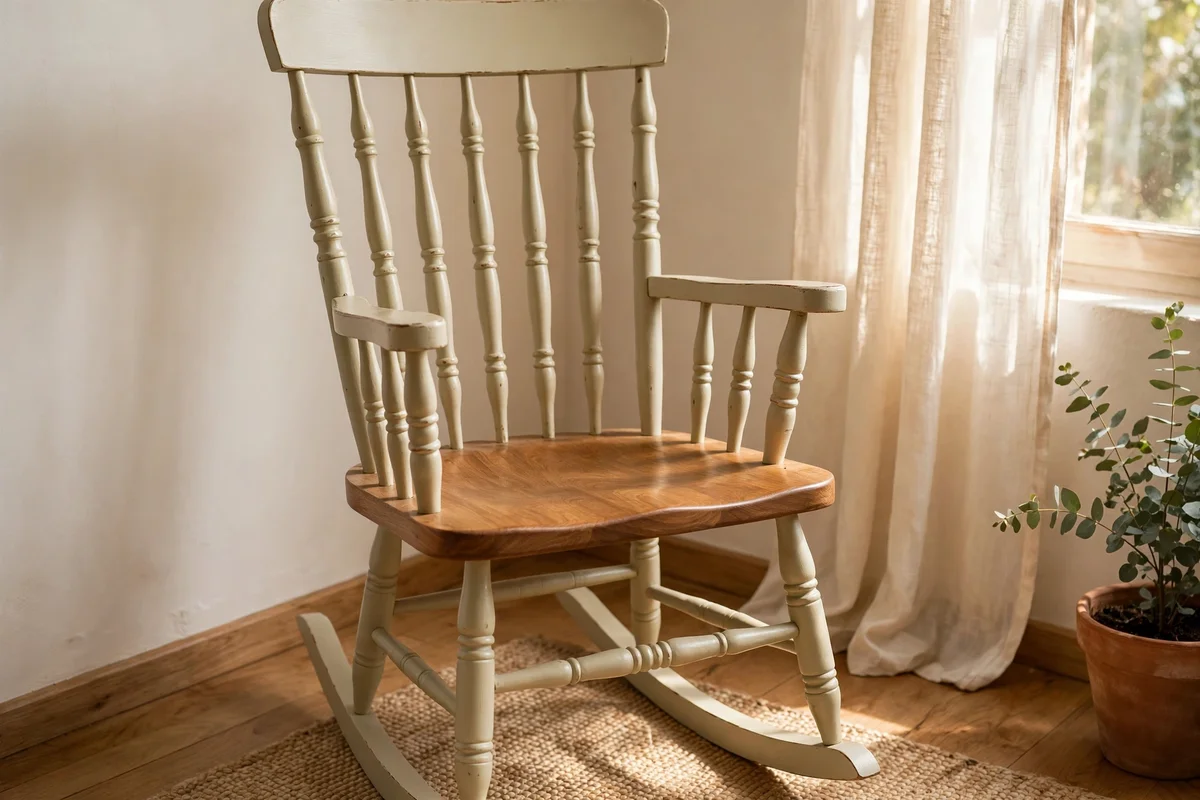
A wooden rocking chair with turned spindles paints beautifully in muted cream, especially when the seat is left bare and oiled. Paint the spindles and legs with a small brush, working one spindle at a time so drips cannot settle on neighbouring wood. Two thin coats of cream eggshell, sanded lightly with 240 grit between coats, give a smooth finish that survives the chair’s constant movement. Mask the seat before you start.
Sand the bare seat through 180 grit and oil it with hard wax oil, which warms the wood and protects it against daily sitting. Check the rockers for worn ends before painting; glue and clamp any loose spindles, since paint will not hold a wobbly chair together. The mistake to avoid is painting the seat too, which makes the chair look flat and hides the prettiest grain in the room.
13. Use Heritage Mustard on a Mid Century Sideboard’s Body
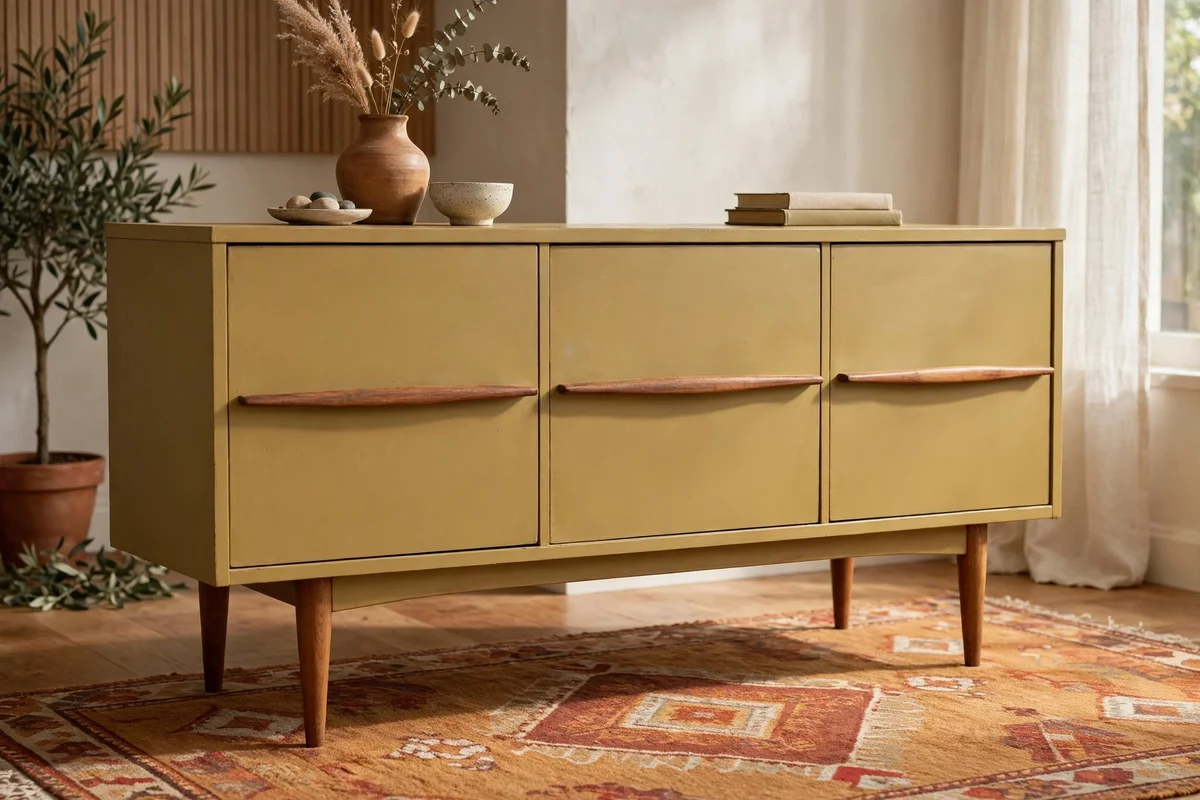
Mid century sideboards with tapered legs and long flat fronts take heritage mustard beautifully, a colour that echoes the 1960s without turning the piece into a novelty. Paint the body in two thin coats of muted mustard, leaving the legs bare teak or oak if the wood is sound. Sand the legs with 180 grit and oil them; the warm timber against mustard is the signature pairing of the era.
Mid century veneer is often thin, so sand the body by hand with 180 grit and never use a power sander, which can burn through the veneer in seconds. Keep the original long handles, usually brass or wooden, since replacements are hard to source. The mistake to avoid is choosing a bright modern yellow; heritage mustard is ochre deep and dusty, and it is the dusty quality that makes it sit calmly in a family room.
14. Keep the Paint Thin So the Wood Grain Shows Through
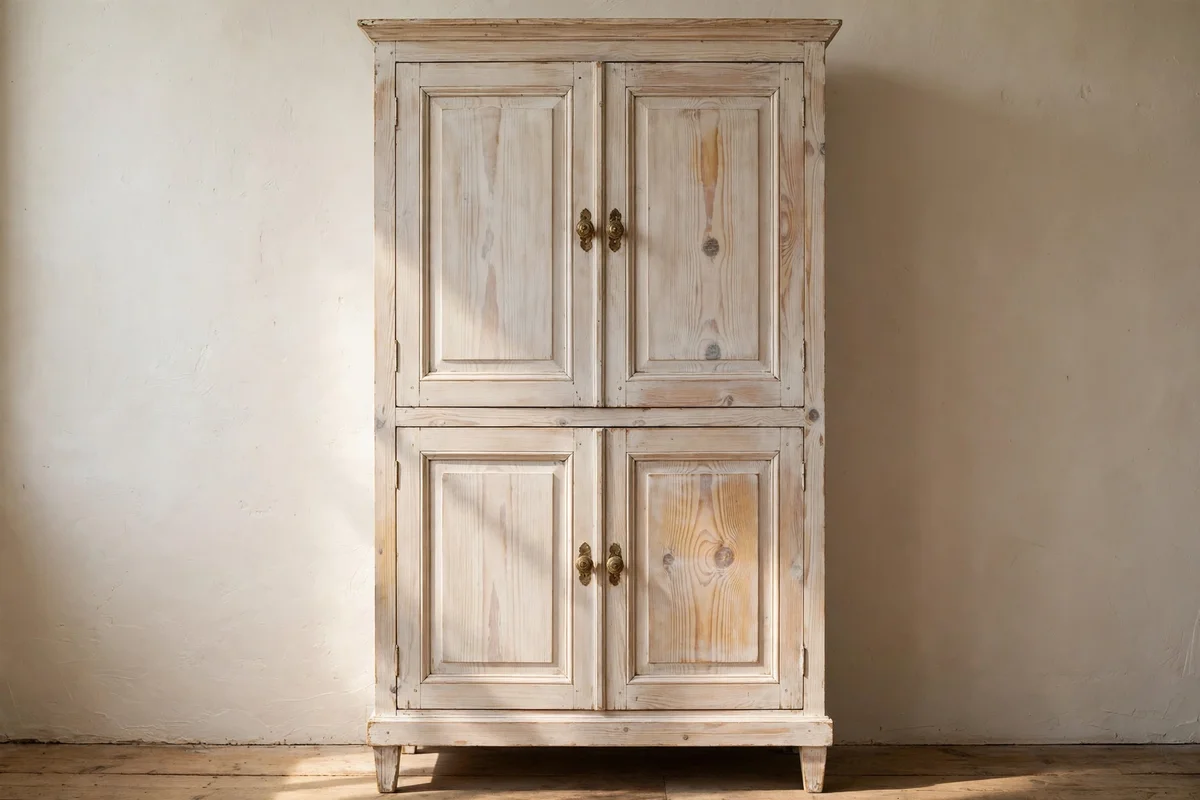
A wash of paint rather than full coverage suits pine and oak pieces with pretty grain. Thin your furniture paint with 10 to 15 percent water and brush it on in the direction of the grain, working one board at a time. Wipe back the excess lightly with a dry cloth before it dries fully, so the paint settles into the grain instead of sitting on top. Two thin washes give depth; one wash looks unfinished.
This technique is forgiving for beginners, because uneven patches read as character rather than mistakes. Seal with a single coat of clear wax to protect the surface while keeping it breathable. The mistake to avoid is thinning the paint more than 20 percent, which makes it too weak to bond and causes it to rub off on hands and clothes. Test your mix on the back of the piece before committing to the front.
15. Refresh a Painted Dresser Inside With Cedar Liners
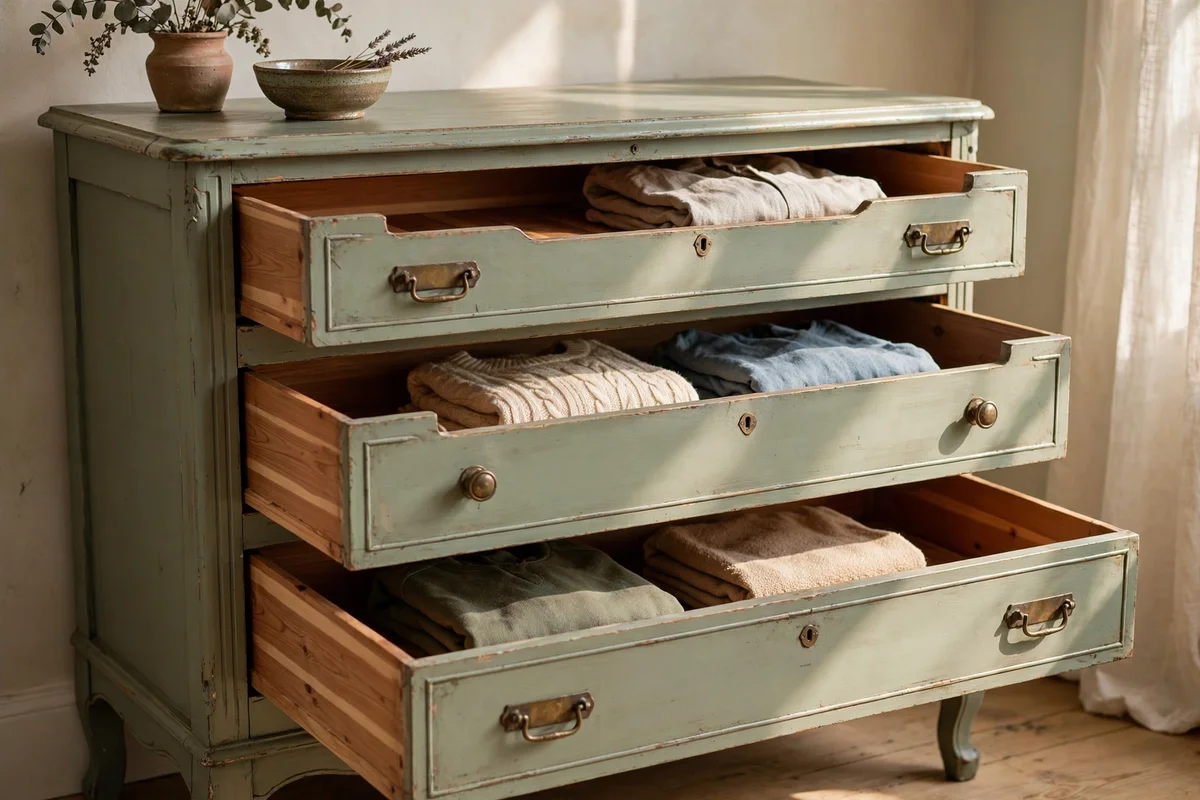
Cedar drawer liners bring a fresh woody scent and protect the newly painted interior. Buy thin cedar sheets, usually 3 mm thick, cut to the drawer size minus 5 mm on each side, and drop them in without glue. A set for a standard six drawer dresser costs 25 to 40 dollars and takes twenty minutes to fit. Cedar also discourages moths, which makes it a sensible choice for clothing drawers.
Sand the cedar lightly once a year with 180 grit paper to revive the scent, which fades gradually over time. If a drawer is too shallow for liners, tuck cedar blocks or rings into the corners instead. The mistake to avoid is varnishing the cedar, since varnish seals in the oils that give cedar its scent and its protective qualities. Keep the wood bare so it can keep working for you.
16. Know Which Antiques Should Never Be Painted
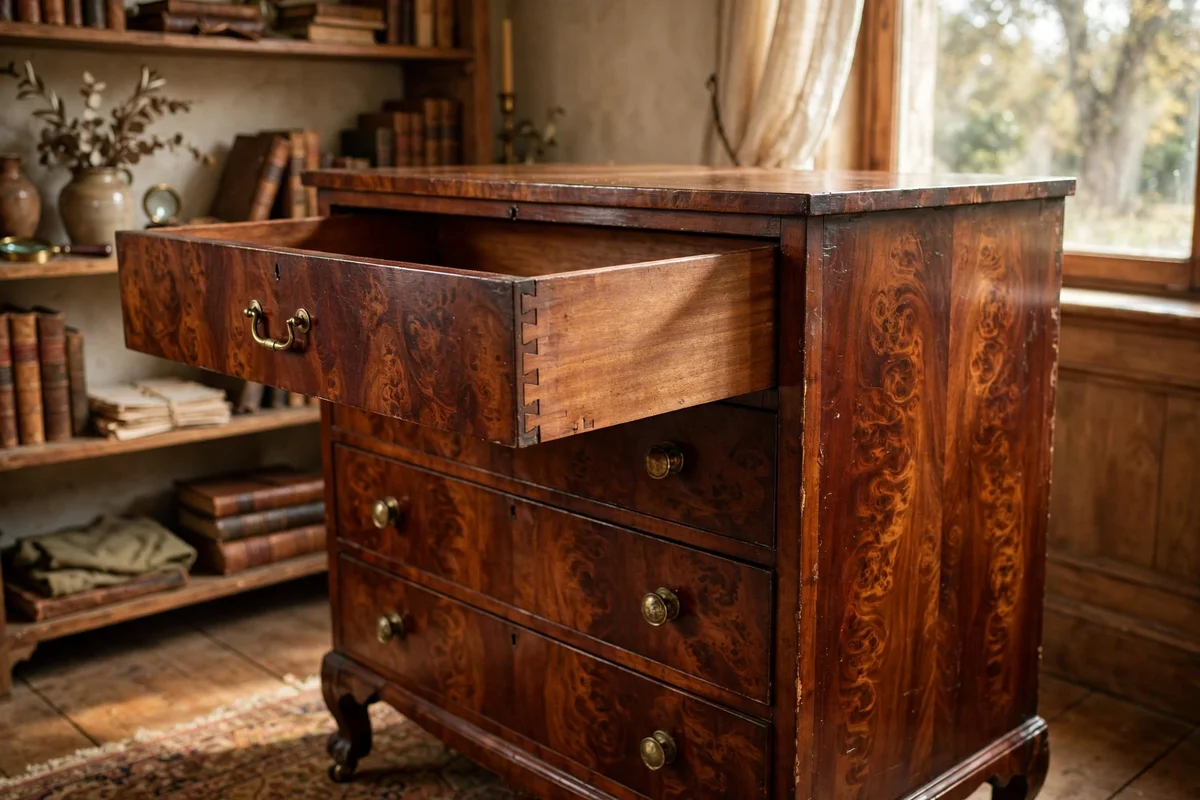
Some pieces lose real value and history under paint. Never paint furniture with original hand cut dovetails paired with rare veneer, hand inlaid marquetry, original japanning, or a known maker’s stamp from an important workshop. Pieces made before 1800 in solid walnut or mahogany almost always deserve careful restoration instead of paint. A painted Regency chest is worth a fraction of the same chest with its original finish, so the loss is measurable in hundreds.
When you are unsure, photograph the joints, the back boards and any labels, and show them to a local furniture restorer or auction house before you buy paint. Many offer free opinions at valuation days. The mistake to avoid is painting a piece because it looks dull; dullness is usually grime and dried polish, which lifts with a wash of sugar soap and a coat of wax. Rescue the finish before you cover it.
17. Paint a Small Nightstand Dusty Rose With a Stripped Oak Top
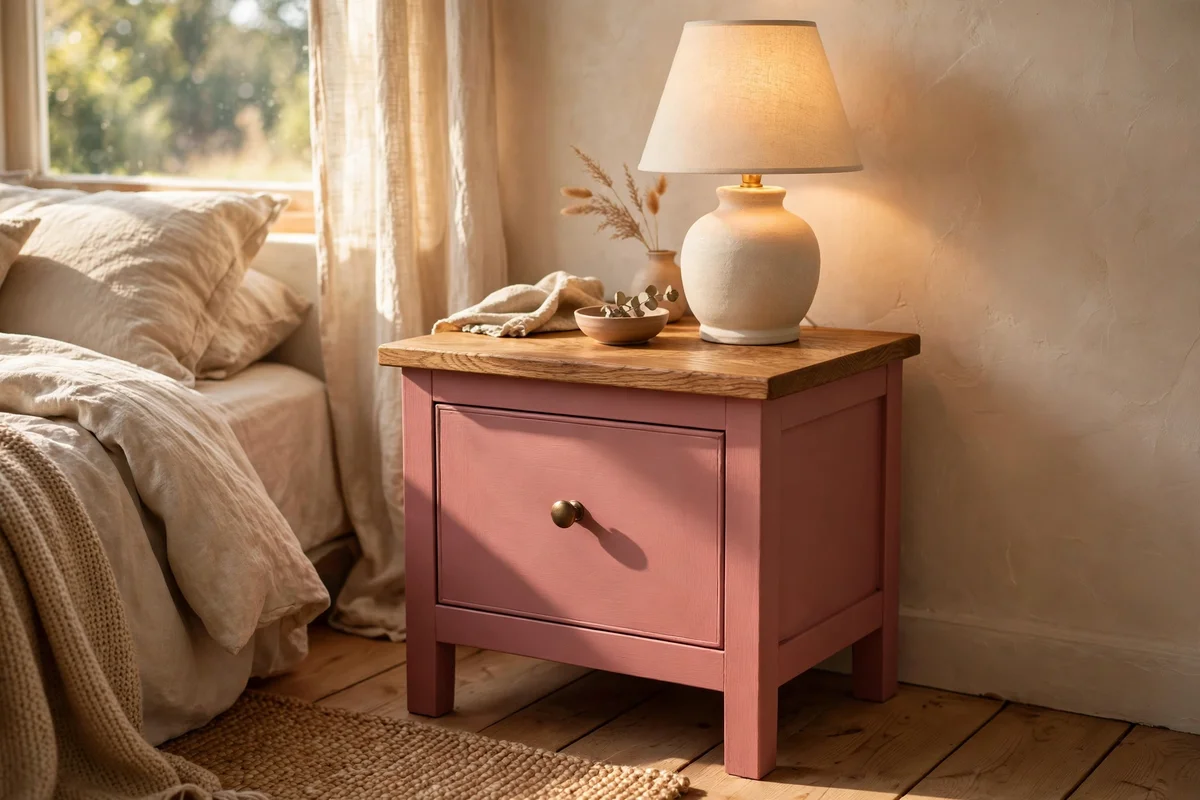
A single drawer nightstand is the perfect first painting project: small enough to finish in a weekend and forgiving of learning mistakes. Strip the oak top with a safe chemical stripper or careful sanding, working through 120 then 180 grit, and oil it with hard wax oil. Paint the body in dusty rose, a soft colour that flatters lamplight and works in both adult and children’s rooms without feeling childish.
Keep the original knob if it is sound, or fit a simple turned wooden knob in a warm tone for about 5 dollars. Nightstands live close to beds, so seal the paint with two coats of wax and let it cure for a week before placing a lamp; a hot lamp base can mark uncured paint. The mistake to avoid is painting the inside of the drawer a dark colour, which makes small contents disappear; use warm white inside.
18. Seal Painted Finishes With Clear Wax for a Soft Glow
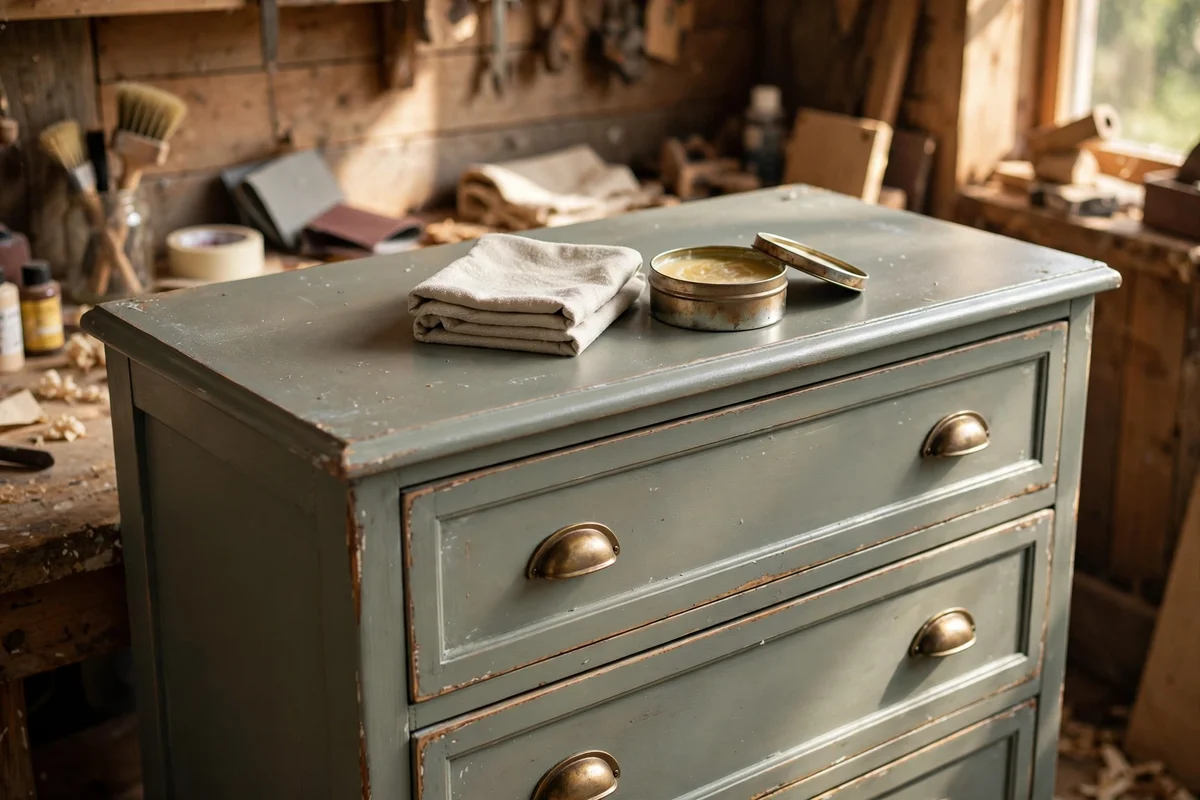
Clear wax is the traditional finish over painted furniture, giving a soft hand rubbed glow that modern varnishes cannot match. Apply it with a clean cloth or wax brush in thin circular motions, one section at a time, and wait 20 minutes before buffing with a second clean cloth. A 200 ml tin covers a dresser comfortably and costs 12 to 20 dollars. The waxed surface resists fingerprints and water rings better than bare paint.
Let wax cure for 48 hours before heavy use, and reapply once a year on surfaces that take daily wear, like table tops and drawer edges. Work in a ventilated room, since wax has a mild solvent smell that fades as it cures. The mistake to avoid is laying wax on thickly, which stays sticky for weeks and collects dust; thin coats rubbed well are always better, and you can add a second thin coat instead.
19. Restore a Vintage Desk With Painted Legs and a Bare Wood Worktop
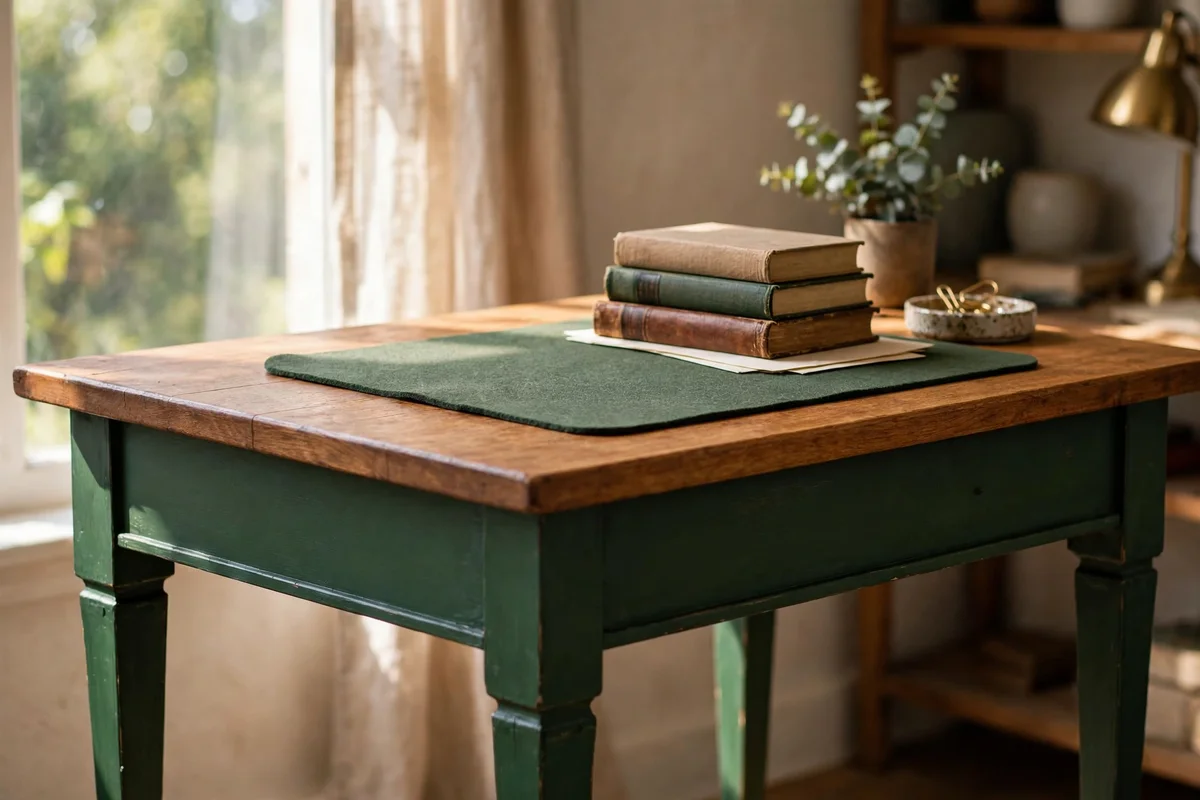
A vintage writing desk gets a fresh working life with painted legs and a bare oiled top. Paint the legs, apron and drawer fronts in a deep colour like forest green or navy, leaving two coats to dry fully. Sand the top back to clean wood through 120 then 180 grit, working with the grain, and finish with two coats of hard wax oil. The bare top is kind to writing and laptops alike, and the painted base hides scuffs.
Fit a leather or felt desk pad, about 60 by 40 cm, to protect the oiled top from pen marks and hot mugs. Check that the desk height suits your chair before you start; most vintage desks sit at 72 to 76 cm, which is comfortable for adults. The mistake to avoid is painting the drawer interiors dark, since desk drawers hold small items that vanish in shadows; warm white inside keeps everything findable.
20. Let One Painted Hero Piece Stand Beside Natural Wood

In a room full of natural timber, one painted piece becomes the hero: a sage dresser against oak floors, or a navy washstand in a pine panelled bedroom. Give the painted piece the best position, usually the wall you face on entering, and let everything else stay quiet. Match the paint colour to something already in the room, like the green in a rug or the blue of a curtain, so the hero feels connected rather than random.
Resist painting the companions to match; a whole room of painted furniture looks staged, while one painted piece among natural wood looks collected over time. If the hero piece ever feels too strong, soften it with a folded linen runner across the top and a simple ceramic vase. The mistake to avoid is scattering three or four painted pieces around one room, which dilutes the effect and makes the room feel busy instead of calm.
Painted vintage furniture rewards patience more than perfection. The pieces that look best are the ones where the painter worked slowly: two thin coats, a day of drying, gentle distressing only where hands would naturally wear the paint away. Start with the easiest project on this list, perhaps a small nightstand or a chair, and let it teach you the rhythm before you move to a big dresser. You will learn more from one finished piece than from ten half started ones.
When your first piece is finished, give it a week in its room before you judge it. Paint settles, wax hardens, and the piece starts to belong. If this guide helped you rescue one old dresser or sideboard, it has done its work. Keep the bare wood tops oiled, the drawers lined, and enjoy furniture that carries its history into your home with quiet grace.
Frequently Asked Questions
How much does it cost to paint a vintage dresser?
Around 40 to 120 dollars for paint, primer, sandpaper, wax and drawer liners if you already own brushes. A litre of heritage colour paint covers a dresser with two thin coats and usually costs 15 to 30. Buying a rescue dresser adds 30 to 150 at flea markets. The total stays well under the price of one new chest of drawers.
Should I strip old paint before repainting vintage furniture?
Usually not. Wash the piece with sugar soap, sand lightly with 150 grit to give the new paint grip, and paint straight over sound old paint. Strip only if the old finish is flaking badly or sticky. Stripping a whole dresser takes a full weekend; scuff sanding takes an afternoon and preserves the aged base underneath.
Which antiques should never be painted?
Pieces with rare veneer, original hand painting, maker labels from important workshops, or strong auction value should stay unpainted. Original mahogany veneer, hand inlaid marquetry and early carved oak gain value with careful restoration, not paint. When in doubt, photograph the piece and ask a local furniture restorer before you open a paint tin.
How do I distress painted furniture without making it look fake?
Distress only where hands and clothes would naturally wear the paint: edges, drawer pulls, corners and raised mouldings. Use 220 grit paper with a light hand after the paint has dried for 24 hours, removing paint in small patches. Step back every few minutes to check balance. The mistake to avoid is sanding flat panel centres, where real wear never happens.
What paint finish works best on vintage furniture?
A matt or eggshell acrylic made for furniture suits most pieces; it levels well and dries to a soft, age appropriate sheen. Use primer on bare or resinous wood to block tannin bleed. Finish with two thin coats of clear wax for a hand rubbed glow. Avoid high gloss, which makes old pieces look new and hides their character.