Crafts
21 Cute Felt Fall Crafts for Labour Day That Feel Sweet, Cosy and Handmade
By Anna Wells · · 22 min read
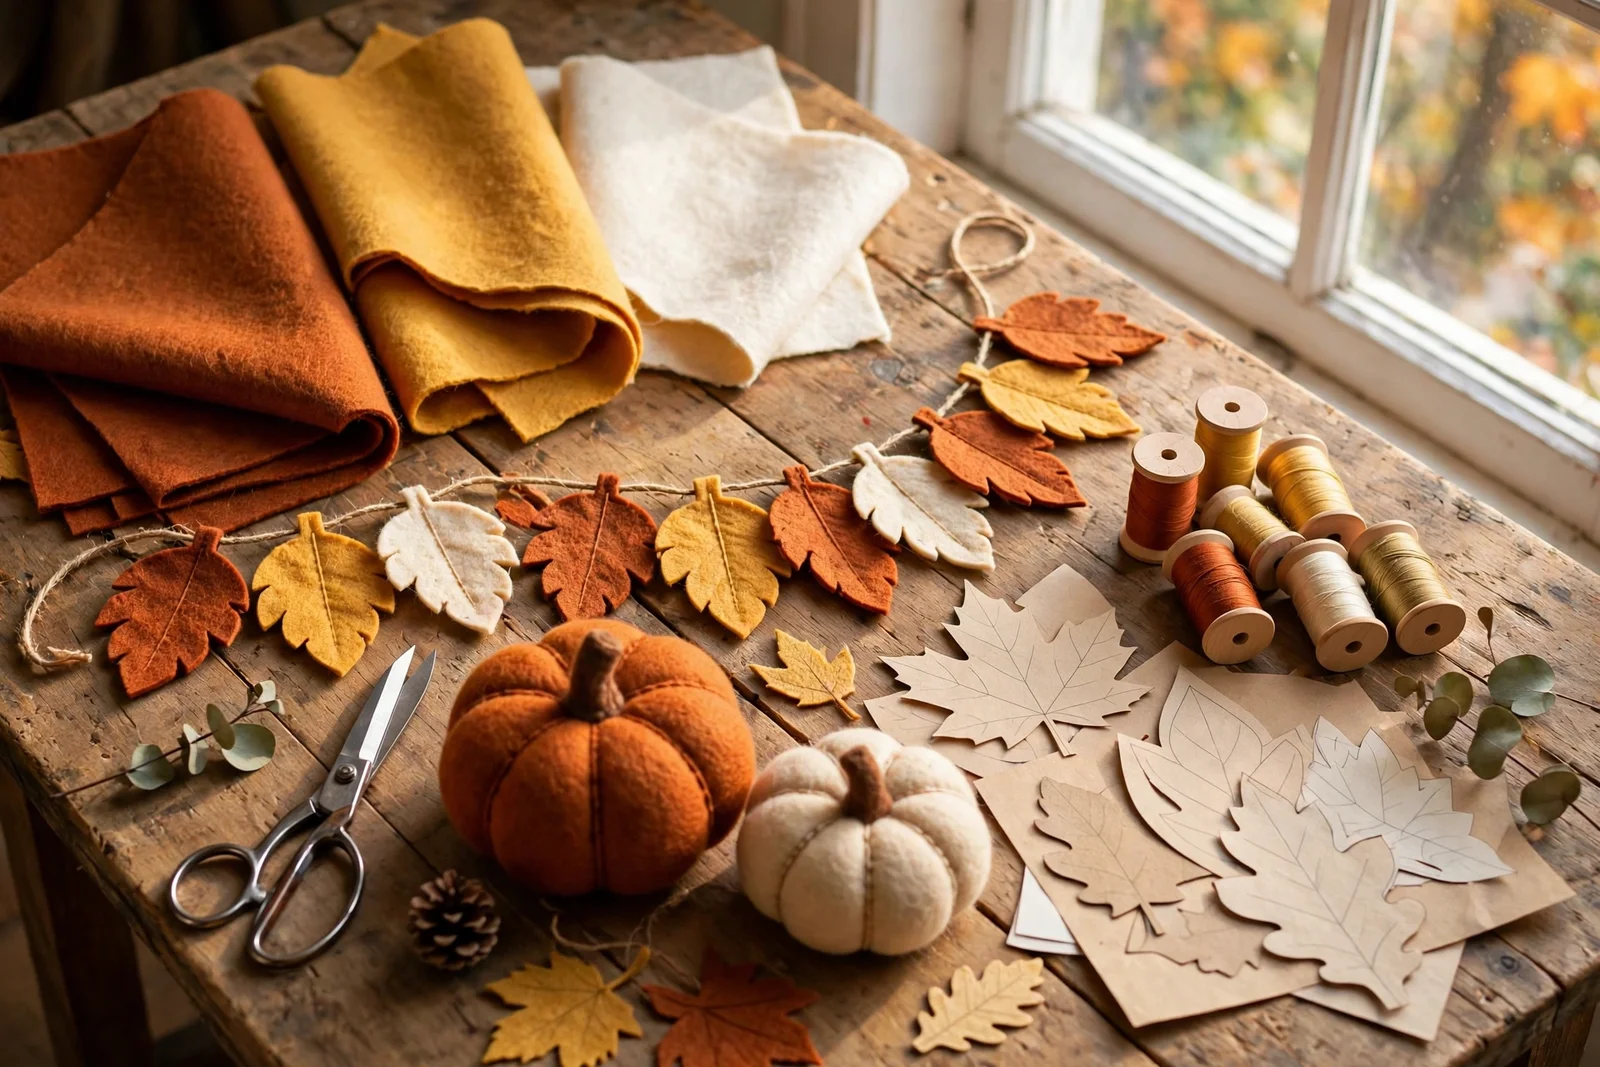
Spend your Labour Day weekend stitching sweet felt fall crafts: leaf garlands, stuffed pumpkins, wreaths and banners in warm harvest colours.
Labour Day weekend arrives with that first cool morning that makes you reach for a jumper, and it is the perfect excuse to clear the kitchen table for a slow making session. Felt is the kindest craft material for a long weekend: it does not fray, it needs no hemming, and a sharp pair of scissors is enough to start. Spread out sheets in rust, gold, moss and cream, put the kettle on, and let the house smell like tea while autumn takes shape in your hands.
This collection gives you 21 felt fall crafts made for relaxed family making, from a two-tone leaf garland for the mantel to plump stuffed pumpkins for the sideboard. Every project uses the same short list of tools: felt sheets, paper templates, embroidery thread, a needle and a little toy stuffing. Most pieces take under an hour, the garlands take an afternoon, and nothing needs a sewing machine, so the whole weekend can move at conversation pace.
Felt rewards beginners and still looks refined on the shelf, because the colours stay matte and the edges stay clean even when your stitching is simple. A running stitch is enough to join a garland, a blanket stitch turns a toadstool cap into a little showcase, and small projects like brooches and mug rugs make satisfying pocket-sized finishes between the bigger ones. Read the felt and stitch basics first, then pick any project that catches your eye and begin.
Everything here is harvest, not Halloween: no pumpkins with faces, no spooky symbols, just warm leaves, acorns, sunflowers and toadstools in cosy colours. Keep the Labour Day spirit gentle by working slowly, sharing the cutting with whoever is home, and finishing the weekend with a shelf or two of handmade autumn. Let us begin with the material that makes it all possible.
1. Cut the Right Felt Weight for Every Autumn Project
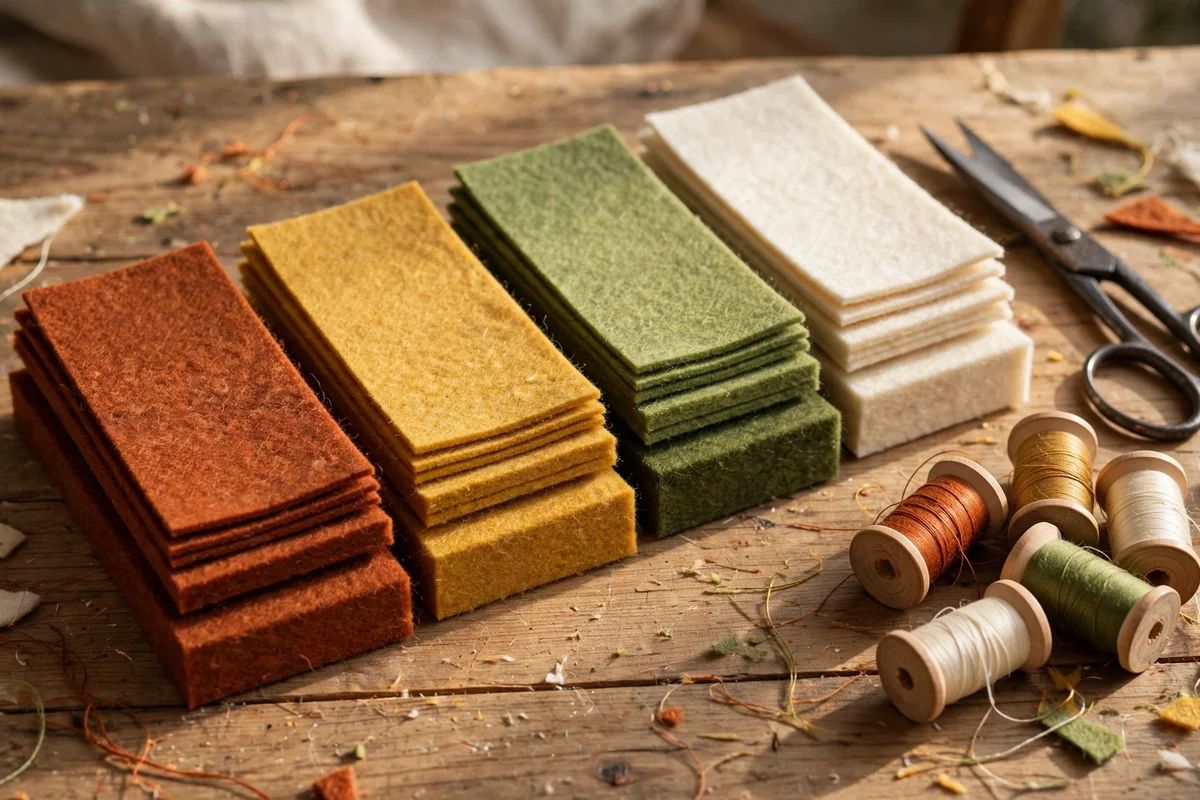
Felt for autumn crafts comes in three useful weights, and matching weight to project is the single biggest quality lever you have. One millimetre craft felt is light and floppy, fine for single flat leaves but too weak for anything stuffed. Two millimetre felt is the all-rounder: crisp enough to hold a leaf point, soft enough to curve around pumpkin stuffing. Three millimetre felt feels almost like thin card and suits mug rugs and brooch bases that must lie perfectly flat.
Wool blend felt, usually about 35 percent wool, sews more smoothly and holds colour richer than plain polyester craft felt, so buy it for the projects people will touch: pumpkins, acorns and brooches. Polyester felt is cheaper and perfectly fine for garlands, banners and anything high up or far away. Budget tip: one variety pack of 30 polyester sheets plus six wool blend sheets covers this whole article for under 15 pounds or dollars. The mistake to avoid is buying the cheapest ultra-thin felt, which puckers at every stitch.
2. Trace Clean Paper Templates for Crisp Leaf and Pumpkin Shapes
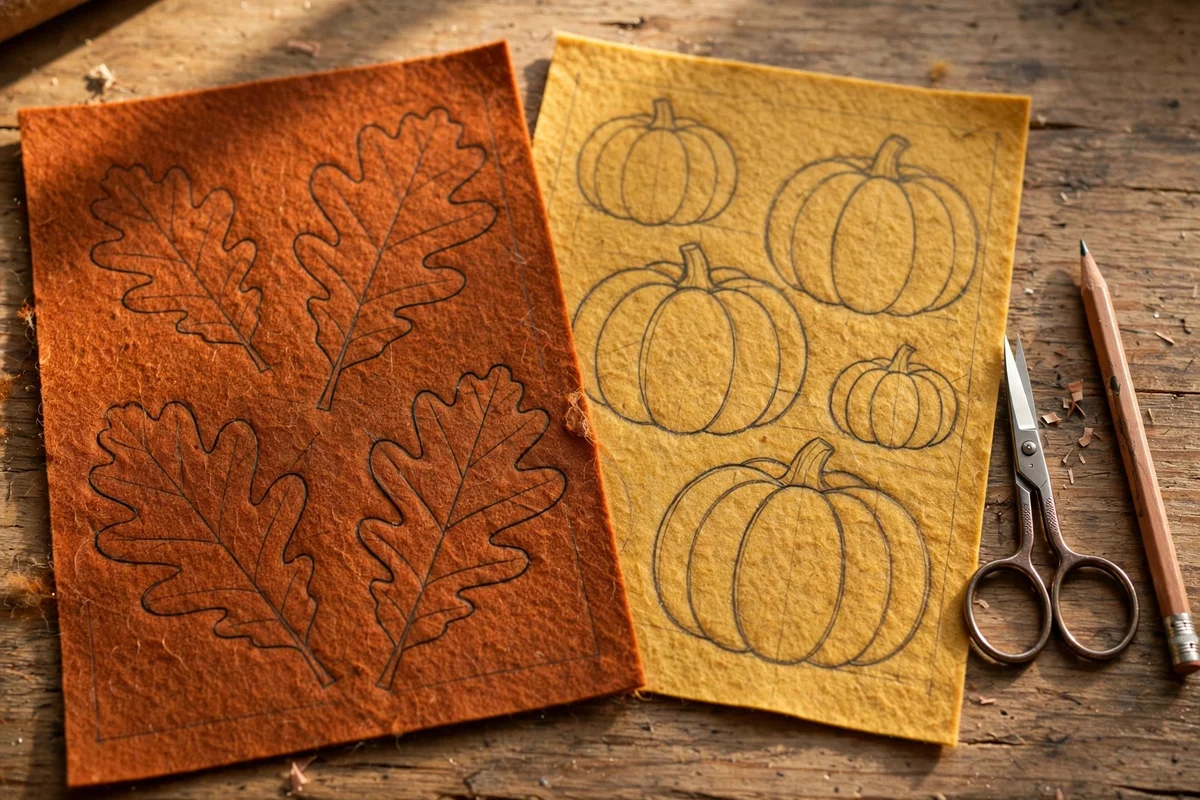
Crisp shapes start on paper, not on felt. Draw each leaf, pumpkin and acorn once on thin card, cereal box card works perfectly, and cut the template out with small sharp scissors. Trace around it onto the back of the felt with a soft pencil, flip the template for a mirrored pair when you need two matching sides, and cut just inside the pencil line so no grey shows on the finished edge. Good templates turn shaky freehand cutting into neat, repeatable pieces all weekend.
Make leaves between 8 and 12 cm long for garlands and 5 to 6 cm for bunting, pumpkins about 10 cm across so they sit nicely in a hand, and acorns around 6 cm tall including the cap. Pin or hold the template firmly while tracing, because felt stretches and a template that drifts gives you a wobbly outline. Save every template in an envelope labelled with its project; by Sunday you will have a reusable kit, and next Labour Day you can start cutting within minutes.
3. String a Two-Tone Felt Leaf Garland Across the Mantel
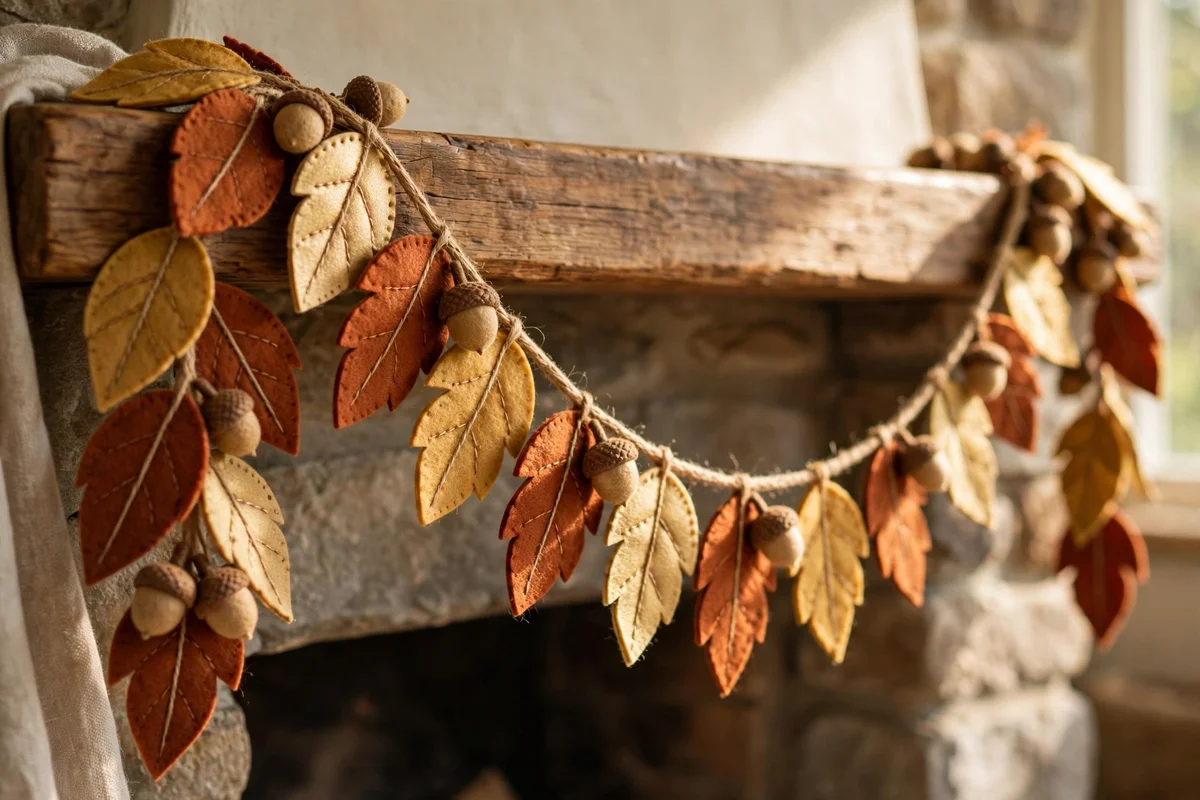
A leaf garland is the project that makes the biggest visual difference for the least effort, so start here on Saturday morning. Cut 15 to 20 leaves, 8 to 10 cm long, half in rust and half in gold, and thread them onto about 2 metres of natural twine with a running stitch down the centre vein of each leaf. Space the leaves 2 to 3 cm apart and leave 25 cm of bare twine at each end for tying. One relaxed hour, including cutting, gives you a finished garland.
Drape the garland along the mantel shelf so the ends trail down each side by about 20 cm, and tuck a few felt acorns between the leaves for depth. It also looks lovely swagged across the top of a wide mirror or along a picture rail. Keep the twine slack rather than drum tight, because a gentle sag looks natural and tight twine curls the leaves. If the mantel is narrow, make a second shorter garland of 10 leaves rather than crowding one long line.
4. Sew Plump Stuffed Felt Pumpkins for the Sideboard
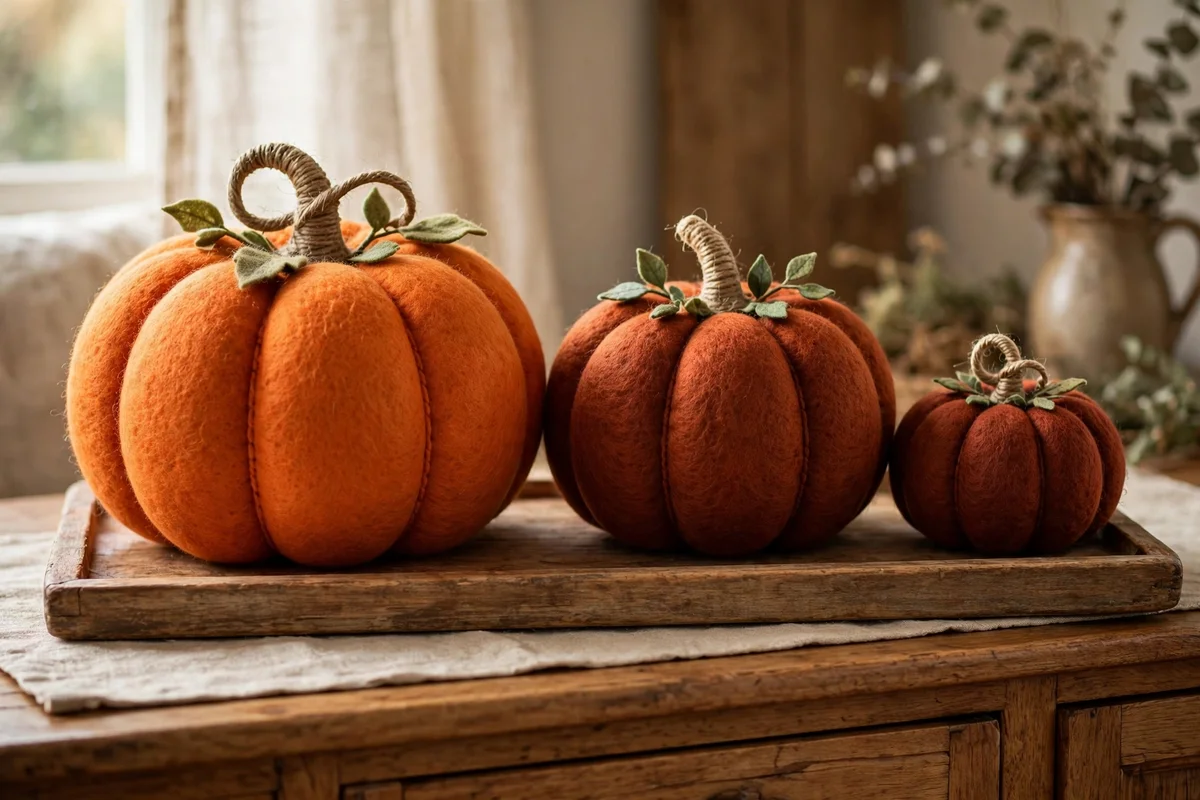
Stuffed pumpkins are the cosiest project in this collection and usefully forgiving for beginners. Cut two circles of wool blend felt, 10 cm across, in pumpkin orange or deep rust, and blanket stitch them together around the edge, leaving a 4 cm gap. Push in about 15 grams of toy stuffing, a small handful, spreading it into the edges so the circle stays even, then close the gap. Add a 4 cm rolled twine stem stitched firmly into the top centre.
Group three pumpkins in graduating sizes, 8, 10 and 12 cm circles, on a wooden tray or along the sideboard for a classic harvest trio. A tiny green felt leaf stitched beside each stem finishes the look in seconds. The mistake to avoid is overstuffing: a pumpkin that feels like a tennis ball will strain its stitches and look hard, while a gently firm fill keeps the soft hand-made character. Budget tip: one 100 gram bag of stuffing fills about six pumpkins.
5. Stitch Acorn Ornaments in Rust and Tan Wool Blend Felt
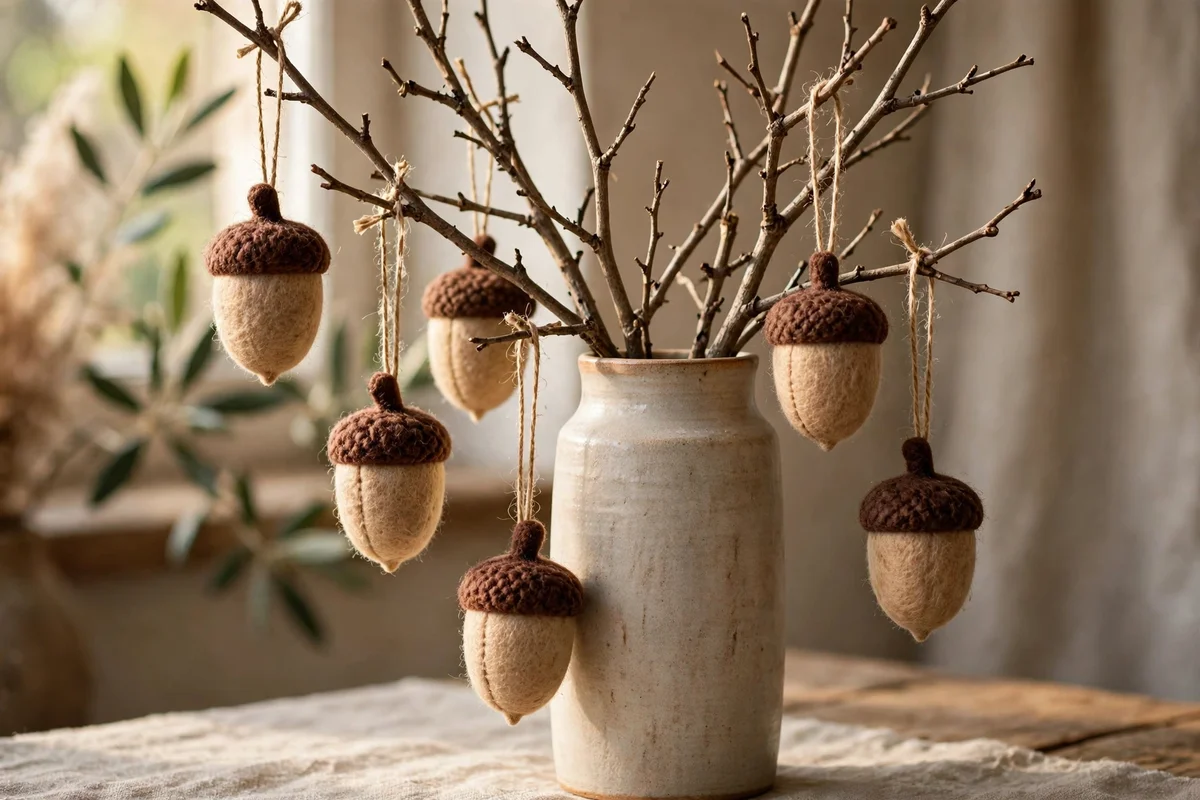
Felt acorns add a woodland note that suits harvest decorating perfectly. Cut the acorn body as a rounded teardrop, 6 cm tall, in tan wool blend felt, and the cap as a 3 cm half circle in chocolate brown with a tiny stem nub. Blanket stitch the cap over the top third of the body in a contrasting cream thread so the join becomes decoration. Stitch a 10 cm loop of twine into the top before you close the back, giving every acorn its hanging point.
Hang a dozen acorns at staggered lengths from a bare branch in a tall vase for a simple harvest arrangement, or pile them in a shallow wooden bowl with dried wheat stems. They also make sweet gift toppers tied onto brown paper parcels. The mistake to avoid is cutting the cap too small: it should overlap the body by at least 1 cm all round or the acorn looks bald. Two sheets of felt yield roughly 12 acorns, so the project costs almost nothing.
6. Craft Sweet Harvest Toadstools With Blanket-Stitched Caps
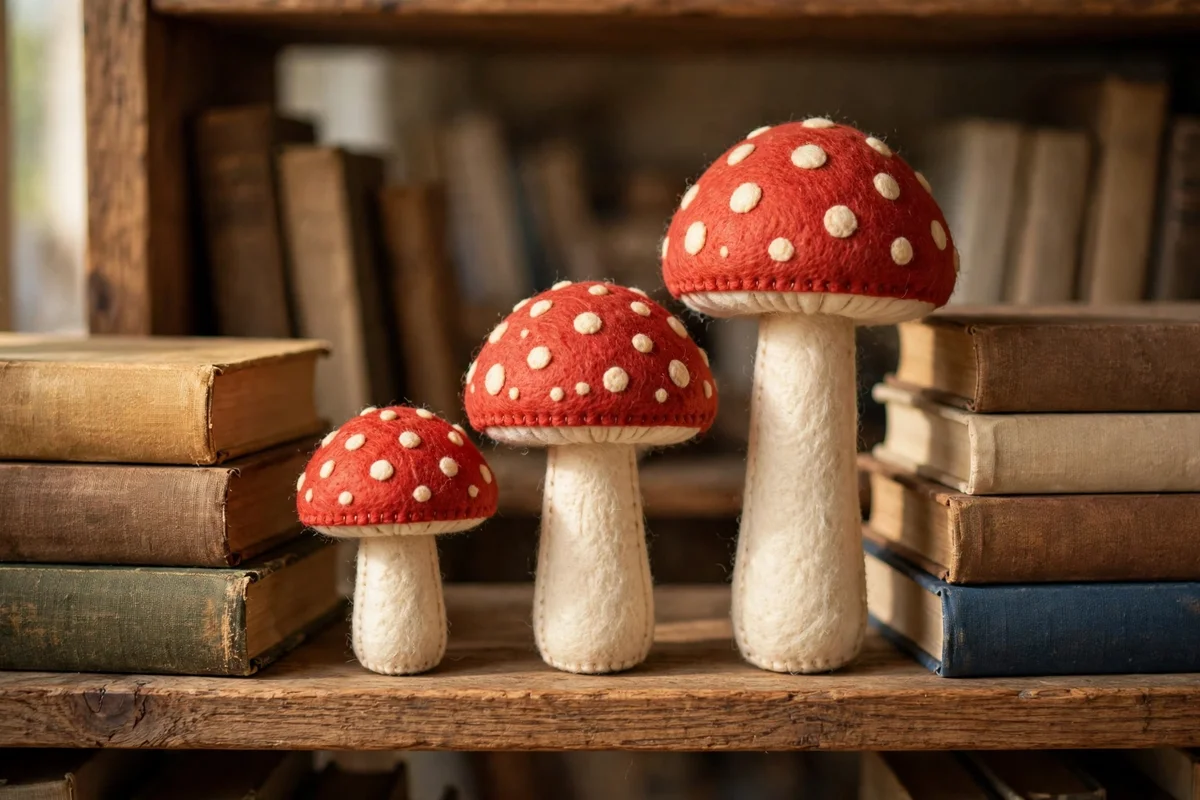
Harvest toadstools are pure storybook charm when you keep them sweet: think cottage garden, never anything spooky. Cut a half circle cap, 7 cm across, in warm red or russet felt, and a 4 cm tall stem in cream. Stitch five or six small cream felt dots onto the cap with tiny whip stitches before assembling, then blanket stitch cap to stem in cream thread. Stuff the cap lightly with a teaspoon of toy filling so it domes gently instead of lying flat.
Stand a trio of toadstools in different heights, 4, 6 and 8 cm, on a bookshelf between stacked books or along a windowsill for a woodland vignette. Their round shapes soften shelves full of square books beautifully. The mistake to avoid is making the dots too large: dots wider than 1 cm start to look cartoonish, while 5 mm dots keep the harvest sweetness. Keep every toadstool clearly daytime and cheerful, and the harvest theme stays warm and welcoming.
7. Pin Golden Sunflower Brooches Onto Jackets and Scarves
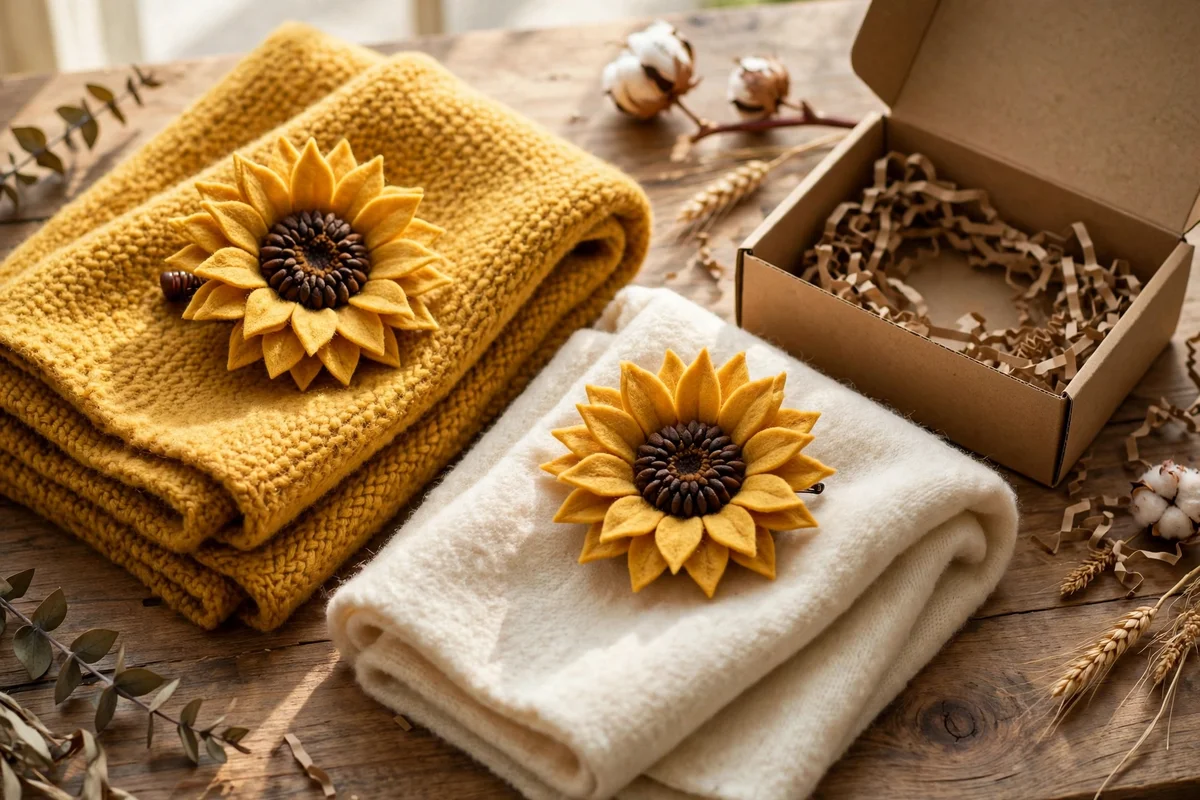
Sunflower brooches bring the harvest outside the house: pin one to a jacket lapel or a wool scarf all autumn. Cut 10 petals, each 3 cm long, in golden yellow felt, and a 3 cm centre circle in dark brown with tiny yellow French knots for seeds. Layer the petals in two rings of five onto a 3 mm felt backing circle, stitch the centre over them, and sew a 3 cm brooch pin to the back with strong thread through all layers.
Make a small set in three colourways, classic yellow, burnt orange and deep gold, so you have a brooch for every coat. They also make lovely handmade gifts tucked into a card, and they cost under a pound each in materials. The mistake to avoid is a weak pin fixing: sew through the backing and the petal layer in at least six places or the pin will wobble and the brooch will droop. Test the pin on thick fabric before you gift it.
8. Shape a Layered Felt Leaf Wreath for the Front Door
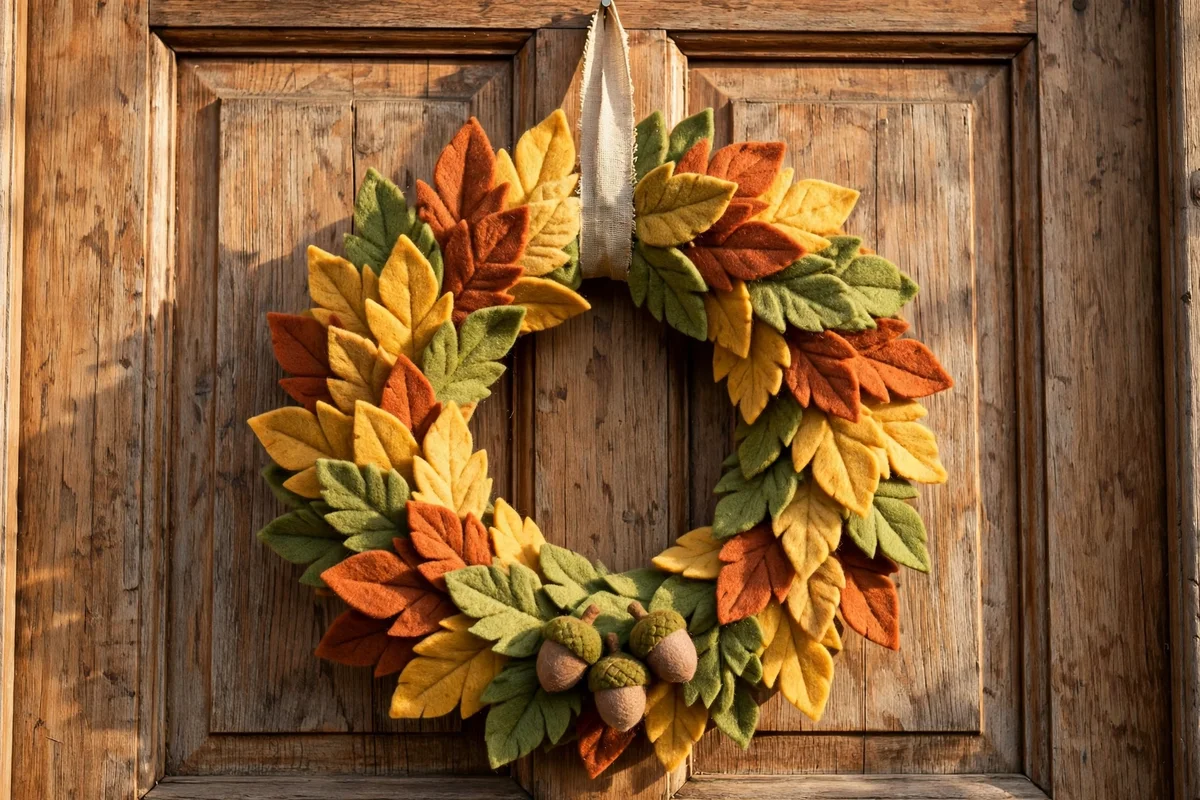
A felt leaf wreath welcomes guests with handmade warmth from the first knock. Start with a 30 cm grapevine or wire wreath base from a craft shop, about 5 pounds, and cut 40 to 50 leaves in three autumn shades, 8 to 10 cm long. Layer them around the base pointing the same clockwise direction, overlapping each leaf by half, and fix them with a dab of hot glue or a few hidden stitches. The layered look needs fullness, so do not stop at 20 leaves.
Hang the wreath on the front door with a simple ribbon loop over a door hook, keeping it on a covered porch if your autumn brings heavy rain, since felt and downpours are not friends. Add three small felt acorns at the bottom centre for a focal point. The mistake to avoid is sparse layering with the base showing through: hold the wreath at arm’s length every 10 leaves and fill any gaps immediately. Stored flat, the wreath will serve for many Labour Days.
9. Hang a Warm Harvest Banner Above the Kitchen Table
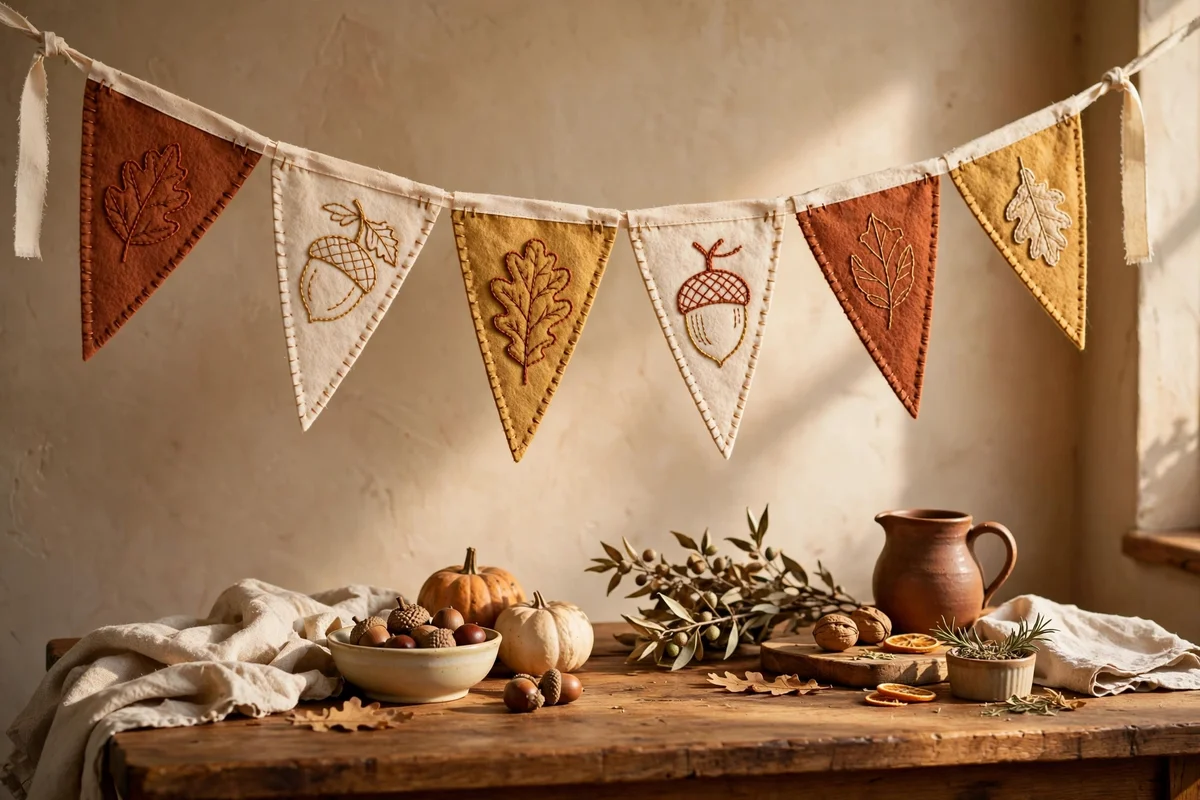
A harvest banner turns the kitchen or dining room into the heart of the long weekend. Cut eight pennants, each 12 cm wide and 15 cm tall, from alternating rust, gold and cream felt, and stitch a simple motif on each: leaf, acorn, wheat ear or the letters of HARVEST. Fold a 2.5 metre length of cotton ribbon over the top edge of each pennant and running stitch it down, spacing the pennants 5 cm apart so the line breathes.
Hang the banner across the wall above the kitchen table at about 180 cm, high enough to see under but low enough to read the motifs, using removable hooks at each end. Two banners layered at slightly different heights look wonderfully generous for a family gathering. The mistake to avoid is uneven pennant spacing: measure the gaps with a ruler before stitching, because a wandering line is the first thing the eye notices. Press finished pennants under a book overnight.
10. Sew Leaf-Shaped Felt Mug Rugs for the Tea Tray
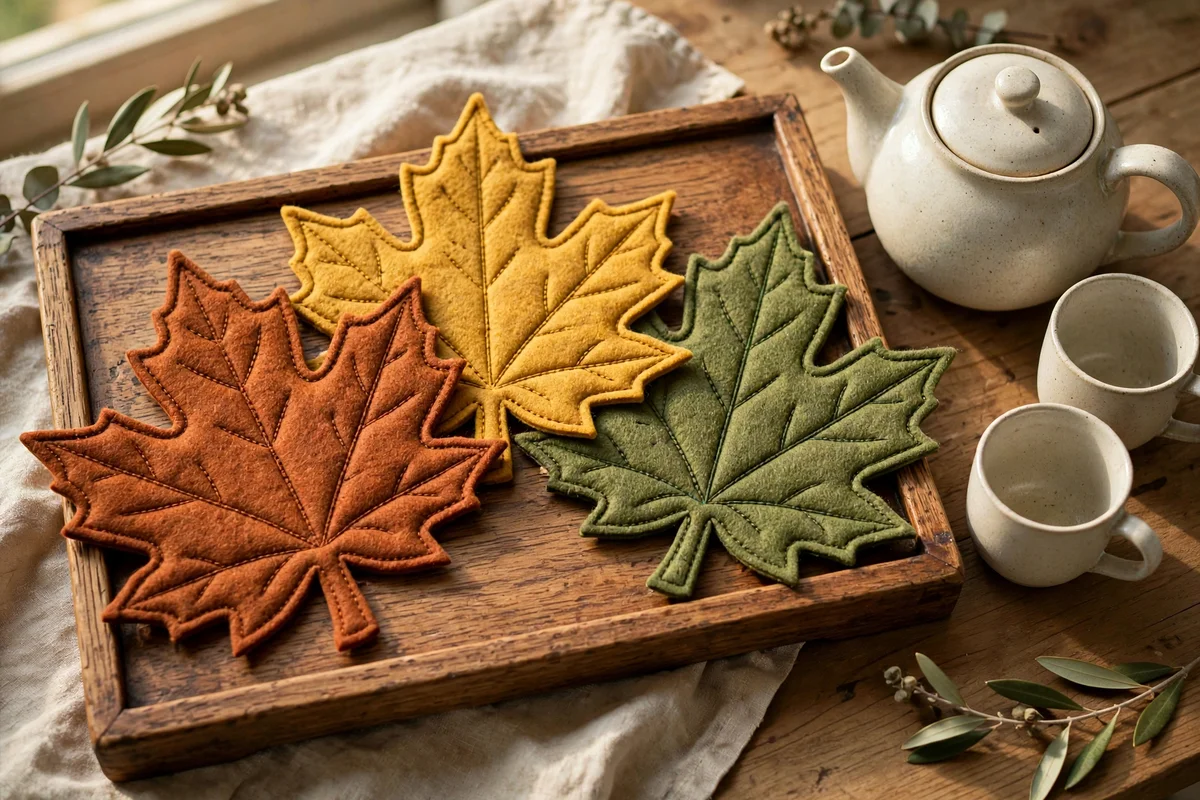
Felt mug rugs are small, quick and endlessly useful, perfect for Sunday afternoon stitching between cups of tea. Cut leaf shapes about 14 cm long from 3 mm felt in autumn colours, and run a neat running stitch border 5 mm from the edge in a contrasting thread. The thickness protects wooden tables from hot mugs far better than thin felt, and the leaf shape turns an ordinary coaster into a tiny piece of seasonal decor.
Make a set of four or six in mixed colours and tie them with twine for a hostess gift that costs under 5 pounds. Keep one by every chair where tea is usually drunk: the armchair, the desk, the kitchen table. The mistake to avoid is using 1 mm felt, which lets heat through and curls at the edges within weeks. If you only have thin felt, stitch two layers together and the rug will behave like the thick kind.
11. Master the Blanket Stitch for Neat Visible Seams
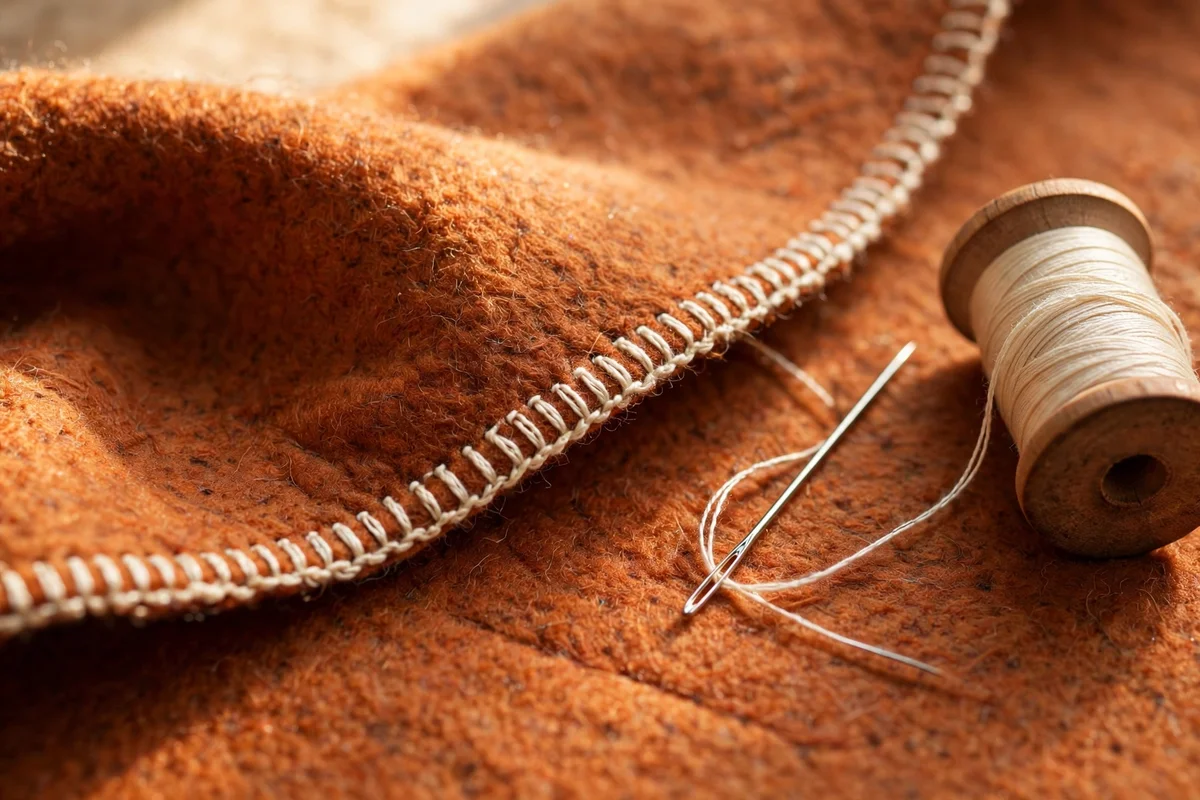
The blanket stitch is the signature stitch of felt craft: decorative, strong and much easier than it looks. Thread a needle with a single length of embroidery thread, knot the end, and bring the needle up through the felt about 5 mm from the edge. Loop the thread under the needle before pulling through, and each stitch forms a neat L shape along the edge. Keep stitches 5 mm apart and the same depth, and the edge will look professionally finished.
Use the blanket stitch anywhere two felt edges meet visibly: pumpkin seams, toadstool caps, acorn caps and brooch backings. Practise first on a scrap strip about 10 cm long until your spacing feels automatic, which usually takes 10 minutes. The mistake to avoid is pulling each stitch a different tightness: a rhythm of loop, pull gently, move on keeps the edge even. A slightly loose, even stitch always looks better than a tight, wobbly one.
12. Use the Running Stitch to Build Garlands Fast
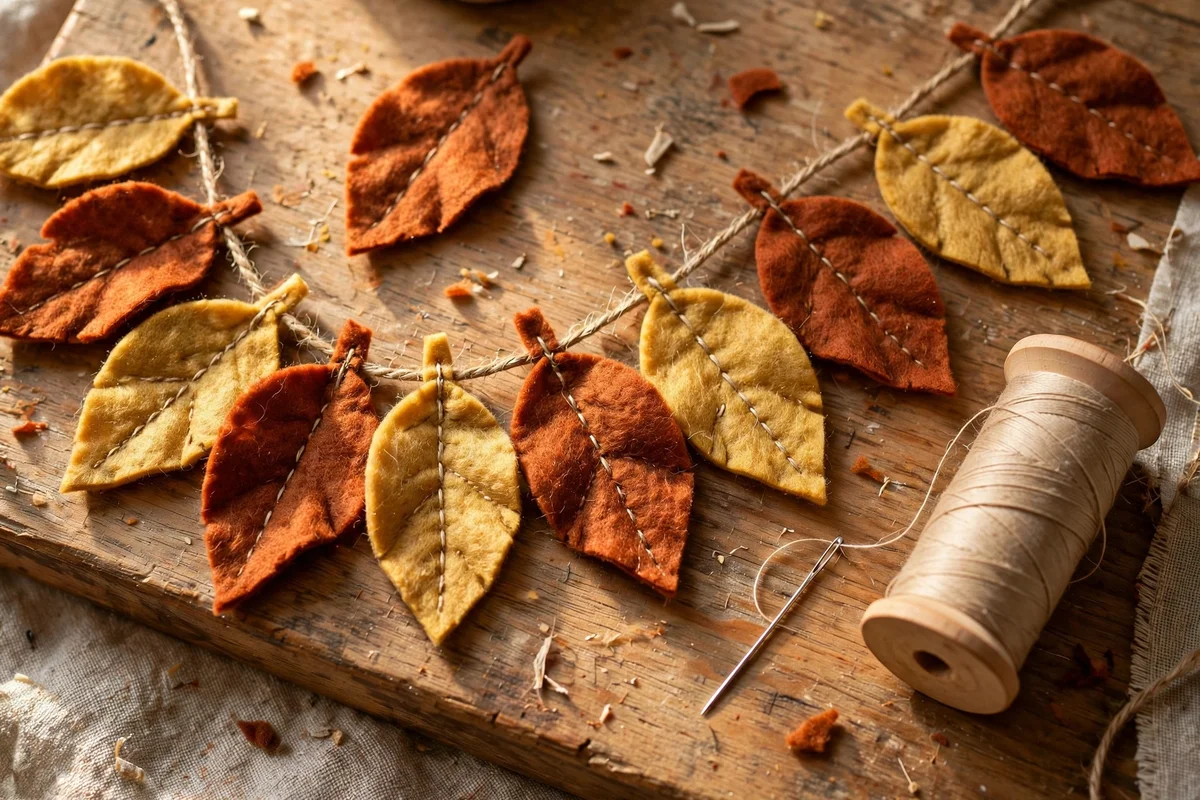
The running stitch is your speed tool: one simple in-and-out stitch that joins garland leaves to twine in minutes. Thread the needle, knot the end, and push it up and down through the felt in even 6 to 8 mm stitches, keeping the spacing as regular as you can. For garlands, run the stitch straight down the centre vein of each leaf, which both fixes the leaf and suggests its natural veining. A whole 20-leaf garland takes about 20 minutes of stitching.
Keep a single thread rather than doubling it, because a fine line suits leaves and a doubled thread can pucker light felt. If the twine frays at the needle eye, wrap the last 2 cm with a scrap of tape before threading. The mistake to avoid is knotting mid-garland to start a new thread and leaving lumps: overlap the old and new threads for three stitches instead, and the join disappears. Children can manage this stitch with a blunt needle.
13. Measure Stuffing So Pumpkins Stay Round Yet Firm
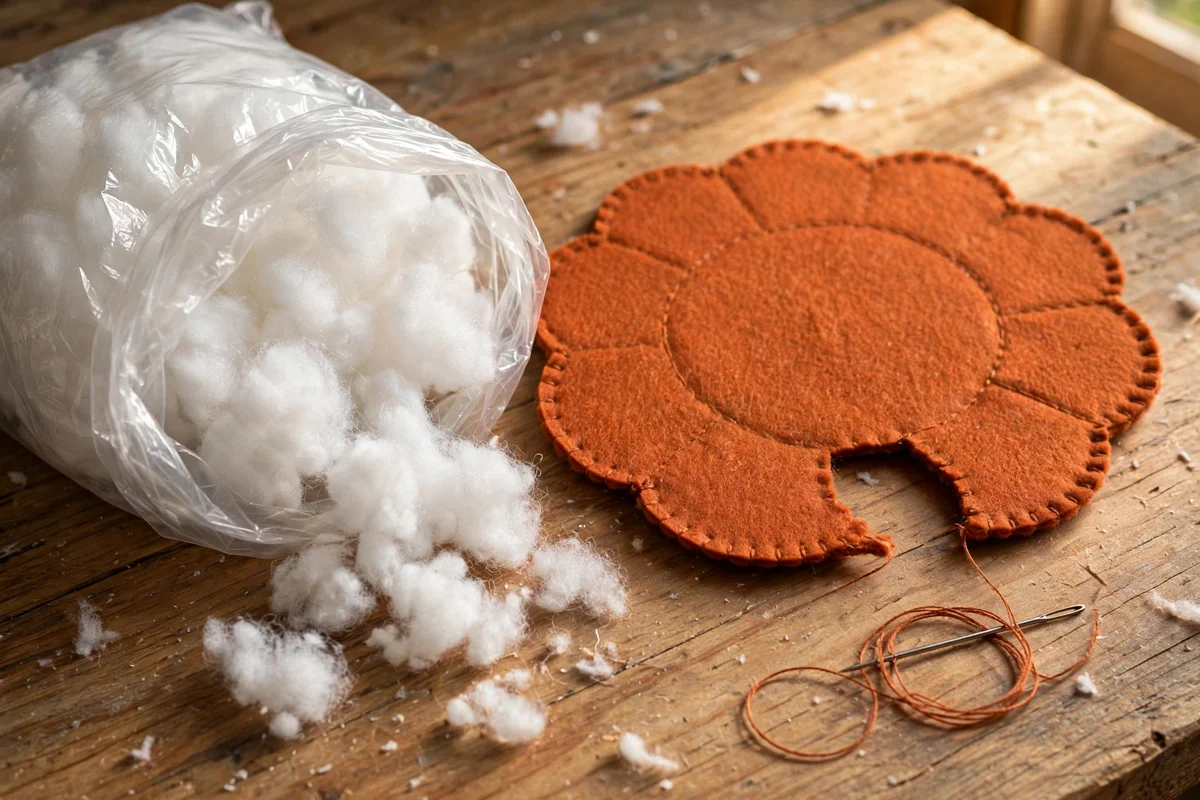
Stuffing is where a felt pumpkin succeeds or fails, and the amount is smaller than beginners expect. For a 10 cm pumpkin you need about 15 grams of polyester toy stuffing, roughly one generous handful, pushed in in three small layers rather than one big clump. After each layer, press the pumpkin gently and check that the stuffing reaches the seam edge evenly. The finished pumpkin should feel like a soft stress ball: plump, springy and evenly round.
Scale the amount with size: 8 grams for an 8 cm pumpkin, 25 grams for a 12 cm one. Underfilled pumpkins sag and show wrinkles at the seam, which is easy to fix by poking more stuffing through the closing gap before you sew it shut. Overfilled pumpkins strain their blanket stitches and look hard rather than cosy. The mistake to avoid is stuffing while the felt is damp from handling: let pieces air for an hour first so the filling stays springy.
14. Add Twine Hanging Loops to Every Ornament
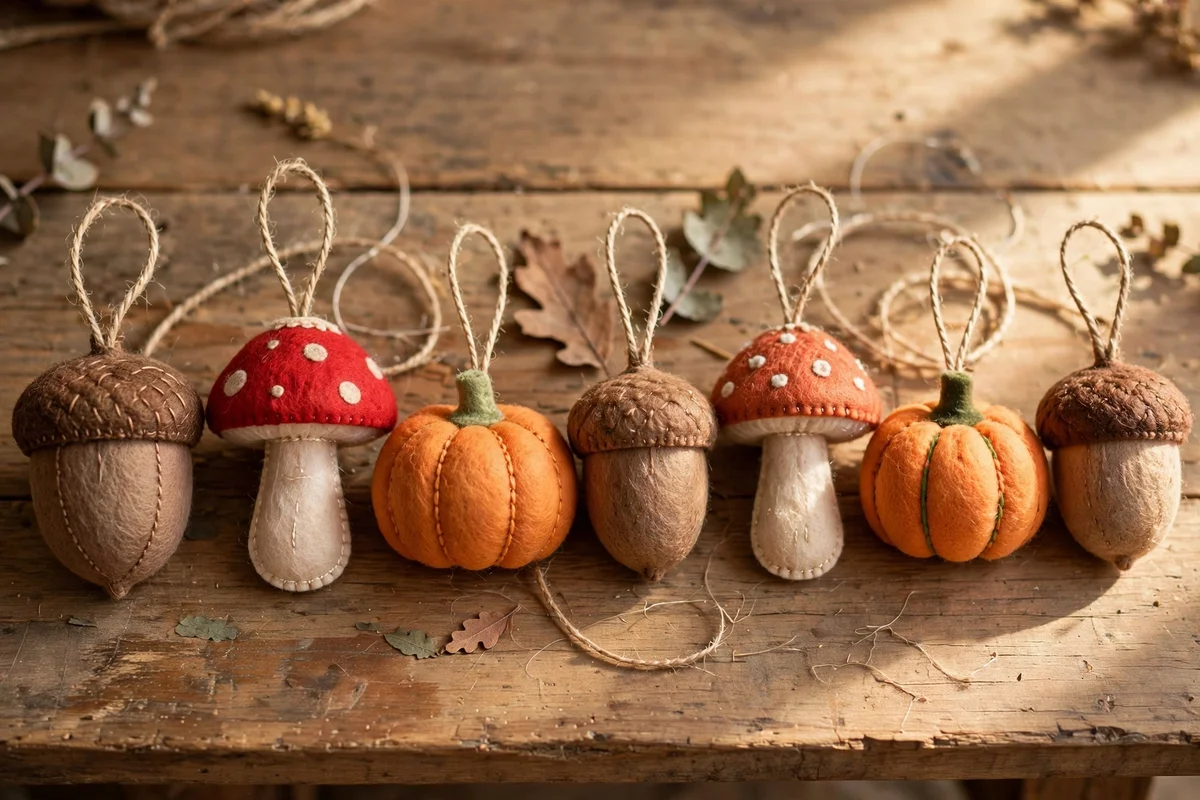
A hanging loop turns any felt piece into an ornament, so add one to every acorn, toadstool and mini pumpkin you make. Cut 10 cm of natural twine or narrow ribbon, fold it into a loop, and stitch the two ends firmly into the top of the piece before you close the final seam, catching them with three or four strong stitches. The loop should stand about 4 cm proud of the ornament, long enough to slip over a branch or hook.
Vary hanging lengths between 8 and 15 cm when you group ornaments on a branch, because staggered drops look natural and identical lengths look stiff. For wreaths, use short 5 cm loops tucked behind leaves so ornaments nest into the foliage. The mistake to avoid is gluing loops on as an afterthought: glued loops peel off within a season, while stitched loops last for years. If an ornament will hang outdoors on a covered porch, use waxed twine that resists damp.
15. Drape a Mini Felt Leaf Bunting Over the Bookshelf
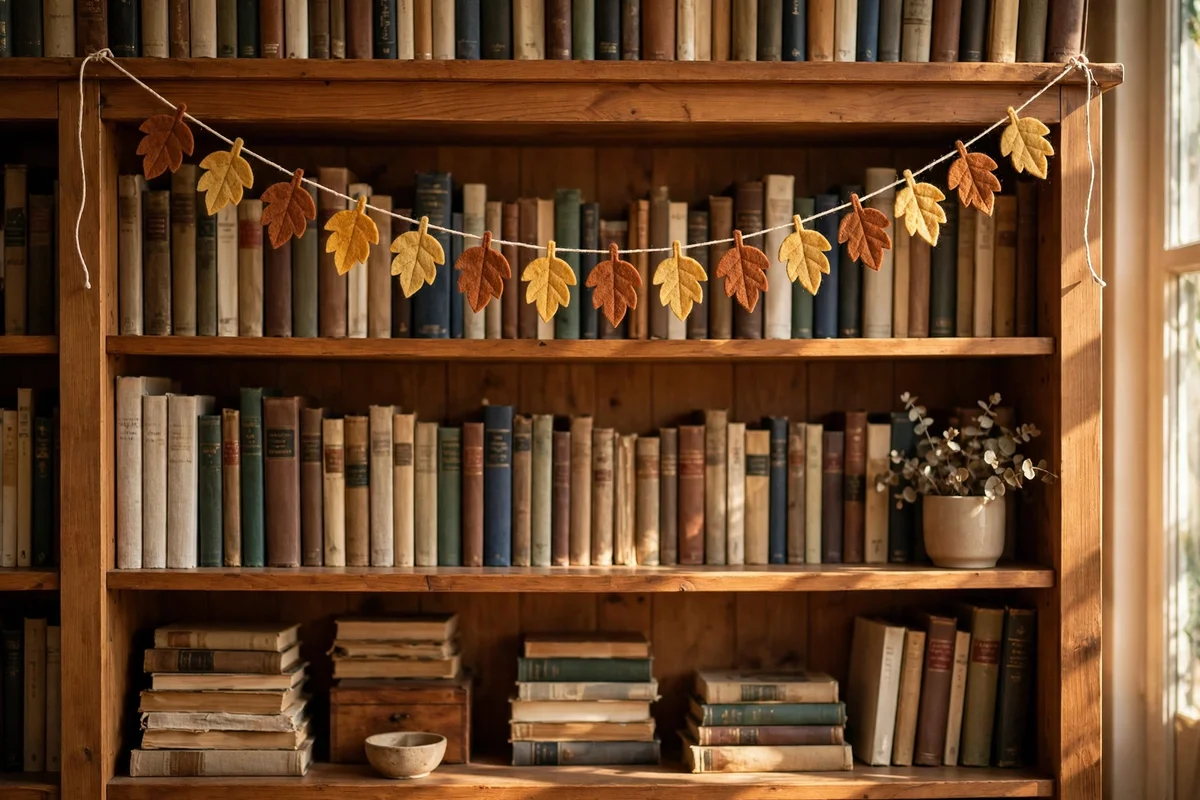
A mini bunting brings autumn to the bookshelf in under an hour. Cut 12 small leaves, 5 to 6 cm long, in a tight palette of two or three colours that echo the room, and running stitch them along 1.2 metres of thin cotton string, spacing them 4 cm apart. Leave 20 cm of bare string at each end for tying to bookends or small removable hooks. The smaller scale suits shelves perfectly where a full garland would overwhelm.
Drape the bunting in a gentle swag across the top shelf, letting the middle dip about 10 cm, and it will frame the books like a little harvest valance. Match one bunting colour to the book spines for a collected, intentional look. The mistake to avoid is hanging bunting from a shelf that already bows under books: the extra visual weight draws the eye to the sag. Fix shelf sag first, or choose a sturdier shelf for your display.
16. Craft Felt Sunflower Stems for a Cheerful Vase
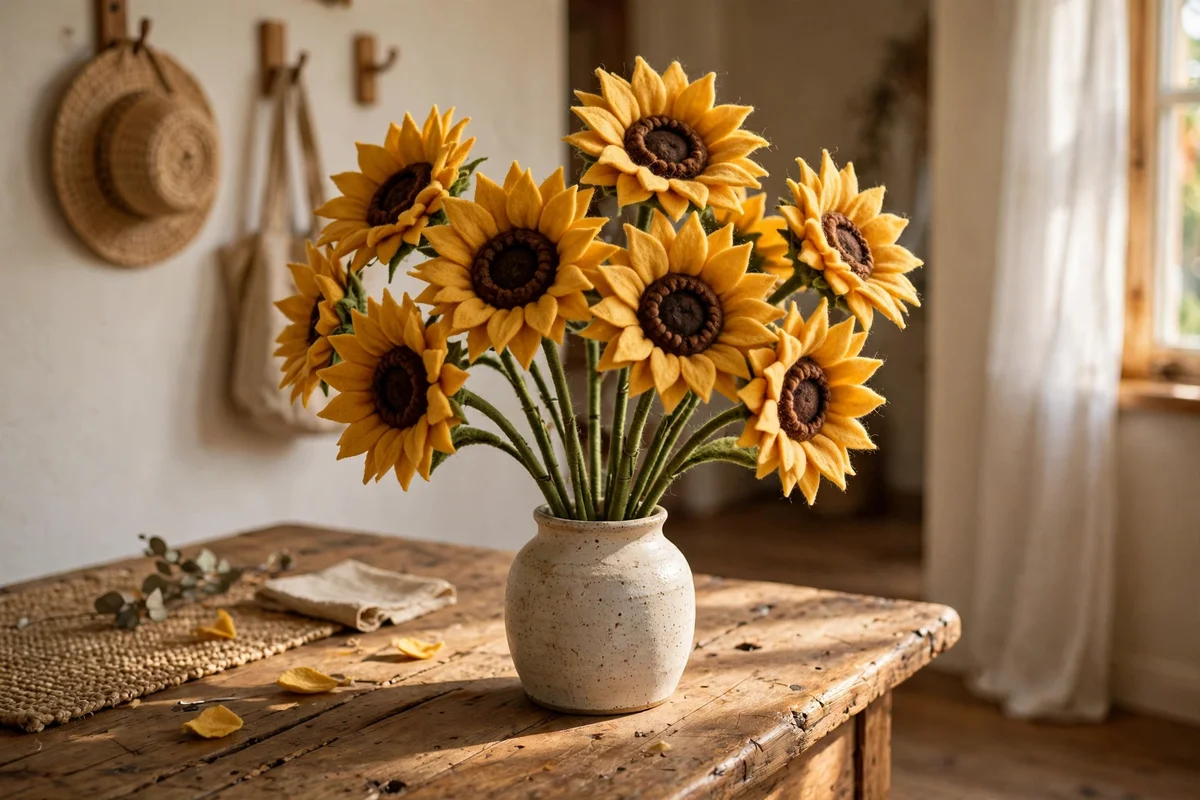
Felt sunflowers on stems make a cheerful, everlasting bouquet for the hall table. Make each flower head like a brooch but larger, 8 cm across, with two rings of golden petals around a dark brown centre, and stitch it to a 40 cm length of green florist wire wrapped in green felt strips. Add two small felt leaves partway down each stem. Five to seven stems in a simple ceramic vase give a full, generous arrangement.
Stand the vase where it catches daylight, since the golden petals glow beautifully in morning sun, and keep total stem height around 50 cm so the flowers sit above the vase rim without towering. Unlike real flowers they need no water and will not drop petals on the console. The mistake to avoid is floppy stems: wrap the wire in two layers of felt and stitch firmly, or tall stems will lean within days. Dust the heads monthly with a soft brush.
17. Roll Felt Napkin Rings in Harvest Hues for the Table
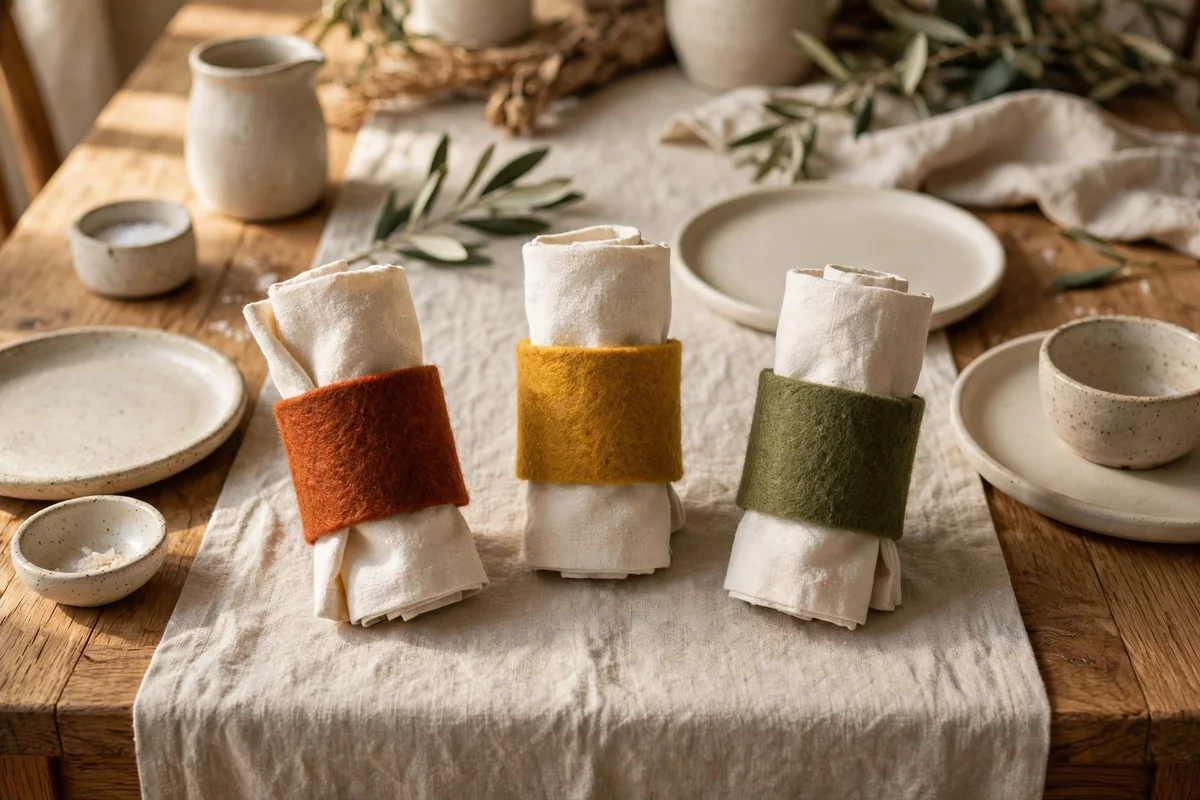
Felt napkin rings dress the Labour Day table in minutes and cost almost nothing. Cut strips of 2 mm felt, 15 cm long and 4 cm wide, in harvest colours like rust, mustard and moss, roll each into a ring with a 1 cm overlap, and fix the overlap with three small stitches or a dot of fabric glue. Slide a linen napkin through each ring and the table instantly looks considered. A set of eight takes about 40 minutes including cutting.
Pair the rings with plain cream linen napkins so the felt colours do the talking, and lay them on charger plates or directly on the table runner. They work for everyday family meals too, not just the holiday table. The mistake to avoid is rolling the rings too tight: a ring that grips the napkin will crush it and look fussy, while a relaxed 5 cm opening lets the linen fall naturally. Store rings standing upright so they keep their round shape.
18. Fill a Wooden Bowl With Felt Acorns and Leaves
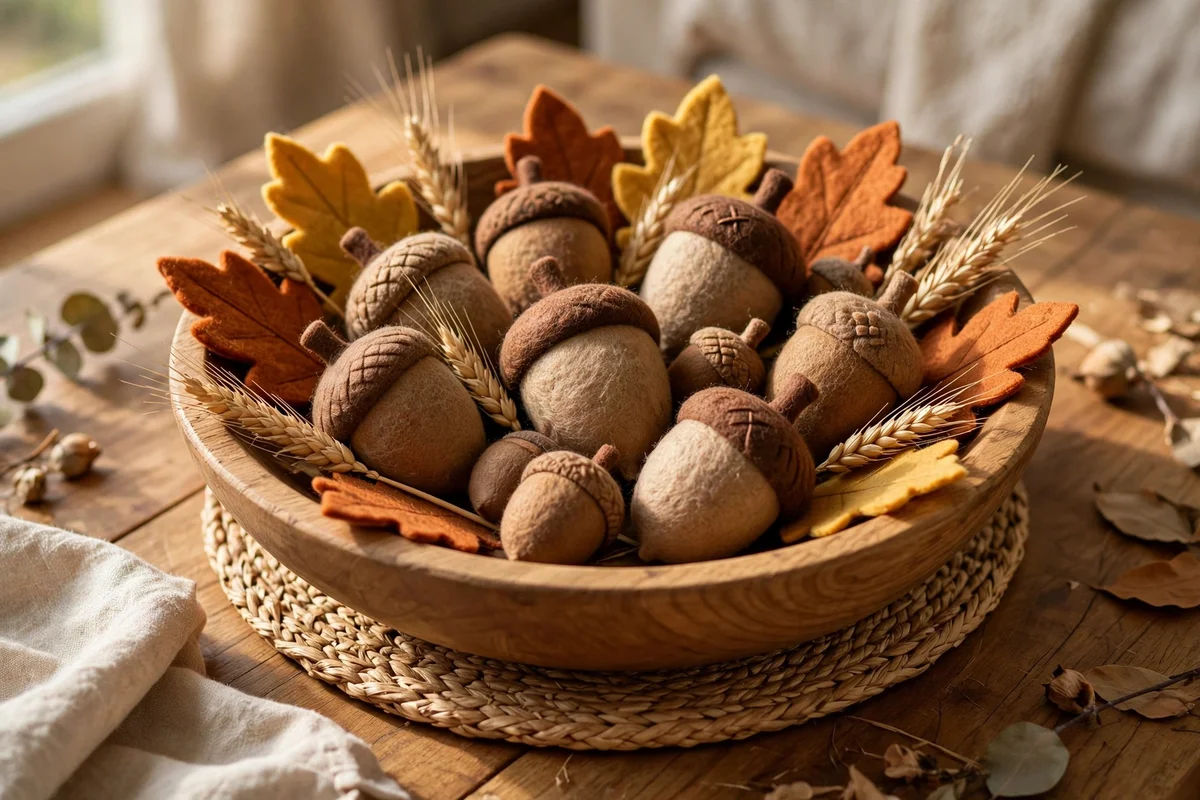
A wooden bowl of felt acorns and leaves makes the easiest harvest centrepiece you will ever assemble. Choose a shallow bowl about 25 cm across in warm oak or walnut, and fill it with 10 to 12 felt acorns mixed with a handful of loose felt leaves in rust and gold. Tuck a few dried wheat stems among them for height and texture. The whole arrangement takes five minutes and costs nothing beyond the felt you already cut.
Set the bowl at the centre of the coffee table or dining table where it can be admired from all sides, and rotate it weekly so the same pieces face forward. Refresh the look by swapping in toadstools or mini pumpkins as you make them through the weekend. The mistake to avoid is overfilling: pieces should rest in a single relaxed layer, because a heaped bowl hides the shapes you worked so hard to stitch. Less is genuinely more here.
19. Hang a Harvest Flag in the Porch Window
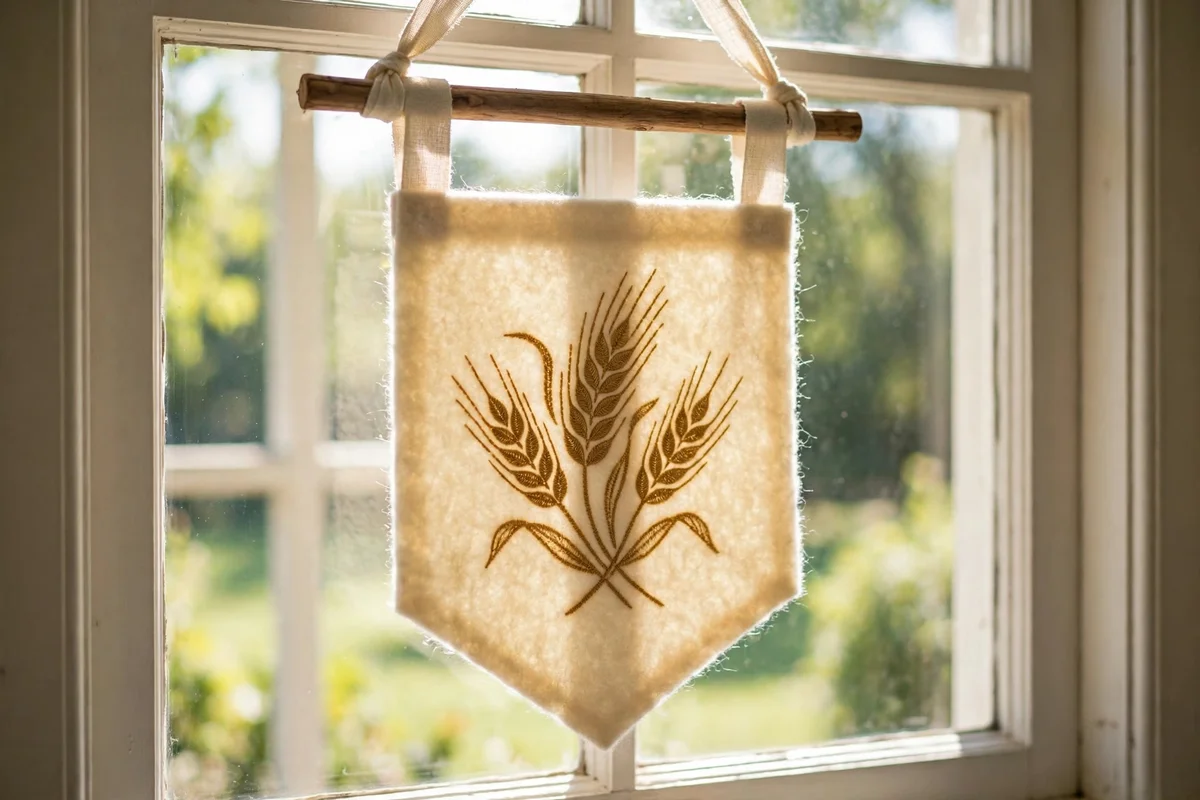
A harvest flag in the porch window greets everyone who passes with handmade colour. Cut a 25 by 35 cm rectangle of cream felt, stitch on felt letters spelling HARVEST or a simple wheat ear motif in gold and rust, and hang it from a 40 cm wooden dowel threaded through a folded top hem. Tie 30 cm lengths of ribbon to each dowel end and hang the flag from a small hook above the window frame.
Hang the flag inside the glass so it stays dry and glows when daylight shines through the felt, which looks magical on an autumn morning. Keep it to one side of the window rather than centred, leaving most of the glass clear. The mistake to avoid is blocking too much light: a flag wider than half the window darkens the porch and defeats its welcoming purpose. Take it down in heavy storms even indoors, since damp air can spot the felt.
20. Build a Sweet Felt Table Scatter for the Dining Runner
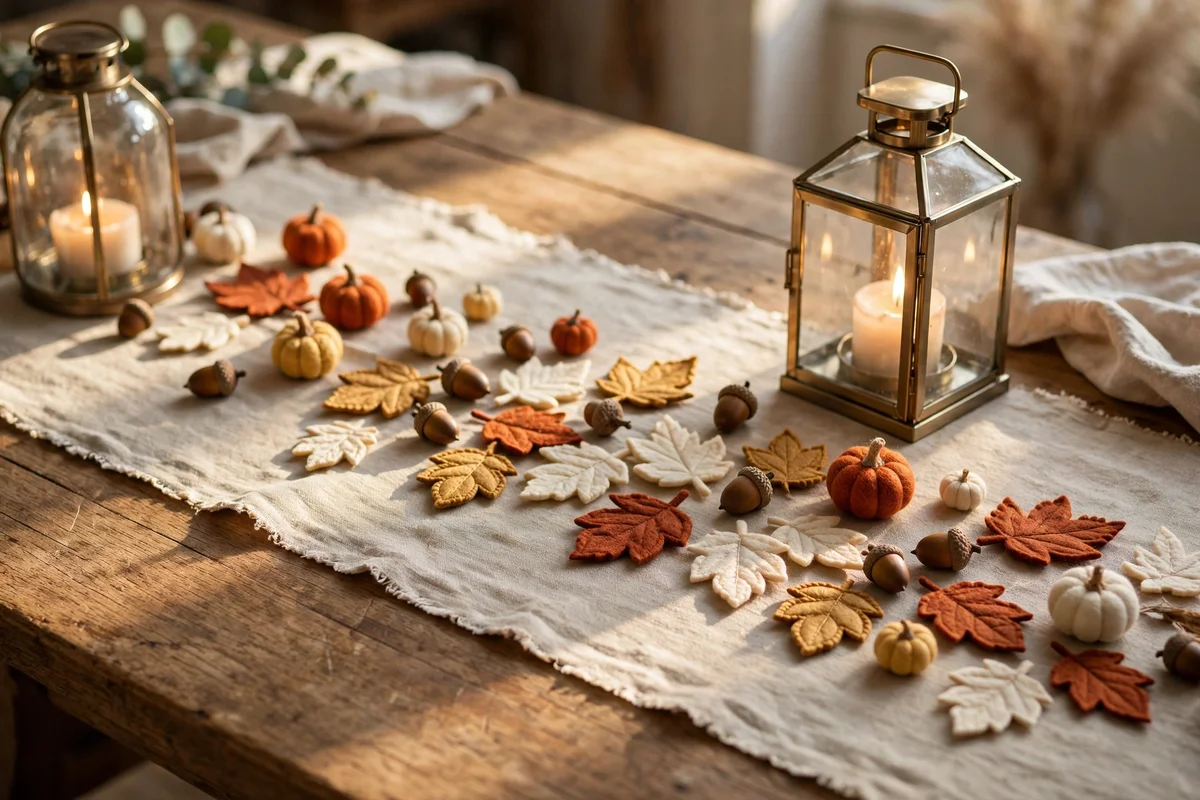
A felt table scatter turns an ordinary runner into a harvest landscape. Cut 15 to 20 small pieces, leaves, acorns and tiny pumpkins, 4 to 6 cm each, in a tight palette of rust, gold and cream, and arrange them loosely along a neutral table runner in a wandering line rather than a straight row. Let a few pieces drift onto the bare table at the edges. The scatter takes 10 minutes to arrange and transforms the whole dining room.
Layer the scatter with glass lanterns or simple tealight holders for evening warmth, keeping every felt piece at least 15 cm from any flame. For everyday meals, sweep the scatter into its wooden bowl in seconds and re-lay it for guests. The mistake to avoid is placing felt near candles or hot serving dishes: felt scorches quickly and the smell lingers. Treat the scatter as decoration, not as trivets, and it will last for years.
21. Store Every Finished Piece Flat for Next Labour Day
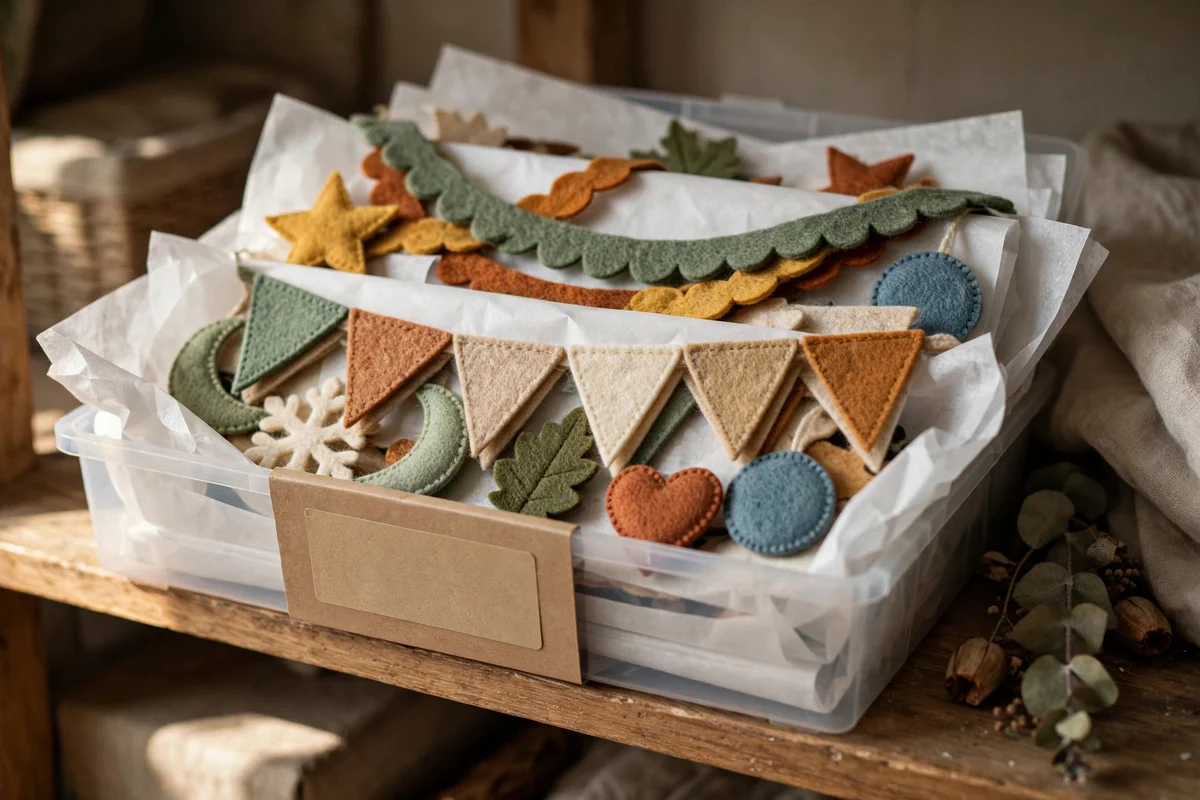
The final Labour Day job is packing everything away properly so next autumn starts with joy, not repairs. Lay garlands, banners and the wreath flat in a wide shallow box, layering acid-free tissue paper between pieces so colours do not rub. Place stuffed pumpkins and acorns loosely on top without squashing them, and tuck the brooches into a small lidded tin. Label the box with the year and the project list.
Store the box on a bedroom shelf or in a cupboard away from damp and direct sun, which fades felt colours over time. Next Labour Day, open the box a week early, shake out each piece, and re-press any creases under a heavy book overnight. The mistake to avoid is folding garlands into tight bundles: sharp folds crease felt permanently and stretched twine never quite recovers. Flat storage takes a little more shelf space and saves every piece.
That is your Labour Day weekend mapped out: honest felt, two simple stitches and a house that now carries the harvest from mantel to front door. The pieces you made will keep their shape for years if you store them flat, so next autumn only needs a fresh look through your box, not a new shopping trip. Try one project first this week, perhaps the leaf garland, because its long line transforms a room in a single afternoon and its rhythm teaches your hands every stitch you will reuse later.
When the weekend ends, press each garland and banner between sheets of tissue, stack the stuffed pieces loosely so they are not squashed, and tuck everything into a labelled box on a shelf. Come next Labour Day you will open it like a small gift to yourself and remember which colours felt like home. Handmade autumn is not about perfection; it is about a weekend well spent, and your rooms already show it.
Frequently Asked Questions
Which felt should I buy for autumn crafts?
Craft felt sheets in a medium weight, around 1 to 2 mm, suit almost everything here: garlands, leaves, banners and mug rugs. Use thicker 3 mm felt for coasters and brooch bases that must hold their shape, and softer wool blend felt for stuffed pumpkins and acorns because it curves smoothly around stuffing. Polyester felt is budget friendly, while wool blend looks richer; both work with the same stitches.
How do I stop my felt pieces from looking homemade in a bad way?
Cut slowly with sharp scissors and always trace templates in pencil on the back of the felt, since neat edges decide most of the finished look. Keep stitches even and small, press layered pieces under a heavy book for an hour, and stick to a palette of three or four autumn colours. Fix wonky shapes by trimming one good piece and re-tracing it as your master template.
Can children help with these felt crafts?
Yes, and Labour Day weekend suits it: let children sort felt colours, trace templates and thread blunt needles for running stitches on garlands, which only need straight stitching along a line. Keep scissors, sharp needles and the blanket stitch for adults, and pre-cut small shapes for little hands. Children love stuffing pumpkins and tying garland ends, which are forgiving jobs that still feel important.
How do I store felt crafts so they last until next Labour Day?
Lay garlands, banners and wreaths flat in a box between sheets of acid-free tissue paper, never folded hard against themselves. Place stuffed pumpkins and acorns loosely so the stuffing is not compressed, and add a small lavender sachet to keep the box fresh. Store the box on a shelf away from damp, and avoid hanging pieces up all year, which stretches loops and fades colours.
How much will a full weekend of felt crafts cost?
About 20 to 40 pounds or dollars covers a weekend if you already own scissors and needles. A pack of 30 felt sheets costs around 8 to 12, toy stuffing about 4, embroidery thread 5 for a multi-colour set, and twine or ribbon 3. Wool blend felt costs a little more but you only need a few sheets for stuffed pieces. Reusing paper templates keeps every later project nearly free.