Living Room
21 Hallway Decorating Ideas That Make Forgotten Passages Feel Beautiful
By Anna Wells · · 21 min read
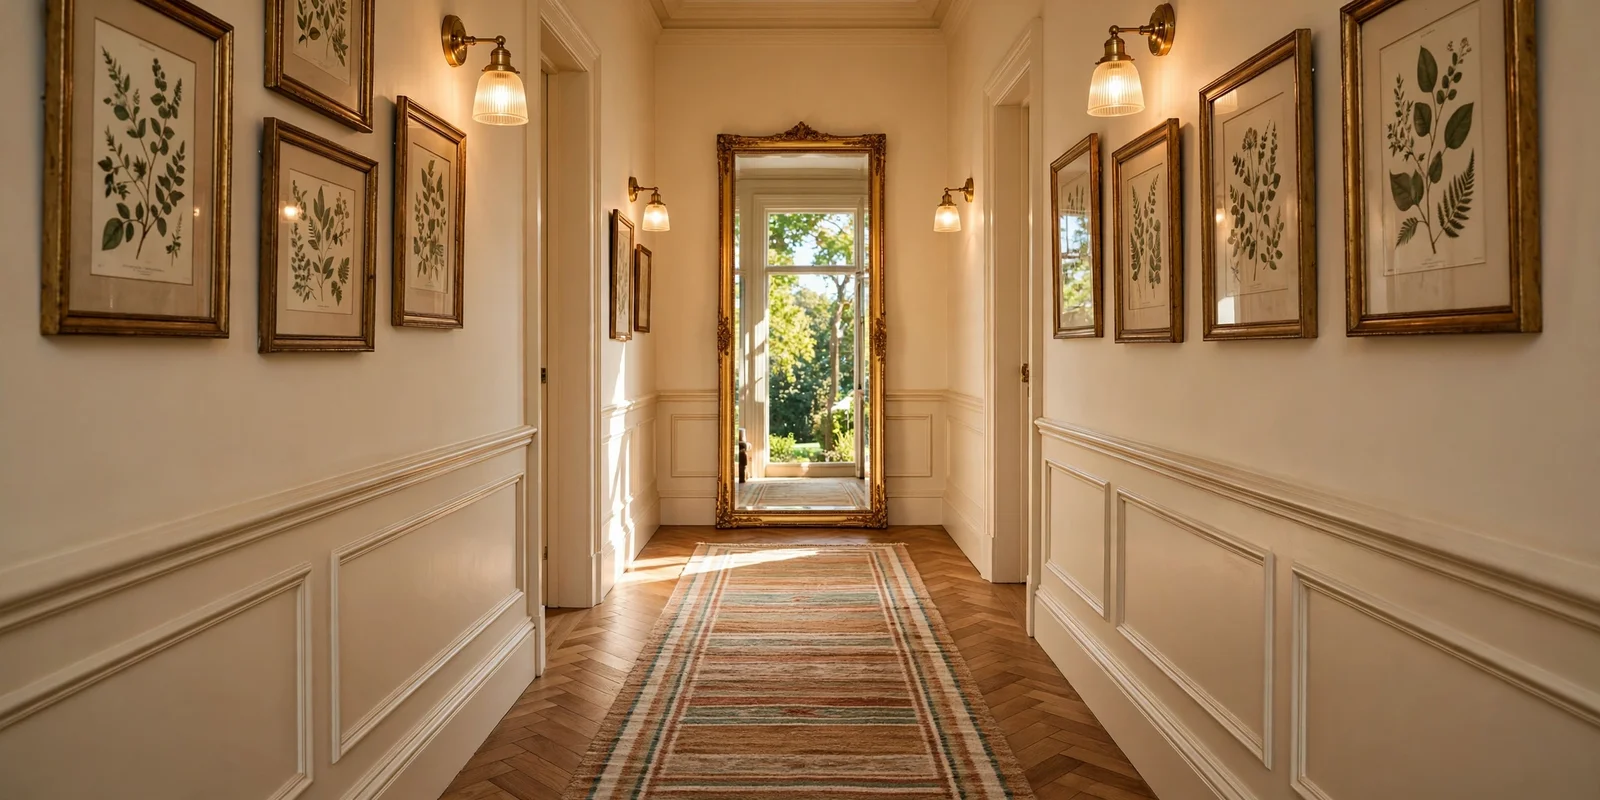
Most hallways are walked through a dozen times a day and truly looked at almost never, yet they shape the feeling of the whole home. These 21 practical ideas, from quieting runners to heritage painted doors, will help you turn a forgotten passage into a space you enjoy.
The hallway is the most walked-through room in the house and the least decorated. Post piles on the console, a cold floor, one harsh ceiling bulb, and walls that have taken a beating for years. It is the small frustration every homeowner knows: the first space guests see and the last one anyone improves.
The good news is that a hallway asks very little. A long runner, a rising line of framed prints, a pair of warm wall lights, and a plant at the far end can transform a bare passage in a single weekend. Narrow halls and rented homes get special attention here, with widths, clearances and no-drill options spelled out.
Below are 21 concrete ideas, each with measurements, materials and budget guidance, so you can pick the two or three that suit your hall and start this week. No big renovation needed, just thoughtful layers added one at a time.
1. Lay a Long Wool Runner to Quiet Footsteps and Soften the Passage
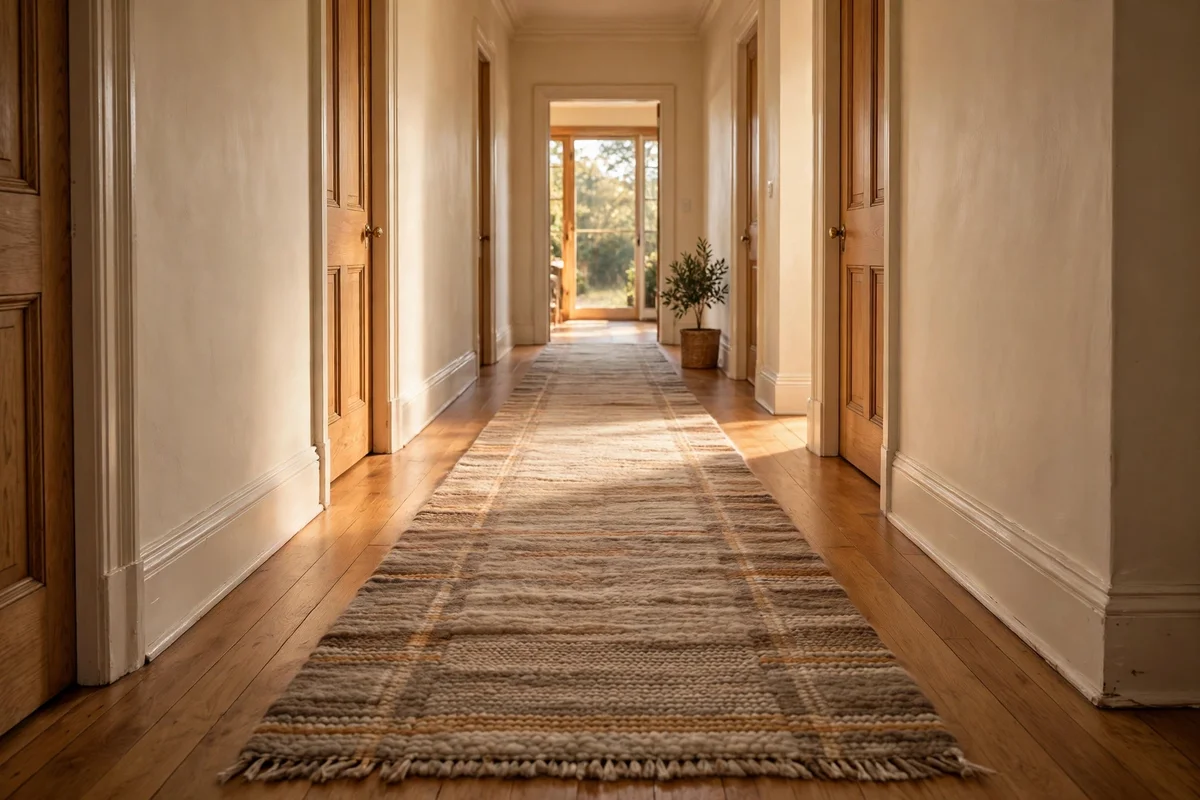
A runner of 60 to 80 cm wide in a hall of 90 to 120 cm leaves a border of bare floor of 10 to 15 cm each side, which looks intentional rather than cramped. Choose a flatweave or low-pile wool runner so doors clear it without catching, since door bottoms often sit only 8 to 12 mm above the floor. A grippy backing or a separate 3 mm underlay keeps the runner flat on tiles or boards and stops the ends curling, which is the most common trip hazard in a narrow passage.
Sound is the quiet benefit: a dense wool runner cuts the sharp clatter of hard shoes on tiles noticeably, making night-time trips down the hall far gentler. Look for 100 percent wool or a wool blend with a cotton backing; these wear slowly and vacuum cleanly with one pass a week. A runner 180 to 250 cm long suits a standard hall, while L-shaped halls need two runners meeting at a neat overlap. Avoid rubber-backed cheap runners in sunny halls, since heat can bond the backing to varnish and leave marks.
2. Size the Runner to Fit With 60 to 80 cm Width and Clear Borders
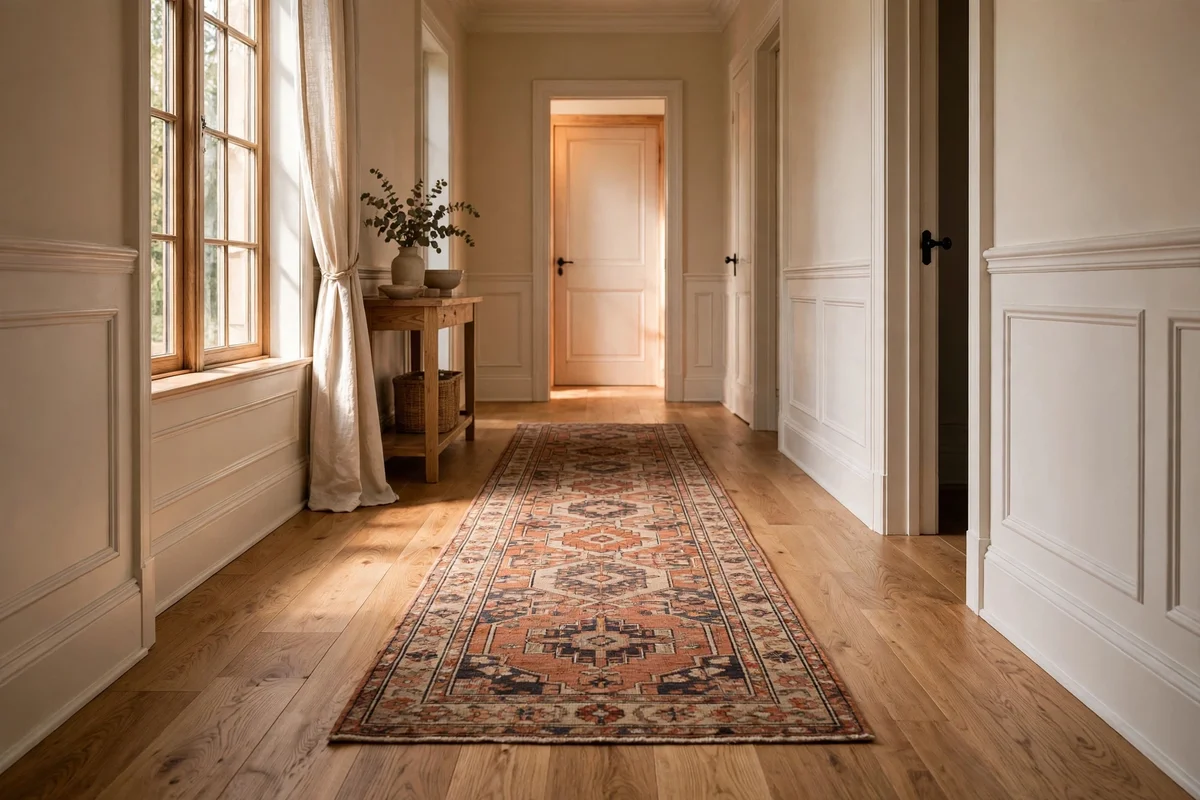
Measure the hall from skirting to skirting, then subtract 20 to 30 cm to find the runner width that sits calmly in the centre. In a 100 cm hall, a 70 cm runner leaves 15 cm of floor visible each side, a balance that keeps the eye moving forward instead of bouncing off the edges. Length matters just as much: leave 15 to 20 cm of bare floor at each end of the passage so the runner reads as a placed layer, not wall-to-wall carpet.
Where two doors open into the hall, a runner that stops short of both thresholds stays safe and looks planned. If the hall turns, use two straight runners and overlap them by 20 cm at the corner, angling the top one to follow the bend. Budget synthetic flatweave runners start around 30 pounds or dollars for 200 cm; mid-range wool flatweave runs 60 to 120. The mistake to avoid is sizing by guess: an over-wide runner folded under at the ends reads instantly as a misfit.
3. March a Gallery Wall of Framed Prints Up the Wall in a Rising Line
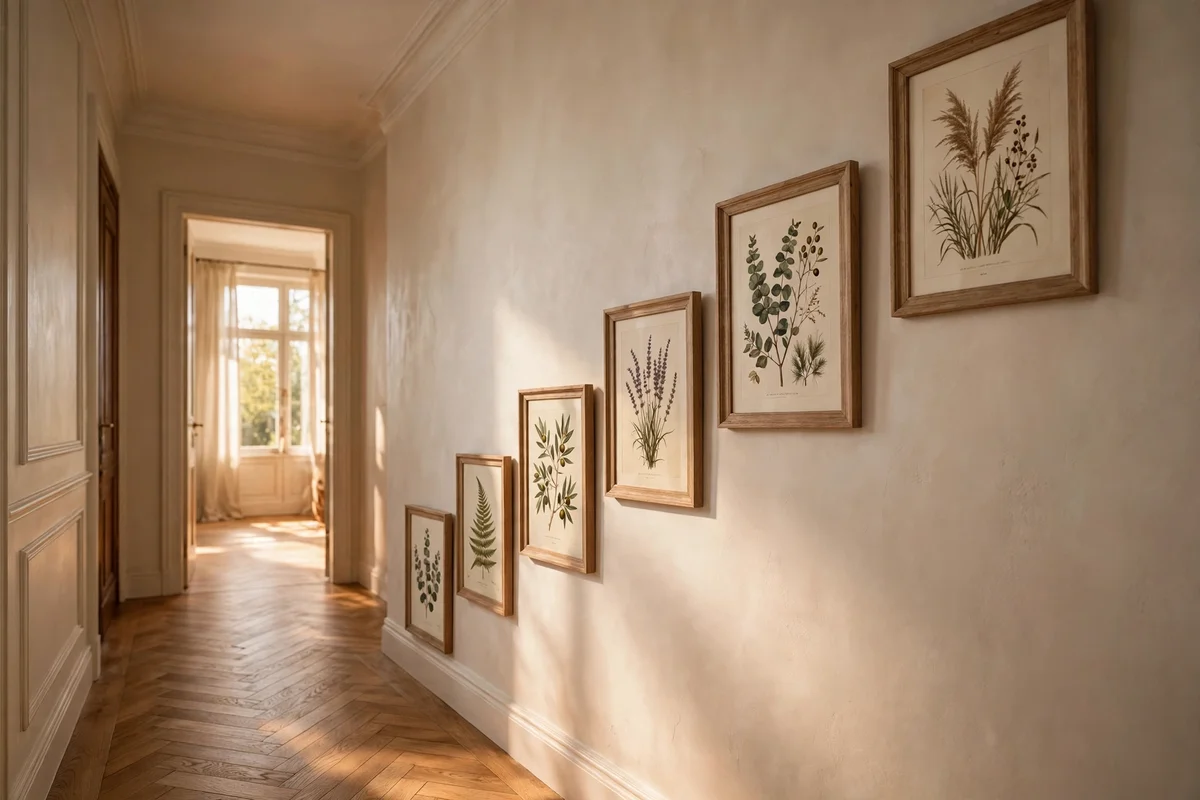
A gallery wall in a hallway works best when it follows the passage rather than the floor: march the frames upward in a gentle rising line of about 10 to 15 degrees, as if climbing a shallow staircase. Start the first frame at 145 to 150 cm from the floor at the near end and let the line rise toward the far wall, which draws the eye to the end of the hall and makes the passage feel purposeful. Keep 5 to 8 cm between frames so each print breathes while the group still reads as one composition.
Five to seven prints of mixed sizes, such as A4, A3 and one square, give rhythm without clutter, and botanical engravings, line drawings and soft landscape studies suit a heritage mood beautifully. Plan the layout on the floor first with paper templates taped to the wall for two days; living with the arrangement reveals spacing mistakes before any holes are drilled. The mistake to avoid is lining every frame top edge level along the whole wall, which flattens the energy and fights the natural walk of the hall.
4. Keep One Frame Finish Across the Gallery for a Calm Rhythm
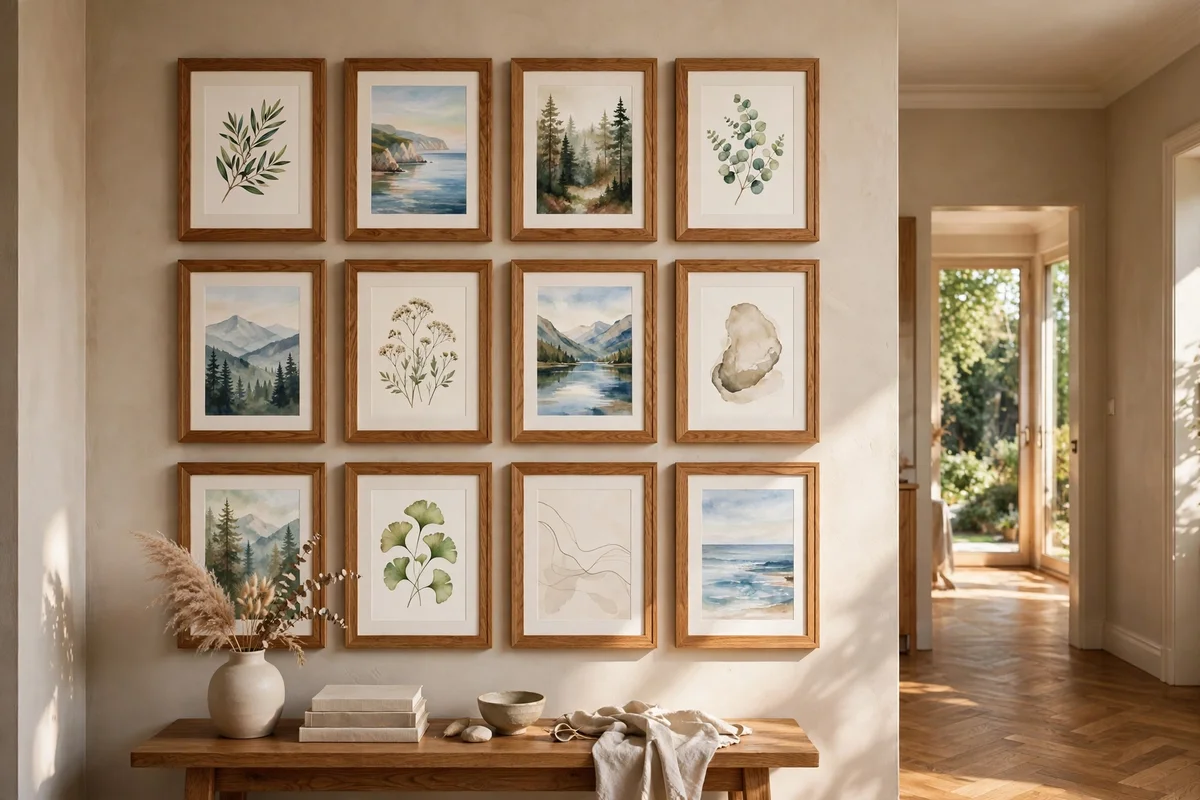
Mixed prints with one shared frame finish look curated; mixed prints with mixed finishes look accidental. Choose a single finish for every frame in the gallery, such as solid oak, black stained wood or antique brass, and keep the mount style consistent too, ideally a wide off-white mount of 5 to 7 cm around each print. That repetition is what lets seven different images sit together calmly in a 100 cm wide passage without visual noise.
Standard sizes save money and framing time: 30 by 40 cm frames cost little new, and a charity-shop find can be refreshed with one coat of chalk paint matched to the others. The mistake to avoid is mixing gold, silver, white and black frames because each was on offer; one confident finish costs no more and looks deliberate. Renter-friendly option: lean two or three large framed prints on a 12 cm deep picture ledge instead of hanging them at all.
5. Swap the Single Ceiling Bulb for a Pair of Warm Wall Lights
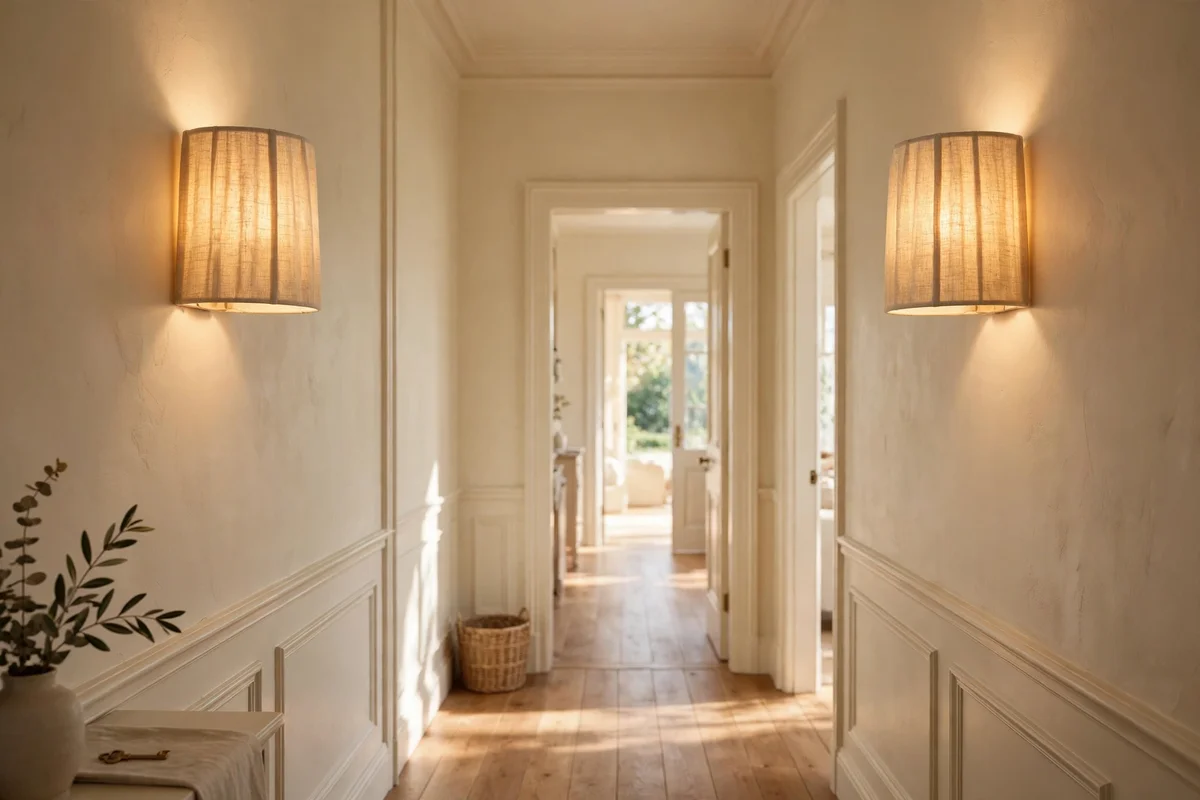
One bare ceiling bulb in a long hall throws hard shadows at both ends and makes every guest look tired. Two wall lights spaced evenly along a 300 cm hall wash both walls softly instead, so the whole passage glows. Choose shaded sconces in linen or opal glass with a 2700K warm white bulb of 6 to 9 watts, mounted at 165 to 170 cm from the floor, which is just above eye level for most adults and avoids glare.
In rented homes, plug-in wall lights with a fabric cable are the answer: they fix with two small screws or strong adhesive mounts and trail the cable neatly down to a socket, then come away cleanly on moving day. Hardwired sconces are a one-hour electrician job in owned homes and cost 60 to 120 pounds or dollars per fitting. The mistake to avoid is leaving the old ceiling rose live alongside the new sconces; remove or cap it so the room has one clear, gentle light story.
6. Hang a Small Pendant at the Hallway Midpoint for Soft Overhead Glow
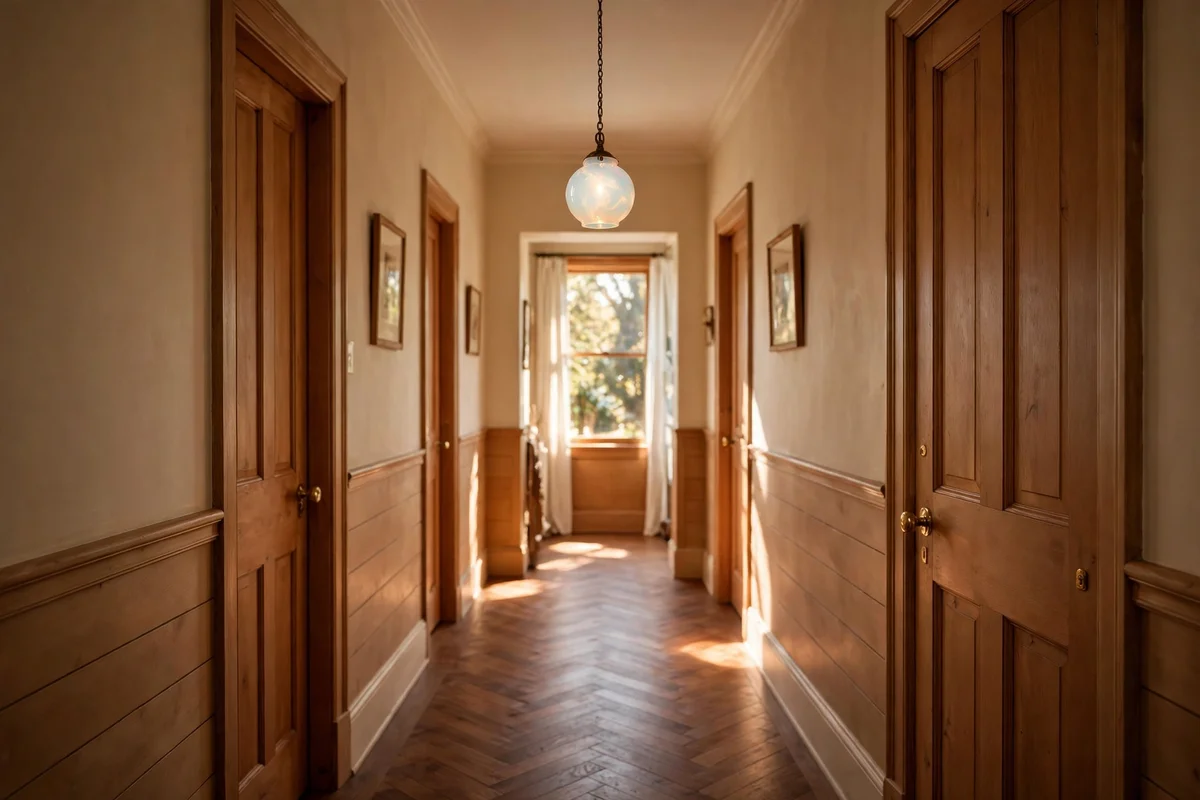
Where wall lights are not practical, one small pendant at the exact midpoint of the hall replaces the harsh bare bulb with intention. Choose an opal glass globe of 20 to 25 cm diameter or a woven rattan shade of similar size, hung so the bottom of the shade sits at 210 to 215 cm from the floor, clear of heads but low enough to spread light sideways rather than straight down.
Pair it with a dimmable warm bulb of 2700K and, if the budget allows, a simple dimmer switch, since hallway light needs vary hugely between a midday errand and a midnight walk. Keep the shade finish in step with the rest of the home: rattan suits country warmth, opal glass suits period elegance. The mistake to avoid is a pendant that hangs below 200 cm in a 90 cm wide hall; guests duck instinctively, and the shade becomes a shoulder target within weeks.
7. Place a Tall Lean-To Mirror to Borrow Light From the Far Window
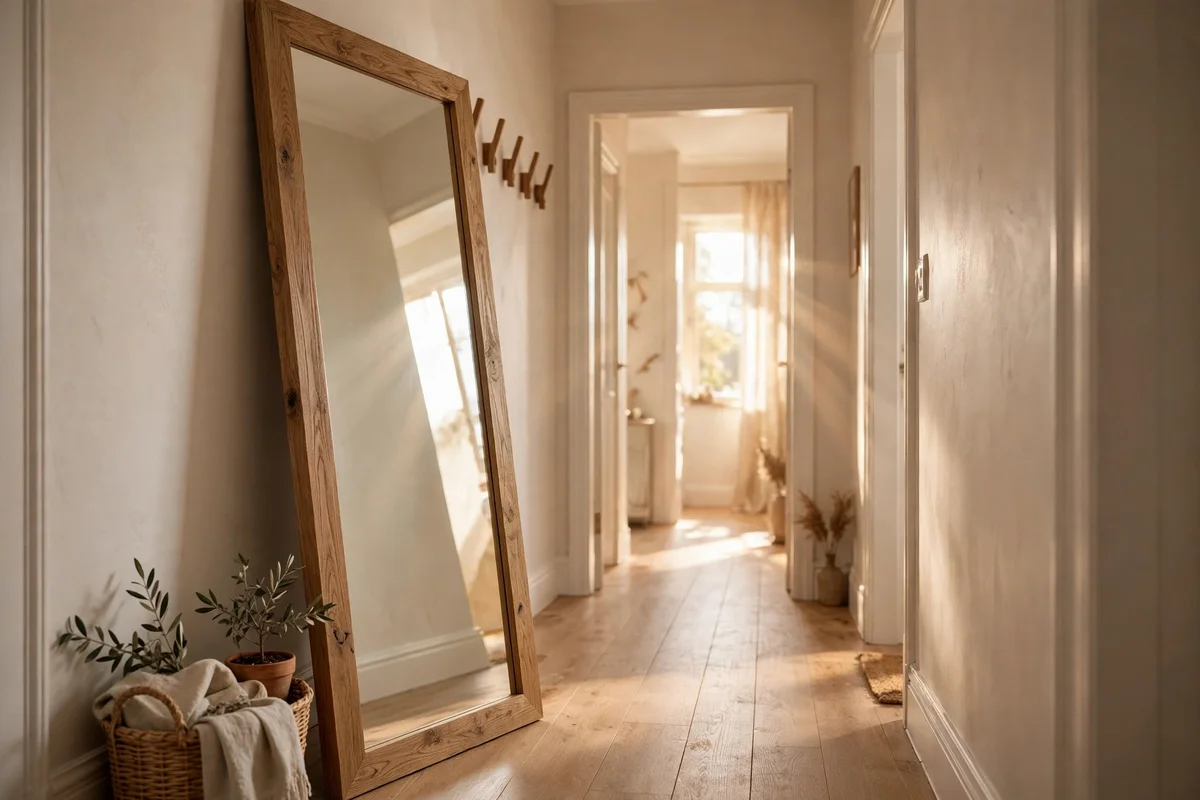
A tall mirror is the oldest trick for a windowless hall: place a 160 to 180 cm lean-to mirror against the long wall and it borrows daylight from the doorway or the end-of-hall window, doubling what little brightness the passage receives. Lean the mirror at a slight angle with the top resting against the wall, which angles the reflection upward and pulls light deeper along the corridor. A slim frame in oak or dark wood keeps the mirror looking like furniture rather than a fitting room.
Size the mirror to the hall: in a 90 cm wide hall a mirror 50 to 60 cm wide fits without crowding, while wider halls take 70 to 80 cm. Anchor the top to the wall with a small L-bracket or anti-tip strap, especially where children or pets pass daily; this is a renter-safe fix using one screw hidden behind the frame. The mistake to avoid is hanging the mirror where it faces a dark cupboard door, since it will then faithfully double the gloom instead of the light.
8. Angle the Mirror to Catch and Double the Daylight
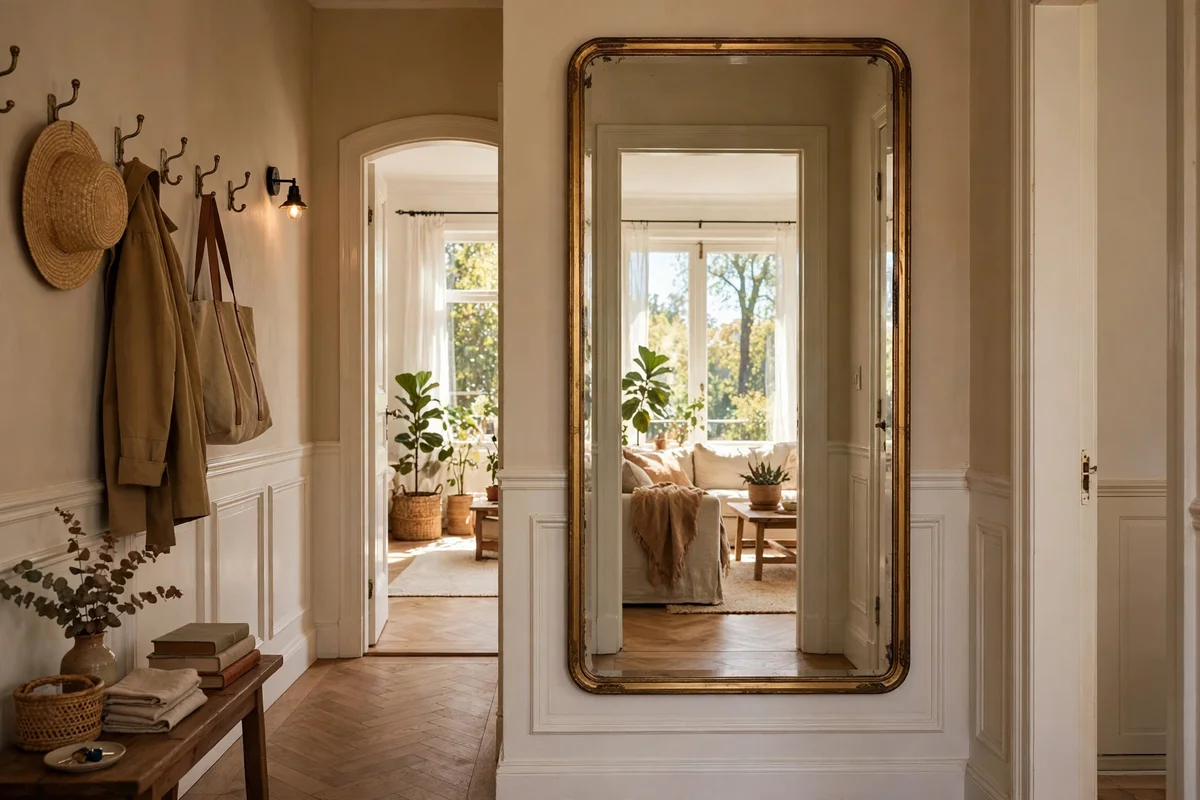
Position matters more than size: stand the mirror where it can see a window, even from three rooms away, and the hallway gains a second source of daylight for free. Opposite the internal door to the living room is often the best spot, since that door is usually open and admits the brightest window light in the house. Test the angle by standing at the dark end of the hall and checking that the reflection shows glass, not plaster.
In halls with no sightline to any window, place the mirror at the end wall under a small wall light, so it doubles the lamplight instead; one warm bulb plus a mirror reads as two lamps. Keep the mirror clean with a microfibre cloth and a vinegar-water spray monthly, because hallway mirrors collect dust fast and a filmed surface eats the brightness it should share. The mistake to avoid is pairing a mirror with a cold 4000K bulb, which turns the borrowed light harsh and flat against warm heritage walls.
9. Fit a 25 cm Deep Console Table for Post, Keys and a Small Bowl
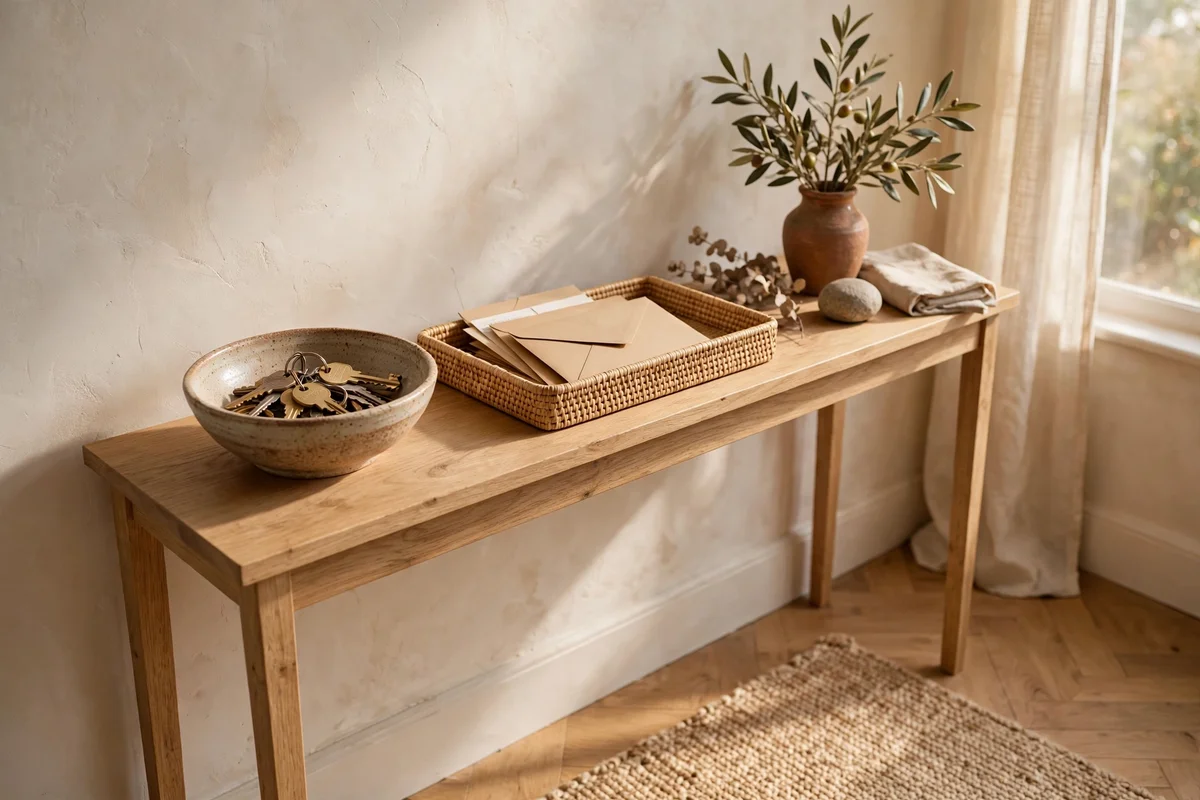
A console table 20 to 25 cm deep is the sweet spot for a narrow hall: deep enough to hold a tray for post and keys, slim enough to leave walking space. Place it against the longest uninterrupted wall near the front door, ideally within two steps of the entrance, and keep the top styled to three zones only: a small bowl for keys, a shallow tray for post, and one low plant or a stack of two books.
Choose a table with a lower shelf or drawer if the hall is the home’s dumping ground; a 100 cm wide console with one drawer hides batteries, spare keys and loose bits out of sight. In halls under 100 cm wide, skip the console entirely and use the floating shelf from idea 10 instead, because a table that forces hips sideways fails its purpose. The mistake to avoid is using the console as a display shelf for six or seven ornaments; in a passage, every surface must earn its keep with a daily job.
10. Mount a Floating Oak Shelf Where a Console Would Block the Way
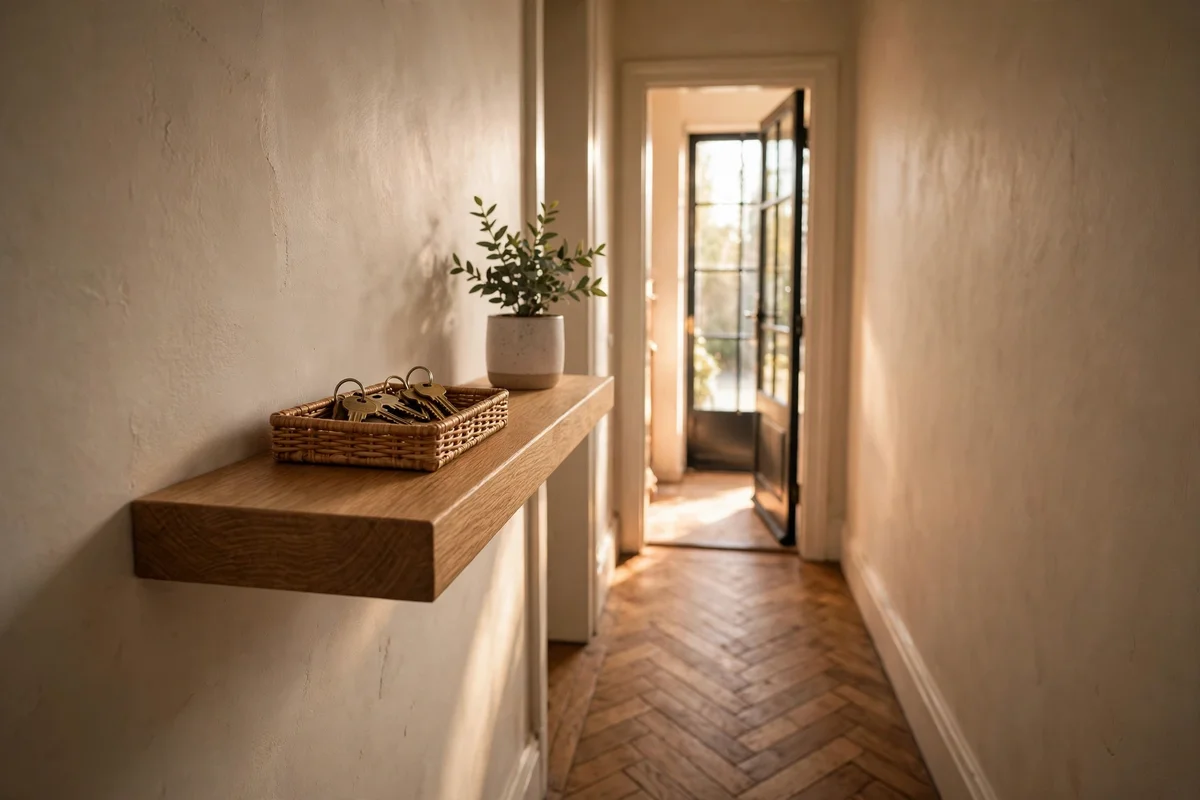
In halls of 90 cm or less, a floating shelf of 18 to 20 cm deep and 60 to 90 cm long gives you a landing spot for keys and post with zero floor footprint. Mount it at 90 to 95 cm from the floor, about the height of a standard console top, and fix it into studs or with heavy-duty plaster anchors rated for at least 10 kg, since it will take leaning elbows and dropped bags. Solid oak or pine 3 to 4 cm thick looks crafted and carries the load without bowing.
Style it as simply as the console: one small tray, one catch-all bowl, nothing taller than 15 cm so the shelf does not visually close the passage. A second matching shelf 40 cm above the first works for homes that need more storage, but stop at two or the wall starts to press in. Budget tip: one 90 cm oak shelf with hidden bracket fixings costs 25 to 50 pounds or dollars. The mistake to avoid is mounting the shelf at picture height of 145 cm; reaching up every day gets old within a week.
11. Add Half-Height Panelling to Protect the Wall at Shoulder and Hip Line
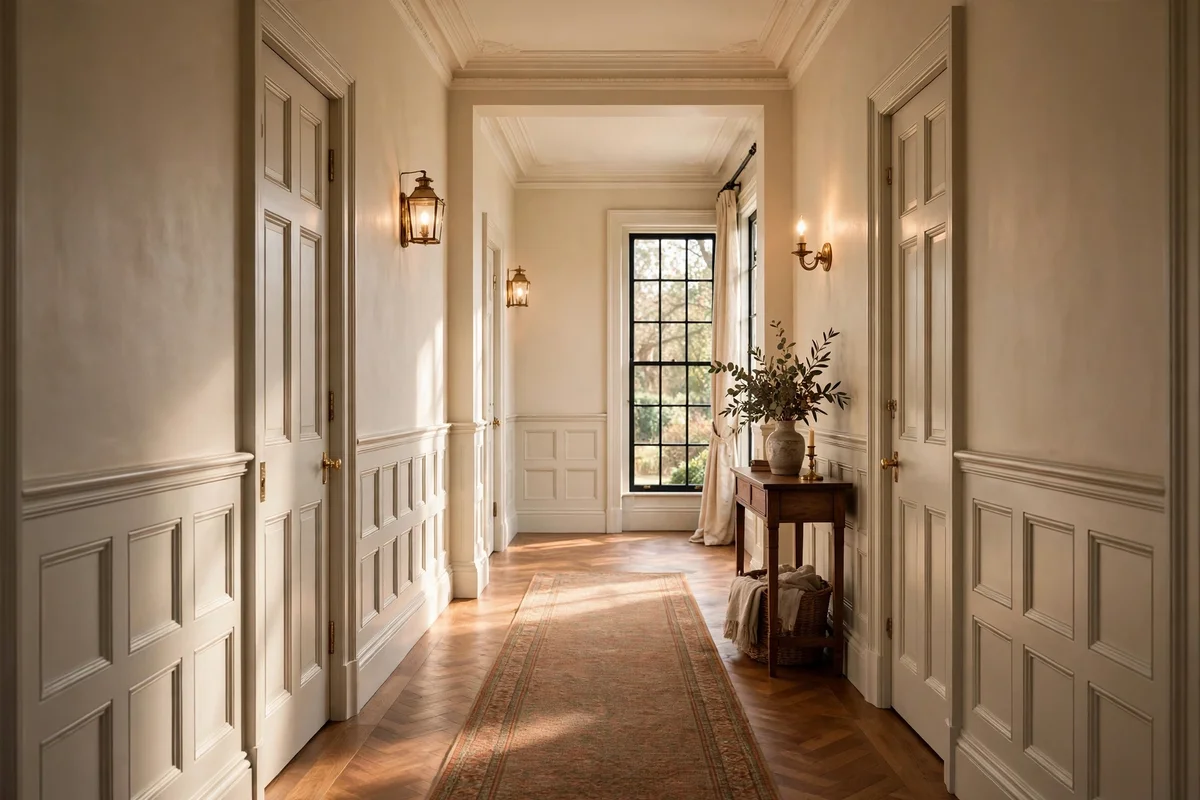
Hallway walls take more knocks than any other room: bags, pushchairs, shoe scuffs and pet leads all mark the paint at hip and shoulder height. Half-height panelling at 90 to 110 cm from the floor, topped with a slim dado rail, puts a sacrificial wooden surface exactly where the damage happens. Paint it the same colour as the wall for a quiet period look, or one tone darker for definition; both look timeless.
Medium-density fibreboard strips with a simple shaker profile are the budget route, costing 8 to 15 pounds or dollars per metre installed yourself, while tongue-and-groove pine suits cottage halls beautifully. Finish with washable eggshell paint so scuffs wipe off with a damp cloth instead of needing a repaint. The mistake to avoid is stopping the panelling mid-wall where a door interrupts it; run it continuously behind door frames and into corners so the line feels structural, not decorative.
12. Paint the Internal Doors a Heritage Colour Like Deep Green or Ink Blue
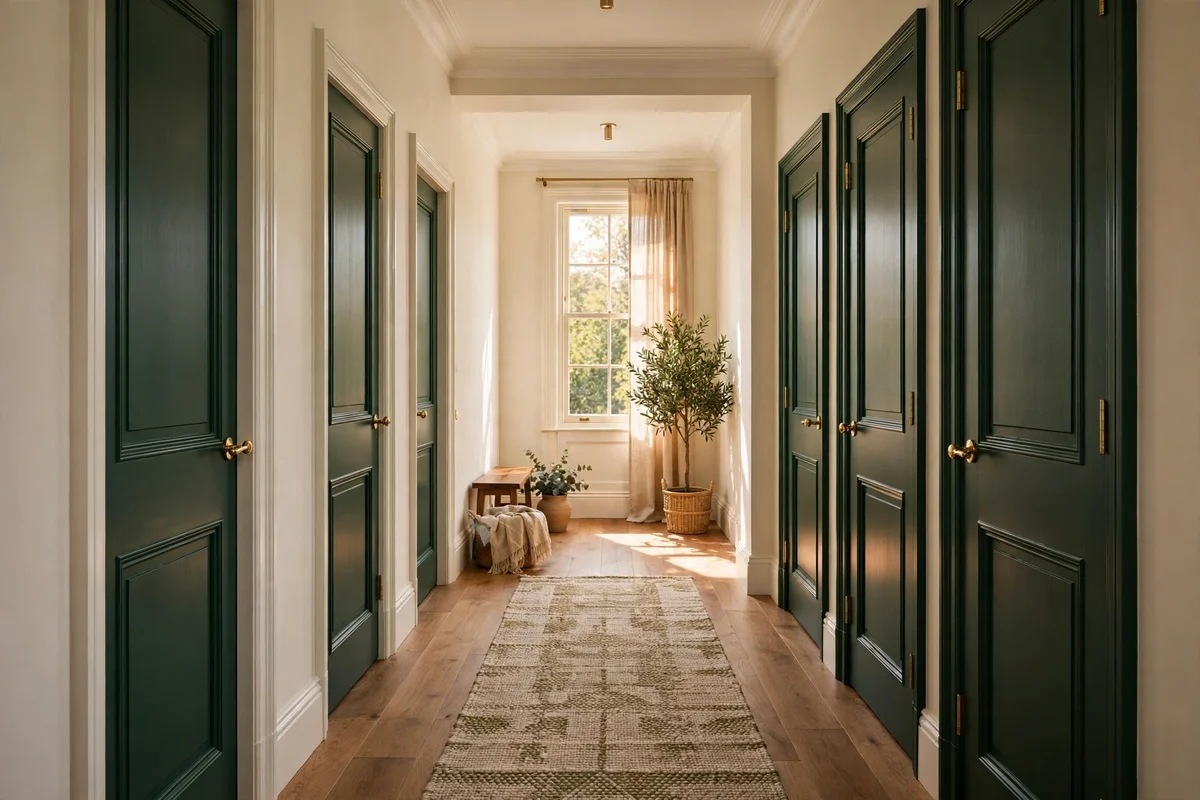
In a neutral hall, painting the internal doors a heritage colour is the fastest transformation for the least money: one door takes a litre of paint, two coats and an afternoon. Deep forest green, ink blue, warm charcoal or heritage red each give flat white passages a pulse, and the colour reads especially well against cream walls and natural oak floors. Sand lightly, prime, and use a satin or eggshell finish that resists fingerprints far better than matt.
Paint every internal door in the hall the same colour, including the inner face of the front door, so the colour becomes a rhythm rather than an accident. Change the handles at the same time: aged brass or black iron knobs cost 6 to 12 pounds or dollars each and lift the whole job. The mistake to avoid is painting only one door in the colour; a single coloured door in a row of white ones looks like a mistake, not a scheme. Renters can use removable door vinyl in a matching heritage tone instead.
13. Wash the Upper Walls in a Warm White to Keep Narrow Halls Bright
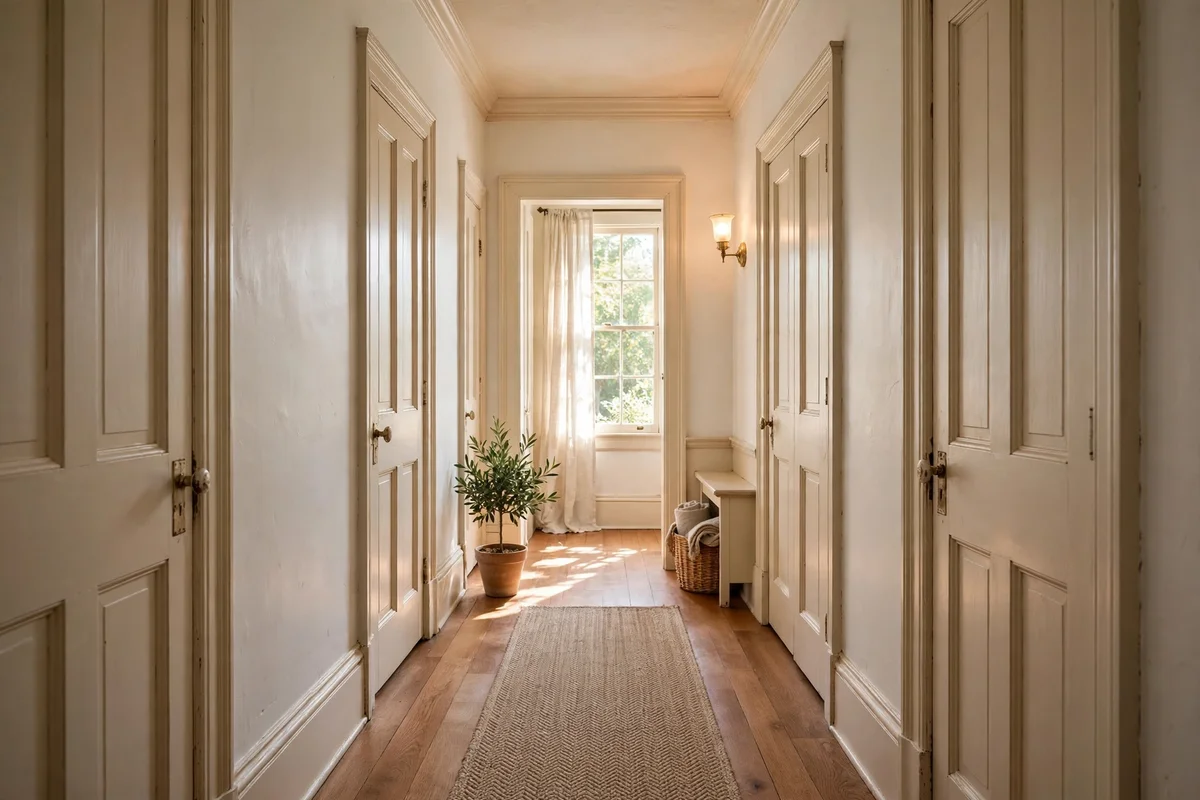
Narrow halls under 100 cm wide look darker than they are, because two close walls bounce little light. Wash the walls in a warm white with a cream or almond undertone, never a blue-grey white, and the passage reads brighter without any new lighting. Paint the walls, architraves and ceiling the same colour in different finishes, matt walls with eggshell woodwork, for a seamless look that blurs the edges of a tight space.
Test the colour on a 30 by 30 cm patch and view it at noon and at night under the hall’s actual bulb before committing, since whites shift dramatically in artificial light. One 5-litre tin covers roughly 60 square metres, enough for two coats in a standard hall with paint to spare. The mistake to avoid is a stark brilliant white, which turns a narrow hall into a clinical tunnel; warmth is what makes a passage feel welcoming.
14. Paint the Ceiling a Soft Warm Tone to Make Long Halls Feel Cosier
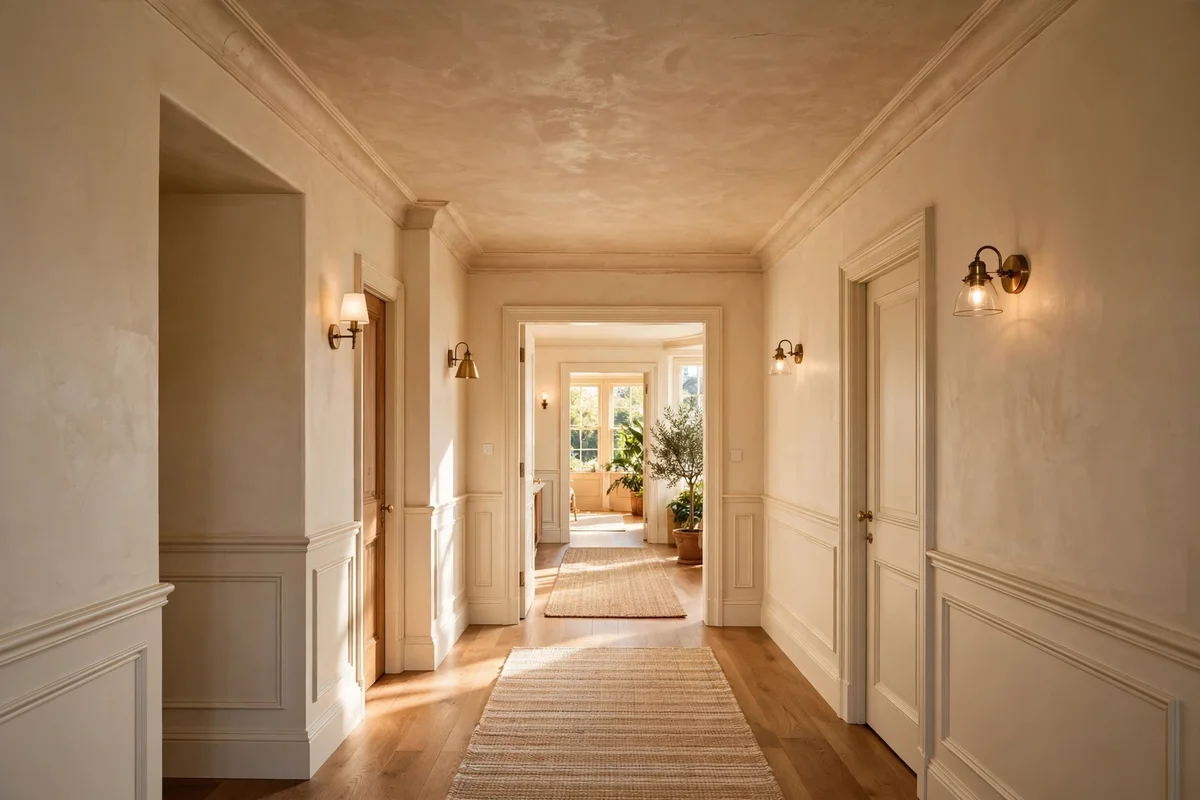
Long halls with standard 240 cm ceilings can feel like tunnels; a ceiling painted two tones darker than the walls, in a warm plaster or oatmeal shade, pulls the height down visually and makes the passage feel cosier. This old decorator’s trick works because the eye reads the darker plane as closer, which shortens the perceived corridor. Use a flat matt finish so the ceiling absorbs rather than reflects the bulb light.
Carry the ceiling colour down 5 cm onto the wall in halls with picture rails, or stop it in a crisp line at the coving where there is none. The same trick flatters wide period halls especially, where height is generous. The mistake to avoid is painting the ceiling darker than mid-tone in a hall with no window; below a certain point the trick reverses and the passage simply reads dark. Keep it soft: a shade card two steps from the wall colour, no more.
15. End the Passage With a Small Chair and a Folded Throw
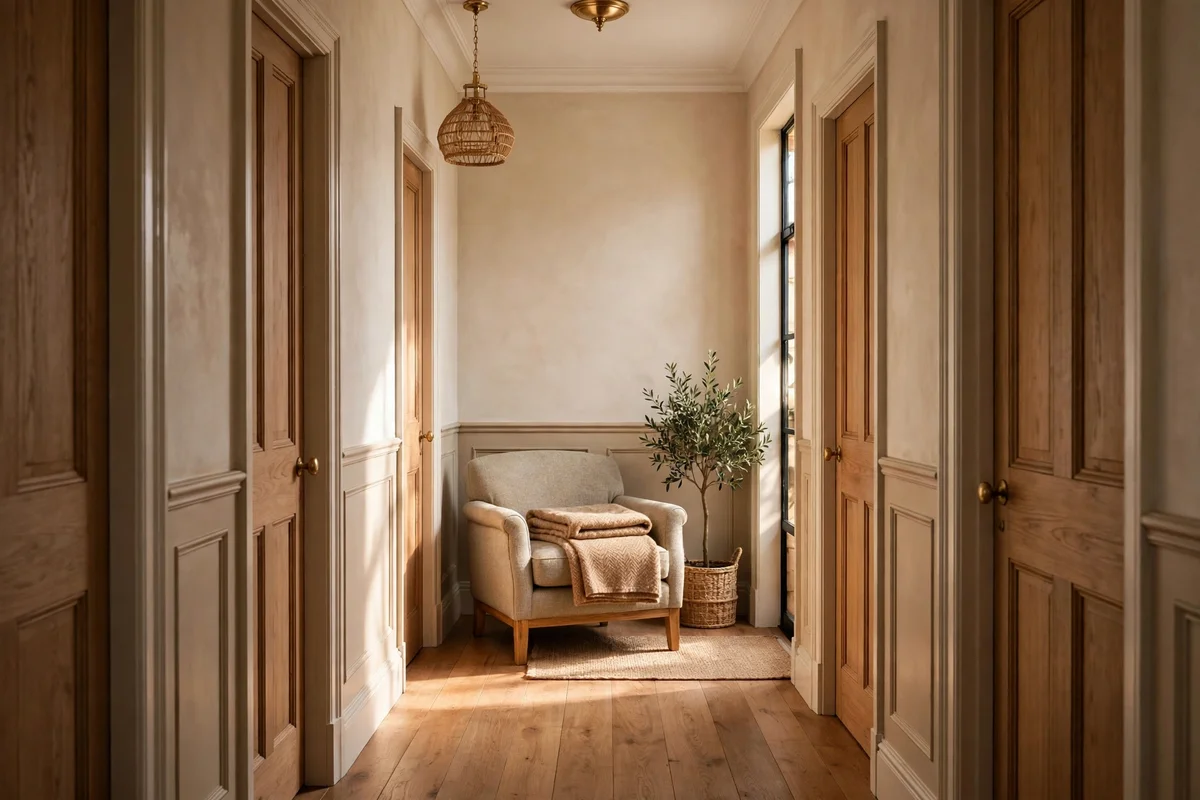
A hall that ends in a blank wall or a closed door feels like it leads nowhere; place a small chair at the end and the passage gains a destination. Choose a compact armchair or a slipper chair no wider than 60 cm, angled slightly, with a folded wool throw over one arm for softness. The chair also becomes a practical perch for changing shoes, which saves a bench taking space along the main walk.
In halls under 90 cm wide, swap the chair for a wall-mounted fold-down seat 30 cm deep, or a sturdy lidded stool that doubles as storage for winter accessories. Keep the seat fabric in the same family as the runner for a connected scheme, and add a cushion no thicker than 12 cm so the chair stays slim. The mistake to avoid is a full-size dining chair at the end wall; oversized seating in the destination spot shrinks the whole passage behind it.
16. Set a Potted Plant at the End of the Hall as a Living Destination
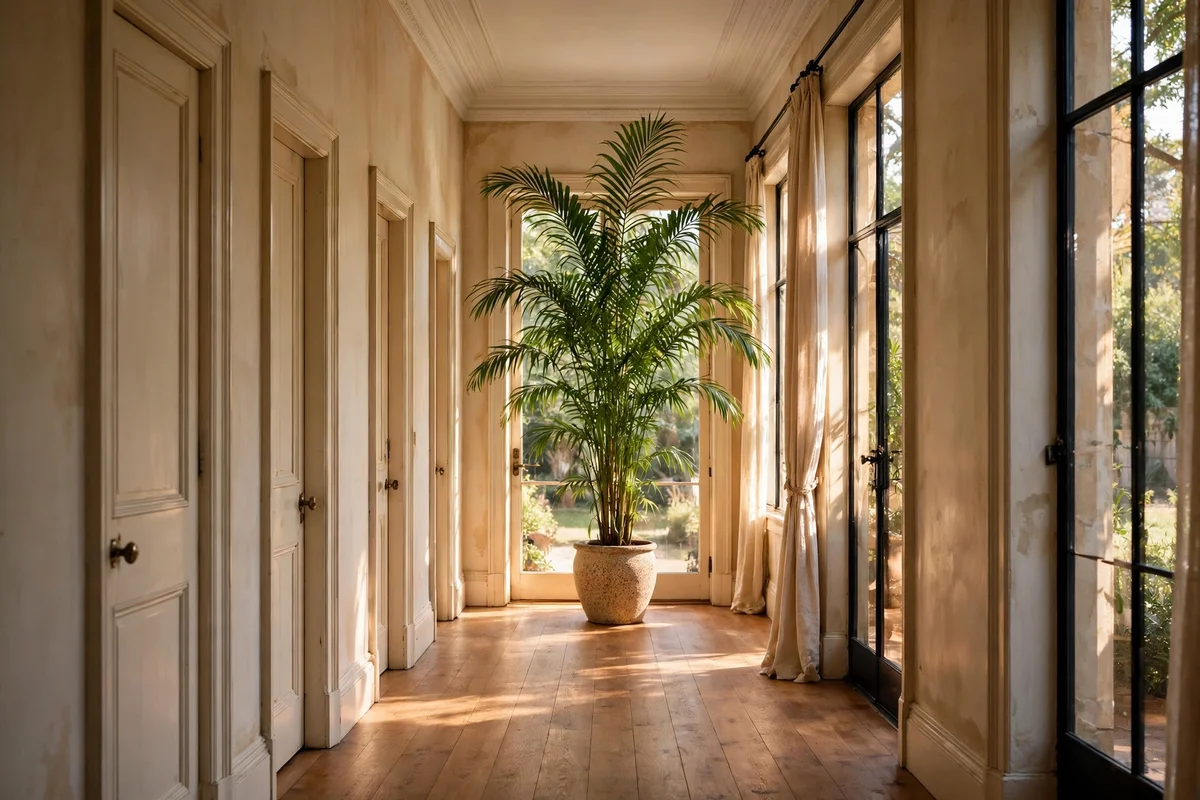
One generous plant at the end of the hall does what no furniture can: it gives the passage a living, growing full stop. Choose a plant 60 to 90 cm tall in a heavy ceramic pot 25 to 30 cm wide, such as a parlour palm or a cast-iron plant, both of which tolerate the lower light of a windowless hall. Raise it on a low plant stand 15 to 20 cm high so the foliage clears the skirting and reads as a deliberate arrangement.
Watering is the detail that makes or breaks it: a plant in a dim hall dries out slowly, so water only when the top 3 cm of soil is dry, roughly every 10 to 14 days in winter. Choose a pot with a saucer to protect the floor, and rotate the plant a quarter turn monthly so it grows evenly. The mistake to avoid is a cluster of four tiny pots instead of one confident plant; small pots read as clutter at a distance, while one strong shape anchors the whole view.
17. Hang One Confident Picture at the End Wall for a Focal Point
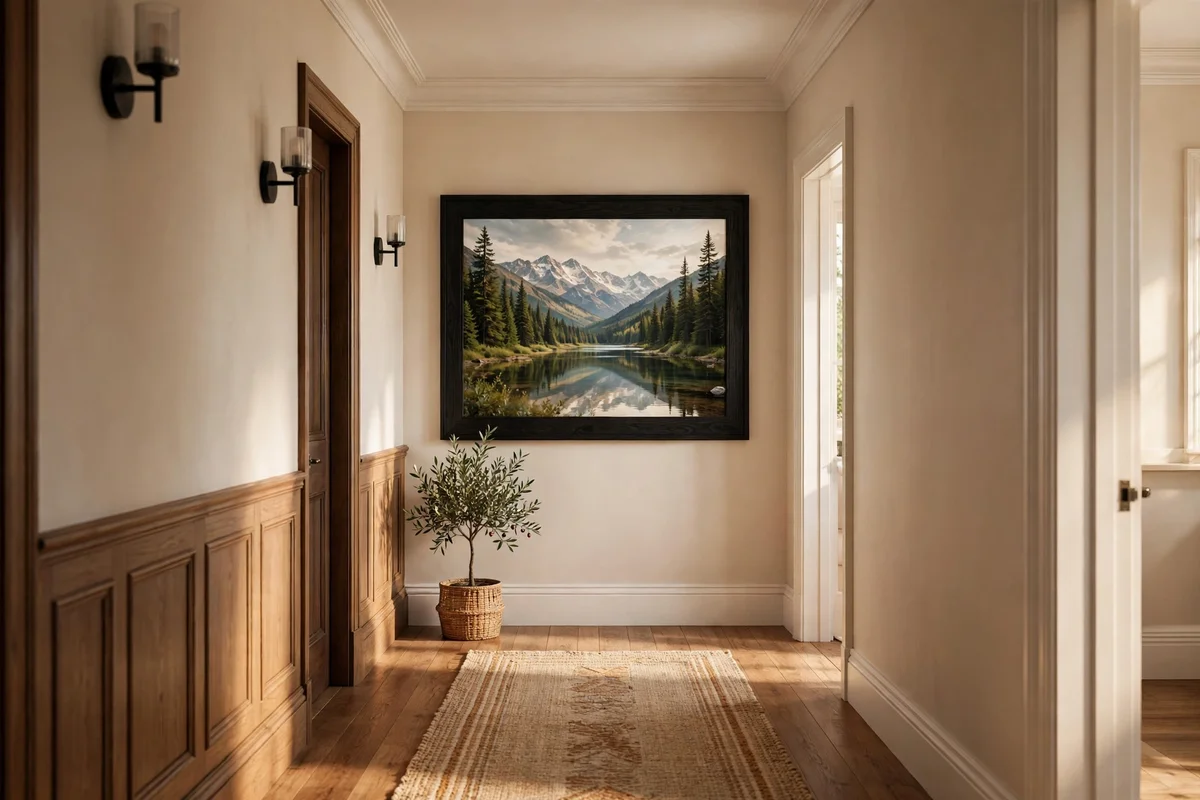
A single framed picture centred on the end wall turns the last thing you see in the hall into the best thing: a landscape, a botanical print or a piece of calligraphy art, framed generously at 50 by 70 cm or larger. Centre it at 145 to 150 cm from the floor to the middle of the frame, the gallery standard, so it sits comfortably in the sightline as you walk toward it.
Light it and it becomes an evening destination too: a small picture light or one of the wall lights from idea 5 aimed across it gives the frame a gentle wash after dark. Keep the frame finish in step with the rest of the hall, matching the gallery frames or the mirror frame so the end wall belongs to the same scheme. The mistake to avoid is a small 20 by 25 cm print lost on a large end wall; scale up confidently, because the picture is the whole point of the passage.
18. Keep 90 cm of Clear Walking Space in Halls Under 120 cm Wide
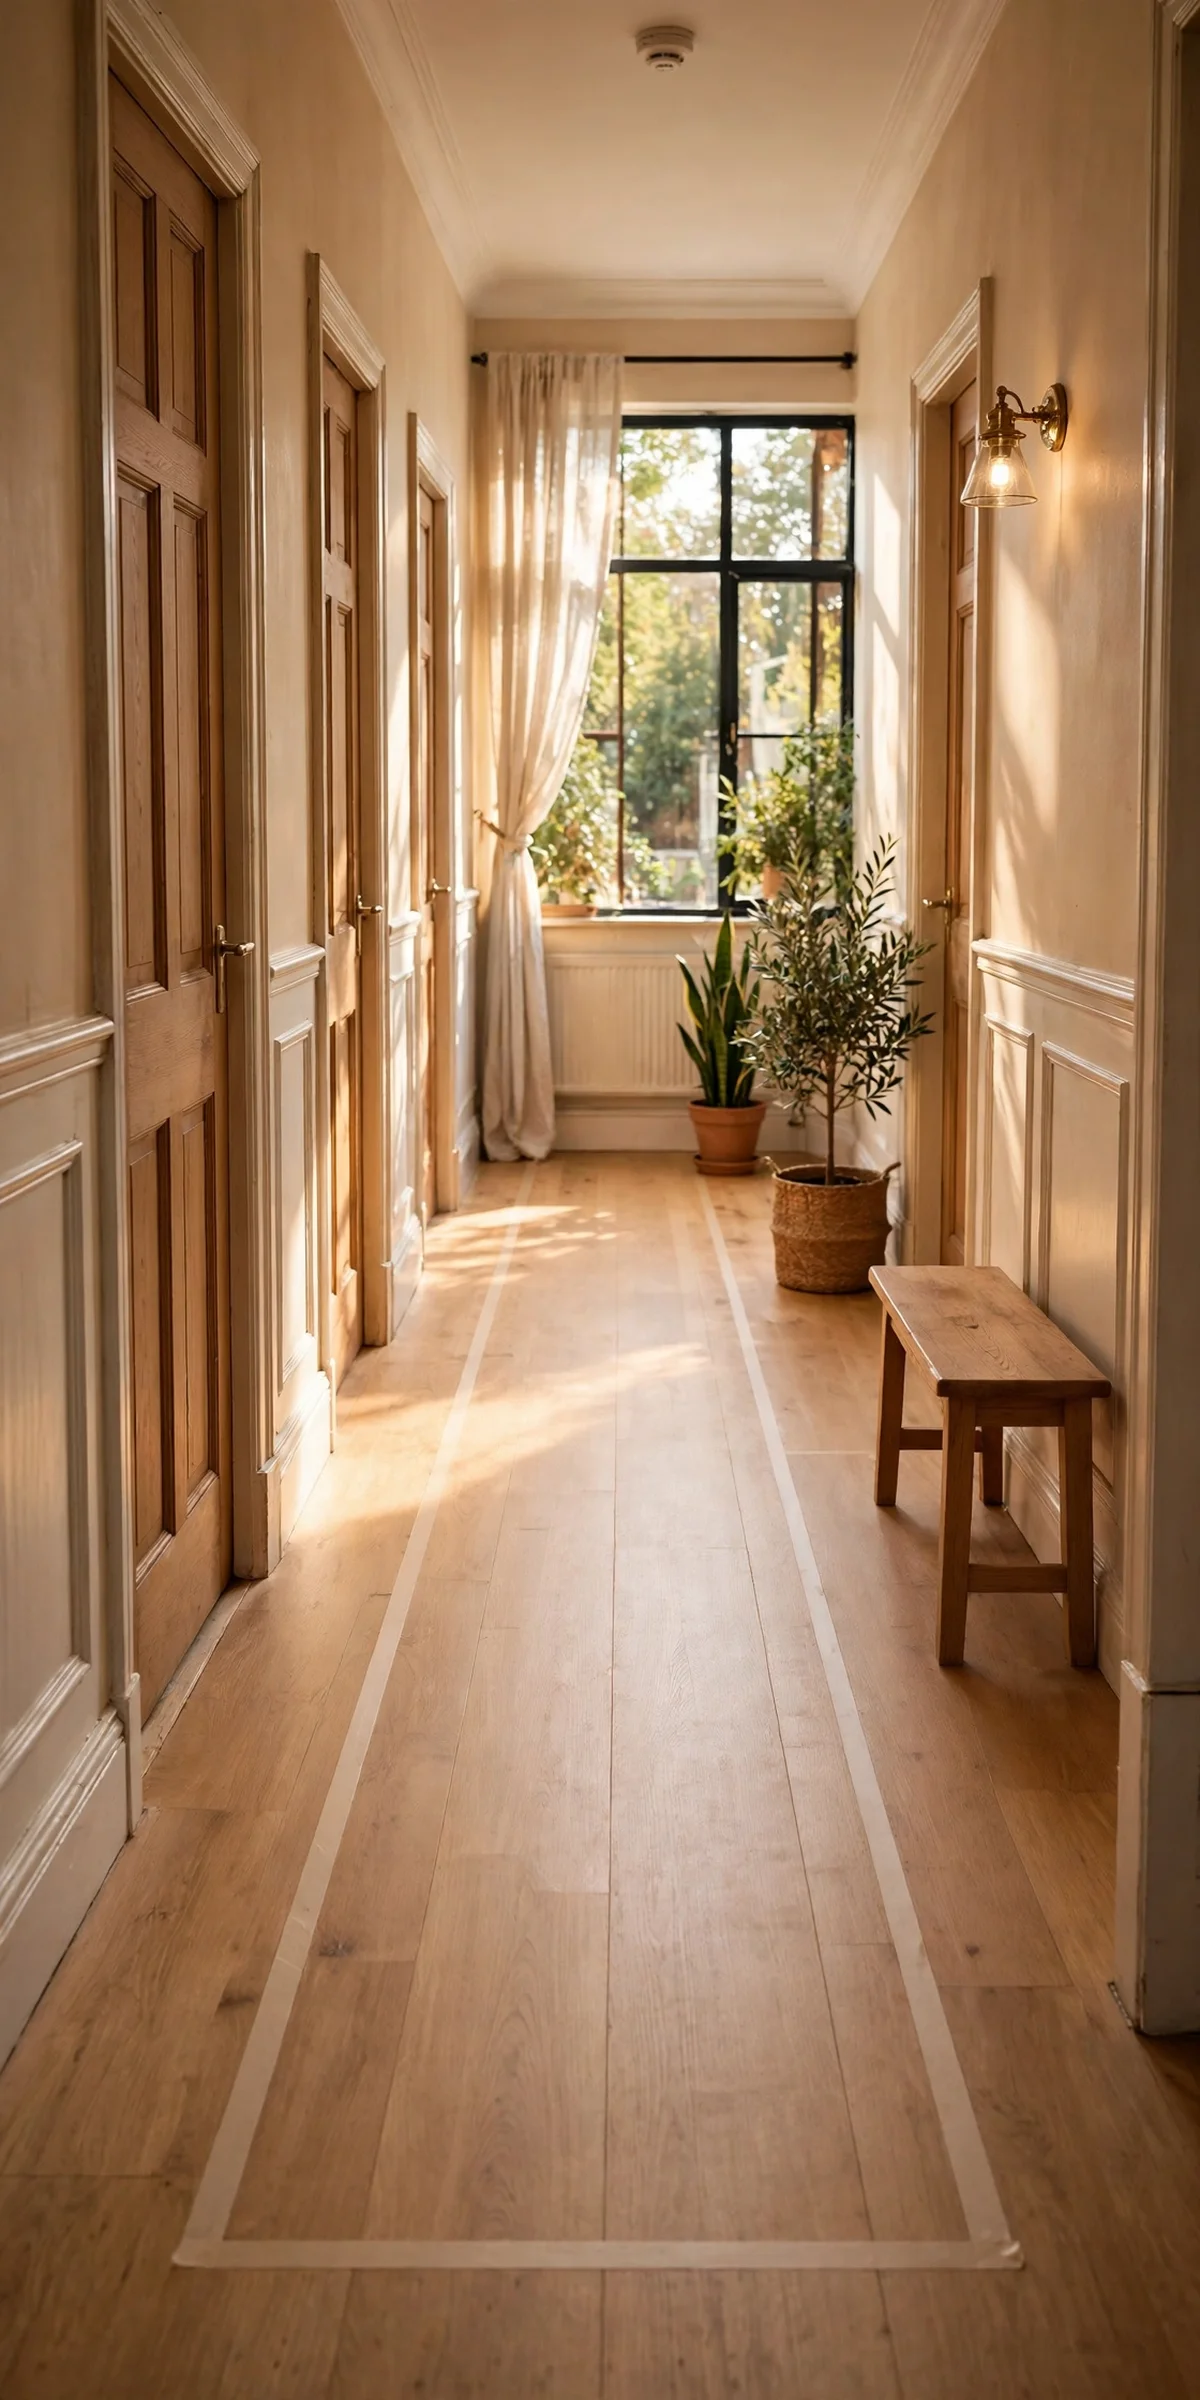
The golden rule for narrow halls: protect a clear walking lane of 90 cm, which is the minimum two people need to pass without turning sideways. In a 100 cm hall that leaves only 10 cm for anything else, so every item must mount on the wall or sit above floor level. Measure before buying anything: a 30 cm console in a 110 cm hall leaves 80 cm, which is too tight, while a 20 cm shelf leaves the full 90 cm lane intact.
Anything that protrudes below 210 cm of height into that lane is a hazard: handles, coat hooks at shoulder height and open drawers all bruise hips and snag bags. Mount hooks at 165 to 170 cm, keep shelf depths under 20 cm, and choose flat radiator covers that add no more than 10 cm. The mistake to avoid is adding furniture piece by piece without re-measuring; three slim items each steal 15 cm and the 90 cm lane quietly disappears.
19. Go Renter Friendly With Adhesive Hooks and Lean-To Frames
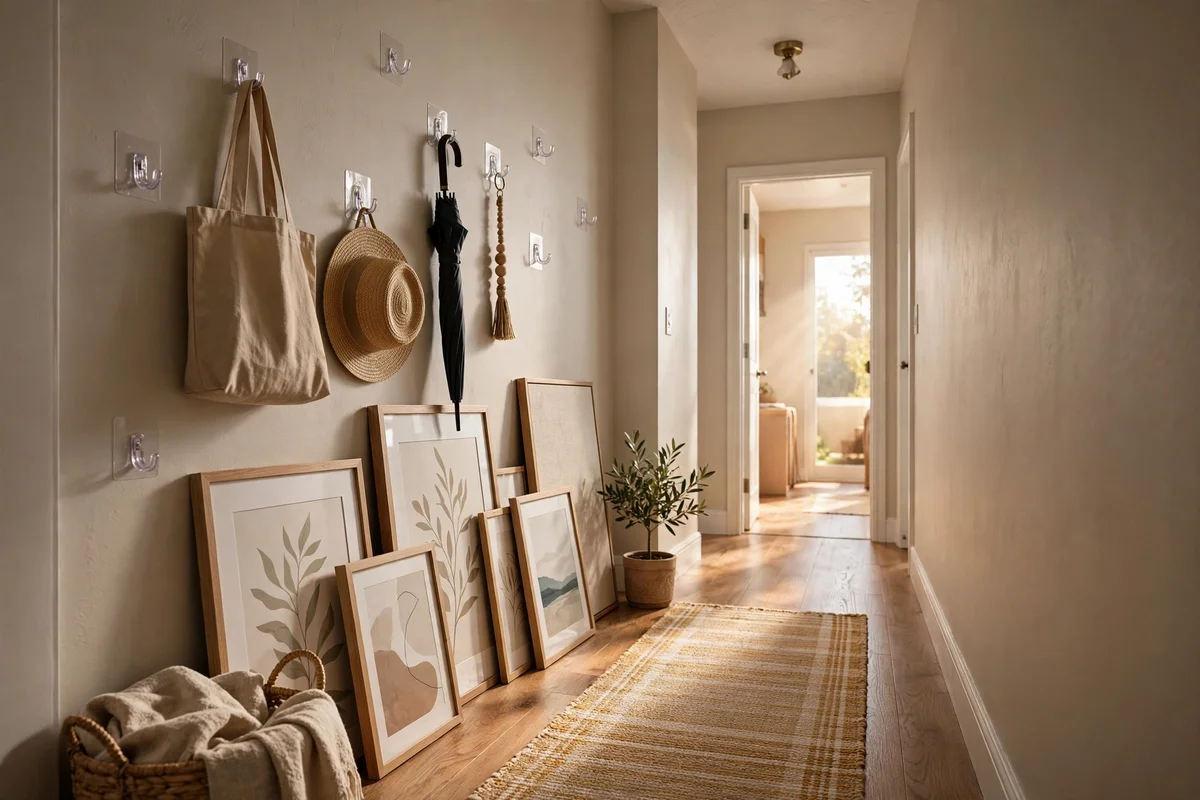
Renters can have a beautiful hall without drilling a single hole. Strong adhesive hooks rated for 3 to 5 kg hold coats, scarves and small framed prints; remove them by pulling the tab slowly downward along the wall at move-out and the paint stays intact. Lean a tall mirror against the wall, rest two large framed prints on a narrow picture ledge fixed with adhesive strips, and lay the runner on an underlay instead of fixing it down.
Keep every original fixture in one labelled bag: the old ceiling shade, switch plates, door handles and any screws, stored in a cupboard so move-out day takes an hour. Photograph every wall on move-in day with a date stamp, so any existing marks are documented before your decor goes up. The mistake to avoid is using nails just for one small hook in rented plaster; small holes multiply, and each one is a deposit argument. Adhesive and lean-to options have improved hugely and look no less intentional.
20. Fix a Row of Brass Wall Hooks for Coats Without Deep Drilling
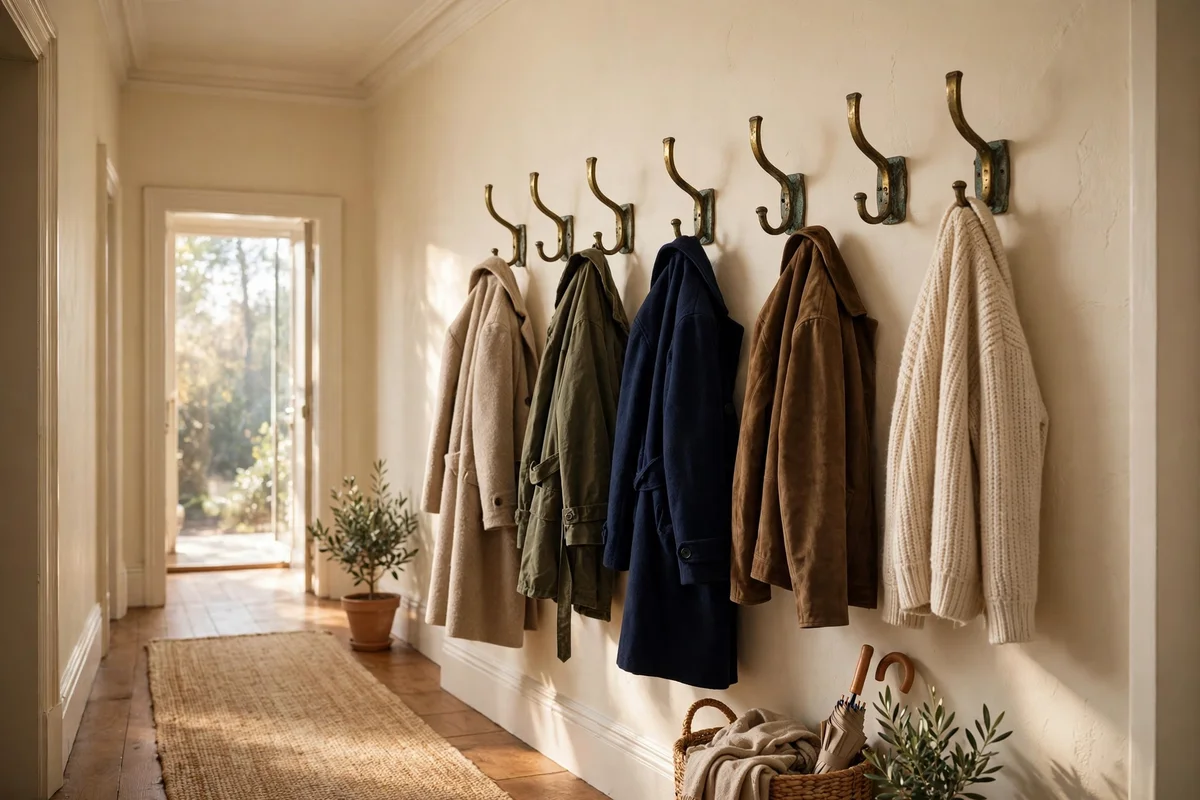
A row of three to five brass hooks at 165 to 170 cm turns one bare wall into a coat station without any floor footprint. Space the hooks 25 to 30 cm apart so winter coats hang without swallowing each other, and mount the rail or individual hooks into the wall’s stud or with proper anchors rated for the weight of wet wool, which can reach 4 kg per coat. Aged brass suits cream, sage and charcoal halls and develops a soft patina over time.
In rented homes use adhesive hooks rated for 5 kg each, and in owned homes choose a hardwood rail 100 to 120 cm long holding four hooks, which spreads the load and looks like original joinery. Hang each coat on its own hook rather than doubling up, since doubled hooks fail sooner and crease the clothes. The mistake to avoid is mounting hooks at 150 cm for the children; adults then knock every coat with their heads, and the row looks accidental. Keep the adult row high and add one low hook separately for little ones.
21. Tuck a Slim Shoe Cabinet Into the Dead Corner by the Door
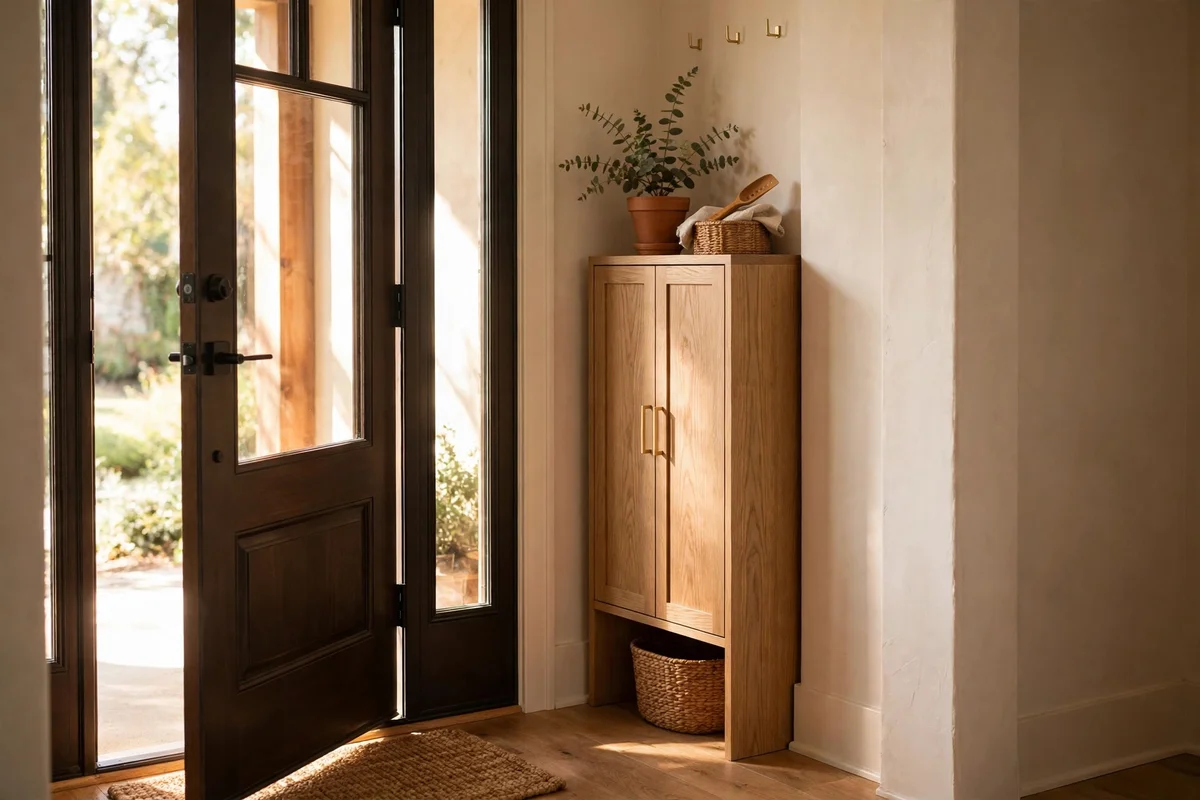
Shoes migrate into hallways and stay there; a slim shoe cabinet 30 cm deep or less, placed in the dead corner beside the front door, contains the drift. Tilt-out cabinets hold three pairs per drawer across two or three drawers, which suits most family entry points, and a flat top becomes a bonus surface for a small plant or the post tray. Ventilation slots or a slight gap behind the cabinet stops the closed-in smell that plagues shoe storage.
Anchor the cabinet to the wall with its anti-tip fixing, especially in homes with small children, and choose a light oak or painted finish that matches the skirting so the cabinet reads as fitted. Budget tilt-out cabinets start around 40 pounds or dollars; mid-range solid wood versions run 80 to 150. The mistake to avoid is an open shoe rack in a narrow hall; open racks collect dust and double the visual clutter, while a closed cabinet keeps the passage calm.
The ideas that change a hallway most are rarely the biggest ones: a runner that hushes the floor, two warm sconces instead of one harsh bulb, a mirror that shares the daylight, and a plant waiting at the end. Each of these costs little and asks for an afternoon at most, yet together they turn a corridor you pass through into a passage you enjoy walking down every day.
If you do nothing else this week, lay the runner. Measure the hall, choose a flatweave that leaves 15 cm of floor each side, and put a 3 mm underlay beneath it. That single change quiets footsteps, warms the floor underfoot and gives every other improvement a calm base to build on. The rest of the list will still be here next weekend, ready when you are.
Frequently Asked Questions
What width runner should I buy for a narrow hallway?
Measure from skirting to skirting and subtract 20 to 30 cm. In a 90 to 120 cm hall, that usually means a 60 to 80 cm wide runner, leaving 10 to 15 cm of bare floor each side. Length should stop 15 to 20 cm short of each end of the passage. Always pair the runner with a thin non-slip underlay so it lies flat and does not curl at the ends.
How do I decorate a hallway in a rental without drilling holes?
Use adhesive hooks rated for 3 to 5 kg for coats and small frames, lean a tall mirror against the wall, and rest larger prints on an adhesive-fixed picture ledge. Plug-in wall lights with fabric cable give warm lighting without wiring changes. Lay the runner on underlay rather than fixing it, and keep all original fixtures in one bag for move-out day.
What is the cheapest way to make a hallway look better?
A flatweave runner plus a litre of heritage paint for the internal doors is the best value pair, often under 80 pounds or dollars total. Next cheapest is swapping a harsh ceiling bulb for a small opal pendant shade and a warm 2700K bulb. Paint alone transforms the space, and both projects finish in a single weekend with basic tools.
How much walking space do I need to leave in a narrow hallway?
Protect a clear lane of at least 90 cm so two people can pass comfortably. In halls under 120 cm wide, that means wall-mounted solutions only: shelves 20 cm deep or less, hooks at 165 to 170 cm, and no furniture that forces hips sideways. Re-measure after adding each item, since several slim pieces can quietly eat the lane away.
Which plants survive in a dark hallway with no windows?
Cast-iron plants and parlour palms tolerate low light well, and a snake plant copes with dim corners too. Water only when the top 3 cm of soil is dry, roughly every 10 to 14 days in winter, and rotate the pot monthly for even growth. Choose one confident 60 to 90 cm plant at the end of the hall rather than several small pots, which read as clutter at a distance.