DIY Projects
21 Painted Hutch Ideas That Become the Heart of the Room
By Anna Wells · · 22 min read
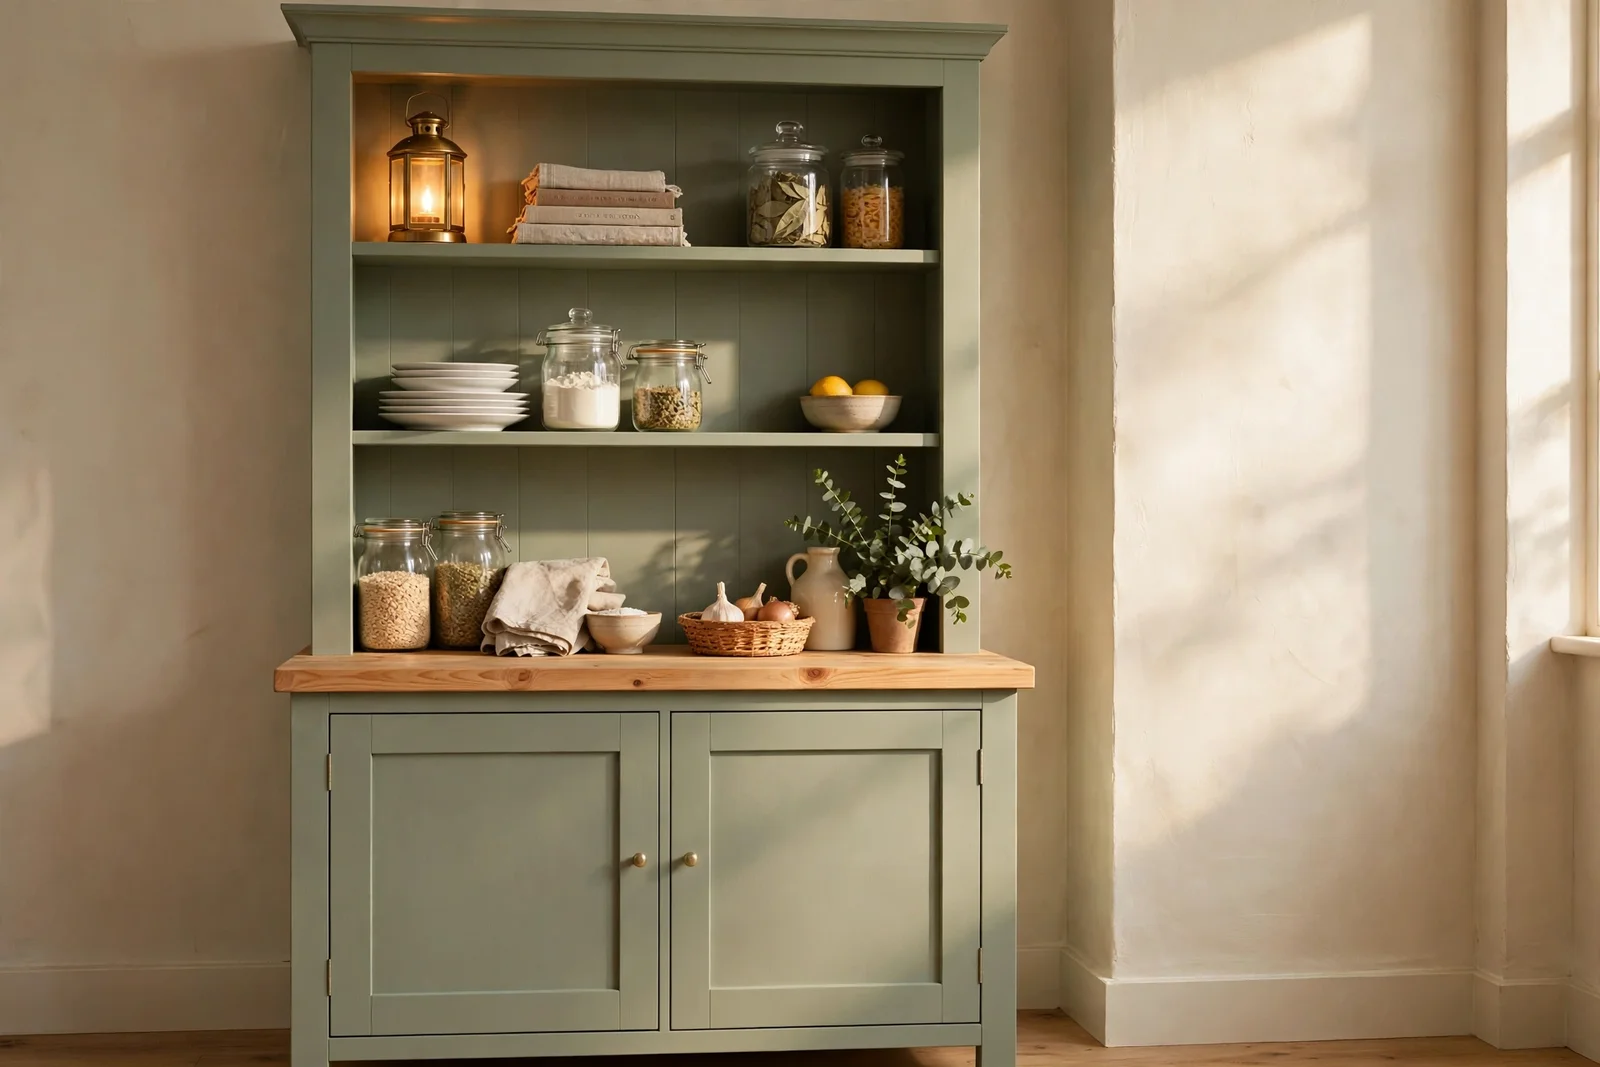
A painted hutch can anchor a whole room. These 21 ideas cover painting, back panel colour, shelf styling, hardware and placement for dining rooms, kitchens and hallways.
Morning light slides across the dining room and catches the painted frame of the hutch before anything else in the room. It stands tall against the wall, shelves lined with plates the family actually uses, the pine worktop glowing softly where breakfast was cleared an hour ago. There is something deeply comforting about a piece of furniture that works this hard and looks this calm at the same time.
A hutch is really two pieces in one, a dresser base with drawers and cupboards below and open shelves above, which makes it one of the most useful things you can put against a wall. Paint transforms a tired unit in a weekend, and the twenty one ideas below walk through every part of the process, from choosing the colour to styling the last shelf.
You will find paint recipes that leave the worktop natural, back panel colours that make plain crockery glow, and shelf styling rules based on simple groups with breathing space. There are also ideas for hardware swaps, soft lighting, and placing a hutch in a dining room, a kitchen corner or a hallway so it earns its place as the heart of the room.
Everything here uses ordinary tools and honest materials, with budget notes and one mistake to avoid alongside each idea. Pick the idea that suits the room you see every day, gather a brush and a free Saturday, and let the hutch take its place at the centre of family life.
1. Paint the Frame in Soft Sage and Leave the Pine Worktop Bare
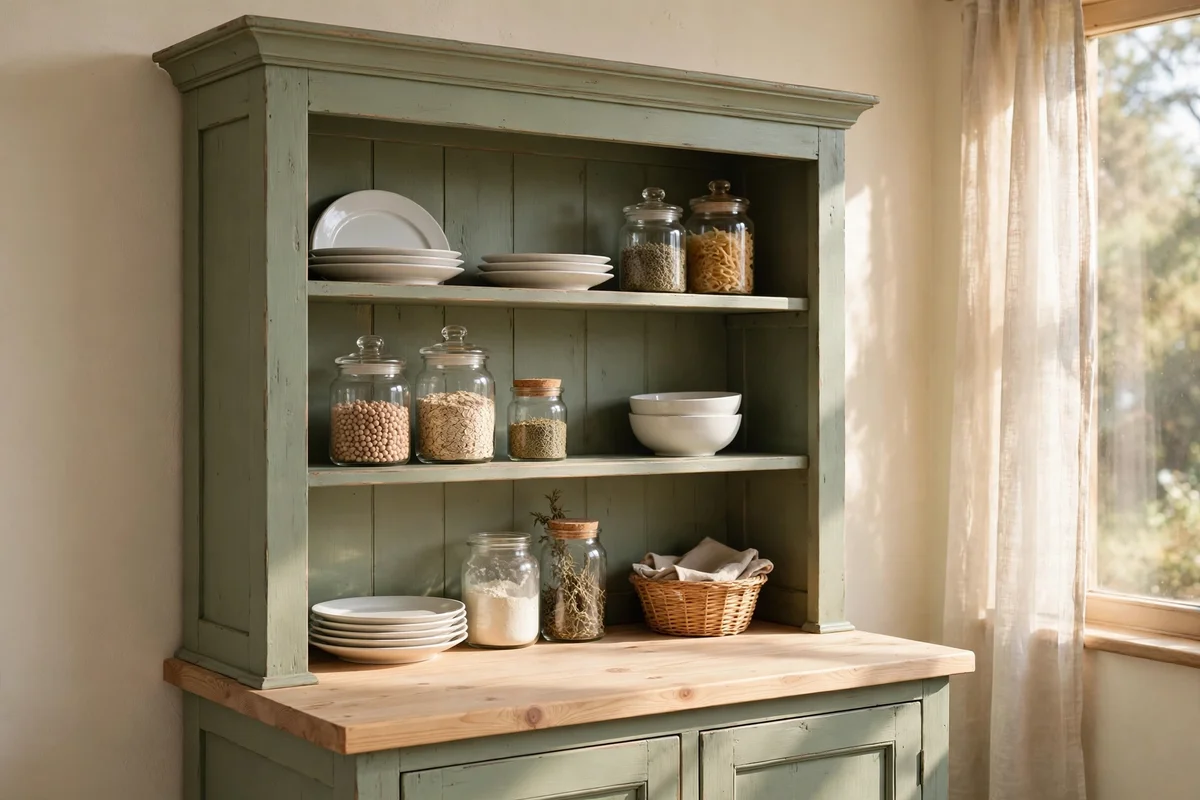
A two-part finish gives a hutch instant character without losing its hardworking surface. Sand the frame lightly with 120-grit paper, wipe away dust with a damp cloth, then apply two thin coats of eggshell or satin furniture paint in soft sage, letting each coat dry four hours. Mask the pine worktop with painter’s tape and leave it bare, sanded smooth and finished with a food-safe oil. The contrast between painted wood and honest grain feels calm and classic.
Budget for one litre of quality furniture paint, which usually covers a full hutch at about 30 to 45 pounds or dollars, plus a small tin of hardwax oil for the top. The common mistake is painting the worktop too, which chips under daily use and shows every plate mark. A bare oiled pine top can be refreshed in twenty minutes with another coat of oil each year. Choose a warm neutral sage rather than a grey-green, since warm undertones sit more comfortably beside oak floors and cream walls.
2. Brush a Deep Teal Into the Back Panel So White Crockery Glows
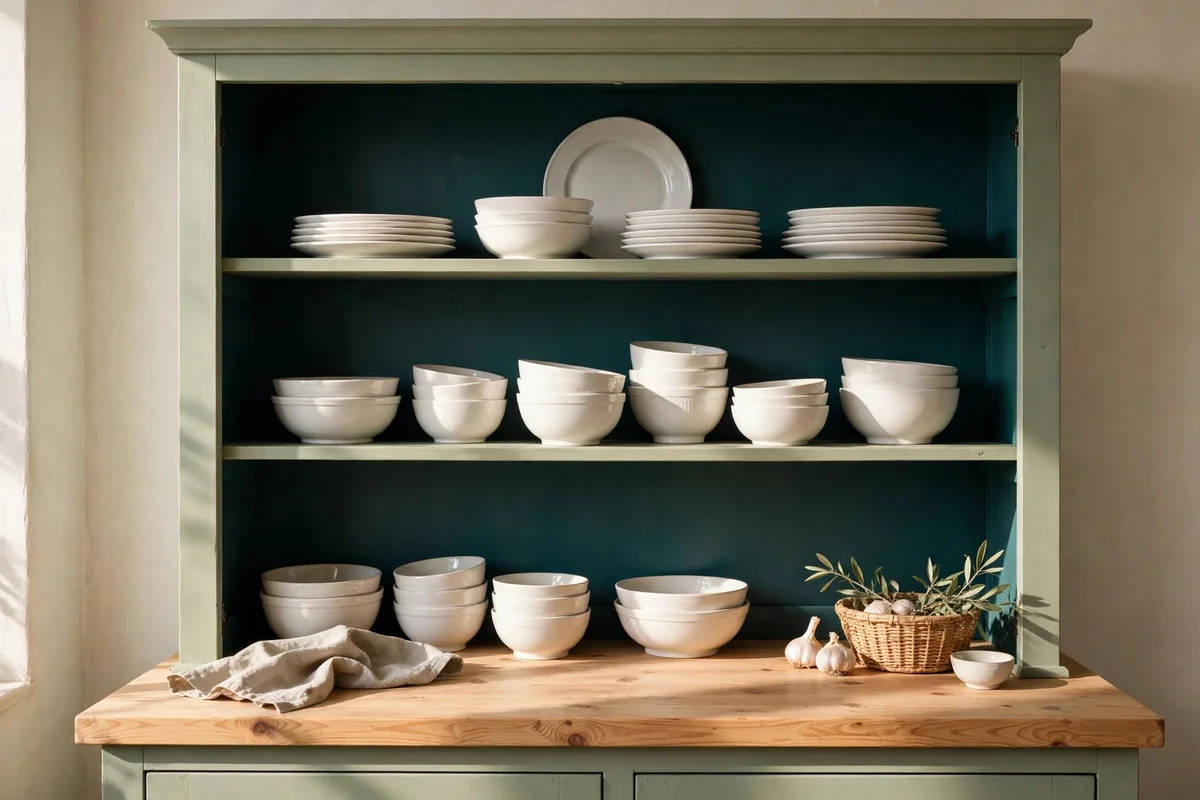
A contrasting back panel turns plain crockery into the star of the display. Remove the shelves if they lift out, then sand the back boards lightly and apply two coats of deep teal with a small foam roller for a streak free finish. Plain white plates, bowls and cups glow against the dark colour as if lit from behind, which means even everyday tableware looks considered. Keep the shelves and frame in the lighter main colour so the depth sits exactly where you want it.
Paint the back panel before the shelves go back in, since cutting in around fixed shelves wastes time and leaves rough edges. A 500 ml sample pot usually covers the back of a standard hutch for about 8 to 12 pounds or dollars, so this is the cheapest high impact move in the whole project. The mistake to avoid is choosing a back panel colour too close to the frame, which reads as a painting error rather than a deliberate contrast. Test your colour on card first and hold it behind a white plate.
3. Stack Everyday Plates in Groups of Three With Breathing Room
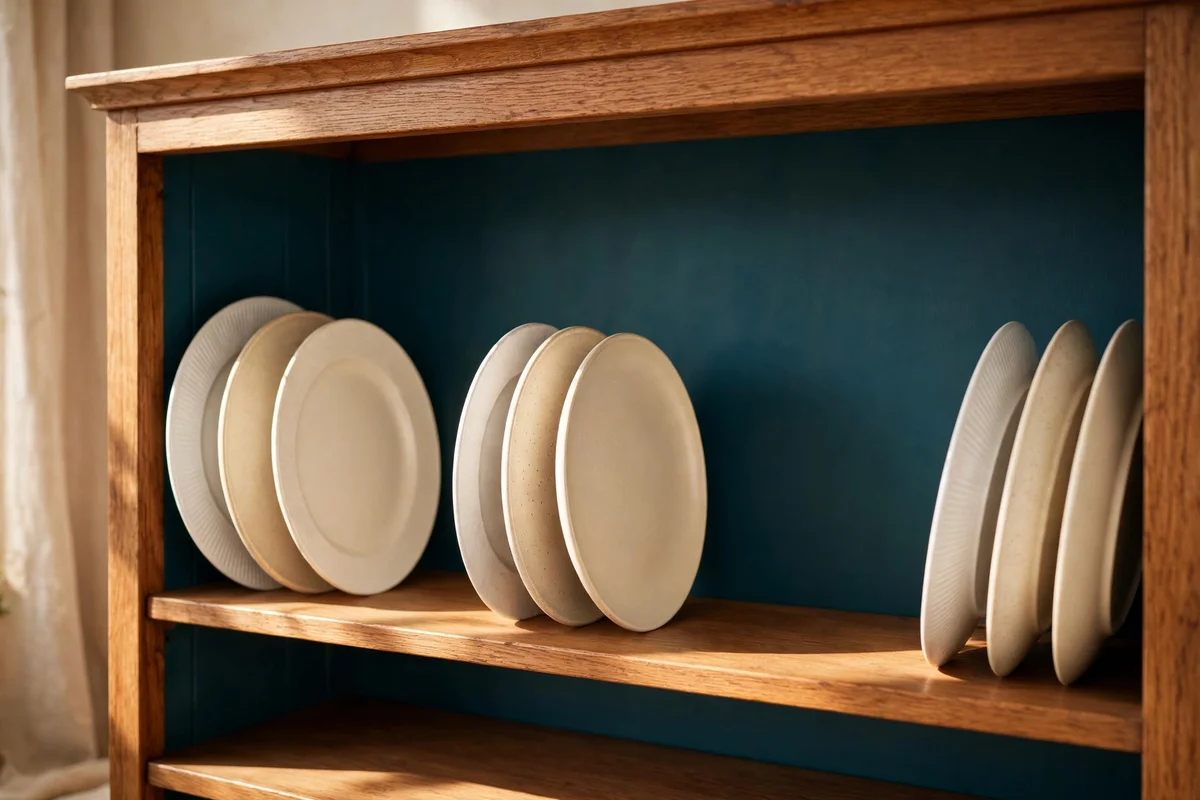
Group plates in threes or fives, since odd numbers feel settled to the eye while even stacks can look stiff. Stand dinner plates upright in a plate groove or lean them against the back panel, largest at the back and smallest in front, with about 5 cm of clear shelf on either side of the group. Mixing two plain patterns, such as white and soft cream, keeps the shelf interesting without turning it into a jumble of competing designs.
Leave one third of every shelf empty, which sounds wasteful but is exactly what lets the groups read as decoration rather than storage. Everyday plates are ideal here because you lift them down and put them back, so the display stays dust free without extra cleaning. The mistake to avoid is filling every centimetre, which makes even pretty plates look crowded and tired. Step back three metres after styling; if the shelf feels busy, remove one item at a time until it calms.
4. Line Glass Storage Jars in Graded Heights Along One Shelf
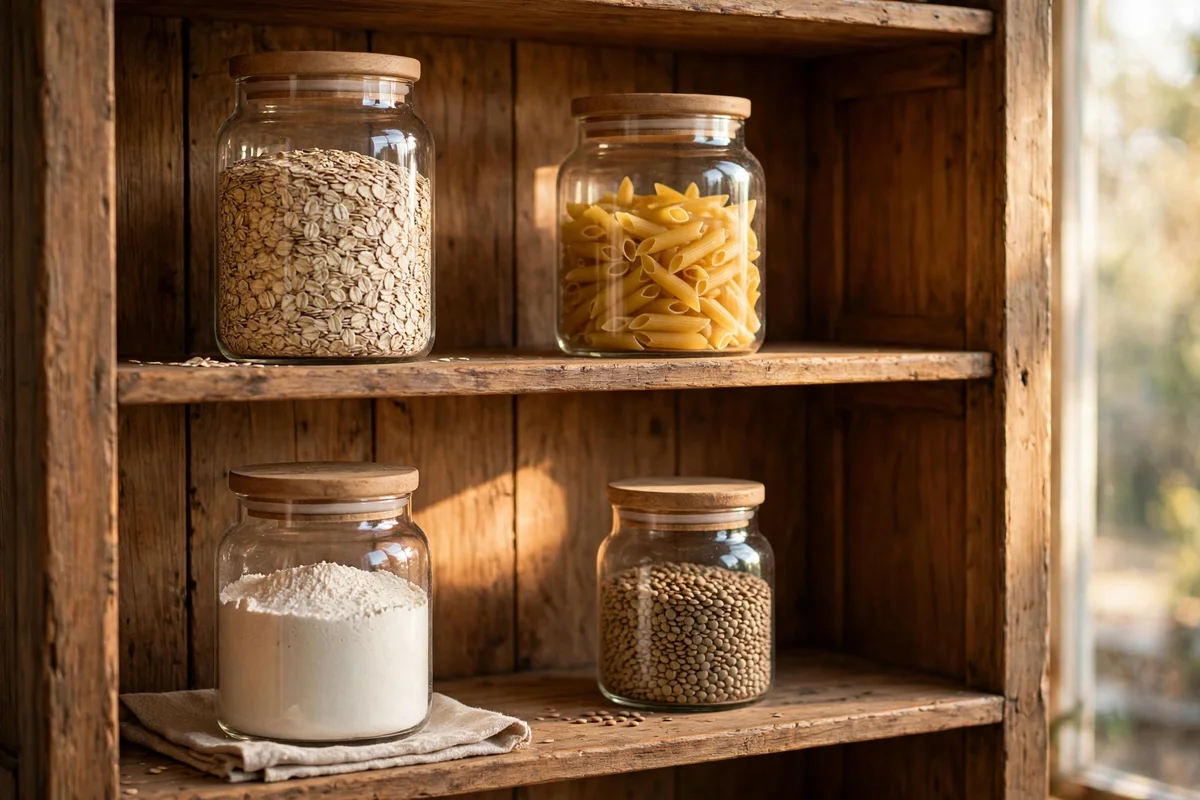
Glass jars full of dry goods turn one shelf into a pantry display that is both useful and pretty. Line five to seven jars along the shelf in graded heights, tallest at the back or at one end, filled with lentils, rice, flour, pasta, oats and dried beans. The layered colours read like a gentle gradient and cost almost nothing, since the contents are things you already buy. Choose jars with simple wooden or glass lids and no printed labels.
Keep jars at least 3 cm apart so each one catches the light separately and you can lift one out without clinking its neighbours. A set of matching jars costs 15 to 30 pounds or dollars from homeware stores, or check charity shops where single jars often sell for a pound each. The mistake to avoid is filling jars to the very brim, which looks tense; fill to about four fifths so the contents settle naturally. Wipe jars with a dry cloth monthly to keep the glass clear.
5. Lean a Small Row of Cookbooks Against a Wooden Bookend
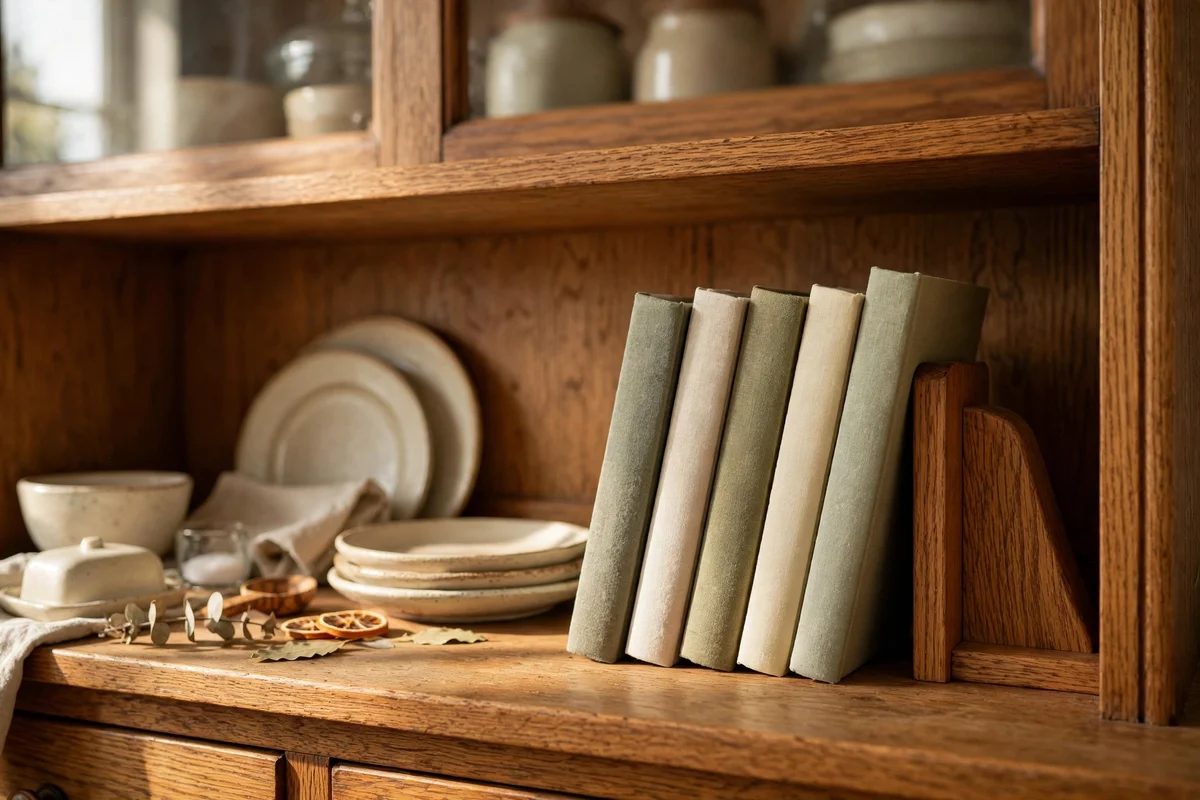
Five or six cookbooks leaned against a solid wooden bookend bring warmth and a lived-in feel to the middle shelf. Choose books with cloth or muted covers in greens, creams and terracotta, and turn any glossy dust jackets inward so the spines read calmly together. The bookend itself can be a simple oak L-shape or a heavy stone piece, and it doubles as a stop that keeps the row from sliding when you pull one book out to cook.
Place the books on the shelf you reach most easily, ideally between 120 and 150 cm from the floor, so cooking from them feels natural rather than decorative. Charity shops sell handsome old cookbooks for one or two pounds each, and a plain wooden bookend costs under 15 pounds or dollars new. The mistake to avoid is stacking books flat in tall piles, which hides the spines and tempts you to pile more on top until the shelf sags. Lean, do not stack, and leave 10 cm of clear shelf beyond the bookend.
6. Place a Brass Candle Lantern on the Top Shelf for Evening Light
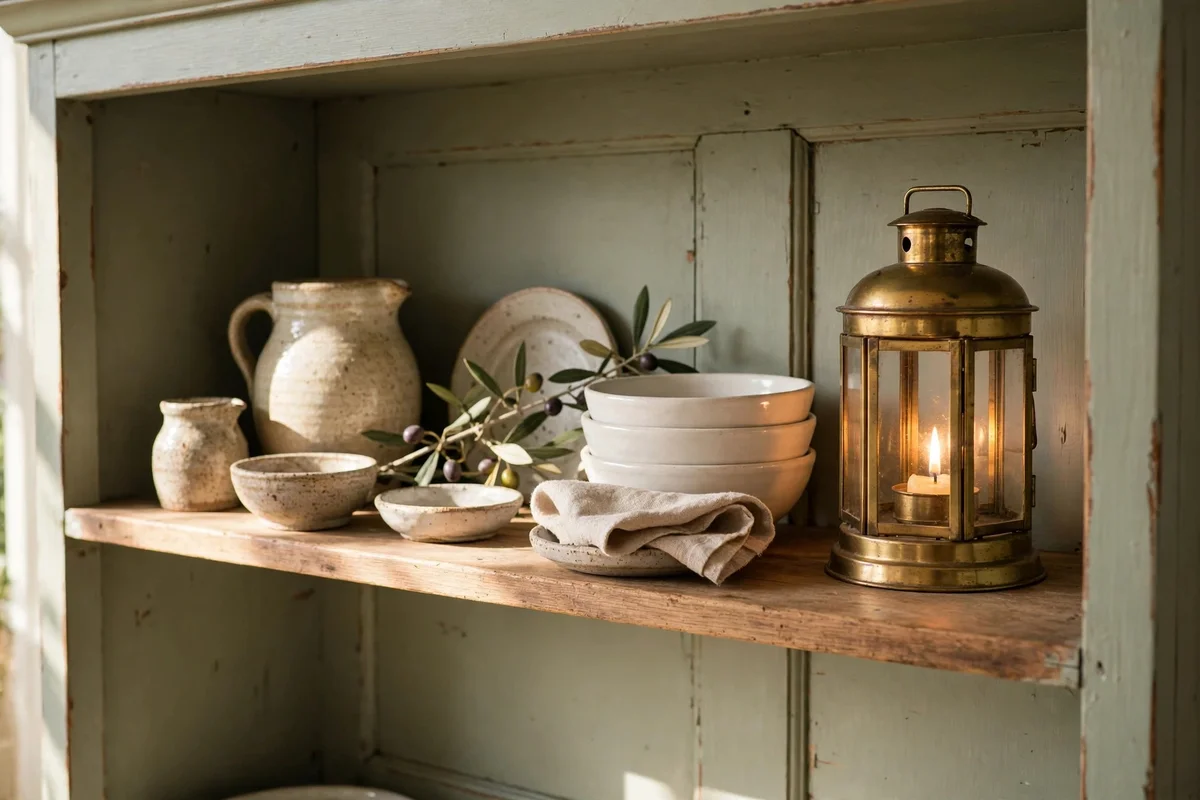
One small brass lantern with a glass panel and a real or LED candle inside gives the top shelf a gentle evening glow. Position it near one end of the shelf, about 20 cm from the side, so the light washes across the crockery without hiding anything behind it. In daylight the brass reads as a warm accent; after sunset it becomes the quiet focal point of the whole room. Choose a lantern no taller than 25 cm so it never crowds the shelf above or the ceiling line.
An LED candle with a timer costs 8 to 15 pounds or dollars and switches itself on each evening, which suits families who want the glow without remembering to light anything. If you prefer a real flame, keep the lantern away from the shelf edge and never leave it burning unattended. The mistake to avoid is placing two or three lanterns side by side, which turns a calm accent into clutter; one lantern, one glow, is the whole idea. Dust the glass monthly with a soft cloth.
7. Swap Tired Knobs for Aged Brass Cup Pulls and Round Knobs
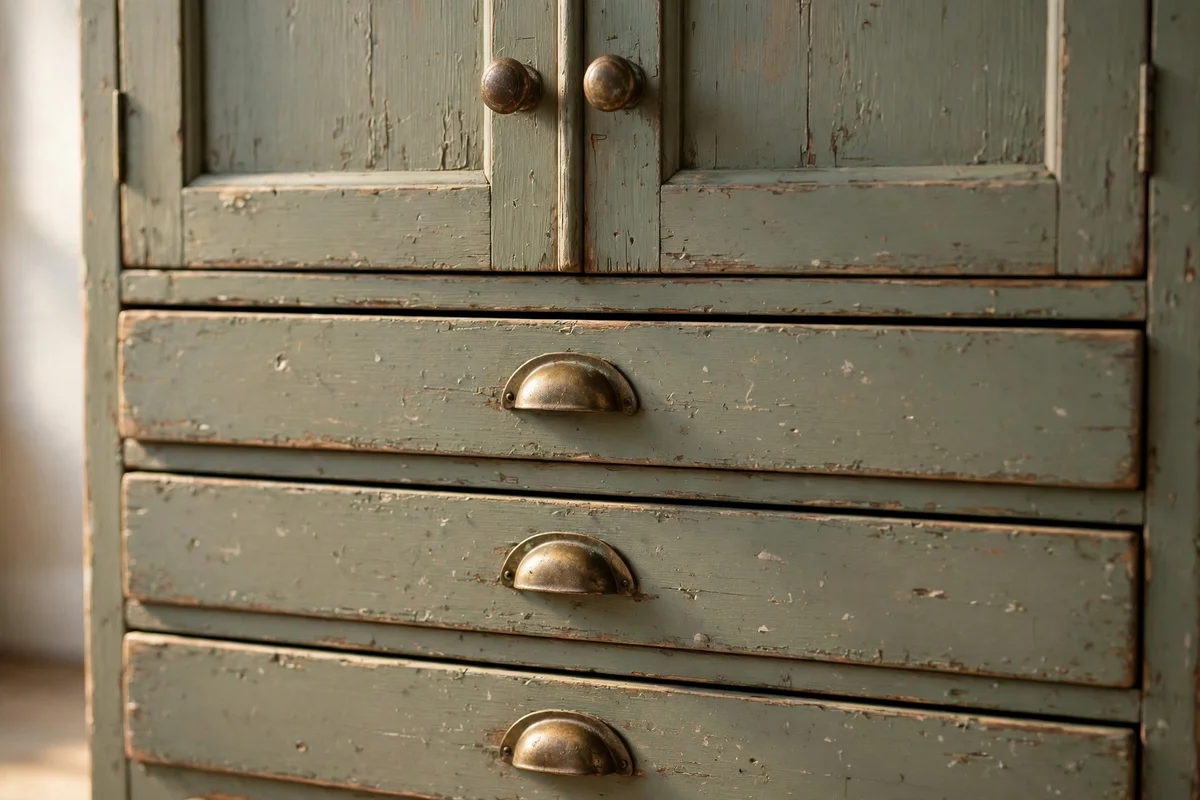
New hardware is the fastest transformation in this whole list, taking about thirty minutes with nothing but a screwdriver. Fit aged brass cup pulls on the drawers and matching round knobs on the cupboard doors, keeping one finish throughout so the piece reads as a set. Measure the existing hole centres first, since most cup pulls come in standard 76 mm or 96 mm spacings, and choose pulls that cover the old holes exactly to avoid filling and redrilling.
A full set of pulls and knobs for a standard hutch usually costs 25 to 60 pounds or dollars, with solid brass sitting at the top of that range and brass finished zinc below it. The mistake to avoid is mixing three or four different finishes across the piece, which makes even new hardware look accidental. One metal, one style family, carried through every drawer and door. Keep the old knobs in a labelled bag inside a drawer; they suit the piece if you ever repaint it a different colour.
8. Anchor the Dining Room Wall With a Full Height Painted Hutch
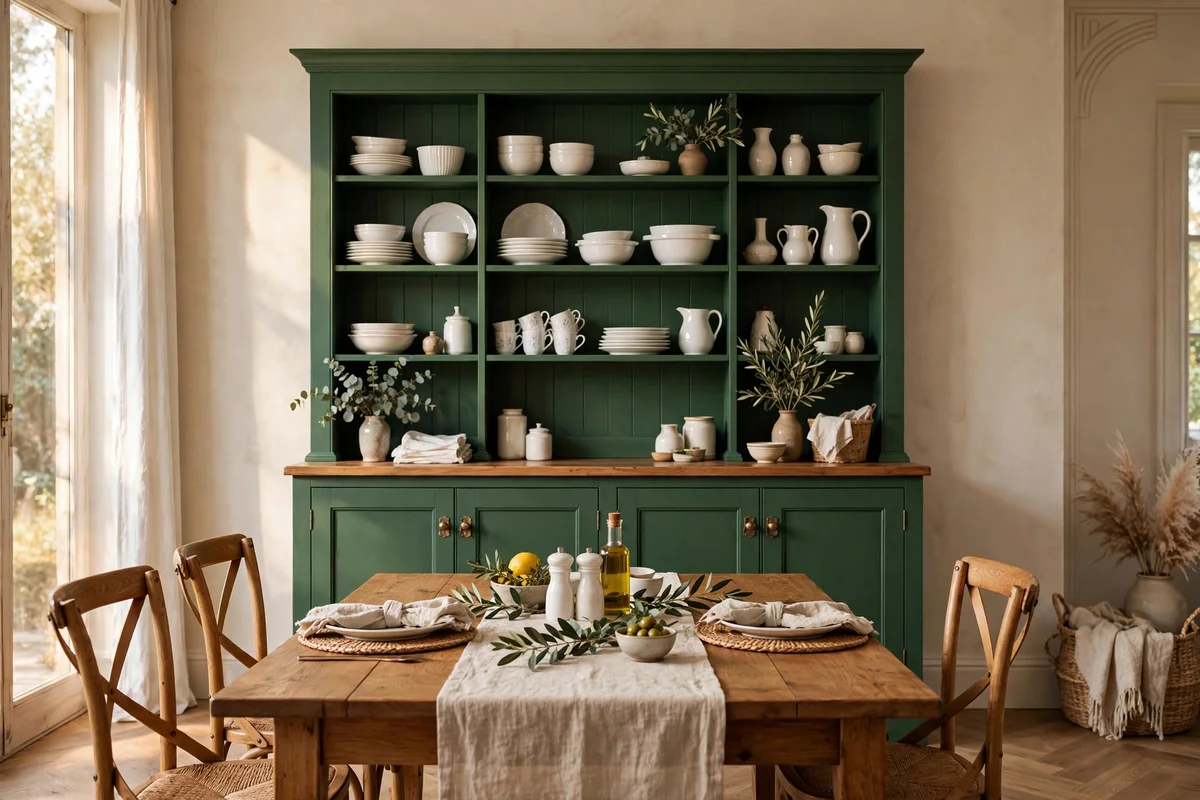
A hutch between 180 and 200 cm tall fills the wall behind a dining table beautifully and gives the room its natural centre. Centre it on the longest clear wall, leaving at least 75 cm between the table edge and the hutch front so chairs pull out comfortably. Paint it in the room’s deepest accent colour, such as forest green or inky blue, so it anchors the space the way a sideboard alone never quite manages.
Use the base cupboards for table linens, serving dishes and the good cutlery, and keep the shelves for the everyday crockery the family reaches for at mealtimes. A dining room hutch earns its keep at gatherings, holding extra plates and a stack of napkins within arm’s reach of the table. The mistake to avoid is pushing it against a wall shared with a doorway, where the open doors block foot traffic. Fix it to the wall with brackets, since a loaded tall hutch is heavy and can tip.
9. Tuck a Painted Hutch Into a Narrow Hallway Alcove
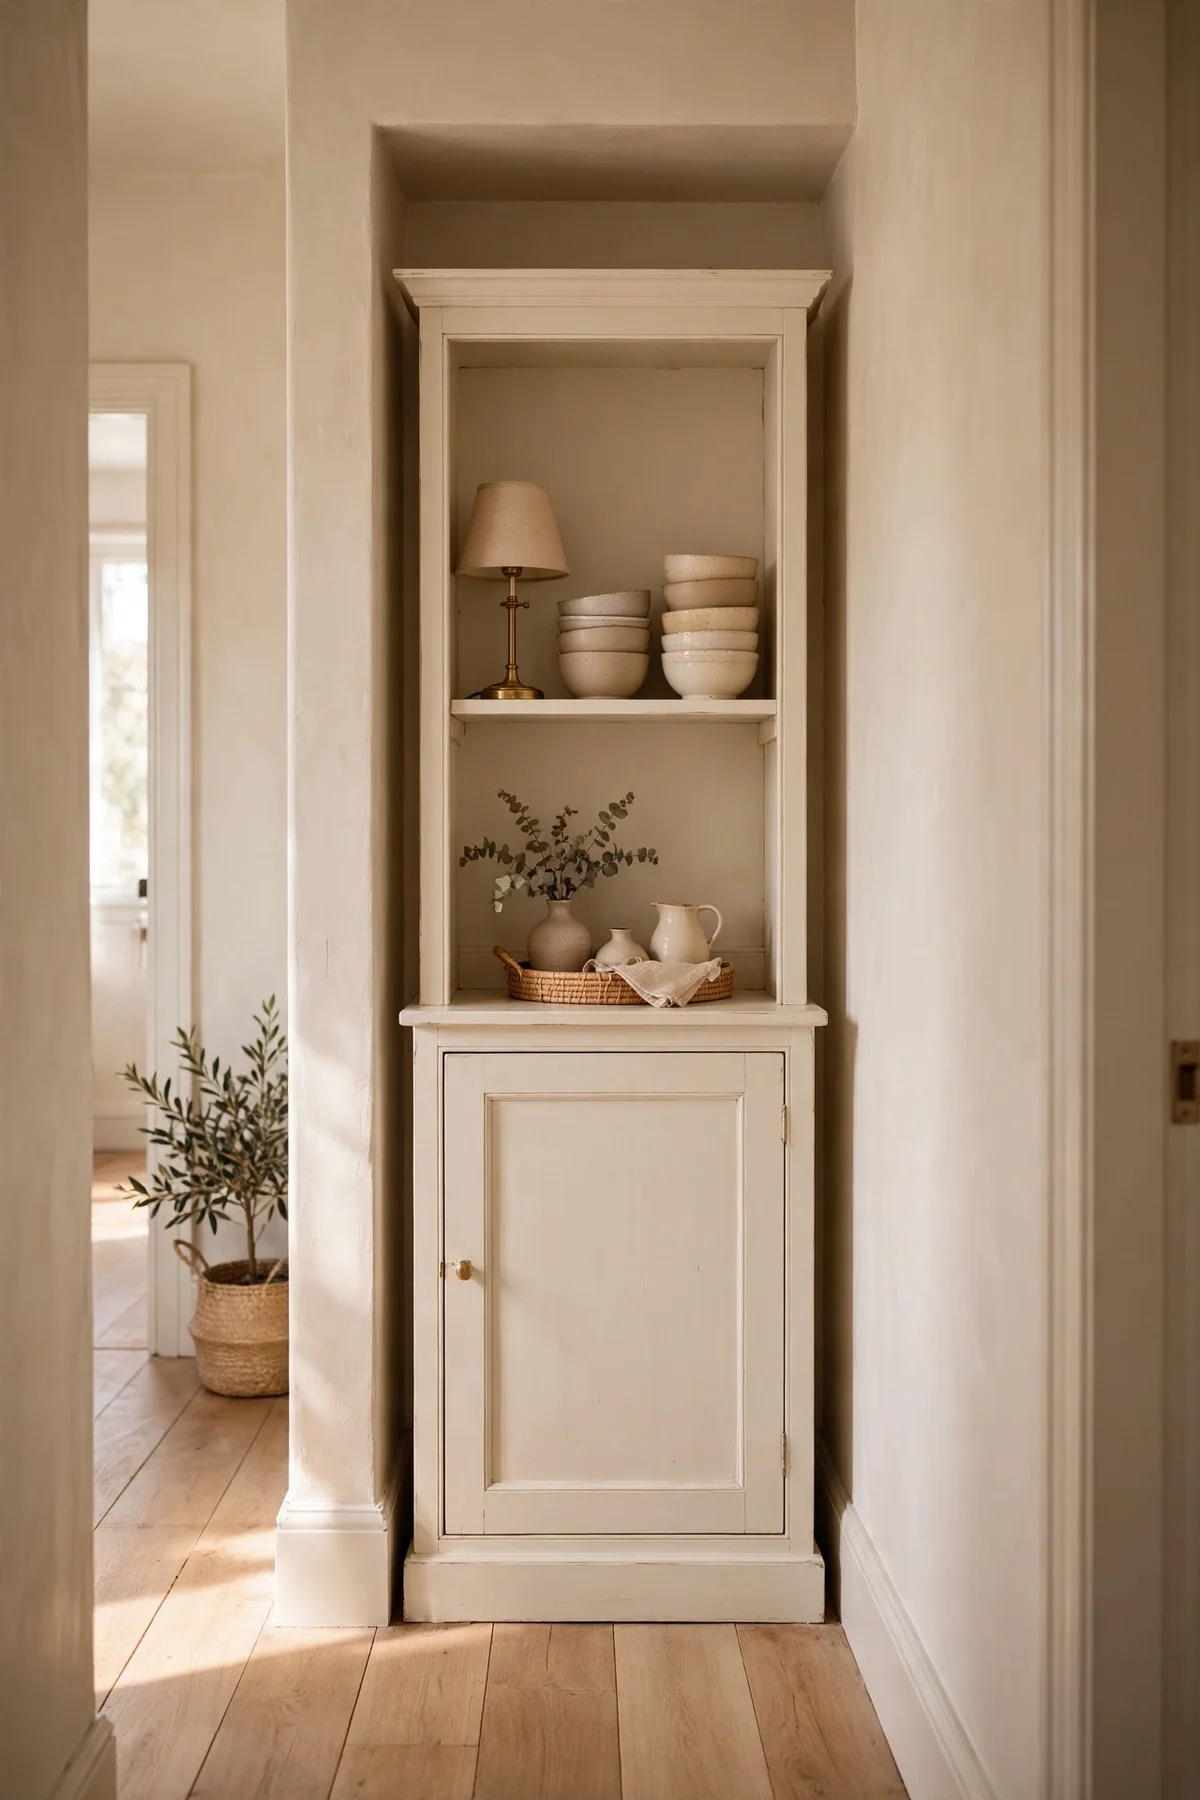
A shallow hutch, no deeper than 35 cm, turns a hallway alcove from dead space into the most welcoming corner of the house. Paint it the same pale colour as the walls so it reads as built in, then style just the top two shelves with a small lamp, a stack of bowls and one trailing plant in a clay pot. The base cupboards swallow shoes, scarves and spare keys, keeping the hallway clear and calm for everyone coming through the door.
Keep at least 90 cm of clear walkway in front of the hutch so two people can pass without turning sideways. A slim second-hand hutch often costs 40 to 80 pounds or dollars, and one litre of pale paint finishes it in a weekend. The mistake to avoid is overfilling the shelves, since a hallway is seen in passing and clutter reads instantly; three calm objects per shelf is plenty. Fix the unit to the wall with anti-tip brackets, because narrow tall furniture topples more easily than wide pieces.
10. Style the Middle Shelf With a Pitcher, Bowls and a Wooden Tray
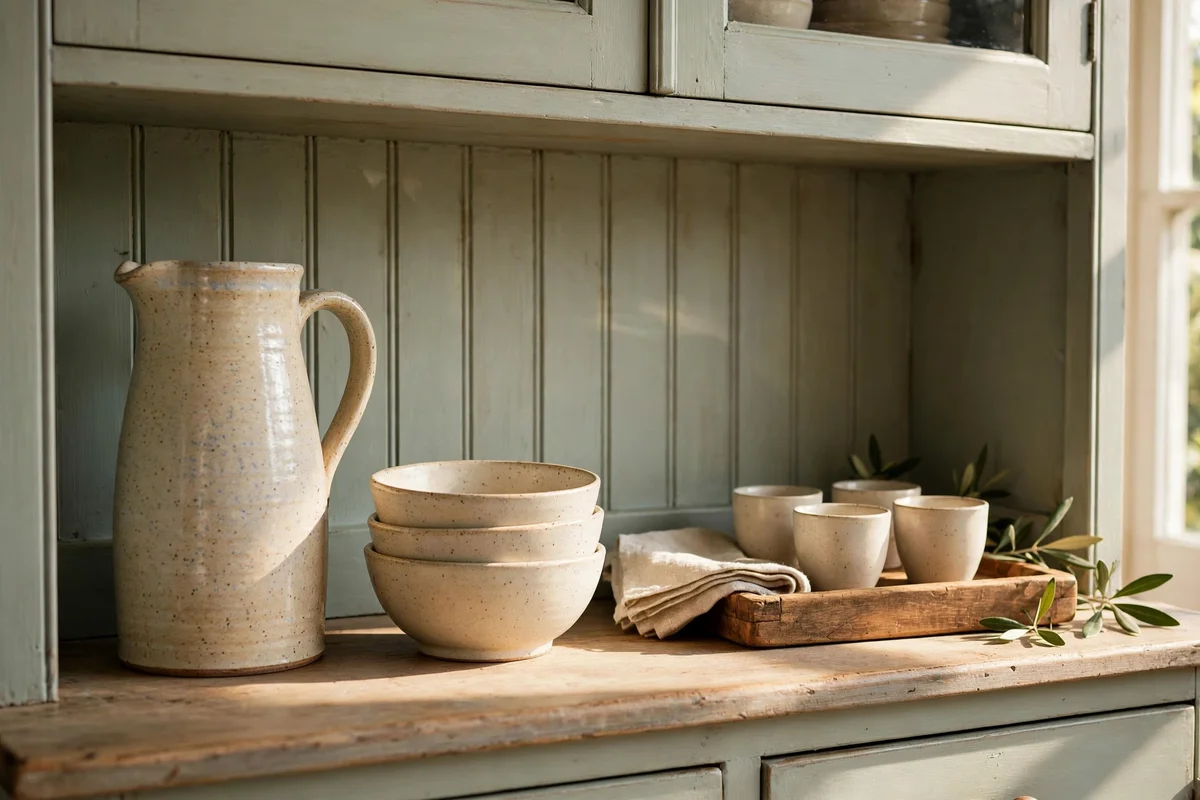
The middle shelf sits at eye level, so give it one composed group rather than scattered singles. Set a tall ceramic pitcher at the back, three or four stacked bowls in front of it, and a shallow wooden tray to one side holding two small cups. This triangle of shapes, tall, round, flat, feels balanced from across the room. Keep the palette to two colours plus the wood tone, for example cream ceramics with a walnut tray, so the group reads as one calm picture.
A pitcher between 25 and 30 cm tall suits a standard 35 cm shelf with room to spare, and a tray about 30 cm wide grounds the group without spilling past it. Charity shops and kitchen sales turn up sturdy pitchers for 5 to 12 pounds or dollars. The mistake to avoid is lining objects up in a straight row like soldiers, which flattens the display; pull the bowls slightly forward and angle the tray a few degrees so the group has gentle depth. Dust the shelf behind the group every few weeks.
11. Paint the Cupboard Doors in Two Tones With a Lighter Interior
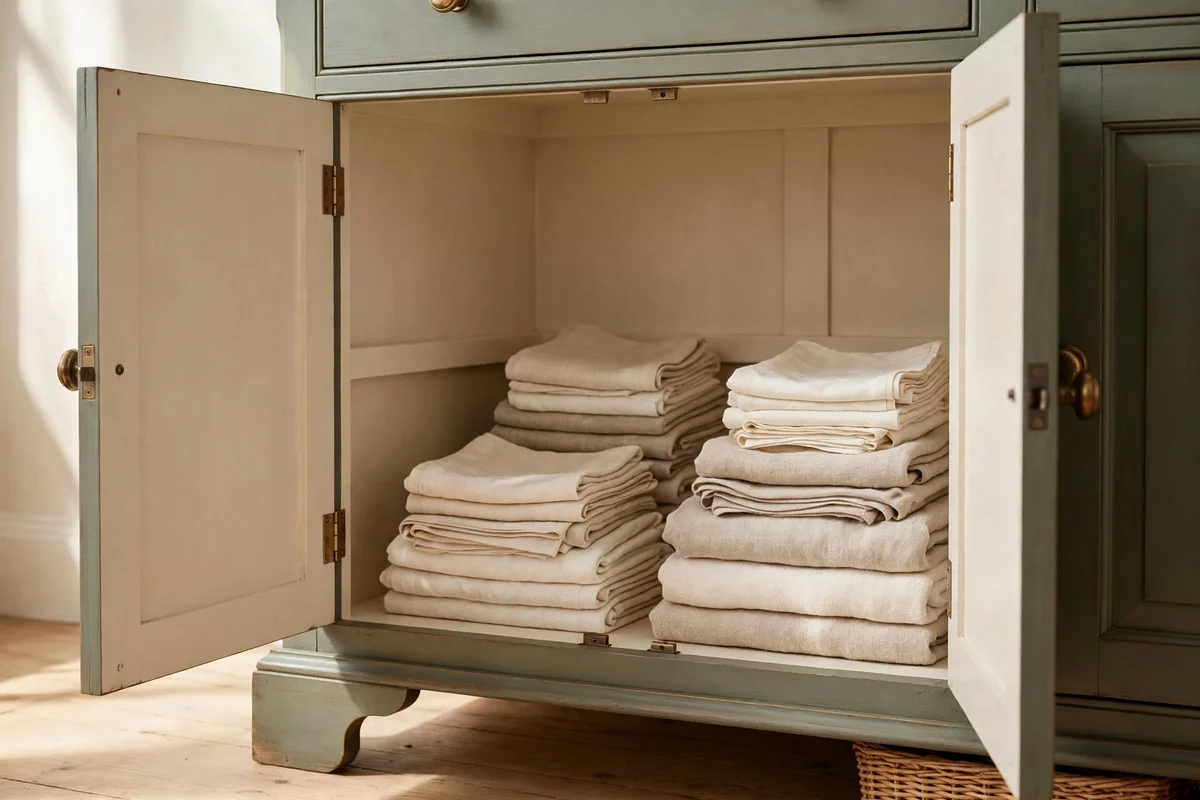
Two-tone doors add quiet craftsmanship to the base of the hutch. Paint the door fronts in your main colour, then paint the inside faces and the interior of the cupboards a lighter tone, such as warm cream inside sage doors or pale oat inside forest green. The surprise of light inside dark doors makes every opening feel like a small reveal. Remove the doors to paint them flat on trestles, which gives a smoother finish than painting them hanging.
Label each door and hinge with masking tape as you remove them, since doors that look identical often hang slightly differently and swapping them causes rubbing. A small tin of the lighter colour costs 10 to 18 pounds or dollars and easily covers the interiors of a standard base. The mistake to avoid is painting the interiors the same dark colour as the fronts, which turns the cupboards into shadowy holes where linens disappear. A light interior also shows dust sooner, which is a quiet reminder to tidy.
12. Add a Plate Groove to Each Shelf for Upright Plate Display
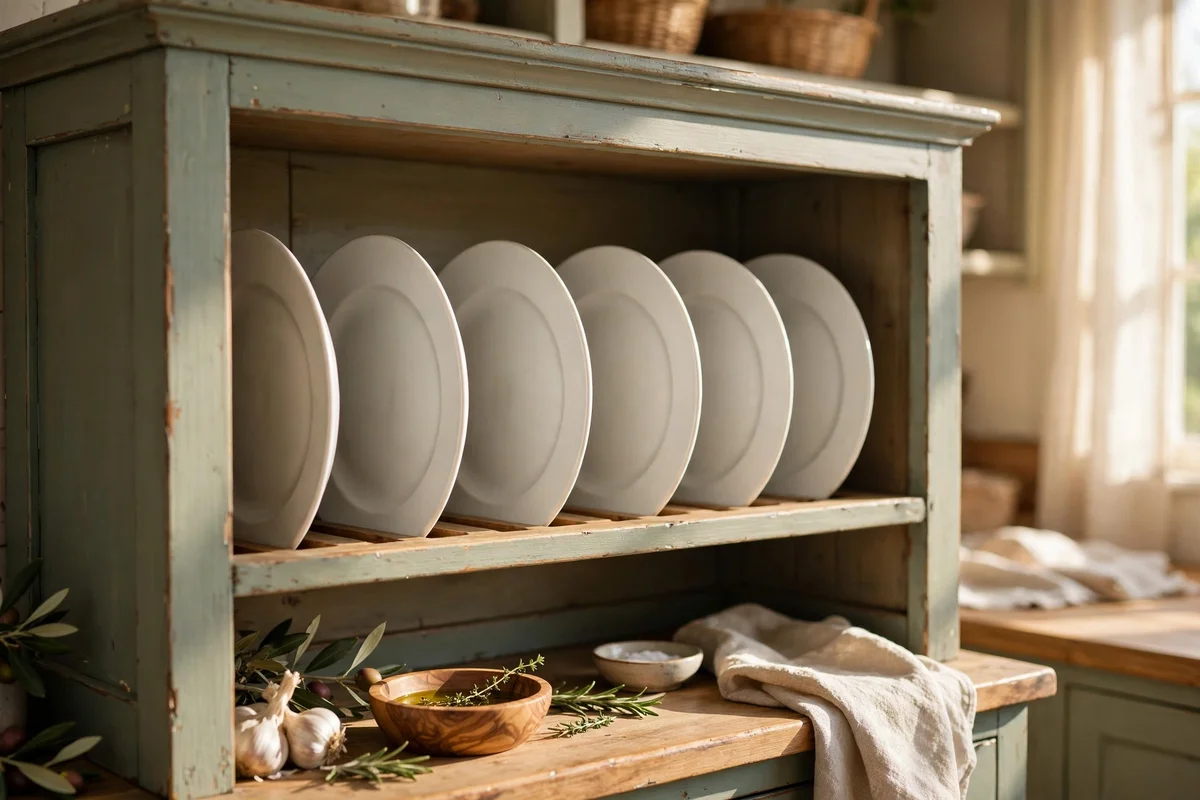
A plate groove is a shallow channel routed or fixed along the front of each shelf that holds plates upright without them sliding forward. You can buy self-adhesive plate groove strips for 8 to 15 pounds or dollars per shelf, or ask a joiner to rout a 12 mm channel when the shelves are out for painting. Plates sit at a gentle backward lean of about 10 degrees, which shows their faces fully while keeping them completely stable.
Fit the groove 5 to 7 cm back from the shelf edge so plates never overhang, and space plates 4 to 5 cm apart so each rim is visible. This works best on shelves at least 30 cm deep with 35 cm of clear height above, which suits dinner plates up to 28 cm across. The mistake to avoid is standing heavy chargers or platters in a groove meant for side plates, since the extra weight can tip the whole row. Keep large serving pieces stacked flat lower down.
13. Keep One Shelf Nearly Empty So the Whole Display Breathes
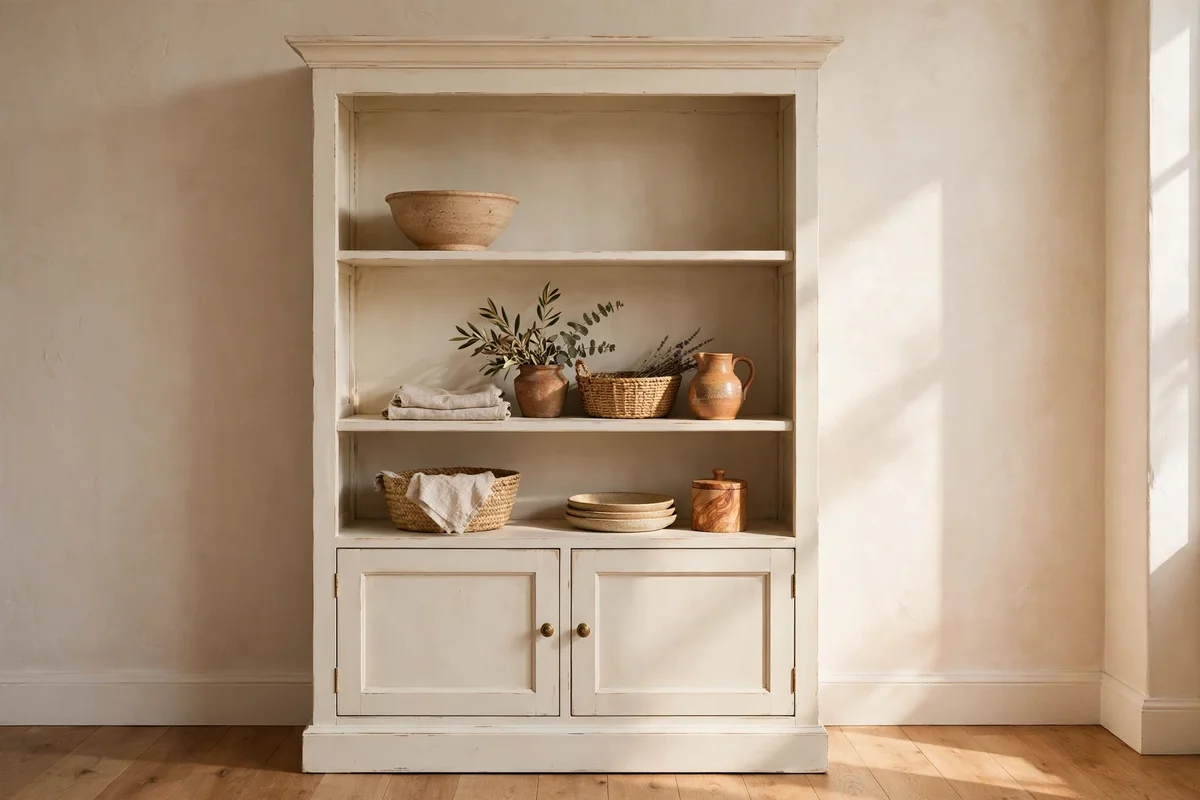
The bravest styling move is also the simplest: leave one shelf almost empty. Choose the shelf just above eye level and place a single object on it, perhaps one wide bowl or a small stack of two plates, set slightly off centre with 30 cm or more of clear space around it. The emptiness gives the busier shelves below it room to be appreciated, and the whole hutch feels more expensive and more calm at once.
This costs nothing and takes two minutes, which makes it the best first styling change to try. If an empty shelf feels wrong at first, live with it for a week; most people find they stop noticing the gap and start noticing how much better the other shelves look. The mistake to avoid is treating the empty shelf as a parking spot for mail, keys and oddments, which ruins the effect within days. Guard the space the way you would guard a clear kitchen worktop.
14. Drape a Folded Linen Runner Over the Worktop Edge
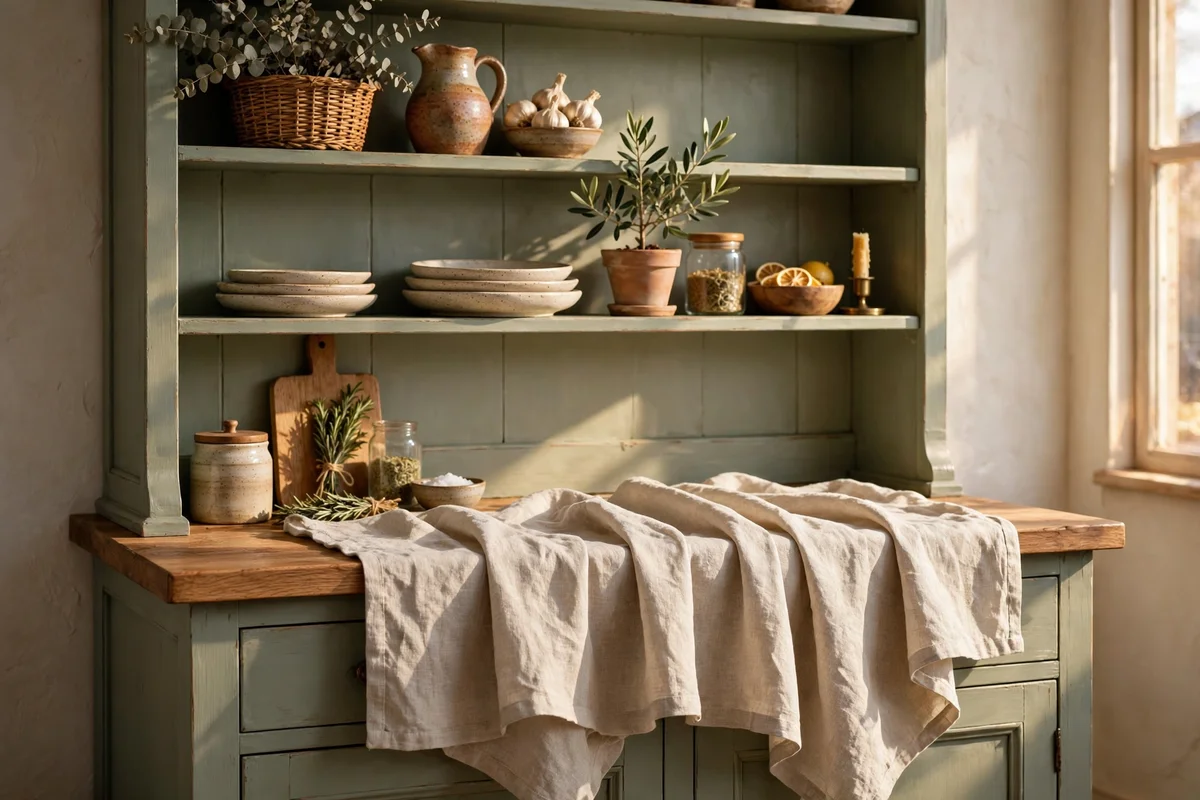
A folded linen runner softens the hard line where the worktop meets the room. Choose natural flax linen about 35 cm wide and 140 cm long, fold it in half lengthways, and lay it so 15 to 20 cm hangs over the front edge of the worktop. The fabric adds texture against the painted wood and protects the oiled pine from hot dishes. Plain weave or a narrow woven stripe in oat or stone suits almost every hutch colour.
A good linen runner costs 20 to 40 pounds or dollars, or make one from a metre and a half of linen fabric with a simple hemmed edge. Shake it out weekly and wash it monthly on a gentle cycle, since a worktop runner collects crumbs faster than a table one. The mistake to avoid is using a runner so long that it pools on the floor or drapes over drawer fronts, which blocks the drawers and looks untidy. Keep it clear of the hardware by at least 10 cm.
15. Fill the Lower Cupboards With Baskets for Table Linens
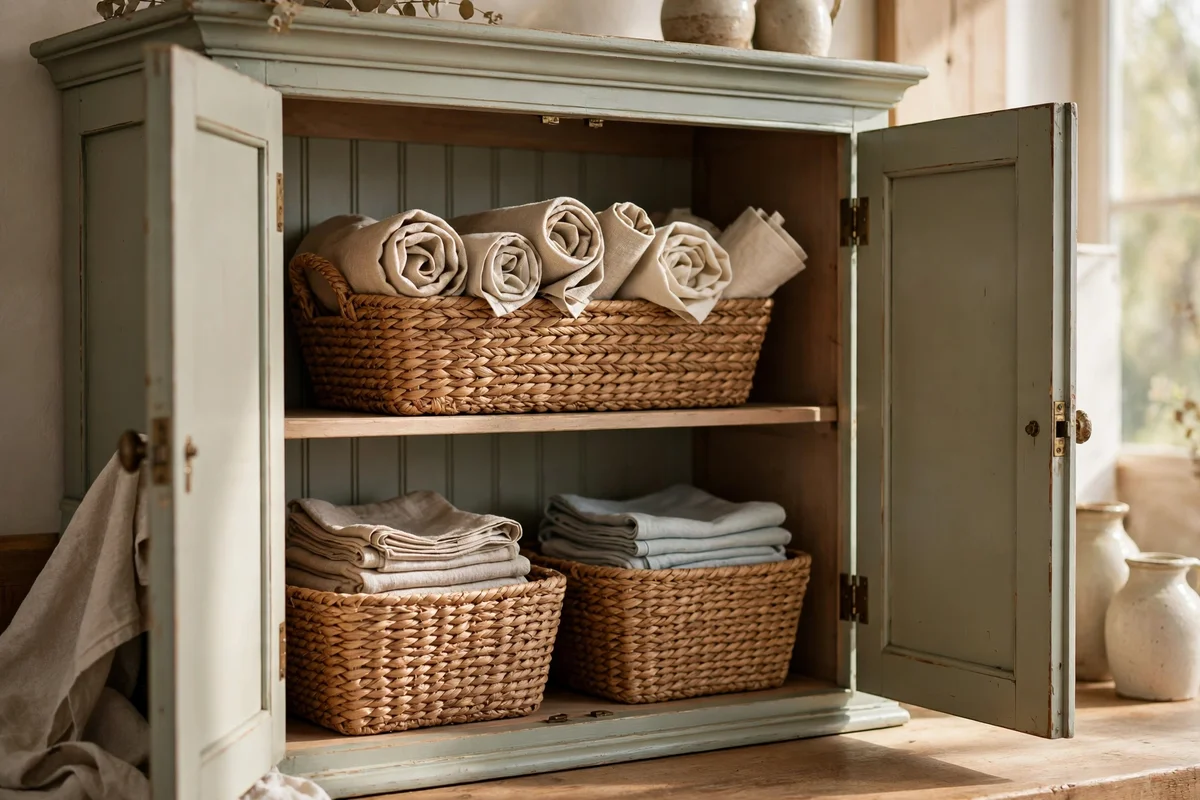
Woven baskets turn the deep lower cupboards into tidy zones for tablecloths, napkins and placemats. Measure the inside of each cupboard first, then choose baskets that leave 2 to 3 cm of clearance on every side so they slide in and out without scraping the fresh paint. Two baskets per cupboard usually works, one for everyday linens and one for the good tablecloths kept for gatherings. Seagrass and willow both suit painted wood beautifully.
Sturdy storage baskets cost 12 to 25 pounds or dollars each, and rectangular shapes use cupboard space far better than round ones. Roll tablecloths rather than folding them to prevent hard creases, and stand napkins upright in a smaller basket like files so you can see every colour at a glance. The mistake to avoid is buying baskets before measuring, since a basket that wedges in tightly will mark the painted interior within weeks. Measure twice, buy once, and leave the tape measure in the drawer.
16. Hang Two Small Dried Herb Wreaths on the Cupboard Doors
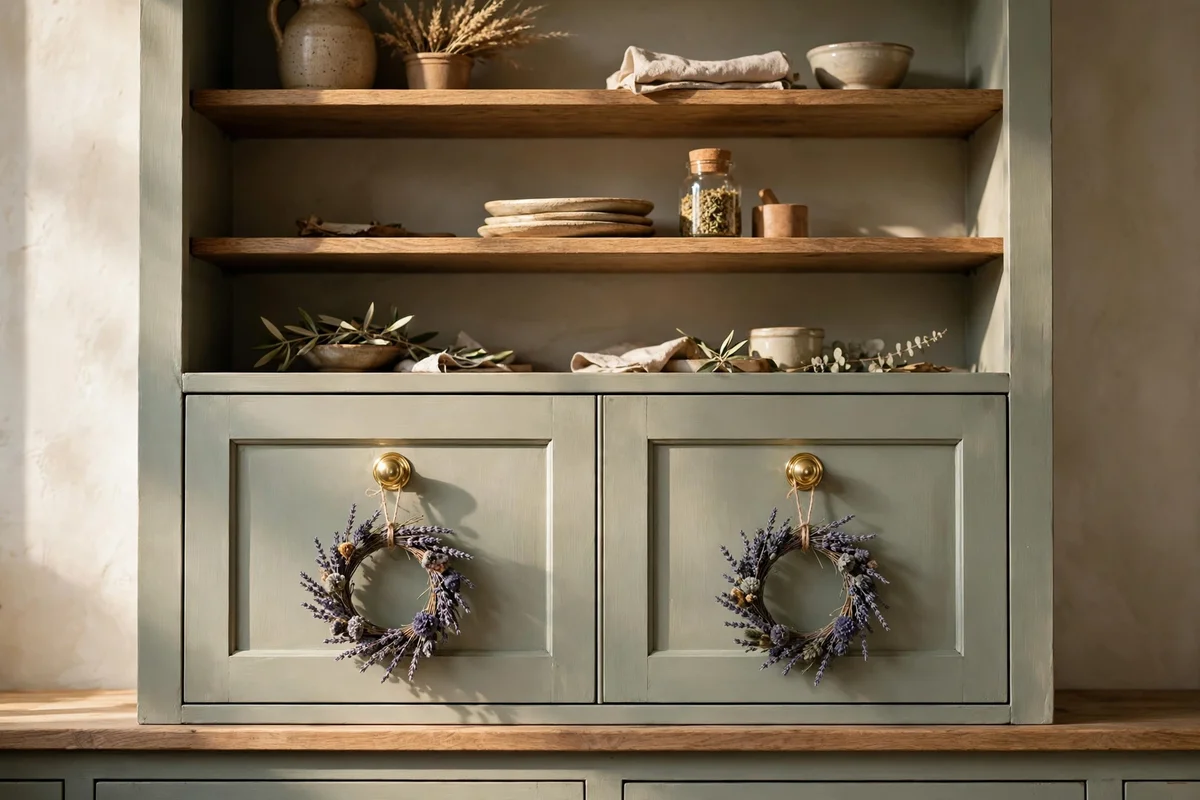
Two small wreaths of dried lavender, rosemary or wheat hang beautifully from the cupboard door knobs and add a natural note to the painted wood. Keep each wreath 15 to 20 cm across so it never overwhelms the door, and hang it from a short loop of natural twine tied to the knob. The dried herbs scent the room gently for months and cost almost nothing if you grow them or buy them at a market in late summer.
Ready-made dried herb wreaths cost 10 to 20 pounds or dollars each from craft markets, and they last a year or more indoors away from direct sun. Hang them only on doors you open rarely, since a wreath on a daily-use door gets crushed within weeks. The mistake to avoid is hanging fresh herb bundles, which drop leaves and moisture onto the paint as they dry; always dry the herbs fully first, hanging them upside down in a dark airy spot for two to three weeks.
17. Set the Hutch in the Kitchen as a Tea and Refreshment Station
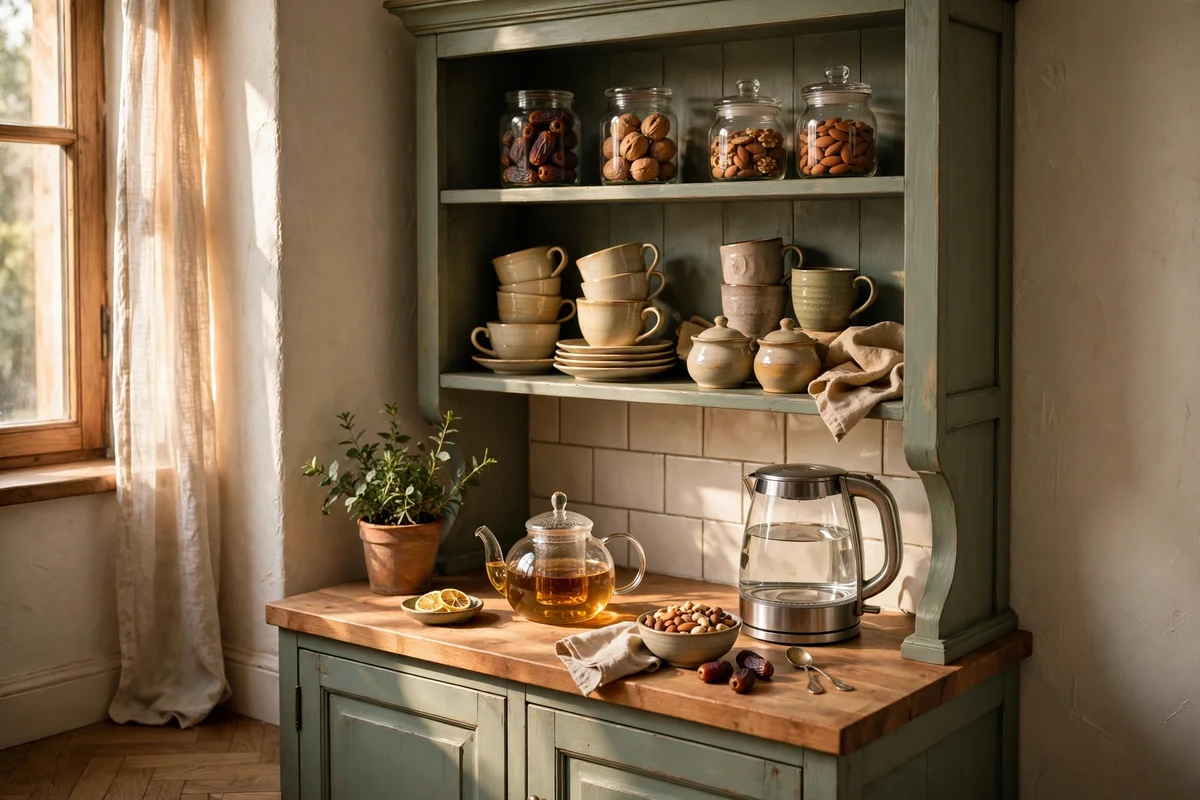
A painted hutch in a kitchen corner makes a natural tea and refreshment station for the family. Keep the kettle and a glass teapot on the worktop, arrange cups and small plates on the middle shelf, and fill the lower cupboards with trays, juice carafes and jars of dates and nuts for guests. Painting the frame in a washable satin finish matters here, since steam and splashes reach further in a kitchen than in a dining room.
Leave 60 cm of clear worktop beside the kettle for pouring and setting down hot pots, and keep everyday cups on the lowest shelf so children can reach them safely. A washable satin paint wipes clean with a damp cloth, and a runner or tray under the kettle catches drips before they reach the oiled wood. The mistake to avoid is placing the hutch right beside the cooker, where heat and grease dull the paint within months; keep at least one metre of distance from direct cooking heat.
18. Paint Inside Glass Fronted Doors a Warm Cream for Extra Depth
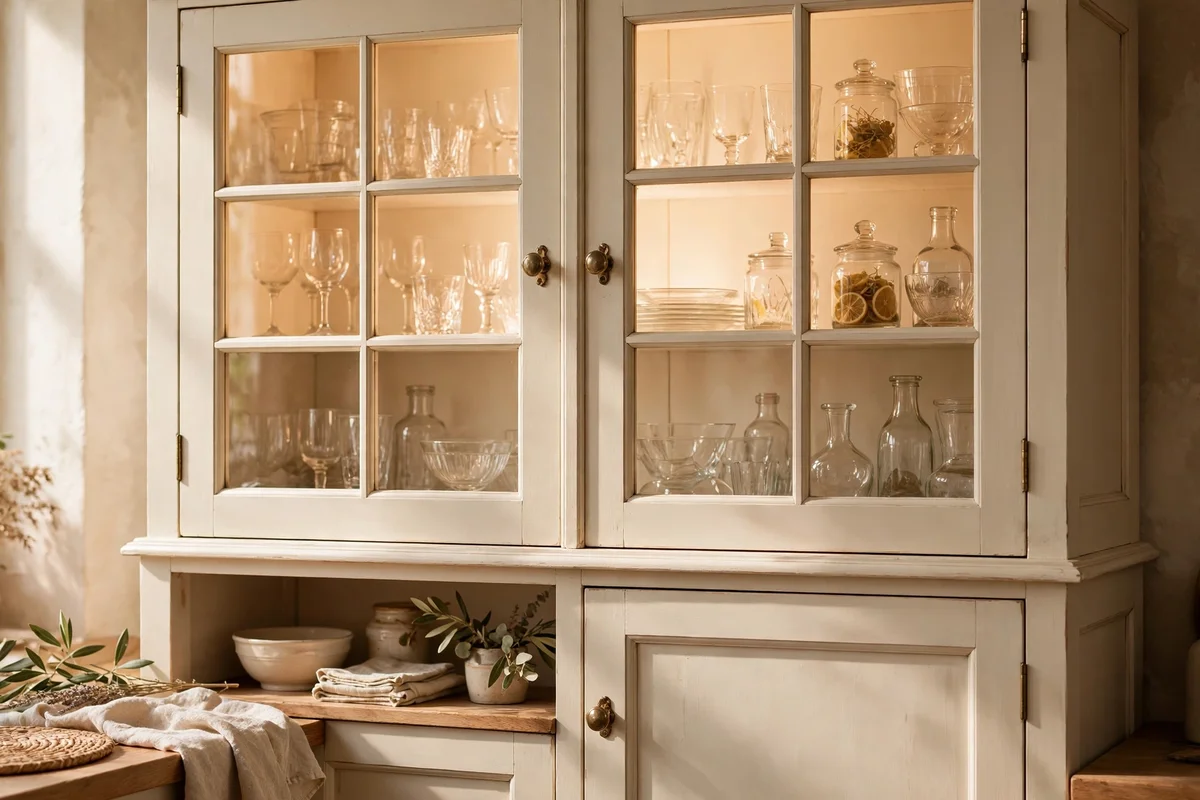
If your hutch has glass fronted upper doors, painting the inside back a warm cream adds gentle depth without the drama of a dark panel. The cream reflects daylight into the cabinet so glasses and pale crockery glow softly, and it flatters the wood tones of the frame around it. Paint the interior before refitting the glass, using two thin coats of satin for a wipeable surface that stands up to fingerprints around the door edges.
Warm cream works behind almost any frame colour, from sage to charcoal, which makes it the safest back panel choice if you are unsure. A 500 ml tin covers the interior of a glazed top for about 8 to 12 pounds or dollars. The mistake to avoid is leaving the glass out while the paint cures and then forcing the panes back in too soon; wait a full week so the paint hardens and the glass beads seat without sticking. Clean the glass inside and out once the paint is fully dry.
19. Style the Top Shelf With a Clock, a Vase and Stacked Bowls
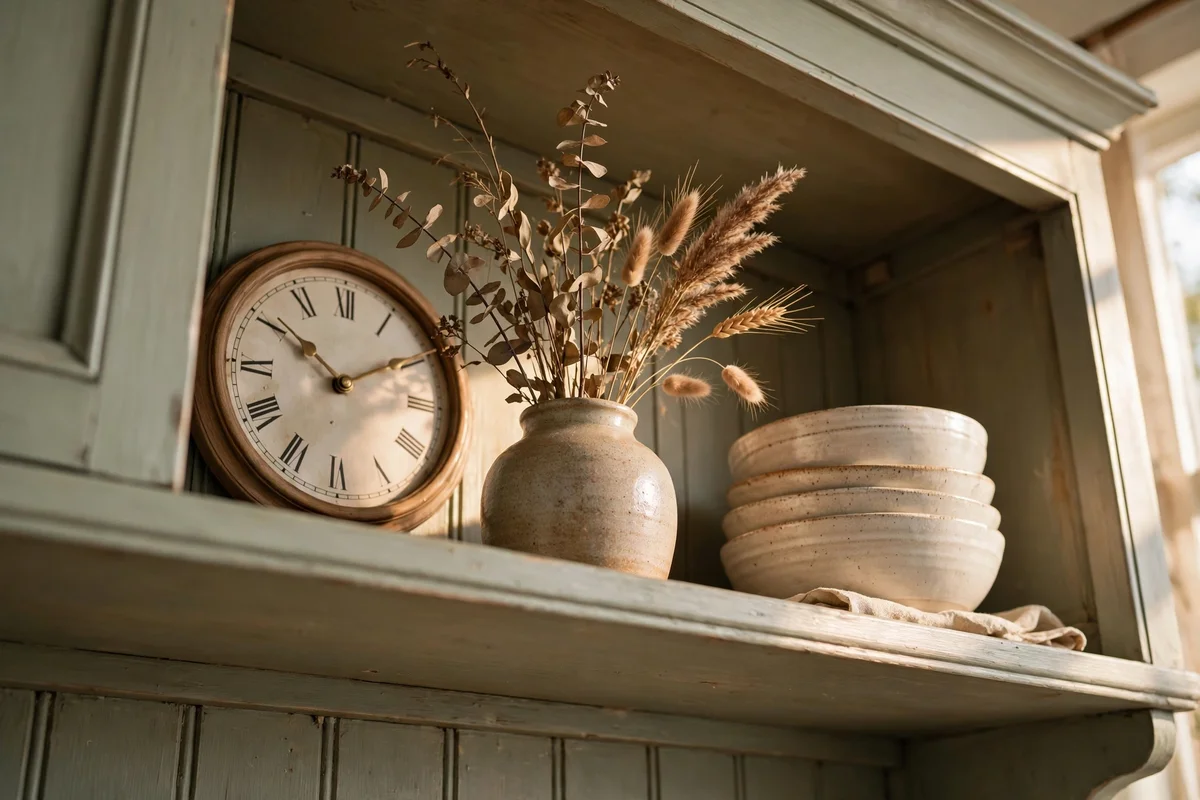
The very top shelf is seen from below, so style it with taller shapes that read well at a distance. Place a small wall style clock or a round clock about 20 cm across at one end, a simple ceramic vase with dried stems in the middle, and a stack of three bowls at the other end. This rhythm of round, tall, round carries the eye across the shelf and finishes the hutch with a sense of quiet order.
Keep everything on the top shelf at least 10 cm back from the edge, since items up high are the easiest to knock when you reach for something below. A simple clock costs 15 to 30 pounds or dollars and a stoneware vase 12 to 25, with dried stems lasting for years. The mistake to avoid is crowding this shelf with small fussy objects that blur into clutter when viewed from below; three clear shapes is the limit. Dust the shelf quarterly with a long handled duster.
20. Fit Soft Strip Lighting Under Each Shelf for Evening Glow
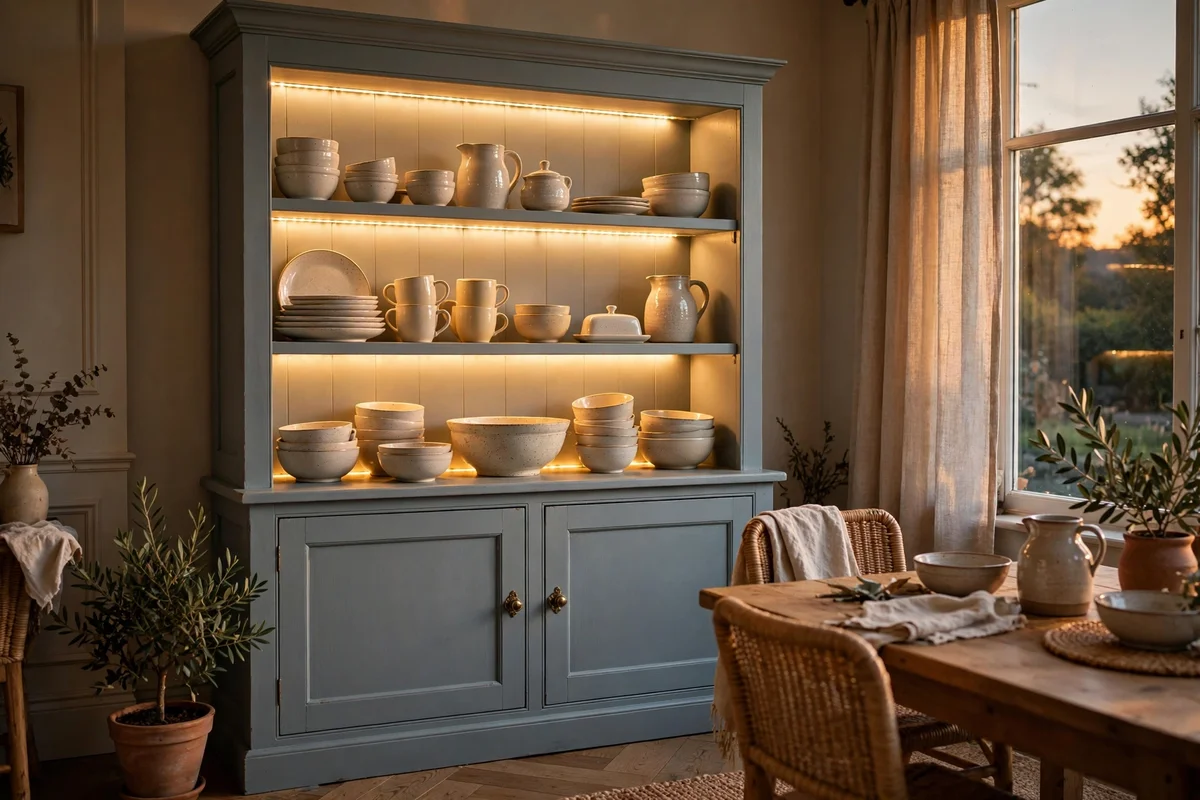
Warm LED strip lighting under each shelf turns the hutch into a gentle lamp for the whole room after dark. Choose 2700K warm white strips, which flatter wood and crockery, and mount them 3 to 4 cm back from the shelf front edge so the light washes down the back panel without glaring into eyes. Battery strips with a remote cost 15 to 25 pounds or dollars per shelf, while plug-in sets with one shared switch suit a hutch near a socket.
Stick the strips to the underside of the shelf above, never to the painted back panel, so future removal never damages the finish. Trim strips only at the marked cut lines, usually every 5 or 10 cm, and test the full run before fixing it in place. The mistake to avoid is choosing cool white 5000K strips, which make wood look grey and food look unappetising; warm 2700K is the only colour temperature that flatters a painted hutch. Set them on a timer so the glow greets you each evening.
21. Seal the Paint With a Gentle Wax Finish for Everyday Durability
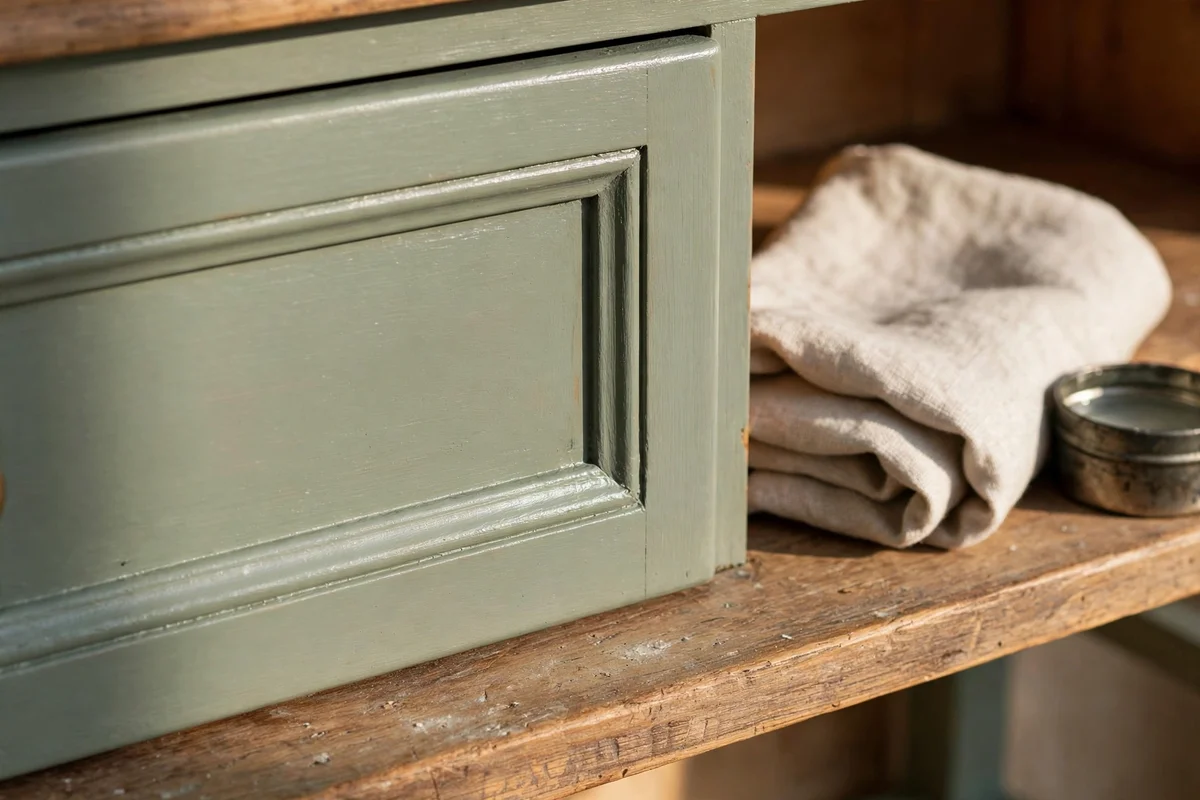
A clear furniture wax seals painted wood against knocks, spills and the daily slide of plates across shelves. Wait until the paint has cured for at least two weeks, then apply a thin coat of clear wax with a soft cloth, working in small circles and buffing off the excess after twenty minutes. One 500 ml tin covers a full hutch and costs 12 to 20 pounds or dollars. The wax deepens the colour slightly and leaves a soft sheen that feels hand finished.
Rewax high touch areas, such as drawer fronts and the shelf edges, once a year to keep the protection even. Keep wax away from the bare oiled worktop, since wax and oil finishes do not layer well and the combination turns cloudy. The mistake to avoid is applying wax before the paint has fully cured, which traps solvents and leaves a sticky finish that never hardens properly. Patience here pays for years; a well waxed hutch shrugs off daily family life and still looks calm and cared for.
A hutch earns the heart of the room slowly, one honest choice at a time. The painted frame, the bare worktop, the crockery glowing against a coloured back panel, each decision builds on the last until the whole piece feels settled and sure of itself. Keep the styling simple enough to live with, let the everyday plates do most of the talking, and resist filling every gap the moment it appears.
This week, start with the easiest win of the set, the hardware swap. Order one set of aged brass cup pulls, fit them on Saturday morning with nothing more than a screwdriver, and stand back to see how much more finished the whole hutch looks. Once you feel that small lift, the paint, the styling and the lighting will follow naturally, and the room will have its centre at last.
Frequently Asked Questions
What kind of paint works best on a wooden hutch?
Use a furniture-grade eggshell or satin acrylic paint, which levels smoothly and resists scuffs from daily use. Clean the wood with sugar soap first, sand lightly with 120-grit paper, and apply two thin coats rather than one thick one. A litre tin usually covers a full hutch and costs 30 to 45 pounds or dollars. Avoid standard wall emulsion, which marks too easily on furniture.
Should I paint the worktop or leave the wood natural?
Leave the worktop natural whenever the wood is solid and in decent shape. A sanded pine or oak top finished with hardwax oil stands up to plates, cups and spills far better than paint, and it gives the piece its two-tone charm. Paint on a worktop chips quickly under daily use. If the top is badly damaged, sand it back hard first and only paint it as a last resort.
How do I stop painted shelves from sticking to plates and jars?
Let the paint cure fully before loading the shelves, which takes two to three weeks for most furniture paints even when the surface feels dry. Line shelves with clear shelf liner or cut-to-size felt to protect both paint and crockery. The mistake to avoid is stacking plates on fresh paint, since the weight bonds them to the finish and pulls it away when lifted.
What colour should I paint the inside back panel?
Choose a colour two or three shades deeper than the frame so plain white crockery glows against it. Deep teal behind sage, warm terracotta behind cream, or navy behind soft white all work beautifully. Paint the back panel before the shelves go back in, using a small roller for a smooth finish. Keep the rest of the interior the frame colour so the contrast feels deliberate rather than random.
Can a painted hutch work in a small hallway?
Yes, if you choose a slim unit no deeper than 35 to 40 cm so it never blocks the walkway. Paint it a pale colour that matches the walls, style only the top two shelves, and keep the base cupboards for shoes, scarves and other hallway clutter. One small lamp on top makes the whole corner feel welcoming. Fix the hutch to the wall with anti-tip brackets, since narrow tall pieces can topple.