Crafts
21 Wooden Cross Painting Ideas That Feel Rustic, Heartfelt and Handcrafted
By Anna Wells · · 18 min read
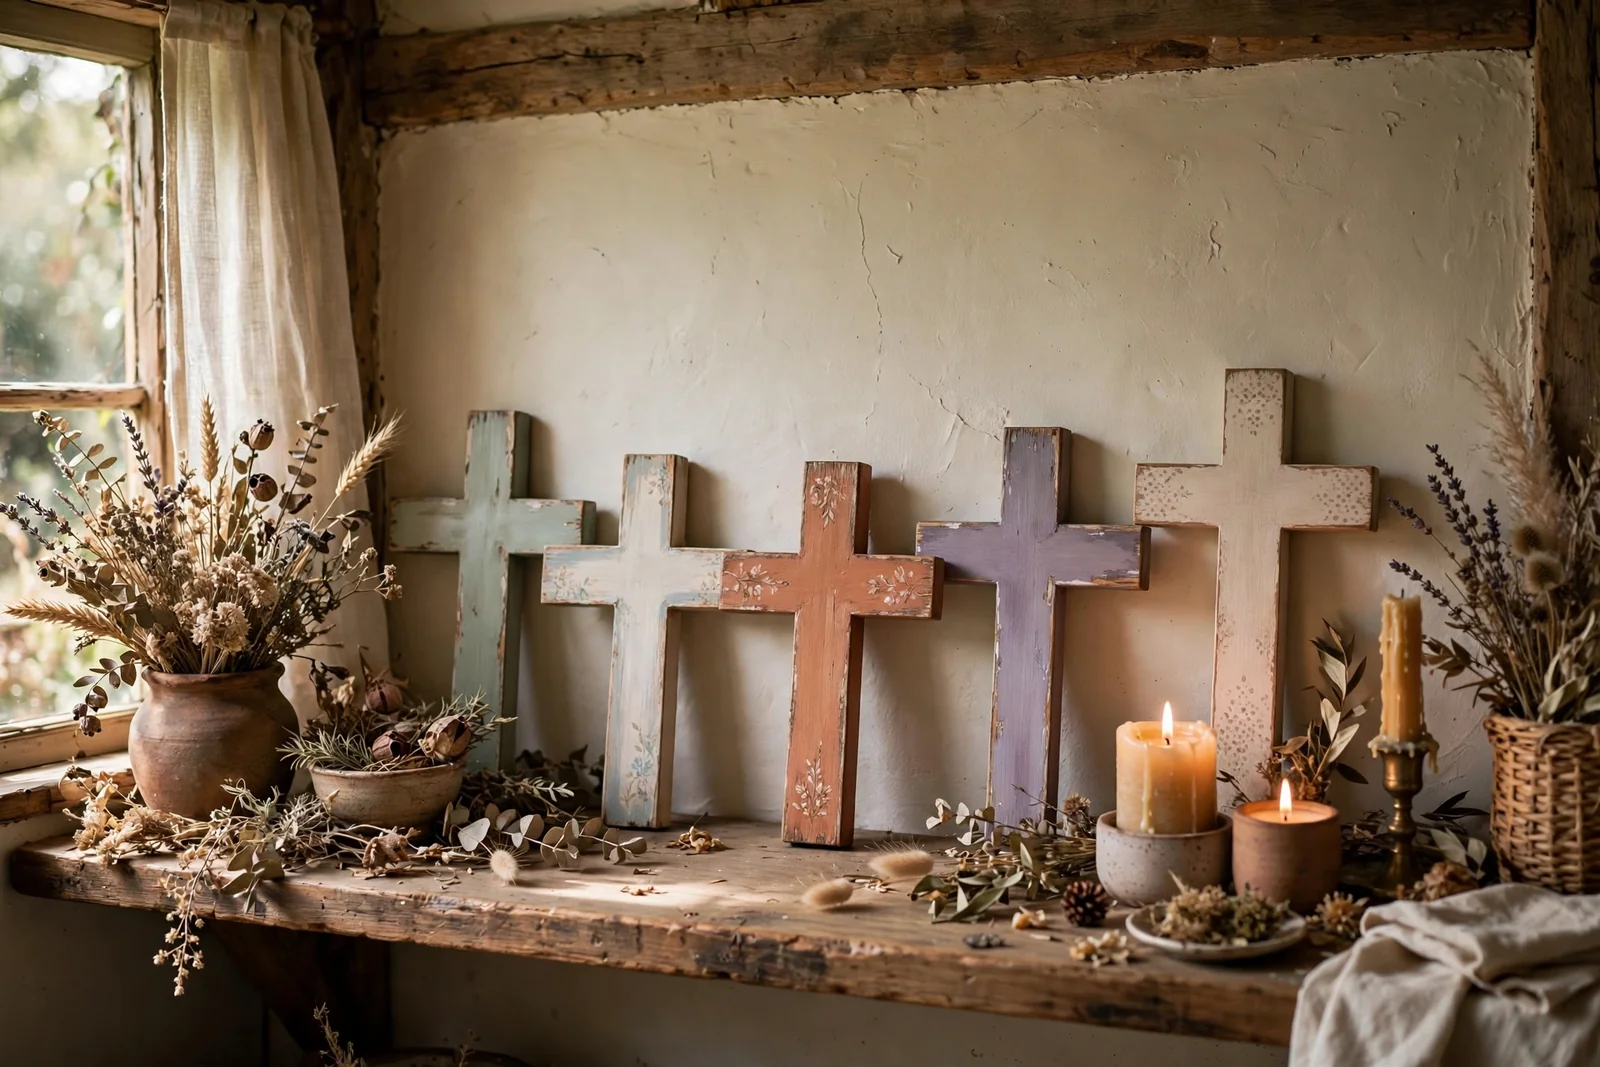
A plain wooden cross becomes something treasured with little more than acrylic paint, a soft brush and an unhurried afternoon. This collection gathers gentle finishes for every skill level, from a five minute whitewash to patient floral painting, so you can make a piece for your own shelf or a heartfelt handmade gift.
A wooden cross is one of the kindest first painting projects. The shape is simple, the surface is forgiving, and even a plain wash of colour looks lovely once the wood grain shows through. Painted gently, a cross can sit on an entryway shelf, hang beside a bedroom door, or be wrapped as a gift that carries real thought behind it.
Work through the finishes below in any order. Some take ten minutes and one colour, while others invite a slow evening of floral detail. Every idea includes the practical notes that matter, like paint ratios, brush sizes, drying times and the small mistakes that are easiest to avoid.
1. A Soft Whitewash That Lets the Grain Show Through
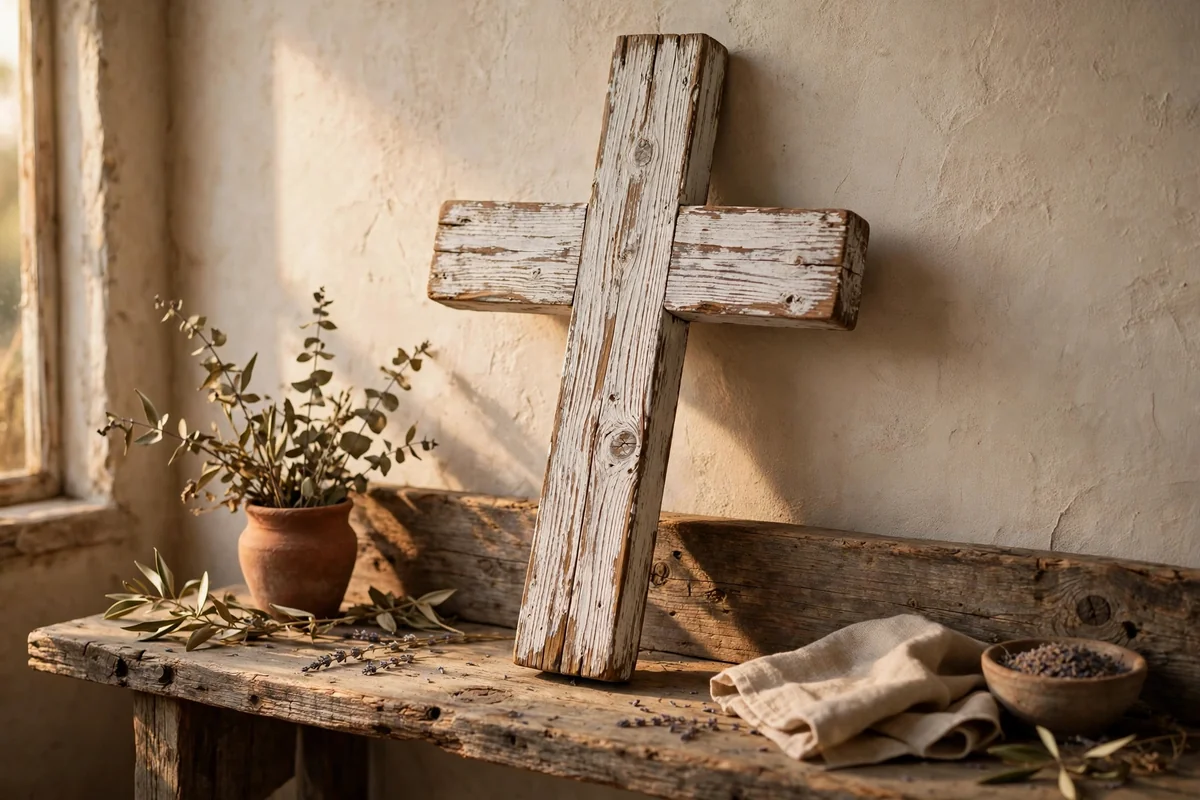
Mix one part white acrylic with one part water and brush it along the grain in long, quick strokes. The diluted paint settles into the low lines of the wood and skims the raised parts, so the grain stays visible instead of disappearing under a solid coat. Wipe back any puddles with a dry cloth within a minute for an even, misty finish.
Let the first wash dry for about thirty minutes before judging the colour, because whitewash darkens slightly as it dries. Add a second wash only where the wood still looks raw. Once fully dry, rub the edges with 220 grit sandpaper to reveal warm wood lines, then seal with clear matte varnish so the pale finish does not yellow.
2. Tiny Hand Painted Wildflowers on a Cream Ground
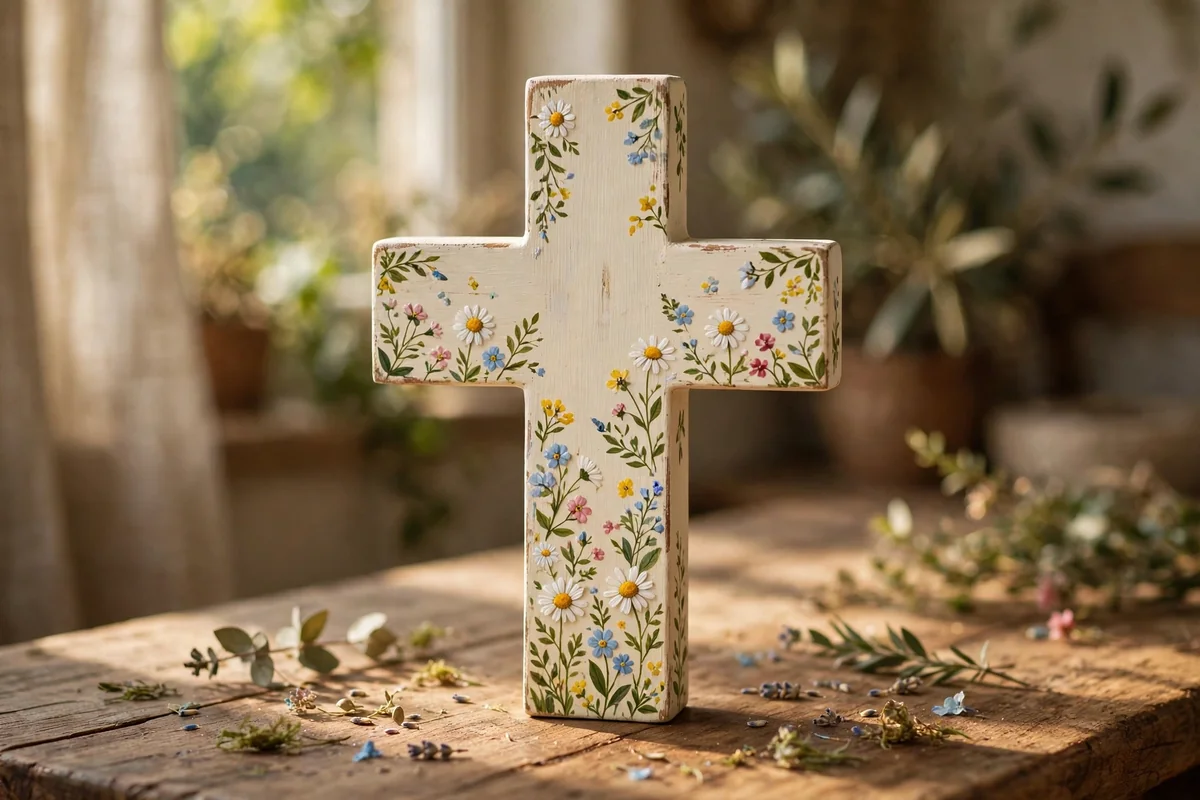
Paint the cross a warm cream and let it dry completely, then plan the flowers in pencil with the lightest touch. Work with a size 2 round brush and simple shapes, five petal daisies, small lavender dots on a stem, and butter yellow circles with a brown centre. Keeping each flower slightly different in size makes the meadow feel natural rather than stamped.
Leave bare cream space between the clusters so the design can breathe, and add thin green stems last, curving them gently toward the centre. If a petal goes wrong, blot it at once with a damp cotton bud rather than painting over wet colour. Seal with matte varnish after a full day, because thick petal dots dry more slowly than they appear to.
3. Layers of Grey and Brown for a Weathered Timber Look
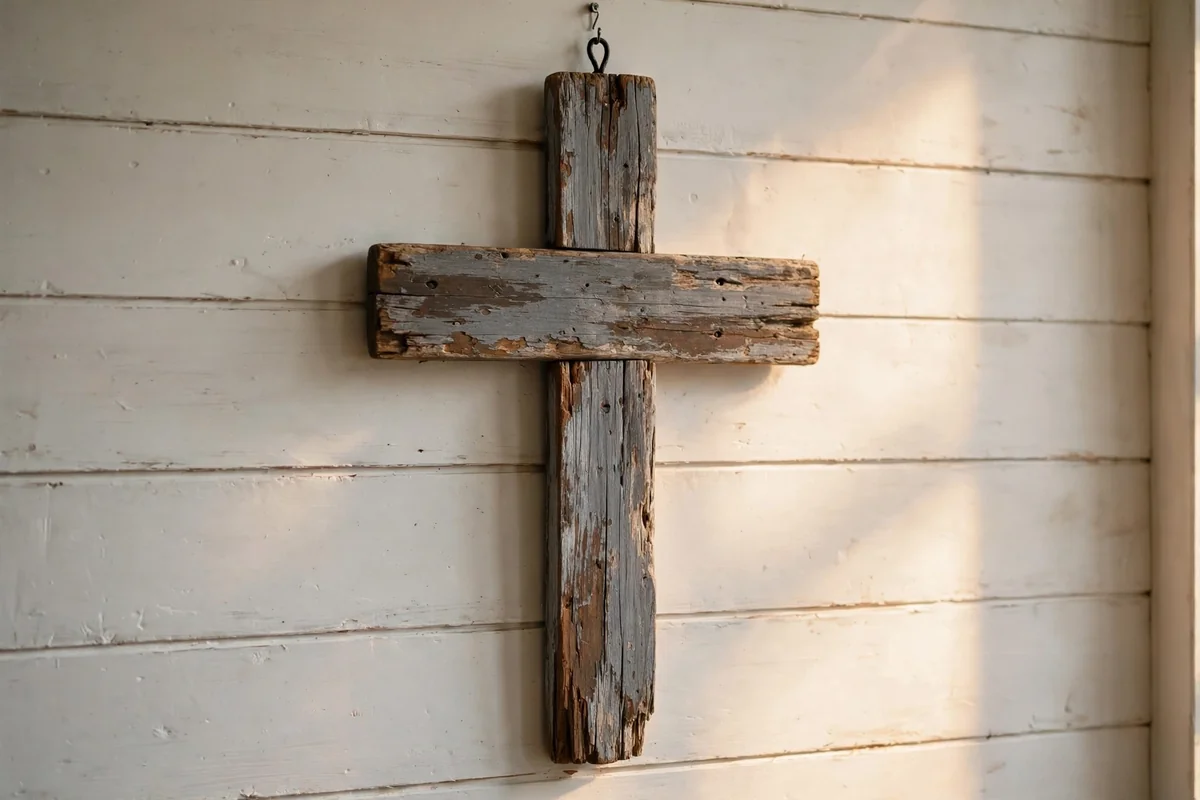
Old timber gets its beauty from layers, so build this finish the same way. Brush on a watery wash of warm brown first and let it dry, then dry brush streaks of grey and a little charcoal across the grain with a nearly dry flat brush. Each pass should look too faint on its own, because the depth arrives from the layering.
Sand the raised grain and corners with fine paper so pale wood flashes through the grey, just as years of handling would wear a real old board. This finish needs no extra decoration, since the texture is the design. Hang it against a pale wall or lean it on a stone mantel, where the weathered tones read clearly from across the room.
4. Quiet Sage Green With a Painted Leafy Vine
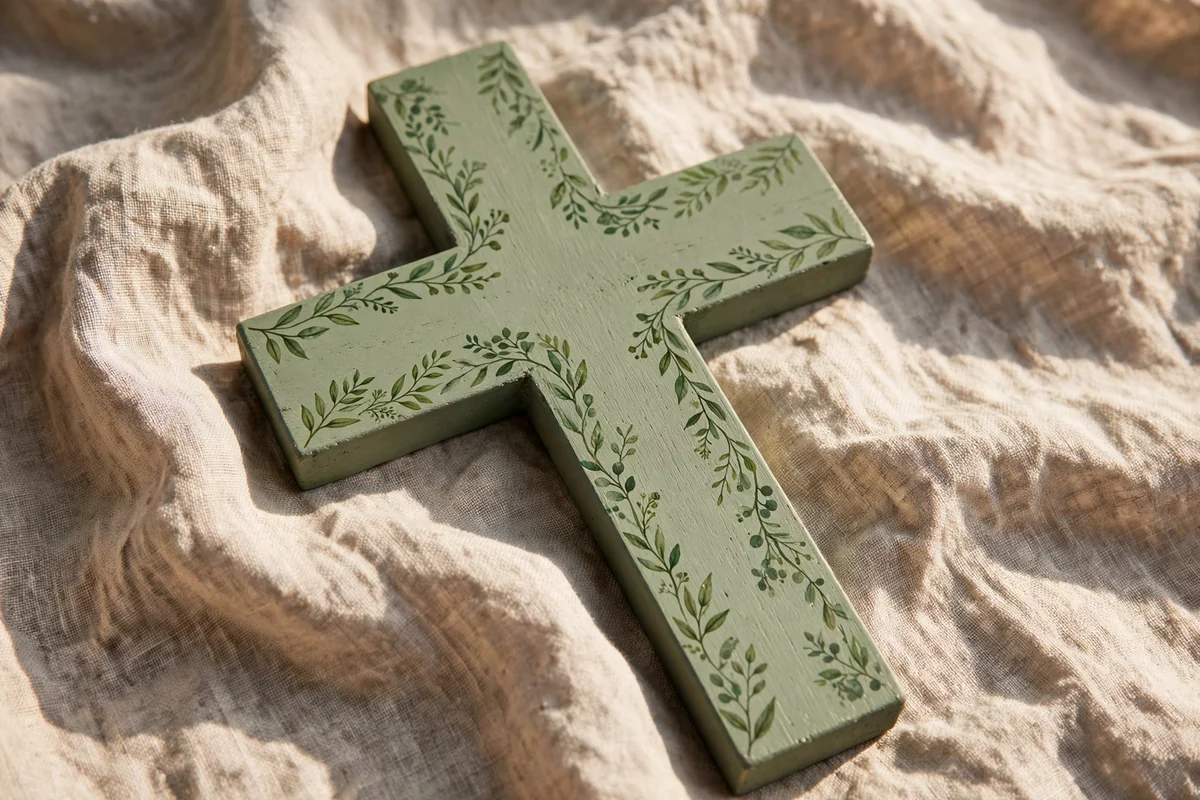
Sage green suits wood beautifully, sitting softly between colour and neutral. Apply two thin coats of a muted sage acrylic, sanding very lightly between coats for a smooth, chalky surface. Once dry, paint a winding stem in a slightly deeper green, following an S curve up the vertical beam and a shorter branch along each arm.
Add simple leaves as paired teardrop strokes, alternating a lighter sage mixed with cream so the vine catches the light unevenly, like real foliage. Keep the painting loose and resist outlining every leaf, which can make it look stiff. A gentle sanding on the edges at the end lets a little wood peek through and keeps the piece rustic rather than perfect.
5. A Gentle Bouquet in Blush, Cream and Taupe
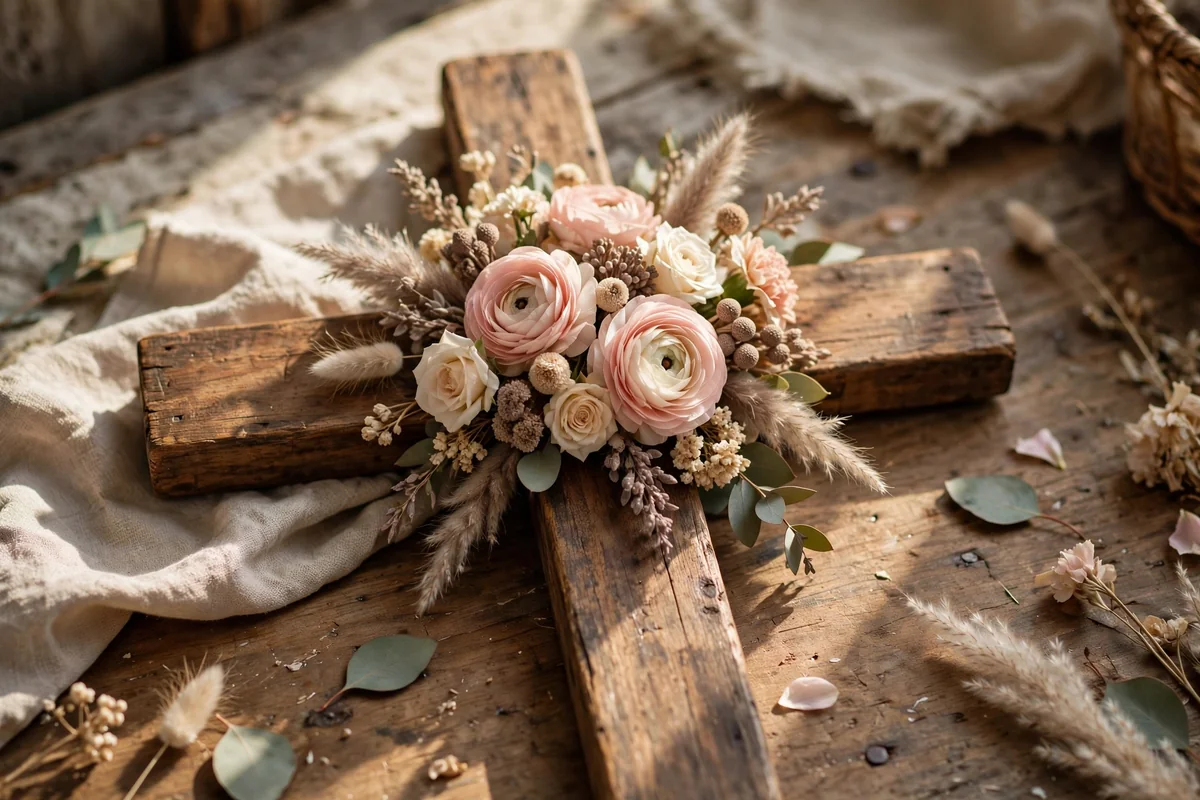
For a softer floral, gather the colours of dried flowers rather than fresh bright ones, with blush pink, warm cream, dusty taupe and a touch of sage. Paint a loose bouquet at the crossing point of the beams, building each bloom from three or four comma shaped strokes around a darker centre. The limited palette keeps the result calm and grown up.
Arrange the largest flower slightly off centre and let smaller buds and leaves trail down one side, because symmetry can look rigid on a handmade piece. Step back after every few flowers and stop earlier than feels natural, since bouquets crowd quickly. Finish with a matte sealer and display against linen or pale wood so the quiet colours hold their own.
6. Delicate Ivory Scrollwork Inspired by Old Lace
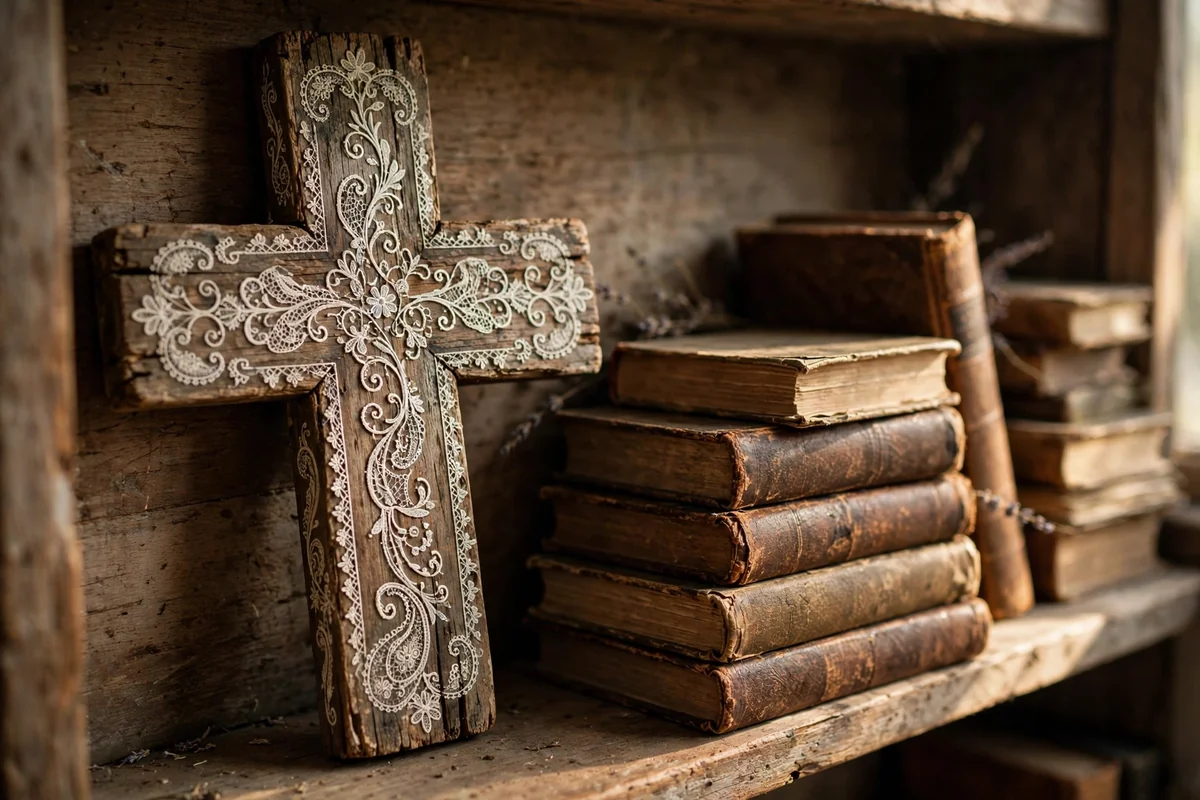
Old lace suggests a pattern without needing to copy every thread. Over a weathered grey brown base, paint simple ivory scrolls with a fine liner brush, using C curves, small dots and tiny three petal motifs repeated along the borders. Practise the stroke on paper first, loading the brush and pulling it in one confident sweep so the line swells and tapers naturally.
Repeat one small motif rather than inventing many, because repetition is what reads as lace from a distance. Keep the centre of the cross fairly open so the pattern frames it instead of filling it. A light sanding over the dried scrollwork knocks back the brightness and settles the ivory into the wood, giving the impression of a cherished old piece.
7. Golden Sunflowers Against Deep Walnut Stain
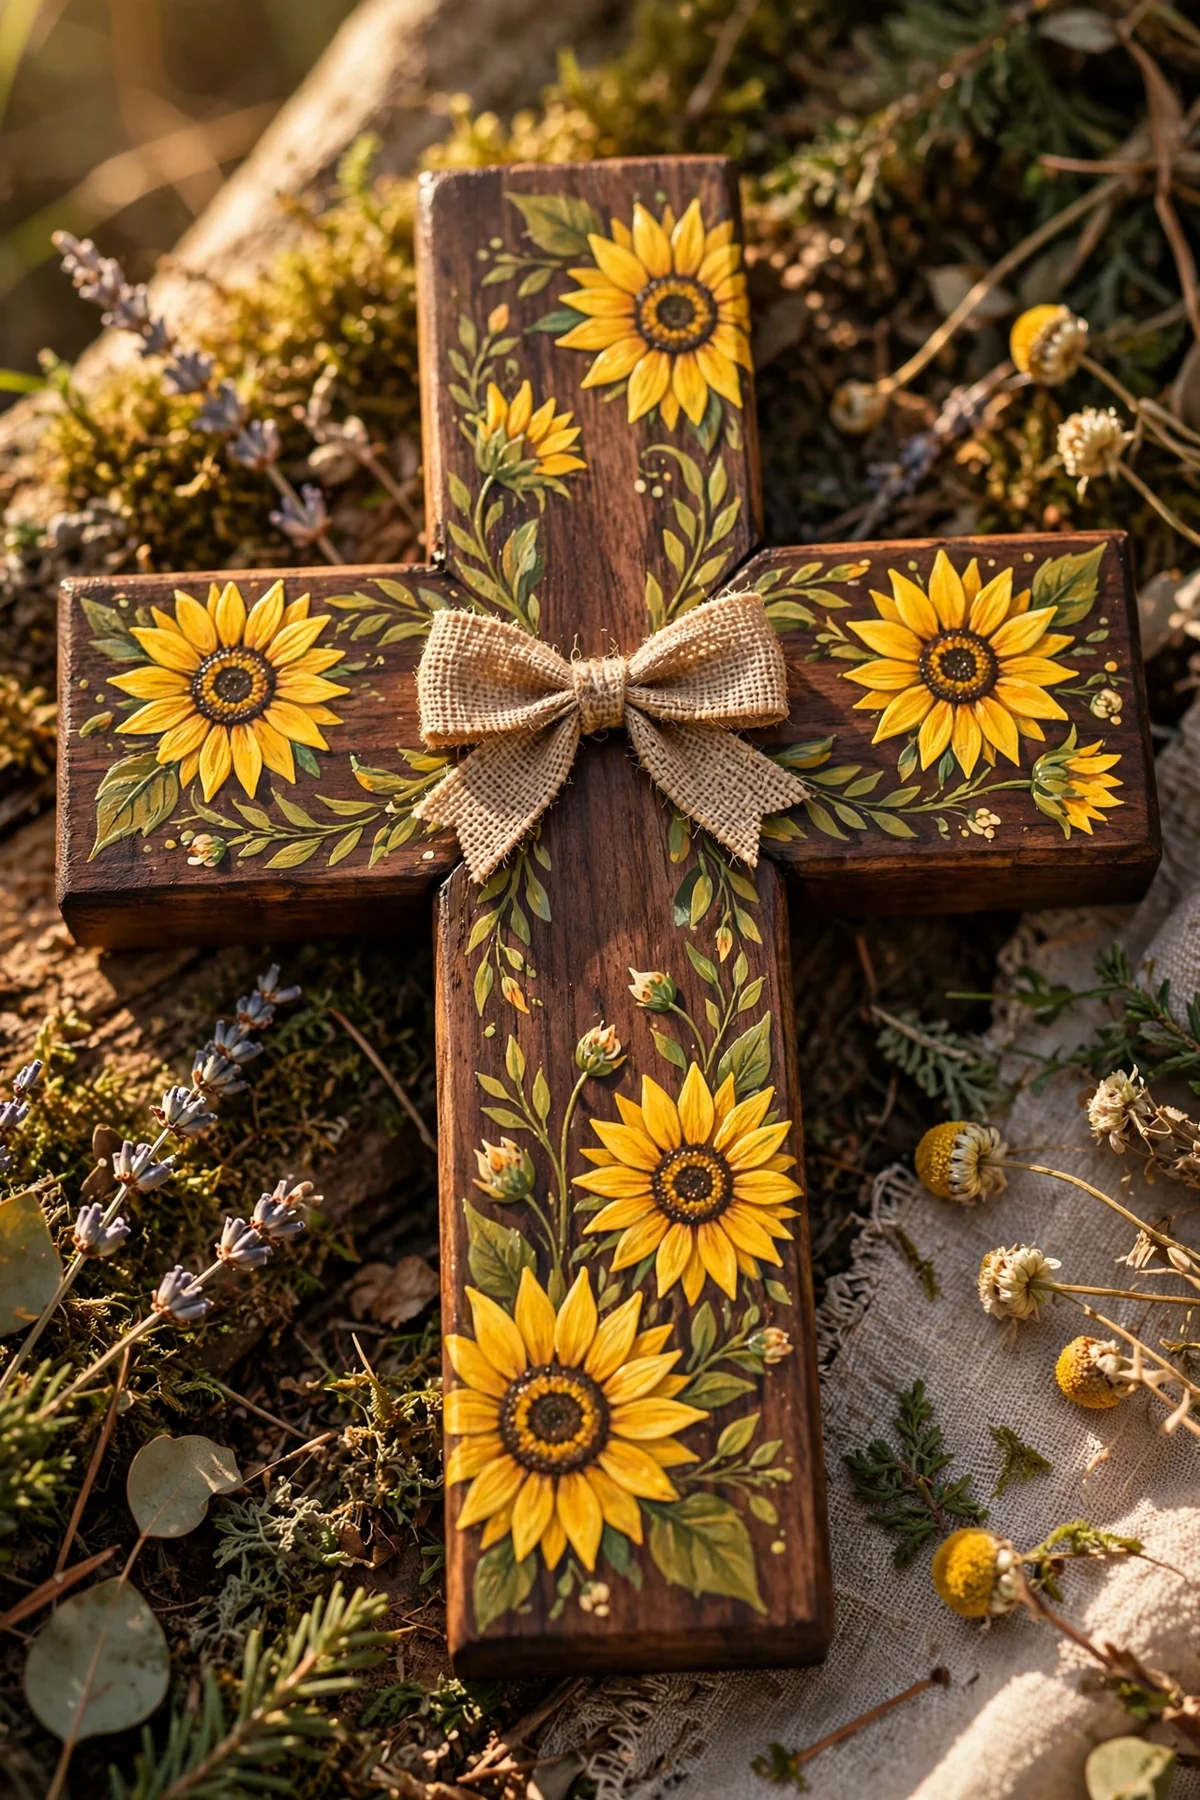
Stain the cross a deep walnut and let it cure overnight so the paint will sit cleanly on top. Sunflowers painted over the dark ground glow like late afternoon light. Block in the petals with a mustard base, then add strokes of golden yellow and a hint of burnt orange at the petal bases, keeping the centres a textured mix of dark brown dots.
One large flower at the crossing and a smaller bud along one arm is usually enough, because the contrast is strong. Tie a small burlap or twine bow at the centre once the paint is dry, fixing it with a dot of hot glue. This design suits a porch, a kitchen wall or a summer gift, where its warmth feels welcoming rather than loud.
8. Dusty Blue Hydrangea Clusters for a Cottage Corner
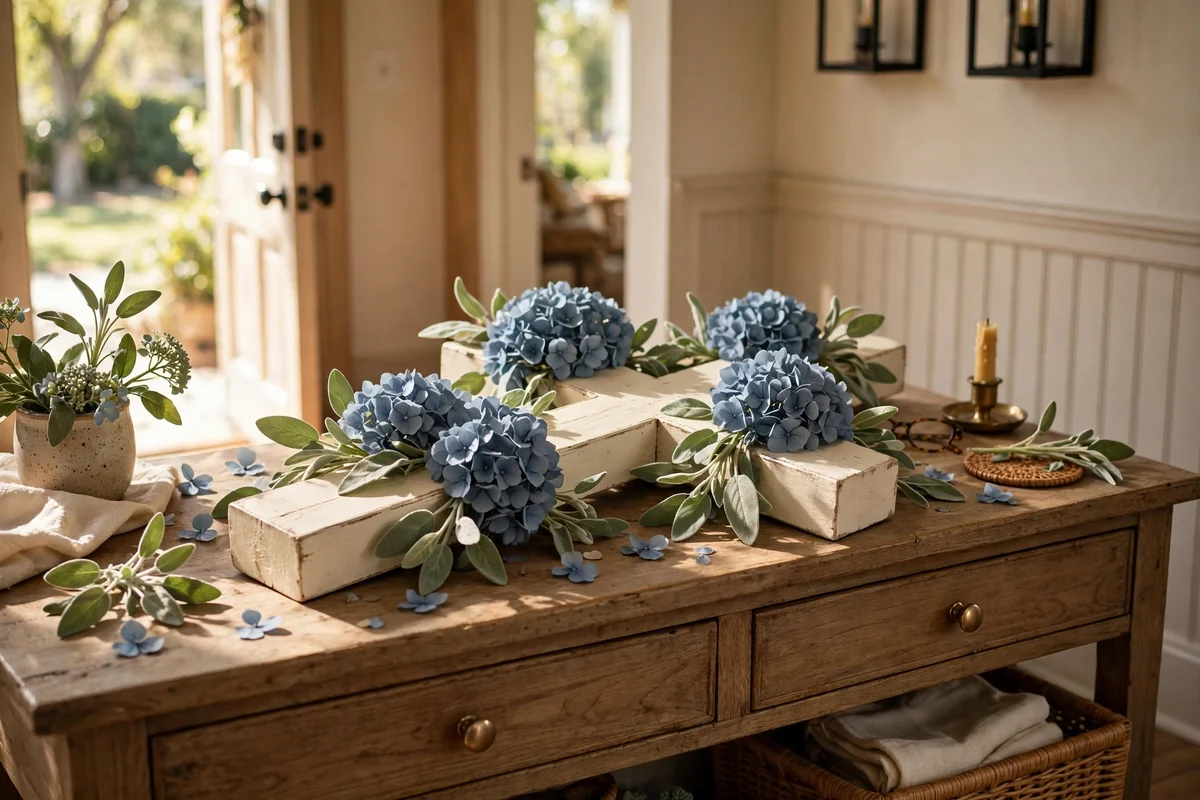
Hydrangeas are kind to beginners because each cluster is just many small dots gathered together. Dab a round brush or a cotton bud in dusty blue and stamp loose circles, then add touches of periwinkle, pale lavender and cream on the top edges so the cluster looks rounded. A soft cream background keeps the blues airy instead of heavy.
Paint two or three sage leaves beneath each cluster with a single sweep of a flat brush, and leave gentle gaps so the flowers stay the focus. A very light distressing along the edges suits the cottage mood. This cross looks especially pretty on a bedroom shelf or an entryway console, paired with woven baskets and pale ceramics.
9. Terracotta Warmth With a Winding Olive Branch
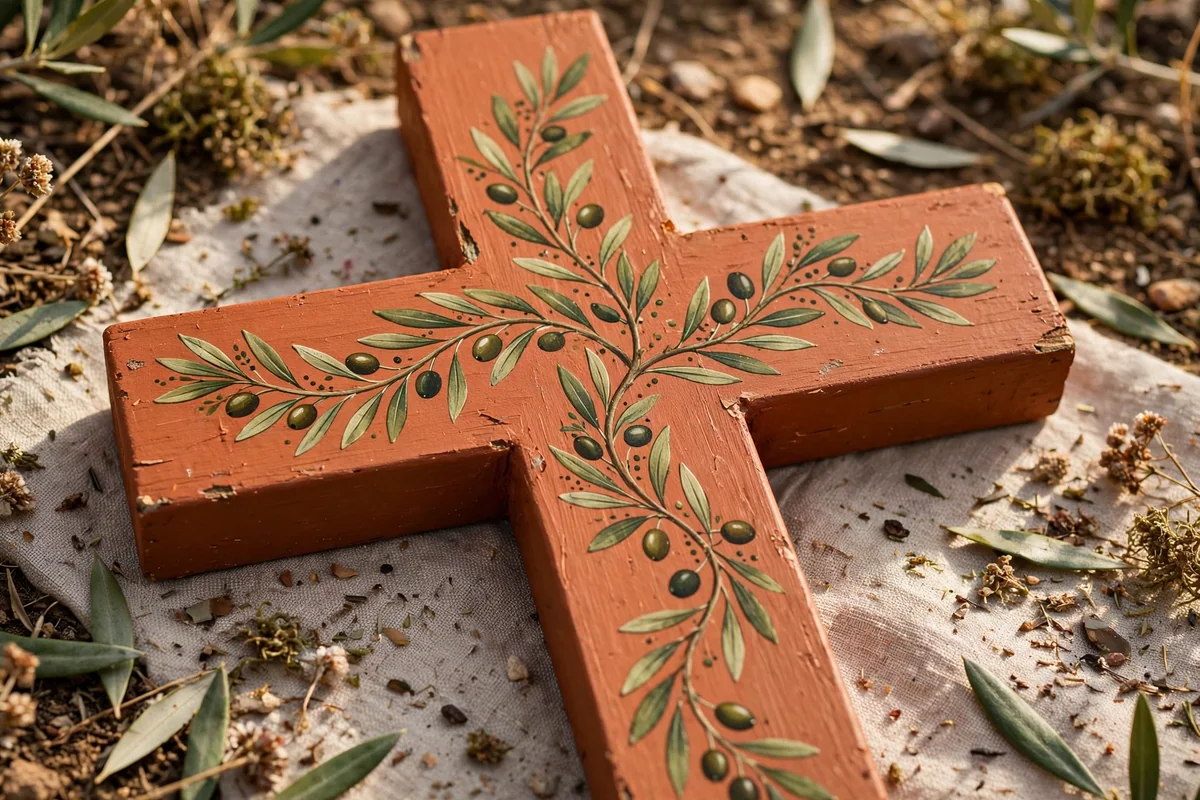
Terracotta brings the warmth of clay pots and sunlit walls to a small wooden piece. Paint the cross in two coats of a soft clay shade, mixing a little cream into the second coat for a sun faded feel. When dry, paint an olive branch that climbs one side and curls gently across the top arm, using muted olive and a grey green for the shaded leaves.
Keep the branch slender and the leaves spaced, because the calm background is half the design. Small olives can be added as pairs of dark dots, or left out entirely for a simpler look. Seal with a matte finish and style the cross with natural textures like linen, stone and dried grasses, where its earthy palette feels completely at home.
10. Faded Musical Notes on an Aged Cream Ground
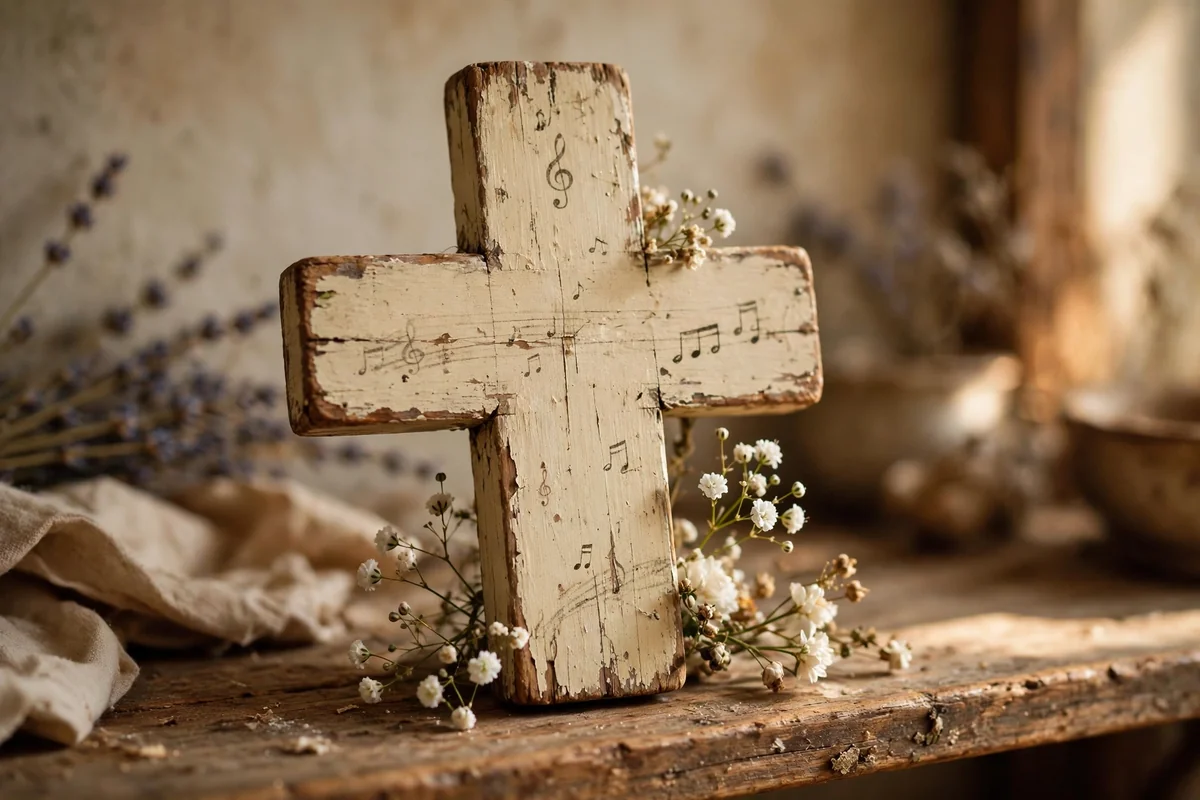
This quiet design suits anyone who loves music. Paint the cross an aged cream, mixing a drop of raw umber into the white so it feels old rather than new. With thinned charcoal paint and a fine brush, add a scattering of soft musical notes and a few gently curving staff lines, keeping them faint, like a memory of a favourite hymn sheet.
Let some notes fade out at the edges by dry brushing cream back over them once dry. A few small white flowers painted over one corner soften the geometry of the notes. Light distressing completes the antique mood. Because the marks are abstract and faint, shaky brush control is not a problem here, which makes this a forgiving and personal gift for a musician.
11. Calm Horizontal Stripes in Stone and Sand Tones

Stripes are the simplest way to give plain wood a finished, tailored look. Mask uneven horizontal bands with painter tape, or paint them freehand for a softer result, alternating warm cream, stone, taupe and pale sand. Vary the widths between 2 and 5 centimetres so the rhythm feels relaxed rather than measured like a ruler.
Peel the tape while the final coat is still slightly tacky to keep the edges clean, then sand the corners once everything is dry so the stripes settle into the wood. This restful design pairs with almost any room and any season, and it is a good first project for a child working beside you, because straight bands forgive wobbles kindly.
12. Watercolour Soft Roses With Feathered Edges
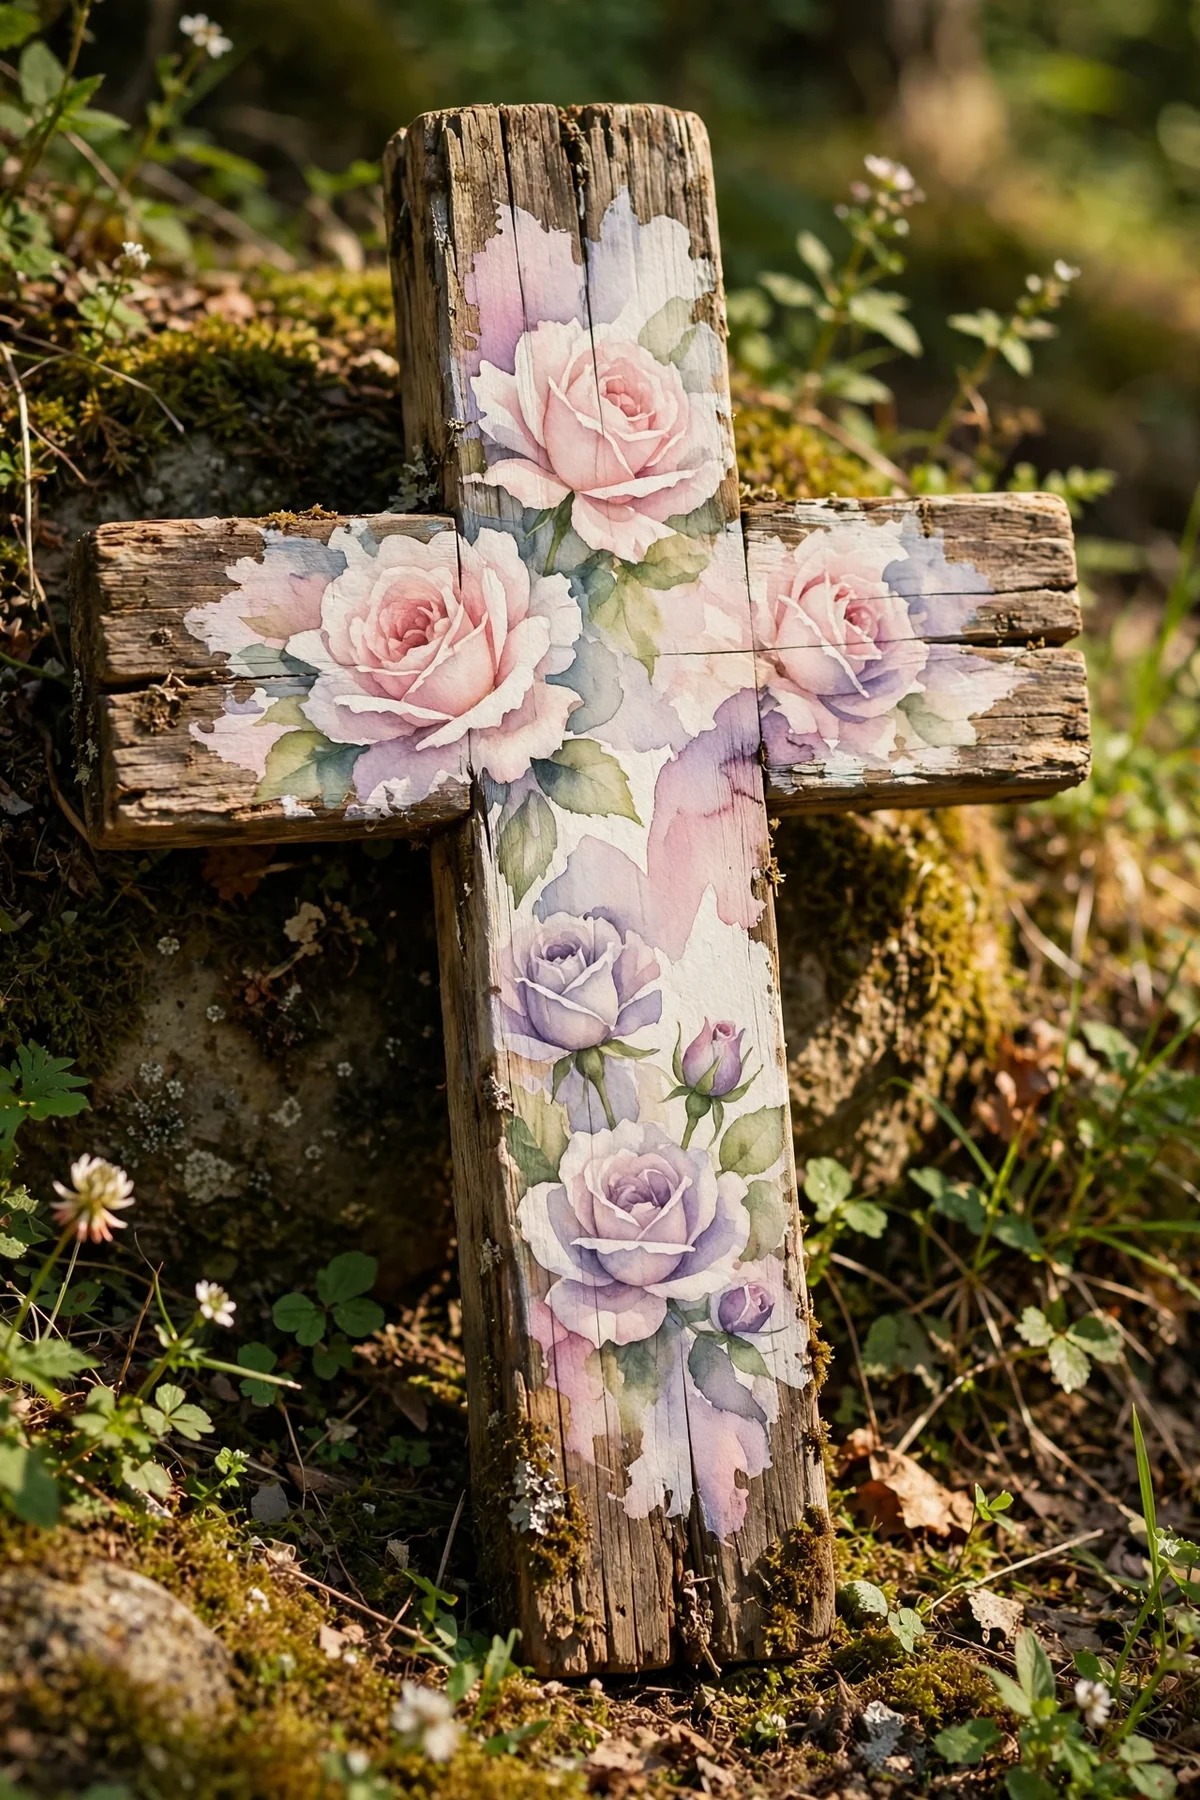
Thin acrylic with a little water until it moves like ink, and the paint will bloom softly into the wood instead of sitting on top. Paint roses as loose spirals of blush, dusty peach and lavender, letting one colour melt into the next while both are wet. The feathered edges give the flowers a dreamy, gentle quality that suits a quiet corner or a nursery shelf.
Work quickly and accept the blooms the paint gives you, because overworking thinned acrylic turns it muddy. Leave plenty of pale wood or cream ground showing so the roses float. Seal with a spray matte varnish rather than a brush coat, since brushing can drag and blur the delicate edges you worked to keep soft.
13. A Peaceful Mountain Sunrise in Muted Blues
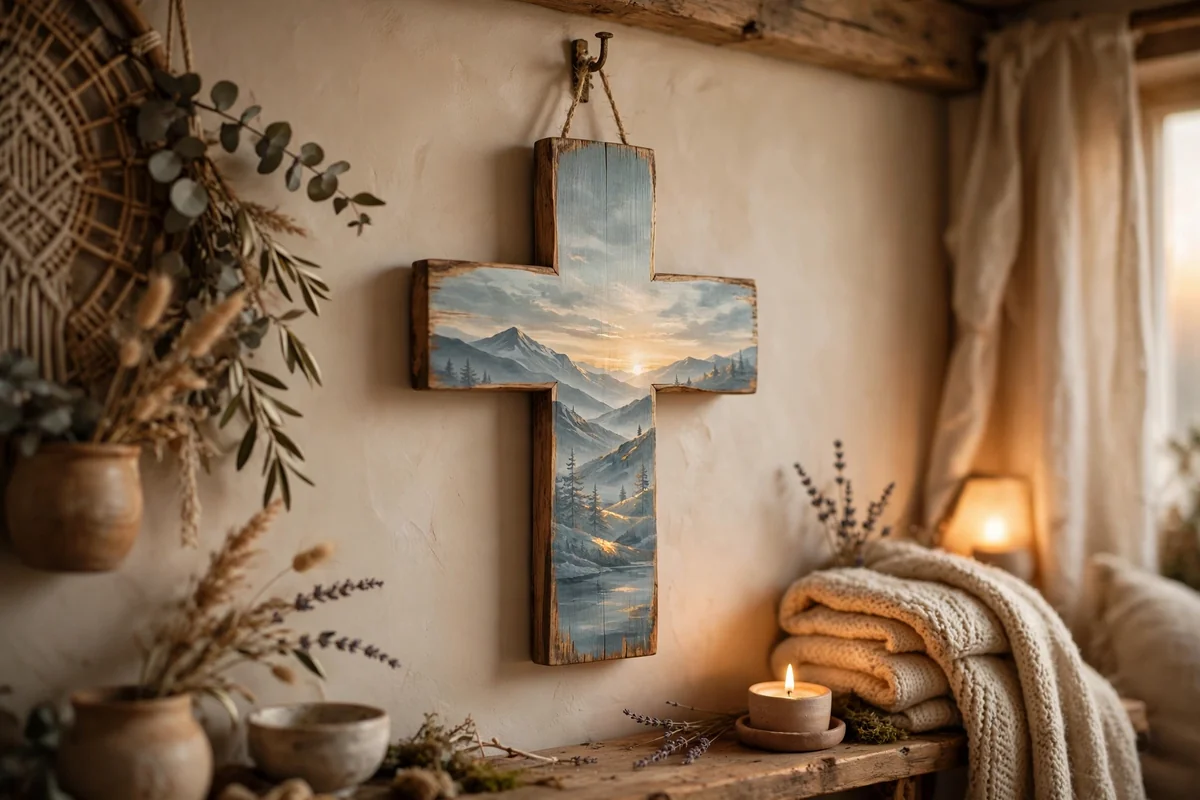
A small landscape turns a cross into a tiny window. Paint the top two thirds a soft dawn sky, blending pale gold near the horizon into dusty blue above. Add two or three mountain ridges in blue grey, each one lighter as it comes forward, and a row of simple dark evergreen triangles along the bottom edge for grounding.
Keep the sun as a small, pale disc rather than a bold circle, and let a dry brush soften every horizon line so nothing looks cut out. A light sanding at the edges ties the scene into the wood. Hang this design where morning light reaches it, in a hallway or beside a reading chair, where its calm mood can do its quiet work.
14. One Large Magnolia Bloom on Dark Stained Wood
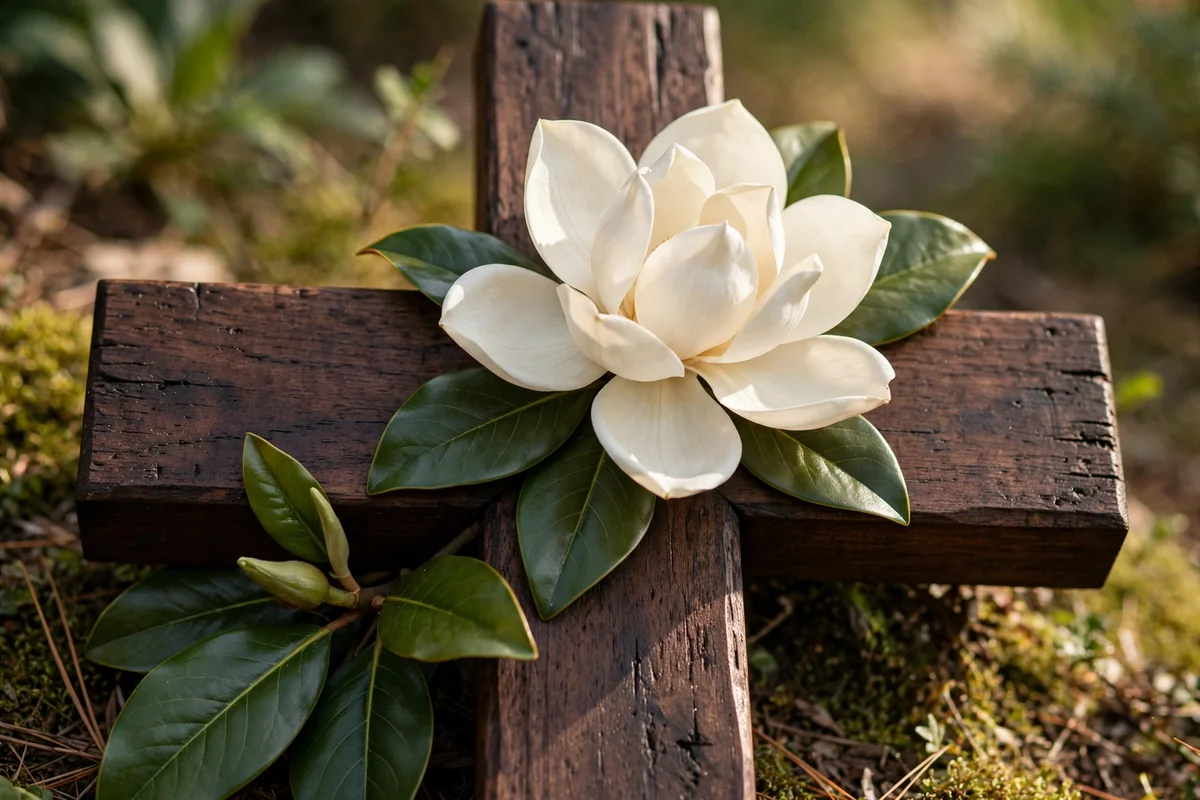
A single magnolia has enough presence to carry a whole piece. Stain the cross a rich walnut, then paint one large bloom angled across the centre, building the petals from creamy white with ivory and the faintest grey shading at their bases. Broad petals are painted with a flat brush in two strokes each, keeping the edges slightly irregular.
Add two or three deep green leaves and leave the rest of the dark wood bare, because the contrast is the elegance here. Resist adding buds or extra flowers, since a crowded version loses the calm. This design looks refined on a mantel or as a wedding gift, and it rewards slow work, so allow a full evening rather than rushing the petals.
15. Slender Lavender Stems on Weathered White
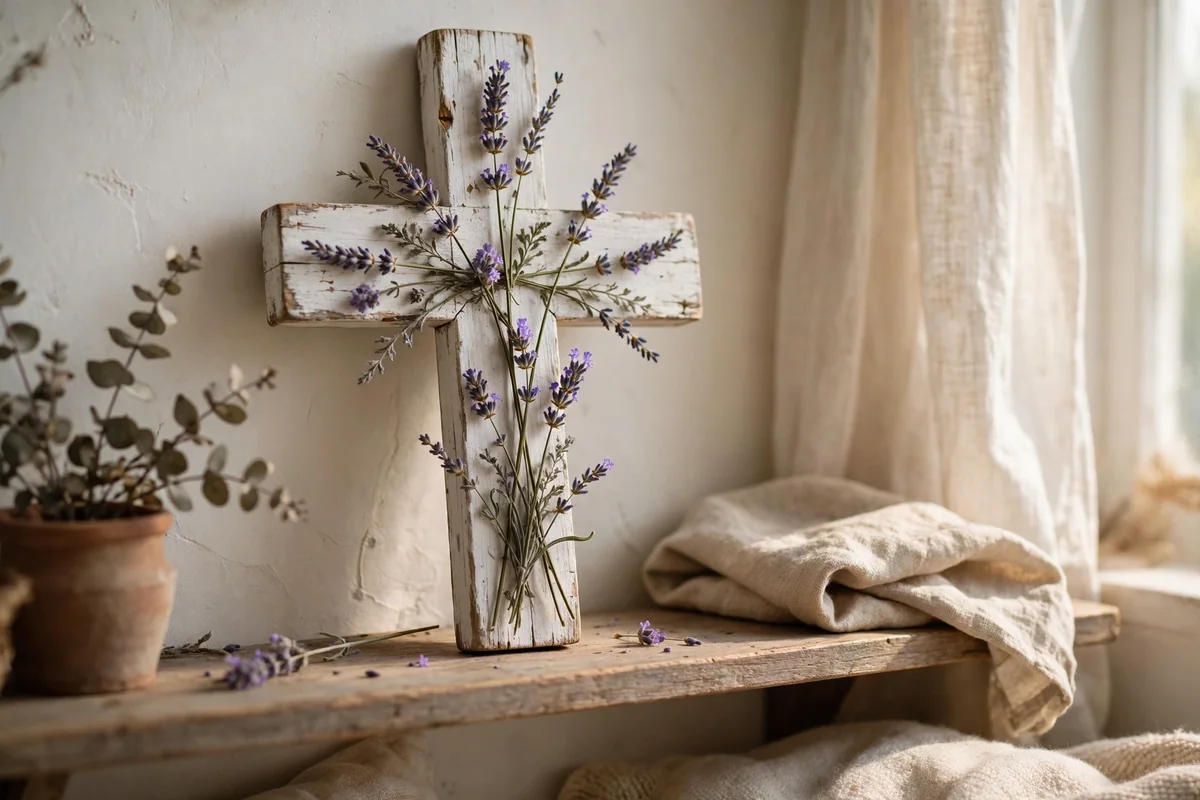
Lavender brings a cottage garden indoors with very little paint. Start with a weathered white base, made by dry brushing white over grey so faint streaks remain. Paint slender green stems that lean at slightly different angles, then dot the flower heads with small strokes of muted purple, dusty violet and a touch of pale blue at the tips.
Tie the stems visually with a painted twine bow at their base, or add a real twine wrap once the paint dries. Keep the flower heads airy rather than solid, because lavender reads through its gaps. This cross feels at home in a guest room or bathroom, and its colours stay gentle enough to leave out through every season.
16. A Patchwork of Reclaimed Board Colours
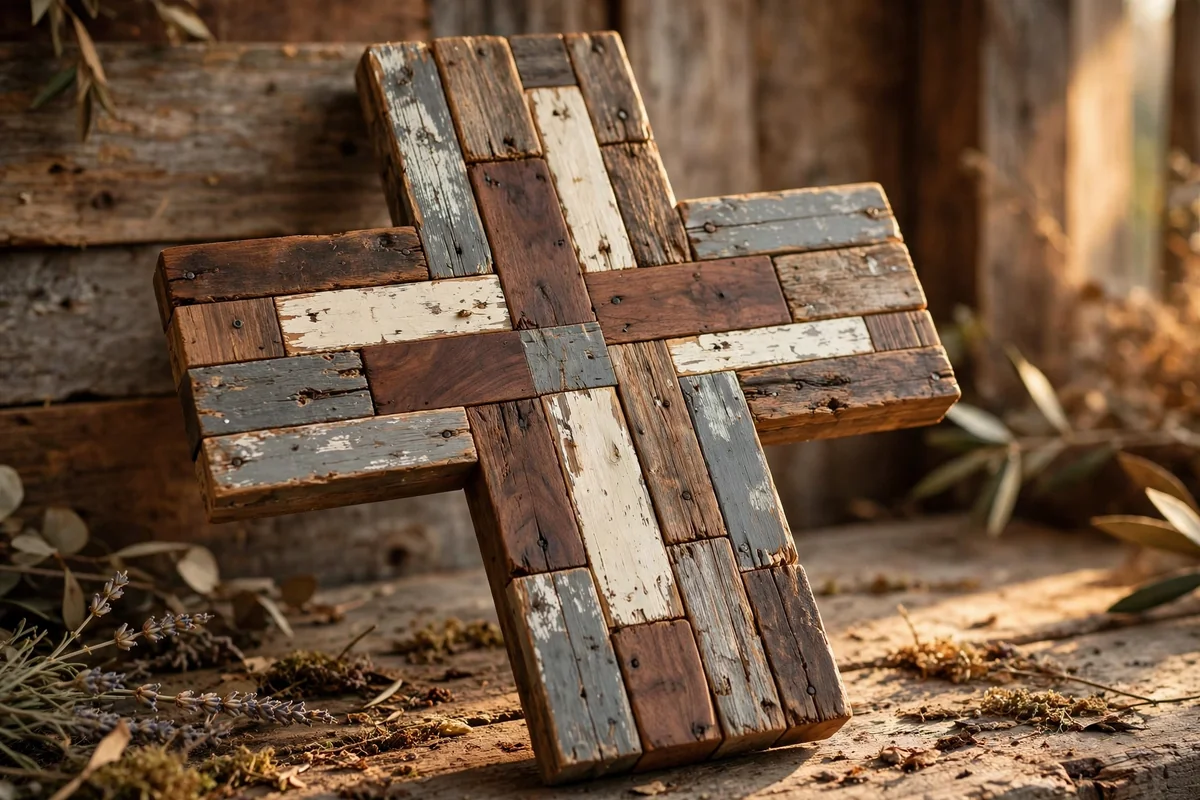
Patchwork celebrates the scraps. Divide the cross into uneven sections with pencil lines that follow where separate boards might join, then paint each section a different weathered colour, like walnut, soft grey, cream, faded charcoal and clay brown. Slight overlaps and uneven edges help the illusion that the piece was built from salvaged timber.
Once dry, sand across the joins and along the grain so the sections wear together instead of looking freshly painted side by side. A few faint brush lines following the grain in each panel adds believability. This is a satisfying way to use leftover paints, and no two patchwork crosses ever match, which is exactly the charm of the finish.
17. Heirloom Roses in Dusty Mauve and Peach
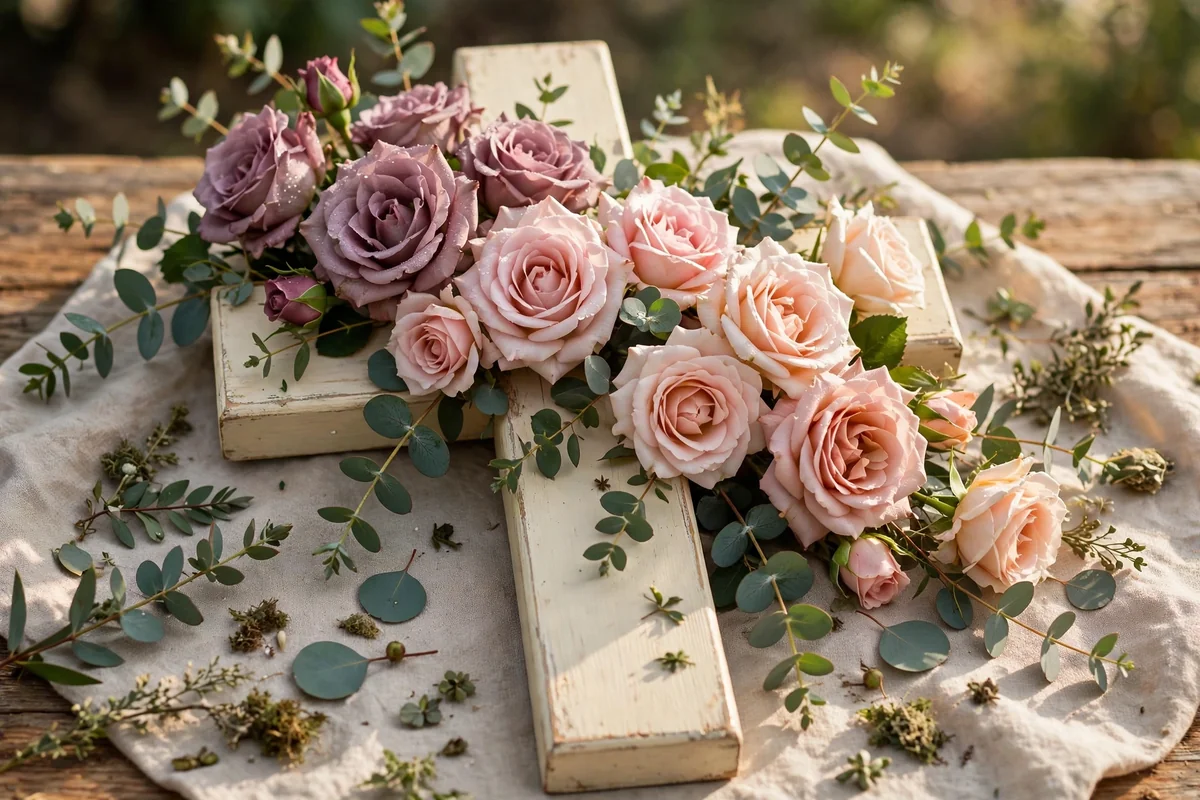
For a gift with an heirloom feeling, choose roses in faded shades, dusty mauve, antique cream and pale peach, and blend their shading softly instead of outlining them. Build each rose from a dark centre spiral outward in lighter arcs, then tuck eucalyptus leaves in blue green around the cluster so the warm and cool tones balance.
Let the bouquet spill naturally down one side of the cross rather than sitting in a neat circle, because the gentle imbalance looks hand gathered. Keep the background a lightly distressed cream so the roses stay bright. Wrap a finished piece in tissue and twine for weddings, anniversaries or a thoughtful sympathy gift, where its softness speaks kindly.
18. Simple Two Tone Dip Painted Ends
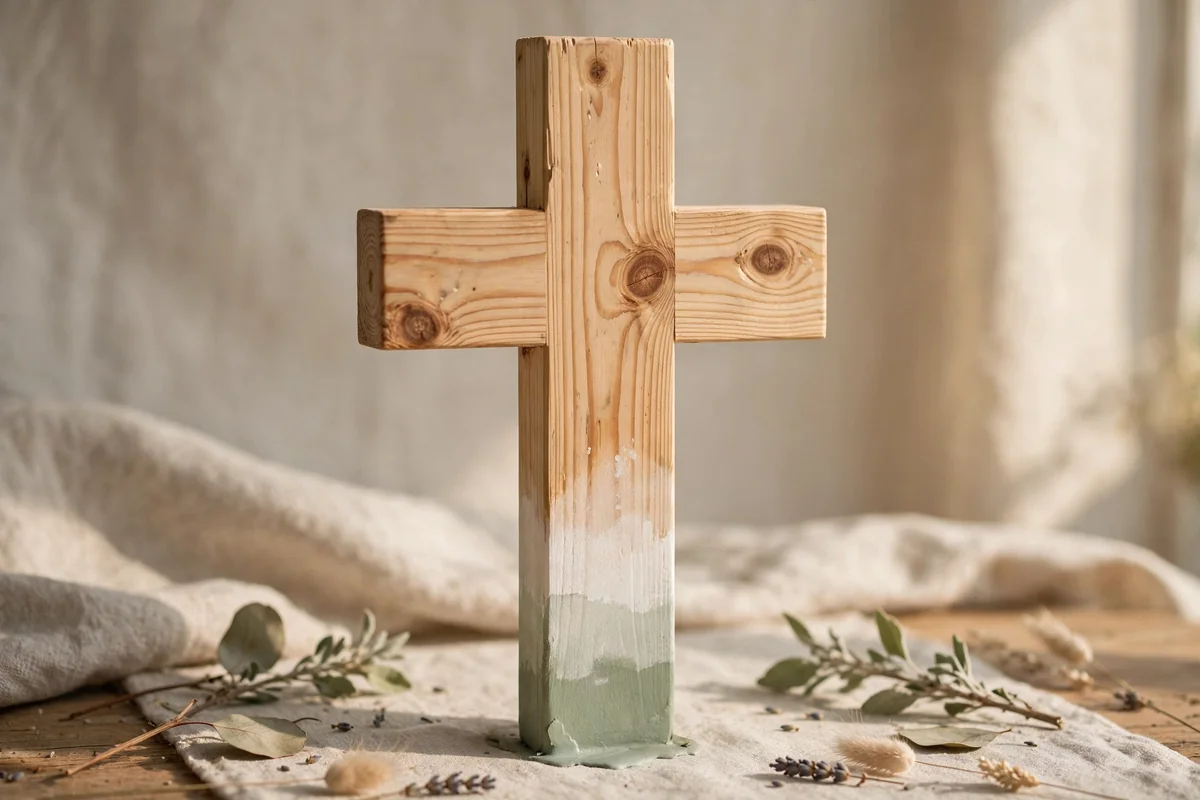
Dip painting is the most modern finish in this collection and the quickest. Sand a natural pine cross until it feels smooth, wipe it clean, then mask a straight line about a third of the way up and paint the lower section in white, sage or soft clay. A second shorter dip in a deeper tone over the first adds a neat layered band.
Crisp lines are the whole effect here, so use good tape, press the edges down firmly, and remove it while the paint is still slightly wet. Leave the upper wood bare and finish everything with clear wax or matte varnish. These small crosses look fresh lined up on a windowsill or given as simple, contemporary gifts in sets of three.
19. A Stencilled Damask Motif in Antique Gold
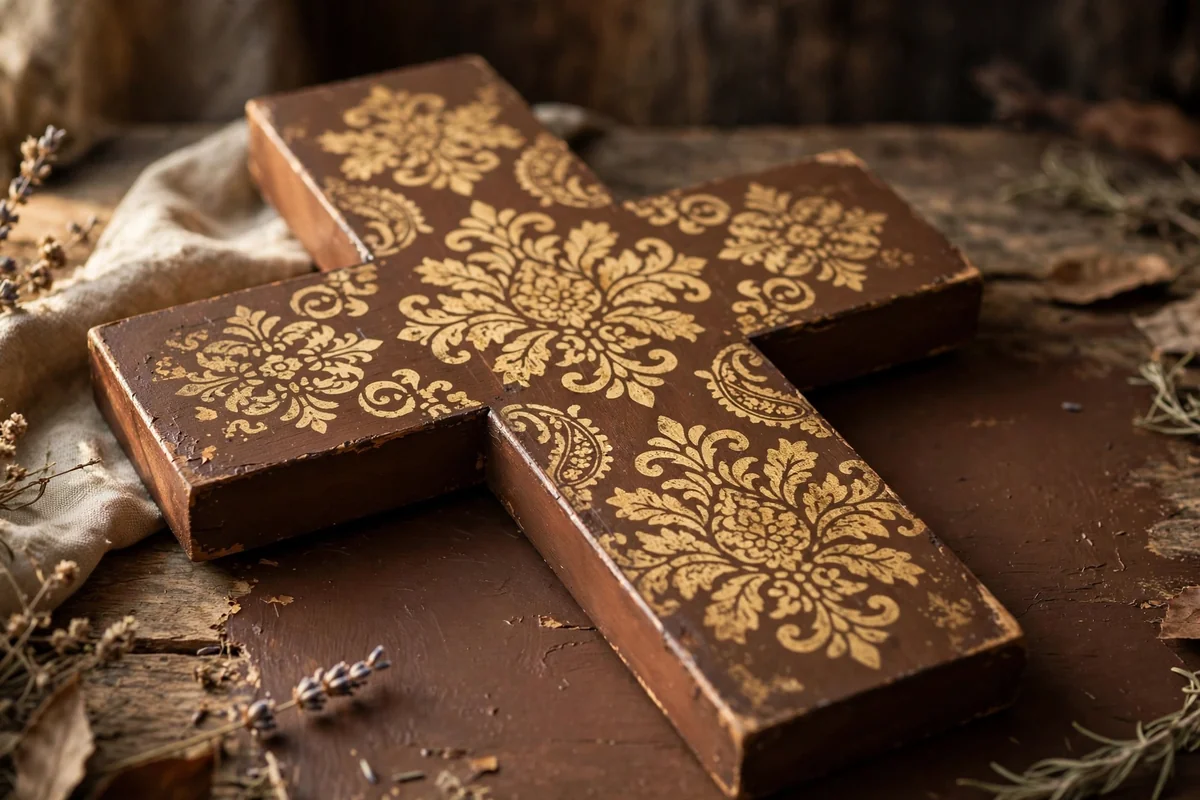
A stencil gives you pattern without needing a steady drawing hand. Paint the cross a deep warm brown or a muted burgundy, then position a damask or simple medallion stencil at the centre. Load a stencil brush with antique gold acrylic, offload most of it onto kitchen paper, and dab straight down so paint does not creep under the edges.
Lift the stencil straight up and let the motif dry before deciding whether to repeat a smaller version along the beam. One strong motif usually looks richer than a crowded repeat. If the gold feels too bright, soften it with a dry brush of the base colour once dry. Seal with satin varnish, because a slight sheen suits the gilded, vintage character of this design.
20. A Speckled Night Sky in Deep Indigo

For something quietly striking, paint the cross a deep indigo, blending a little black at the edges and a touch of violet at the centre so the colour feels like dusk rather than flat navy. While the base dries, plan a gentle arc of stars sweeping from one corner, the way a Milky Way band crosses the sky.
Flick fine white and gold speckles from an old toothbrush held a few centimetres away, practising on paper first to control the spray, then add a few larger four point stars with the tip of a fine brush. Keep the stars denser along the arc and sparse elsewhere. Seal with matte varnish and display this one where low evening light can catch the gold.
21. Clear Beeswax With a Single Painted Olive Sprig
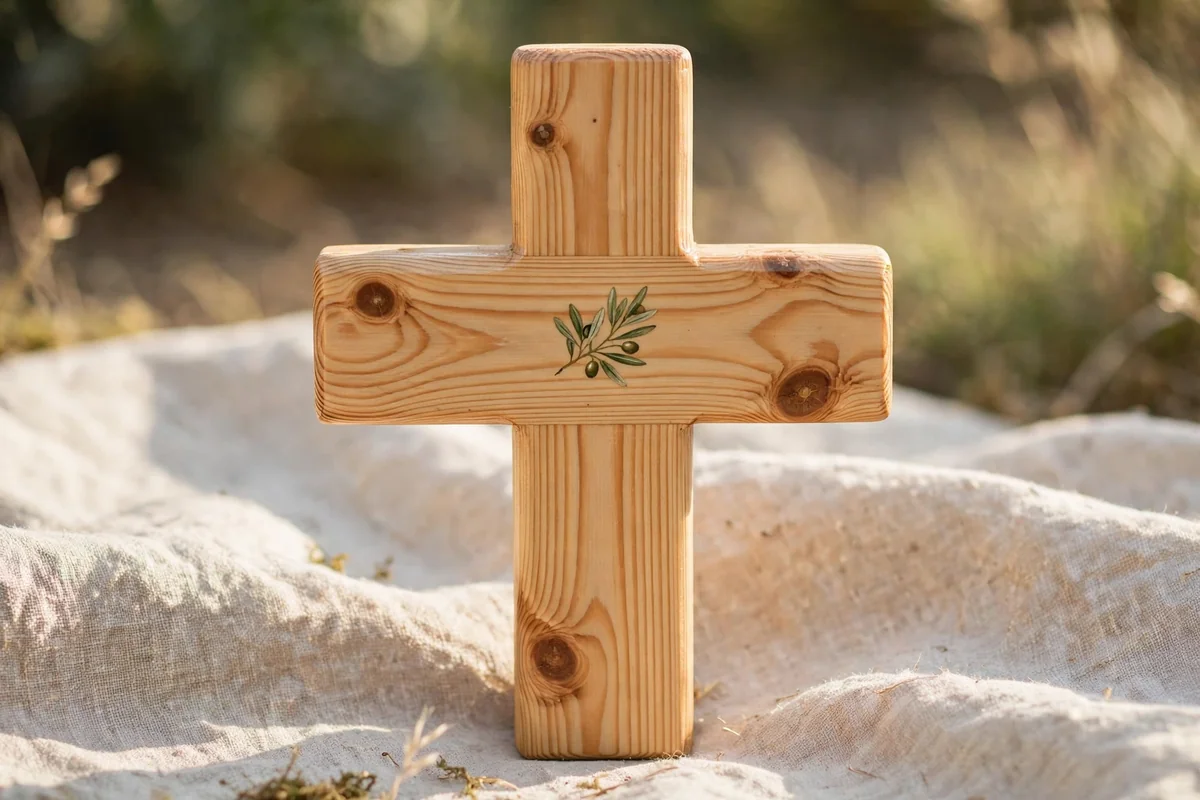
Sometimes the most heartfelt finish is barely a finish at all. Sand a pine or oak cross until it is silky, then paint just one small olive sprig at the centre, with a curved stem, six slender leaves in two greens and two tiny olives. The single motif leaves the wood to speak, and the restraint gives the piece a peaceful honesty.
Warm the grain with clear beeswax or a light coat of natural oil, buffed after fifteen minutes so the surface glows without shine. This design suits a prayer corner, a bedside table or a gift for someone who loves simple things. Because it uses so little paint, choose your best brush and take your time over the one sprig.
A Few Final Thoughts
Every finish in this collection begins with the same kindness, which is sanding the wood smooth and wiping away the dust before any paint touches it. From there, trust thin coats, let each layer dry, and stop a little earlier than you planned, because hand painted crosses charm most when they stay simple. Make one for your home first, and the gifts will follow naturally.
Frequently Asked Questions
What paint works best on a wooden cross?
Matte acrylic craft paint is the most practical choice. It covers raw wood in about two coats, dries within the hour, mixes easily into soft vintage shades and washes out of brushes with water. Chalk paint is a good alternative when you want an extra soft, slightly powdery surface that distresses beautifully with fine sandpaper along the edges.
How do I stop paint bleeding into the wood grain?
Bleeding usually happens on very open grained or unsanded wood. Sand the cross to at least 180 grit, wipe it with a tack cloth, and brush on one thin coat of clear matte sealer or a diluted wash of your base colour first. That primer layer fills the thirsty fibres, so your details stay crisp instead of feathering outward.
How can I make a new cross look old and rustic?
Layering and gentle sanding do most of the work. Brush a grey or brown wash over the base colour, let it dry, then rub the edges, corners and raised grain with 220 grit paper until the wood shows through in believable wear spots. A final coat of dark wax settled into the grooves deepens the aged effect without extra painting.
Should I seal a painted wooden cross?
Yes, sealing protects all your work from dust, handling and fading. Use clear matte varnish for an invisible shield that keeps the handcrafted feel, or clear wax when you want a softer, warmer touch. Apply two thin coats rather than one thick one, and let the paint cure for a full day before sealing floral details.
What size cross is best for a first project?
A cross between 20 and 30 centimetres tall is the most forgiving size. It is large enough for simple flowers, stripes or a stencil motif, small enough to finish in one or two sittings, and easy to display on a shelf, desk or wall. Smaller crosses suit dip painting and single motifs, while larger ones carry landscapes and bouquets better.