Crafts
22 DIY Bracelet Packaging Ideas That Make Handmade Gifts Feel Truly Special
By Anna Wells · · 22 min read
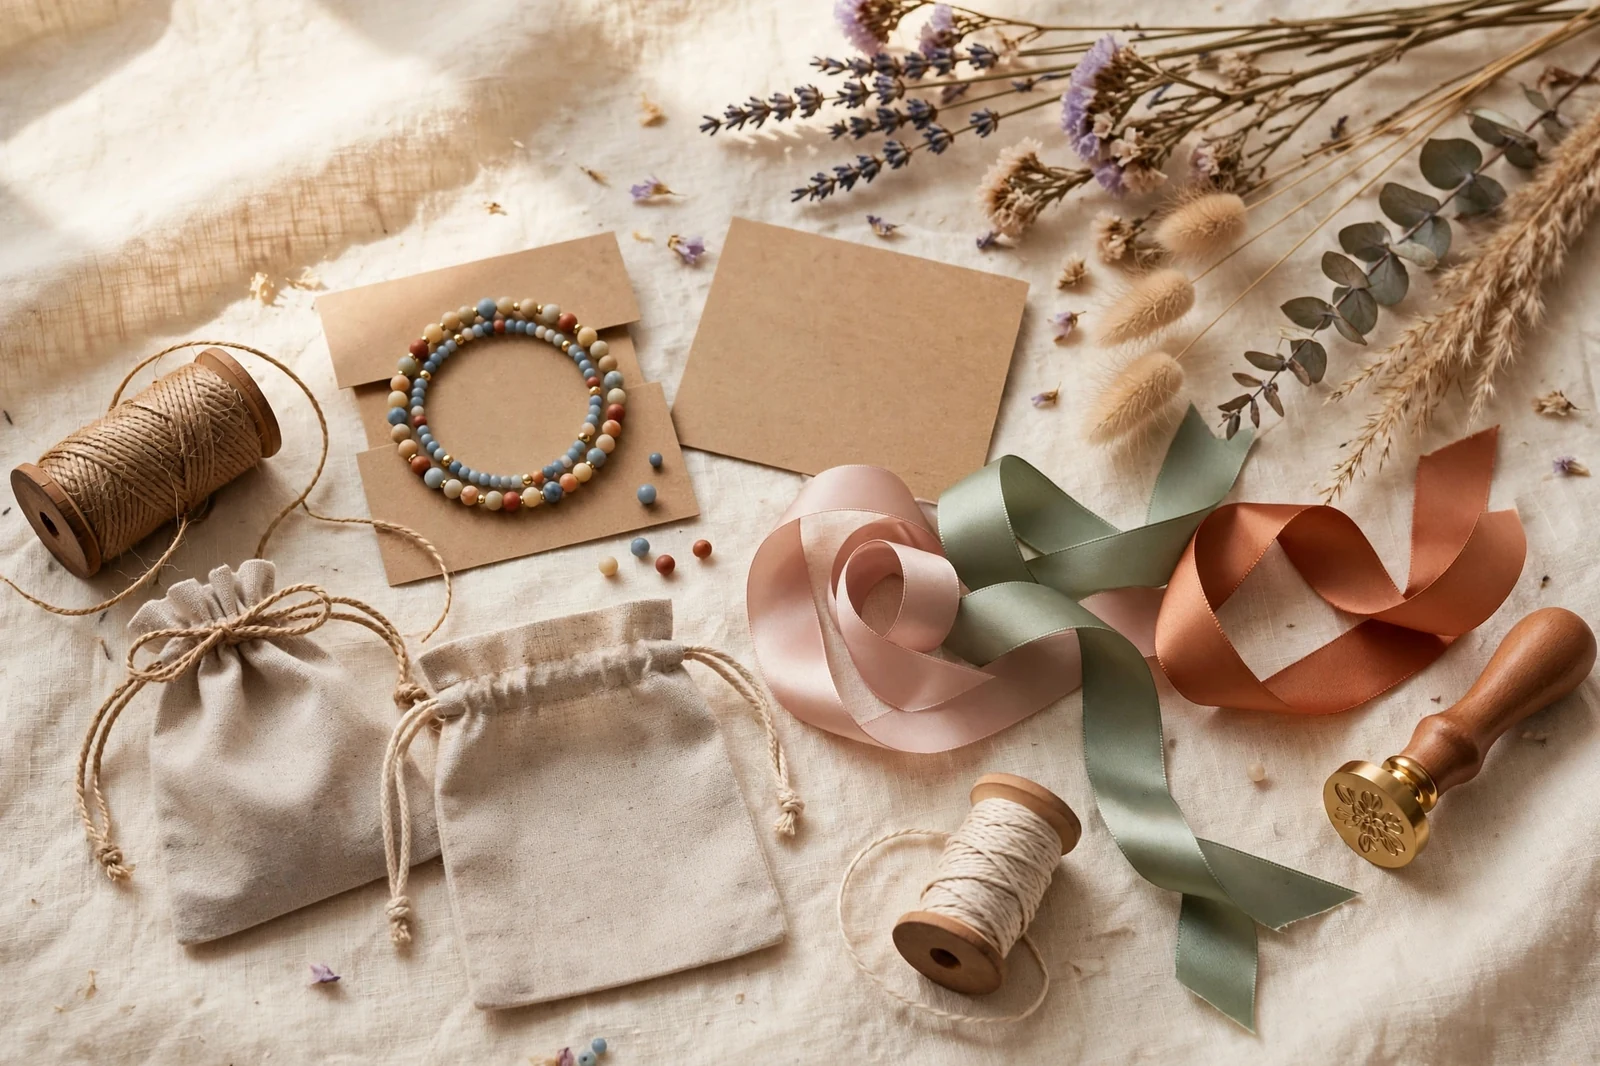
Beautiful packaging turns a simple handmade bracelet into a gift worth remembering. These 22 original ideas use affordable paper, fabric, ribbon, and natural materials to present every bracelet with care, protect it in transit, and make the unboxing feel warm and personal.
The moment someone receives a handmade bracelet, the packaging becomes part of the gift. A bracelet resting on a carefully made card, tucked into a soft pouch, or revealed from a tiny drawer instantly feels more thoughtful, more valuable, and more personal. You do not need expensive boxes or professional printing to create that impression, since most beautiful packaging starts with simple paper, fabric scraps, ribbon, and basic craft supplies.
This collection gathers 22 original packaging ideas for gifts, market stalls, online orders, and party favors. Each one is designed to protect the bracelet, prevent tangling, and create a warm unboxing moment, all while keeping costs low and materials easy to find. Match the packaging to the mood of the jewelry, prepare your favorites in batches, and every bracelet you make will arrive feeling like a small celebration.
As you browse, notice how each idea balances beauty with practicality. The best packaging secures delicate chains, cushions beads, and still looks lovely sitting on a gift table. Choose two or three styles that fit your bracelets, gather the supplies, and enjoy turning simple materials into presentation worthy of the handmade piece inside.
1. Rustic Kraft Card Displays with Hand-Stamped Motifs
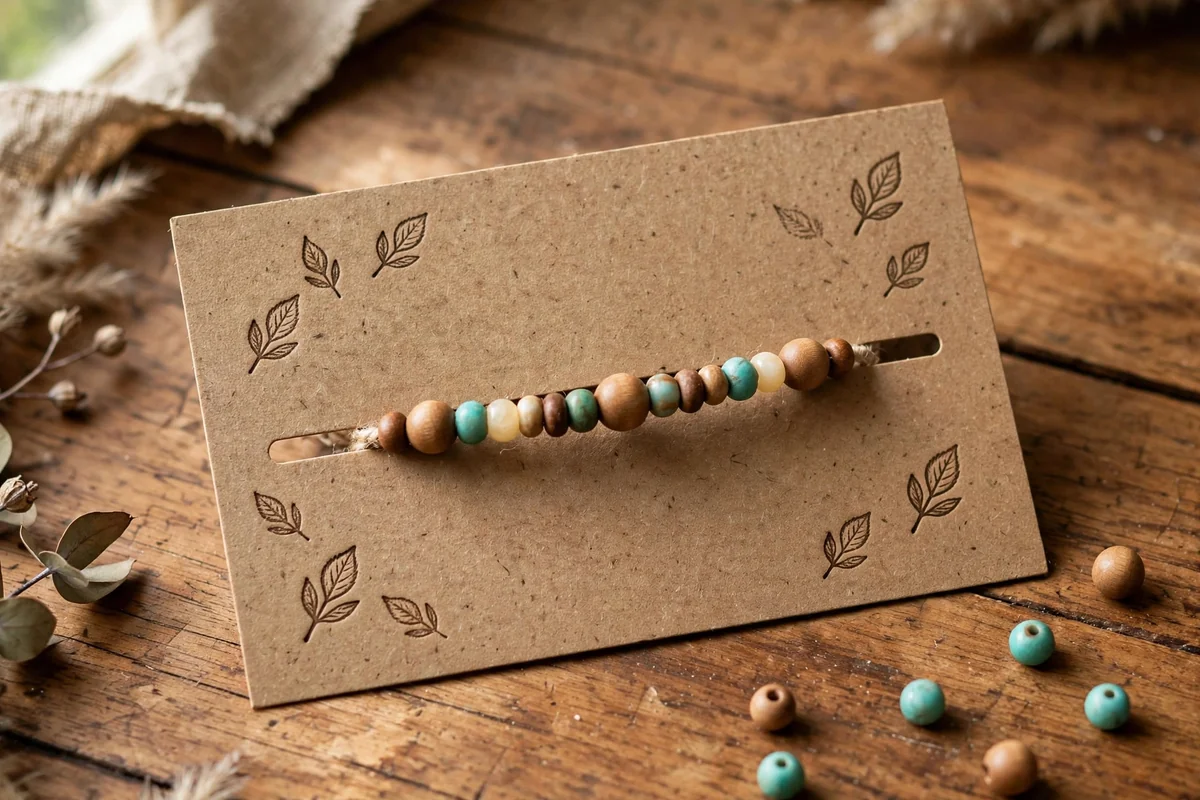
Cut heavyweight kraft cardstock, around 300 gsm, into cards measuring about 2.5 by 3.5 inches, then round the corners with a punch for a soft finish. Make two narrow slits near the left and right edges, thread the bracelet through, and let it rest flat across the front. Stamp a small leaf, star, or heart motif near the top with brown or black ink, keeping the design simple so the jewelry stays the focus.
This style suits wooden beads, leather cords, and earthy gemstone bracelets because the warm brown tone flatters natural materials. Write a short thank-you note or care instructions on the back in neat handwriting, and the card doubles as a keepsake. For craft fairs, prepare cards in batches and keep the stamping consistent so your whole display looks coordinated. Avoid glossy inks, which can smear on kraft, and always let the stamp dry fully before attaching the bracelet.
2. Soft Watercolor Floral Backing Cards
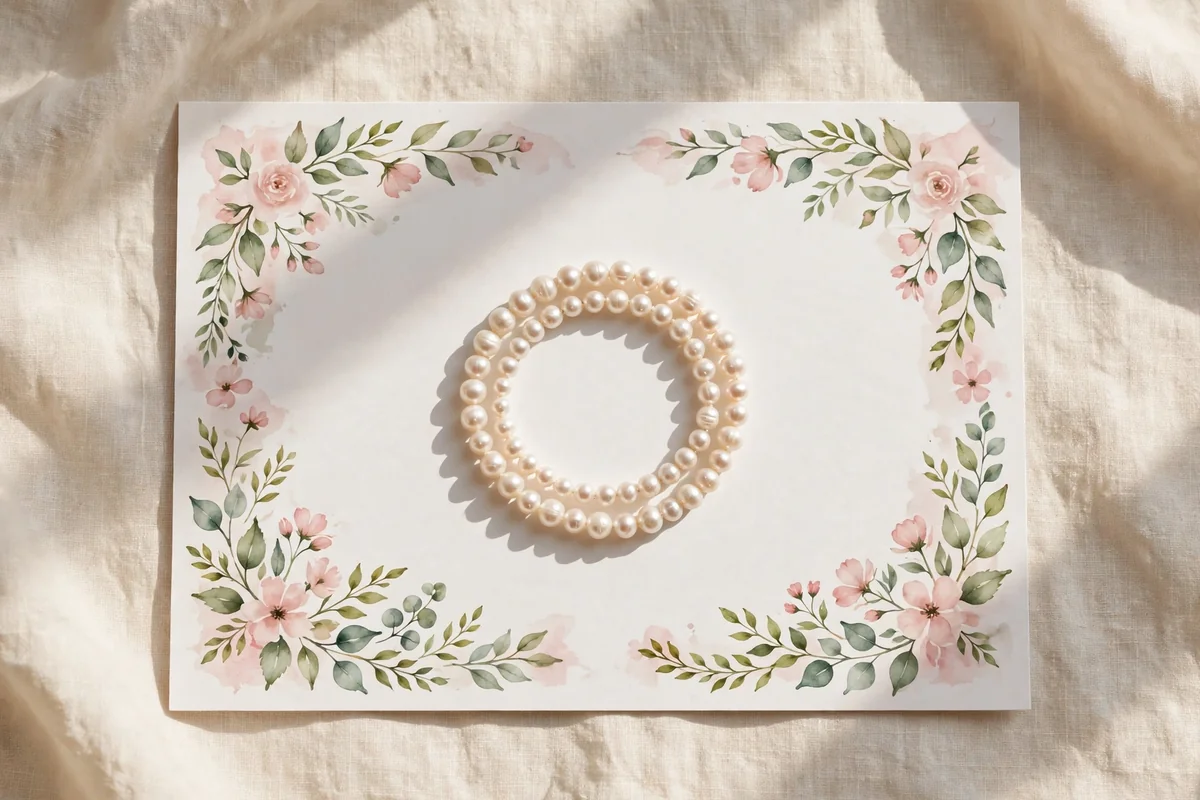
Start with heavyweight white watercolor paper, at least 300 gsm, and paint loose flowers or gentle color washes around the edges, leaving the center clear for the bracelet. Blush pink, lavender, sage, and dusty blue all flatter jewelry without competing with it. Cut two small slits for the bracelet once the paint is completely dry, since damp paper tears easily and the colors can transfer onto beads or cords.
Paint several cards in one sitting and let each design vary slightly, since those small differences make every package feel like miniature art. This style is especially lovely for pearl bracelets, birthstone jewelry, and bridesmaid gifts. Slip a handwritten message beneath the bracelet, and the recipient can keep the card afterward as a bookmark. Seal finished cards in a dry box, because humidity can warp watercolor paper and dull the painted edges.
3. Pocket-Sized Folded Paper Envelopes
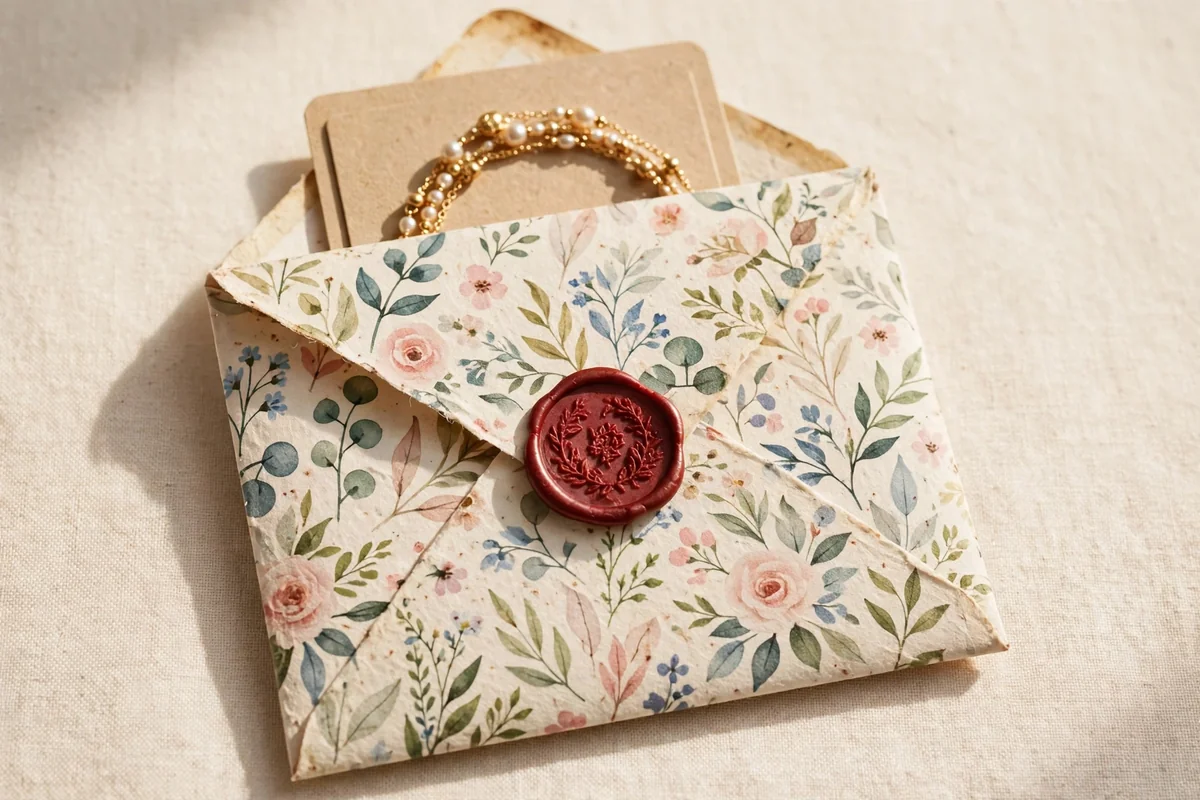
Fold small envelopes from patterned scrapbook paper, sturdy gift wrap, or handmade paper using a simple template, aiming for a finished size near 3 by 4 inches. Tuck the bracelet inside on a slim card or inside a tiny glassine bag so chains cannot tangle. Close the flap with a round sticker, a small wax seal, or a strip of decorative tape, and write the recipient’s name on the front for gifts.
These envelopes store flat, so they are ideal when you need dozens for party favors, markets, or classroom gifts. Choose paper around 160 to 200 gsm, thick enough to hold its shape but easy to fold crisply. For mailed orders, slide the envelope into a rigid mailer so corners do not bend. Avoid very dark patterns behind pale bracelets, since strong prints can visually overwhelm delicate jewelry when the flap is opened.
4. Natural Linen Drawstring Gift Pouches
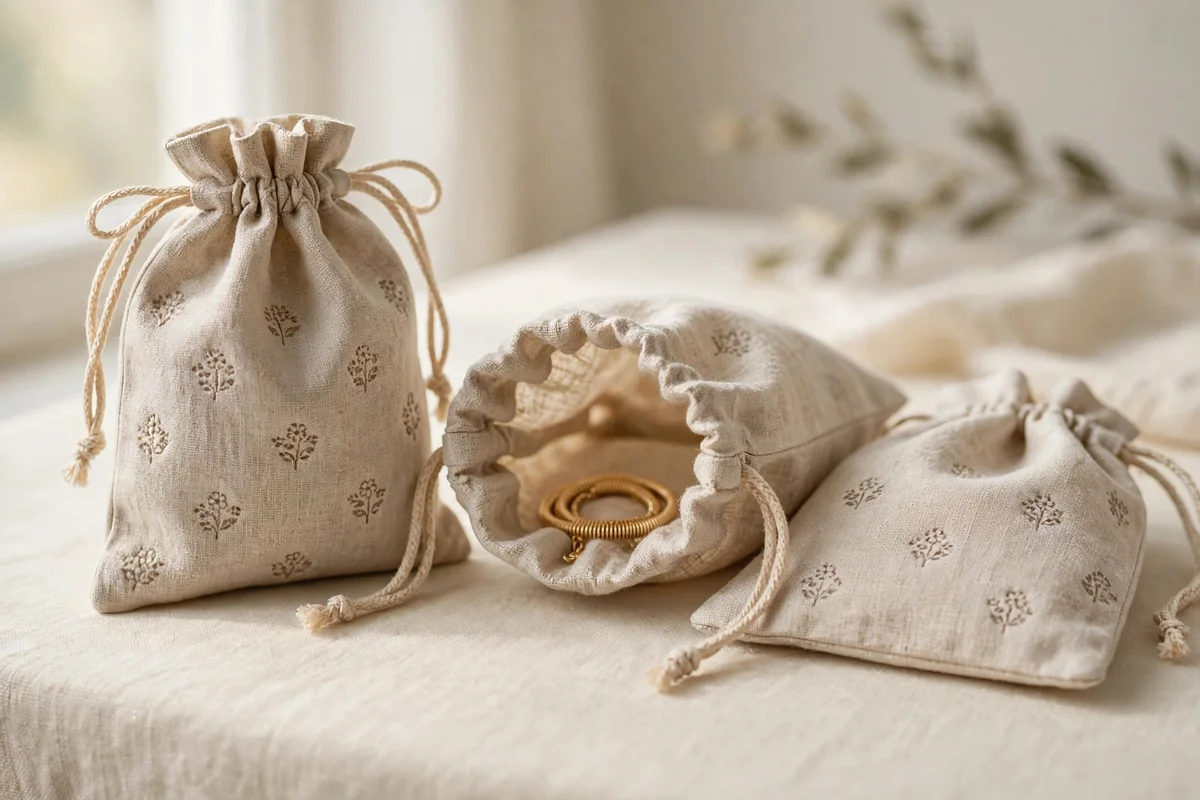
Sew simple pouches from natural linen or a cotton-linen blend, cutting rectangles about 4 by 5 inches and leaving a narrow channel at the top for ribbon or cord. Cream, oatmeal, dusty rose, and sage are versatile colors that suit almost any bracelet style. The slight texture of the fabric adds warmth, and a folded piece of tissue inside helps the bracelet keep its shape during handling.
Stamp the pouch with fabric ink or embroider a tiny flower, initial, or heart near one corner, keeping the decoration small so it never overwhelms the simple shape. These pouches are reusable, which makes them feel more substantial than disposable packaging, and recipients often reuse them for coins or small treasures. Wash and press the fabric before sewing, because linen can shrink, and always knot cord ends so the drawstring never pulls out.
5. Sliding Matchbox Drawer Gift Boxes
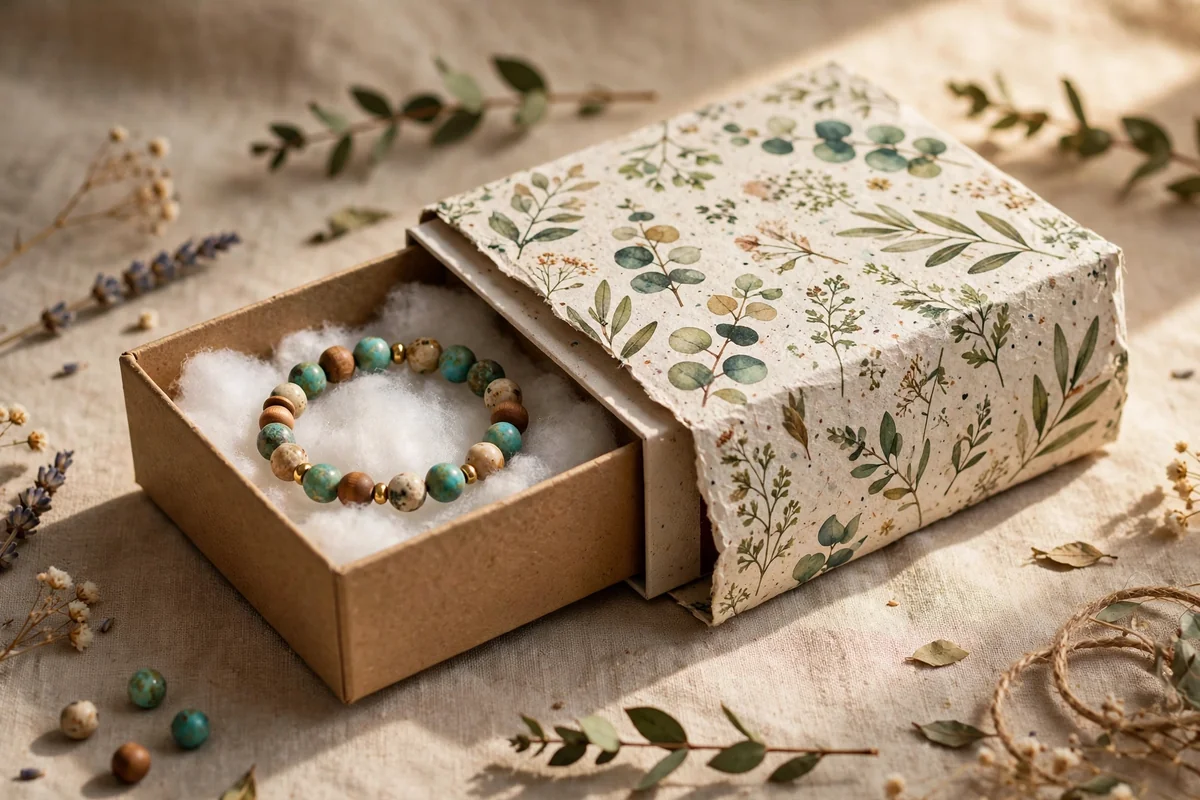
Build a shallow drawer and a snug sleeve from thick cardstock, roughly 2.5 inches square and 1 inch deep, so the bracelet rests comfortably inside. Line the drawer with cotton padding, crinkled paper, or a scrap of velvet, then lay the bracelet flat so it cannot slide around. Cover the outer sleeve with botanical paper or a hand-painted pattern, and add a small ribbon loop to the drawer front so it pulls open easily.
The sliding reveal makes even an inexpensive bracelet feel special, and the compact box protects delicate pieces during mailing. This design takes more time than a flat card, so reserve it for gifts, bridesmaid sets, or higher-priced pieces. Test the fit before decorating, because a sleeve that is too tight will crush the drawer and one that is too loose will slide off in transit. Keep a finished sample as your measuring template for future batches.
6. Plantable Seed Paper Presentation Cards
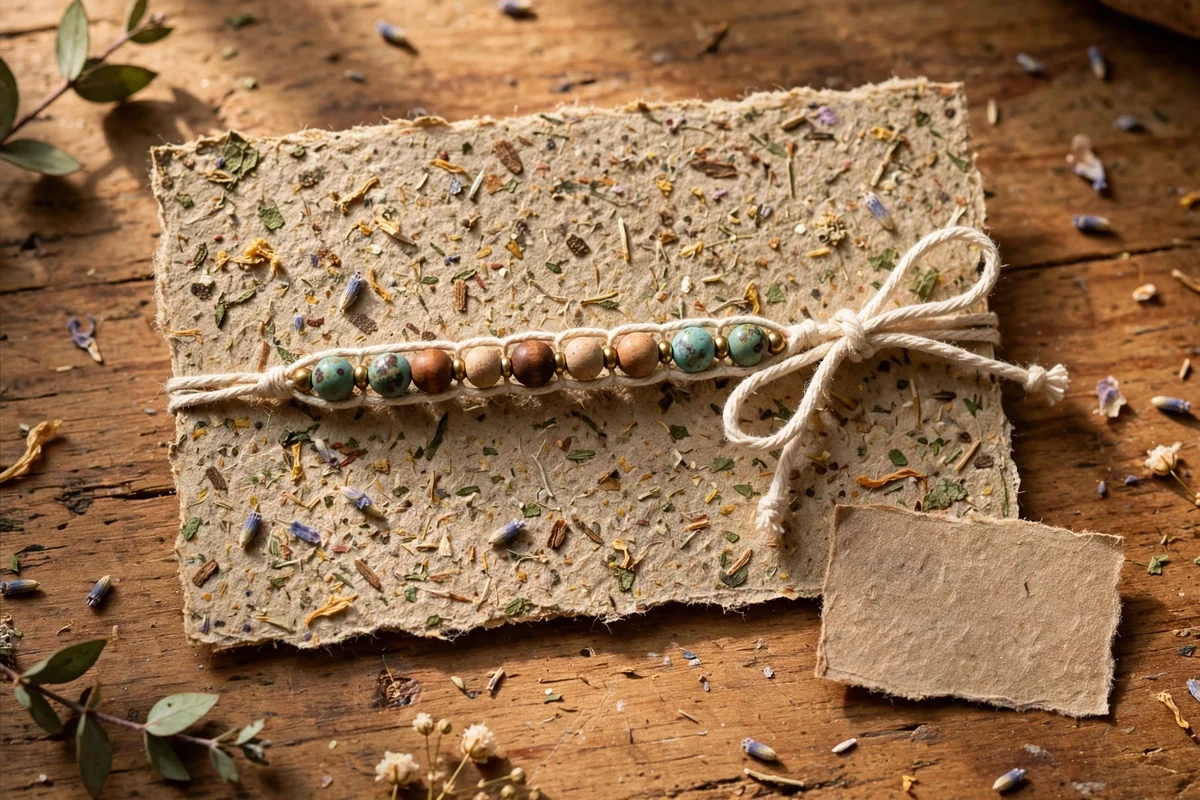
Cut plantable seed paper into simple display cards about 2.5 by 4 inches, and attach the bracelet with small cotton ties rather than plastic fasteners. The natural texture and visible flecks of petals give every card a beautifully handmade look. Include brief planting directions on a separate recycled-paper tag so the card itself stays uncluttered, and mention which seeds are inside, such as wildflowers or herbs.
This packaging suits nature-inspired jewelry, eco-conscious gifts, and spring collections, because the card literally grows into flowers after the bracelet is removed. Keep seed paper away from moisture during storage, since dampness can trigger early sprouting. Avoid heavy metal charms that might tear the soft paper, and test one card with water first to confirm the seeds are viable. The second life of the card makes the gift genuinely memorable.
7. Dried Blossom Accent Display Cards
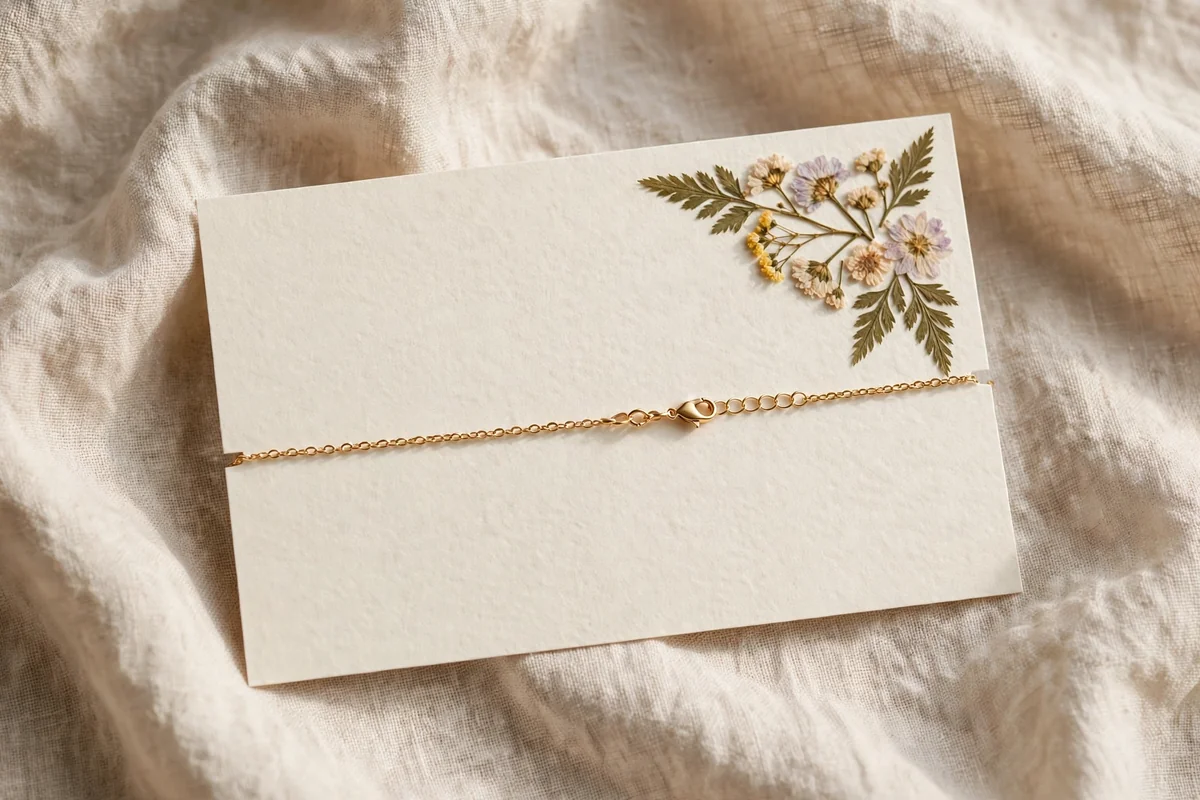
Begin with thick cream or white cardstock, then attach one or two tiny dried flowers near a corner using a very small amount of clear-drying glue. Baby’s breath, lavender buds, fern leaves, and small daisies work well because they lie fairly flat and never overpower the jewelry. Secure the bracelet across the center with two slits, leaving generous space between the blossoms and the beads so the design breathes.
For mailed packages, cover the flowers with a strip of transparent vellum so the petals do not break in transit. For hand-delivered gifts, the blossoms can stay uncovered for a more natural look. This style pairs beautifully with delicate chains, floral charms, and pastel beads. Press the flowers fully flat before gluing, and avoid fresh flowers entirely, since moisture will stain the card and wilt within days.
8. Sheer Vellum Sleeves with Paper Belly Bands
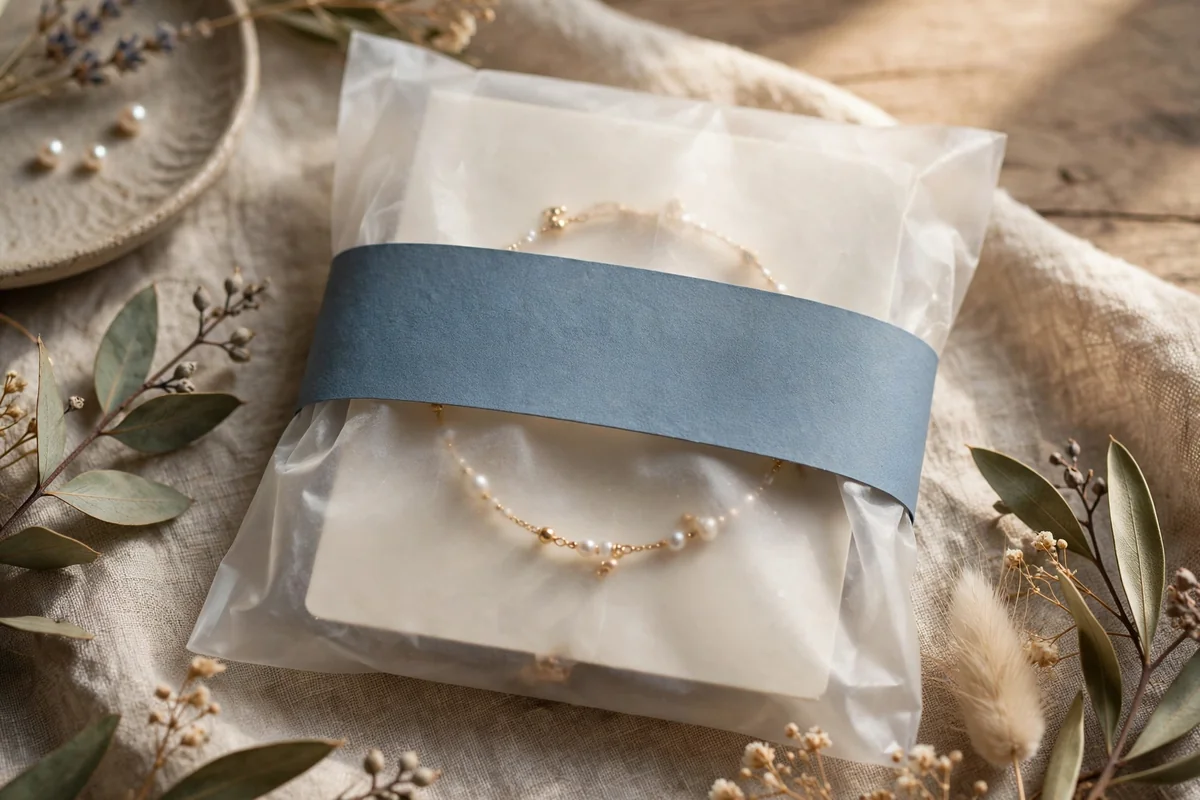
Place the bracelet on a plain cardstock display card, then wrap the whole card in a sheet of translucent vellum so the jewelry stays softly visible underneath. Secure the wrap with a narrow paper band around the center, choosing a muted color like dusty blue, sage, or warm beige that echoes the bracelet. The band can carry a small motif or a short thank-you message without cluttering the design.
Vellum adds a dreamy layer that makes simple packaging feel boutique quality, and it shields beads from dust and light scratches. Because the wrap is lightweight, it suits online orders without adding bulk or postage cost. Cut the vellum slightly larger than the card and fold the edges crisply, since wrinkled vellum looks untidy. Avoid using vellum with very heavy bracelets, which can stretch the delicate sheet out of shape.
9. Petite Curved Pillow Gift Boxes
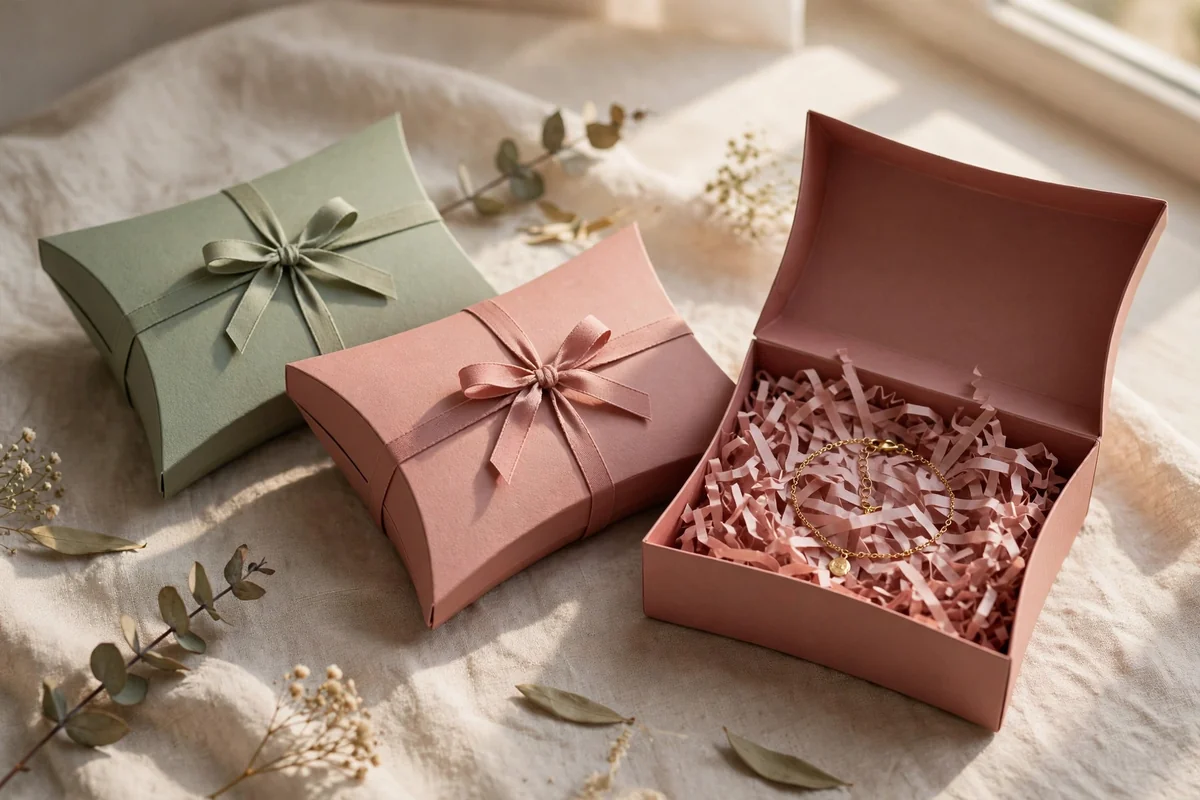
Make pillow boxes from heavyweight cardstock using a simple template, folding along the curved ends so each package closes without glue. A finished size near 3 by 4 inches holds most bracelets comfortably on a bed of shredded tissue or a folded piece of soft fabric. Decorate the outside with one narrow ribbon, a raffia tie, or a small gift tag, since solid colors with a single embellishment look more refined than busy prints.
These boxes are ideal for party favors, bridesmaid bracelets, and market purchases, and they assemble quickly in batches. Score the fold lines with a bone folder before curving the ends, which prevents cracking on thicker card. Avoid overfilling, because a bulging pillow box will not close neatly and the curved seams may split. Store finished boxes flat until needed, then pop the ends closed just before placing the bracelet inside.
10. Textured Handmade Paper Sleeve Wraps
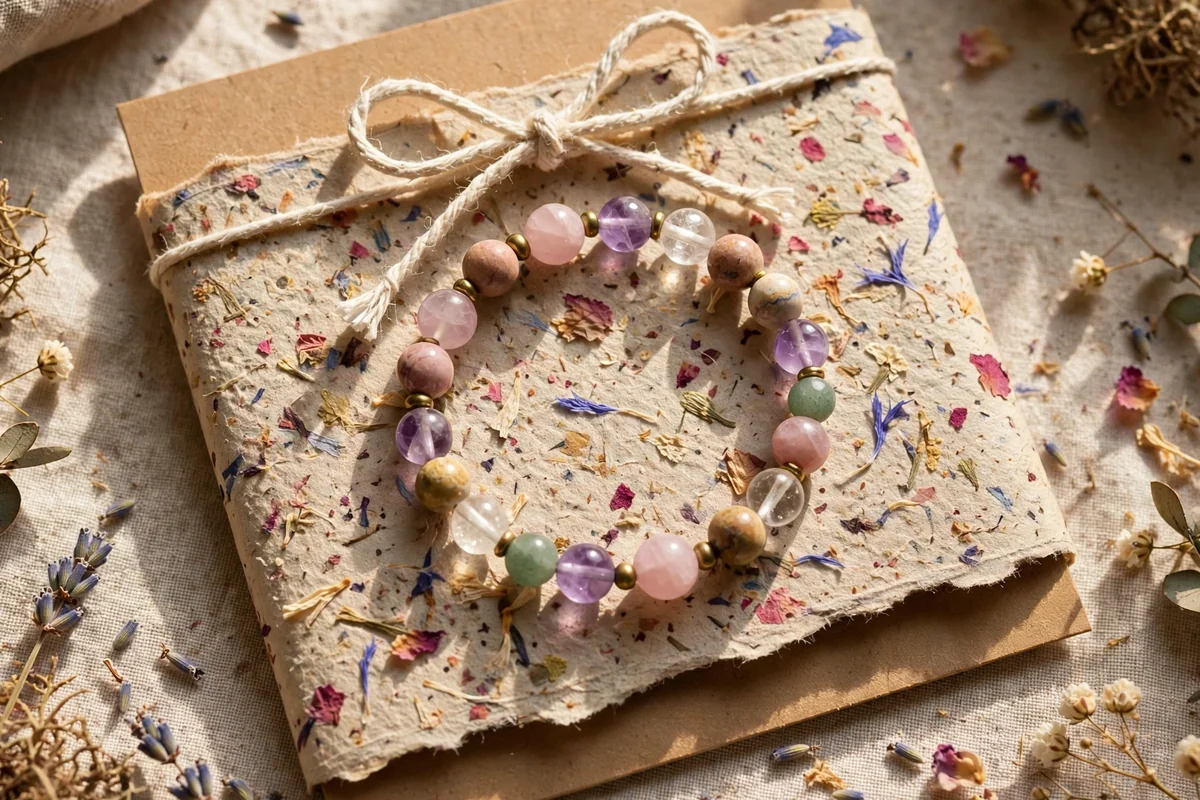
Wrap a piece of textured handmade paper around the bracelet like a sleeve and secure it with cotton string or narrow ribbon. Papers with flower petals, leaves, or subtle color flecks are especially beautiful, though even plain deckle-edged paper has plenty of character. Place the bracelet on a sturdy inner card first, which gives the package structure and stops the jewelry from bending the delicate paper.
This style pairs wonderfully with natural gemstones, ceramic beads, and woven cords that already have an organic feel. Add a tiny tag with string rather than writing directly on the textured surface, since ink can bleed into the fibers. Keep the sleeve snug but not tight, and avoid exposing handmade paper to rain or humidity before gifting. The fibrous texture alone makes the packaging feel artistic without extra decoration.
11. Knotted Fabric Scrap Bundle Wraps
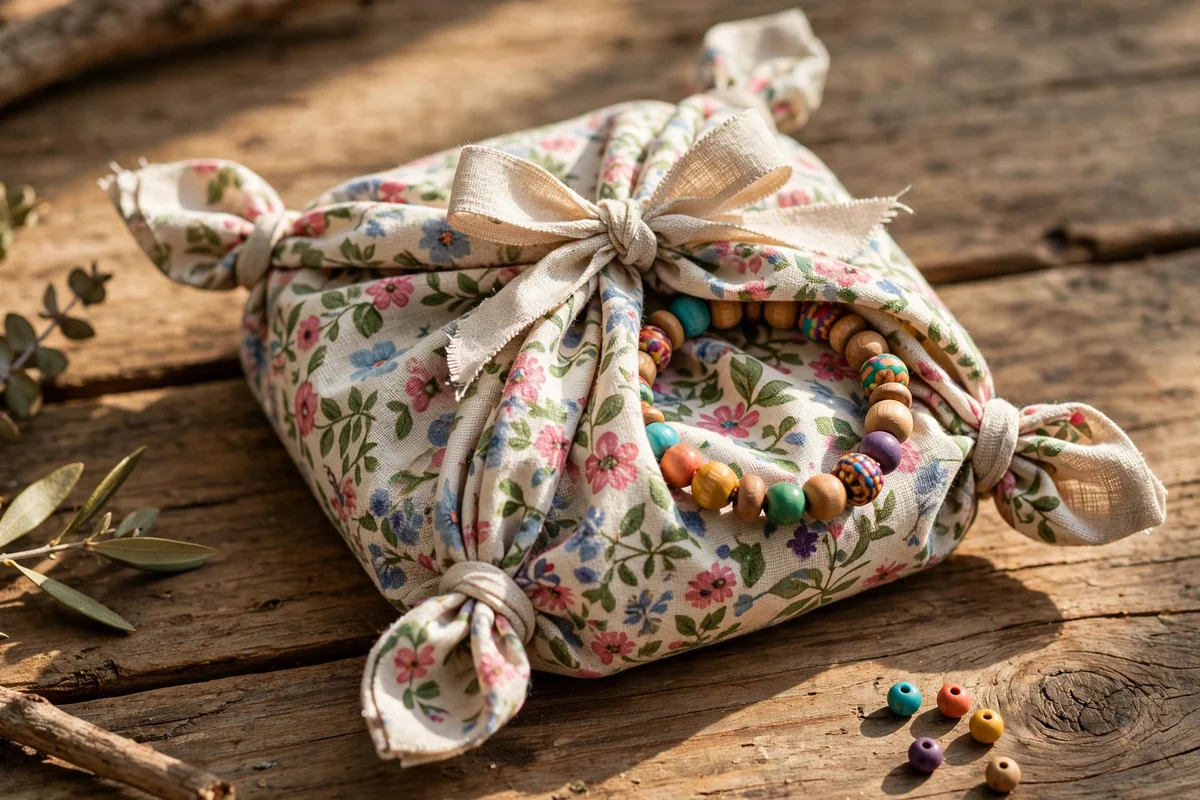
Cut a square of cotton, linen, or muslin about 8 inches across, place the bracelet in the center on a small card, then gather the corners and tie them with ribbon or cord. This bundle style turns sewing leftovers into pretty packaging and suits a relaxed handmade aesthetic. Slightly frayed edges can enhance the look, though pinking shears or a quick hem give a cleaner finish for market products.
Floral prints feel charming for romantic bracelets, while stripes, checks, and solids suit modern designs. The recipient can reuse the cloth as a jewelry wrap or craft material, which makes the package feel more valuable than disposable paper. Tie the knot firmly but keep it easy to undo, and avoid fabrics that shed lint onto dark beads. A sprig of dried lavender tucked into the knot adds a lovely finishing touch.
12. Storybook-Style Mini Keepsake Books
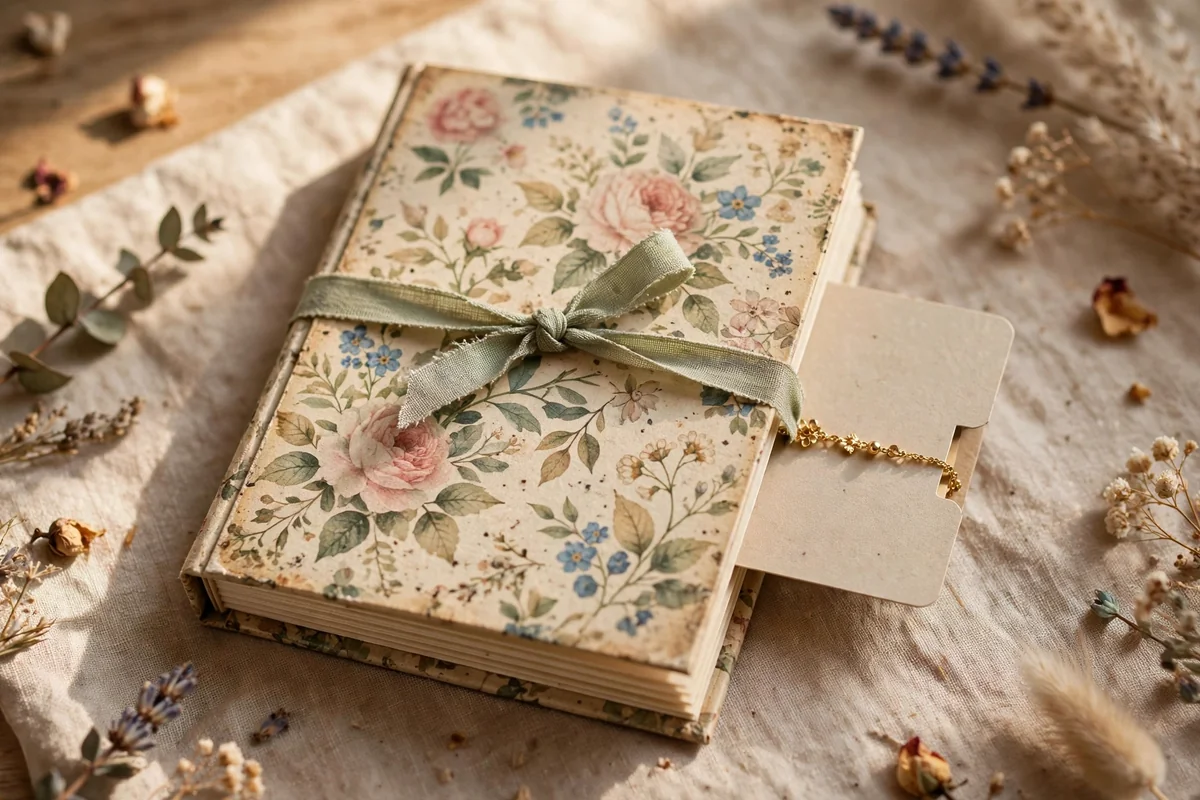
Fold a small cover from sturdy cardstock, roughly 3 by 4 inches, and place a bracelet display card inside like a page. Decorate the front with a simple floral illustration or the recipient’s name, and use the inside pages for a short message about the bracelet, such as the meaning of its stones. Tie a narrow ribbon around the closed book to keep everything secure and add a finished look.
This format shines for sentimental gifts, because the written message becomes part of the experience rather than an afterthought. It works beautifully for friendship bracelets, birthday milestones, and encouragement gifts. Keep the cover design calm so the bracelet remains the star, and use thin cardstock for the inner pages so the book closes neatly. The recipient will likely keep the little book long after the bracelet is worn.
13. Warm Cork Panel Display Cards
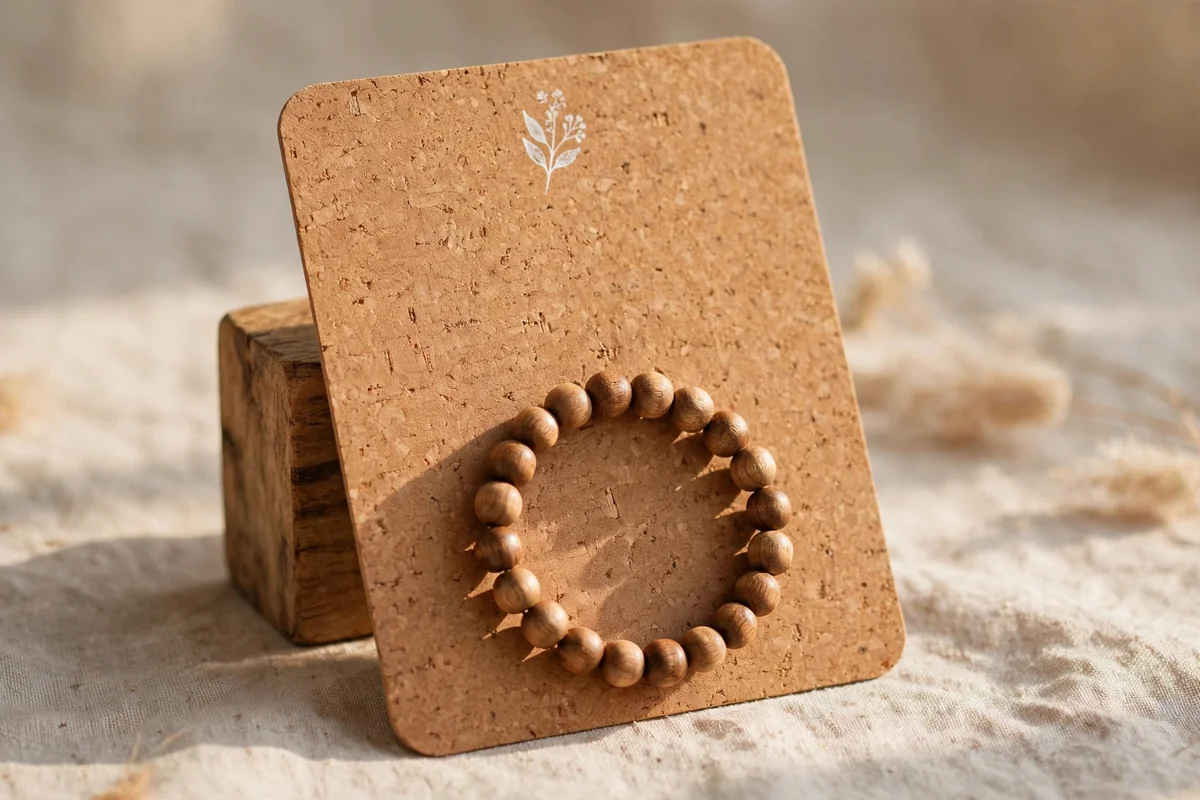
Attach a thin sheet of natural cork to sturdy recycled cardstock, then cut the layered board into rectangles or soft arch shapes about 2.5 by 4 inches. Secure the bracelet across the front with small slits or discreet paper tabs, letting the neutral cork texture frame the jewelry. The material already has plenty of visual interest, so a tiny white stamped design near the top is usually all the decoration needed.
Cork-backed cards feel substantial in the hand and can stand upright against a small display block at a market stall. They are especially attractive for wooden beads, leather bracelets, and earthy gemstone pieces. Use a sharp craft knife and a metal ruler for clean edges, since cork crumbles when cut with dull blades. Seal the cork lightly if the bracelet has pale cords, because natural cork dust can transfer onto light fabrics.
14. Glassine Sachets with Patterned Header Cards
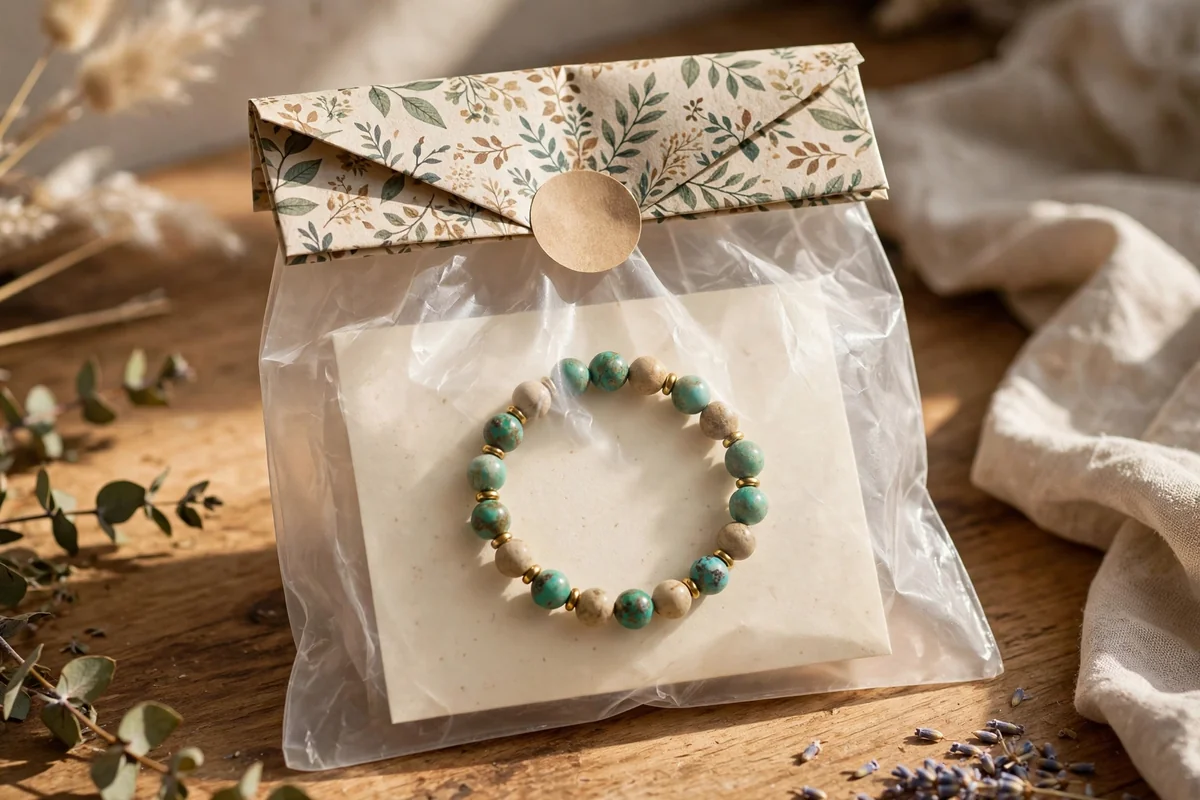
Slide the bracelet, mounted on a small card, into a translucent glassine bag and fold the open edge neatly. Then fold a narrow strip of patterned cardstock over the top and secure it with staples, double-sided tape, or a tiny sticker to create a finished header. The glassine protects against dust and moisture while keeping the jewelry visible, and it looks softer and more refined than clear plastic.
Match the header pattern to the season or your brand colors for a cohesive market display. This method is affordable and tidy, which makes it ideal for preparing dozens of bracelets for craft fairs. Keep the header narrow, about 1 inch tall, so it never hides the bracelet inside. Avoid sealing the bag completely with strong adhesive, since customers may want to open it and the glassine can tear.
15. Hand-Stitched Felt Envelope Pockets
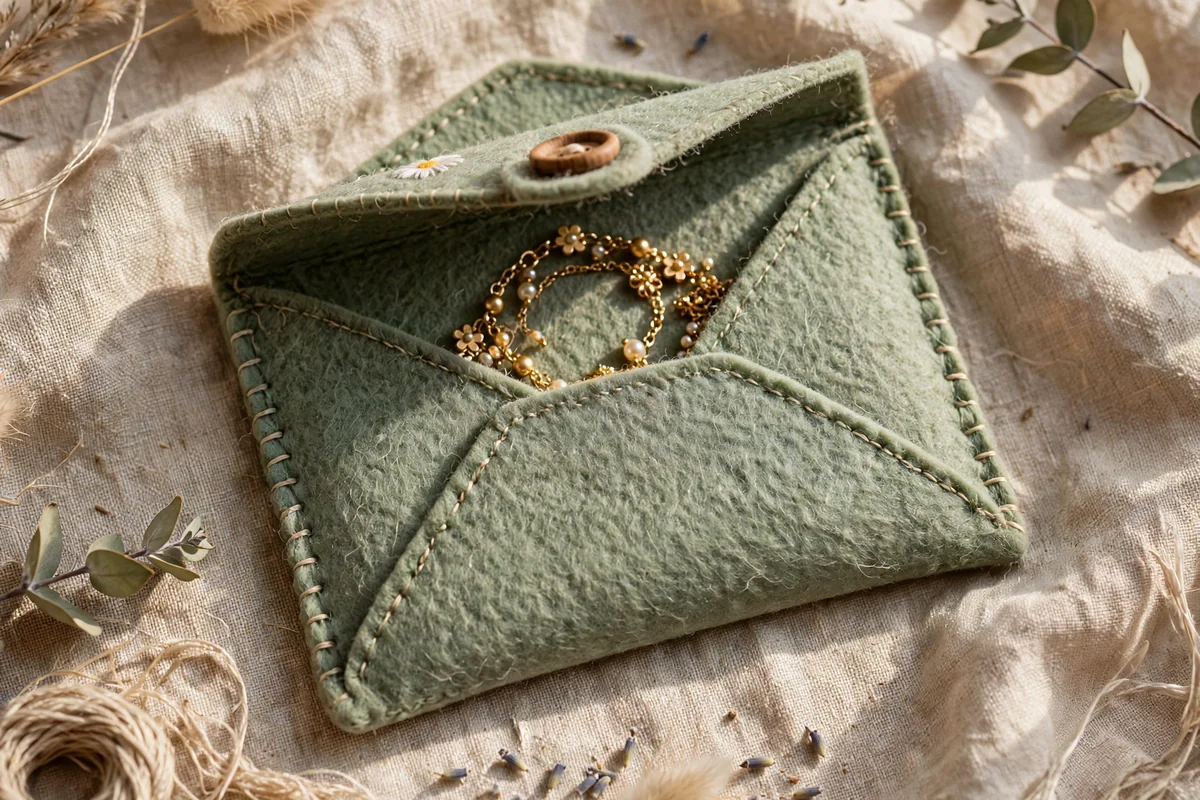
Cut two small rectangles or rounded shapes from wool-blend felt, about 3 by 4 inches, and stitch them together around three sides, leaving the top open like a pocket. Felt is sturdy enough to protect the bracelet yet soft enough to prevent scratches on delicate beads. Add a few embroidered stitches, such as a tiny daisy, leaf, or initial, using contrasting thread to turn the pocket into something special.
Close the pocket with a snap, a ribbon tie, or a button-and-loop fastener to keep the bracelet secure. These reusable pockets make lovely packaging for children’s bracelets, holiday gifts, and cozy winter collections, and they use up small felt leftovers beautifully. Keep embroidery away from the opening edge so threads never snag the bracelet. Choose thicker felt, since very thin sheets lose their shape after a few uses.
16. Muslin Pouch Wraps with Twine Ties
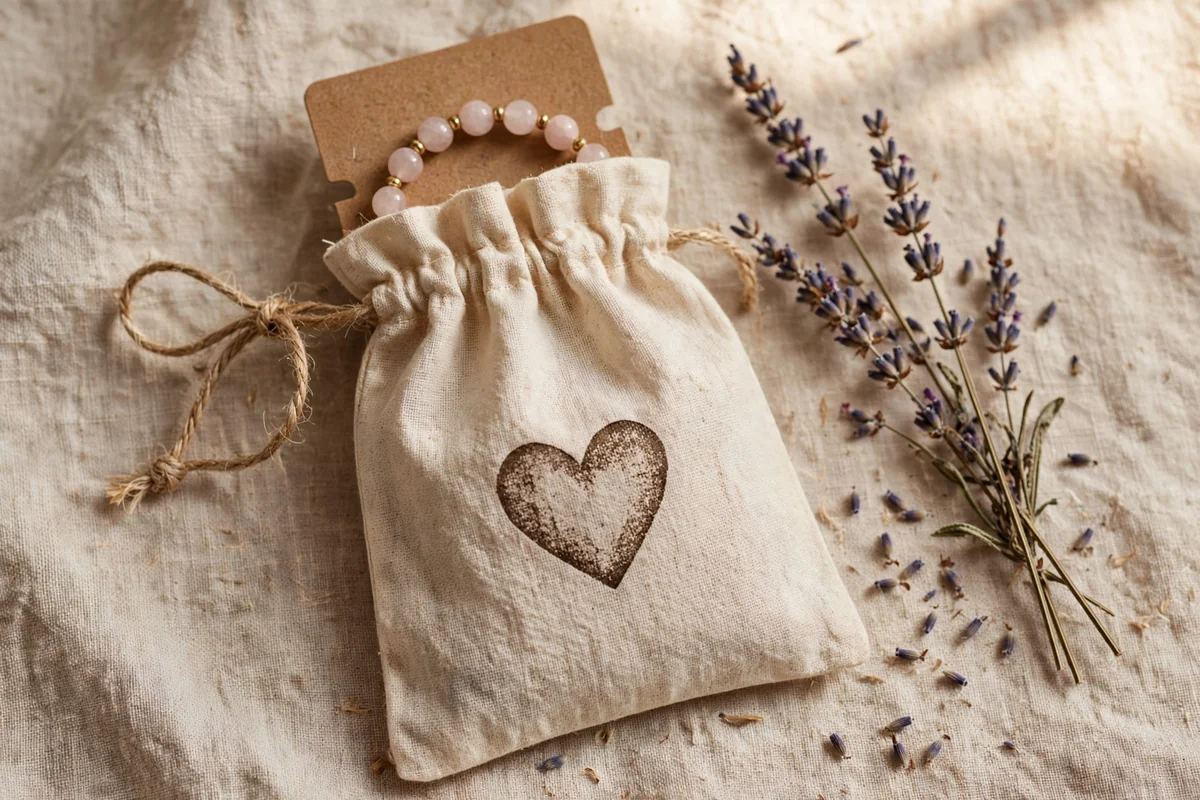
Choose small cotton muslin bags with drawstring closures and press them flat before decorating so the fabric looks neat. Stamp a simple heart, moon, flower, or tiny branch with fabric ink, keeping the design modest so the bag never looks commercial. Wrap the bracelet around a small recycled card before placing it inside, which prevents chains from tangling and gives the soft pouch a tidy shape.
Tuck a sprig of dried lavender or a small thank-you note inside, but avoid loose materials that might snag delicate chains. Muslin bags suit rustic weddings, boho jewelry, and friendship bracelets, and their neutral color works with nearly every style. They are easy for recipients to reuse, which adds lasting value. Always test the stamp on a scrap first, because fabric ink can bleed on loosely woven muslin.
17. Folded Origami Keepsake Boxes
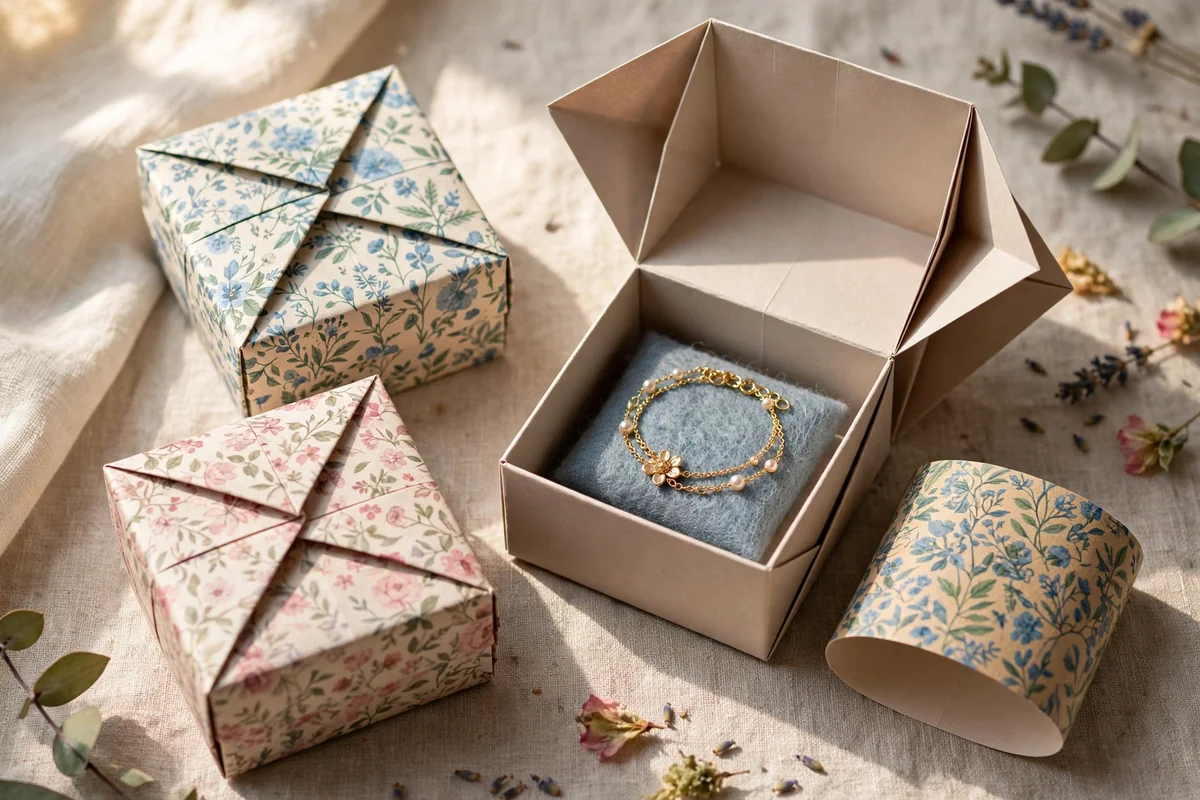
Fold a small base and a matching lid from square sheets of sturdy paper, choosing coordinating colors rather than identical prints for an artisan feel. A 6-inch square typically yields a box near 3 inches across, which fits most bracelets on a small square of felt or tissue. The crisp folds make even ordinary paper feel carefully crafted, and the design needs no glue at all.
Wrap a paper belly band around the closed box to keep the lid secure during transport. These boxes create a satisfying unboxing moment, and they can be folded from scrapbook paper, old maps, or clean gift wrap for a thrifty touch. Make sure any reused paper is strong enough to hold its shape, and avoid very thin sheets that collapse under the lid. Prepare the bases and lids in assembly-line batches to save time.
18. Tiny Wooden Treasure Boxes with Cotton Fill
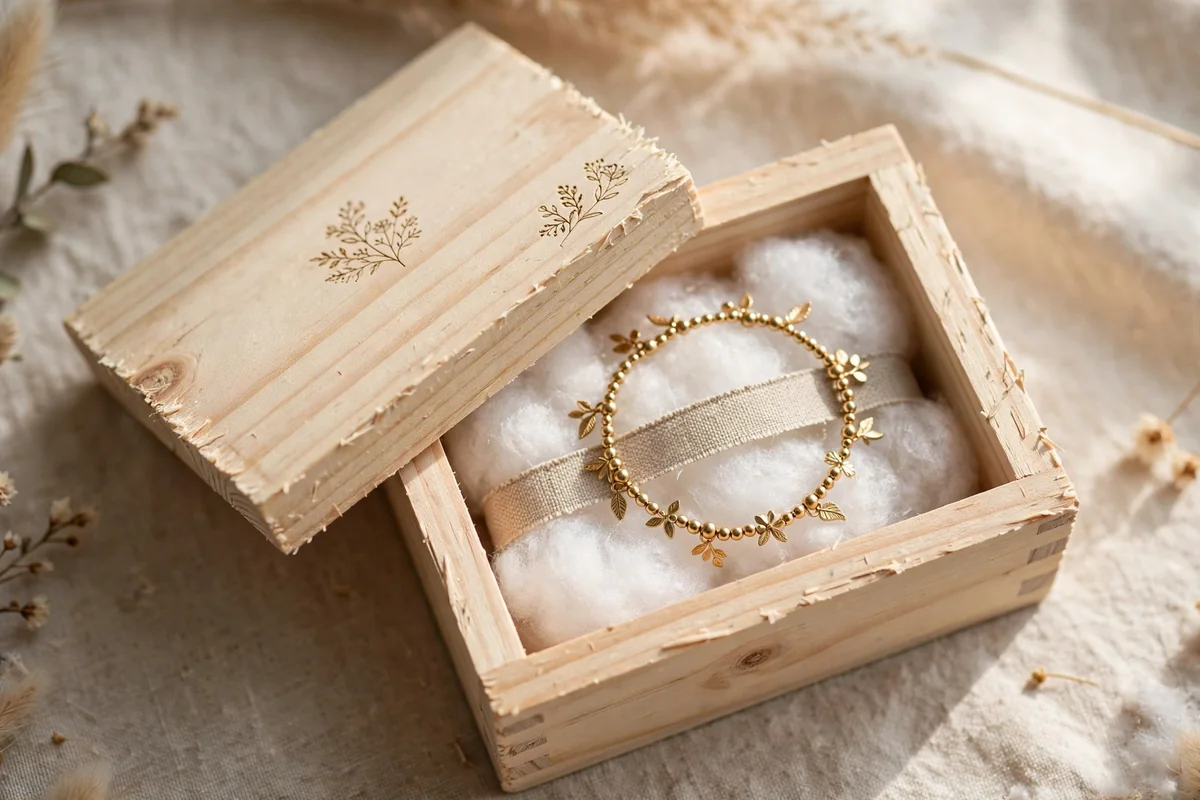
Start with small unfinished craft boxes with sliding lids, which are affordable and easy to customize with a light stain or a small botanical motif. Keep the finish natural rather than heavily painted, so the wood grain stays visible. Line the inside with cotton batting covered in linen or velvet, then rest the bracelet on top, adding a narrow ribbon loop beneath the jewelry so it lifts out easily.
A wooden box becomes part of the gift, since the recipient can later store rings and small treasures inside. Reserve this sturdier option for premium bracelets, milestone gifts, or special collections, because it costs more than paper packaging. Sand the edges smooth before finishing, and let any stain or paint cure fully so no residue touches the bracelet. The lasting quality makes the presentation feel truly significant.
19. Arched Window Display Cards
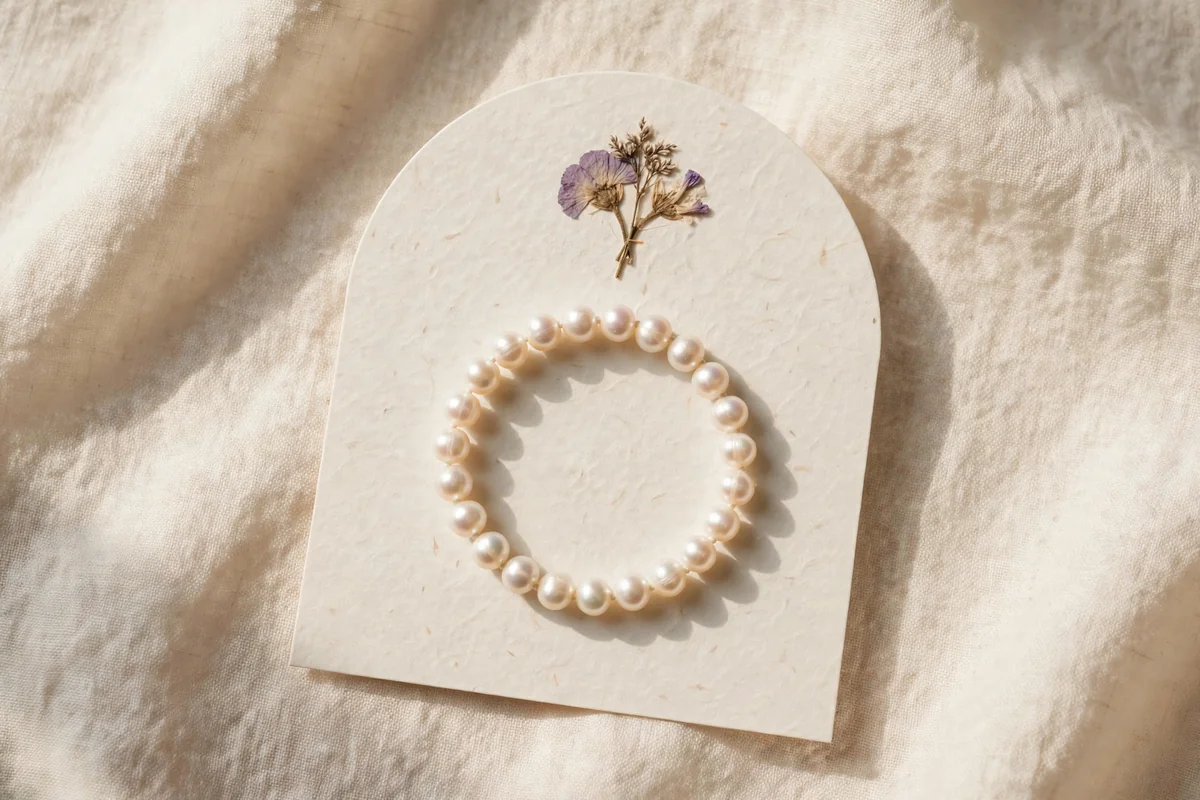
Cut sturdy cardstock into an elegant arch shape, about 2.5 inches wide and 4 inches tall, which frames the bracelet like a little window. The curved top adds a graceful, vintage feel that suits pearls, delicate chains, and romantic beadwork. Attach the bracelet with two small slits positioned low on the card so the arch stays clean and uncluttered, and consider a thin gold or kraft border following the curve.
Use a template or a large circle punch to keep the arch symmetrical, since an uneven curve is immediately noticeable. This shape displays beautifully on a small easel at markets, drawing the eye among rectangular cards. Keep embellishments minimal, because the silhouette itself is the decoration. Avoid flimsy paper, which will flop forward when the bracelet’s weight pulls on the slits, and choose at least 300 gsm for a confident stand.
20. Layered Tissue and Ribbon Gift Wraps
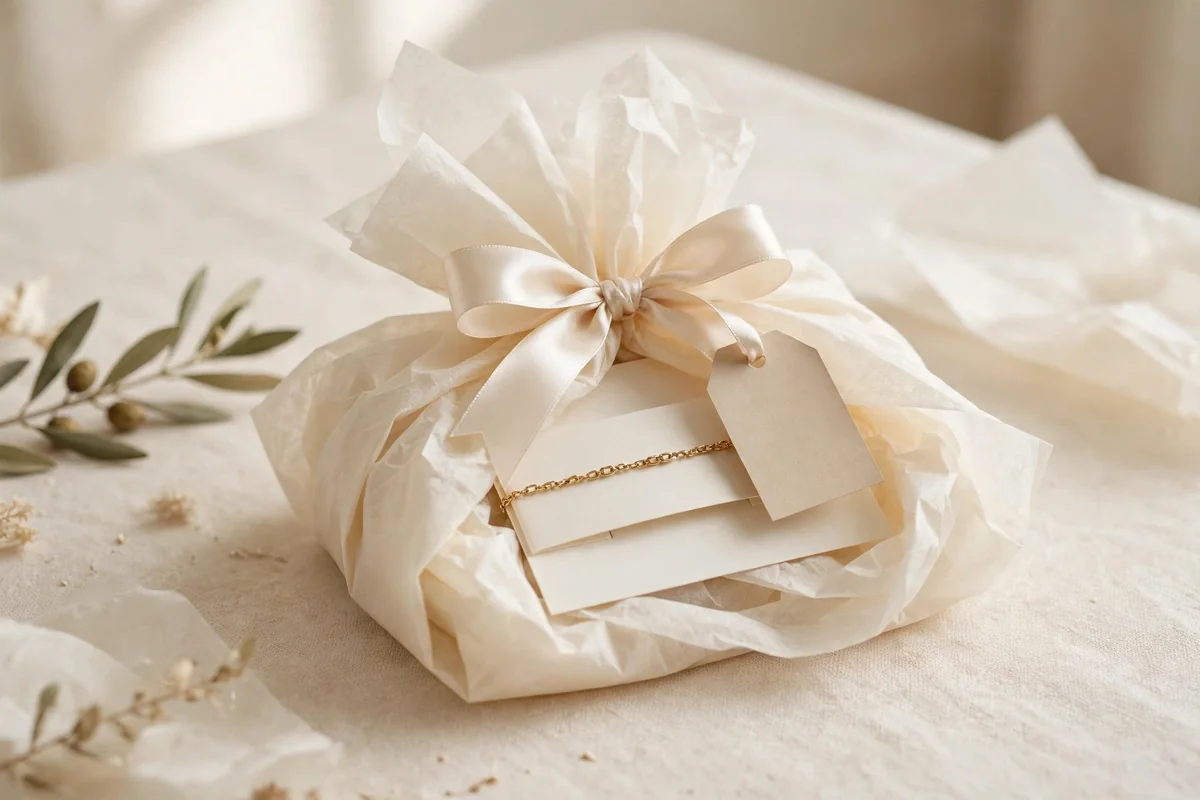
Lay the bracelet card on two sheets of soft tissue, gather the tissue upward, and tie it with a satin ribbon bow for a classic gift-shop finish. Ivory, blush, and champagne tissue flatter most jewelry, while the ribbon can pick up a color from the beads. Tuck a small blank tag under the bow for the recipient’s name, and fluff the tissue edges gently so the package looks full rather than flat.
This timeless wrap works for birthdays, holidays, and thank-you gifts, and it needs no special tools at all. Use two layers of tissue so the card never shows through, and cut the ribbon long enough for a generous bow, about 18 inches for a small package. Avoid wrinkled tissue from old gifts, since fresh sheets make all the difference. A tiny sprig of dried flowers tucked into the bow adds a thoughtful finishing detail.
21. Round Tin Keepsake Containers
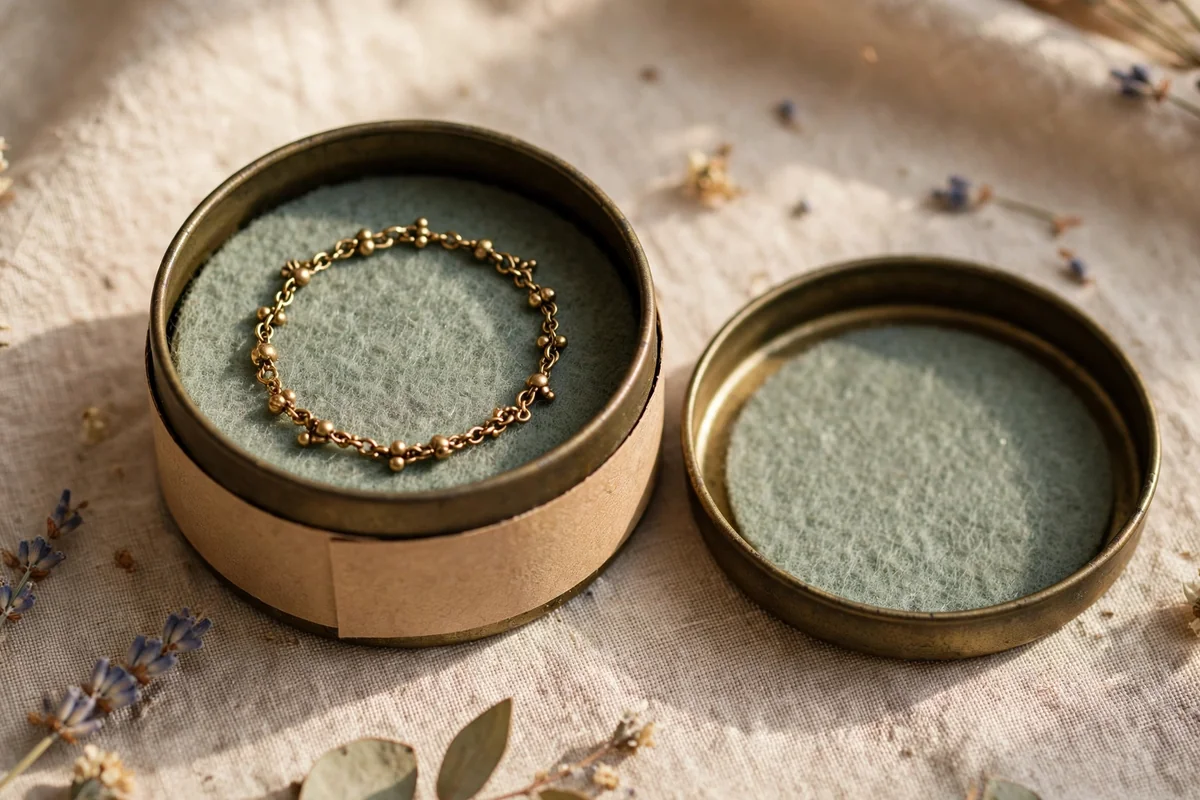
Choose small round metal tins, about 3 inches across, and line the bottom with felt or folded cotton so the bracelet rests softly. Arrange the bracelet in a loose circle to prevent tangling, and consider a tin with a clear window lid if you want the jewelry visible. Wrap a simple paper label around the outside or tie the tin with narrow ribbon to soften the industrial look.
Tins offer excellent protection, which makes them practical for travel bracelets, children’s jewelry, and pieces that ship long distances. They stack neatly, helping with market organization and storage, and recipients reuse them for years. Keep any label easy to remove so the container stays useful afterward. Avoid tins with sharp inner seams, and add an extra felt circle if the bracelet has delicate stones that could scratch.
22. Tri-Fold Accordion Story Cards
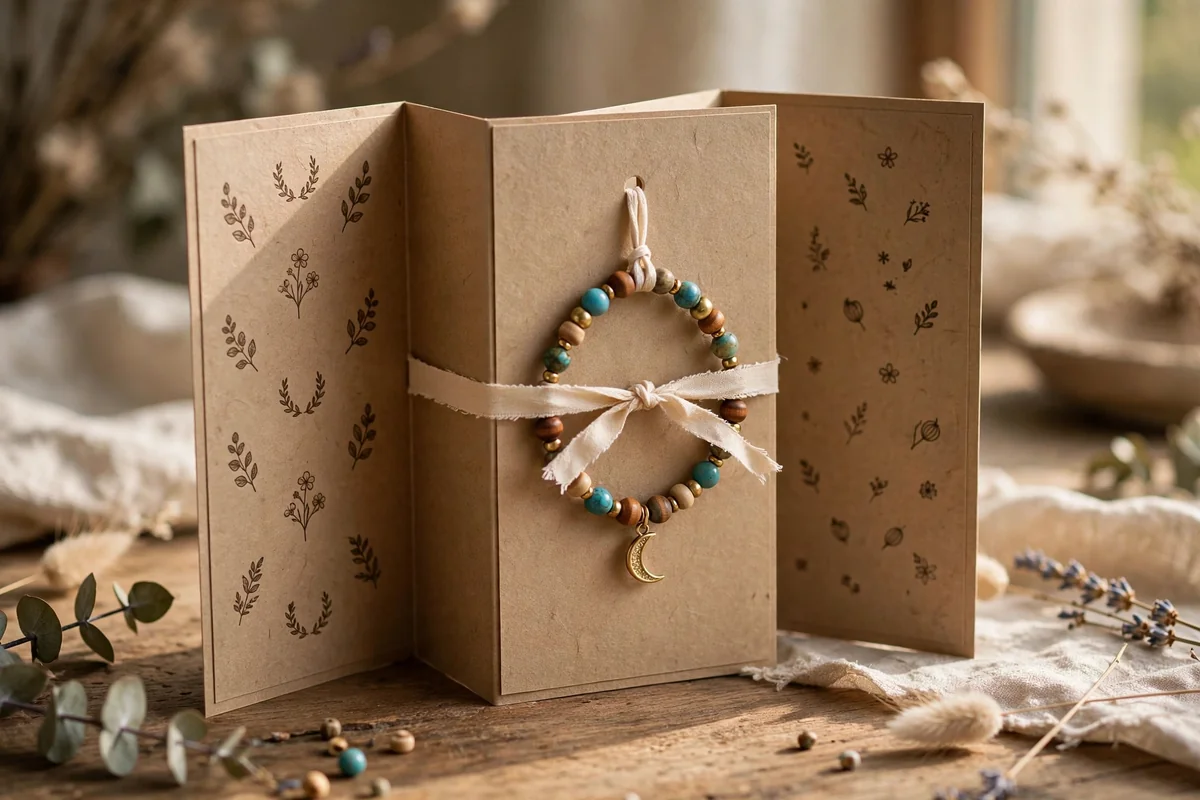
Fold a strip of cardstock into three equal panels, attach the bracelet to the center panel with two slits, and use the outer panels for a short message, care instructions, or the story behind the design. When folded closed and tied with narrow ribbon or cotton cord, the card opens gradually, which feels more thoughtful than a standard flat card. Keep the panels near 2.5 inches wide so the folded package stays pocket sized.
This format suits affirmation bracelets, birthstone pieces, and friendship gifts, because it gives you room to explain the meaning behind the jewelry. Use medium-weight cardstock so the folds stay crisp but the bracelet still has support. Write the message before attaching the bracelet to avoid smudging ink on the beads. The unfolding ritual turns a simple gift into a small storytelling moment the recipient will remember.
Closing Thoughts
Beautiful bracelet packaging does not require a big budget, only a little thought and a few humble materials. Whether you choose a stamped kraft card, a linen pouch, or a tiny wooden box, the care you put into the presentation tells the recipient that the bracelet was made with love. Start with the simplest ideas, refine your favorites, and soon your packaging will feel like a signature part of your craft.
Frequently Asked Questions
What is the cheapest way to package handmade bracelets?
Kraft display cards are the most affordable option, since a single sheet of heavyweight kraft cardstock yields many cards at just pennies each. Cut the cards, round the corners, stamp a small motif, and secure the bracelet with two slits. Glassine bags and folded paper envelopes are similarly inexpensive, especially when you buy supplies in bulk or reuse clean paper and fabric scraps from other projects.
How do I keep a bracelet from tangling inside its packaging?
Always secure the bracelet to a display card with two narrow slits, small paper tabs, or soft cotton ties before placing it in any pouch, box, or envelope. Fasten clasps on chain bracelets so the chain stays in a controlled loop. Avoid leaving bracelets loose inside containers, and test each package with a gentle shake. If the jewelry stays centered, the design is secure.
What size should a bracelet display card be?
A card around 2.5 by 3.5 to 4 inches suits most bracelets, giving enough space for the jewelry to lie flat without looking lost. Wider cuffs may need a 3 by 4 inch card, while smaller bracelets for children fit nicely on 2 by 3 inch cards. The card should feel balanced, with the bracelet as the clear focus and a little breathing room around the edges.
Can I make bracelet packaging eco friendly?
Yes, many beautiful options use only paper, cardboard, fabric, wood, cork, or metal. Kraft cards, seed paper, linen pouches, origami boxes, cotton ties, and glassine bags all protect bracelets without conventional plastic. For mailed orders, place the plastic-free inner package inside a sturdy recyclable mailer so the bracelet still arrives safely.
How should I package bracelets for mailing?
Secure the bracelet to a card, place it inside a pouch, envelope, tin, or small box, then use a rigid mailer or padded recyclable envelope as the outer layer. Fill any empty space with tissue or crinkled paper so nothing shifts. For delicate pieces, add a vellum cover or extra padding, and always test by gently shaking the finished package before sealing.