Crafts
22 Felt Halloween Crafts That Are Soft, Friendly and Fun to Make Together
By Anna Wells · · 24 min read
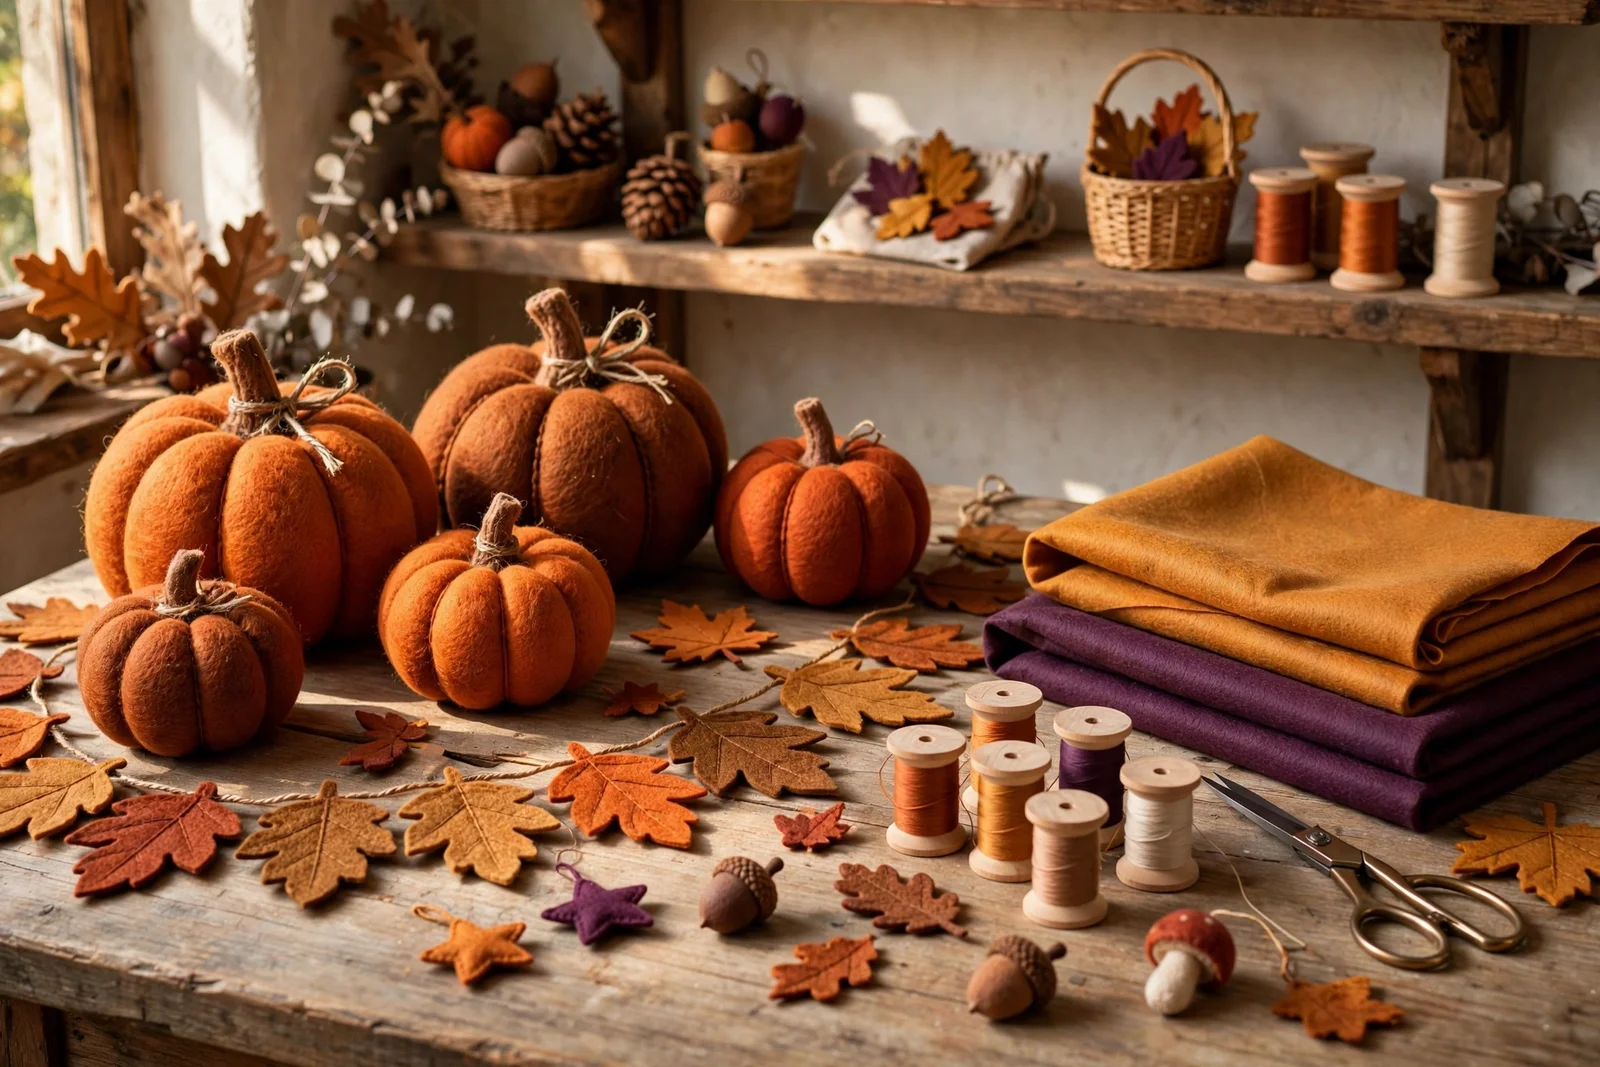
Twenty-two soft, friendly felt crafts for autumn and Halloween: pumpkins, owls, garlands, wreaths, treat bags and table runners, all with simple materials, clear sizes and honest budgets.
October afternoons have a particular softness, the light turning honey coloured as it slants through the windows and the house settling into its cosiest season.
Felt is the perfect material for this moment: soft under the fingers, forgiving of wobbly stitches, and warm in exactly the colours autumn wears, rust, amber, plum and deep green.
These twenty-two projects keep Halloween friendly and family centred, with pumpkins, owls, hedgehogs and harvest garlands that children can help make and that never frighten.
Every idea below names its materials, sizes and budget, so you can start with whatever felt you have at home and build from there.
1. Cut Chunky Felt Pumpkins From 3 mm Wool-Blend Sheets for the Mantel
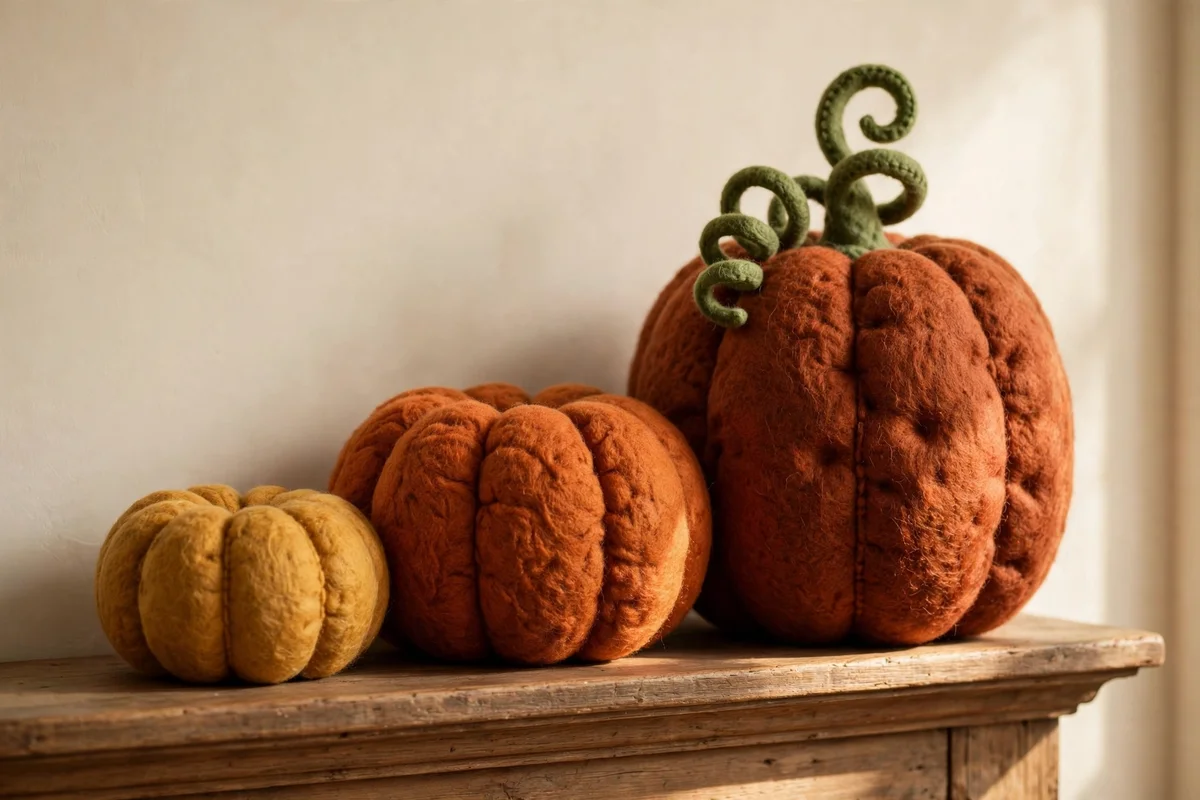
Chunky felt pumpkins sit upright on a mantel when you cut them from 3 mm wool-blend felt instead of thin craft felt. A standard 22 by 30 cm sheet yields two pumpkins of about 12 cm diameter with little waste. Choose burnt orange, rust and golden mustard tones for a harvest palette that feels warm rather than loud. Trace circles with a wide drinking glass or a compass so every shape stays even. The common mistake is reaching for 1 mm felt, which puckers and refuses to hold a round shape.
Stitch two circles together with a simple running stitch, leaving a 5 cm gap for stuffing, then fill with a handful of polyester filling until firm. Pull the stem from a 4 by 6 cm strip of brown felt rolled into a tube and glue it into the top opening. A curled tendril made from a thin green strip adds a finishing touch for almost no cost. Set three pumpkins of staggered heights, 10, 12 and 15 cm, along the mantel for a natural cluster. Budget tip: one pack of ten felt sheets usually costs under 12 pounds or dollars.
2. Stitch a Harvest Leaf Garland With Natural Twine for the Stair Rail
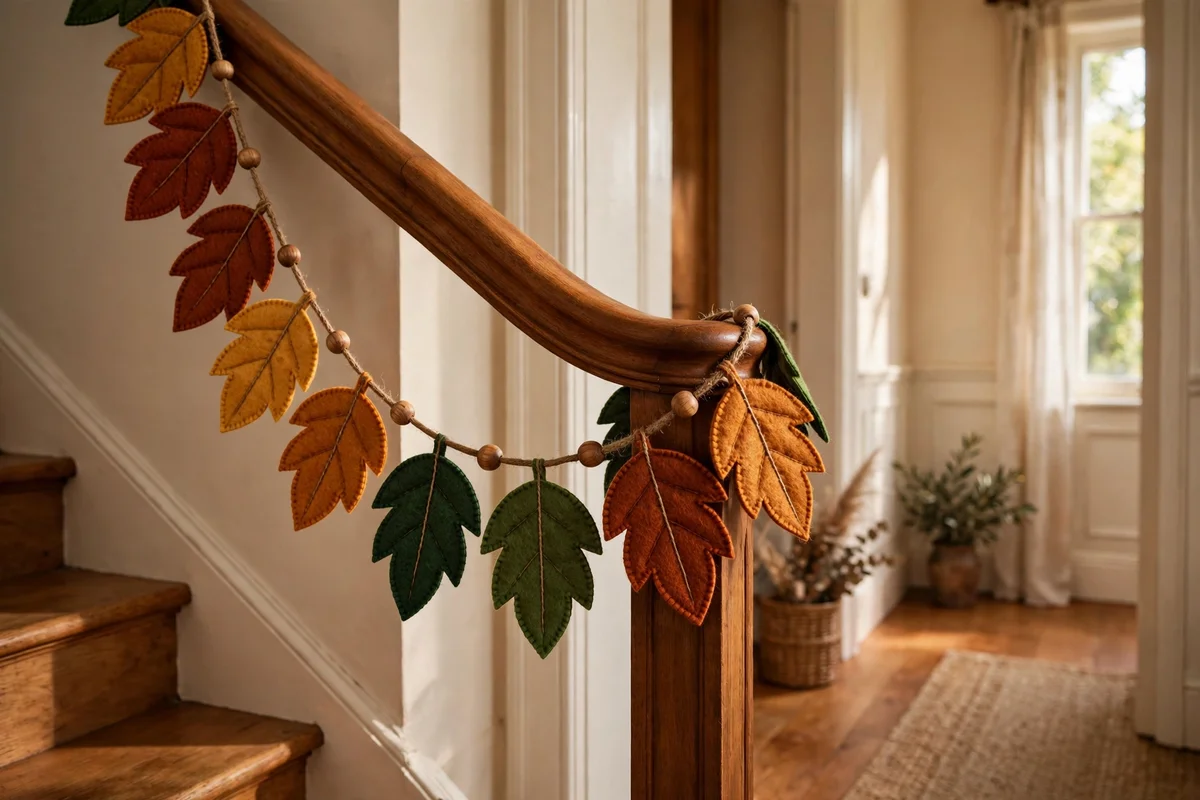
A harvest leaf garland brings autumn colour to a stair rail with just felt, twine and a little patience. Cut twelve to fifteen leaf shapes, each 8 to 10 cm long, from two or three tones of rust, amber and deep green felt. A simple leaf template drawn on card and traced keeps every leaf the same size without measuring twice. Space the leaves 10 cm apart along 2.5 metres of natural twine for a full but uncluttered line. The mistake to avoid is gluing leaves to the twine before arranging them, since spacing always looks off.
Use a running stitch through the top of each leaf to join it to the twine, or dab fabric glue for a no-sew version that still holds through the season. Adding a small wooden bead between every third leaf gives gentle rhythm without extra cost. Hang the garland with two clear adhesive hooks rated for 500 g so the rail paint stays untouched. When the season ends, roll the garland loosely around a cardboard tube and store it flat. Budget tip: twine, beads and felt for one garland usually total under 10 pounds or dollars.
3. Make Round Felt Pumpkin Coasters for Warm Autumn Mugs
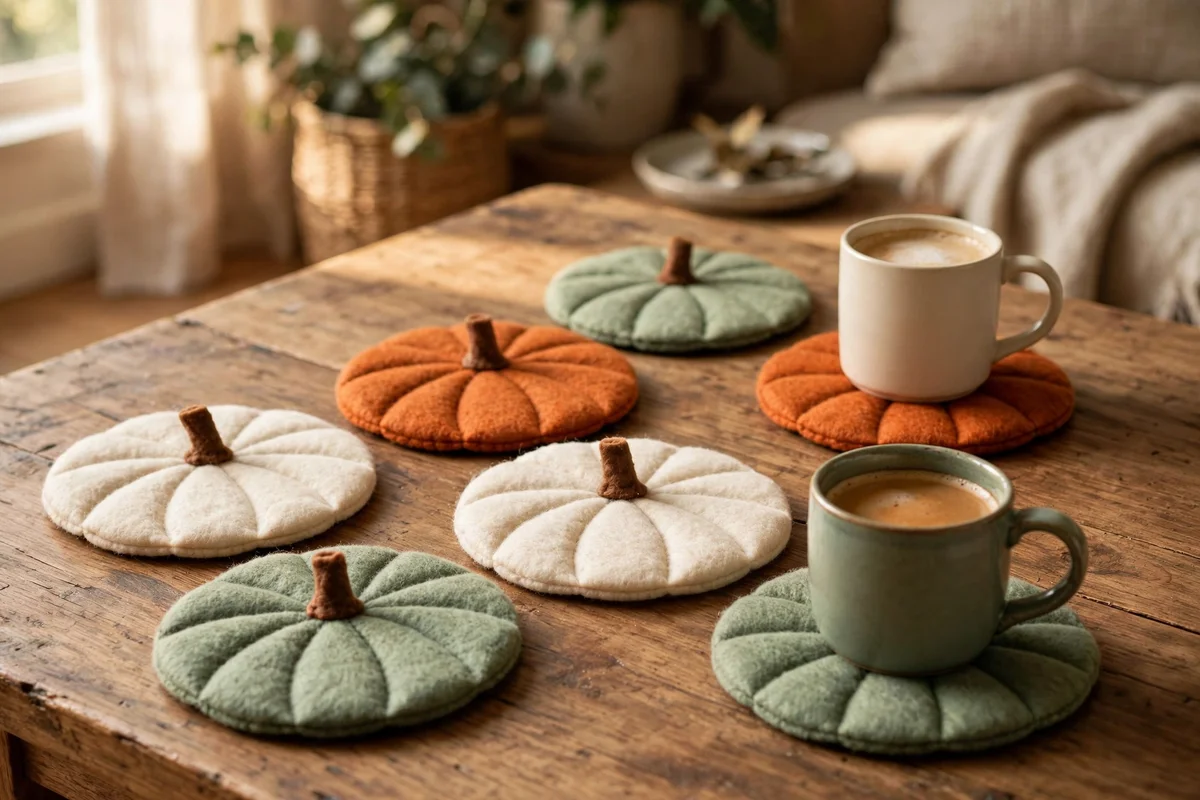
Round felt pumpkin coasters protect wooden tables from hot mugs while adding a soft autumn note to the living room. Cut circles of 10 cm diameter from 2 mm felt in burnt orange, then layer a smaller cream circle of 6 cm in the centre for contrast. A brown felt stem of 2 by 4 cm glued at the top turns a plain circle into a pumpkin. The thicker 2 mm felt absorbs condensation without curling, unlike thin sheets that warp after one use. The mistake to avoid is skipping the stem, since plain orange circles read as fruit.
Make a set of six coasters in an afternoon, since each one takes about fifteen minutes of simple cutting and gluing. Mix cream, rust and sage green coasters for variety across a coffee table, or keep all six in one tone for a calmer look. Wipe them with a damp cloth if a ring forms, then air dry flat so the edges stay crisp. They stack neatly in a drawer when not in use and cost almost nothing per piece. Budget tip: one sheet of 2 mm felt makes four coasters, so two sheets cover a full set.
4. Sew Simple Felt Treat Bags for Family Sweets
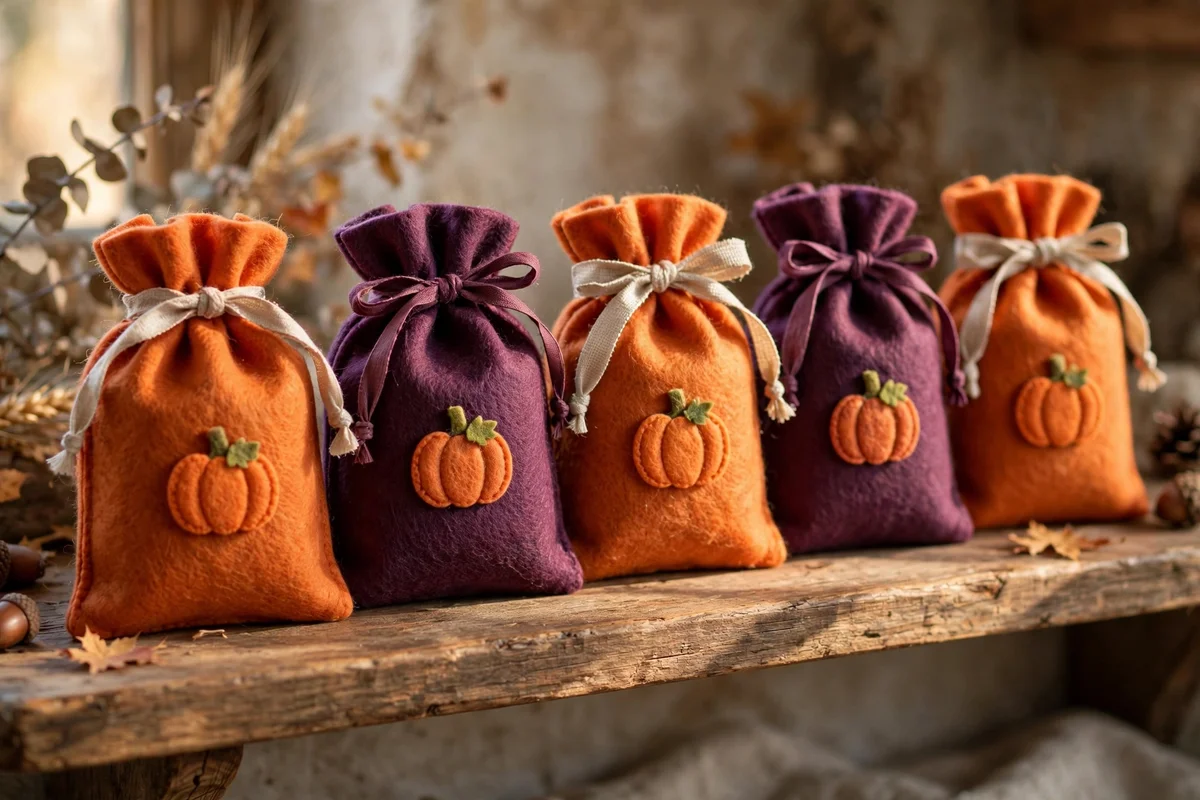
Simple felt treat bags hold family sweets through the Halloween season and survive years of reuse when sewn well. Cut two rectangles of 18 by 22 cm from 2 mm felt in harvest orange or plum, then stitch the sides and base with a running stitch 1 cm from the edge. A folded 3 cm hem at the top holds a 60 cm ribbon drawstring threaded through with a safety pin. The mistake to avoid is using fabric glue alone on the side seams, since heavy sweets pull glued seams apart while stitching holds firm.
Decorate each bag with a felt pumpkin, leaf or acorn applique glued to the front so family members can tell their bags apart. Personalise with a letter cut from cream felt, about 5 cm tall, for a handmade touch that children love. Keep bags away from radiators, since prolonged heat stiffens felt and fades bright dyes. When the season ends, empty them, brush off crumbs and fold flat in a drawer. Budget tip: three sheets of felt plus ribbon make two bags for under 8 pounds or dollars.
5. Craft Friendly Owl Ornaments for Autumn Shelf Branches

Friendly owl ornaments perch happily on autumn shelf branches when you keep the faces round and soft, never fierce. Cut two brown body shapes of 9 cm tall, two cream belly ovals of 5 cm, and big round eyes of 2 cm diameter with tiny dark pupils. Stitch the bodies together with a blanket stitch, leaving the top open for a pinch of polyester filling. Large round eyes set wide apart read as curious and gentle, which suits a family home. The mistake to avoid is drawing angular eyebrows, since sharp lines turn a sweet owl stern.
Add folded felt wings of 4 cm on each side and tiny cream feet of 2 cm so the owl stands on a branch without tipping. Use a 15 cm ribbon loop through the top for hanging on a branch, or stand the owl flat on a shelf without one. Vary the browns, caramel, chocolate and tan, across a set of five for a natural woodland row. Keep them away from direct sun, which bleaches felt eyes fastest. Budget tip: one sheet of brown felt yields three owls, so a full set costs under 6 pounds or dollars.
6. Build Tiny Felt Hedgehogs With Layered Leaf Spines
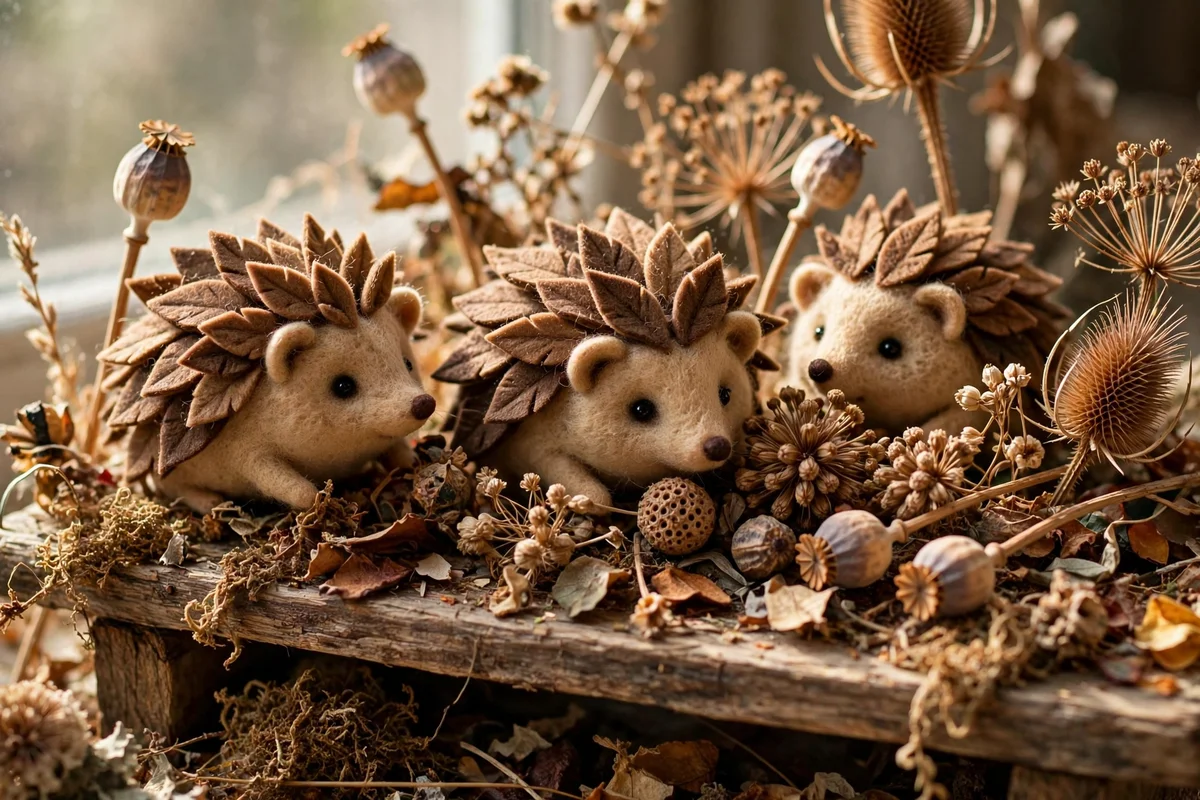
Tiny felt hedgehogs charm a shelf when their spines are built from layered leaf shapes in warm browns. Cut a body oval of 7 cm from tan felt and a pointed face triangle of 4 cm from cream felt, then stitch them together along one edge. Glue fifteen to twenty small leaf shapes, each 2 cm long, in overlapping rows across the body so they fan like quills. Two tiny black bead eyes of 4 mm complete a gentle face. The mistake to avoid is gluing the leaves flat in one layer, which looks patchy instead of full.
Place three hedgehogs of slightly different sizes, 6, 7 and 8 cm, on a low shelf among dried seed heads for a woodland vignette. Use 3 mm felt for the body so the little figures keep their shape when handled by curious children. A dab of fabric glue on each leaf base holds the spines through gentle play, though stitching lasts longer. Keep the finished hedgehogs in a shallow tray when stored, since stacked leaves crease under weight. Budget tip: tan and cream felt sheets plus bead eyes cost under 5 pounds or dollars per set.
7. Thread an Acorn Garland From Felt Caps and Wooden Beads
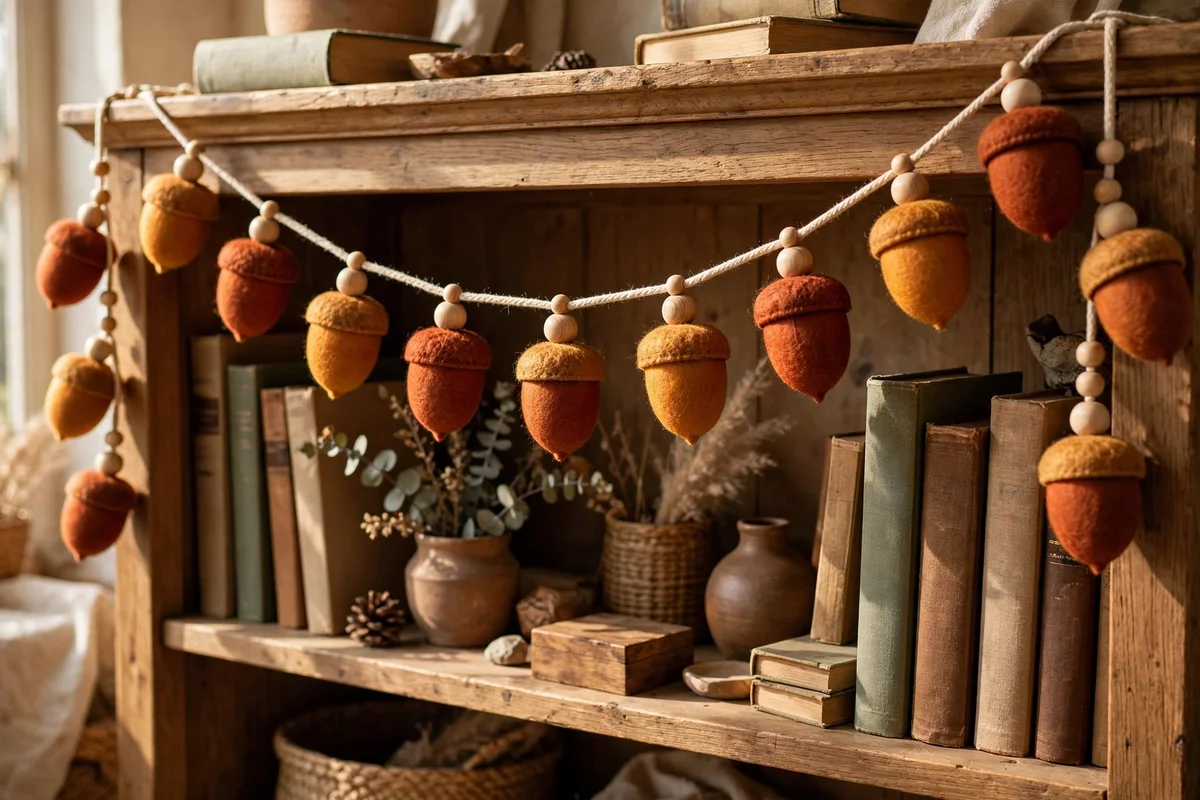
An acorn garland mixes soft felt with smooth wood for a texture that flat decorations cannot match. Cut felt acorn bodies of 5 cm from rust and amber felt, then top each with a real wooden bead cap of 2.5 cm diameter glued in place. Thread the acorns on 2 metres of cotton cord, alternating each acorn with a plain 1.5 cm wooden bead for spacing. Tie a knot between every bead so the pieces cannot slide together in storage. The mistake to avoid is using oversized caps, which make the acorns look top heavy.
Drape the finished garland across a sideboard mirror or along the top of a bookcase, letting the ends fall 20 cm for a relaxed line. Making the full 2 metre length takes about one hour, including the knots between beads. Choose cord in natural cotton rather than nylon, since cotton knots grip and hold their position. At the end of the season, coil the garland into a 15 cm circle and tie it with a scrap of ribbon. Budget tip: a bag of wooden beads and two felt sheets come in under 9 pounds or dollars.
8. Hang a Felt Pumpkin Wall Hanging in the Entryway
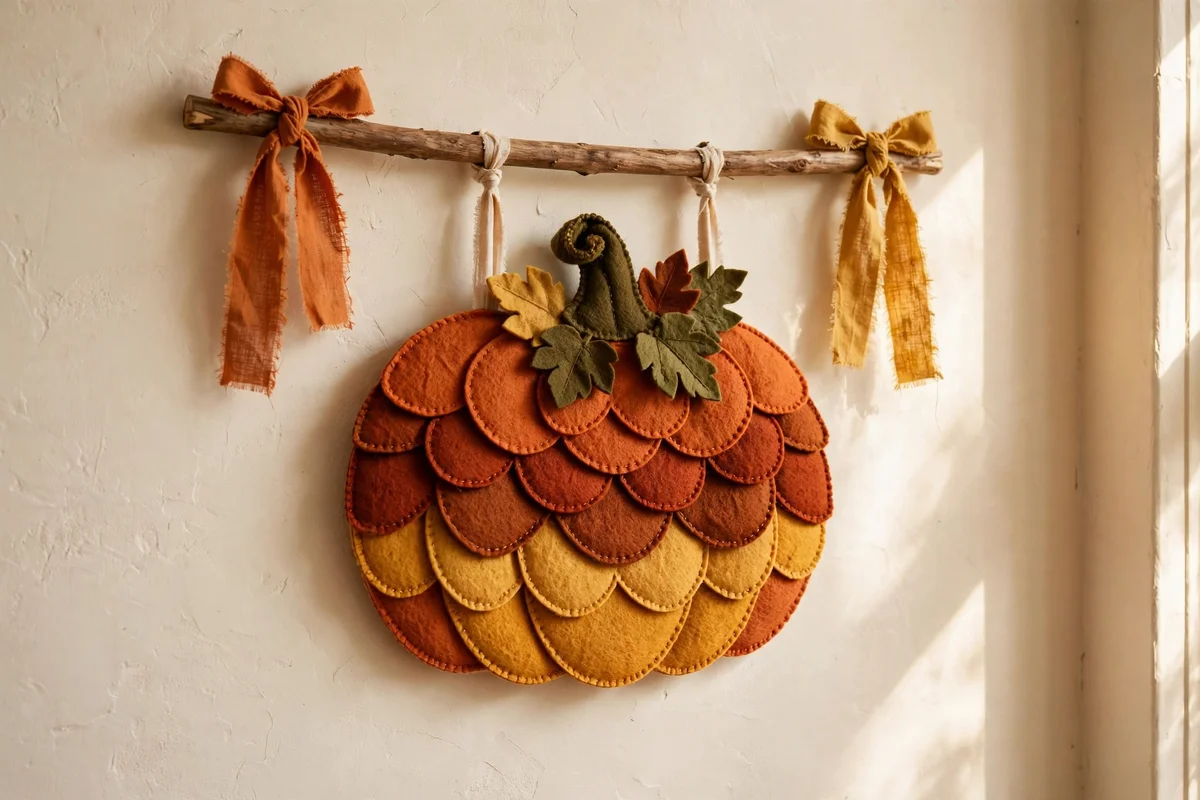
A felt pumpkin wall hanging greets visitors with soft autumn colour at the front door. Cut a large pumpkin of 30 cm diameter from 3 mm burnt orange felt, then layer smaller rust and mustard pumpkins of 18 and 12 cm across it for depth. Hang the cluster on a 45 cm wooden dowel with two 25 cm ribbon ties for balance. Mount the dowel on the entryway wall at eye level, about 150 cm from the floor. The mistake to avoid is hanging it where the door swings, since felt creases badly after repeated bumps.
Assemble the whole hanging in under two hours, with most of the time spent cutting clean pumpkin curves. Use a sharp rotary cutter on a cutting mat for the large 30 cm shape, which keeps the edge smooth where scissors can wobble. Stitch the layers with a contrasting thread, cream on orange, for a folk craft look that hides uneven edges. Keep the hanging away from damp entryway walls, since felt absorbs moisture and spots. Budget tip: the dowel, ribbons and felt sheets total about 11 pounds or dollars.
9. Wrap a Foam Ring in Felt Leaves for a Harvest Wreath
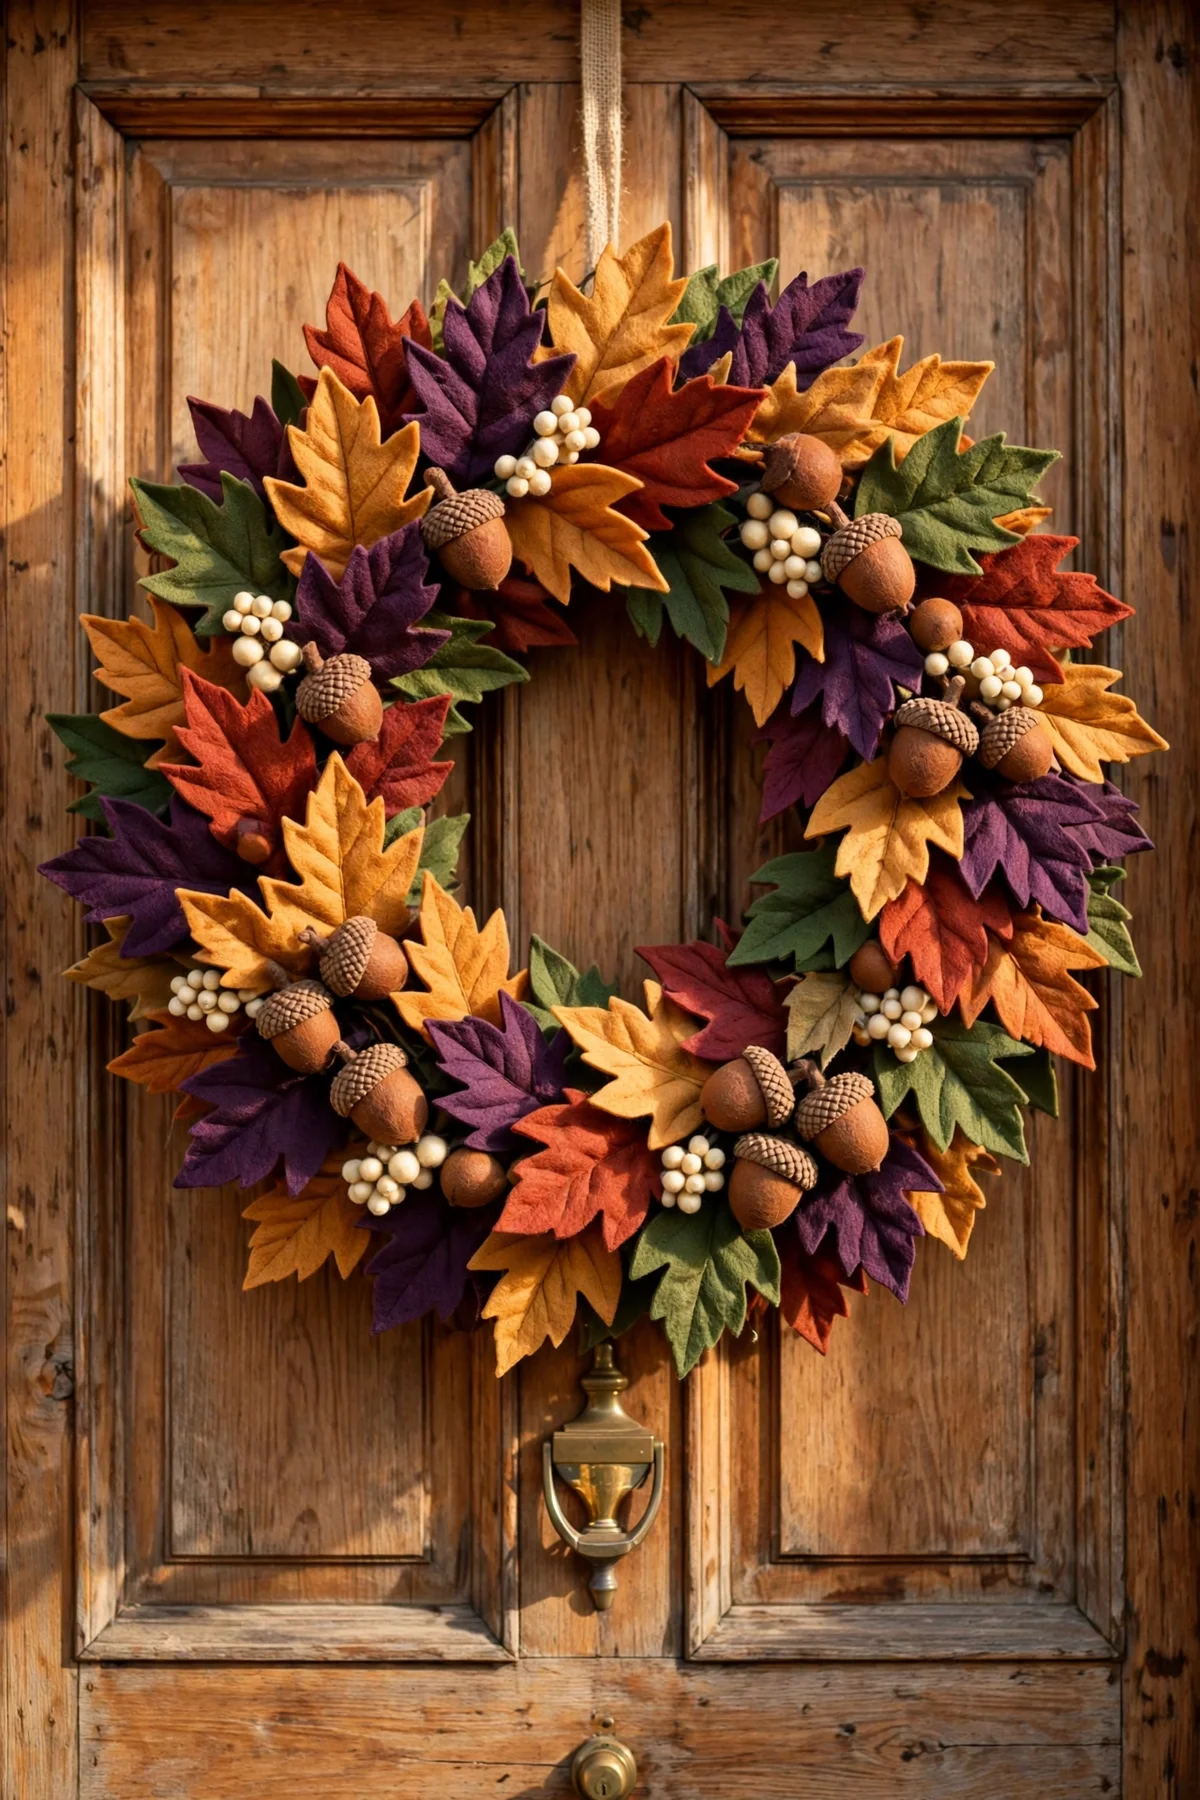
A harvest wreath looks full and warm when a foam ring disappears under two layers of felt leaves. Choose a foam ring of 30 cm diameter and wrap it first with a 5 cm strip of brown felt to hide the white foam. Cut sixty leaf shapes of 7 cm from rust, amber, plum and forest green felt, then glue them in overlapping rows around the ring. Two layers keep every gap covered, which single layers never manage. The mistake to avoid is gluing leaves in one direction only, since the wreath looks flat instead of lush.
Tuck a few felt acorns of 4 cm and small cream berries among the leaves for gentle variety without clutter. Hang the wreath on the front door with an over-door hook, or rest it on a plate stand in the hallway for a no-hook option. Making the wreath takes one relaxed afternoon, with the leaf cutting taking longer than the gluing. Keep it out of rain, since soaked foam and felt take days to dry fully. Budget tip: the ring, glue and four felt sheets usually cost under 14 pounds or dollars.
10. Run a Scalloped Felt Table Runner Down the Dining Table
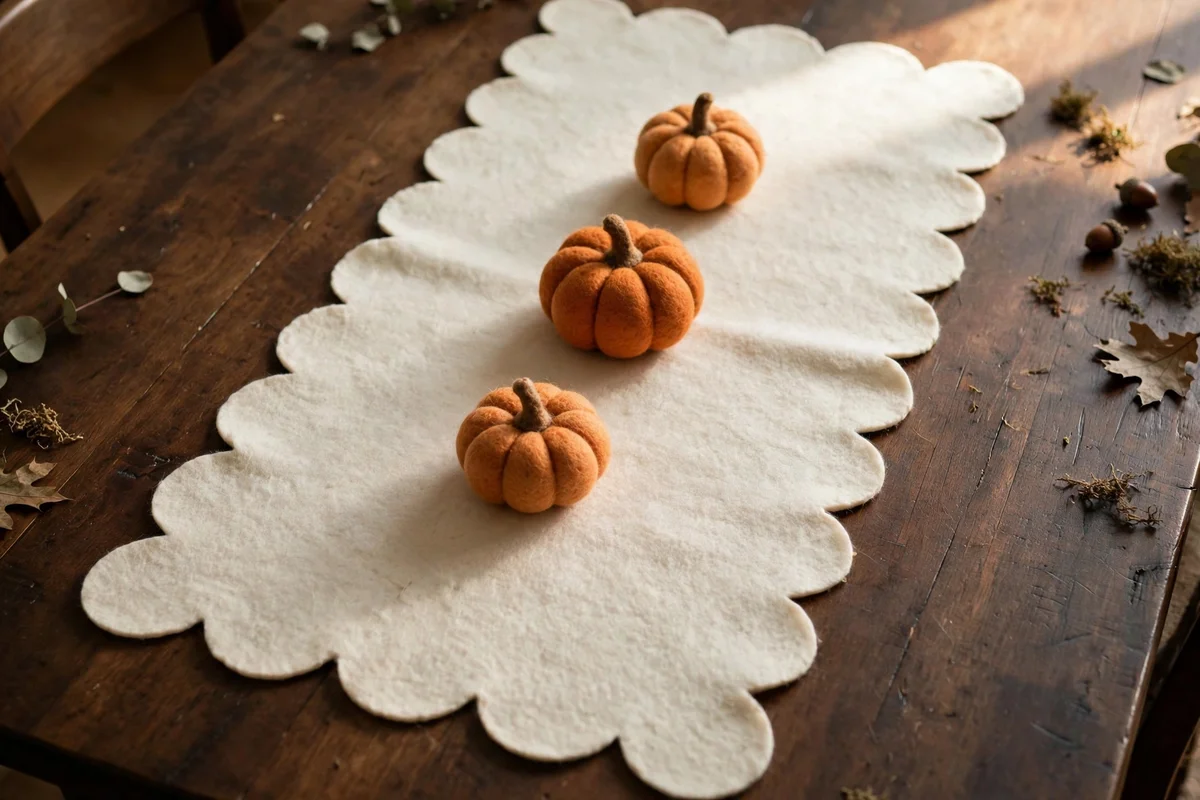
A scalloped felt table runner softens a dining table and frames autumn centrepieces without stealing attention. Cut the runner 35 cm wide and 30 cm longer than the table so 15 cm hangs over each end. Use 2 mm felt in warm cream or soft sage, then cut scallops of 5 cm radius along both long edges with a round template. The scalloped edge catches the light gently and hides small cutting wobbles. The mistake to avoid is cutting the runner exactly table length, which makes it look like a placemat that lost its way.
Layer three small felt pumpkins of 8 cm down the centre of the runner for a simple display that takes minutes to arrange. Spot clean spills with a damp cloth at once, since felt stains set quickly if left overnight. Roll the runner around a cardboard tube for storage, never fold it, because creases along the scallops never fully relax. A runner in cream lifts a dark wood table, while sage calms a light oak one. Budget tip: two large felt sheets joined with a neat overlap seam cost under 10 pounds or dollars.
11. Choose the Right Felt Weight Before You Start Cutting
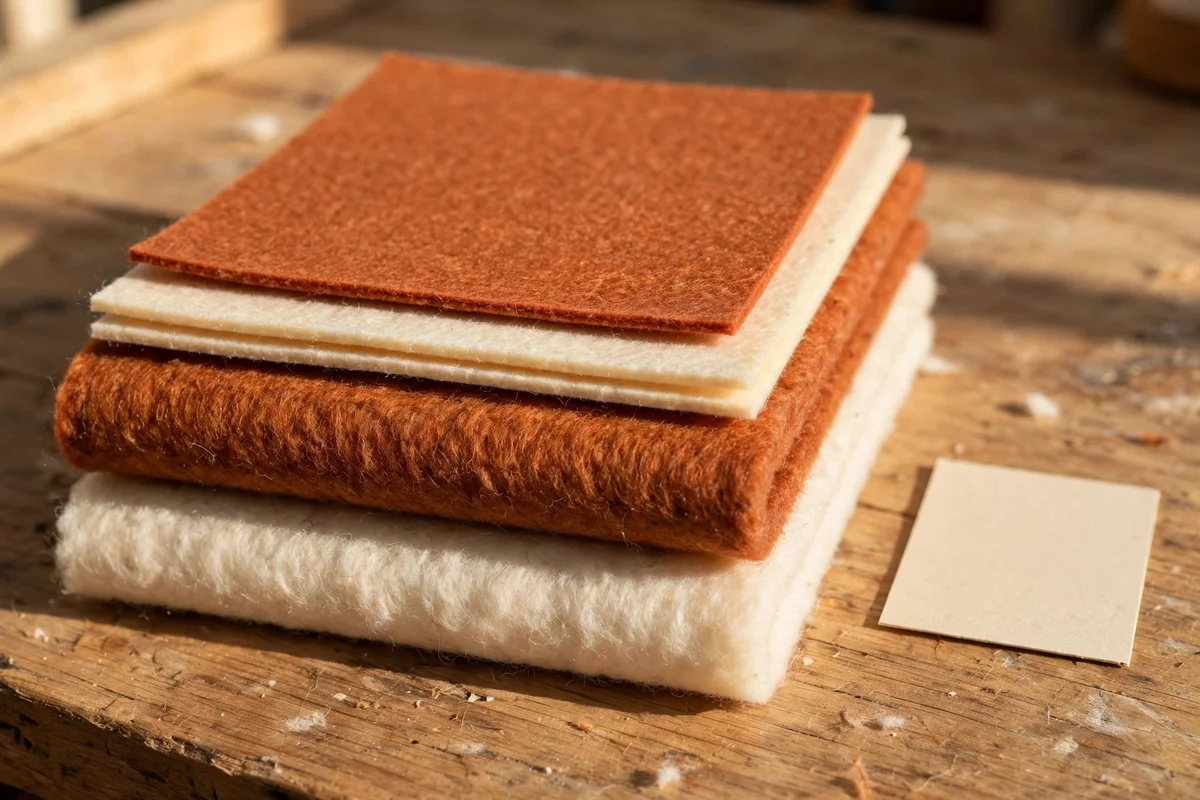
Choosing the right felt weight before cutting saves more projects than any other single decision. Use 1 mm craft felt for flat appliques, linings and banner letters, where drape matters more than structure. Reach for 2 to 3 mm felt for ornaments, coasters and treat bags that must hold a shape. Thicker 4 to 5 mm felt suits sturdy wreaths and wall hangings that hang under their own weight. The mistake to avoid is buying one thickness for everything, since thin felt sags in pumpkins and thick felt refuses to fold into neat bags.
Wool-blend felt, usually 20 to 35 percent wool, cuts cleaner and resists pilling better than pure acrylic sheets. A simple test helps: bend a corner sharply, and wool-blend springs back while cheap acrylic stays creased. Buy sheets of 22 by 30 cm for small projects and half-metre cuts for runners and wall hangings, which avoids wasteful joins. Keep a labelled sample card of each thickness on your craft shelf for quick reference. Budget tip: wool-blend costs about twice the price of acrylic, but one sheet goes twice as far without fraying.
12. Trace Reusable Cardboard Templates for Every Shape
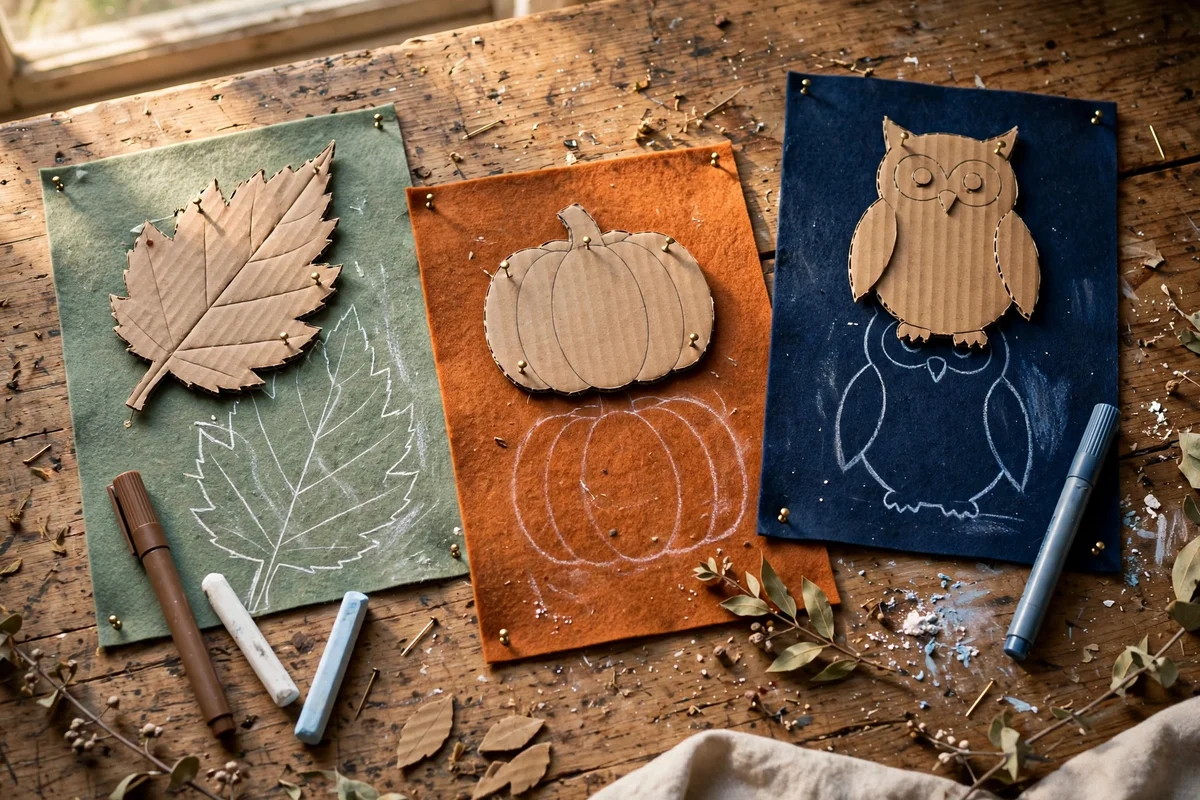
Reusable cardboard templates turn wobbly freehand cutting into matching sets of neat, even shapes. Draw each shape once, leaf, pumpkin, acorn or owl, on thin card, then cut the card with a craft knife on a cutting mat. Trace around the template with a fabric marker or a sliver of tailor chalk, keeping the pen upright for a true line. Cereal box card works perfectly and costs nothing, though it softens after about twenty tracings. The mistake to avoid is tracing the same shape twice by eye, since the pieces never quite match.
Label each template on the back with its project name and finished size, for example pumpkin 12 cm, so next year needs no measuring. Store the templates flat in an A4 envelope or a folder, sorted by project, where they stay crisp between seasons. Pin or clip the template to the felt while tracing so it cannot slip mid-line. When a template edge grows fuzzy, trace it onto fresh card and retire the old one. Budget tip: a full set of templates for all twenty-two projects costs nothing beyond scrap card and ten minutes.
13. Cut Clean Edges With Sharp Micro-Serrated Scissors
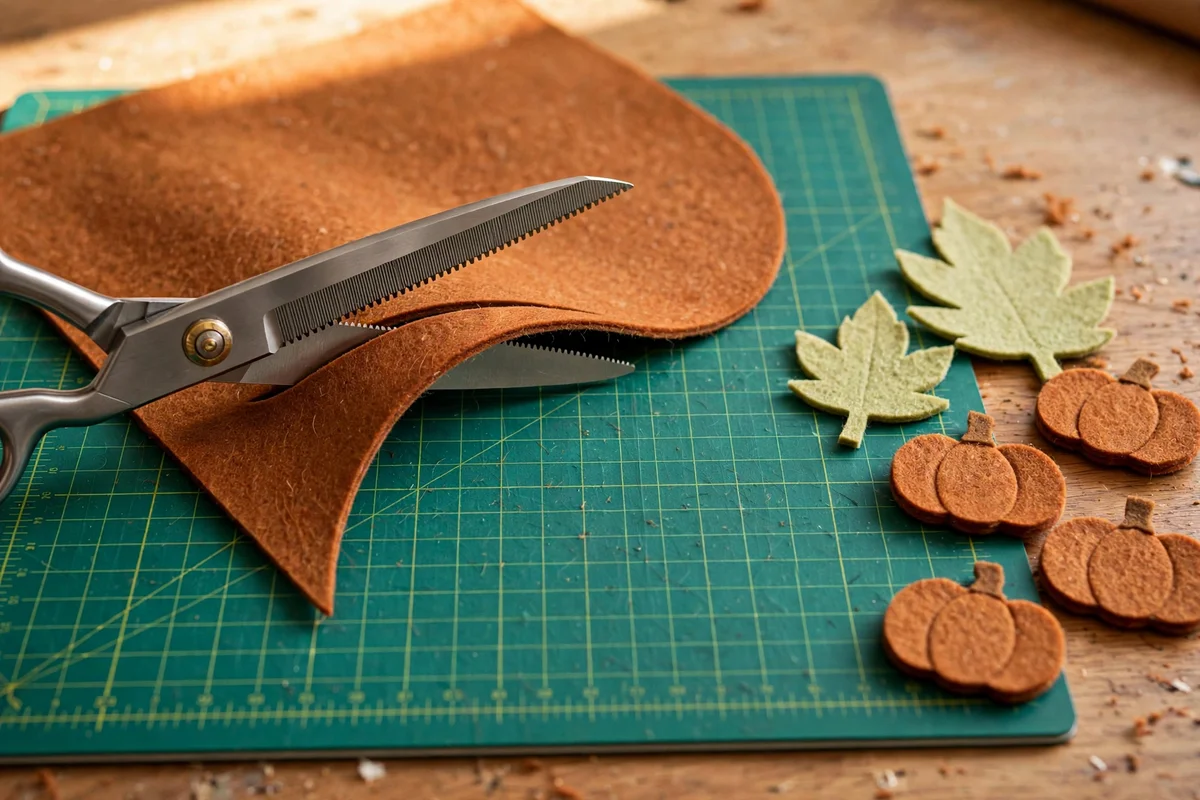
Clean felt edges start with sharp micro-serrated scissors, which grip the fibres instead of pushing them aside. Cut with long, smooth strokes along the marked line rather than short snips, which leave a chewed edge. Keep one pair of scissors for felt only, since paper dulls blades quickly and felt punishes dull blades with frayed edges. Test sharpness on a scrap strip: a clean cut whispers, while a dull blade drags. The mistake to avoid is lifting the felt while cutting, which tilts the blade and curves the line.
For long straight cuts, a rotary cutter and a self-healing mat beat scissors for speed and accuracy. Change rotary blades after about ten metres of felt cutting, since felt blunts blades faster than cotton. Cut small curves slowly, turning the felt rather than the scissors, so the blade follows the line. Sweep cut scraps into a jar straight away, because felt dust settles into carpets quickly. Budget tip: decent micro-serrated scissors cost 8 to 12 pounds or dollars and last years with felt-only use.
14. Finish Open Edges With an Easy Blanket Stitch
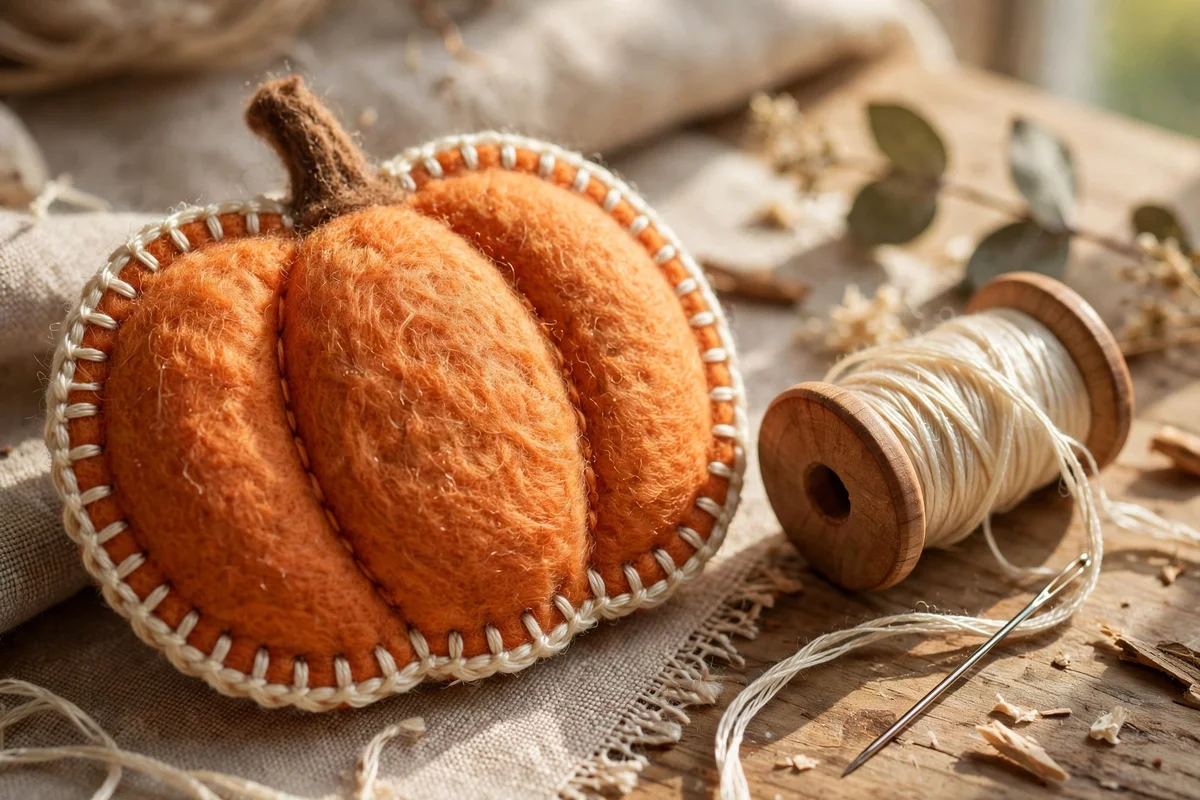
A blanket stitch finishes open felt edges with a neat, decorative border that also stops fraying. Thread a sharp needle with embroidery floss, using all six strands for a bold edge or three for a finer line. Space stitches 5 to 8 mm apart and keep the depth even, about 6 mm in from the edge, for a professional rhythm. Work the stitch clockwise around the shape so the loops fall in the same direction. The mistake to avoid is pulling each stitch tight, which puckers the edge into waves.
Choose thread in a contrasting colour, cream on rust or sage on cream, for a folk look that forgives small wobbles. One 8-metre skein of floss edges about four medium ornaments, so a single packet covers a whole garland. Keep a small seam ripper nearby, since felt hides a removed stitch without a scar. Practise the first ten stitches on a scrap strip before touching the real piece. Budget tip: embroidery floss costs under 1 pound or dollar per skein, making stitched edges the cheapest decoration available.
15. Reach for Fabric Glue When Stitching Feels Like Too Much
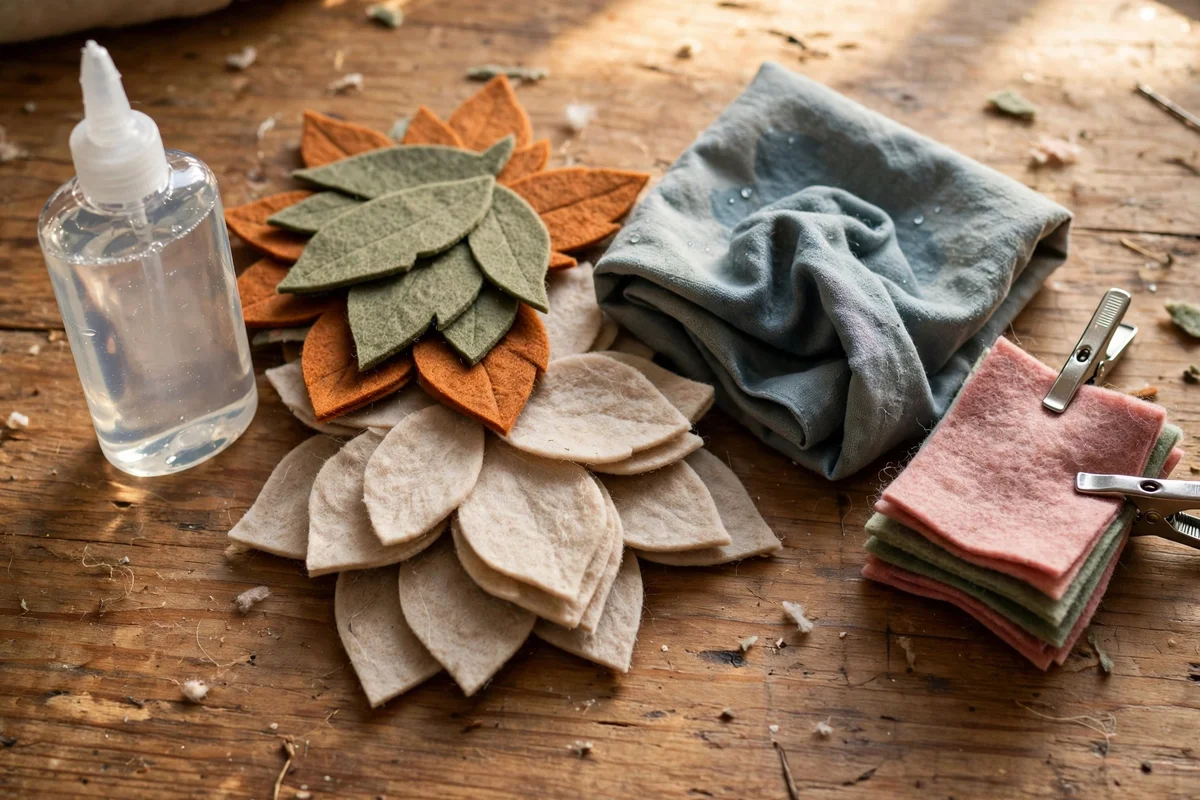
Fabric glue gives the same joined look as stitching with none of the needlework, which suits busy evenings. Apply a thin 2 mm line of glue 5 mm inside the edge, press the layers together, and hold for thirty seconds. Full strength develops after twenty-four hours, so plan glued projects a day ahead of display. Choose a clear-drying, washable fabric glue rather than a hot glue gun for soft seams. The mistake to avoid is squeezing out thick beads of glue, which seep through felt and leave hard, shiny spots.
Glue works best on flat appliques, banner letters and leaf layers, where no stress pulls at the seam. Combine methods for strength: glue the pieces in place first, then add a few anchor stitches at stress points. Keep a damp cloth handy to wipe stray glue at once, since dried glue resists removal. Store the tube upright with the cap tight, or the nozzle clogs by the next project. Budget tip: one 60 ml tube of fabric glue covers roughly ten small projects and costs under 4 pounds or dollars.
16. Stuff Small Shapes With Soft Polyester Filling
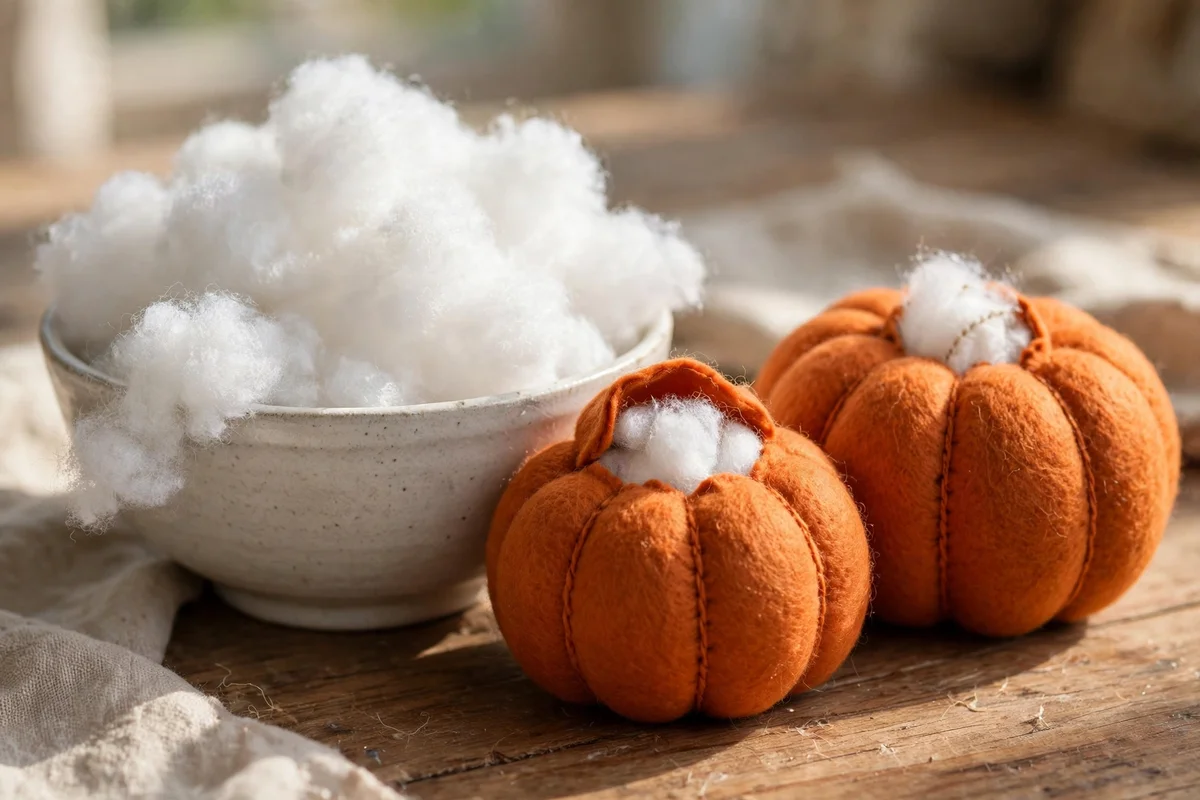
Soft polyester filling turns flat felt shapes into plump pumpkins, owls and hedgehogs that hold their form. Tear the filling into walnut-sized pieces before stuffing, since clumps leave lumps that show through thin felt. Push small amounts through a 5 cm opening with the blunt end of a pencil, working from the edges toward the centre. Fill until the shape feels firm but still squeezes gently, which usually takes one handful for a 10 cm pumpkin. The mistake to avoid is overstuffing, which strains the seams and warps the shape.
Use filling made for toys rather than pillow stuffing from old cushions, since toy filling stays springy for years. A 200 g bag fills roughly fifteen small ornaments, so one bag covers a whole season of projects. Close the stuffing gap with a ladder stitch for an invisible seam, or a blanket stitch for a decorative edge. Keep finished pieces away from pets, since pulled filling scatters everywhere. Budget tip: a 200 g bag of polyester filling costs 3 to 5 pounds or dollars at craft shops.
17. Add Ribbon Loops So Every Piece Hangs Securely
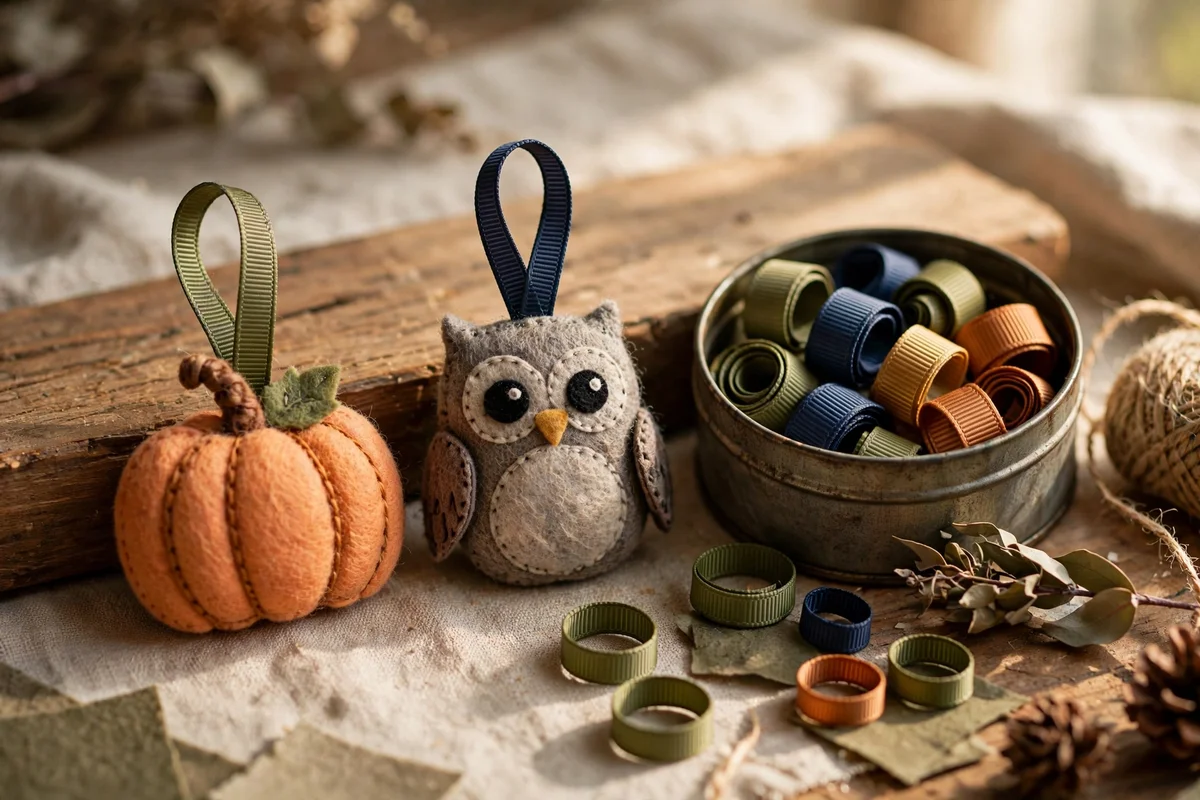
Ribbon loops let every ornament, pumpkin and owl hang securely from branches, hooks and garland cords. Cut ribbon 15 cm long, fold it into a loop, and stitch or glue the ends 2 cm deep inside the top of the shape. Grosgrain ribbon of 1 cm width holds knots better than satin, which slips under weight. Match the ribbon to the project, rust on pumpkins, sage on owls, or use cream everywhere for calm. The mistake to avoid is gluing the loop to the surface only, since it peels off the first time the piece is lifted.
For heavier pieces like stuffed pumpkins of 15 cm, double the loop by threading the ribbon through twice. Test every loop by holding the piece aloft for ten seconds before hanging it on the tree or branch. Keep spare loops of 10, 15 and 20 cm in a small tin, so replacements take seconds during decorating. Cotton twill tape works as a sturdy, inexpensive alternative to ribbon. Budget tip: a 20 metre reel of grosgrain ribbon costs about 4 pounds or dollars and loops fifty ornaments.
18. Store Finished Crafts Flat in Lidded Boxes Between Seasons
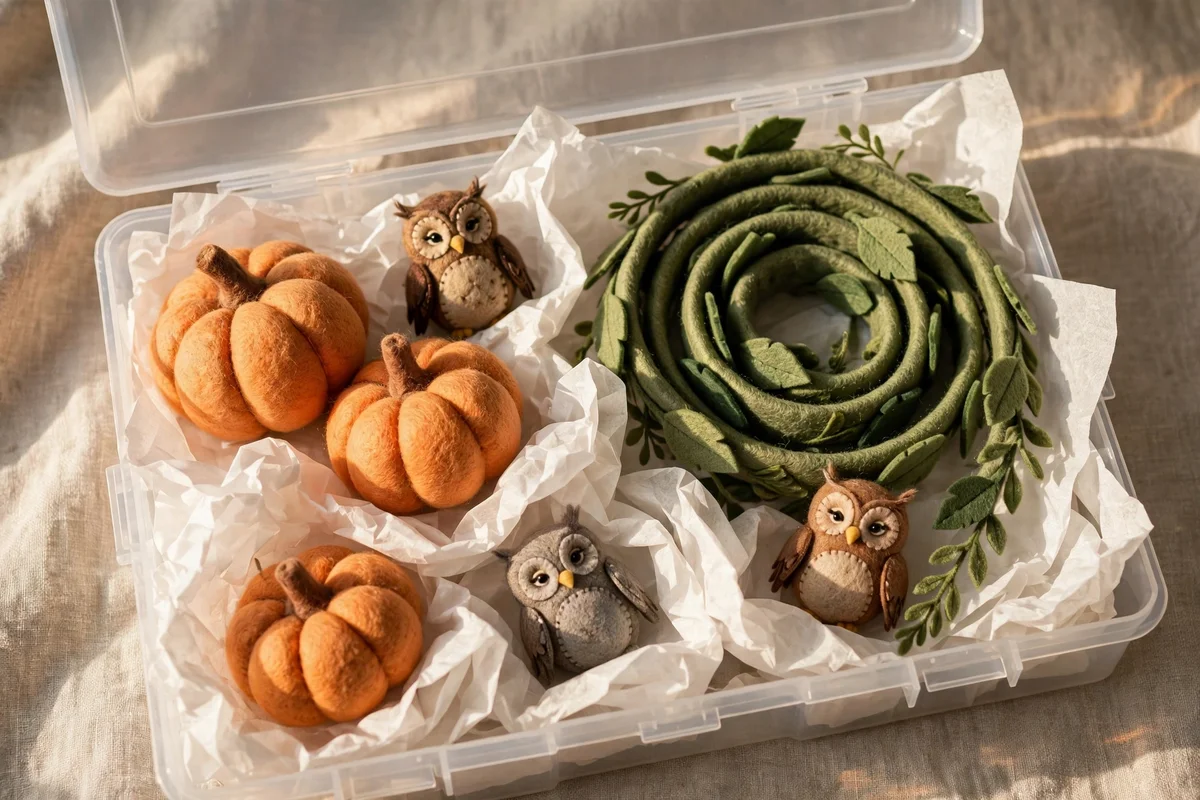
Storing finished felt crafts flat in lidded boxes keeps them crisp and ready for next autumn. Layer pieces between sheets of plain tissue paper, with heavier wreaths on the bottom and light ornaments on top. A box of 40 by 30 by 15 cm holds one full season of garlands, pumpkins and owls for most households. Add a silica gel sachet to each box, since felt absorbs damp air in lofts and garages. The mistake to avoid is stacking boxes under heavy items, which flattens stuffed shapes beyond recovery.
Label every box with its contents and the year, for example autumn felt 2026, so unpacking takes minutes. Coil garlands loosely around a cardboard tube before boxing, since folded garlands crease at every bend. Keep the boxes in a dry cupboard rather than a damp garage, where musty smells cling to felt. Check stored pieces each September for loose threads or tired glue before display. Budget tip: sturdy lidded boxes cost 5 to 8 pounds or dollars each and protect crafts for a decade.
19. Cut Flat Felt Leaf Magnets for the Fridge Door
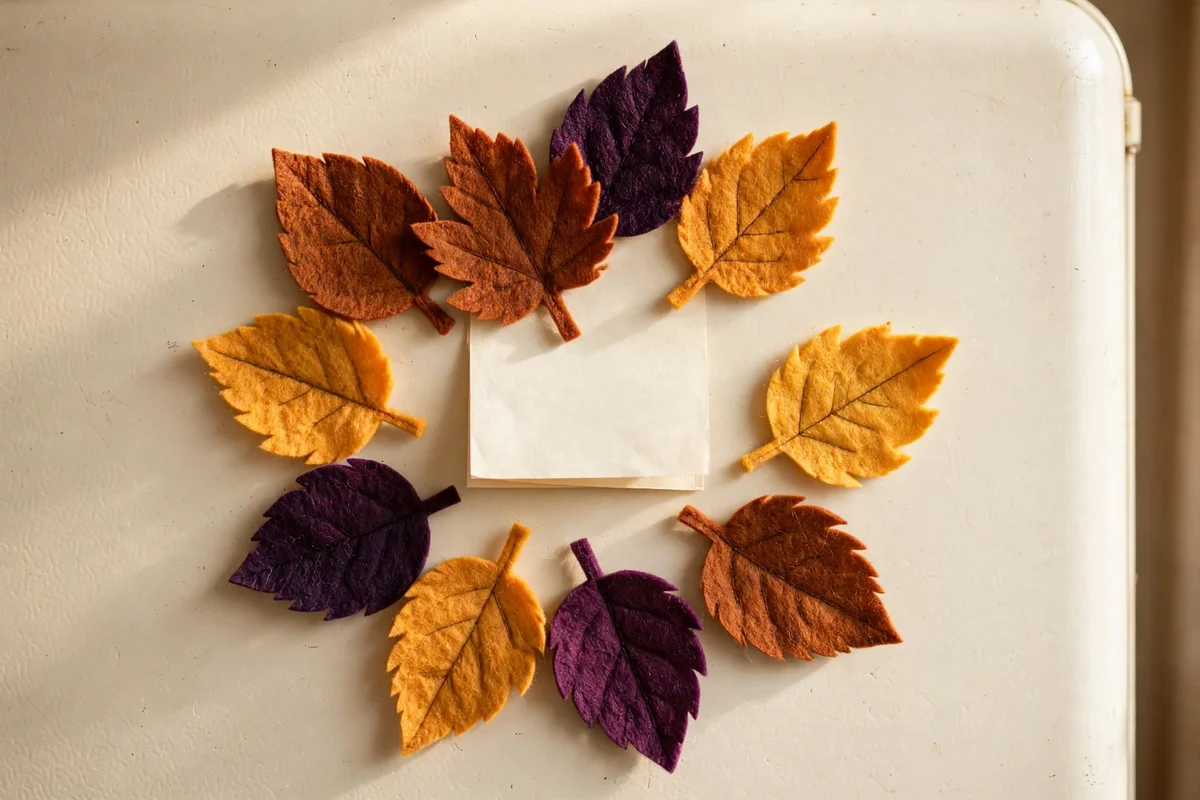
Flat felt leaf magnets brighten the fridge door in the simplest project here. Cut leaf shapes of 6 to 8 cm from 1 mm felt in rust, amber and plum, then glue a round magnet of 2 cm diameter to the back of each. The thin 1 mm felt keeps the magnet close to the metal, so the grip stays strong. Keep the leaf flat while the glue sets one hour, since curling leaves peel away. The mistake to avoid is using weak craft magnets, which slide down the door under the felt.
Make a set of ten magnets in under one hour, since cutting and gluing each leaf takes about five minutes. Arrange them in a loose autumn wreath shape on the fridge, or line them along the door edge like falling leaves. Wipe the felt fronts with a dry cloth to lift kitchen dust, and reglue any magnet that loosens after a year. They also hold children’s drawings and shopping lists with a handmade touch. Budget tip: a strip of ten strong magnets and one felt sheet cost under 5 pounds or dollars.
20. Fold Felt Napkin Rings for the Autumn Table
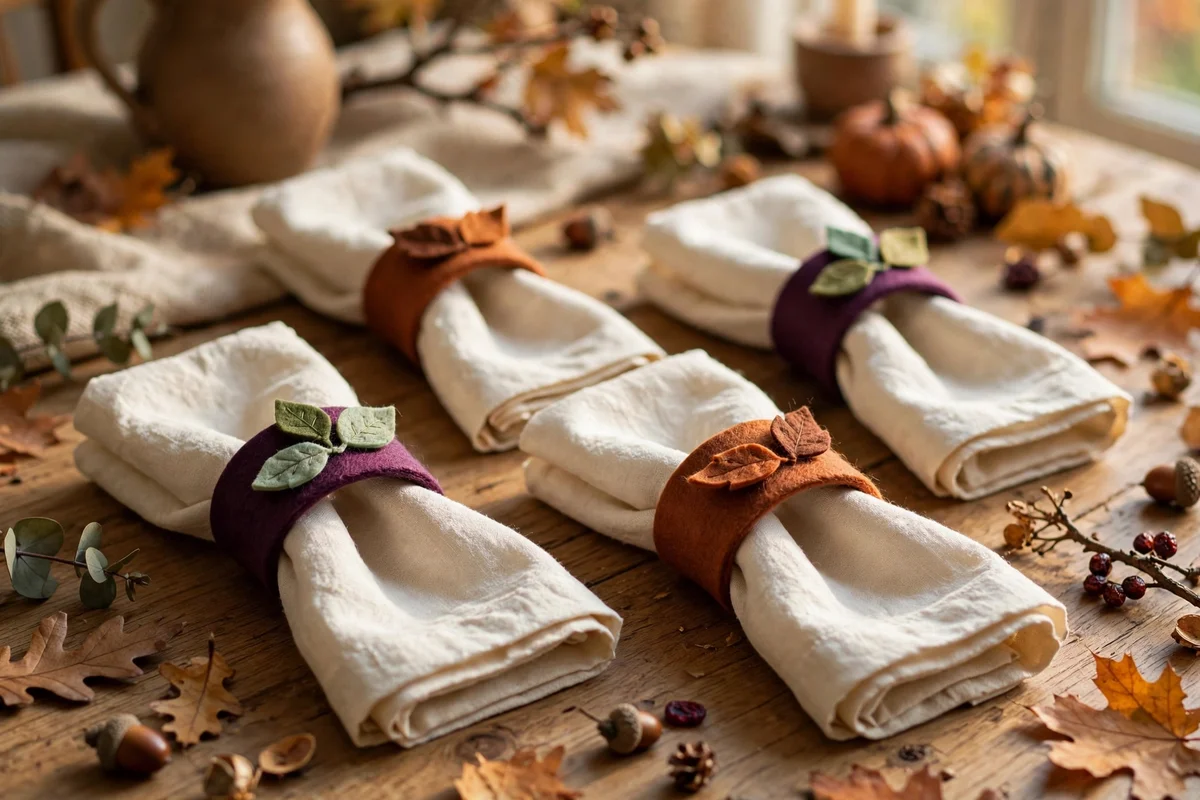
Felt napkin rings dress the autumn table in minutes and cost almost nothing per setting. Cut 15 by 4 cm strips from 2 mm felt in plum, rust or forest green, then overlap the ends 2 cm and glue or stitch them. Glue a small felt leaf of 5 cm or a tiny acorn to the front of each ring for a finished look. Let the glue cure for two hours before setting the table. The mistake is making rings too tight, since stiff linen needs room to slide through.
Make eight rings for a full table in one short evening, since each ring needs only cutting and one join. Store the rings nested inside one another in a drawer, where they keep their shape for years. Mix leaf colours across the set for a playful table, or keep one tone for a calmer, more elegant meal. Wipe away food splashes with a damp cloth at once. Budget tip: one felt sheet makes six rings, so two sheets dress a table of twelve for under 4 pounds or dollars.
21. Layer a Felt Banner Spelling Harvest Thanks Over the Sideboard
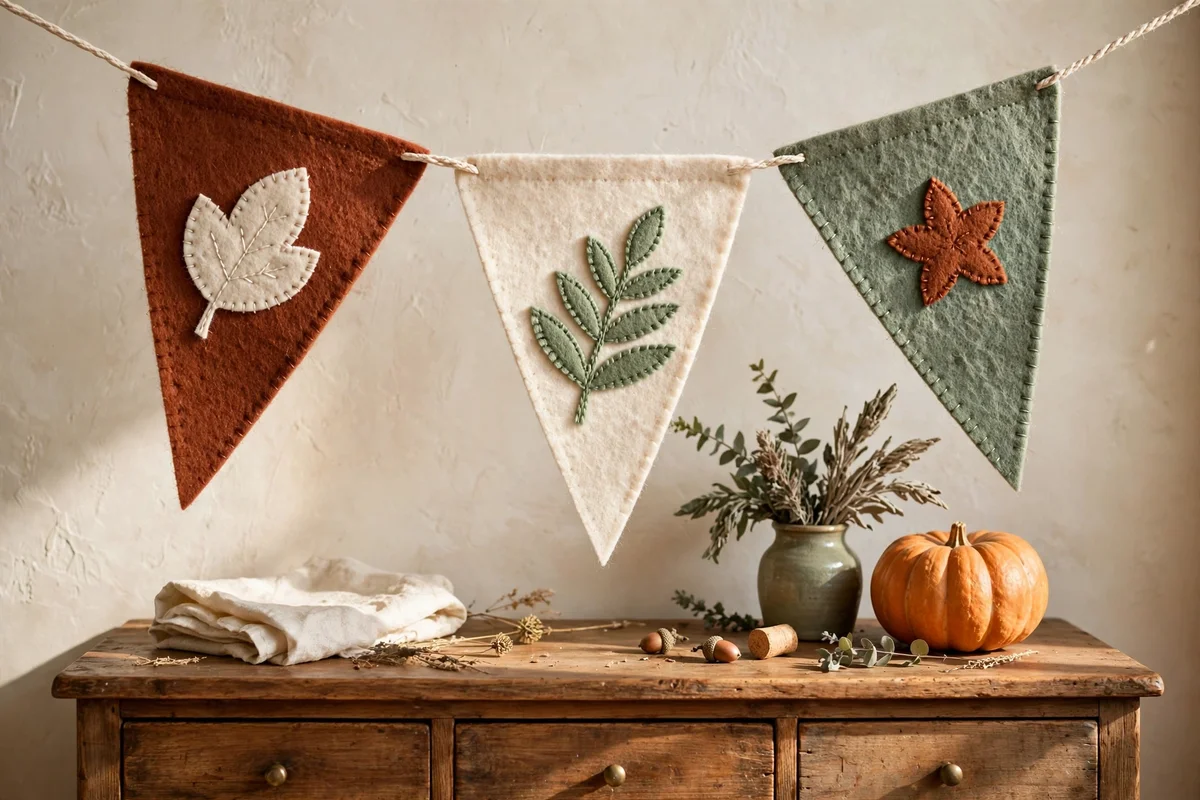
A felt banner spelling harvest thanks warms a plain sideboard into the heart of the autumn room. Cut thirteen pennants of 12 by 15 cm from alternating rust, cream and sage felt. Cut letters of 6 cm from contrasting felt and glue one to each pennant, spelling H A R V E S T T H A N K S. Thread the pennants on 3 metres of cotton cord with 10 cm gaps between them. The mistake to avoid is gluing the letters off centre, since the word looks crooked from across the room.
Hang the banner with two small adhesive hooks, keeping the cord level so the letters sit in one straight line. Fold each pennant top over the cord and glue a 3 cm hem for a tidy finish that slides for spacing. Making the banner takes about two hours, with letter cutting the slowest step. Roll it around a tube for storage, letters facing in, to keep them flat. Budget tip: three felt sheets and one cord make the full banner for under 8 pounds or dollars.
22. Turn Leftover Scraps Into Felt Gift Tags
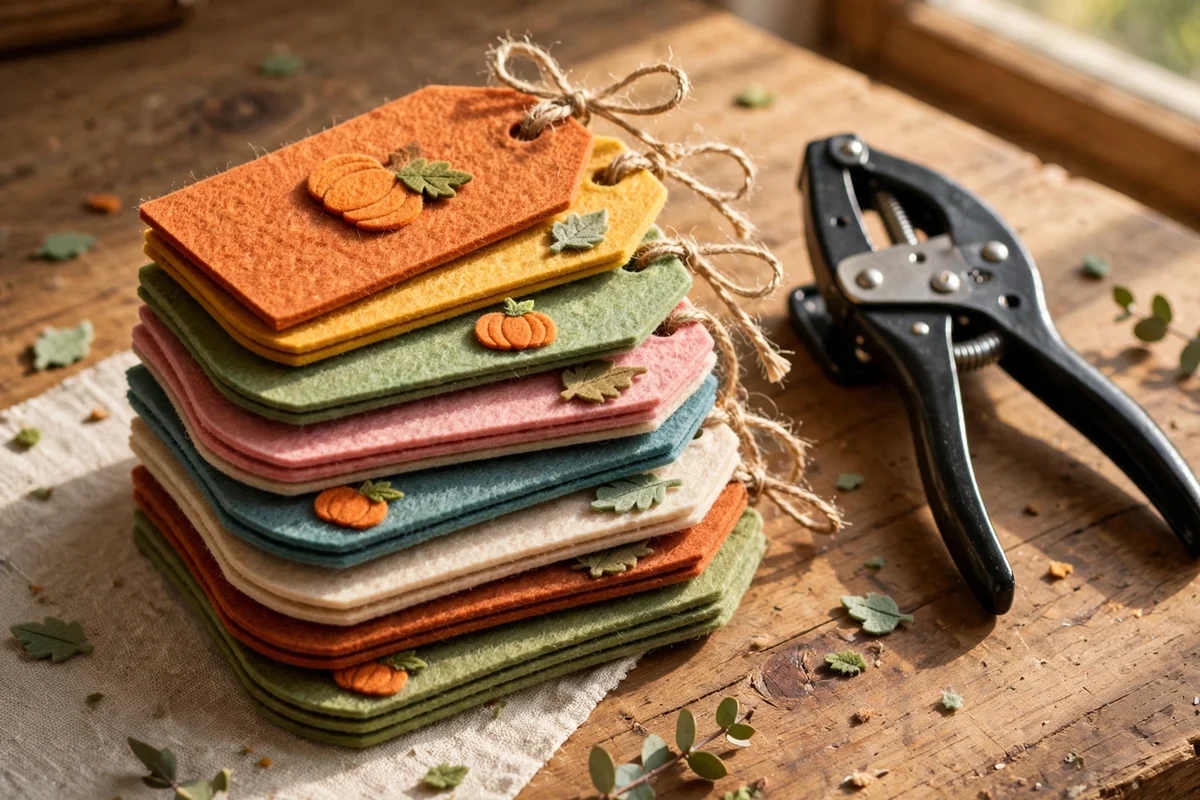
Leftover felt scraps become gift tags that finish autumn presents with a handmade touch. Cut rectangles of 6 by 9 cm from scraps at least 8 cm wide, rounding the top corners for a softer look. Punch a 5 mm hole 1 cm below the top edge and thread 20 cm of twine through for tying. Glue a tiny leaf or pumpkin of 3 cm to the front, or write a name with a fabric pen. The mistake to avoid is writing on the felt before the glue dries, since pens skip across damp glue.
Cut a batch of twenty tags in one sitting, since each tag takes under five minutes once the scraps are sorted. Sort scraps by colour first, which turns a messy pile into quick matching sets. Keep finished tags in a small box with the twine pre-cut, ready for last-minute wrapping. They also work as place cards when a name is written larger. Budget tip: tags cost nothing beyond scraps, twine and a hole punch you likely already own.
These twenty-two projects share one gentle idea: autumn decorating works best when hands make it. From chunky mantel pumpkins to a hand-stitched banner over the sideboard, each piece carries the small imperfections that make handmade things feel alive. Nothing here needs perfect stitches or expensive tools, only felt, patience and an afternoon or two. Start with whichever project caught your eye first, because enthusiasm finishes more crafts than skill ever does.
If you make only one thing this week, cut the flat felt leaf magnets, the simplest project in the set. Ten leaves, ten magnets and one hour give you autumn colour on the fridge door and a feel for cutting and gluing felt. Once those are up, the pumpkins, garlands and wreaths will feel like natural next steps, and by Halloween your home will carry the warm, handmade glow that shop-bought decorations never quite manage.
Frequently Asked Questions
How much does it cost to start making felt crafts?
About 15 to 25 pounds or dollars covers everything: a multi-pack of felt sheets, embroidery floss, fabric glue, a bag of polyester filling and a pair of micro-serrated scissors. That single kit makes most of the twenty-two projects in this article. Buy wool-blend felt if the budget allows, since it cuts cleaner and lasts longer than pure acrylic.
What is the best felt to buy for these projects?
Wool-blend felt with 20 to 35 percent wool is the best all-rounder: it cuts cleanly, resists pilling and holds stitched shapes. Use 1 mm for flat appliques and magnets, 2 to 3 mm for ornaments and bags, and 4 to 5 mm for sturdy wreaths. Pure acrylic felt works for simple flat projects and costs about half the price.
Can children help with these felt crafts?
Yes, with age-appropriate tasks. Children from about five years can trace templates, sort felt colours and glue flat pieces with washable fabric glue. Save sharp scissors, needles and hot tools for adults, and let children place leaves on garlands or choose colours for pumpkins. Felt has no sharp edges and tolerates wobbly cutting, which makes it one of the most forgiving craft materials for families.
How do I keep felt decorations clean from year to year?
Brush felt gently with a soft dry brush or a lint roller to lift dust, and spot clean marks with a barely damp cloth. Never machine wash stuffed ornaments, since agitation mats the fibres and warps the shapes. Let cleaned pieces air dry flat, then store them between tissue sheets in a lidded box with a silica sachet.
Where should I store felt garlands and wreaths after Halloween?
Coil garlands loosely around a cardboard tube and lay wreaths flat in lidded boxes, with tissue paper between layers. Keep the boxes in a dry cupboard rather than a damp garage, since felt absorbs moisture and musty smells. Label each box with its contents and the year so unpacking next October takes minutes.