DIY Projects
22 Painted Dresser Ideas to Transform Old Furniture Beautifully
By Anna Wells · · 22 min read
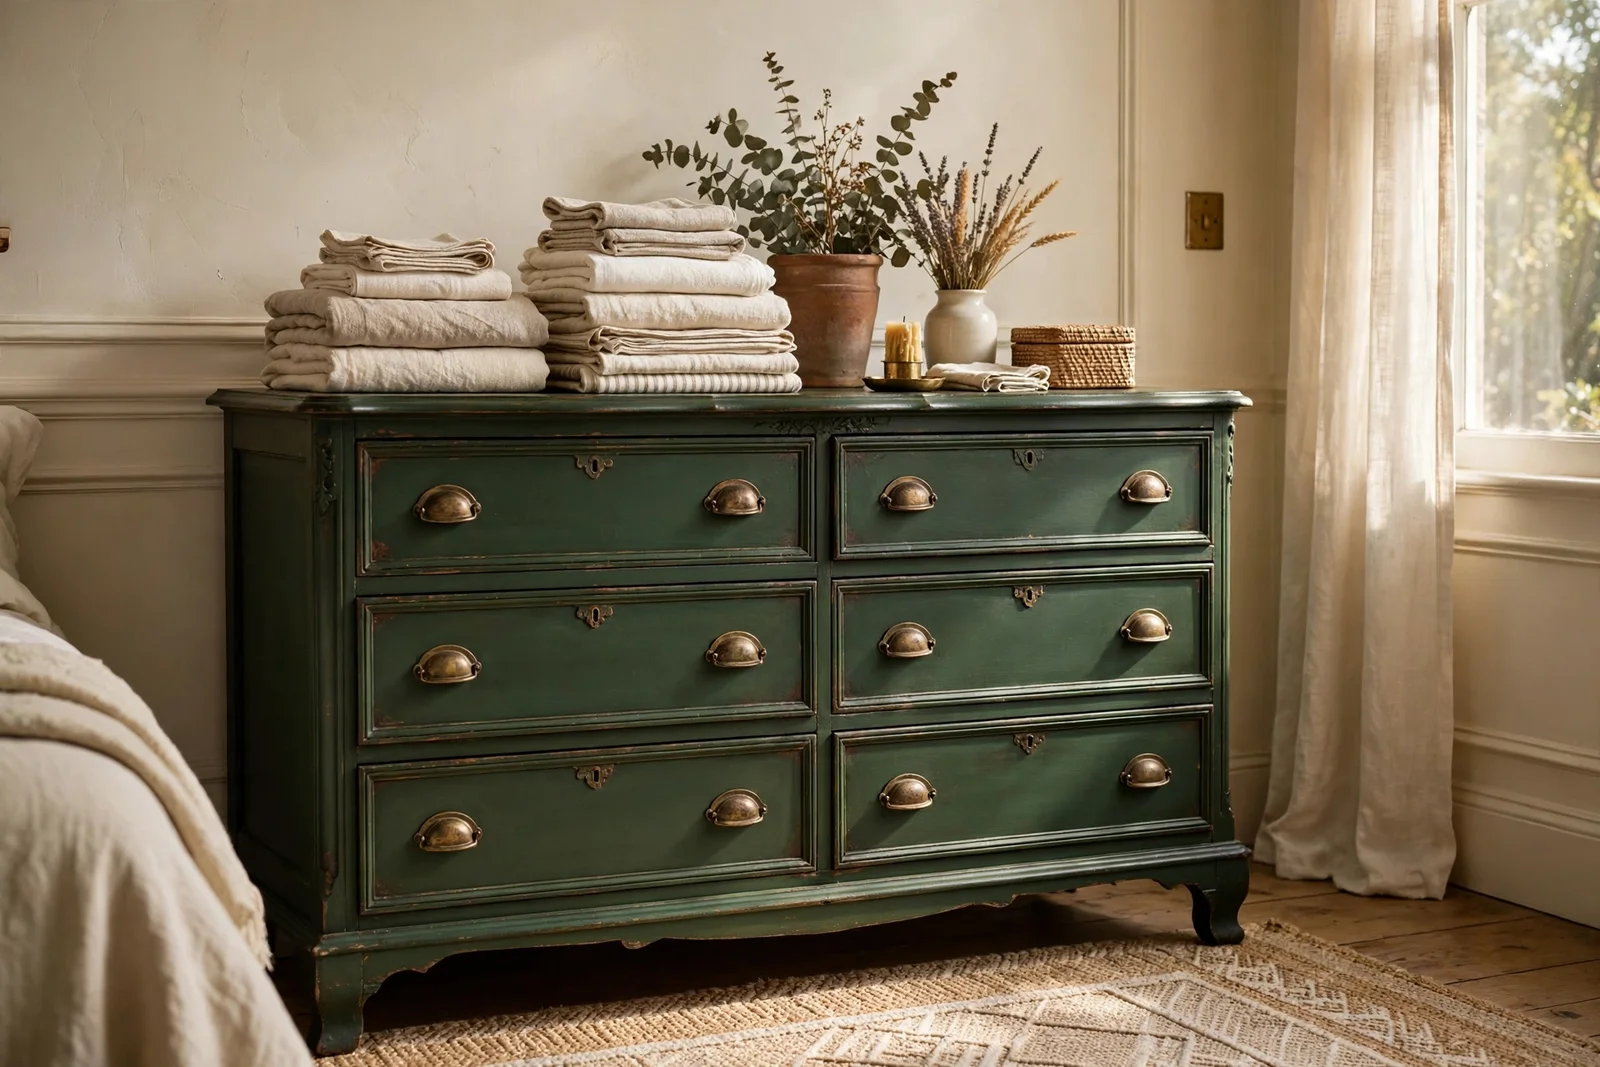
Give a tired dresser new life with paint, clever two-tone finishes and simple hardware swaps: 22 practical ideas for real homes.
Every home seems to hold one dresser that has seen better days: the drawers stick, the varnish has gone orange, and it sulks in the corner of the spare room. Yet underneath that tired surface is solid wood and honest joinery, the kind of furniture that is getting harder to buy new.
Paint is the kindest way to bring it back. A couple of tins, a free weekend and a little patience can turn that forgotten piece into the most admired furniture in the room, whether you love deep heritage greens, soft nursery pastels or the quiet contrast of paint against natural wood.
This collection gathers 22 concrete ideas, from heritage colour stories and two-tone finishes to hardware swaps, drawer linings and the prep work that makes paint last. Each one is practical, budget friendly and written for real homes, so pick the finish that suits your room and start with the easiest drawer.
1. Give Each Drawer a Deep Heritage Green for a Library Calm
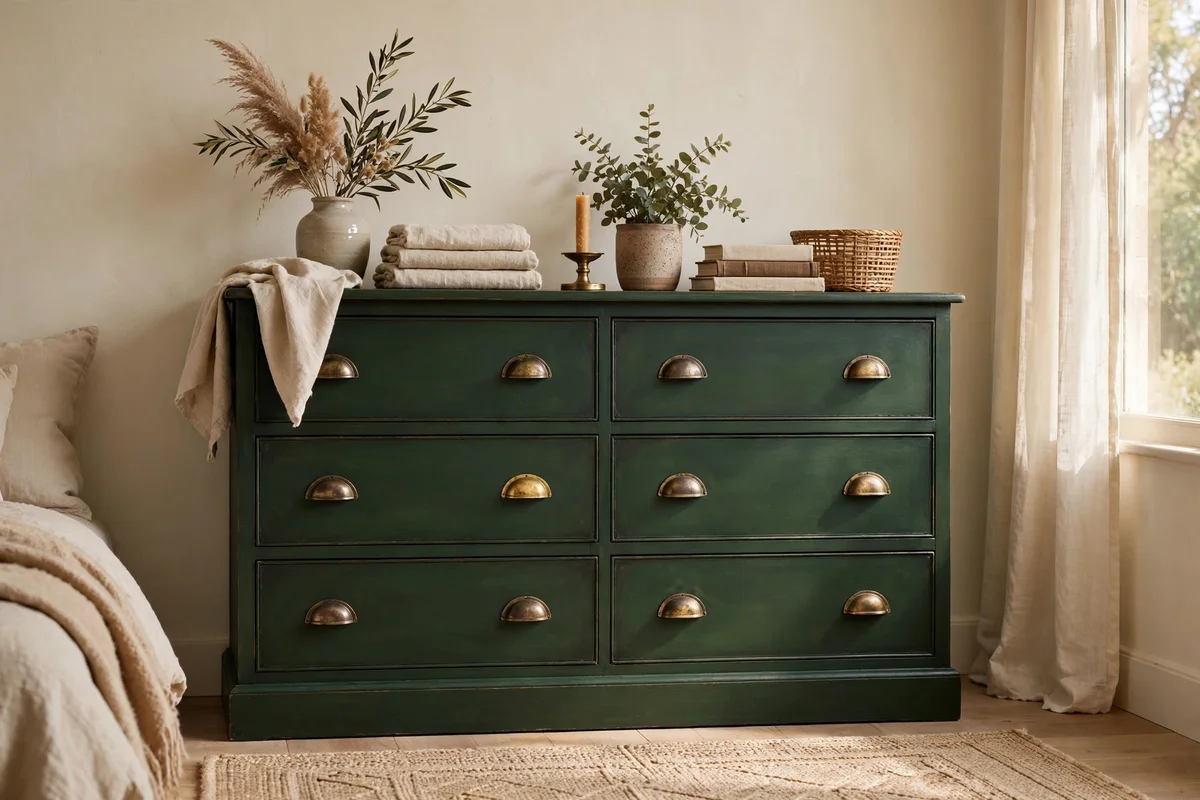
A deep heritage green, like the shade of old library shelves, gives a plain dresser instant character. Choose a furniture paint with a flat or eggshell sheen and roll two thin coats over a light grey primer, letting each coat dry for a full six hours. Deep green suits rooms with warm wood floors and cream walls, and it pairs beautifully with brass handles. The paint hides small dents well, so a tired second-hand piece works perfectly here.
Budget about 12 to 18 pounds or dollars for a half-litre tin, which covers a standard six-drawer dresser. Add new knobs only after the final coat has cured for two days, otherwise the pressure leaves ring marks in the soft paint. The mistake to avoid is painting in a cold room; below 10 degrees Celsius the paint skins before it levels and the finish stays rough. Finish with a light sanding between coats using 220-grit paper for a smooth, durable surface.
2. Paint Drawers in Muted Clotted Cream for Soft Vintage Grace
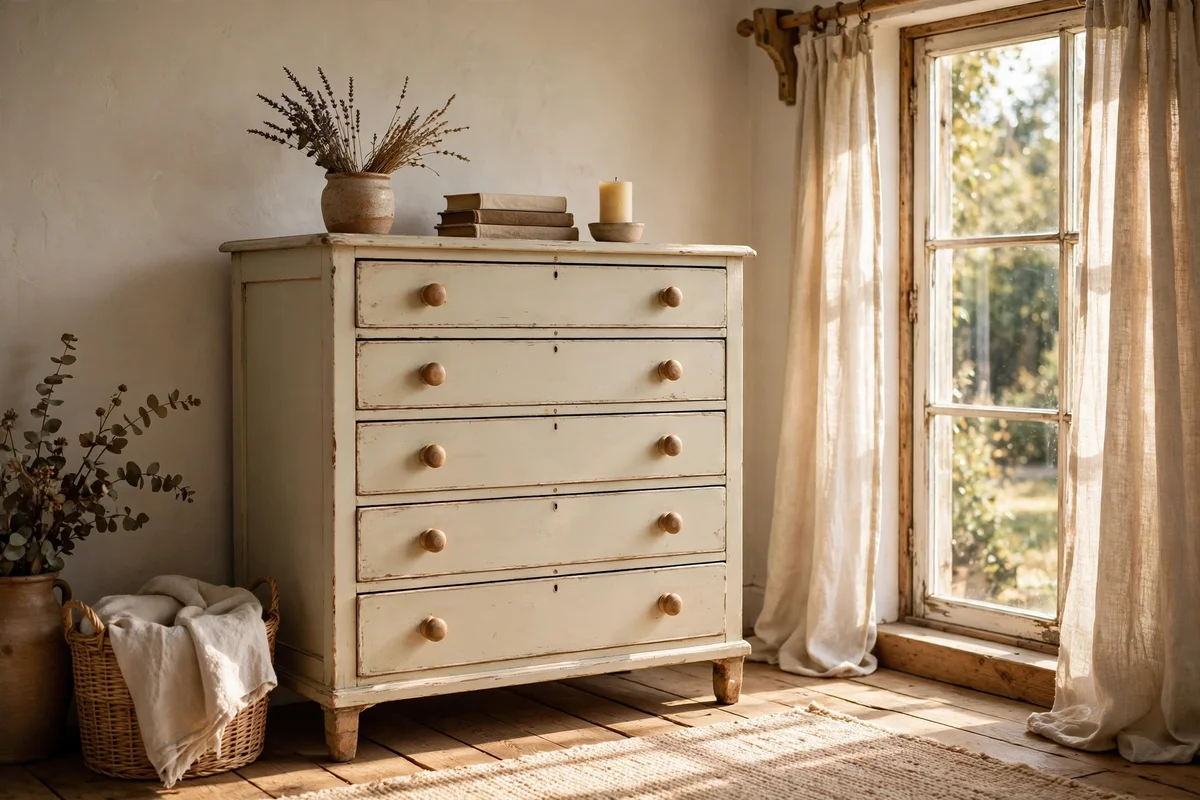
Muted clotted cream is the quietest colour in the paint chart, and it flatters older wood with uneven grain. Apply one coat of stain-blocking primer, then two coats of cream furniture paint with a soft synthetic brush to keep brush marks shallow. Cream reflects morning light beautifully, so this finish suits dressers placed near windows in bedrooms and hallways. Keep the undertones warm, leaning toward honey rather than grey, to avoid a cold flat look.
A 750 ml tin covers a four-drawer chest twice over and costs roughly 15 to 22 pounds or dollars. Let the final coat cure for a full week before stacking books or lamps on top, because pale paint shows dents for longer while it is soft. The mistake to avoid is skipping the primer: wood tannins bleed through cream in two weeks, leaving yellow patches that no topcoat can fix. Seal lightly with clear wax only if the piece will be touched daily.
3. Layer Ink Navy on Lower Drawers With a Faded Top Row
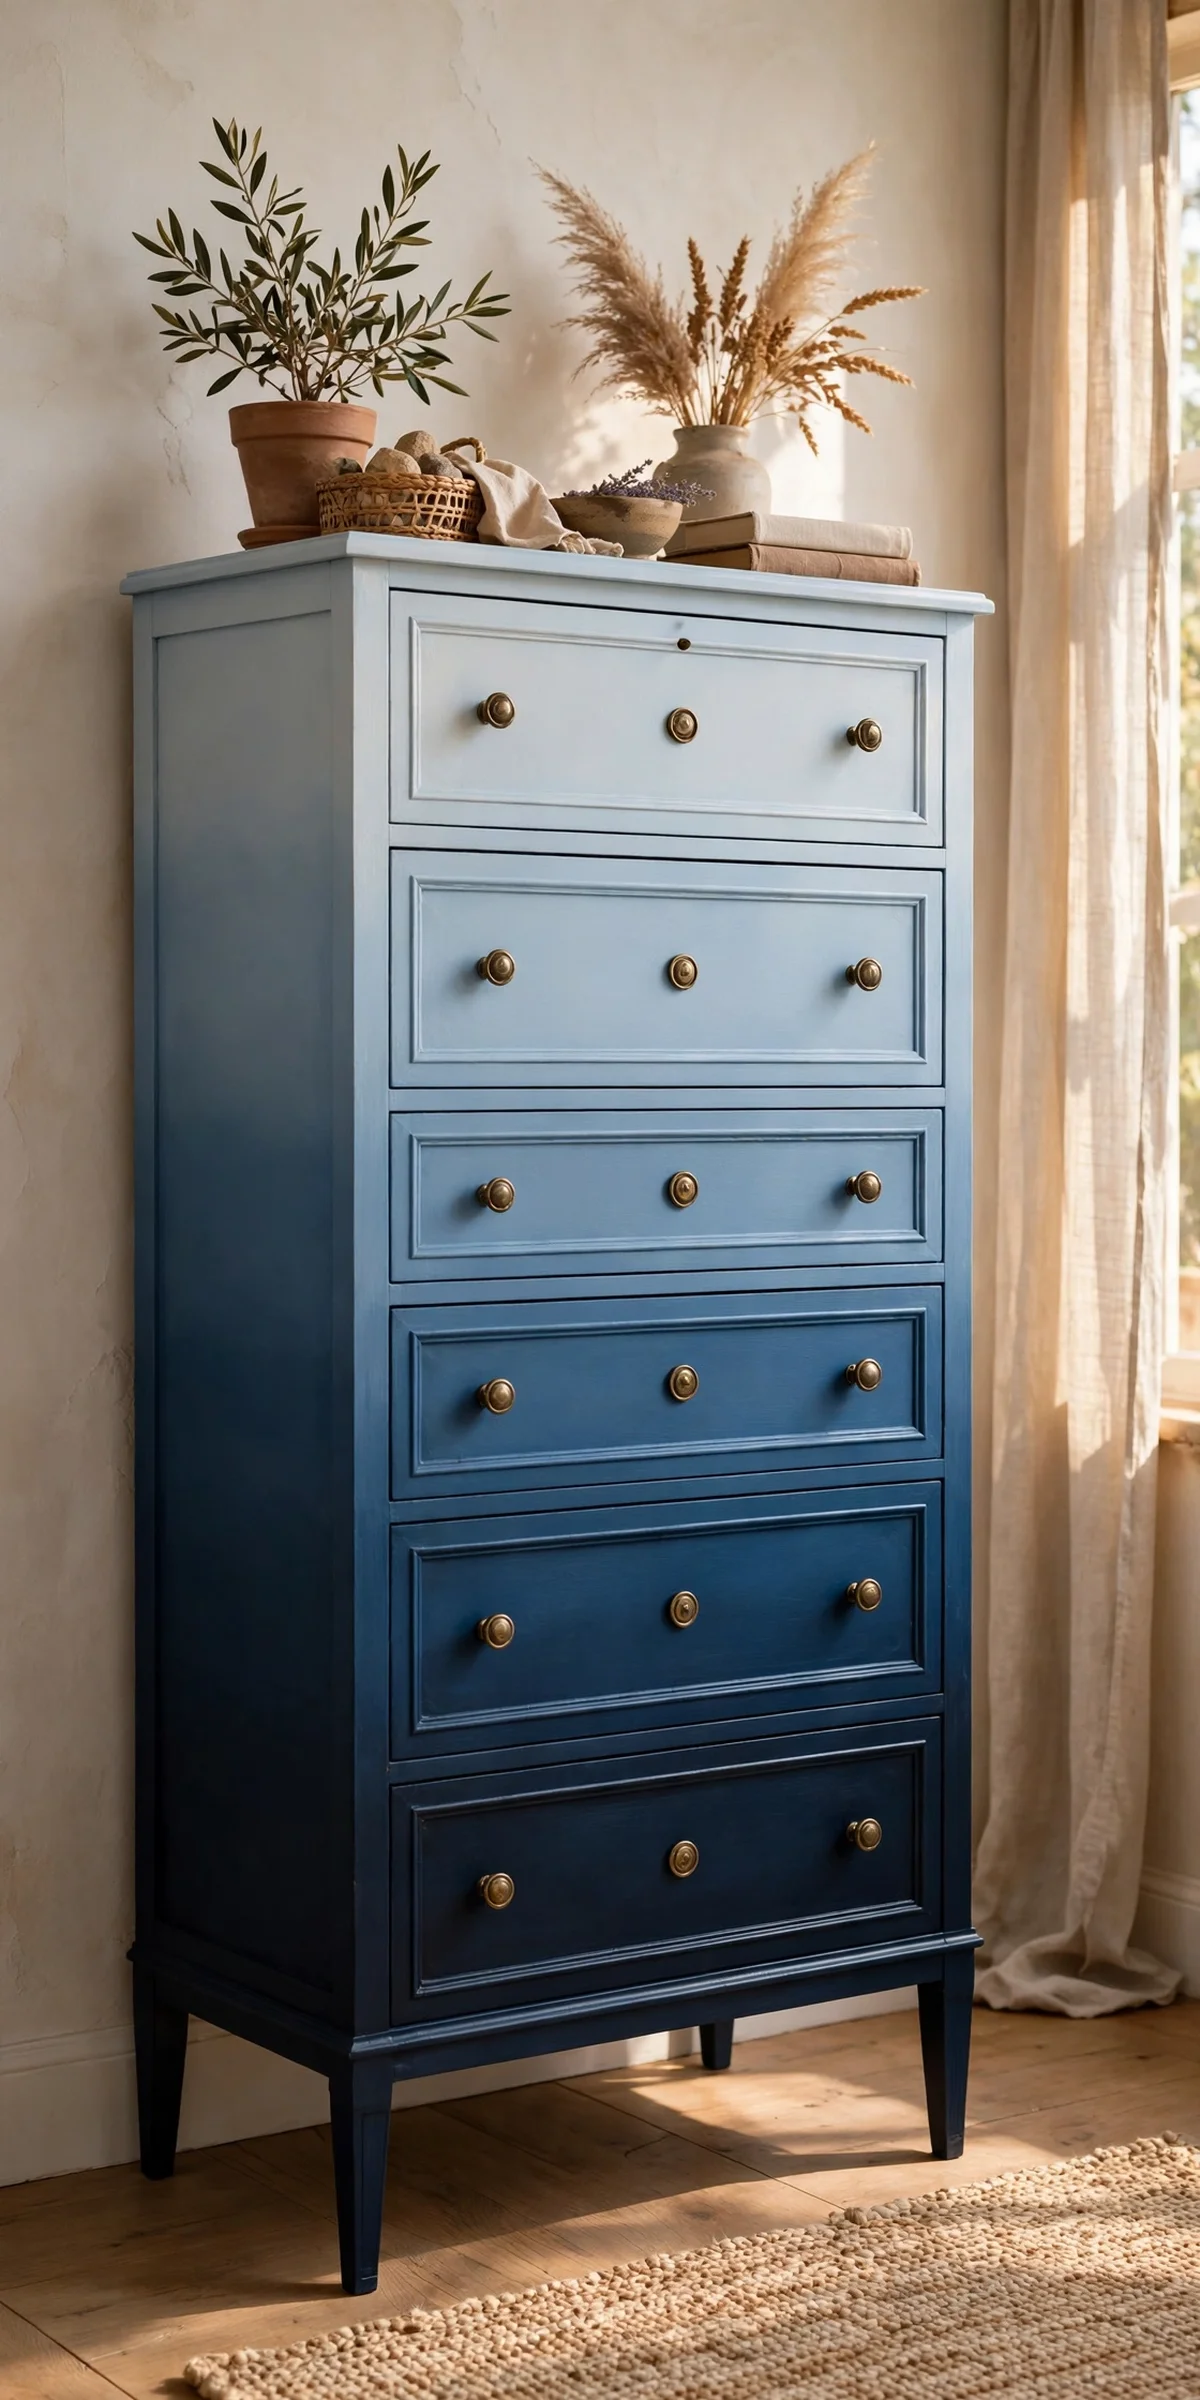
An ombre of ink navy, deepest at the bottom and fading toward the top, gives a plain dresser a custom furniture look. Mix the full navy with white in stages, for example 100 percent, 70 percent, 40 percent and 10 percent paint, and assign one mix per drawer from bottom to top. Mark the tins clearly and work bottom to top so wet edges stay consistent. This works best on tall six or seven drawer chests.
Sand drawer fronts with 180-grit paper and wipe them clean before the first coat, since navy shows dust nibs badly. Two thin coats per drawer dry in four hours in a warm room. The mistake to avoid is mixing fresh batches per drawer without measuring; unmeasured mixes leave visible jumps between rows. Budget under 25 pounds or dollars for four small tester pots in graduating shades instead of mixing from scratch, which saves time and keeps colours even.
4. Try a Sunlit Ochre Across the Drawers for Warm Nostalgia
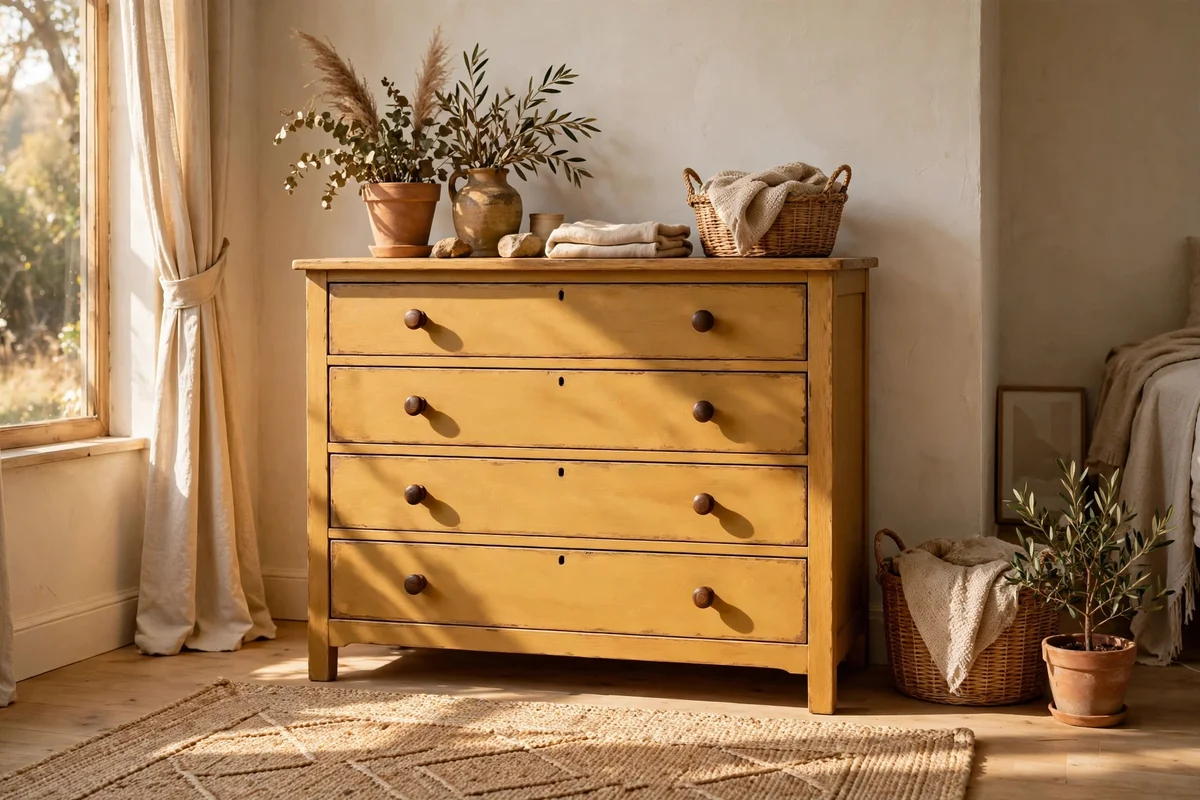
Sunlit ochre, the colour of wheat fields in late summer, brings nostalgic warmth to bedrooms and guest rooms. It works especially well on 1930s to 1950s oak dressers, where the warm undertones echo the wood beneath. Use an eggshell finish so the colour glows softly rather than glaring. Pair ochre drawers with a cream or sage frame for a balanced, heritage look that never feels heavy, and keep wall colours pale so the dresser stays the warm focal point.
Test the colour on a drawer back first, because ochre changes dramatically between daylight and lamplight. One litre covers a standard dresser with two coats and costs about 16 to 24 pounds or dollars. The mistake to avoid is pairing ochre with glossy orange-toned wood nearby; the combination looks muddy. Refresh it with simple dark wood knobs rather than ornate ones, since the colour itself is the statement. A single coat of satin varnish protects the finish without dulling the glow.
5. Keep the Top in Natural Oak Above Soft Sage Sides
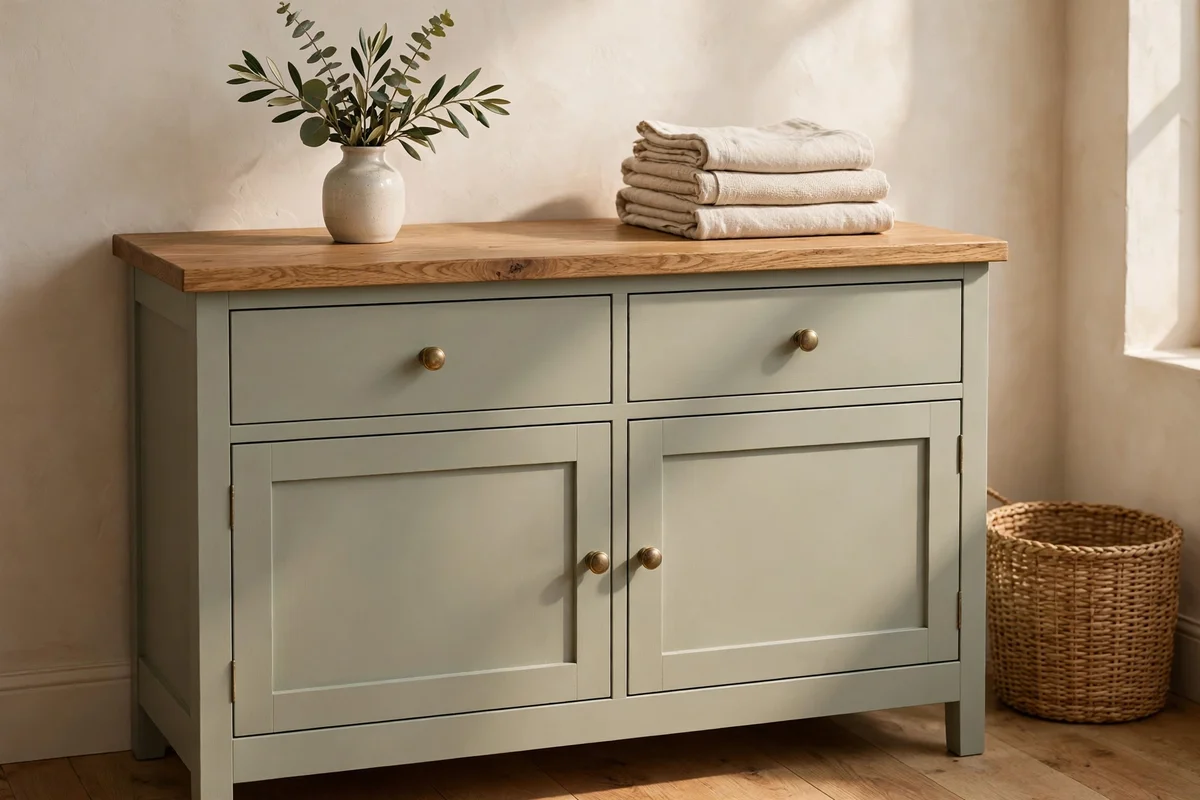
A natural oak top above soft sage sides is the two-tone dresser look that works in almost every home. Strip the existing finish from the top with a chemical stripper or a heat gun, sand it smooth through 120, 180 and finally 220 grit, then seal it with two coats of hardwax oil. Paint the carcass in soft sage with an eggshell finish, masking the top edge with painter tape for a crisp line. The contrast between warm wood and calm colour feels timeless.
Hardwax oil costs around 20 to 30 pounds or dollars for a tin that seals several tops, and it dries to a touchable finish in 24 hours. Apply it with a lint-free cloth in thin coats, buffing back the excess after ten minutes. The mistake to avoid is sanding the top and then leaving it unsealed for days; bare oak absorbs moisture and stains. Keep about 5 cm of clear space between painted edges and the oiled top so the oil never creeps onto the paint.
6. Pair a Charcoal Frame With a Warm Walnut Top
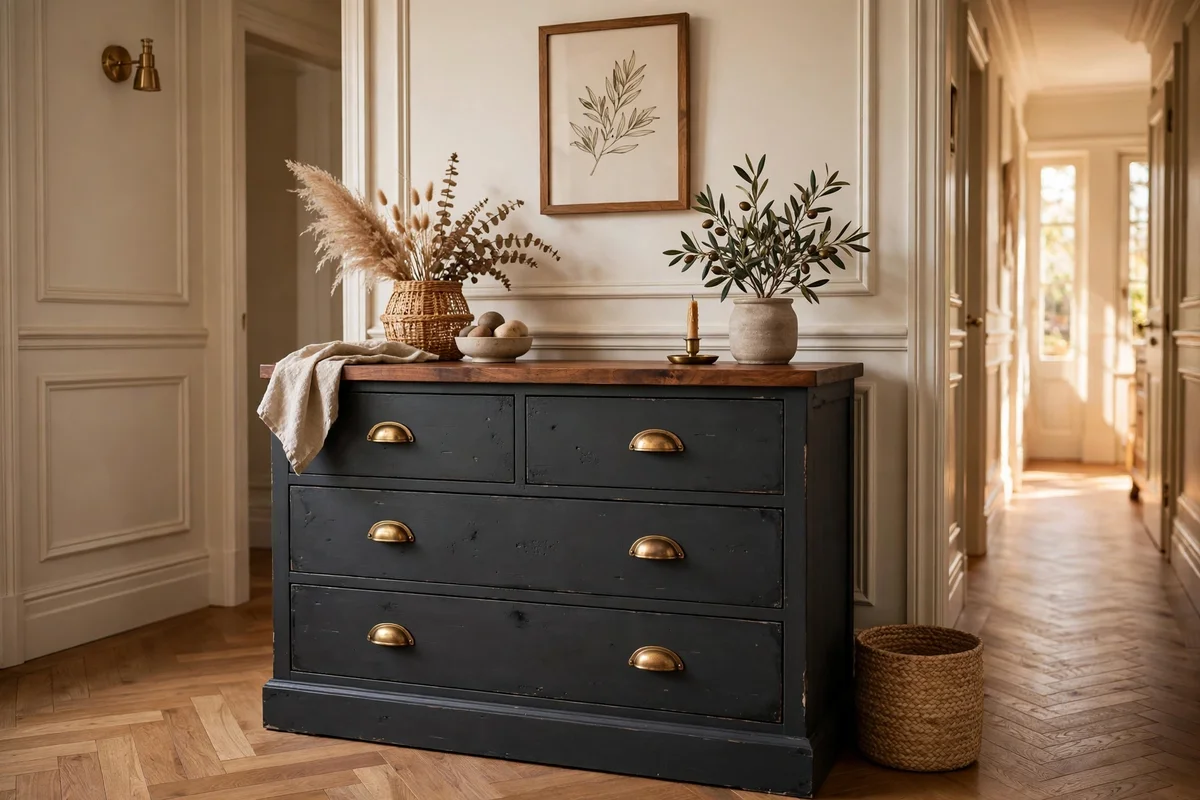
Charcoal frames with warm walnut tops suit hallways and studies where a dresser needs quiet authority. Paint the body in a near-black charcoal with a matte furniture paint, applying three thin coats for full depth, because dark colours show every thin patch. Stain the top with a walnut wood stain, then protect it with satin polyurethane so keys and post do not mark it. Dark frames make brass or copper handles glow, so upgrade the hardware at the same time.
A matte charcoal tin and a small stain tin together cost roughly 25 to 35 pounds or dollars. Ventilate the room well when staining and let the stain sit for five to ten minutes before wiping back the excess, depending on how deep you want the walnut. The mistake to avoid is touching the matte paint with wet hands during the first two weeks; dark matte marks easily until fully cured. Keep a small tin of touch-up paint labelled and stored for future scuffs.
7. Brush a Powder Blue Body Under a Pale Beech Top
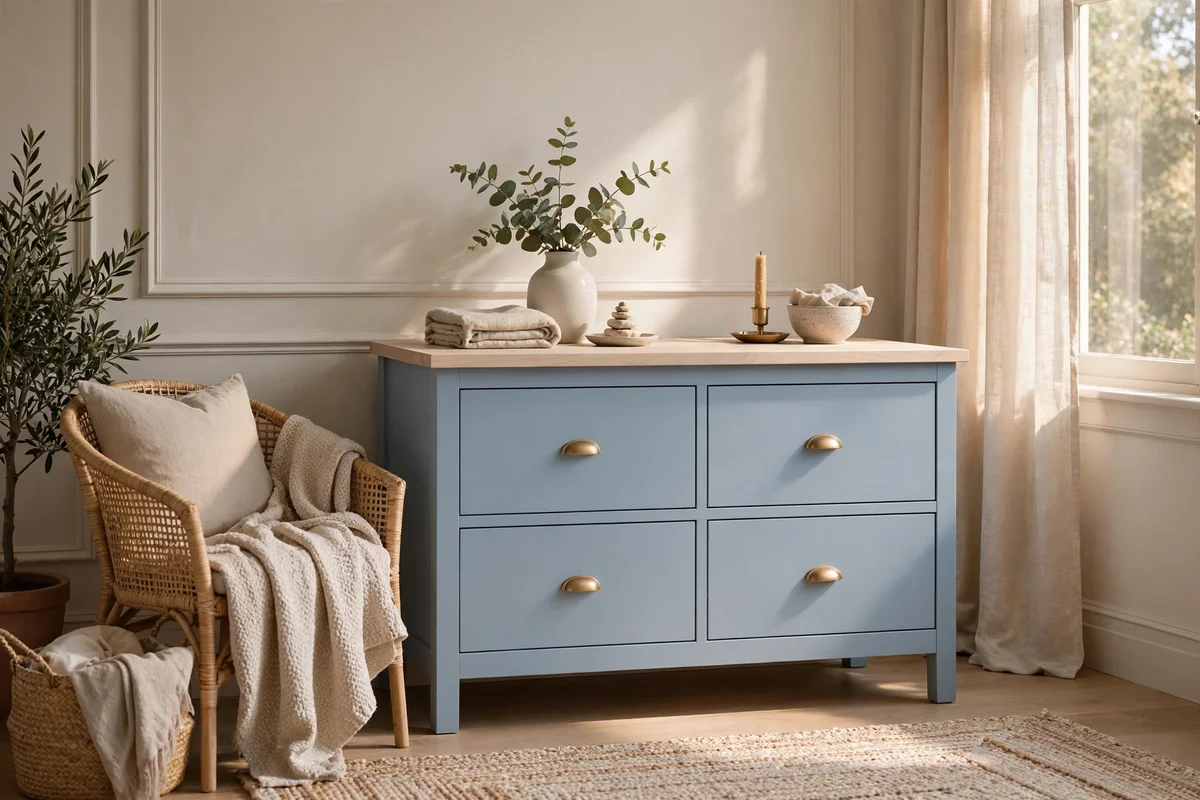
Powder blue bodies with pale beech tops feel calm and coastal without being themed. Choose a chalk-style paint for the body, since it brushes on smoothly over old varnish with just a light scuff sand. Sand the beech top to bare wood and finish it with a clear matte varnish that keeps the pale tone instead of yellowing it. The blue should read as a whisper rather than a statement, so hold paint chips against the room walls before committing.
Powder blue suits nurseries, guest rooms and quiet corners equally well. Two 500 ml tins cover most dressers and cost around 18 to 28 pounds or dollars combined. The mistake to avoid is choosing a varnish with an amber cast for the top; it turns pale beech orange within months. Look for a water-based varnish labelled non-yellowing. Allow 48 hours between the final paint coat and varnishing the top so tape lines stay clean when the masking comes off.
8. Paint the Frame Cream and Stain the Drawers in Honey Oak
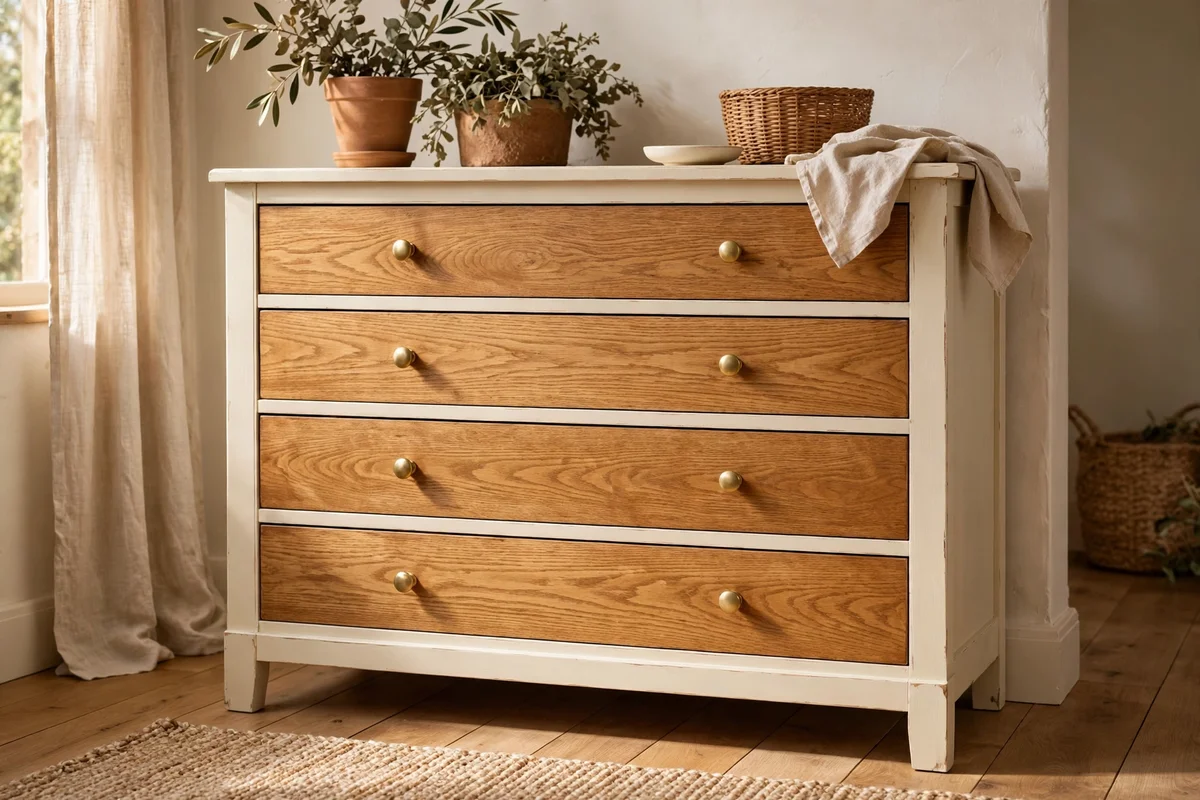
Painting the frame in clotted cream while staining the drawers in honey oak splits the difference between painted and wooden furniture. Remove the drawers and sand their fronts to bare wood with 120-grit followed by 180-grit paper, then brush on honey oak stain and wipe back after five minutes. Paint the frame separately with two coats of cream eggshell, protecting drawer runners with tape. Reassemble only when both finishes are fully dry to avoid sticking.
This combination suits bedrooms that already have wooden floors or oak wardrobes, since the stained drawers tie the piece into the room. The stain tin costs about 10 to 15 pounds or dollars and covers far more than one dresser. The mistake to avoid is staining the drawer fronts while they sit inside the frame; drips land on the wet cream paint and are nearly impossible to remove. Lay each drawer flat on newspaper and stain one at a time.
9. Stain the Frame Dark Walnut and Paint the Drawers Linen White
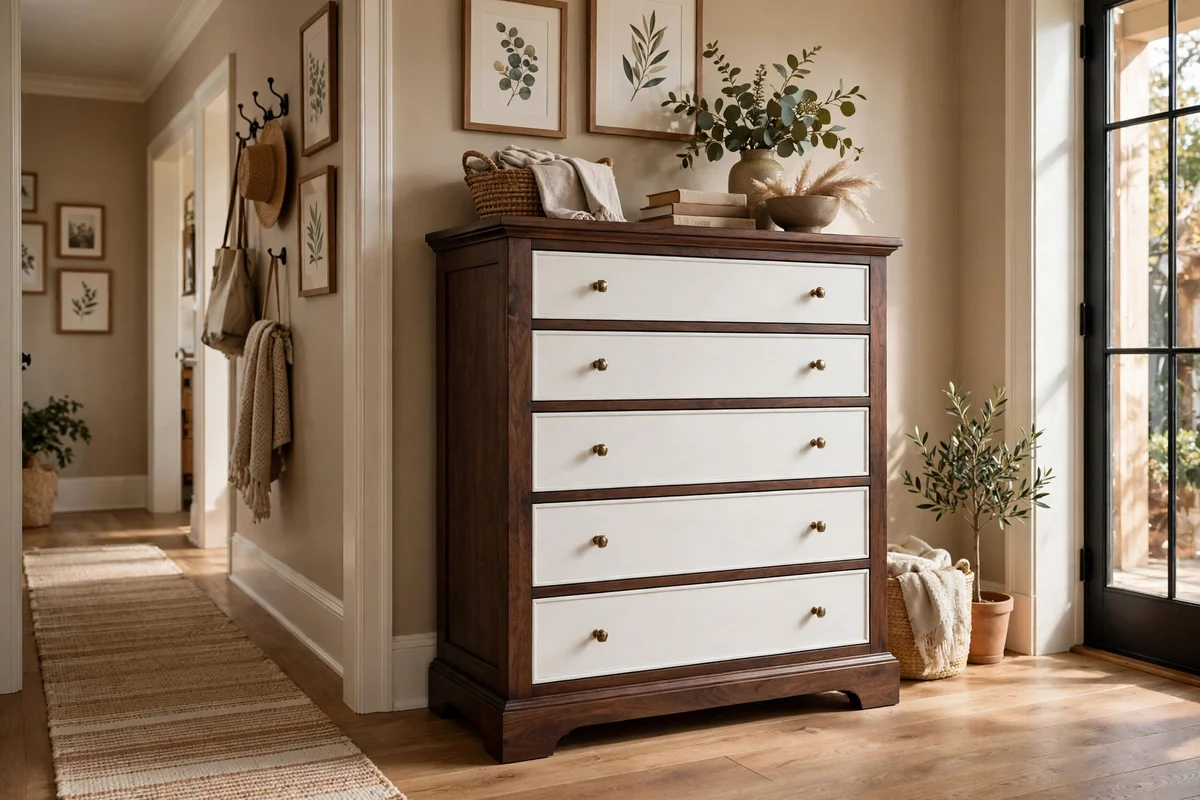
The reverse of the classic split, a dark walnut stained frame with linen white painted drawers, makes the drawers look like they float. Stain the carcass with dark walnut, taking care around drawer openings where stain can pool, and wipe excess immediately. Paint the drawer fronts in linen white with two coats of satin furniture paint over primer. Number the drawers with tape on the underside before removal so each returns to its own opening, since old drawers are rarely identical.
Dark frames forgive scuffs better than pale ones, which makes this a smart choice for family hallways. Linen white needs a stain-blocking primer underneath or the wood grain shows through as grey shadows. The mistake to avoid is painting the drawer edges thickly; built-up paint makes drawers stick in their runners. Paint edges lightly and wax the runners with a candle for a smooth glide. The full project costs roughly 30 pounds or dollars in paint, stain and primer.
10. Swap Wooden Knobs for Aged Brass Cup Pulls
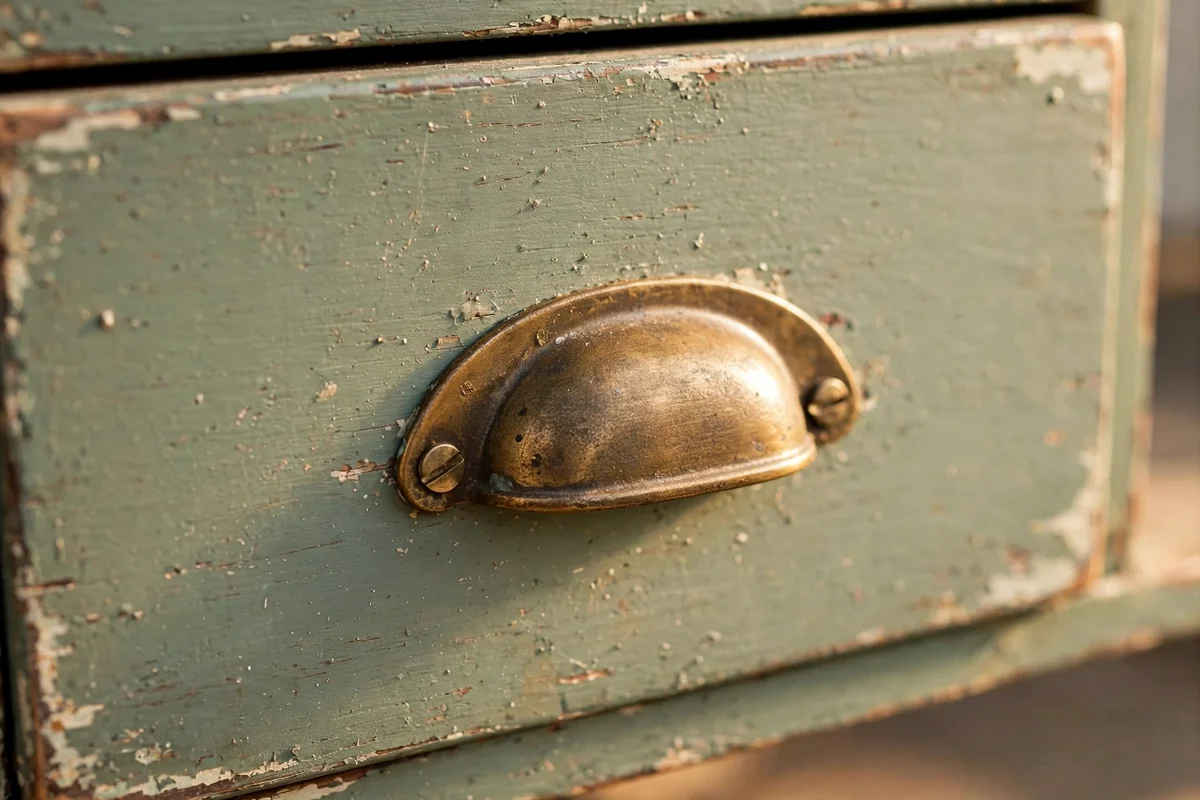
Swapping tired wooden knobs for aged brass cup pulls changes the whole personality of a dresser in under an hour. Cup pulls sit across the centre of each drawer front, so measure the existing hole spacing first; standard spacings are 64, 96 and 128 mm. Fill old holes with wood filler, sand smooth and repaint the fronts before drilling new holes. Aged brass suits green, navy, cream and charcoal paint alike, and it darkens gracefully with handling.
A set of six solid brass cup pulls costs 18 to 40 pounds or dollars depending on weight and finish. Use a drill bit one millimetre larger than the bolt and tape the drawer front to prevent chipping the paint. The mistake to avoid is mixing pull styles across one dresser; two different brass tones look like a repair, not a choice. Keep all pulls from the same maker and batch. Add a drop of threadlocker on each bolt so daily tugging never loosens them.
11. Fit Leather Loop Handles on Painted Drawers
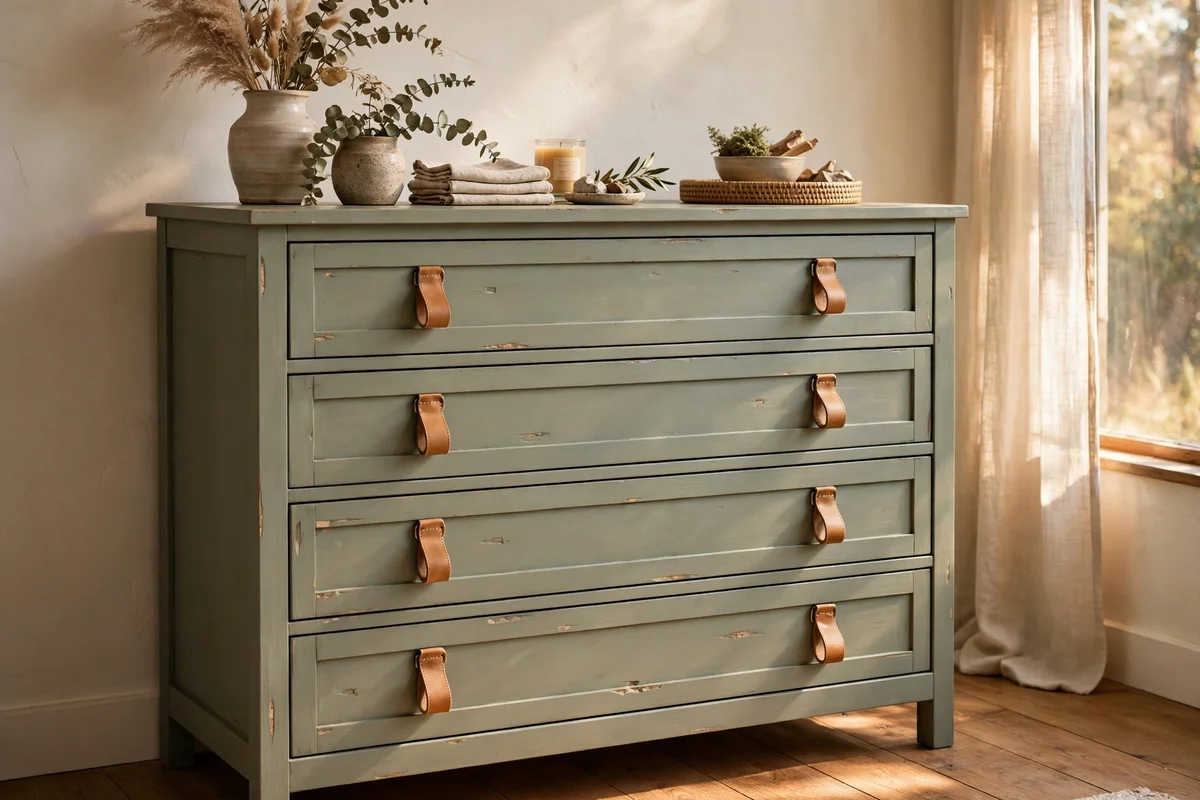
Leather loop handles bring a soft, crafted feel to painted drawers and suit Scandinavian and cottage rooms. Cut 15 mm wide leather straps into 12 cm lengths, fold each into a loop and fix with two brass screws through a small brass washer. The loops hang about 4 cm below the fixing point, so position them high on the drawer front for a comfortable grip. Choose vegetable-tanned leather in tan or dark brown, which ages into a rich patina.
A metre of leather strapping costs around 8 to 14 pounds or dollars and makes six to eight handles. Predrill the screw holes with a 2 mm bit to stop the leather splitting. The mistake to avoid is using thin fashion leather; it stretches under daily pulling and sags within months. Ask for 2.5 to 3 mm thick strap leather. Condition the loops twice a year with a little leather balm to keep them supple and prevent cracking at the fold.
12. Choose Ceramic Knobs With Hand Painted Floral Motifs
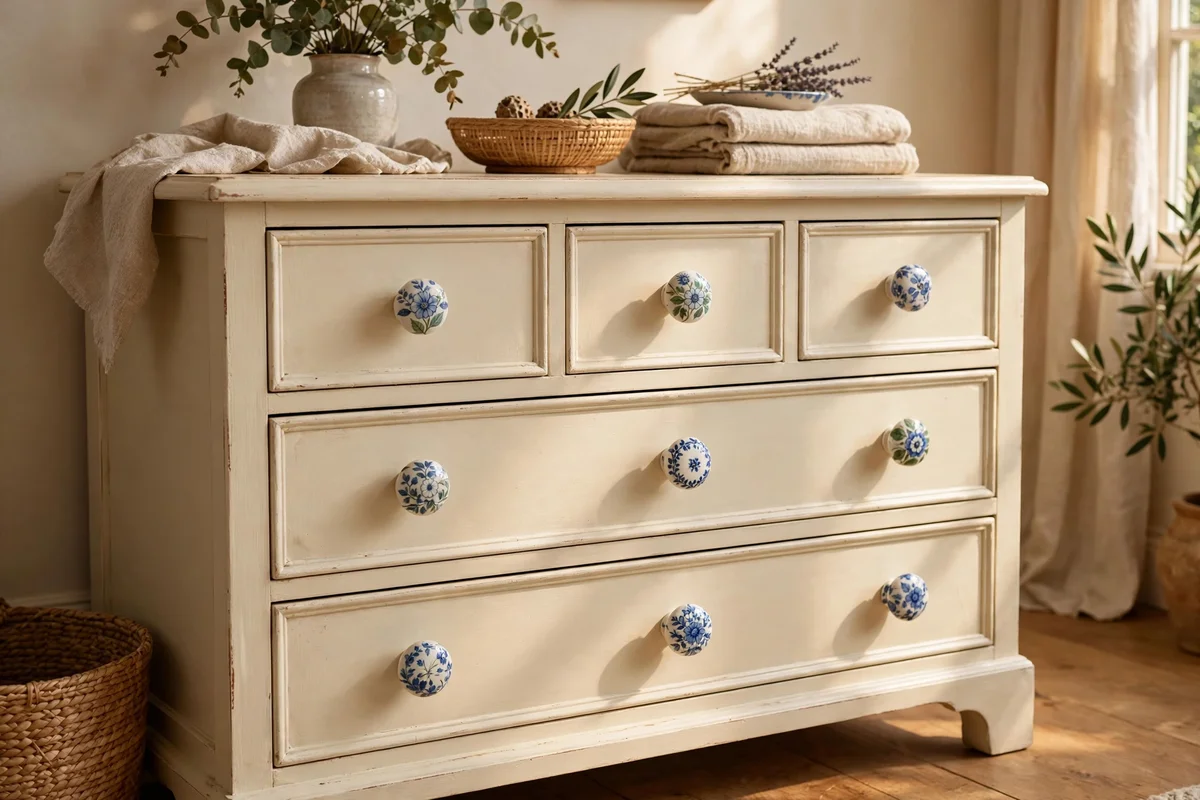
Hand painted ceramic knobs with small floral motifs turn a plain painted dresser into something that feels collected rather than bought. Each knob is slightly different, which suits cream, sage and powder blue paint especially well. Unscrew the old knobs, check the bolt length against the drawer front thickness, and swap in longer bolts where needed. A set of mismatched florals in a shared colour palette, say blue and white, reads as deliberate; clashing palettes look accidental.
Ceramic knob sets of six to ten cost 12 to 25 pounds or dollars from craft markets and independent sellers. Tighten bolts by hand rather than with a power driver, because ceramic cracks under torque. The mistake to avoid is fitting ceramic knobs on heavy deep drawers full of winter clothes; the bolt takes the full weight and can snap the ceramic. Reserve ceramic knobs for lighter drawers and use brass pulls on the deep bottom drawers of the same piece.
13. Line Drawers With Patterned Paper for a Quiet Surprise
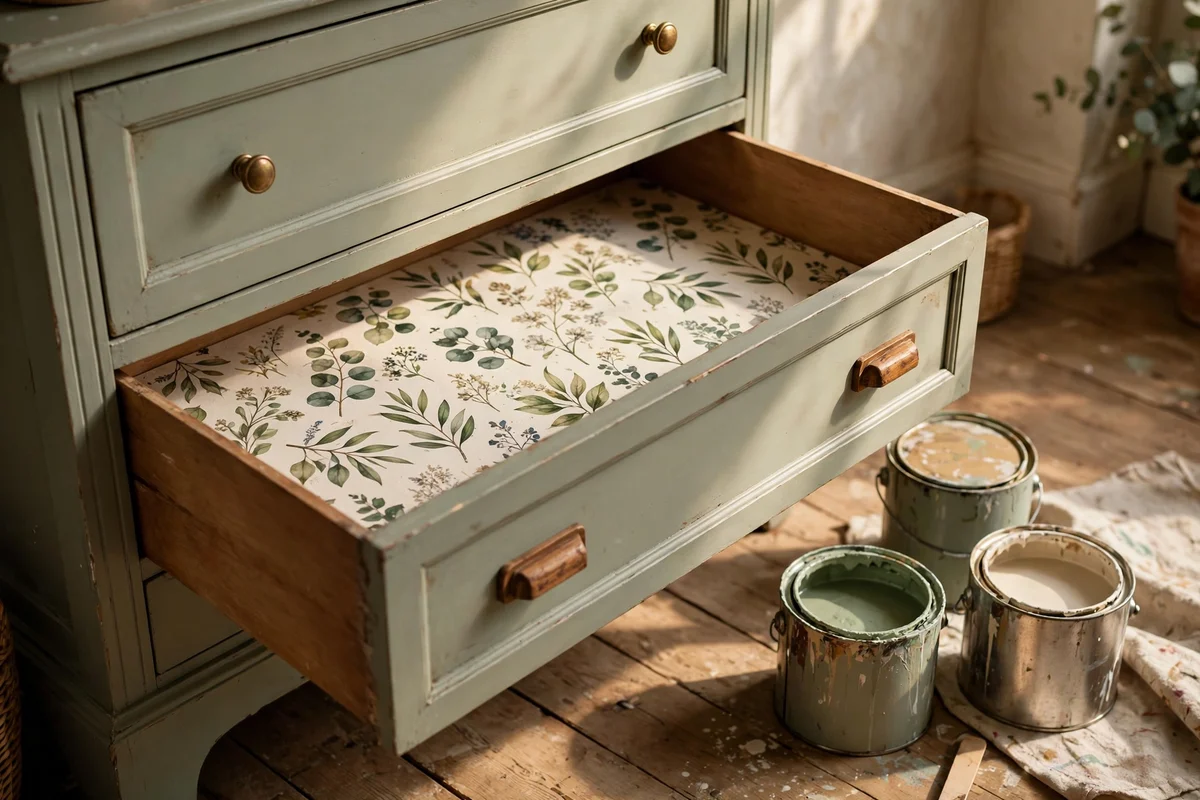
Lining drawers with plain or patterned paper is the finishing touch most makeovers skip, and it protects clothes while delighting whoever opens the drawer. Choose acid-free wrapping paper or proper drawer liner in a pattern that complements the paint colour, for example a small botanical print inside cream drawers. Measure the drawer base, cut the paper 3 mm short on each side, and fix it with repositionable adhesive dots so it can be changed later without residue.
A roll of quality liner costs 6 to 12 pounds or dollars and lines six to eight drawers. Avoid paper with any lettering or text prints, since words can transfer ink to fabric in warm drawers and they date quickly. The mistake to avoid is using wet glue on thin paper; it wrinkles and bubbles as it dries. Use spray adhesive or dots applied in the drawer, never on the paper. Replace liners every two years or when they start to lift at the corners.
14. Paint a Gentle Nursery Dresser in Soft Powdered Colours
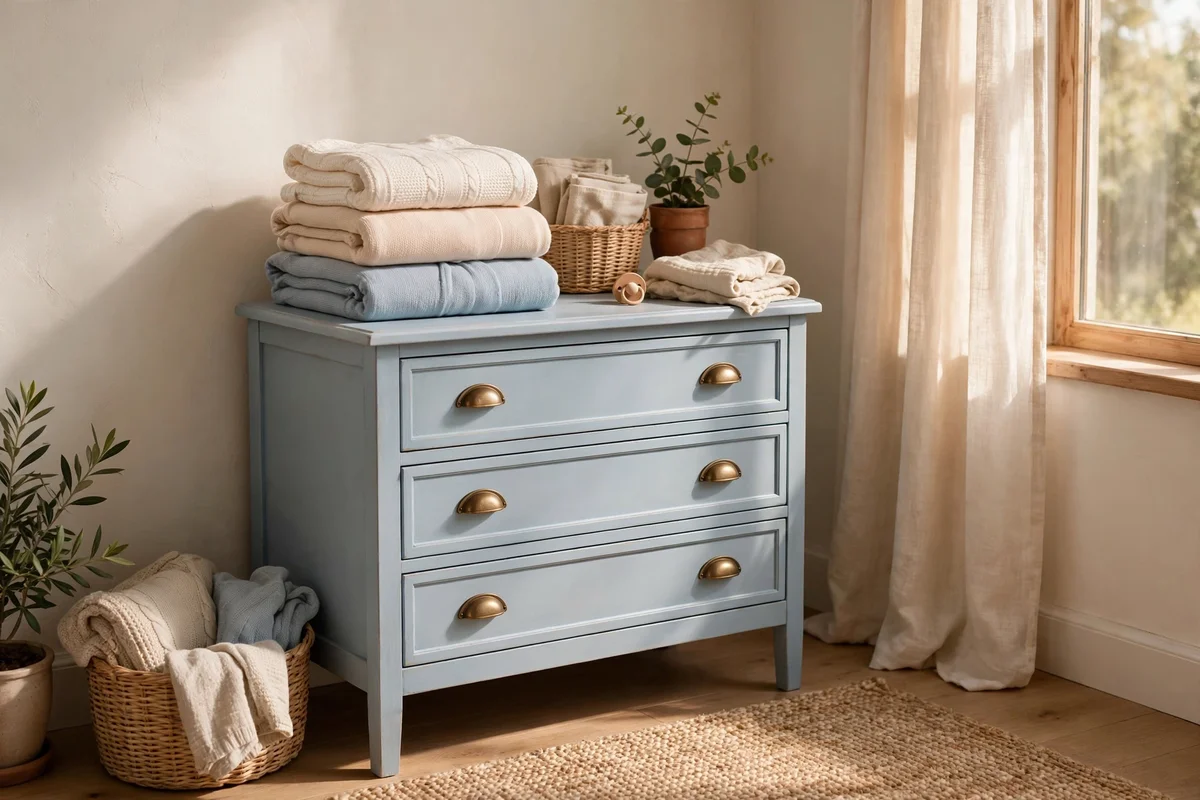
A gentle nursery dresser in soft powdered colours needs a finish that is beautiful and safe. Choose water-based furniture paint in soft sage, powder blue or warm blush, and check the tin for a toy-safe or low-VOC certification before buying. Remove all hardware and paint drawer fronts, frame and sides with two thin coats, sanding lightly with 220-grit paper between coats. Let the piece cure for a full three weeks before the room is used, since water-based paint hardens slowly.
Fit soft-close drawer runners or simple drawer stops so little fingers cannot slam drawers, and anchor the dresser to the wall with an anti-tip strap, which costs under 10 pounds or dollars. The mistake to avoid is using strong-scented oil-based paint in a nursery; the fumes linger for weeks and the finish yellows in sunlight. Keep spare paint for touch-ups, because nursery furniture takes more knocks than any other room. Wash the painted surface only with a damp cloth and mild soap.
15. Scuff Sand and Prime Laminate Dressers the Patient Way
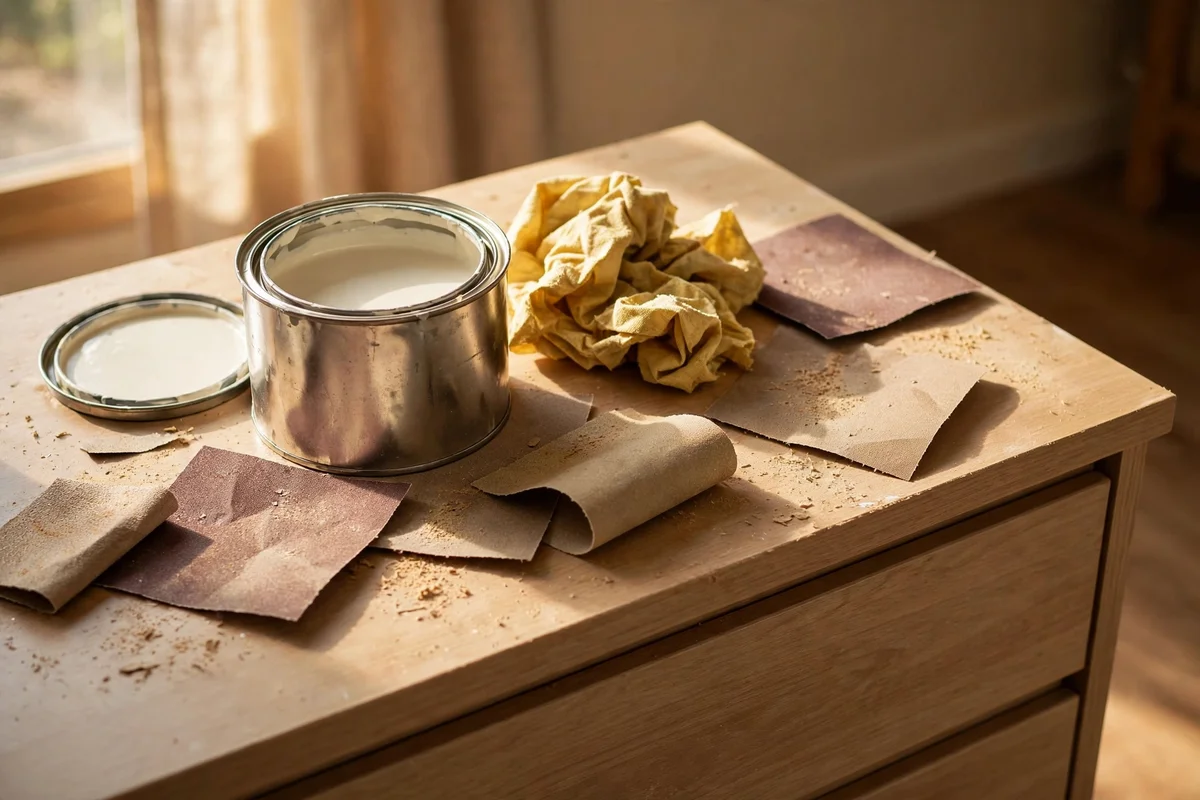
Laminate dressers, with their slick plastic-coated surfaces, need patient prep or the paint peels within months. Start by cleaning every surface with sugar soap and warm water, then rinse and let the piece dry fully. Scuff the laminate all over with 120-grit sandpaper until the shine is gone and the surface feels rough to the touch. Wipe away the dust with a tack cloth, then apply a bonding primer made for slick surfaces and let it cure for the full time on the tin.
Bonding primer costs 14 to 20 pounds or dollars for a tin that covers two dressers. After priming, paint two coats of furniture paint, sanding lightly between coats. The mistake to avoid is rushing the primer cure; paint applied to tacky primer slides and peels in sheets. Give it the full 24 hours the tin recommends, longer in damp weather. Test adhesion with a strip of masking tape after curing; if it lifts paint, strip back and start the priming again.
16. Prime Solid Wood Dressers to Lock In Tannins
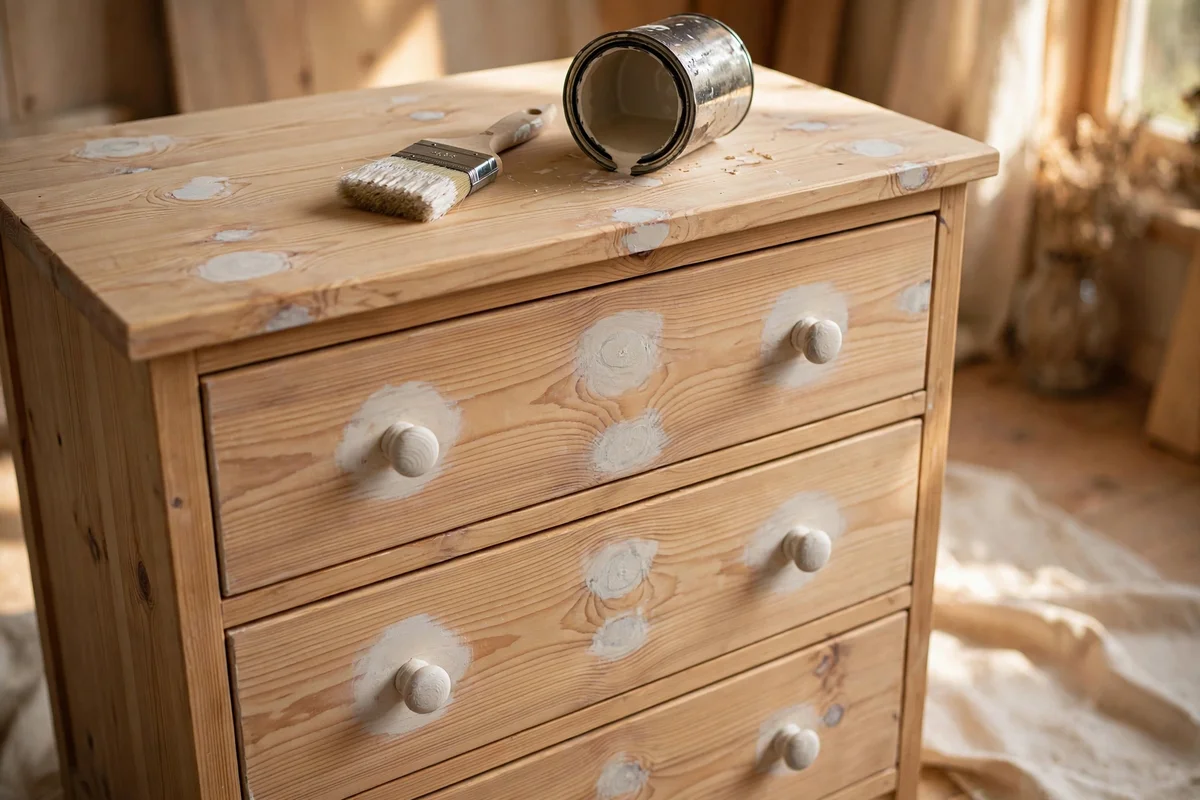
Solid wood dressers reward different prep: the enemy here is tannin bleed, the brown stains that seep through pale paint from knots and old varnish. Clean the piece, sand with 150-grit paper, and seal every knot with two coats of shellac-based primer, which locks tannins in. Follow with one full coat of the same primer over the whole dresser. Mahogany, oak and pine are the worst offenders, so never skip this step on pale finishes.
Shellac-based primer costs around 16 to 24 pounds or dollars and dries in under an hour, so the whole sealing stage takes one morning. Ventilate the room because the smell is strong, though it fades once dry. The mistake to avoid is using ordinary water-based primer on knotty pine; the tannins bleed through within two weeks and the cream paint turns patchy yellow. After priming, two coats of top paint give a finish that stays clean and bright for years.
17. Seal Bedroom Dressers With Soft Furniture Wax
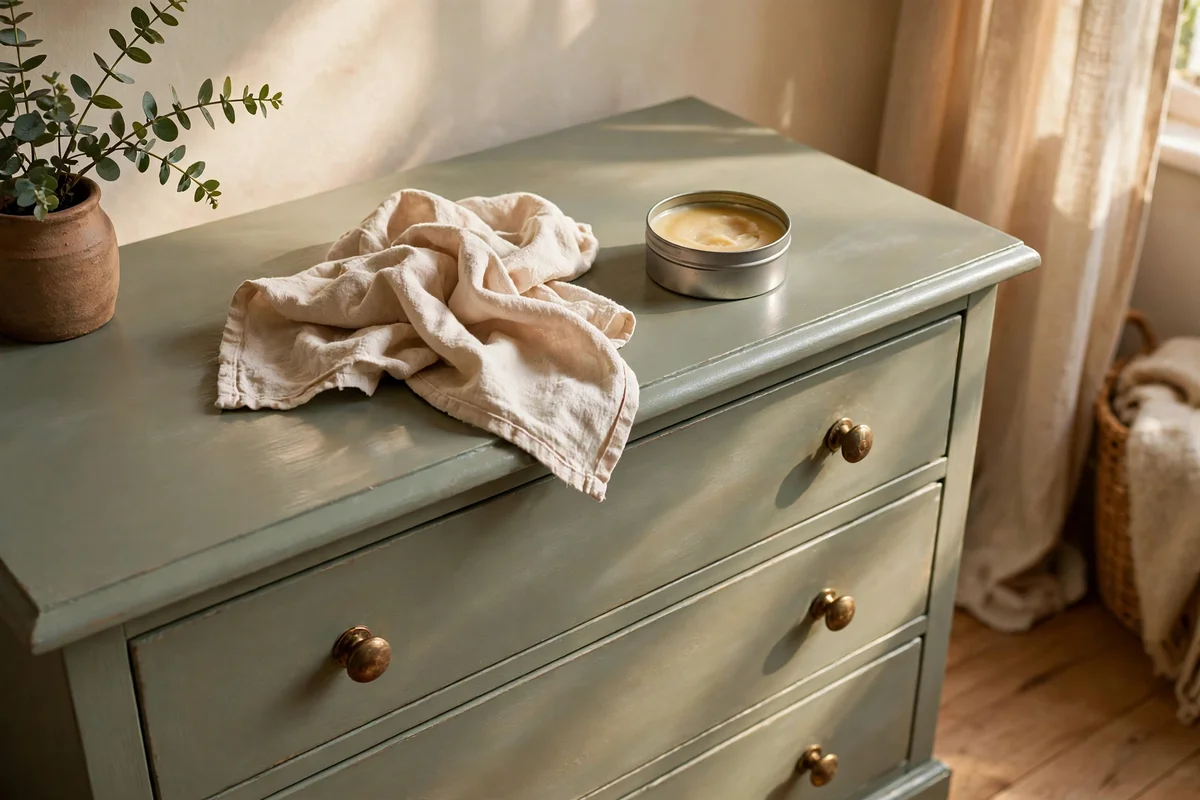
Soft furniture wax is the right topcoat for bedroom dressers that are looked at more than they are knocked. Brush or rub a thin coat of clear wax over fully cured paint, wait twenty minutes, then buff with a soft cloth until the surface glows softly. Wax deepens colour slightly and gives a hand-rubbed feel that varnish cannot match. Two thin coats beat one thick coat, which stays tacky. A 500 ml tin covers several dressers and costs about 10 to 16 pounds or dollars.
Wax needs reapplying once a year on pieces that are touched daily, and it marks if hot cups sit on it, so keep waxed dressers away from drinks. The mistake to avoid is waxing before the paint has fully cured; trapped moisture turns the wax cloudy. Wait at least two weeks after the final paint coat. Never use wax under varnish or over it; the two finishes repel each other. For a dresser top that holds a lamp and books only, wax is the kindest finish.
18. Protect Busy Dressers With a Hard Wearing Varnish
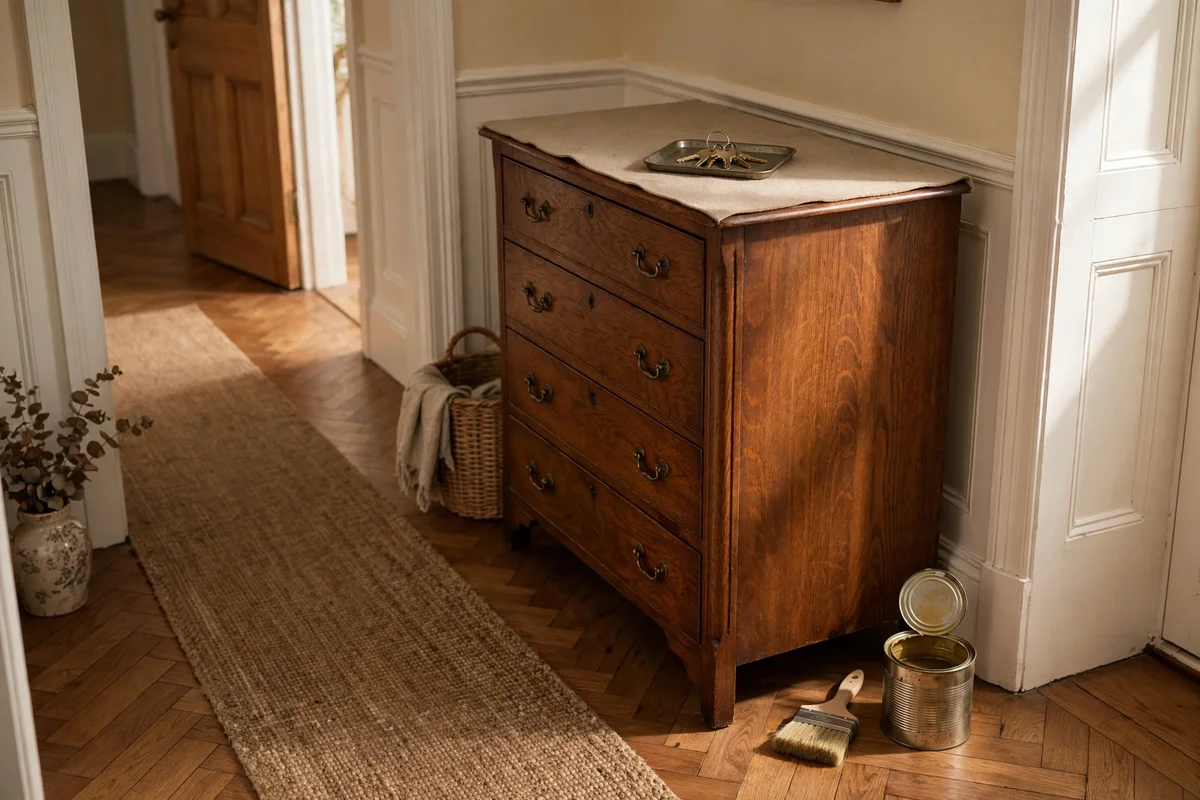
Dressers in hallways and family rooms take daily knocks, and hard-wearing varnish protects them far better than wax. Choose a water-based polyurethane in satin or matte, which resists scuffs, wipes clean with a damp cloth and does not yellow. Apply three thin coats with a good synthetic brush, sanding with 220-grit paper between coats and wiping dust away each time. Thin coats level out; thick coats trap bubbles that show forever.
A litre of quality water-based varnish costs 18 to 28 pounds or dollars and covers a dresser three times over. Let each coat dry four to six hours and give the final coat a full week to harden before heavy use. The mistake to avoid is shaking the tin; shaking whips air into the varnish and the bubbles transfer to the surface. Stir gently with a stick instead. Label the tin with the project name and date so touch-ups years later match the sheen.
19. Sand Edges Back for a Gently Worn Vintage Finish
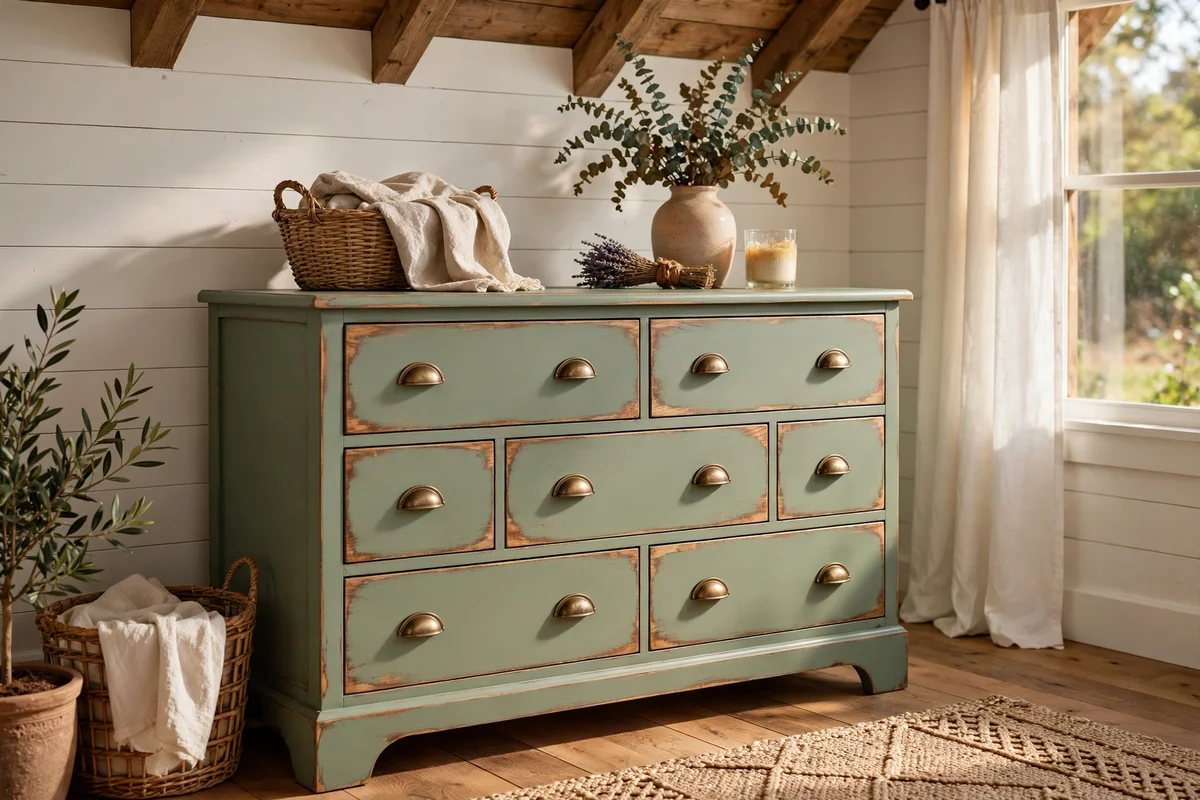
Sanding edges back for a gently worn vintage finish suits farmhouse and cottage rooms where perfection would look out of place. Paint the dresser in your chosen colour with two full coats and let it cure for a week. Then rub 120-grit sandpaper along edges, corners and raised details where natural wear would occur, revealing hints of wood beneath. Work slowly and step back often, since it is easy to overdo. Seal the whole piece with clear wax to protect the exposed wood.
Keep the distressing restrained: edges and corners only, never the flat centres of drawers, which looks accidental. A sanding sponge gives more control than loose paper on curved mouldings. The mistake to avoid is distressing before the paint has cured; soft paint tears off in patches instead of wearing smoothly. The whole technique costs nothing beyond sandpaper you already own. If you dislike the result, one more coat of paint erases it, so it is a low-risk experiment for a first makeover.
20. Refresh Flat Drawer Fronts With Applied Wooden Moulding
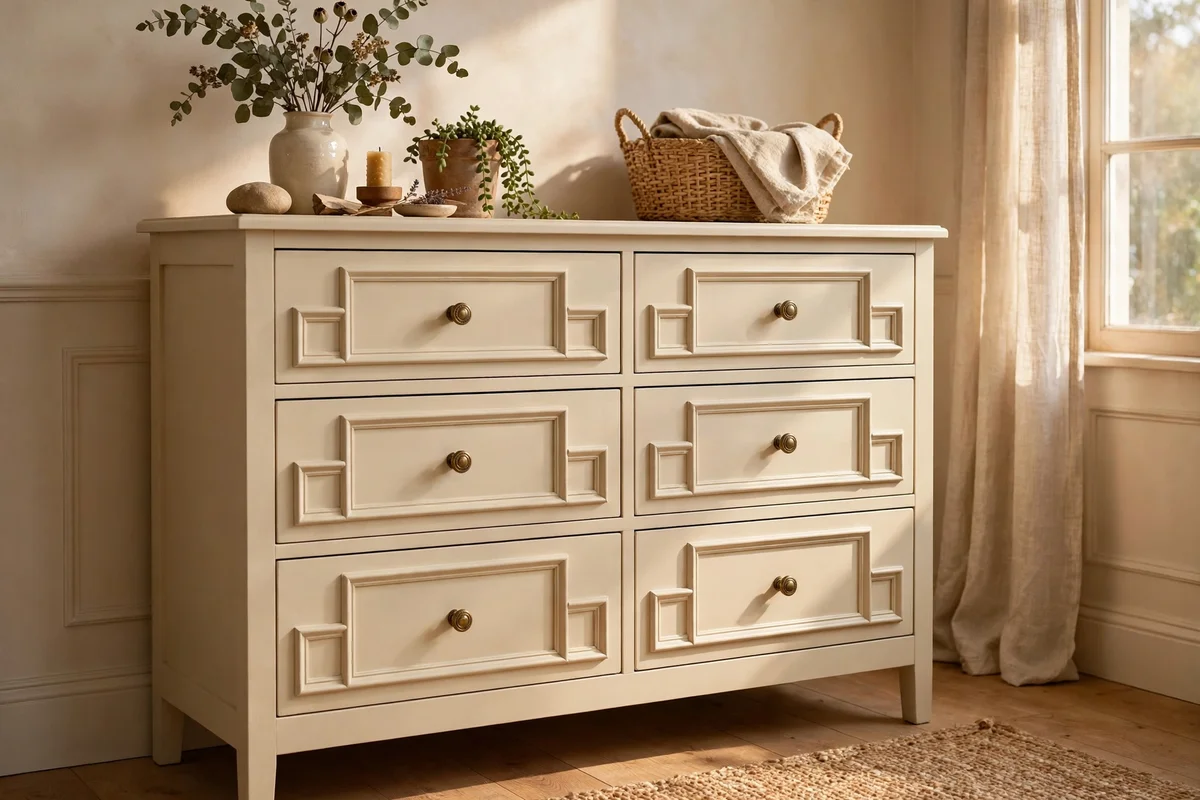
Flat, boring drawer fronts transform with applied wooden moulding that mimics panelled furniture. Buy thin pine beading or picture-frame moulding, cut 45-degree mitres for each drawer front, and glue the rectangles in place with wood glue, holding them with painter tape until set. Paint over the moulding with the drawer fronts so the whole piece reads as one. Keep the moulding at least 4 cm from every edge so the panels look balanced on drawers of different sizes.
A bundle of pine beading costs 8 to 15 pounds or dollars and trims a six-drawer dresser. Measure twice and cut the longest pieces first, since mistakes on short pieces waste less wood. The mistake to avoid is using a thick, heavy moulding on shallow drawers; it catches on clothes and looks clumsy. Choose beading no deeper than 12 mm. Fill any mitre gaps with wood filler before painting, because paint highlights gaps rather than hiding them.
21. Colour Wash an Old Pine Dresser in Thin Diluted Paint
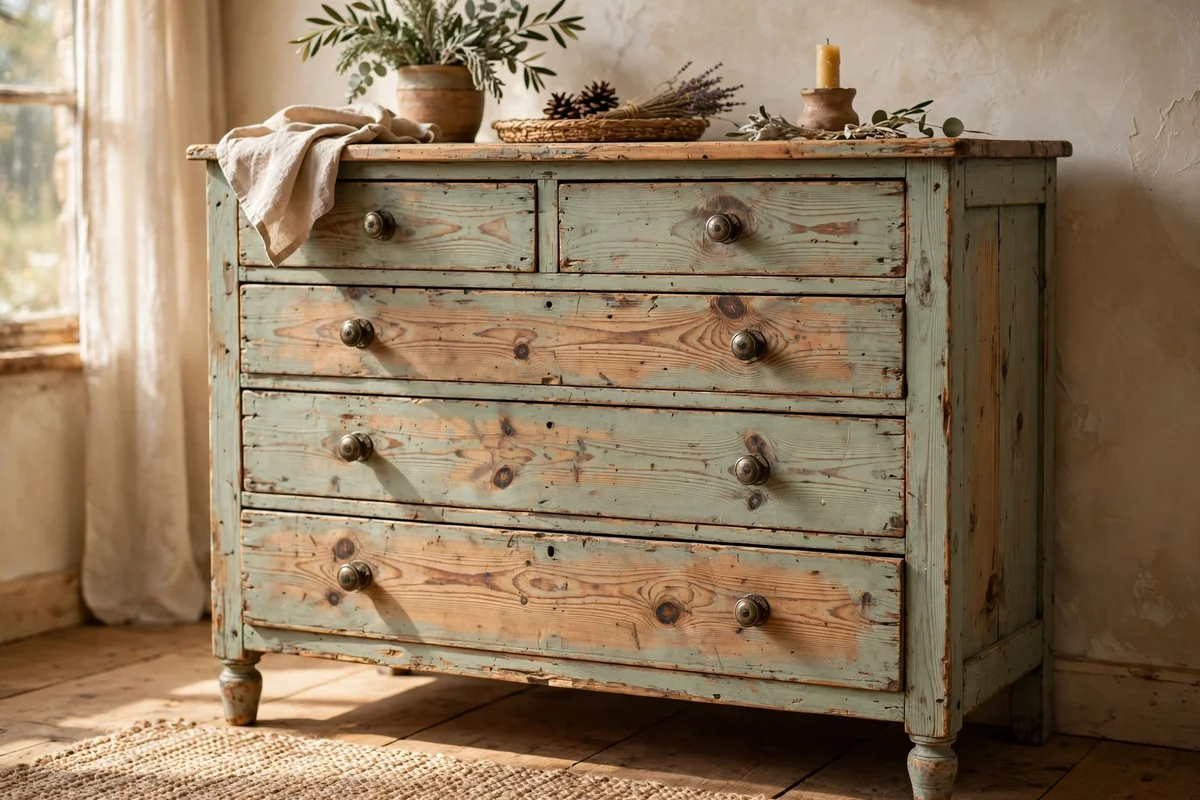
A colour wash of thin diluted paint lets the grain of an old pine dresser show through a veil of colour. Mix furniture paint with water at roughly one part paint to one part water, brush it on in the direction of the grain and wipe back the excess with a lint-free cloth within two minutes. The pine underneath glows through sage, blue or cream washes beautifully. Work one drawer front at a time so the wash never dries before you wipe it.
Colour washing uses very little paint; a 250 ml tester pot washes a whole dresser and costs about 6 to 9 pounds or dollars. Seal the wash with a clear matte varnish, since the thin paint layer alone scuffs easily. The mistake to avoid is washing over a glossy old varnish; the diluted paint beads and slides. Sand the varnish back to bare wood first. Test the ratio on the back of the dresser, because thirsty pine drinks more paint than you expect.
22. Paint the Drawer Sides in a Contrasting Colour for a Hidden Detail
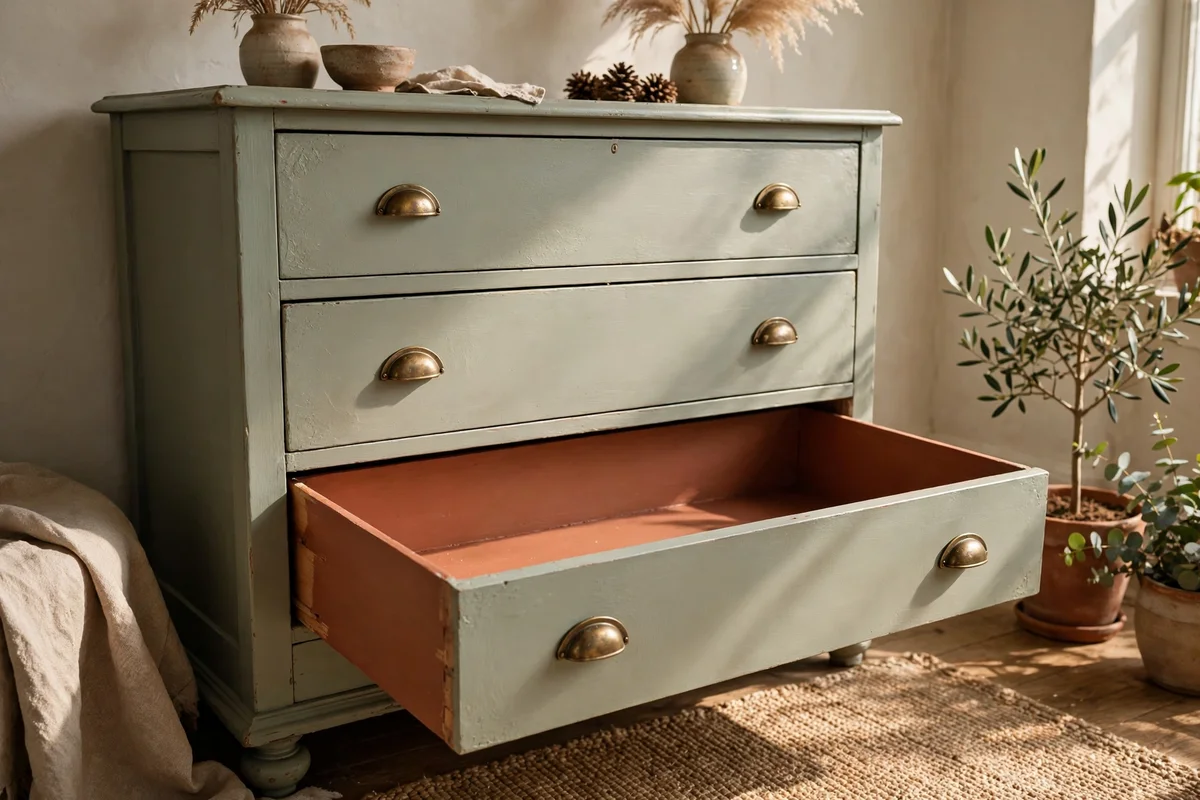
Painting the drawer sides in a contrasting colour is a hidden detail that rewards whoever opens the dresser. Choose a warm accent like terracotta, mustard or teal against a neutral body, and paint only the visible side panels of each drawer box, not the runners. Mask the runners with tape first so the drawers keep gliding smoothly. Two thin coats dry quickly because the wood is usually bare inside, and the colour flashes each time a drawer slides open.
This detail costs almost nothing if you have leftover paint, or about 6 pounds or dollars for a tester pot. It works best when the accent colour appears elsewhere in the room, on a cushion or a rug, so it feels intentional. The mistake to avoid is painting the bottom of the drawer box; paint there sticks to folded clothes and peels. Keep the base clean and paint sides only. Refresh the colour when you reline drawers every couple of years.
A painted dresser rewards patience more than skill. The pieces that last for decades are the ones that were cleaned properly, primed for their surface and given time to cure before daily life resumed. Whether you chose deep heritage green, a soft sage two-tone or simply new brass pulls on the old paint, the transformation comes from the same quiet steps: prepare, paint thinly, protect and wait.
This week, try the easiest win first: remove one drawer, clean it thoroughly and test your chosen colour on the drawer back. Living with that small painted patch for two days tells you more than any colour chart. Once you love it, work drawer by drawer at a relaxed pace, and you will finish with a piece that looks made for your home.
Frequently Asked Questions
How much does it cost to paint a dresser?
A straightforward dresser makeover costs between 30 and 60 pounds or dollars. That covers sugar soap, sandpaper, a tin of primer and a tin of furniture paint. New handles add 15 to 40 on top. The most common overspend is buying three colour testers you never use; test on the drawer back with one pot first. Borrow a sander rather than buying one for a single project.
Do I need to sand a dresser before painting it?
Yes, always scuff the surface, though you rarely need to strip it bare. A light sanding with 120 to 150-grit paper gives the primer something to grip, and the whole job takes under an hour on a standard dresser. On laminate, sanding is essential because the surface is too slick for paint alone. Skipping this step is the main reason painted dressers peel within months, so treat it as non-negotiable.
What is the best paint for a dresser that gets used every day?
A water-based acrylic furniture paint with a satin or eggshell sheen is the most forgiving choice. It dries hard, resists scuffs and wipes clean, and it does not yellow the way oil-based paints do. Apply two thin coats over the right primer and seal high-contact areas with a water-based varnish. Avoid flat wall paint; it marks with every touch and cannot be wiped without leaving shiny patches.
How do I stop drawers from sticking after painting?
Paint the drawer edges thinly and never let paint pool in the runners. Number each drawer before removal so it returns to its own opening, since old drawers are never identical. Rub a white candle along the runners and the drawer sides for a smooth glide. If a drawer still sticks, sand the high spot on the side with 180-grit paper rather than forcing it, which cracks the new paint.
Can I paint a dresser in a small flat with no outdoor space?
Yes, with a few precautions. Choose low-odour water-based paints and work near an open window, painting one section at a time. Lay dust sheets over the floor and use a small folding work table for drawers. Drying takes longer in still air, so allow extra hours between coats. Keep pets and soft furnishings out of the room until the final coat cures, which takes about two weeks.