DIY Projects
23 Two Tone Furniture Painting Ideas That Show Off the Wood
By Anna Wells · · 21 min read
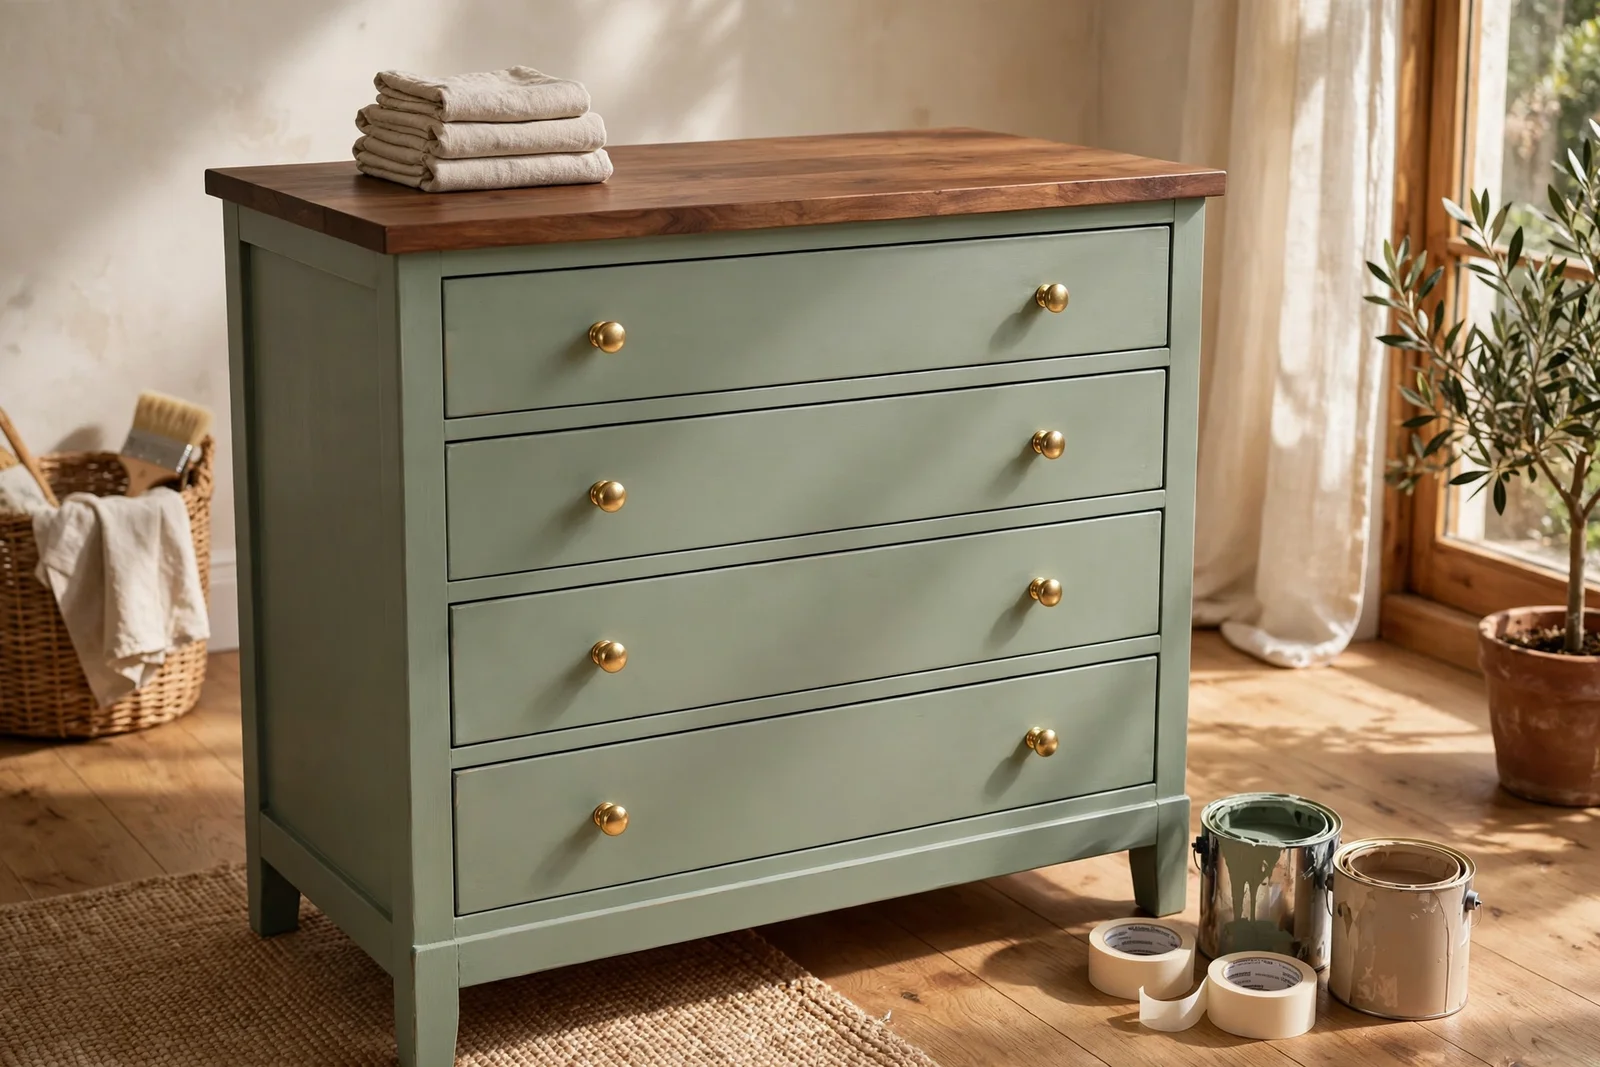
Discover 23 two tone furniture painting ideas that pair paint with natural wood grain for timeless, handcrafted pieces.
Morning light falls across a sanded dresser top, and the grain glows like quiet water. That single moment is why two tone painting has won so many hearts: it lets wood be wood where the grain deserves the stage, while paint does the heavy lifting everywhere else. You get the warmth of natural timber and the freshness of colour in one piece.
This collection gathers 23 practical ideas, from painted frames with stained tops to dipped legs and colour blocked wardrobes. Every idea explains the materials, the sequence and the one mistake to avoid, so you can start this weekend with confidence. Whether you found a sturdy oak dresser at a charity shop or want to refresh a plain pine nightstand, there is a two tone plan here for you.
You will learn which woods deserve to stay visible, how to mask razor sharp lines, and how to match stain tones to paint colours. You will also find honest guidance on the woods that are better fully painted, because not every grain is worth showing. Settle in with a cup of tea, and let these ideas guide your next furniture project from first sand to final seal.
Ready your brushes and painter’s tape; the first idea starts with the most loved combination of all, a painted frame beneath a stained wooden top.
1. Paint the Dresser Frame and Stain the Top in Warm Walnut
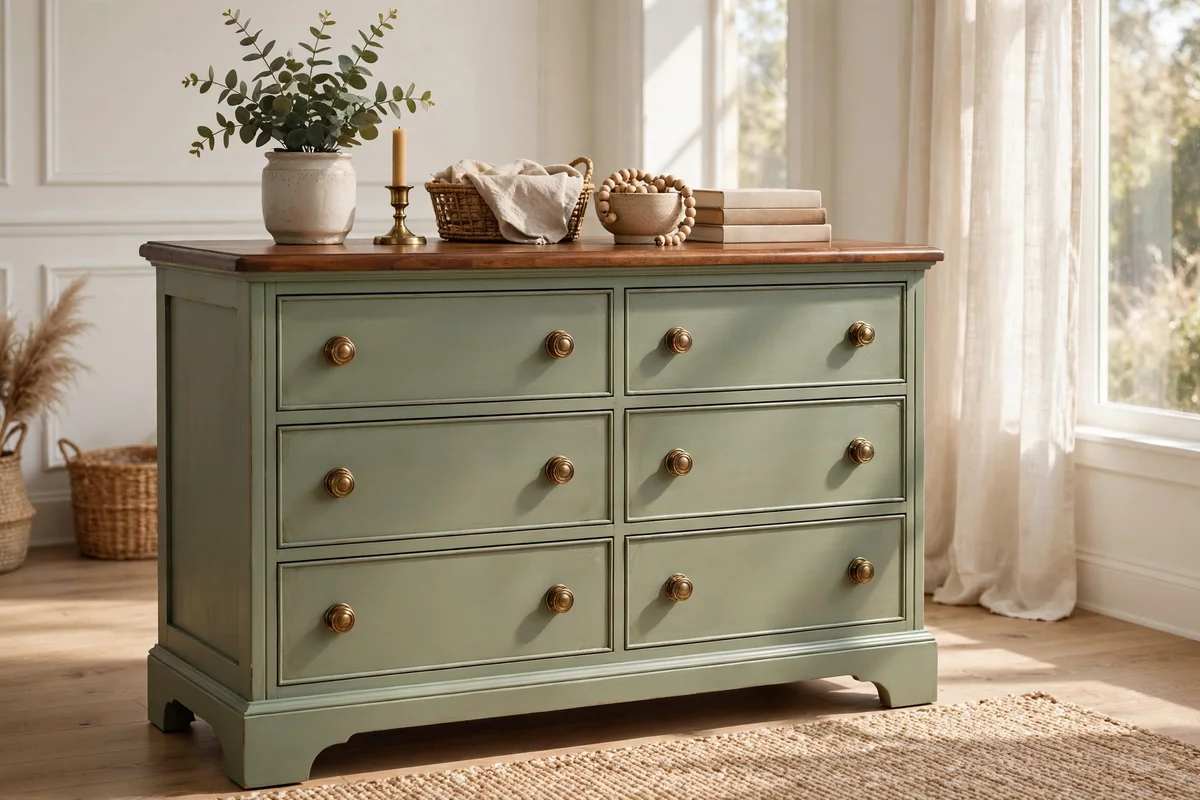
A classic dresser gets new life when the frame wears paint and the top shows off its wood. Sand the whole piece to bare or scuffed wood, then tape off the top with crisp painter’s tape. Apply two thin coats of chalk or mineral paint in a soft sage, cream or charcoal to the frame, letting each coat dry two hours. Sand lightly between coats with 220 grit paper for a smooth hand feel.
For the top, stain with a warm walnut oil-based stain, wiping with the grain and leaving it five minutes before wiping excess. Two coats build a rich colour that pairs beautifully with muted paint. Finish the top with three thin coats of water based polyurethane for durability, sanding lightly between coats. The common mistake is staining before masking cleanly; stain bleeds under loose tape and ruins the paint line.
2. Create the Dipped Legs Look With Two Paint Colours and Tape
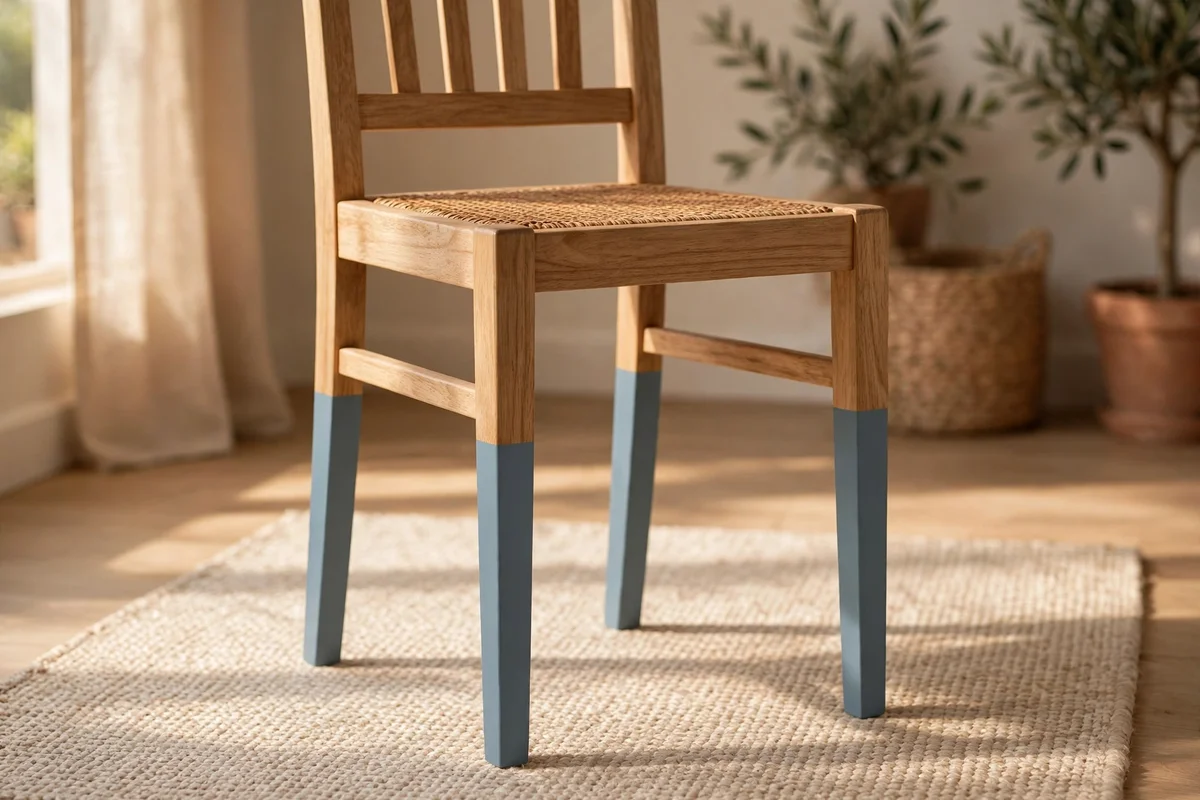
Dipped legs give a table or chair the look of furniture dipped in paint. Choose the dip height first, marking a straight pencil line about 10 to 15 cm from the floor on every leg. Wrap painter’s tape just above the line, pressing the edge firmly with a credit card so no paint seeps underneath. Paint the lower section in your accent colour with a small angled brush for control.
Let the accent coat dry fully, at least four hours, before a light second coat. For a crisp reveal, score the tape edge gently with a craft knife before peeling it back at a 45 degree angle while the paint is still slightly tacky. The classic mistake is dipping legs at different heights, which the eye catches instantly. Measure every leg twice from the floor, and set a budget of under 15 pounds or dollars for tape and a sample pot of paint.
3. Paint the Cabinet Body and Leave the Drawers in Natural Oak
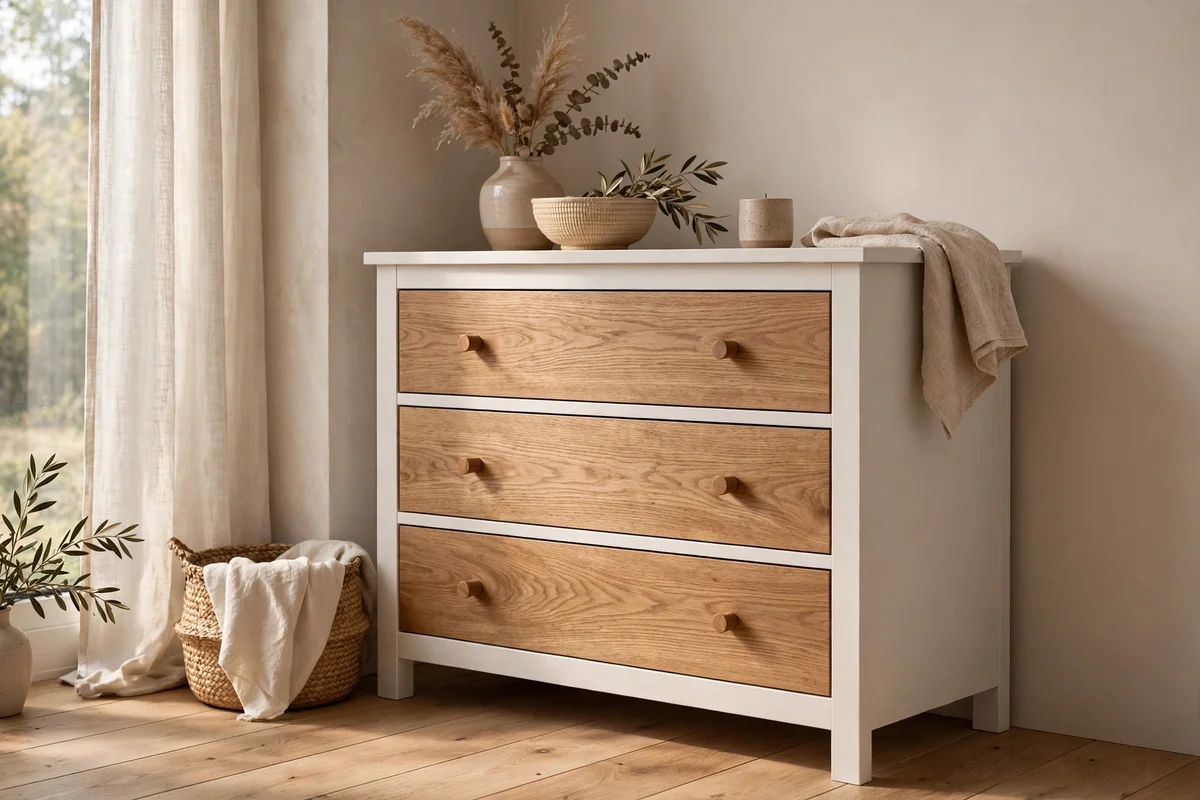
Painting a cabinet body while the drawers keep their natural oak creates a calm contrast that shows off the grain. Remove every drawer first and label the backs with painter’s tape so each returns to its own slot. Clean the body with a degreasing cleaner, then apply a bonding primer so the paint grips old varnish. Two coats of eggshell paint in warm white, sage or navy give a furniture grade finish.
For the drawers, sand lightly with 150 grit paper and apply a clear matte topcoat that deepens the oak without changing its colour. This protects against fingerprints and daily handling. The mistake to avoid is painting the drawer boxes while leaving only the fronts natural; the line looks unfinished when drawers open. Keep the entire drawer natural, front and box, for a deliberate two tone effect that reads as a design choice.
4. Try the Reverse: Stained Body With Painted Drawer Fronts
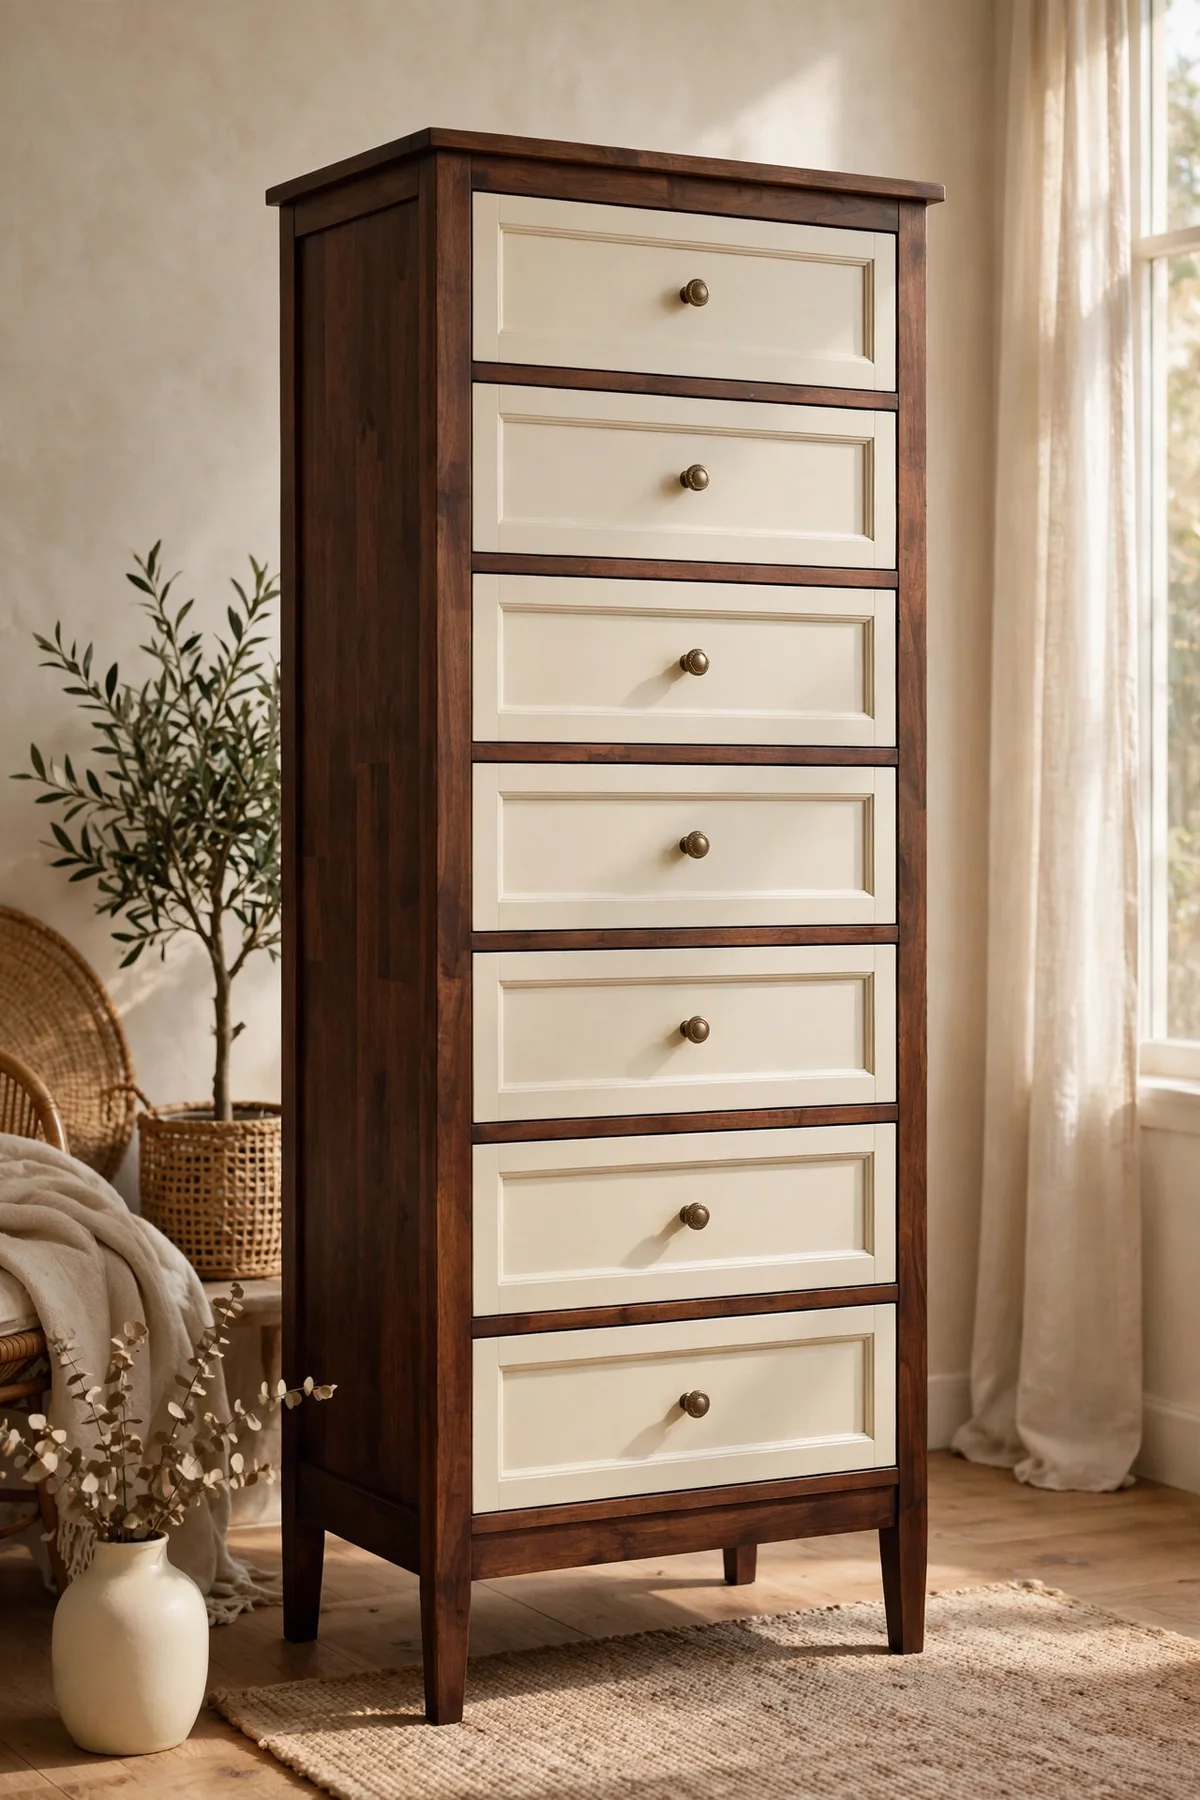
Flipping the formula gives a bold twist: stain the body deep and paint just the drawer fronts. A walnut or espresso stain on the body grounds the piece, while painted fronts in cream, dusty blue or soft terracotta become the stars. Sand the body evenly, apply stain in thin coats following the grain, and seal it before masking for the drawer fronts. Two light coats of paint per front keep the look smooth and even.
Remove the fronts from their boxes before painting so you can lay them flat and avoid drips. Number each front on the back with a pencil so it returns to the right drawer. The common error is choosing a paint colour that fights the stain temperature; test a painted card against the stained body in daylight. This reverse two tone works especially well on tallboys and bedside chests, using one 250 ml tin of paint for all the fronts.
5. Colour Block a Wardrobe in Paint Below and Stain Above
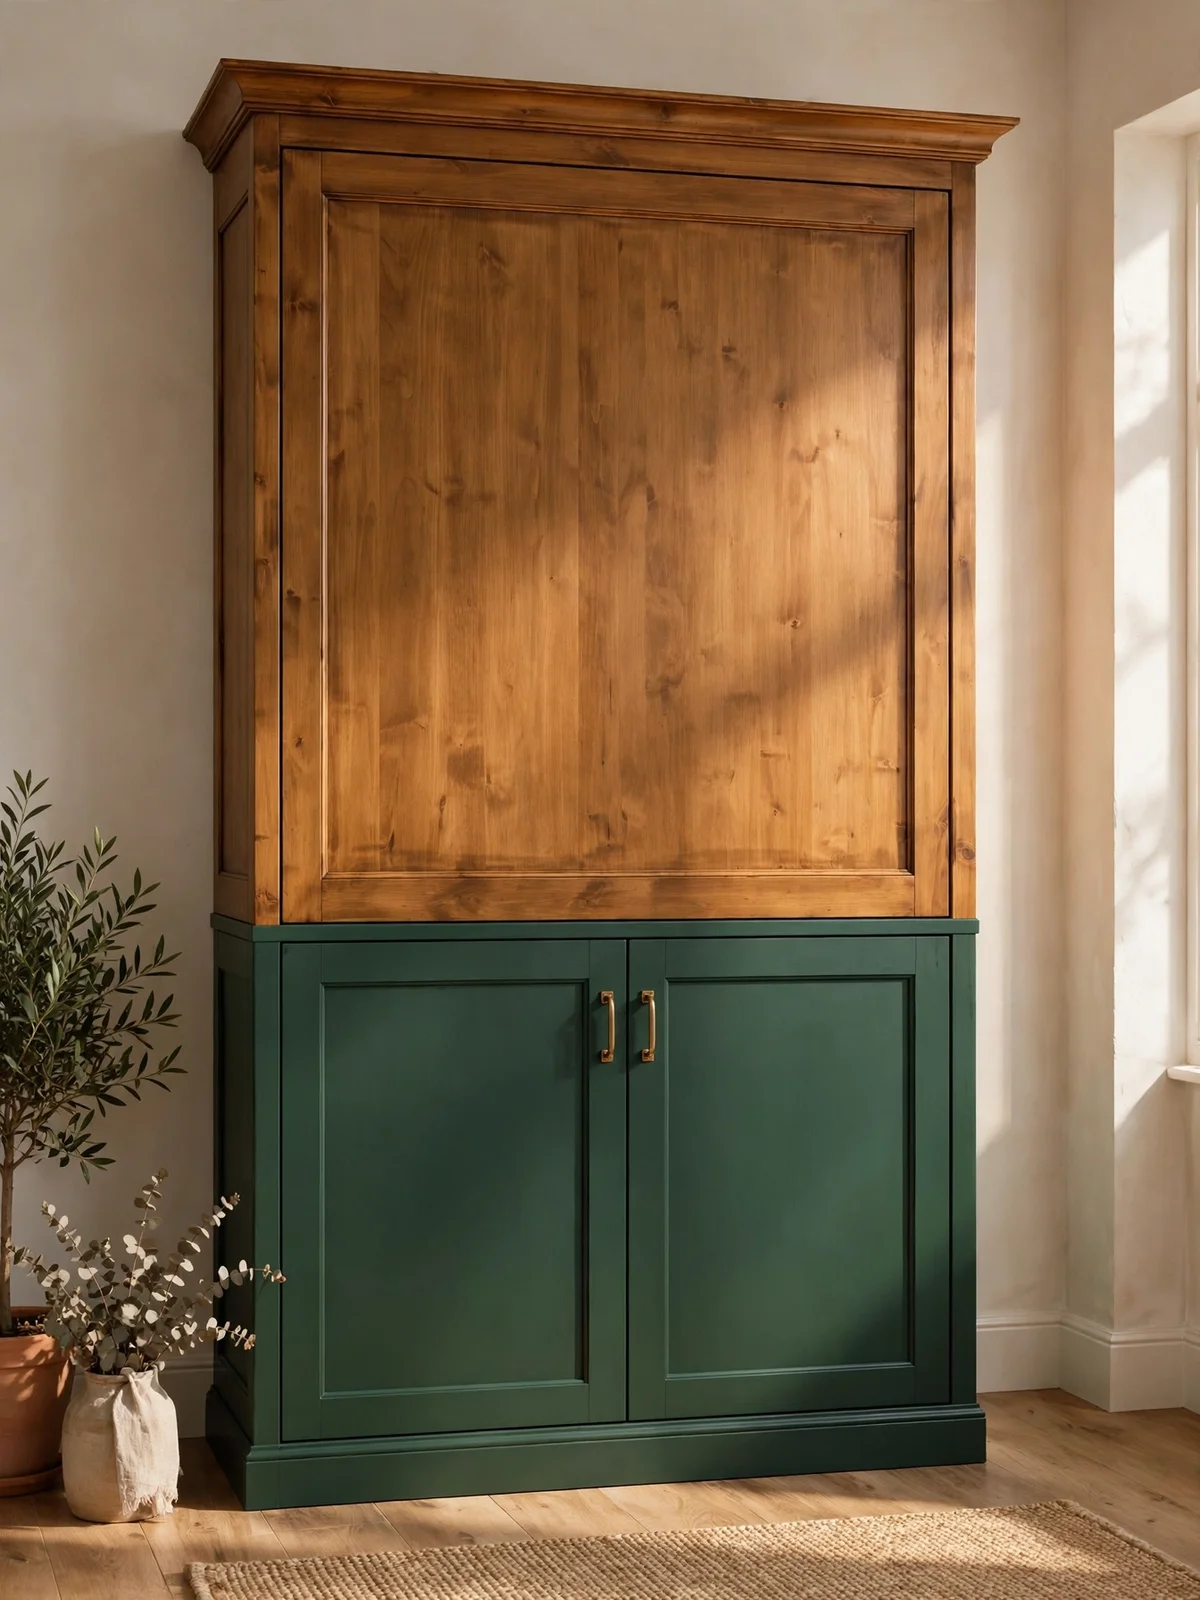
A wardrobe splits naturally into two zones, making it perfect for colour blocking. Paint the lower half or the doors in a solid colour like deep green, warm clay or inky blue, and let the upper frame or crown show stained wood. Divide at a natural line, such as the door rail or a trim detail, so the split feels built in. Mask along that edge with 48 mm tape for a confident band.
Stain the upper section in a tone that flatters the paint, such as honey oak beside deep green or warm walnut beside cream. Apply two thin stain coats and seal with a satin topcoat. The mistake is blocking at an arbitrary mid-door point with no trim to anchor it; the line then looks like a mistake. Always align the colour split with a rail, moulding or panel edge, and budget about 20 pounds or dollars for stain and a small paint tin.
6. Mask Razor Clean Lines With Quality Tape and Sealant
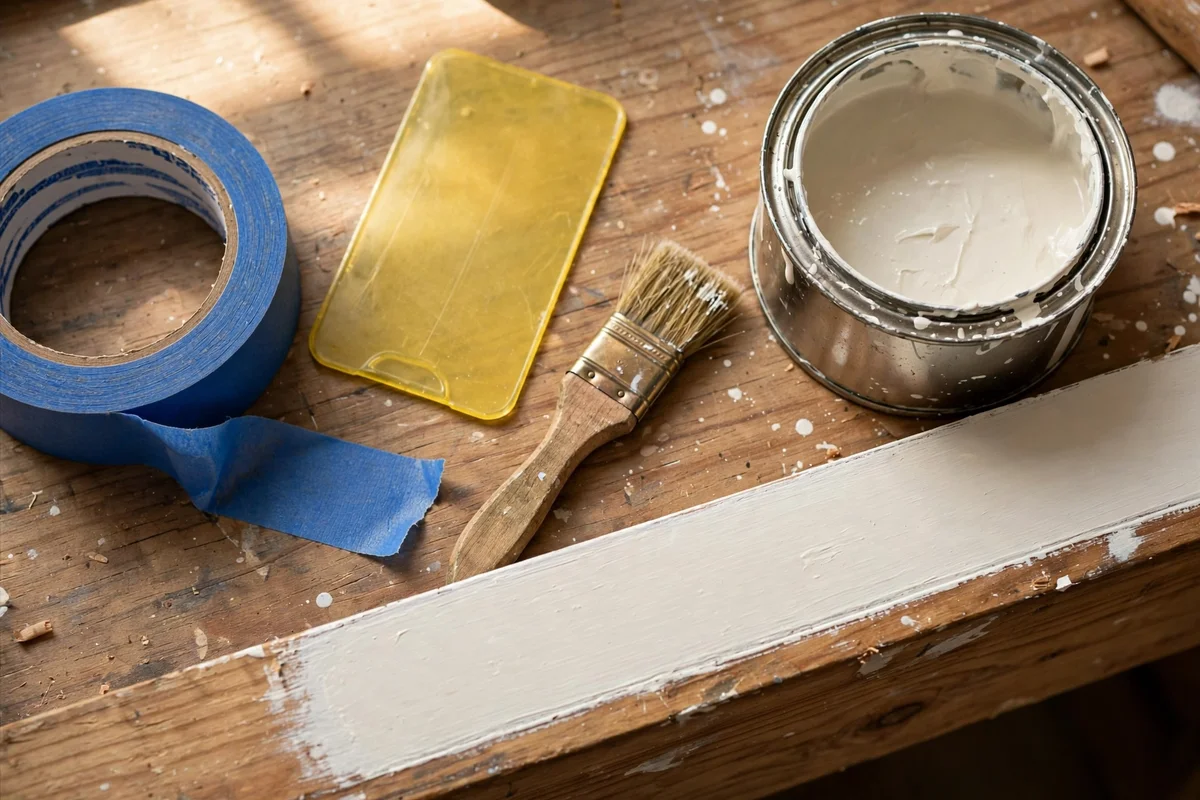
The secret to every sharp two tone edge is tape work done properly. Choose a high adhesion painter’s tape, at least 24 mm wide, and lay it along your line without stretching it, which causes it to shrink back later. Burnish the edge firmly with a plastic card or old gift card, moving slowly along the full length. Then brush a thin line of the base colour or clear sealer over the tape edge to lock it down.
This sealer trick stops bleed under the tape, giving a factory straight line when you peel. Remove the tape while the top coat is just dry to the touch, pulling it back at 45 degrees, never straight up. The common mistake is leaving tape on overnight; paint can bond to the adhesive and tear. Quality tape costs a little more but saves hours of touch ups, and one roll usually covers three or four small furniture projects.
7. Follow a Steady Sequence: Prep, Paint, Mask, Stain, Seal
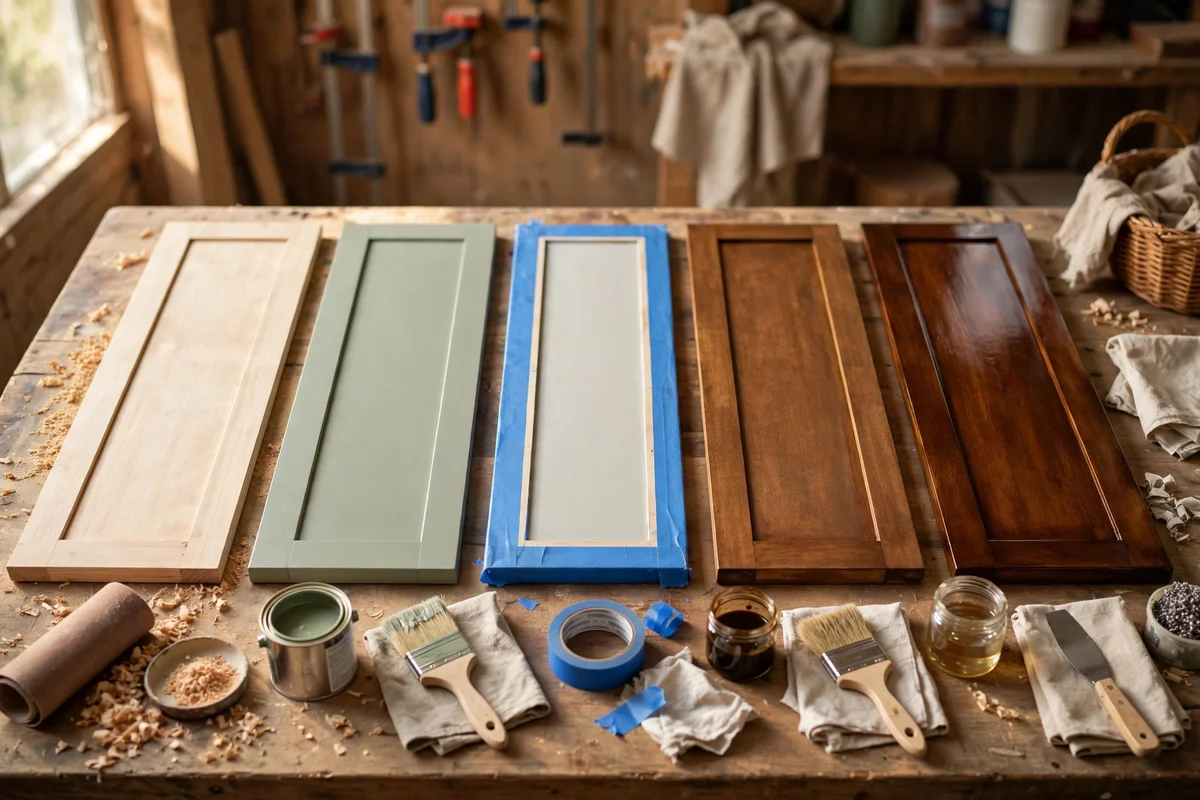
A reliable order keeps two tone projects calm from start to finish. Begin with full prep: clean with a degreaser, sand everything with 120 then 180 grit paper, and fill dents with wood filler. Paint comes first on the painted half, two coats with four hours between them. Let the paint cure for a full 24 hours before any tape goes on, since masking fresh paint pulls it straight off.
Once paint has cured, mask your line and stain the natural half, working in small sections and wiping excess within ten minutes. Seal the stained half with two or three thin topcoat layers, sanding lightly with 320 grit between coats. Finish by sealing the whole piece lightly if the paint needs extra protection. The mistake to avoid is rushing the sequence on a single weekend; give the piece five to seven days and the finish will last years instead of months.
8. Let Oak Grain Shine With a Light Honey Stain Beside Soft Paint
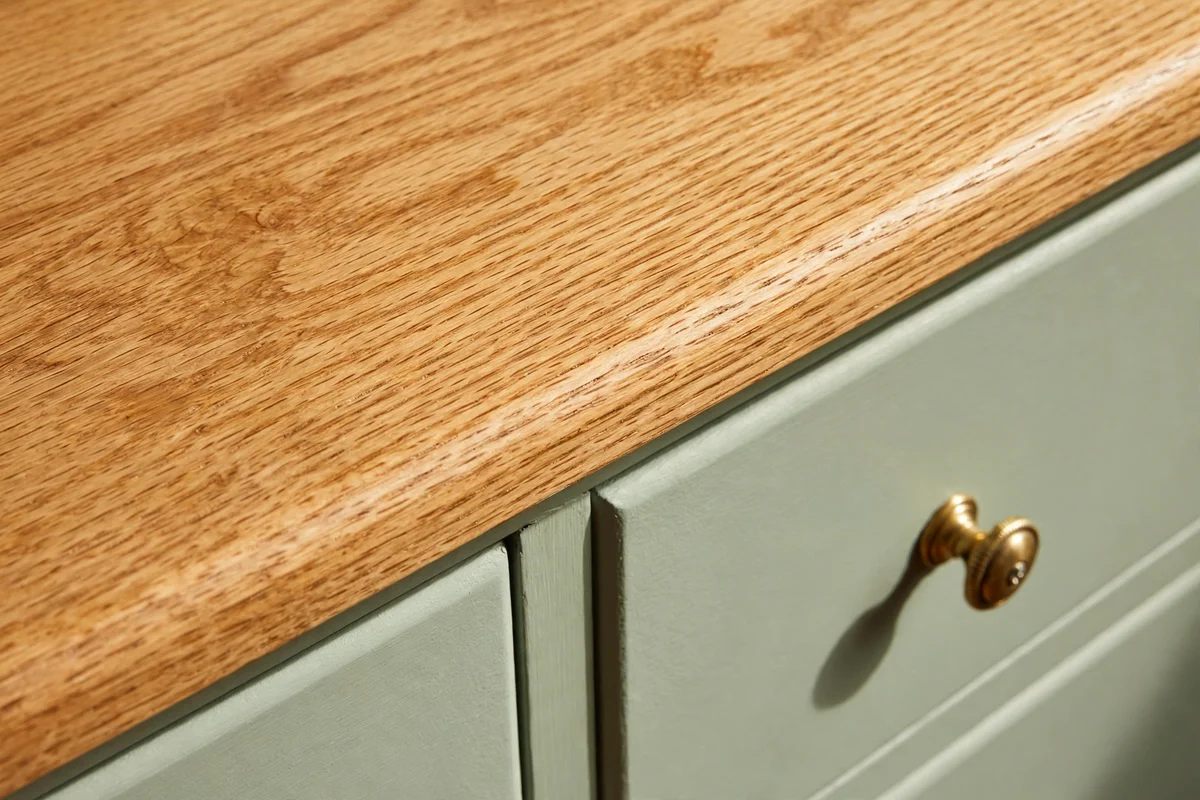
Oak earns its place in two tone work because its open grain takes stain beautifully. Keep the wood half light with a honey or natural oak stain that darkens the grain lines without hiding them. Sand to 180 grit and raise the grain once with a damp cloth, sanding again when dry, so the finished surface feels silky. Pair the oak with soft sage, warm cream or pale blue paint for a timeless look.
Test the stain on the back of a door or underneath first, since oak can pull golden or pink depending on the cut. One or two thin coats usually suffice; more coats muddy the grain instead of deepening it. The mistake is choosing a stain darker than the piece can carry, which hides the very grain you wanted to show. A 250 ml tin stains a full dresser top with plenty left, keeping the project under 25 pounds or dollars.
9. Celebrate Walnut Grain With Deep Stain and Creamy Paint
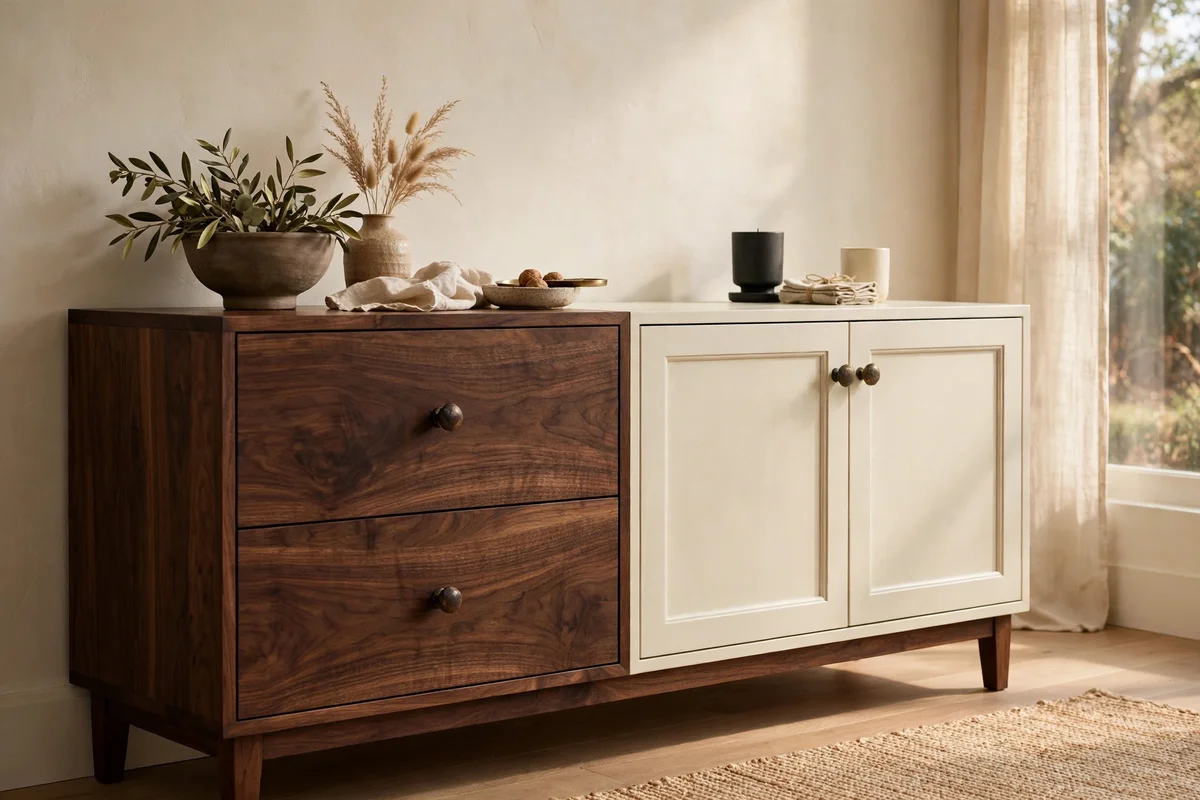
Walnut brings a deep chocolate tone that deserves the spotlight in a two tone piece. Use a clear or walnut toned topcoat rather than a dark stain, since the wood already carries rich colour and extra pigment can flatten it. Sand to 220 grit for a glassy feel, then apply oil based finish thinly and wipe back after fifteen minutes. Creamy ivory or warm linen paint sets off the dark grain perfectly.
Walnut oil finishes need patience: three coats, each curing 24 hours, build real depth. Work in a dust free corner, since every speck shows on dark wood. The mistake to avoid is sanding through the veneer on mass market pieces; walnut veneer can be less than 1 mm thick. Sand by hand with a block and check your progress often. Genuine walnut pieces are investment finds, so plan the two tone layout on paper before touching the wood.
10. Fully Paint Soft Pine and MDF Where Grain Adds Little
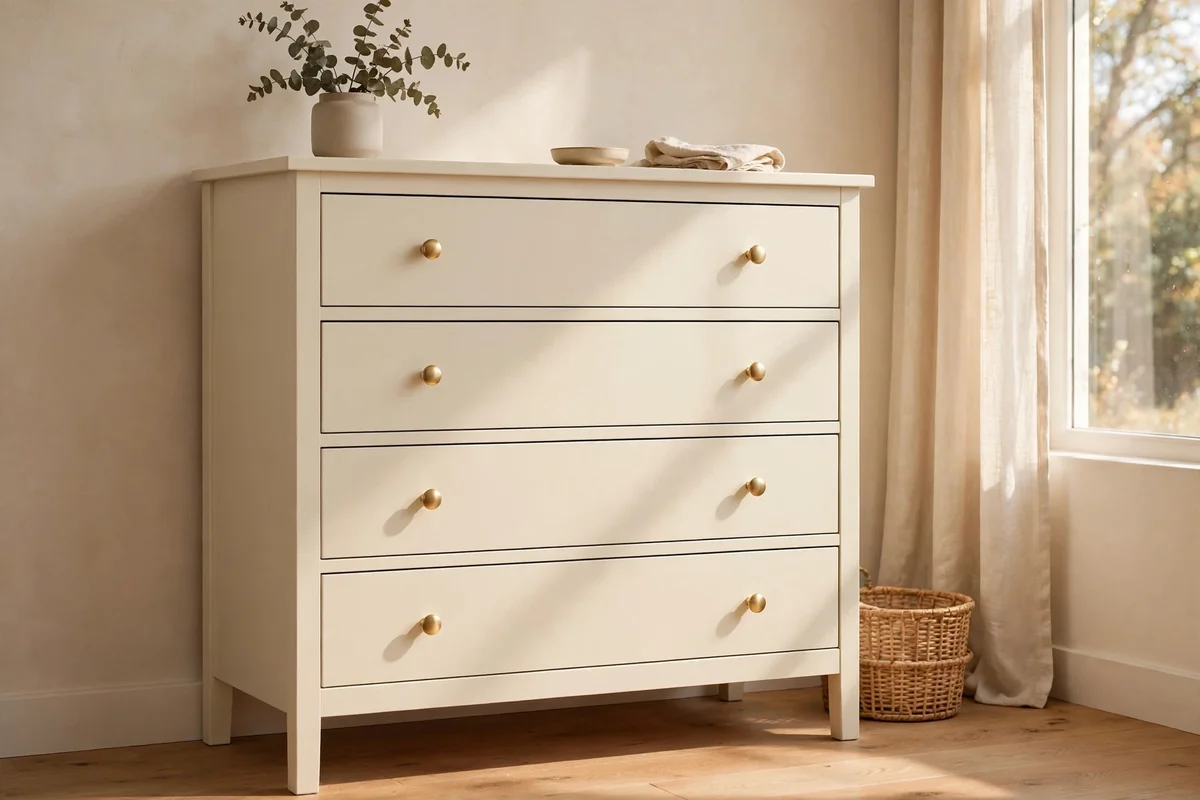
Not every wood deserves a starring role. Soft pine knots bleed through light stains and can look blotchy, while MDF has no grain at all and drinks stain unevenly. For these materials, commit to full paint coverage in two or three coats for the richest finish. A shellac based primer blocks pine resin from bleeding through cream paint, which is the single most important step on pine furniture.
You can still get a two tone effect on plain pieces by pairing two paint colours or two sheens, such as matte body with satin drawers. This keeps visual interest without pretending the wood has grain worth showing. The mistake is staining MDF edges, which swell and fuzz. If the brief truly demands a two tone look on MDF, stain is off the table; use paint and consider a wood effect glaze only on flat panels you can seal properly.
11. Match the Stain Tone to the Paint Temperature for Harmony
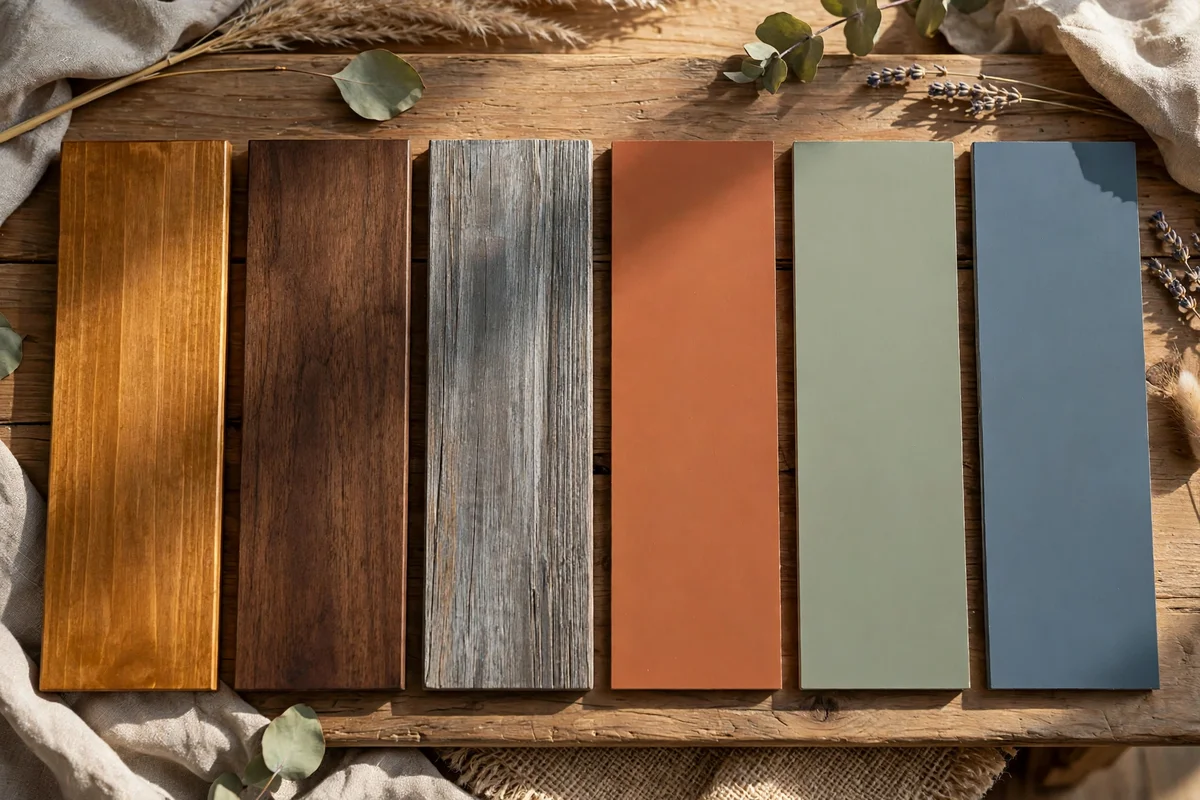
Two tone pieces sing when the wood and paint share the same temperature. Warm paints like terracotta, honey yellow and warm greige ask for golden stains such as honey oak or warm walnut. Cool paints like slate blue, soft grey and sage ask for cooler stains such as weathered grey or dark espresso. Hold a stain sample card against a painted board in natural daylight before committing to the whole piece.
Neutral creams and warm whites are forgiving and suit almost any stain, which makes them the safest first choice. The classic mistake is pairing a golden orange stain with a cool grey paint; the two fight and neither looks intentional. A quick test board costs almost nothing and saves a full redo. Keep a notebook of pairings that worked, noting brand names, so future projects start from proven combinations instead of guesswork.
12. Protect the Natural Half With Hardwearing Water Based Polyurethane
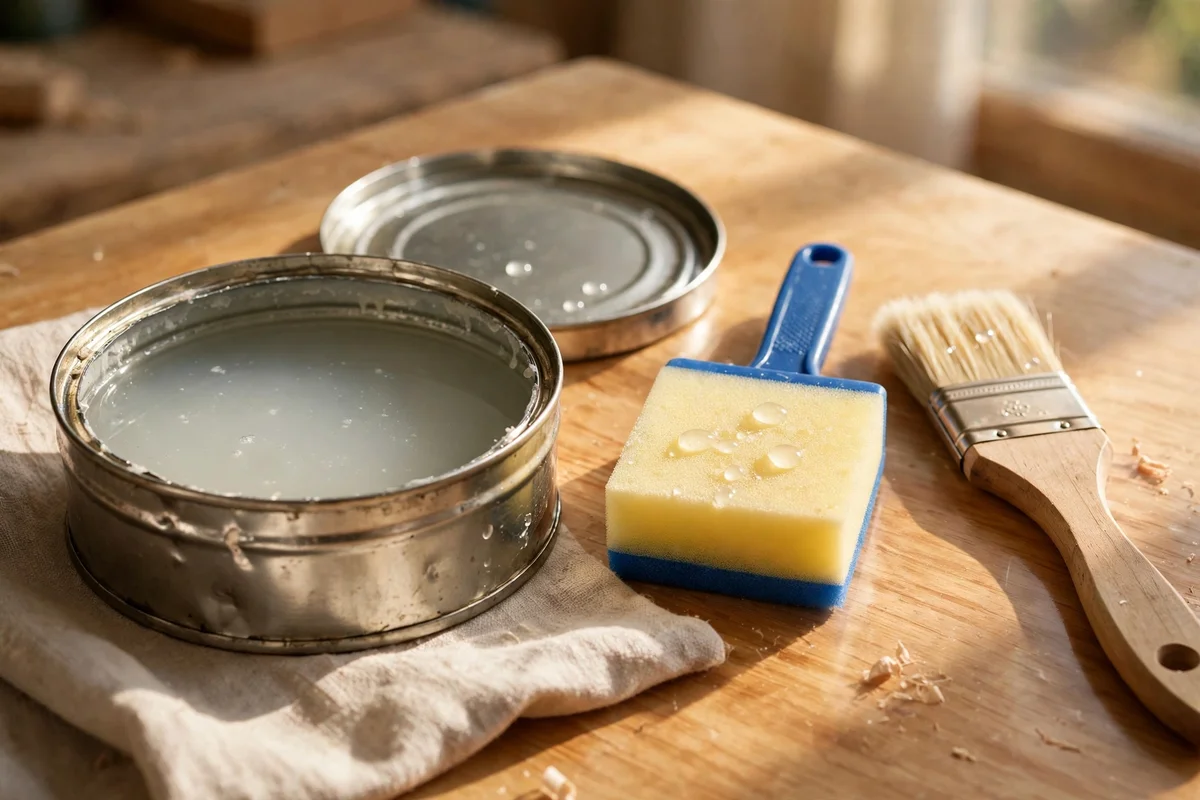
The natural wood half takes daily wear, so it needs a tougher finish than the painted half. Water based polyurethane in satin or matte dries fast, stays clear and resists yellowing on light woods. Apply three thin coats with a high quality synthetic brush or a foam applicator, sanding lightly with 320 grit paper between coats. Let each coat dry two to three hours in a ventilated room.
Oil based finishes give a warmer glow but take 24 hours per coat and yellow over time, so reserve them for dark woods like walnut. The mistake is using wax alone on a tabletop; wax marks with every hot cup and water ring. Wax suits low touch areas like drawer fronts or decorative frames. For dining tables and desks, polyurethane is the sensible choice, and a 500 ml tin covers most single pieces with room for the next project.
13. Two Tone a Nightstand: Painted Base With a Stained Wooden Lid
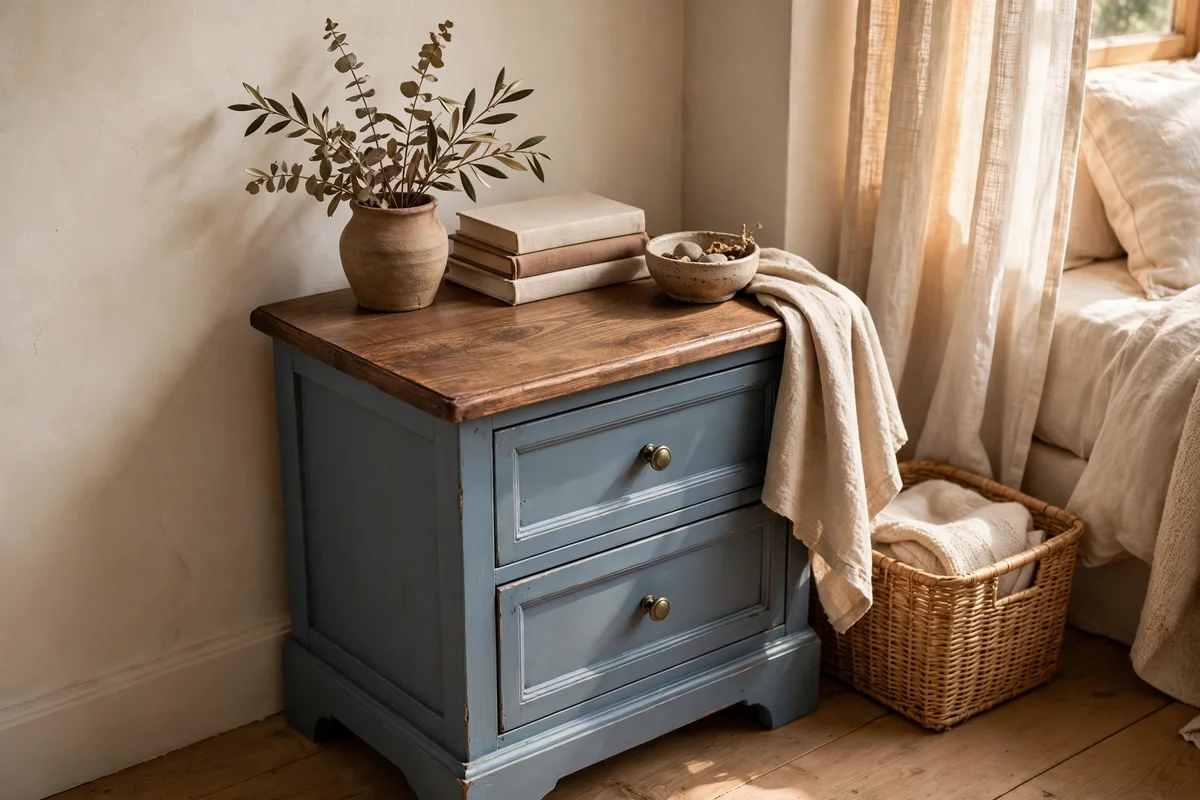
A nightstand is the perfect small project for trying the two tone technique. Paint the base in a calm colour like warm white, dusty blue or sage, and stain the lid to show off the grain. Remove the lid if screws allow, or mask around it carefully with 36 mm tape. Two thin paint coats on the base and one or two stain coats on the lid are usually enough.
Nightstands take knocks from books, lamps and cups, so seal the lid with two coats of satin polyurethane for easy wiping. Keep paint off the lid edge with a clean tape line scored lightly before peeling. The common mistake is painting the inside of the drawer while the outside stays natural; inside paint scratches fast from daily use. Leave drawer interiors natural or line them with felt for a polished, lasting finish.
14. Leave the Inside Shelves Natural While Painting the Exterior
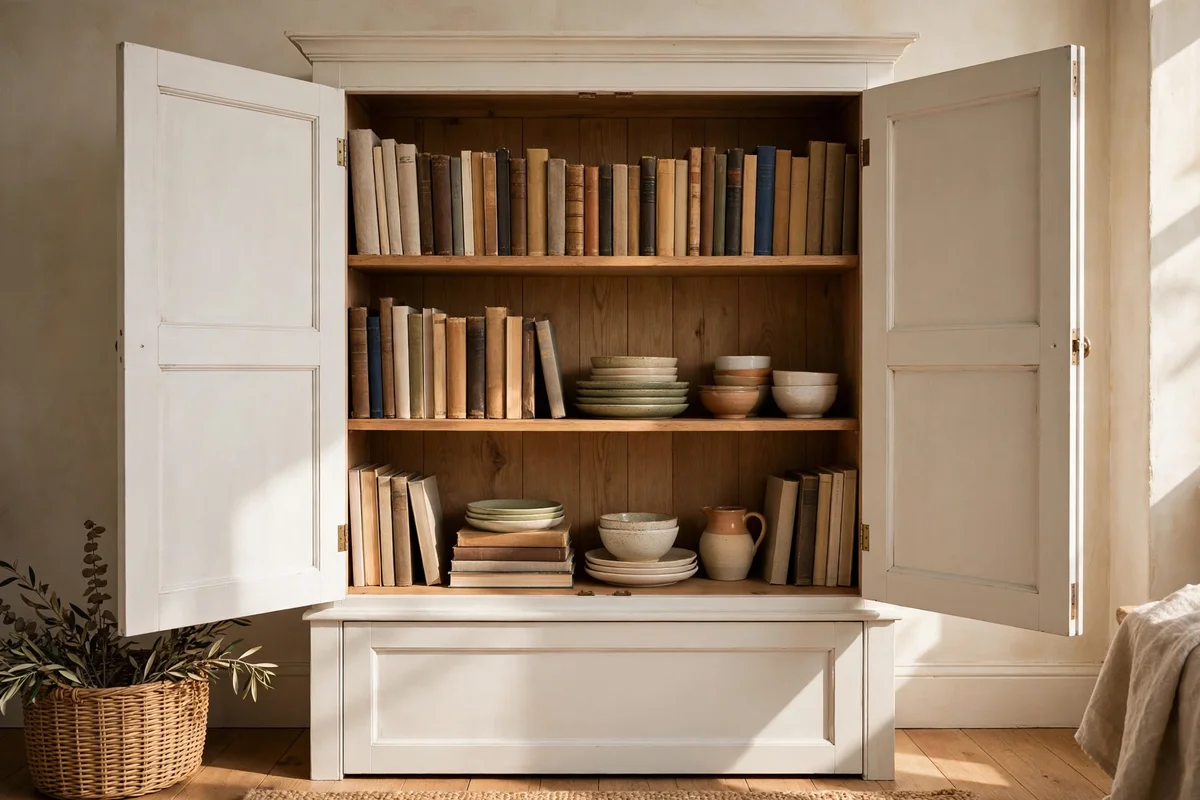
Opening a painted cabinet to find warm wooden shelves is a quiet delight. Paint the exterior in your chosen colour, then mask the carcass edges and leave the interior shelves in natural wood with a clear matte seal. Sand the shelves smooth to 220 grit so books and dishes slide without catching. This two tone trick suits bookcases, dressers with glass doors and kitchen hutches especially well.
Two thin coats of matte topcoat on the shelves resist scuffs without adding shine that competes with the paint. The mistake is staining the interior a different colour from the exterior wood trim; mismatched tones inside and out look accidental. Keep all natural wood in the same stain family or leave it all clear coated. Budget tip: interior shelves need only a small 250 ml tin of topcoat, so this upgrade adds little cost to any cabinet project.
15. Paint the Desk Base and Keep the Desktop in Bare Wood
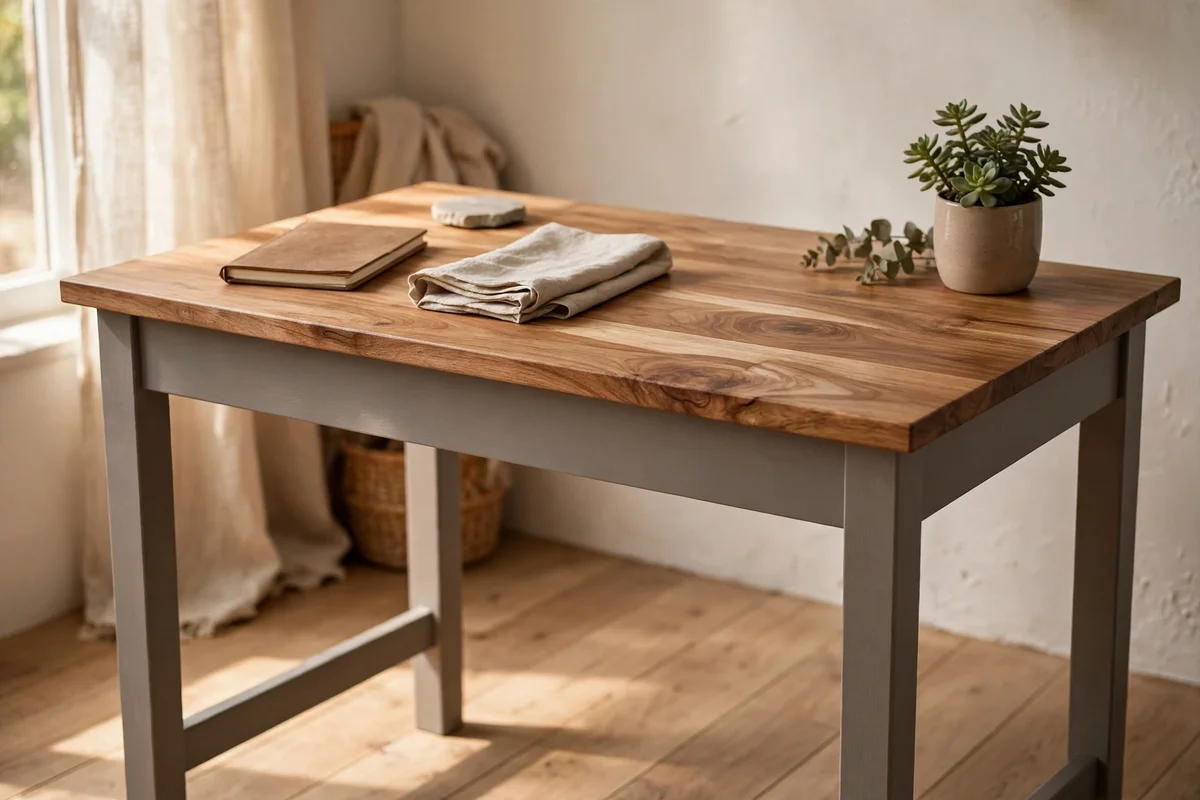
A writing desk divides neatly into a painted base and a working wooden top. Paint the legs and frame in a steady colour like warm grey, deep navy or soft black, using two coats over a bonding primer. Sand the desktop back to clean wood, then stain it lightly or leave it clear coated to show every grain line. A clear matte finish keeps paperwork from sliding while protecting the surface.
Mask the underside of the desktop before painting the base, since drips there are hard to sand out later. Three thin polyurethane coats on the top handle pens, cups and daily wear. The mistake is choosing a high gloss topcoat for a desk; glare under a lamp tires the eyes. Satin or matte finishes look calmer and hide small scratches better. One tin of paint and one of topcoat usually finish a standard desk for under 40 pounds or dollars.
16. Soften the Grain With Whitewash Instead of Full Opaque Stain
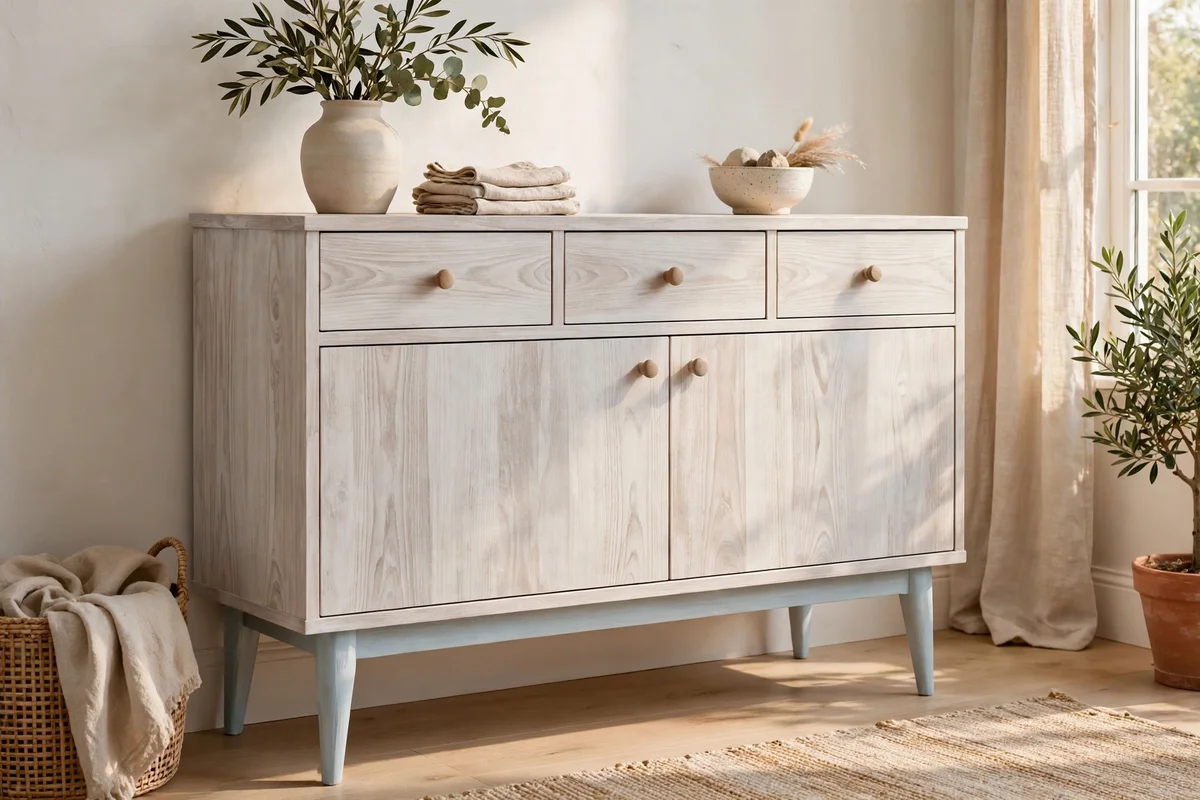
Whitewash gives a third option between bare wood and full stain, perfect for two tone pieces that need gentleness. Mix white paint with water at roughly one part paint to two parts water, brush it along the grain and wipe back within five minutes. The pigment settles into the grain lines while the wood shows through. This suits pale woods like ash, beech and light oak beside soft blue or sage paint.
Seal whitewashed wood with a clear matte topcoat, since the thin wash offers no protection on its own. Work in sections no wider than 60 cm so the wash never dries before wiping. The mistake is using the mix too thick; it then reads as patchy white paint rather than a wash. Keep it watery, test on a hidden area, and remember that two thin washes beat one heavy coat every time for an even, airy finish.
17. Paint a Chair Seat and Leave the Legs in Natural Wood
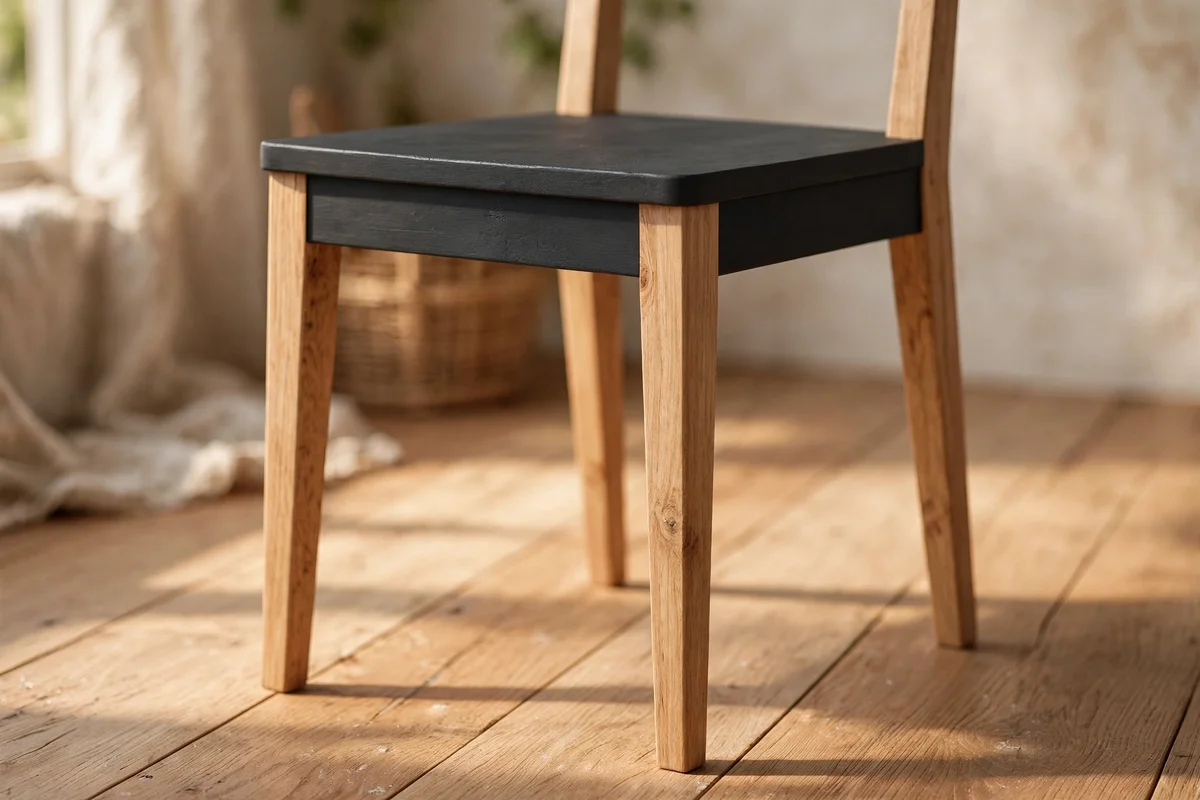
A simple dining chair transforms when the seat wears paint and the legs keep their wood. Sand the seat smooth, apply a bonding primer, then two coats of paint in a colour that echoes the room, such as warm white with sage walls or charcoal with oak floors. Tape the legs where they meet the seat, sealing the tape edge with the seat colour first to stop bleed.
Finish the legs with a clear hardwax oil or matte polyurethane, since chair legs take kicks and scuffs. Two coats give lasting protection without a plastic look. The mistake is painting chairs without removing the seats from the frames where screws allow; paint bridging the joint cracks within weeks. Unscrew what you can, finish each part separately, and reassemble for clean lines that survive daily family meals.
18. Contrast Dark Paint With Pale Birch or Ash Wood
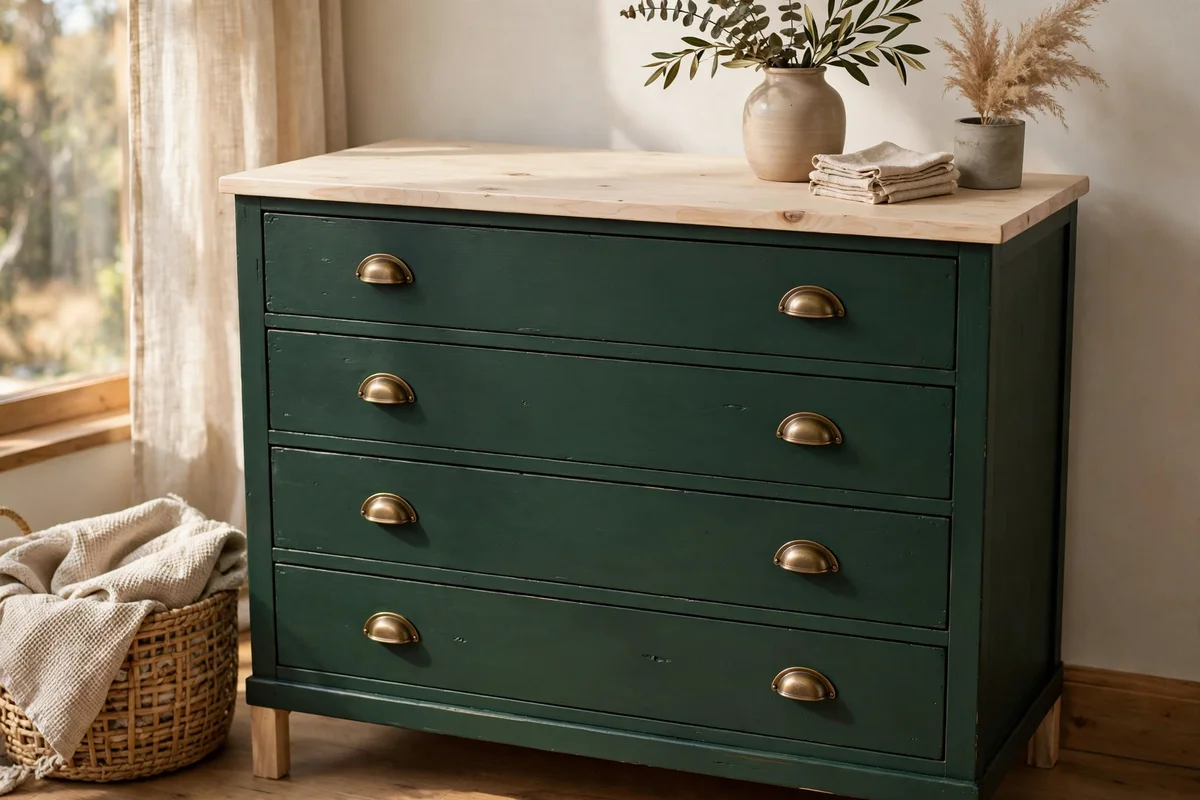
Dark paint beside pale wood is one of the strongest two tone contrasts. Paint the body in deep forest green, charcoal or midnight blue, and let birch or ash show on the top, drawers or trim with just a clear matte seal. Pale woods need little stain; a single coat of clear topcoat keeps them bright. Sand to 220 grit so the pale surface feels smooth under hand.
Keep the pale wood sections generous; small slivers of light wood beside large dark areas can look like an afterthought. A half and half split or a full wooden top balances the depth of the paint. The mistake is letting pale wood yellow under an oil based finish; water based topcoats stay clear. This contrast suits small rooms too, since the pale wood keeps the piece from feeling heavy against the dark paint.
19. Add a Thin Bare Wood Line Between Two Paint Colours
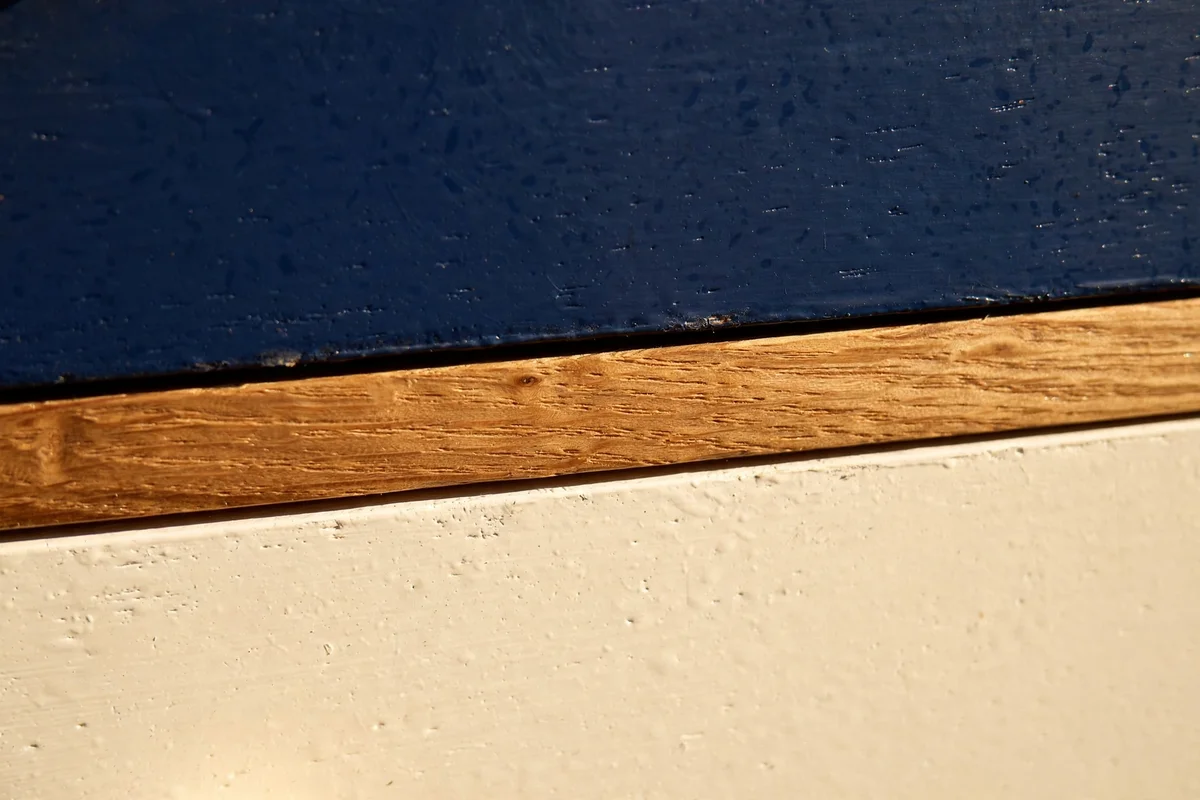
A slim strip of bare wood between two paint colours adds a handcrafted detail to a two tone piece. Mask a 2 to 3 cm band along a drawer edge or door frame, paint the sections on either side in your two colours, then sand the band back to clean wood and seal it clear. The wooden line reads as intentional inlay and softens the meeting of two strong colours.
This technique suits pieces where two paints might otherwise clash, such as navy beside terracotta or green beside cream. The wood band gives the eye a rest between colours. The mistake is making the band too wide; beyond 4 cm it stops reading as a line and starts looking like an unpainted patch. Keep it slim, keep it straight with a ruler guide, and seal it with the same topcoat as the other wood parts.
20. Refresh a Second Hand Dresser With Paint and Stain on a Budget
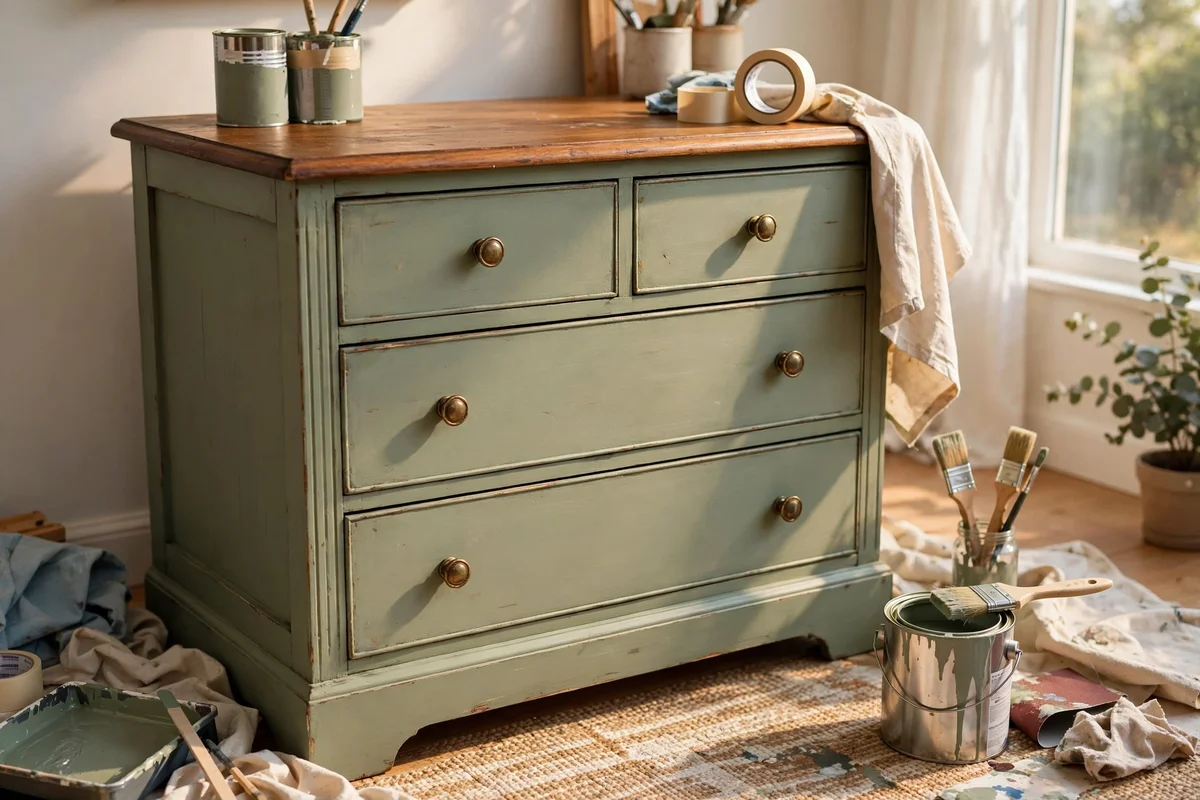
Charity shops and online marketplaces offer solid wood dressers for 30 to 60 pounds or dollars, ideal for a two tone makeover. Look for dovetail drawers and a flat, sturdy top; wobbly legs and missing veneer signal more work than the saving is worth. A full strip is rarely needed; a good clean, a 120 grit sand and a bonding primer prepare most second hand pieces for paint.
Spend the budget where it shows: one quality tin of paint, a small tin of stain for the top, and a tin of topcoat. Hardware can stay if it cleans up well; a soak in warm soapy water revives most knobs. The mistake is buying the cheapest paint available; thin paint needs four coats where good paint needs two, costing more in time and tins. A careful 80 pound makeover can rival pieces selling for five times that.
21. Test Stain and Paint Together on a Hidden Spot First
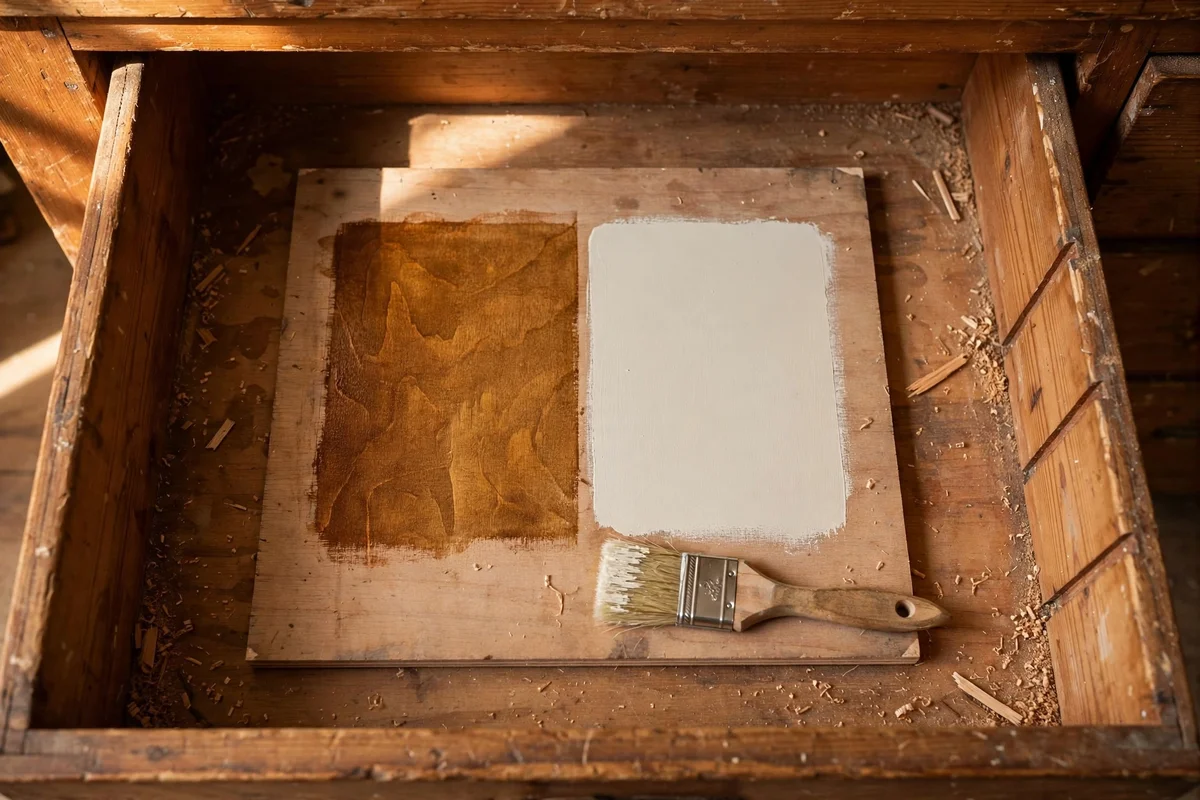
Every two tone project deserves a trial run before the real work begins. Sand a hidden area, such as the back panel, the underside or inside a drawer, and apply your planned stain and paint side by side. Let both dry fully, then view the sample in morning and evening light. Colours shift through the day, and a pairing that glows at noon can look dull under lamplight.
This test also reveals how many coats your stain needs and whether the paint covers in two. Note the winning combination in a small notebook with brand names and colour codes, so you can repeat it later. The mistake is skipping the test to save an hour; a wrong pairing costs a full weekend of sanding back. Professional refinishers test every time, and the habit separates lasting results from lucky ones on home projects too.
22. Choose Hardware That Bridges Paint and Wood
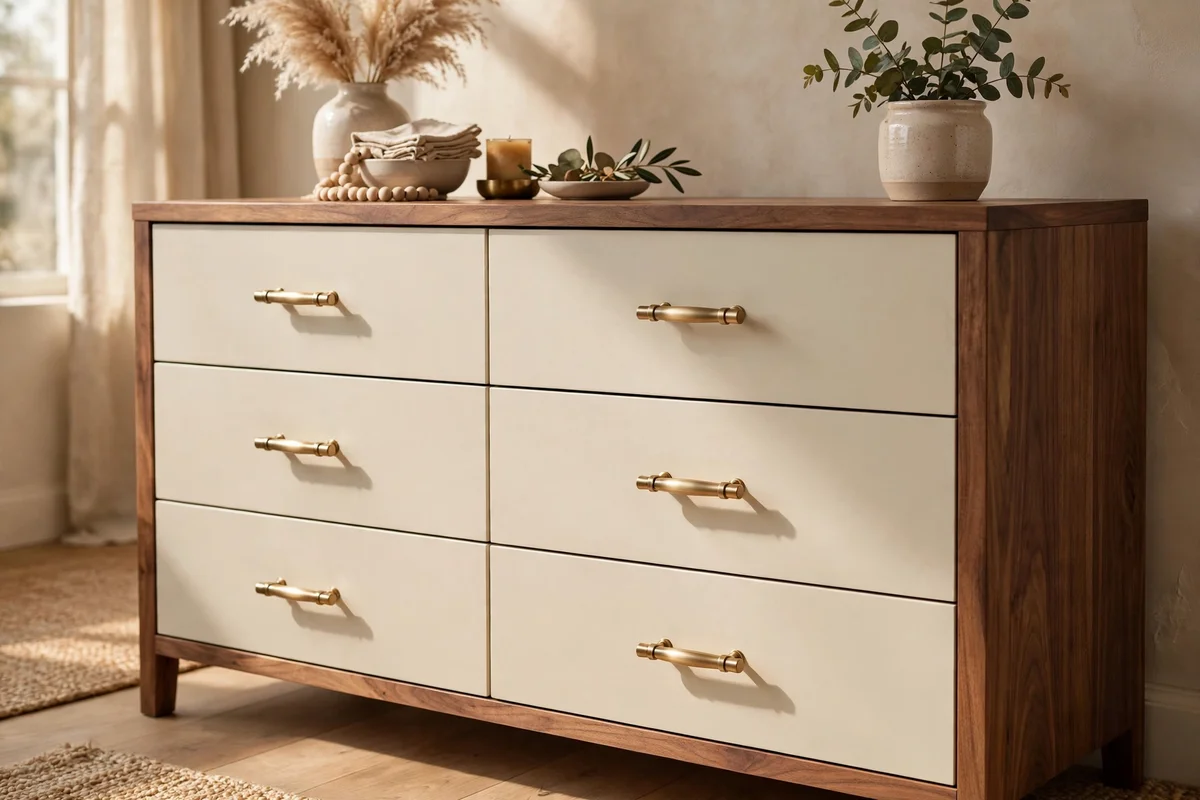
Knobs and pulls are the jewellery of a two tone piece, so choose finishes that speak to both halves. Brushed brass and aged bronze warm up wood and sit beautifully against painted surfaces. Matte black suits modern pairings like charcoal paint with oak, while ceramic knobs add cottage charm to cream and pine. Measure the existing hole spacing, usually 96 or 128 mm, before ordering replacements.
Fit all hardware after the final topcoat has cured for at least 24 hours, so screws do not crack fresh finish. Use a cardboard template to mark new holes straight. The mistake is mixing three or four hardware finishes on one piece; the hardware then fights the calm two tone story. Pick one finish for the whole piece, buy one spare knob, and keep the old ones in a labelled bag in case a future owner prefers them.
23. Seal the Border Where Paint Meets Wood for a Crisp Lasting Line
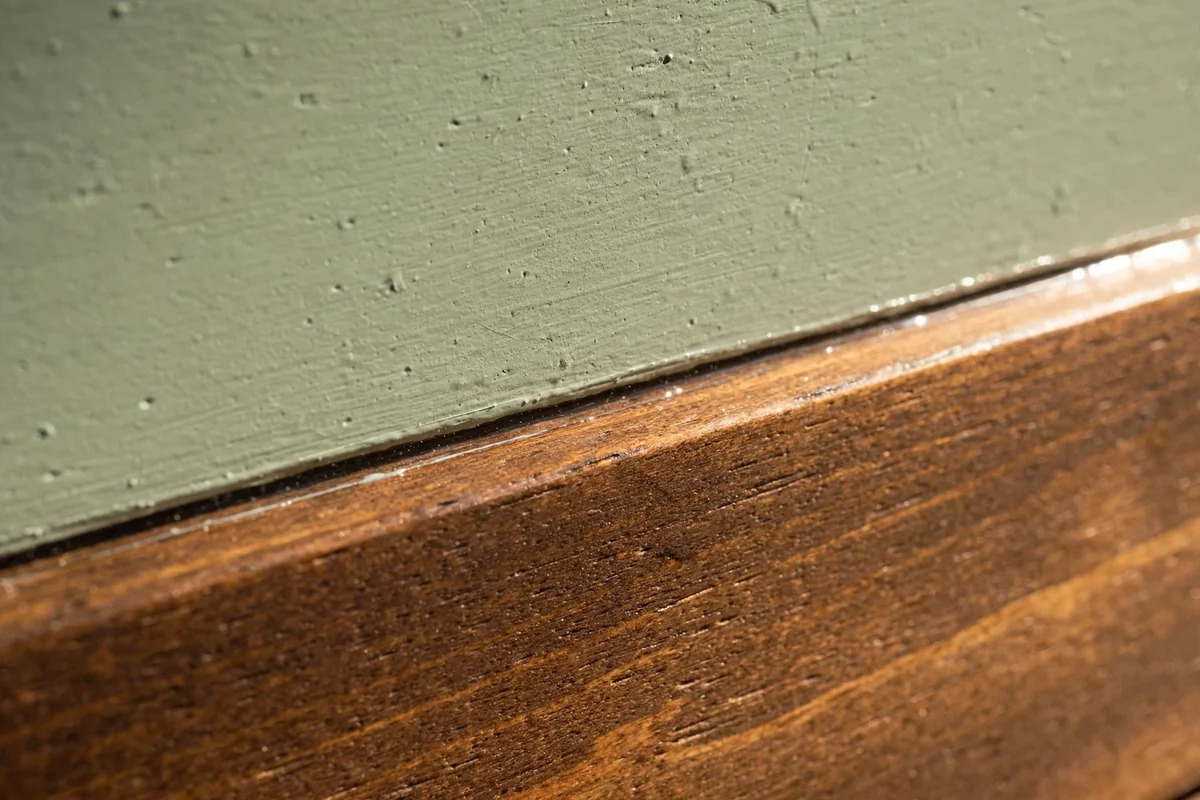
The line where paint meets wood takes the most stress, so give it extra protection. After both finishes have cured, run a fine bead of clear matte topcoat along the border with a small artist’s brush, overlapping 2 mm onto each side. This locks the edge against moisture and daily knocks. Two thin passes beat one thick one, which can pool and dry cloudy along the line.
Let the border seal dry fully before the piece goes back into daily use; 24 hours in a ventilated room is a safe minimum. Check the line in raking light and touch up any thin spots with the same brush. The mistake is skipping this step and watching the paint edge chip within months on drawer fronts and tabletops. A ten minute border seal is the cheapest insurance in the whole two tone process, protecting hours of careful work.
Two tone painting asks you to look closely at each piece and decide where the wood earns its keep. Start small this week with the dipped legs technique on a side table or stool; it needs only tape, a sample pot of paint and an afternoon. That first crisp line will teach you more about masking than any tutorial, and the result looks far more skilled than the effort it took.
Once you have felt the rhythm of prep, paint, mask, stain and seal, larger pieces like dressers and wardrobes feel less daunting. Keep your test boards, note the pairings that worked, and share finished pieces with family and friends who will admire the honest mix of colour and grain. A two tone piece does not just refresh a room; it proves that careful hands can give old furniture a long, beautiful second life.
Frequently Asked Questions
Do I need to strip old varnish before two tone painting?
Not always. A thorough clean and a 120 grit sand usually give paint enough grip, especially over a bonding primer. Strip fully only when the old finish is flaking or the wood half needs fresh stain on bare timber. Test adhesion with a small painted patch; if it scratches off easily after 24 hours, strip that area back before continuing.
Which paint finish works best next to natural wood?
Eggshell or satin paint suits most two tone pieces, since both echo the soft sheen of sealed wood. Matte paint also works on cottage style pieces but marks more easily. Avoid high gloss beside natural grain; the shine contrast looks harsh. Whatever you choose, buy furniture grade paint rather than wall emulsion for a harder wearing finish.
Can I two tone paint furniture as a beginner?
Yes. Start with a small nightstand or side table, where mistakes cost little. Follow the steady sequence of prep, paint, mask, stain and seal, and always test colours on a hidden spot first. Dipped legs and painted frames with stained tops are the friendliest beginner techniques. Allow five to seven days so coats cure properly between steps.
How do I stop stain bleeding under the tape line?
Seal the tape edge before staining. After burnishing the tape firmly, brush a thin line of clear sealer or the base paint colour along the tape edge and let it dry. This locks the edge so stain cannot creep underneath. Remove tape while the stain is fresh, pulling at 45 degrees. Cheap tape is the usual culprit, so buy a quality brand.
What does a two tone furniture makeover cost?
A small piece like a nightstand usually costs 20 to 35 pounds or dollars for a sample pot of paint, a small tin of stain and basic tape. A dresser runs 40 to 80, depending on paint quality and whether you replace hardware. Buying second hand furniture keeps the total low, and one tin of topcoat often stretches across two or three projects.