Living Room
24 Empty Wall Decorating Ideas That End the Blank Stare
By Anna Wells · · 22 min read
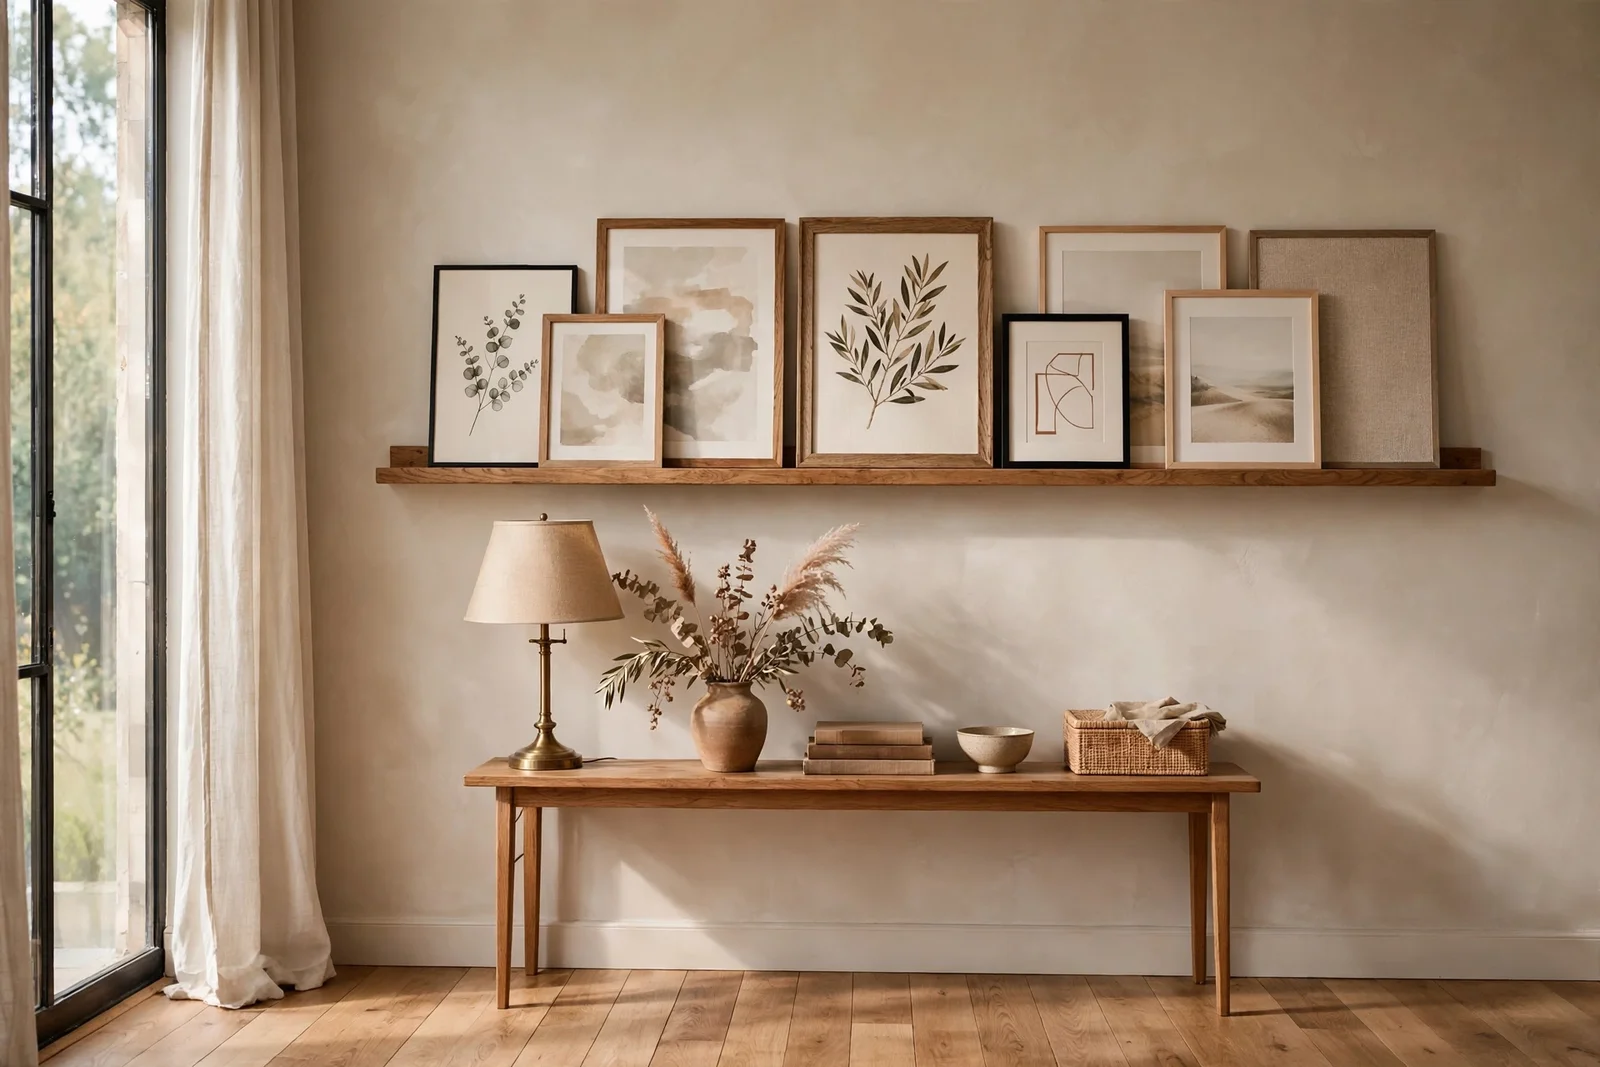
Twenty-four practical ways to dress bare walls in any room, with measurements, renter-friendly fixings and budget tips.
Late afternoon light slides across the room and lands on the one thing you cannot stop noticing: a completely bare wall. It stares back every single day, flat and unfinished, while the rest of the room carries on around it. Every home has at least one, and most have three or four. The good news is that a blank wall is not a problem; it is simply a project waiting for a tape measure.
Before you buy a single frame, measure the wall. Decor that spans roughly sixty percent of the wall width looks balanced, while pieces that are too small make the emptiness worse. A wall that is 300 cm wide asks for about 180 cm of decorated width, whether that is one wide ledge, a group of frames or a mirror with sconces. This one habit separates walls that look finished from walls that look like an afterthought.
This collection gathers 24 empty wall decorating ideas that work in any room, from living rooms and hallways to stairwells and bedrooms. Each idea comes with real numbers: widths, heights, spacing, materials and budget ranges. Many are renter friendly, using adhesive fixings, leaning pieces and paint-free tricks that come down cleanly. Whether you want a seasonal picture ledge, a collected plate wall or a simple painted arch, you will find a starting point here.
Read through, pick the idea that matches your wall and your budget, and begin with the measuring step. You will be surprised how quickly one deliberate choice changes a room.
1. Run a Shallow Picture Ledge That Changes With the Seasons
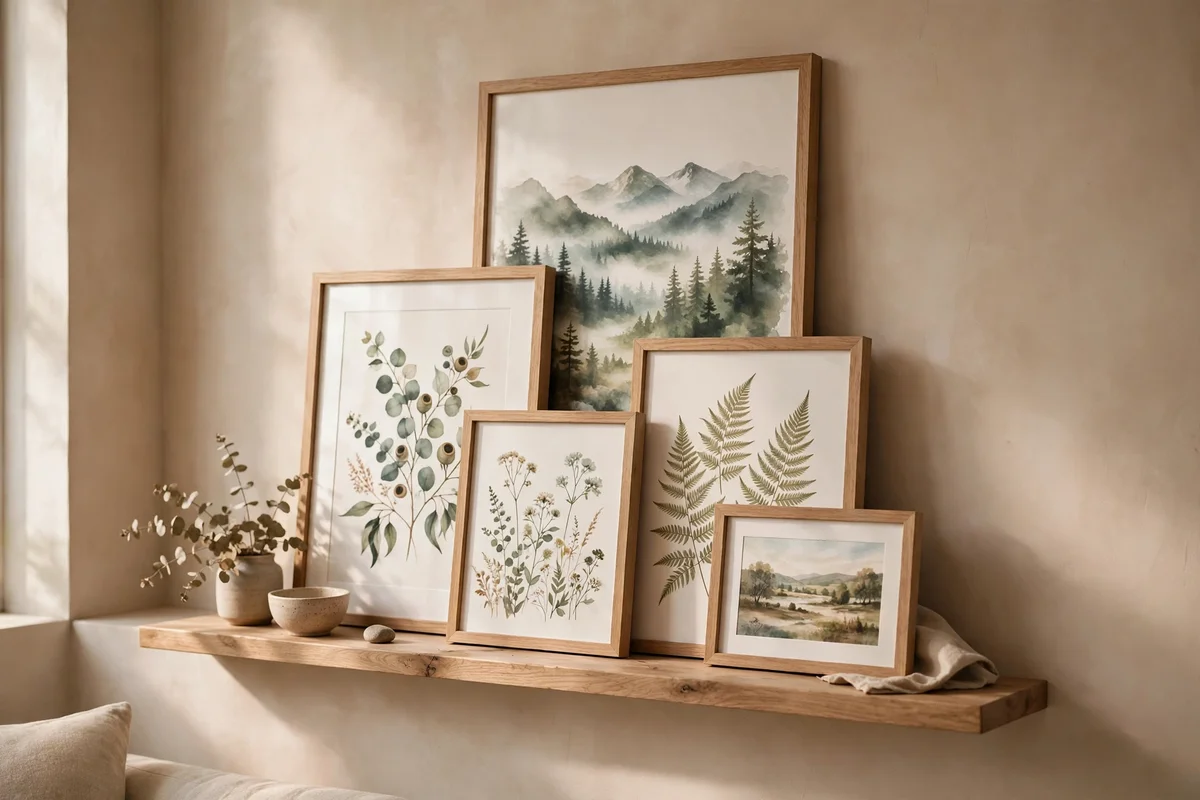
A picture ledge 8 to 12 cm deep holds framed prints, small canvases and postcards without a nail behind each frame. Fix one ledge 150 to 180 cm long at eye level, so its centre sits about 145 to 155 cm from the floor, and let it cover roughly sixty percent of the wall width. A single ledge suits narrow walls; run two ledges 40 to 50 cm apart on wider walls. Choose solid wood or painted MDF for a clean, timeless line.
Layer frames with the tallest at the back and the smallest in front, overlapping edges by 3 to 5 cm for a collected feel. Swap the art with the seasons: botanical sketches in spring, warm landscapes in autumn, simple line drawings in winter. The mistake to avoid is lining frames up like soldiers; varied heights look relaxed and intentional. One ledge, brackets and fixings usually cost 25 to 45 pounds or dollars.
2. Build a Collected Plate Wall From Plain, Unlettered Pieces
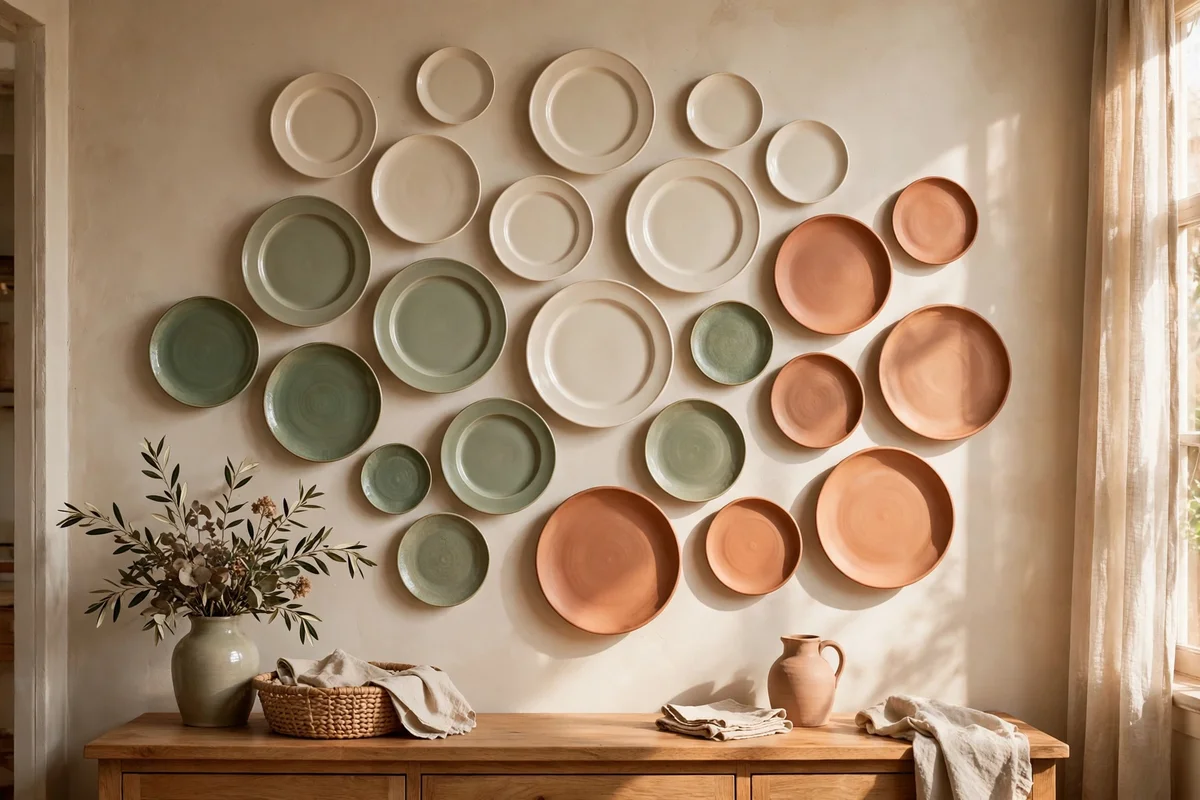
Gather 7 to 9 plain plates in cream, sage, dusty blue or soft terracotta, with no lettering or printed sayings anywhere. Mix diameters between 15 and 28 cm so the group feels collected over time rather than bought as a set. Lay the plates on the floor first, photograph the layout, then transfer it to the wall using plate hangers or adhesive discs rated for ceramic weight. Keep 5 to 8 cm of space between plates for a calm rhythm.
Centre the whole composition about 150 cm from the floor and keep it within a 120 to 150 cm wide zone so it reads as one piece of art. The mistake to avoid is adding lettered or novelty plates at the last minute; they break the quiet mood instantly, so edit before you hang. Plain second-hand plates plus hangers usually total 30 to 50 pounds or dollars, making this one of the cheapest ways to fill a dining room wall with character.
3. Hang a Woven Basket Wall in Warm Natural Fibres
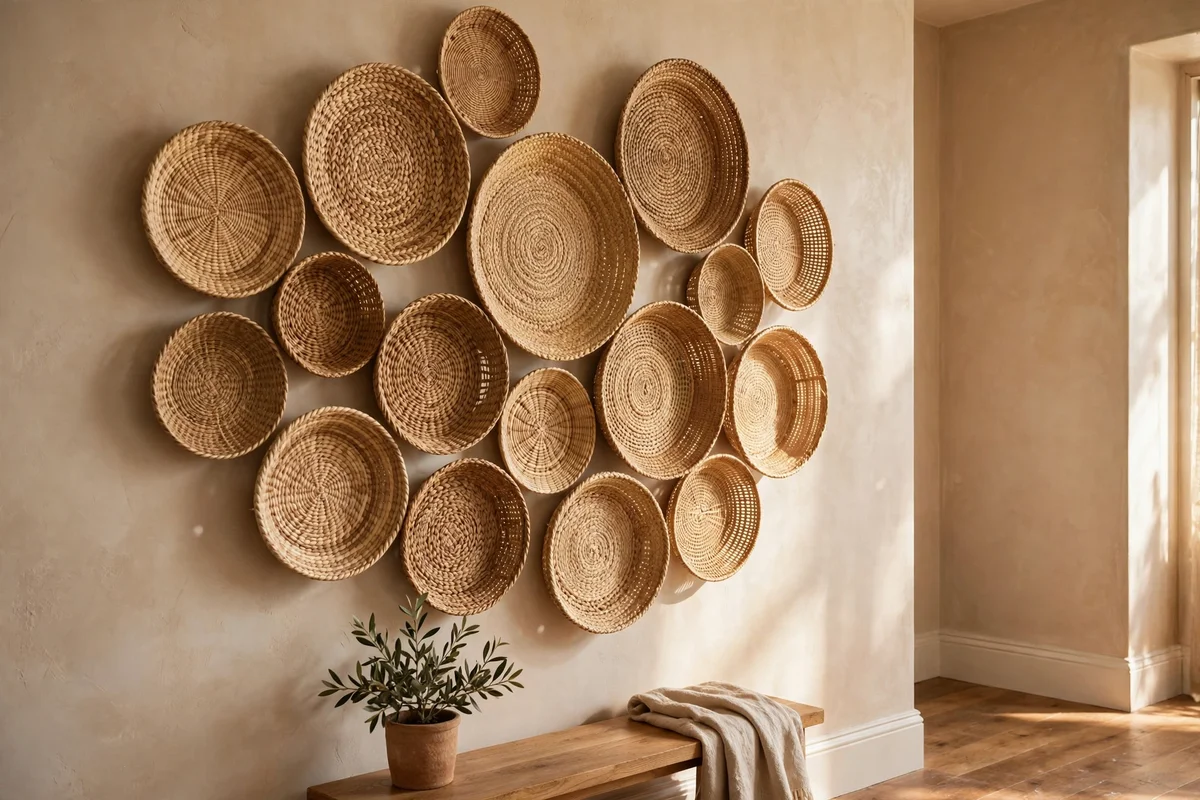
Collect 5 to 8 shallow baskets in seagrass, jute, rattan or woven palm, choosing flat-backed pieces that sit close to the wall. Vary the diameters from 20 to 45 cm and stick to natural tones with maybe one darker woven accent. Hang them on small nails or removable adhesive hooks, starting with the largest basket slightly off-centre and building outward. Keep gaps of 6 to 10 cm so each basket keeps its shape in the group.
This idea suits hallways, dining rooms and stairwell landings where flat art can feel predictable. Dust the baskets with a soft brush every month or two, and keep them out of steamy bathrooms where natural fibres can mildew. The common mistake is buying a matching set of identical baskets; the charm comes from pieces that look gathered from markets and travels. A wall of charity-shop baskets often costs under 35 pounds or dollars.
4. Add Simple Panelling for Old-World Wall Character
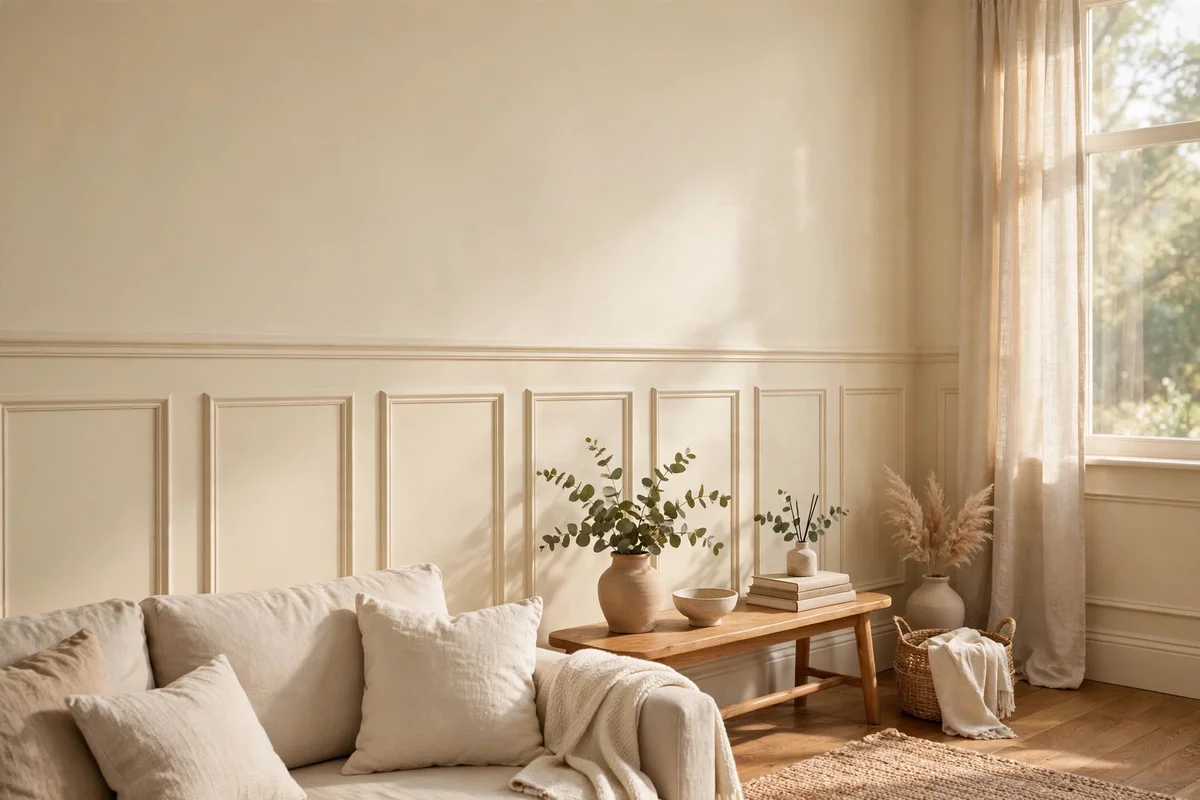
Thin MDF or pine strips, 5 to 10 cm wide, fixed in rectangles below a chair rail at 100 to 120 cm high, give a plain wall instant heritage character. Paint the strips the exact same colour as the wall for a subtle shadow line, or one shade deeper for quiet definition. Measure and mark every rectangle with a spirit level before fixing, because one crooked line shows forever. Space the rectangles 10 to 15 cm apart for even rhythm.
Renters can fake the look with paint alone: tape the same rectangle pattern and paint inside it, then peel the tape for crisp lines. The mistake to avoid is stopping the panelling halfway along a wall with no trim or corner to finish it; always end at a door frame, a corner or a full stop. Materials for a 3 metre wall usually run 40 to 80 pounds or dollars, plus paint.
5. Paint a Soft Arch Behind a Console or Chair
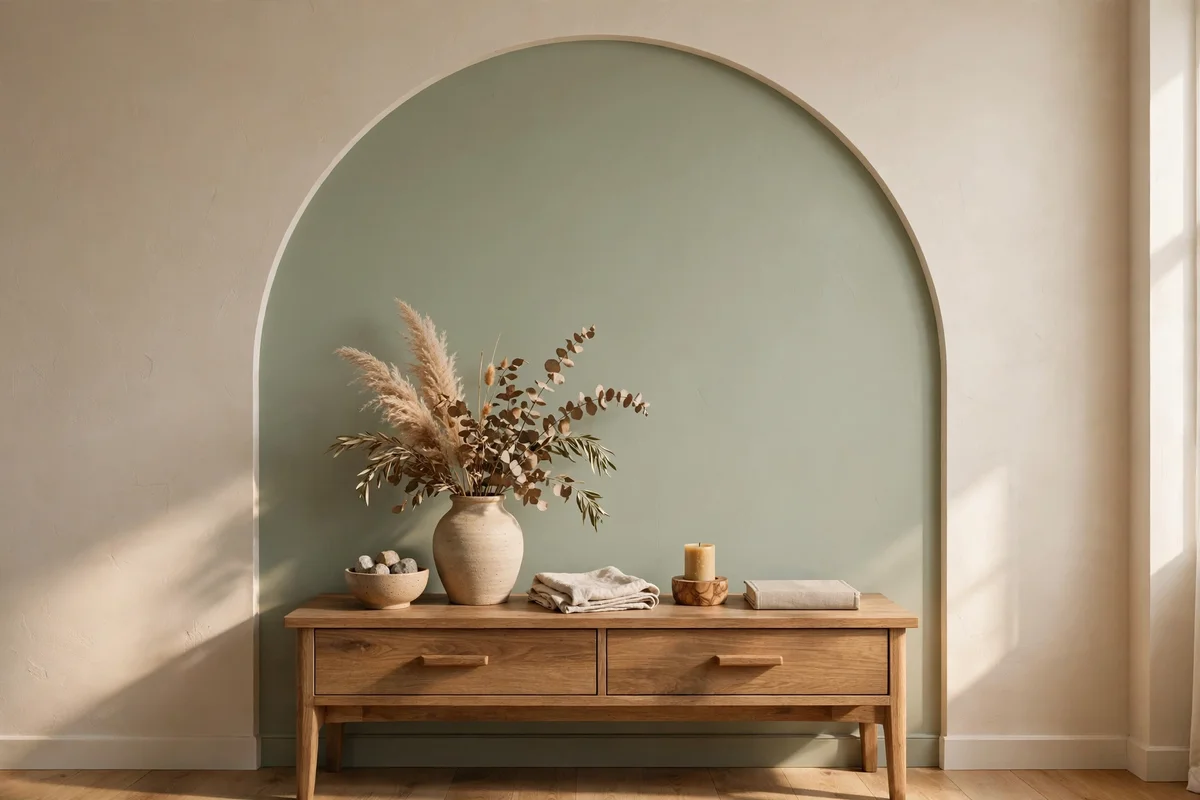
A painted arch, 120 to 150 cm wide and reaching about two thirds up the wall, frames furniture the way a headboard frames a bed. Mark the centre line, then swing a pencil on a string from the top centre to draw a clean curve. Use low-tack painter’s tape along the line and apply two thin coats of matte emulsion in clay, sage or warm ochre. Let each coat dry fully so the edge stays sharp.
Place a console, armchair or small desk against the arch so the furniture sits inside the colour, not beside it. The mistake to avoid is painting the arch too narrow; anything under 100 cm wide looks like a stripe rather than a backdrop. This is a weekend project costing little more than a tester pot and a roll of tape, usually 15 to 30 pounds or dollars, and it suits owned homes or rentals with landlord permission.
6. Pair One Round Mirror With Two Matching Sconces
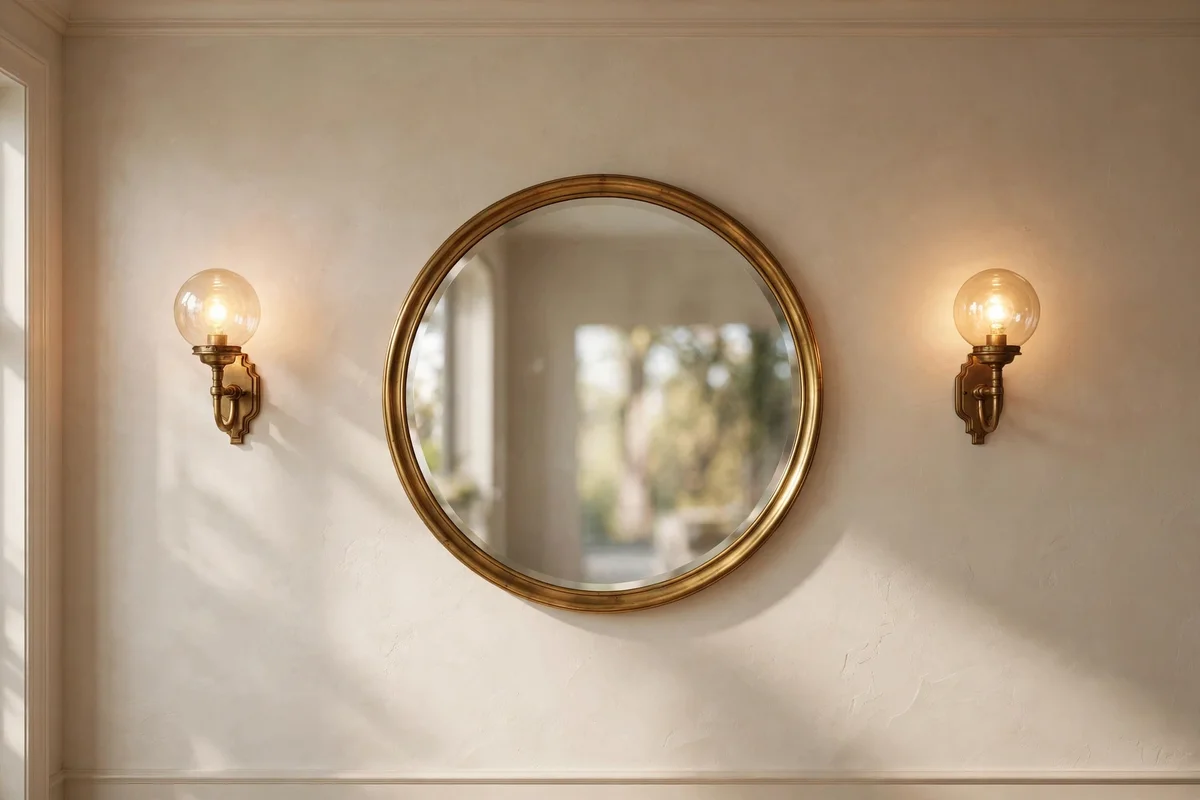
Hang a round mirror 60 to 80 cm across at eye level, its centre about 150 cm from the floor, and flank it with two matching sconces 15 to 20 cm from the mirror edge. The mirror doubles the daylight while the sconces add warm pools of light after dark. Choose warm 2700K bulbs and shades or globes that match the mirror frame, in brass, black metal or natural wood, so the trio reads as one deliberate arrangement.
Renters can use plug-in sconces with slim cord covers painted to match the wall, avoiding any wiring. The mistake to avoid is hanging the mirror too high; a mirror centred above eye level reflects ceiling, not room. Fix the mirror on two anchors rated for its weight, since even a medium mirror can weigh 6 to 8 kg. A fair mirror plus two plug-in sconces usually costs 70 to 140 pounds or dollars.
7. Style Floating Shelves in Balanced Groups of Three
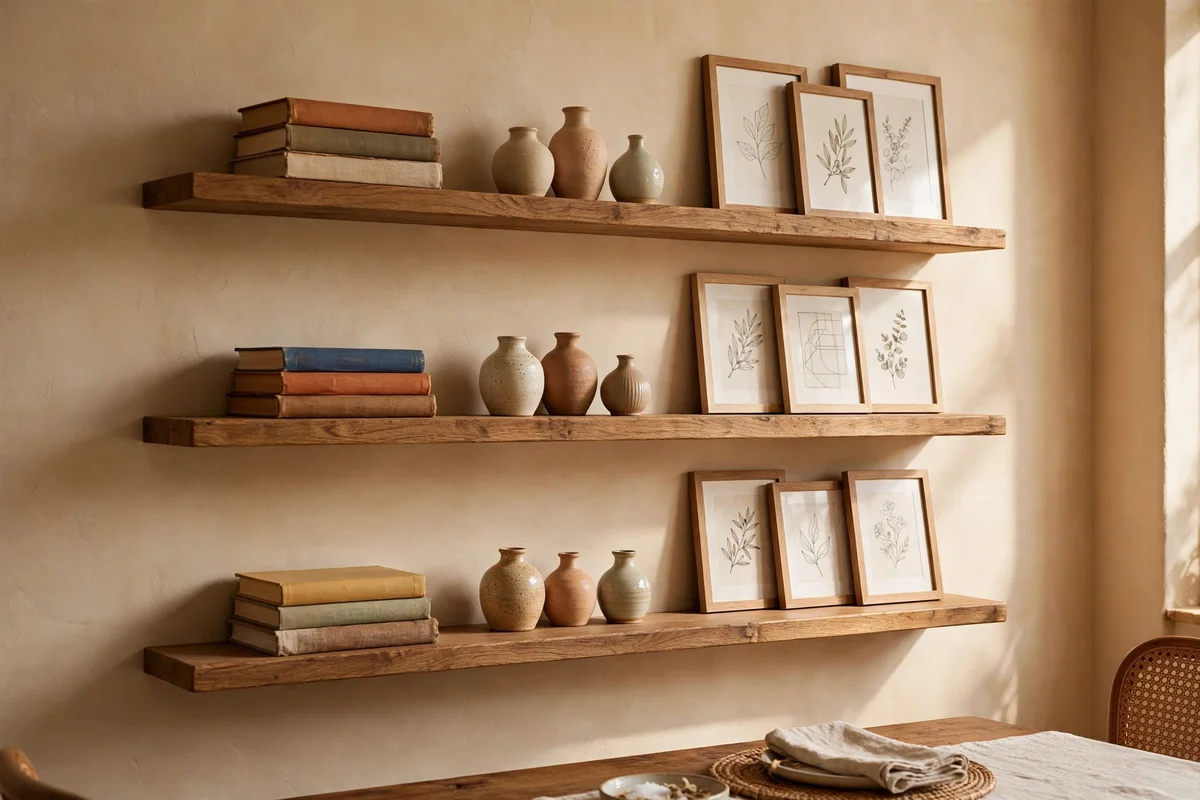
Fix two or three floating shelves, each 60 to 90 cm long, with 30 to 35 cm of vertical space between them on a living room or dining wall. Style each shelf in odd-numbered groups: three objects of different heights, such as a stack of books, a small vase and a framed print leaning at the back. Keep the palette to two or three colours across all shelves so the group feels calm rather than busy.
Anchor every shelf into studs or use heavy-duty plaster anchors, because books get heavy fast; a shelf of paperbacks can pass 10 kg. The mistake to avoid is filling every centimetre; leave about a third of each shelf empty so the objects can breathe. Two solid wood shelves with concealed brackets usually cost 40 to 80 pounds or dollars, and they turn a blank wall into useful, changeable storage.
8. Hang a Plain Woven Textile Panel for Softness
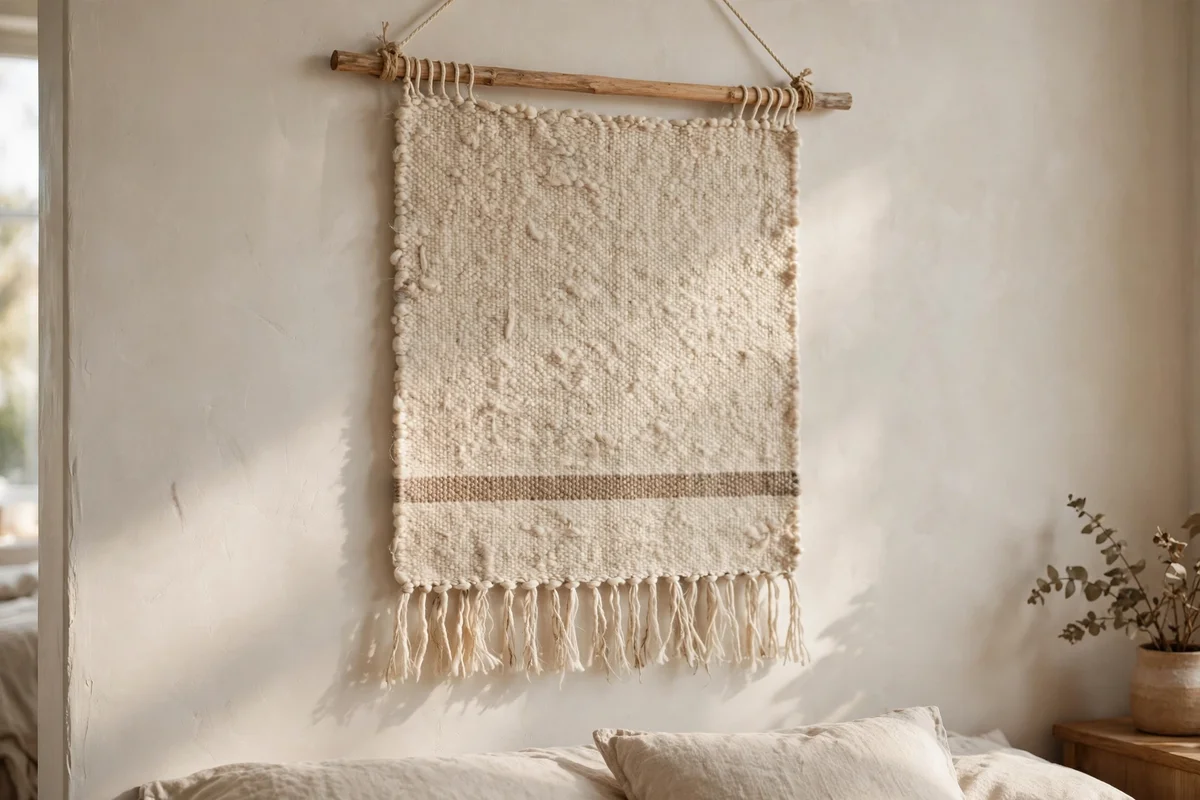
A plain woven wall hanging, roughly 100 by 140 cm, softens a hard wall the way a rug softens a hard floor. Choose wool, cotton or jute in undyed neutrals or a simple stripe, with no lettering or slogans. Hang it from a wooden dowel, a brass rod or a slim branch threaded through a top sleeve, fixed on two hooks. Leave 10 to 15 cm of clear wall on each side so the textile keeps its presence.
Textiles absorb sound as well as add warmth, so they suit bedrooms and dining rooms where echo lingers. Shake the piece outdoors twice a year and vacuum it gently with an upholstery nozzle to keep dust down. The mistake to avoid is hanging a textile in direct daily sun, which fades natural dyes within a year. Handwoven panels start around 40 pounds or dollars; a simple cotton weave from a market stall can cost half that.
9. Float a Small Writing Desk Against the Blank Wall
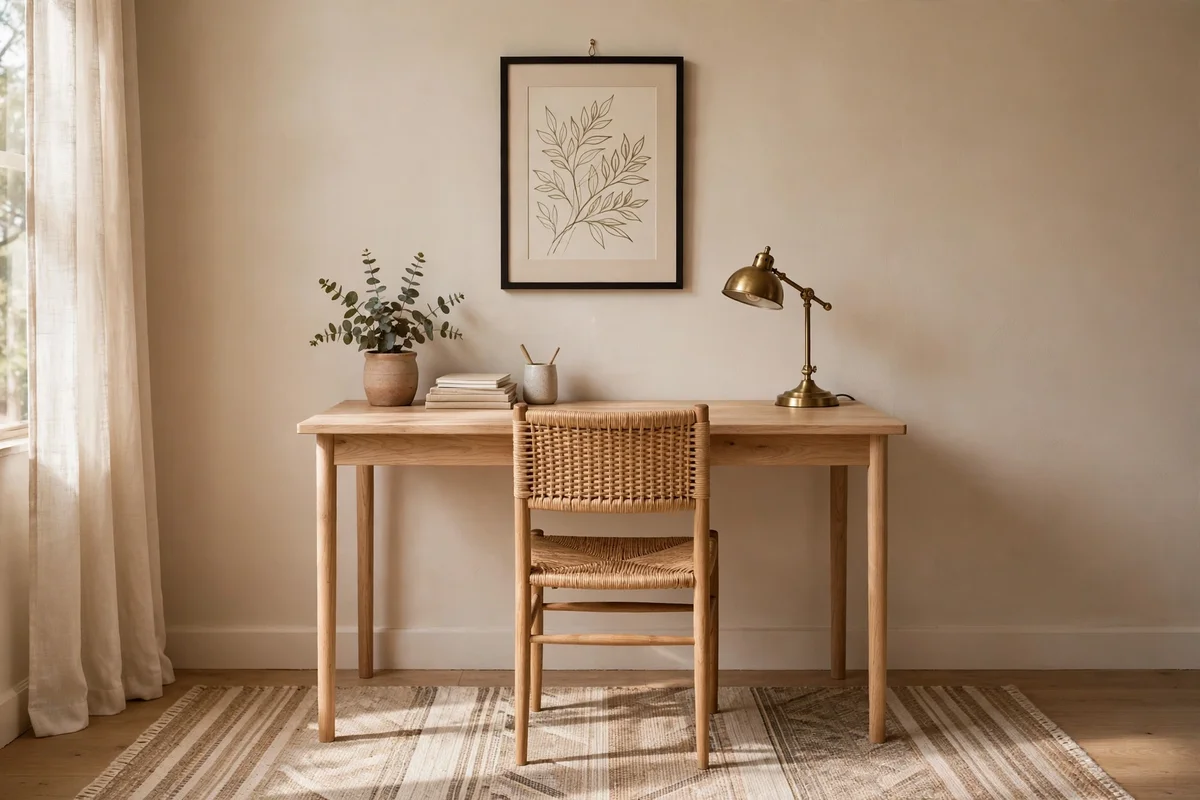
A slim desk 90 to 120 cm wide turns an empty wall into a useful corner without swallowing the room. Place it centred on the wall with a chair tucked fully underneath, and lay a flatweave rug about 120 by 180 cm beneath to anchor the zone. Hang one framed print or a small shelf above the desk at 30 to 40 cm above the surface, keeping the composition inside that sixty percent width for balance.
Add a small task lamp with a warm bulb and a cable tidy so cords never trail down the wall. The mistake to avoid is pushing the desk flush into a corner; a few centimetres of breathing room on each side looks calmer and makes cleaning easier. A simple oak or pine desk plus a comfortable chair usually costs 80 to 160 pounds or dollars, less second-hand.
10. Set a Narrow Console Table With a Layered Display
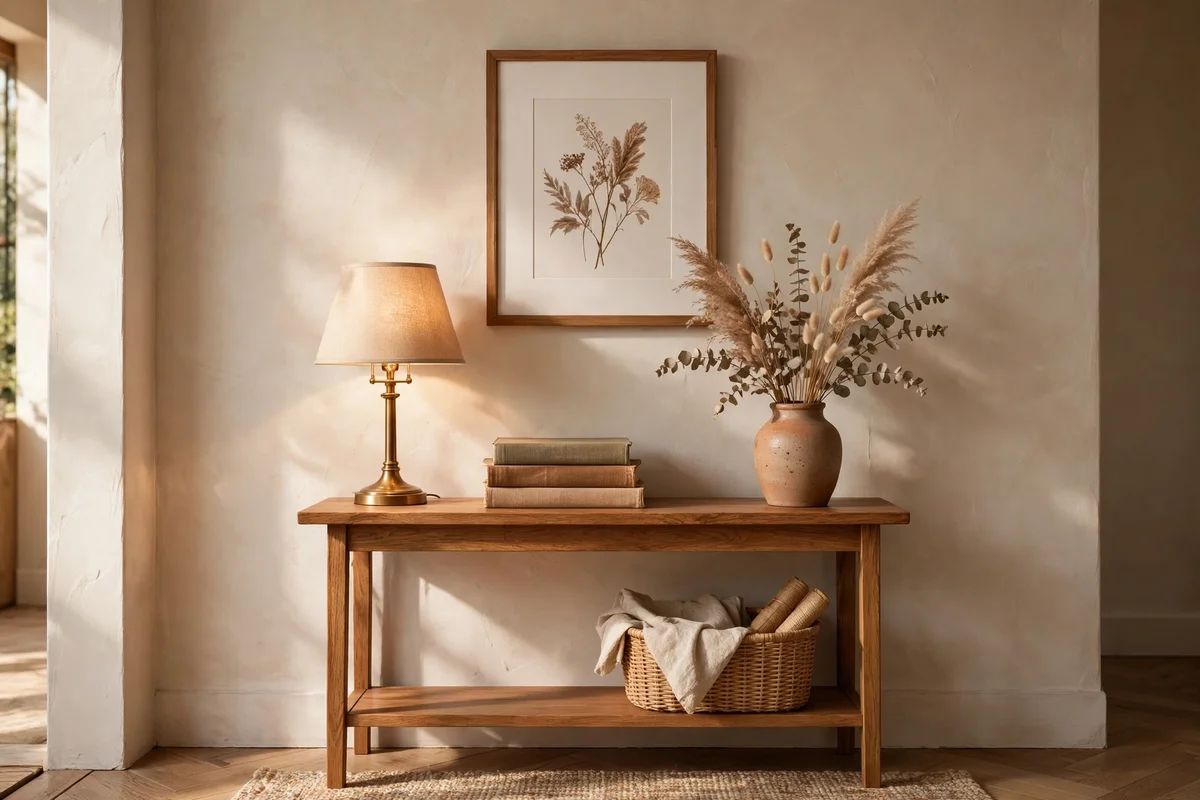
A console 25 to 35 cm deep and 120 to 150 cm long dresses an entryway or living room wall without blocking walkways. Style it in three zones: a table lamp at one end, a stack of two or three books with a small object on top in the centre, and a vase with dried stems at the other end. Hang one wide frame or a mirror above, centred on the console, with 15 to 25 cm of space between the tabletop and the frame bottom.
Keep the total display height under 80 cm above the table so the wall above stays calm. The mistake to avoid is lining up five or six small trinkets in a row; odd groups of three read as styled, rows read as cluttered. A painted wood console plus a lamp and vase usually costs 90 to 170 pounds or dollars, though second-hand consoles halve that.
11. Turn a Hallway Wall Into a Framed Print Run
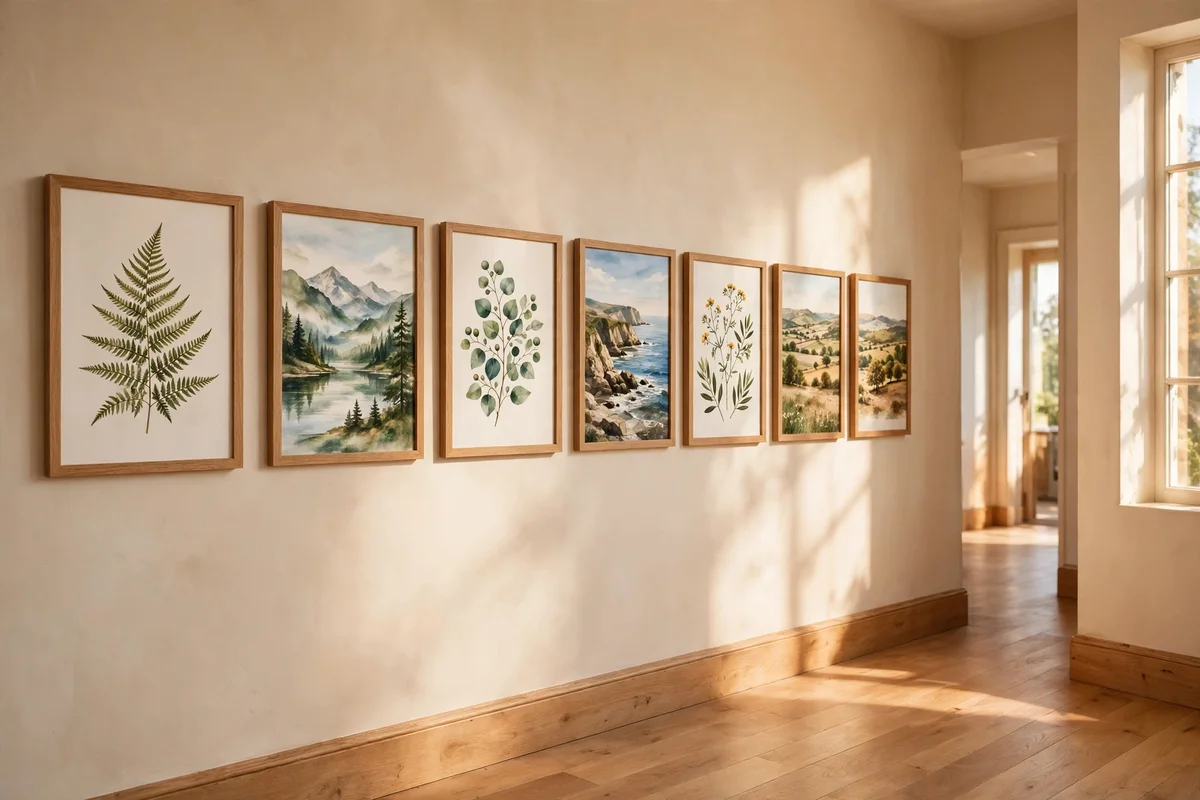
A hallway is the perfect home for 4 to 6 framed prints in matching or near-matching frames, hung in a single horizontal run. Keep the centre line at 150 cm from the floor and space frames 8 to 10 cm apart so the run reads as one ribbon of art. In narrow hallways choose slim frames under 4 cm wide and keep print sizes modest, 30 by 40 cm or smaller, so nothing juts into the walkway.
Mix landscapes, botanical studies and abstract shapes in one tight palette of two or three colours for cohesion. The mistake to avoid is hanging the run too high; hallway art viewed on the move should meet the eye, not the ceiling. Prints from independent artists plus simple frames usually cost 60 to 120 pounds or dollars for the full run.
12. Dress the Stairwell With Prints That Climb the Steps
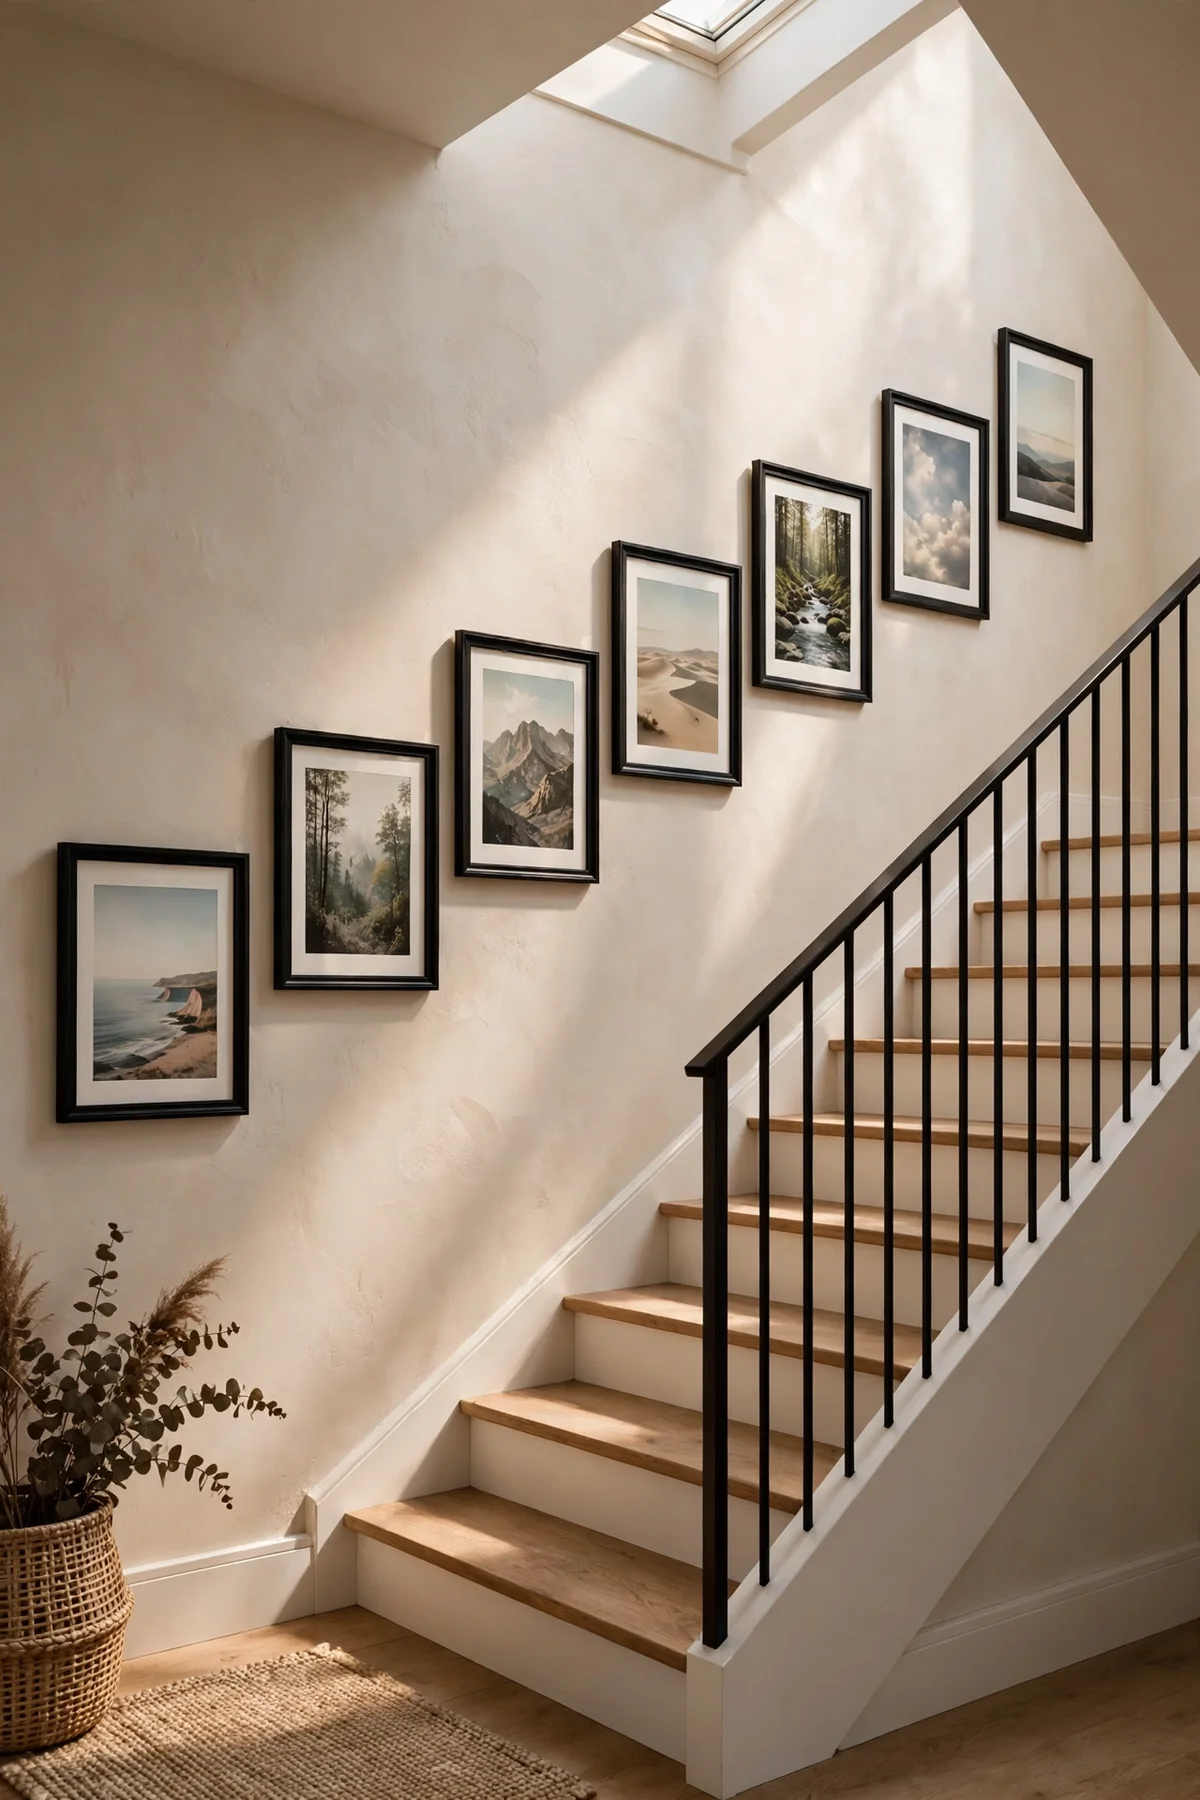
Hang 3 to 5 frames so they rise with the staircase, keeping each frame’s centre about 150 cm above the tread nosing directly below it. Step the frames up in a diagonal that echoes the stair angle, spacing them 20 to 30 cm apart along the slope. Use the same frame finish throughout, black, oak or white, so the diagonal line stays clean. Lighter frames with wide mats keep a dark stairwell feeling open.
Measure from the nosing, not the floor, because stair treads change height as they climb. The mistake to avoid is hanging frames level with each other like a flat wall; on stairs, the rising diagonal is the whole point. Secure each frame with two hooks or adhesive strips so stair vibrations never tilt them. A set of prints and frames for a stairwell usually costs 50 to 100 pounds or dollars.
13. Start With the Sixty Percent Rule Before You Hang Anything
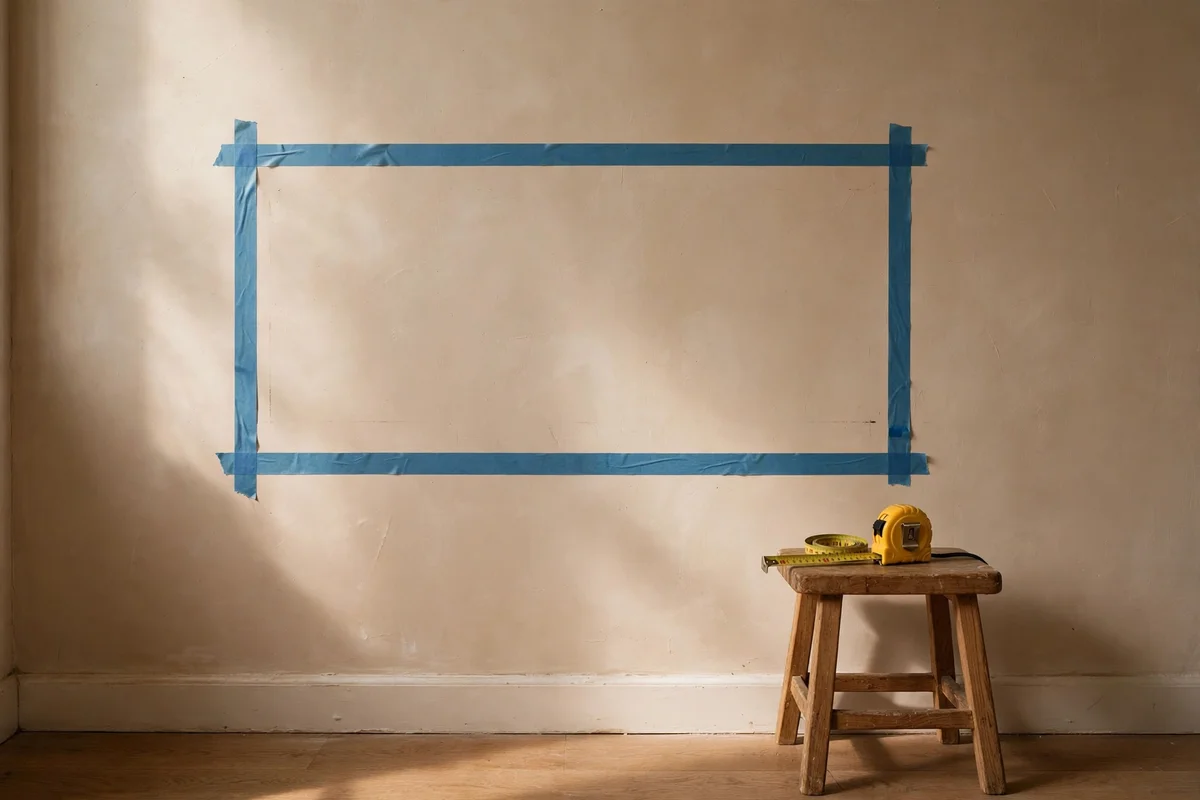
Measure the wall width, then multiply by 0.6: that is the width your decor should roughly cover for visual balance. On a 300 cm wall, aim for about 180 cm of decorated width; on a 200 cm wall, about 120 cm. This applies to a single wide piece or a group of smaller ones measured edge to edge. Furniture below counts too, so a 150 cm console under a 60 cm frame already fills a 210 cm zone on a 300 cm wall.
Mark the planned width on the wall with low-tack painter’s tape before you hang anything, then step back and look from the doorway. The mistake to avoid is centring one small 40 cm frame on a 300 cm wall and calling it done; the emptiness around it will shout louder than the art. A tape measure and a roll of tape cost almost nothing and prevent the most common decorating regret.
14. Choose Renter Friendly Fixings That Hold Firm and Remove Clean
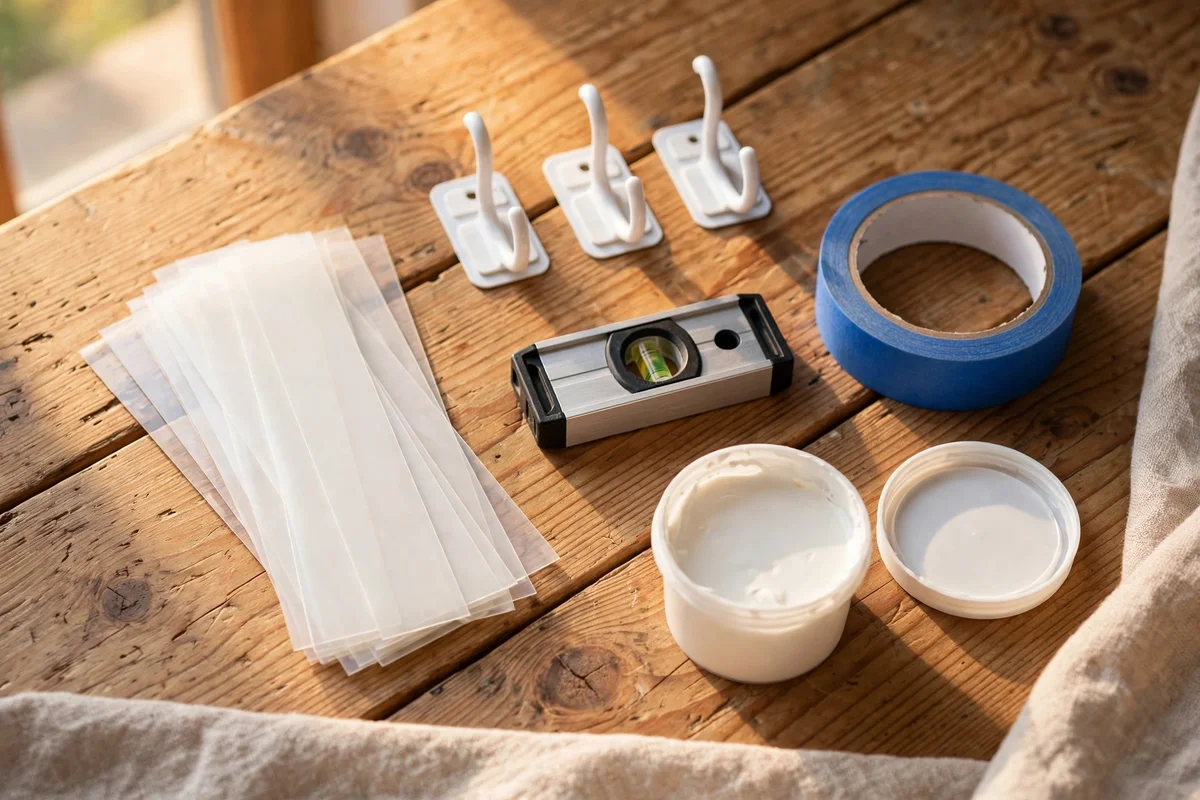
Adhesive hanging strips hold frames up to about 7 kg per set when the wall is cleaned with alcohol first and left to cure for an hour before hanging. For heavier mirrors, use French cleats or monkey hooks that need only a tiny nail hole, easily filled later. Keep a small kit: strips, removable hooks, a spirit level, painter’s tape for marking and white filler for move-out day. Always check the weight rating on the packet, then stay under it.
Leaning pieces need no fixings at all: a tall mirror or a framed canvas rested against the wall suits renters perfectly. The mistake to avoid is pressing adhesive strips onto fresh paint less than a month old; the bond can pull the paint off with the strip. Photograph every wall before you decorate so you can return it to its original state. A full renter kit usually costs 15 to 30 pounds or dollars.
15. Hang One Large Canvas as a Single Confident Statement
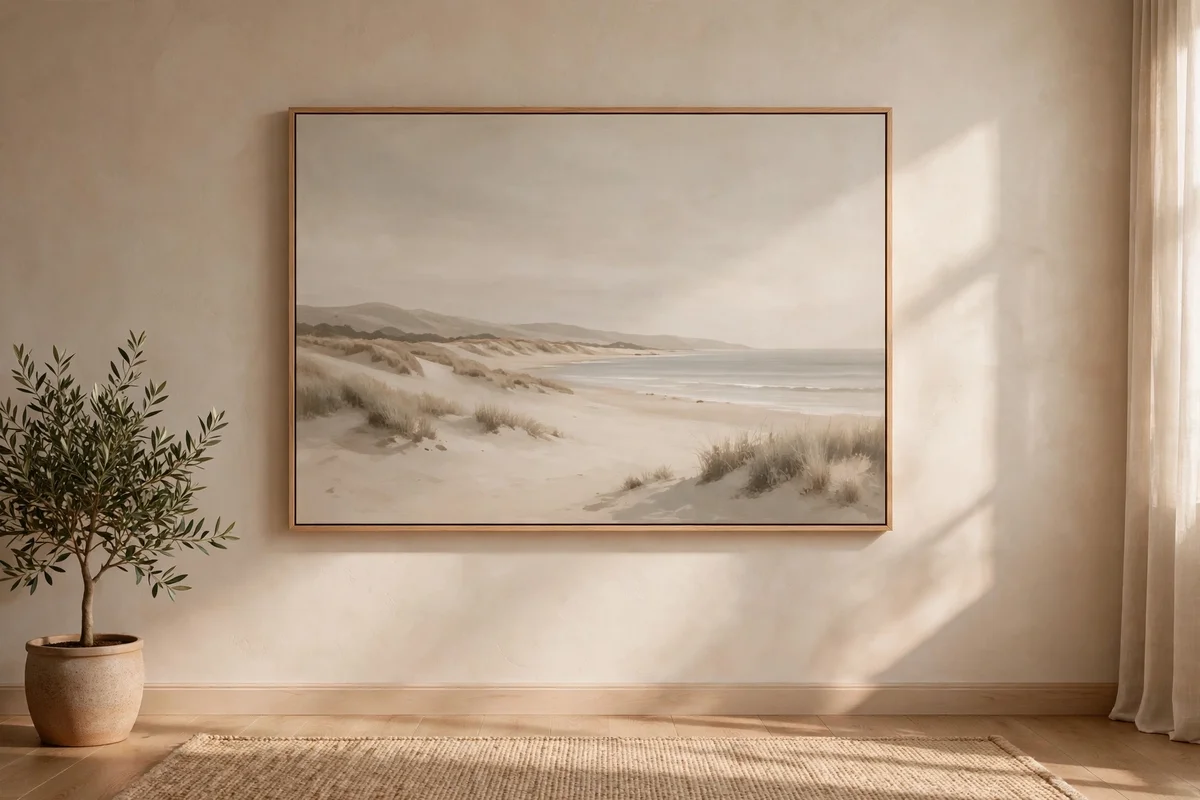
One canvas 100 by 140 cm or larger can finish a wall that would swallow three small frames. Hang it so its centre sits 145 to 155 cm from the floor, and use two hooks or a wire on two anchors to share the weight and keep it level. Choose a calm subject, a landscape, a still life or soft abstract shapes in two or three colours, since one large piece sets the mood of the whole room.
Leave at least 30 cm of clear wall on each side so the canvas commands its space. The mistake to avoid is buying a huge canvas for a wall you have not measured; check the sixty percent rule first, because oversized art on a narrow wall overwhelms. Large stretched canvases start around 60 pounds or dollars unframed; local artists and print shops often offer better value than big-box stores.
16. Lean a Tall Floor Mirror to Double Light and Space
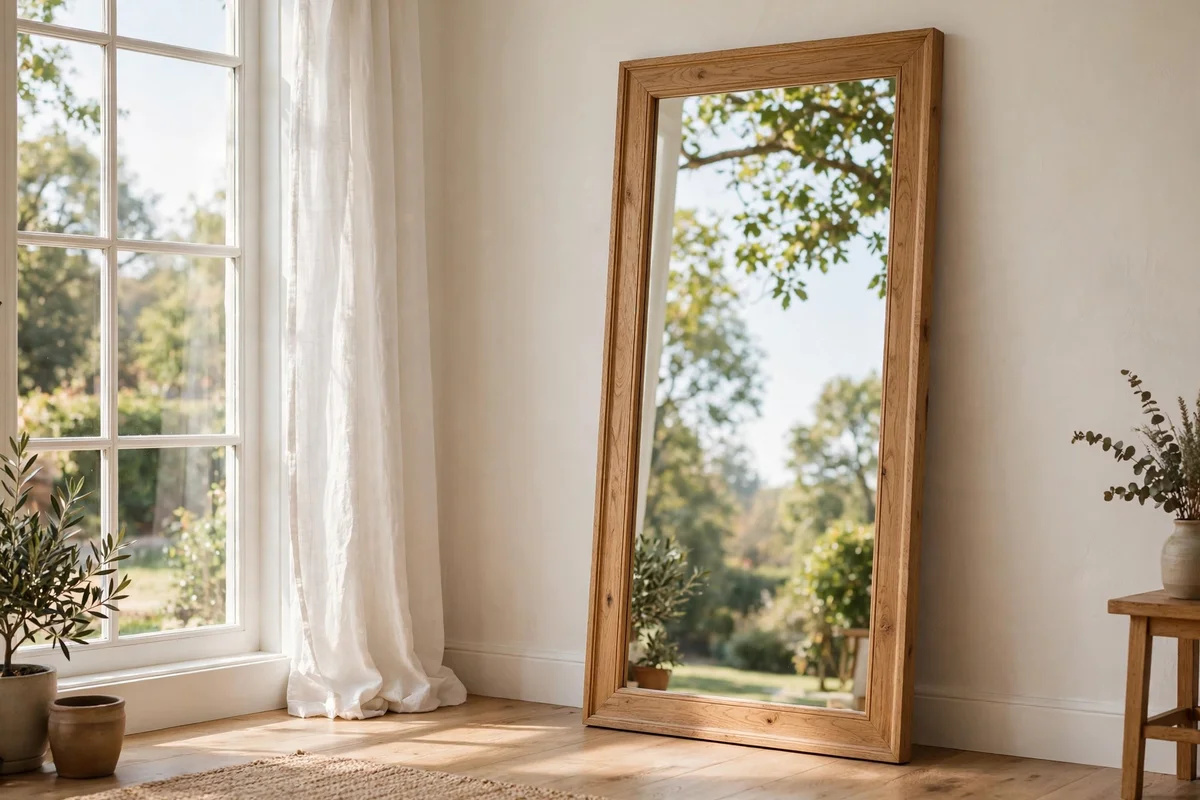
A floor mirror 160 to 180 cm tall, leaned at a slight angle against the wall, bounces daylight deep into the room and makes narrow spaces feel twice as wide. Place it opposite or beside a window, never facing clutter, and anchor the top to the wall with a discreet strap or hook so it can never slide. Keep the floor in front clear for 60 to 80 cm so the reflection stays clean and the mirror feels intentional.
Choose a slim frame in oak, black metal or brass to suit the room, and wipe the glass with a microfibre cloth weekly to keep the reflection bright. The mistake to avoid is leaning an unsecured mirror in a busy hallway where it can be knocked; always fix the top, especially with children or pets around. Tall leaning mirrors cost 80 to 180 pounds or dollars depending on frame and glass quality.
17. Mount a Vintage Style Clock as a Working Wall Centrepiece
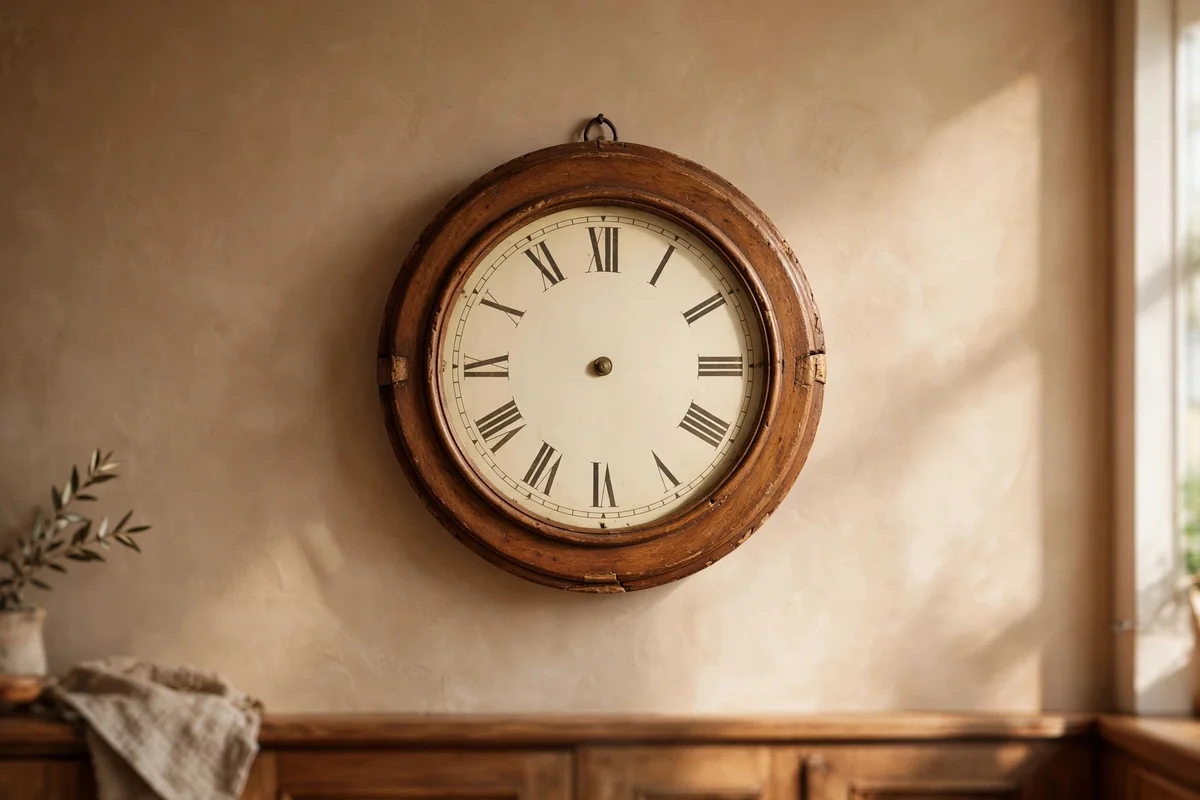
A clock 40 to 60 cm across fills a kitchen or hallway wall with something both beautiful and useful. Choose a silent sweep movement so there is no ticking in quiet rooms, and a face in cream or soft white with clear numerals in a classic serif. Hang it alone at eye level, centre about 150 cm from the floor, or centre it over a console with 20 to 30 cm of space between the clock bottom and the tabletop.
Wood, aged brass or matte black cases suit heritage and farmhouse rooms; avoid plastic faces that cheapen the look. The mistake to avoid is hanging the only clock where glare from a window washes out the face; check the light at different times of day. A well-made silent clock costs 35 to 70 pounds or dollars and needs only a battery change once a year.
18. Arrange Dried Branches in a Tall Floor Vase
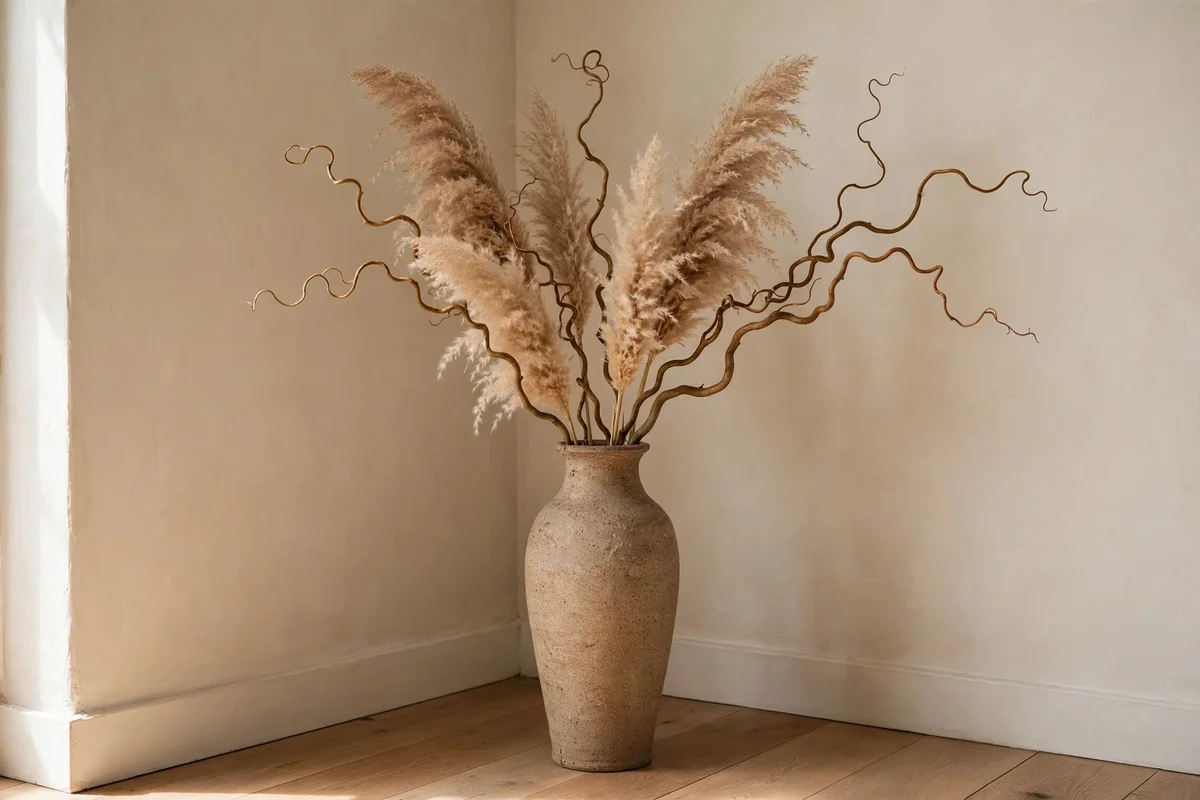
A floor vase 40 to 60 cm tall holding dried branches 100 to 130 cm long fills an empty corner or a bare stretch of wall with sculptural height. Choose pampas grass, dried eucalyptus, lunaria or curly willow, and trim stems at an angle so they fan naturally. Keep the arrangement to one or two stem types for a calm look; a jumble of five varieties reads as messy. Place the vase where it will not be brushed by passing traffic.
Dried stems last for years with a gentle shake outdoors each season to release dust. The mistake to avoid is placing dried arrangements near radiators or sunny windows, where heat makes them brittle and colours fade fast. A sturdy ceramic or stoneware vase plus a generous bunch of stems usually costs 30 to 60 pounds or dollars.
19. Fix a Peg Rail With Hooks for Hats, Bags and Baskets
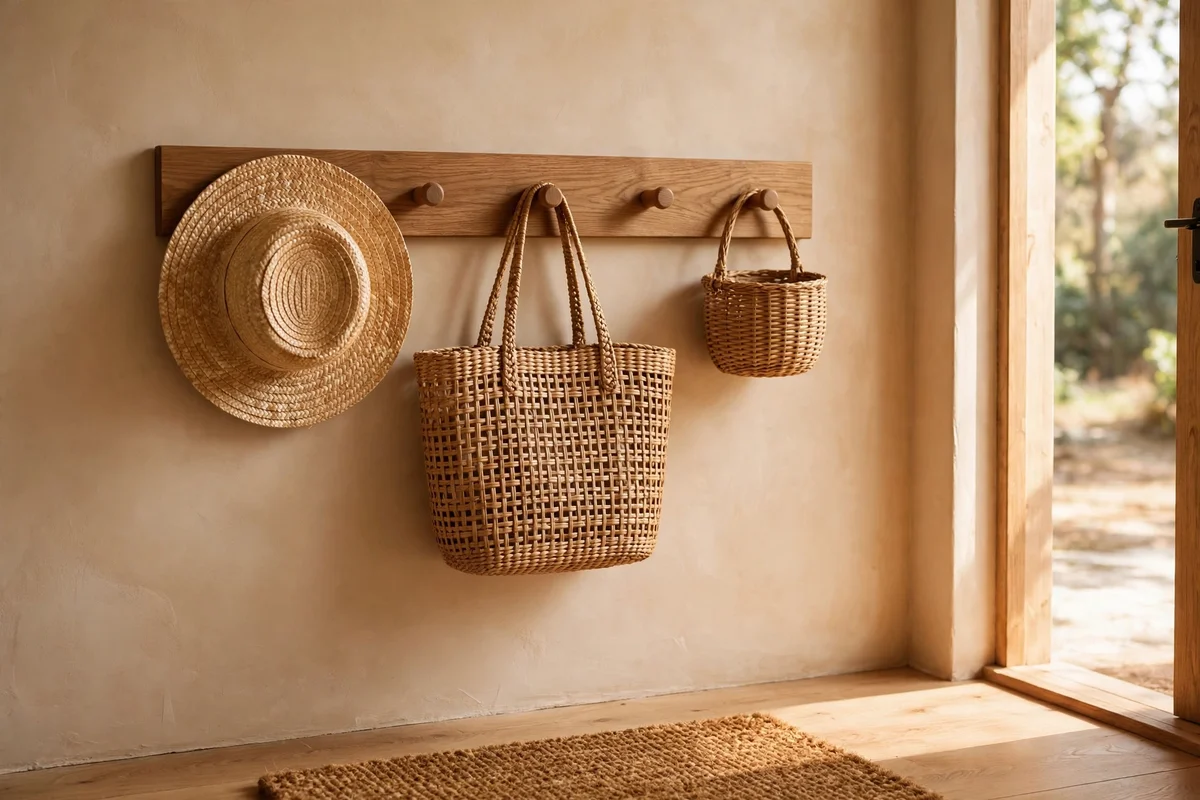
A wooden peg rail 100 to 150 cm long, fixed at about 160 to 170 cm high in an entryway or bedroom, turns a blank wall into hard-working storage. Space the pegs 15 to 20 cm apart and fix the rail into studs or with proper wall anchors, since a rail holding coats and bags can carry 10 kg or more. Hang a mix of useful and pretty things: a straw hat, a woven tote, a small basket and a light scarf.
Paint the rail the wall colour for a quiet look or in a contrast shade like deep green for a feature. The mistake to avoid is overloading one peg; spread weight evenly and keep heavy coats on the pegs nearest the fixings. A solid wood peg rail with six to eight pegs costs 20 to 40 pounds or dollars and installs in under an hour.
20. Display Six Framed Botanical Prints in a Tidy Grid
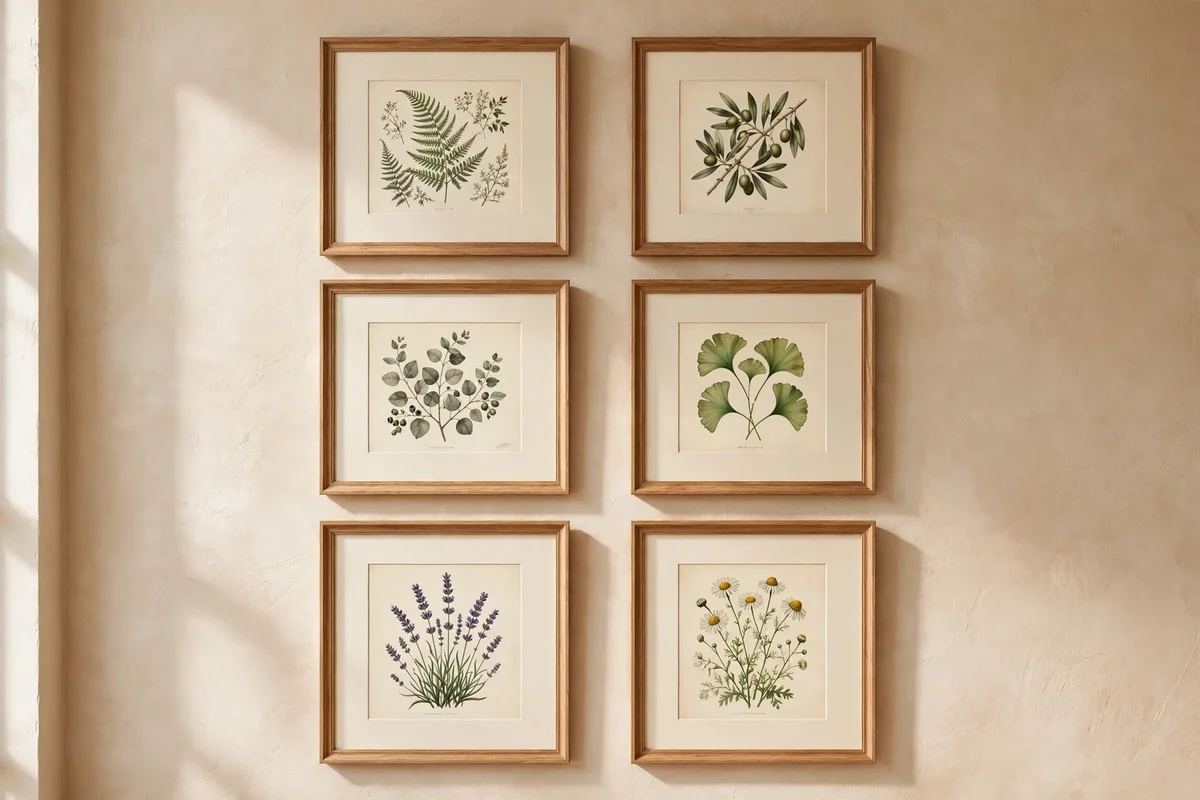
Six matching frames, each 30 by 40 cm with a wide cream mat, hung in a two-by-three grid make one of the calmest statements a blank wall can carry. Keep 5 cm gaps between frames so the whole grid measures about 95 by 130 cm, and hang it so the grid centre sits 150 cm from the floor. Botanical studies, pressed leaf prints or simple line drawings of plants suit the format beautifully.
Use a paper template the size of the full grid, taped to the wall first, to get spacing perfect before any holes. The mistake to avoid is mixing frame colours within the grid; one finish, oak, black or white, keeps the rhythm crisp. Six prints with mats and frames usually cost 70 to 130 pounds or dollars, less if you print at home and buy frames in a multipack.
21. Fill an Empty Corner With an Armchair, a Lamp and One Print
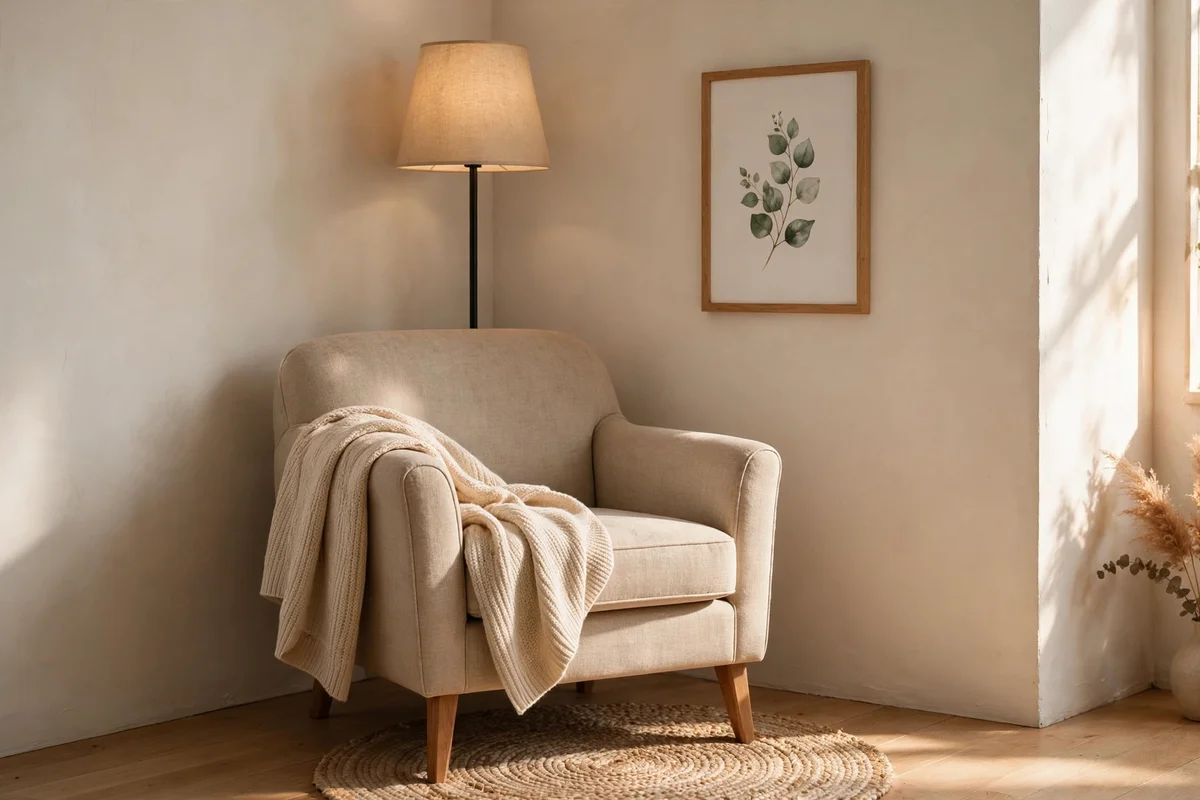
A bare corner becomes a reading spot with three pieces: a comfortable armchair pulled 10 to 15 cm out from the corner, a floor lamp about 160 cm tall behind one shoulder, and a single framed print 50 by 70 cm hung on the wall beside it at eye level. Lay a small round rug about 120 cm across under the chair to define the zone. The chair angled slightly into the room feels welcoming rather than pushed away.
Choose a warm 2700K bulb in the lamp and a shade that throws light down onto the chair for evening reading. The mistake to avoid is pushing every piece flat against the walls; the small gap behind the chair creates shadow and depth that make the corner feel designed. A second-hand armchair, a simple lamp and one frame often total 100 to 200 pounds or dollars.
22. Mount a Small Bookshelf as a Living Wall of Books
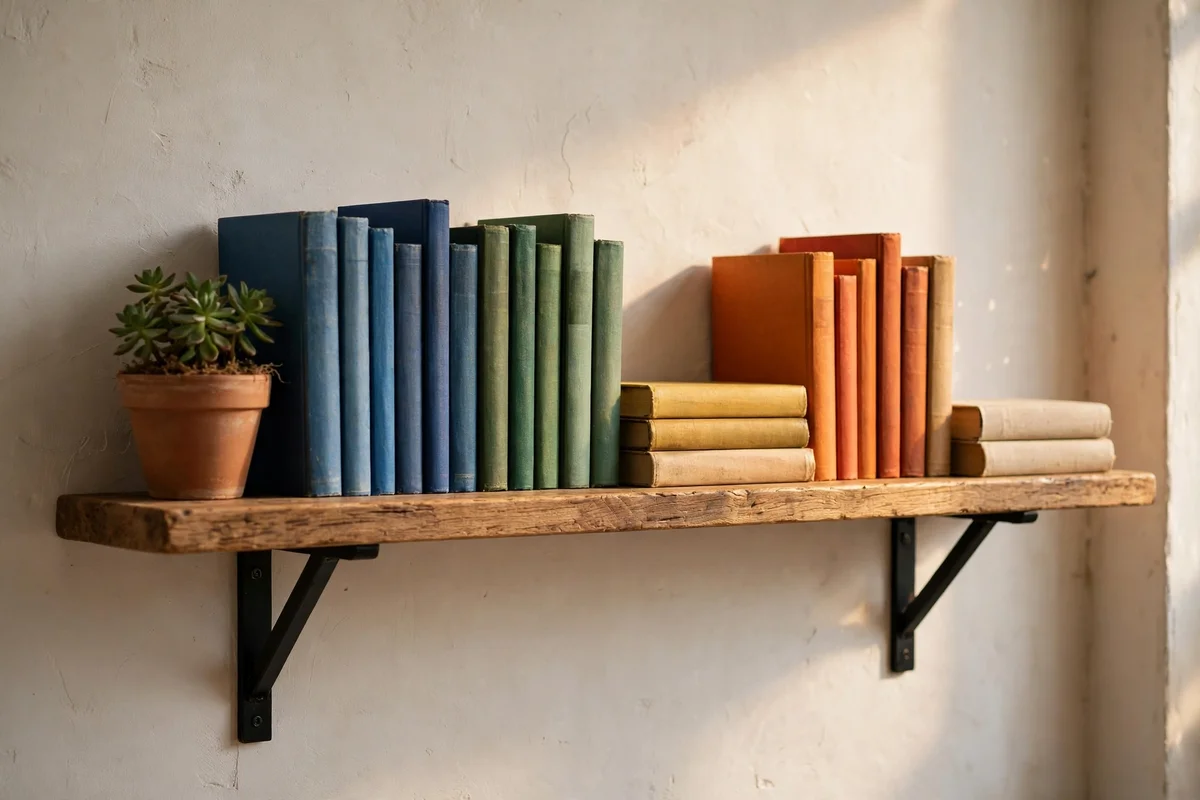
A single shelf 80 to 100 cm long, fixed with two sturdy brackets into studs, turns a blank wall into a small library display. Arrange books in groups by spine colour or size, mixing a few horizontal stacks with upright rows for rhythm. Leave the ends of the shelf breathing room: books should fill about two thirds of the length, with a small plant or framed photo in the remaining third.
Check the bracket rating, because a metre of books easily weighs 15 to 20 kg. The mistake to avoid is lining books edge to edge like a warehouse; the small styled gap is what makes it decor rather than storage. A solid wood shelf with brackets costs 25 to 50 pounds or dollars, and the books, of course, you already own.
23. Hang a Round Jute Mirror With a Dried Wreath Beneath
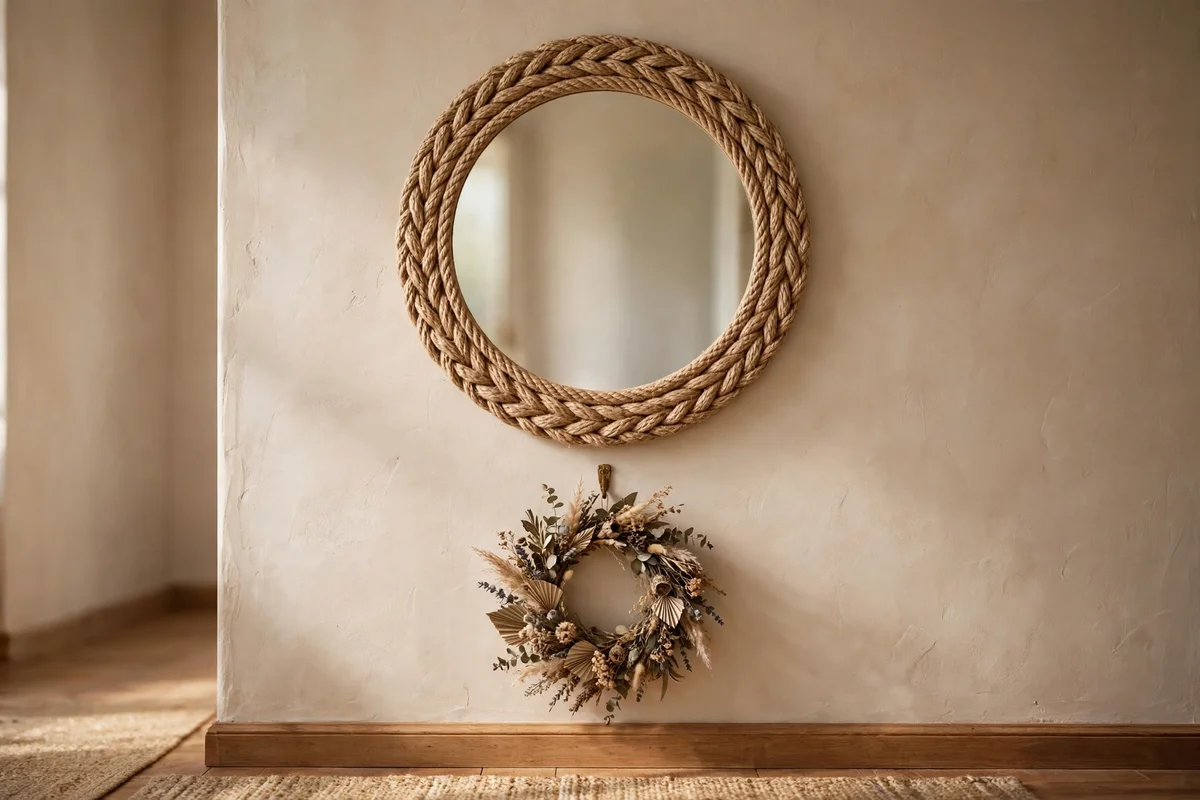
A round mirror 50 to 60 cm across in a natural jute or rattan frame brings warmth to hallways, bathrooms and bedrooms alike. Hang it at eye level, centre about 150 cm from the floor, then hang a simple dried wreath 30 to 40 cm across about 20 cm below the mirror’s bottom edge. The pairing gives the wall two layers, reflection above and texture below, without any drilling beyond two small hooks.
Choose wreaths of dried lavender, wheat or lunaria, and keep them out of steamy bathrooms where they will droop. The mistake to avoid is hanging the wreath so close it touches the mirror frame; the 20 cm gap keeps each piece distinct. A jute mirror plus a dried wreath usually costs 40 to 80 pounds or dollars.
24. Paint a Warm Colour Block, Then Hang One Simple Frame
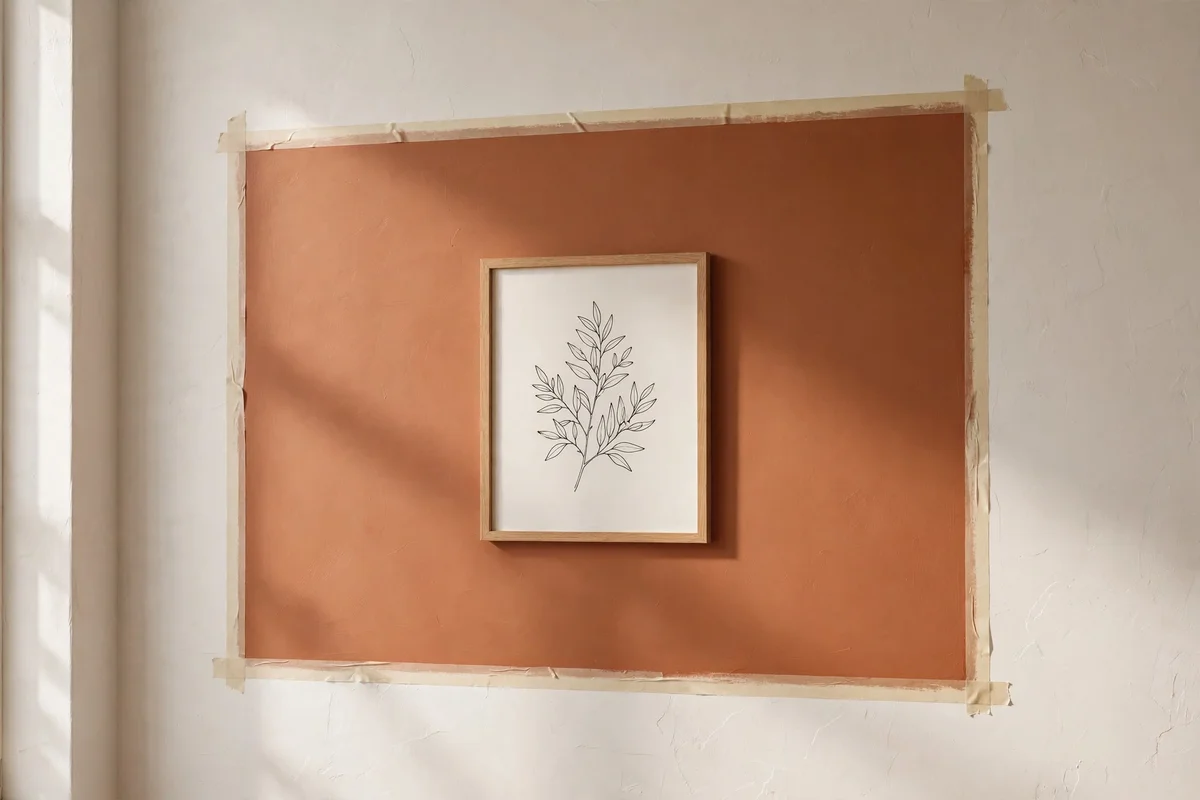
Paint a large rectangle, about 180 cm wide and 140 cm tall, in a warm clay, sage or ochre on the lower middle of the wall, then hang a single simple frame centred within it. The colour block acts like a giant mat, giving one modest print the presence of a much larger piece. Use low-tack tape for crisp edges and two thin coats of matte paint, letting the first coat dry fully.
Centre the frame 150 cm from the floor and keep the painted block’s edges at least 40 cm from the wall’s edges so it reads as a deliberate panel. The mistake to avoid is choosing a paint colour that fights the art; pick the block colour from a minor tone already in the frame. A tester pot, tape and one frame make this a 25 to 45 pound or dollar project, ideal for a first decorating attempt.
Bare walls ask for less than you think. One measured choice, a ledge at the right height, a mirror flanked by sconces, a grid of six quiet prints, usually does more than a scatter of small fixes. Keep the sixty percent rule in your pocket, choose fixings that suit your home, and let each piece earn its place. Walls that feel finished are rarely full; they are simply deliberate.
This week, try the easiest win first: outline your wall with painter’s tape to the sixty percent width and live with the shape for a day. Seeing the true scale makes every later decision simpler, from frame sizes to shelf lengths. Then hang one thing, just one, inside that outline. A wall that holds a single confident choice already looks cared for, and the rest can follow in its own time.
Frequently Asked Questions
What should I put on an empty wall in a rental?
Start with pieces that need no drilling: a leaning floor mirror, a picture ledge on adhesive-rated fixings, or a woven textile on two removable hooks. Peg rails on minimal fixings and plate walls on adhesive discs also come down cleanly. Always check weight ratings, clean the wall with alcohol before applying strips, and photograph walls first. Keep filler and touch-up paint ready for the tiny holes you do make.
How do I measure a blank wall before decorating?
Measure the full wall width and multiply by 0.6 to find your target decorated width. Mark it with low-tack painter’s tape, then step back and view it from the doorway. Hang art so its centre sits 145 to 155 cm from the floor, and leave 15 to 25 cm between a tabletop and the frame above it. This ten-minute habit prevents the most common mistake: decor that is too small for the wall.
How much does it cost to decorate an empty wall?
A simple refresh costs 25 to 60 pounds or dollars: a painted arch, a plate wall from second-hand finds, or a peg rail. A mid-range wall with a mirror, sconces or floating shelves runs 70 to 150. One large canvas or a quality leaning mirror can reach 200. Buying frames in multipacks, printing at home and shopping second-hand usually halve these figures.
What are the best blank wall ideas for a narrow hallway?
Choose slim, shallow pieces that never jut into the walkway: a horizontal run of small framed prints, a peg rail for bags and hats, or a round jute mirror that reflects light. Keep frame depths under 4 cm and hang the centre line at 150 cm. In dark hallways, mirrors and warm sconce light matter more than art, since they make the whole passage feel wider and brighter.
How high should I hang pictures on a blank wall?
Centre each piece or group 145 to 155 cm from the floor, which suits average eye level. Over furniture, leave 15 to 25 cm between the tabletop and the frame’s bottom edge. On stairwells, measure 150 cm above each tread nosing instead of the floor. When in doubt, hang slightly lower than feels natural; most people place art too high, which disconnects it from the furniture below.