Crafts
25 Butterfly Handprint Craft Ideas That Turn Painted Prints Into Sweet Keepsakes
By Anna Wells · · 26 min read
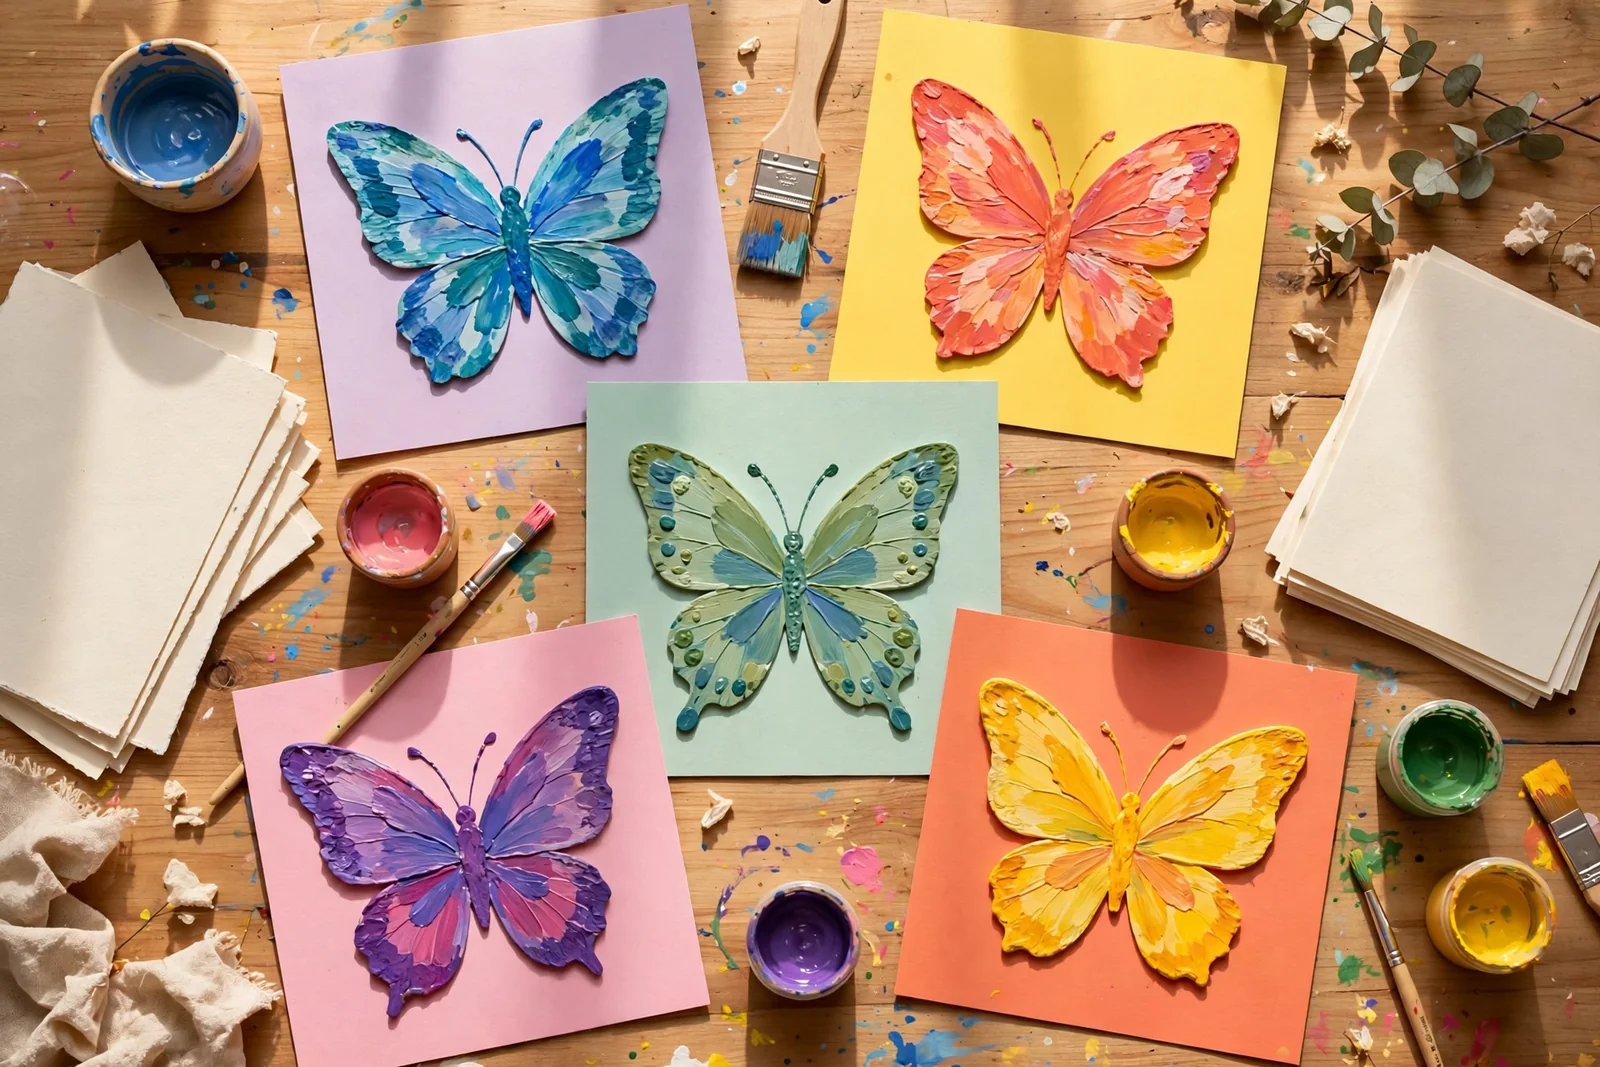
Two painted handprints, pressed side by side, become the wings of a butterfly in seconds, and these twenty-five ideas turn that simple print into canvases, cards, garlands and framed keepsakes worth keeping for years.
Few crafts capture a moment in childhood as honestly as a painted handprint, and shaping two prints into butterfly wings makes that record genuinely beautiful. Every idea in this collection starts from the same simple print, then changes one thing: the colour story, the texture, the background or the way the finished piece is displayed. That means one relaxed afternoon of printing can supply a whole season of cards, decorations and gifts.
Set up for success before the first print. Cover the table, pour paint onto paper plates, and keep a damp cloth nearby for quick wipes between colours. A sponge brush paints small palms more evenly than dipping, which keeps fingers defined and stops prints turning into blobs. Make several spare prints on extra sheets every time, because the best ones can be chosen later for framing while the spares become cards and toppers.
1. Sunrise Gradient Wings on a Small Stretched Canvas
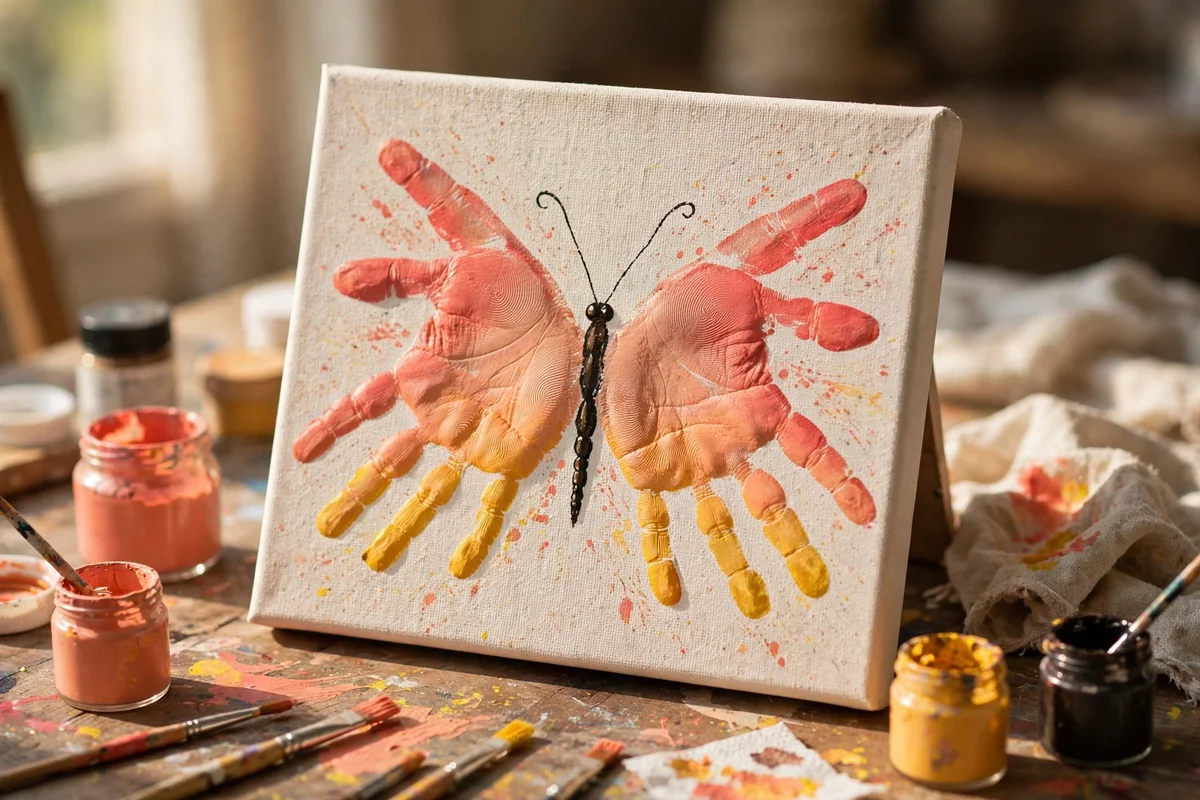
Paint one palm in coral and peach and the other in soft gold and pale yellow, blending the colours where they meet at the wrist so the wings glow like early morning light. Print onto a small stretched canvas around 20 by 25 centimetres, thumbs touching in the centre, then add a slim painted body and fine antennae once the prints are fully dry.
Canvas gives this simple craft the weight of real wall art, so it hangs happily in a bedroom or hallway for years. Leave generous white space around the wings rather than adding a busy background. A common mistake is overloading the brush, which fills the palm lines with paint; a thin, even layer pressed firmly for three seconds gives the crispest, most recognisable print.
2. Pastel Prints Framed With Real Pressed Blooms
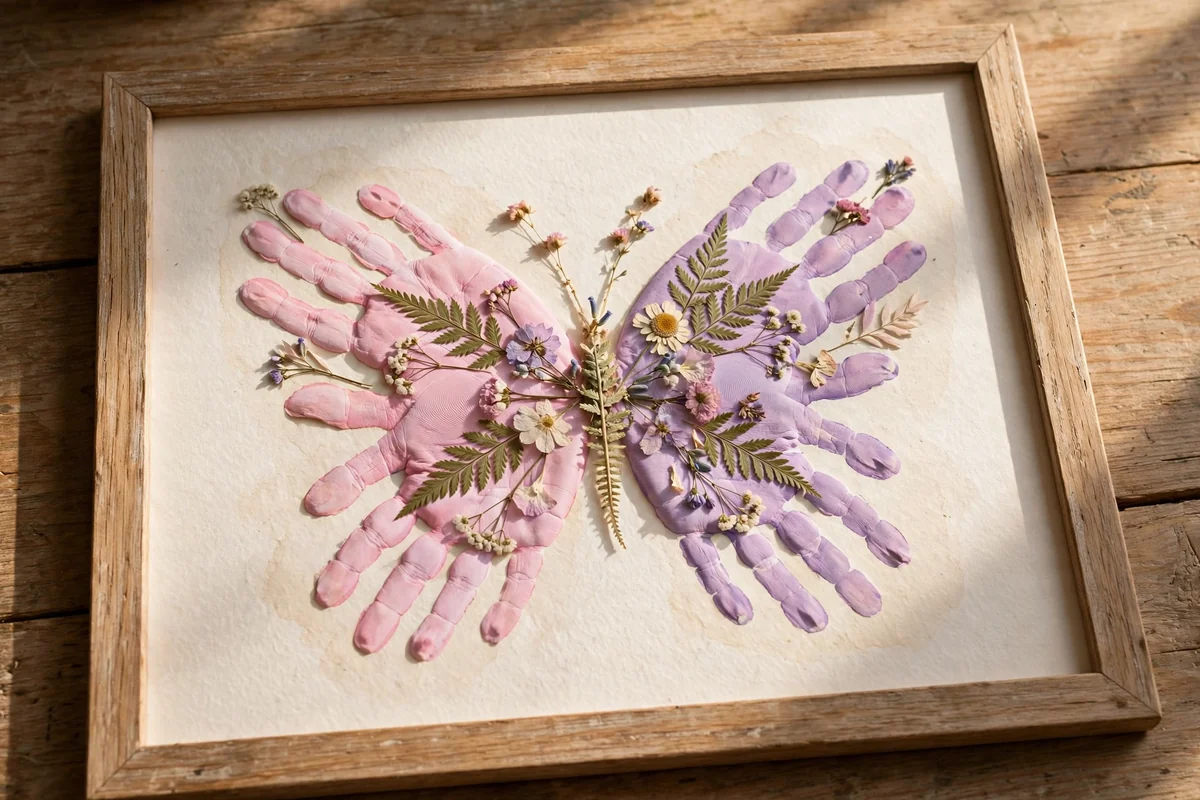
Print the wings in gentle pastel pink, lilac and powder blue on watercolour paper, then glue tiny pressed flowers across them once dry. Daisies, baby’s breath, lavender buds and small fern tips press well between book pages in about a week, and a dot of craft glue under each bloom holds them flat without covering the handprint shape beneath.
A pale watercolour wash behind the butterfly, applied before printing, gives the piece a soft, handmade calm. Frame it in a light wood or white frame around 25 by 30 centimetres and it reads almost like botanical art. Keep the finished piece out of direct sunlight, since both pressed petals and paint fade faster in strong sun, and note the date on the back for a true keepsake.
3. Torn Tissue Mosaic Wings With Layered Colour
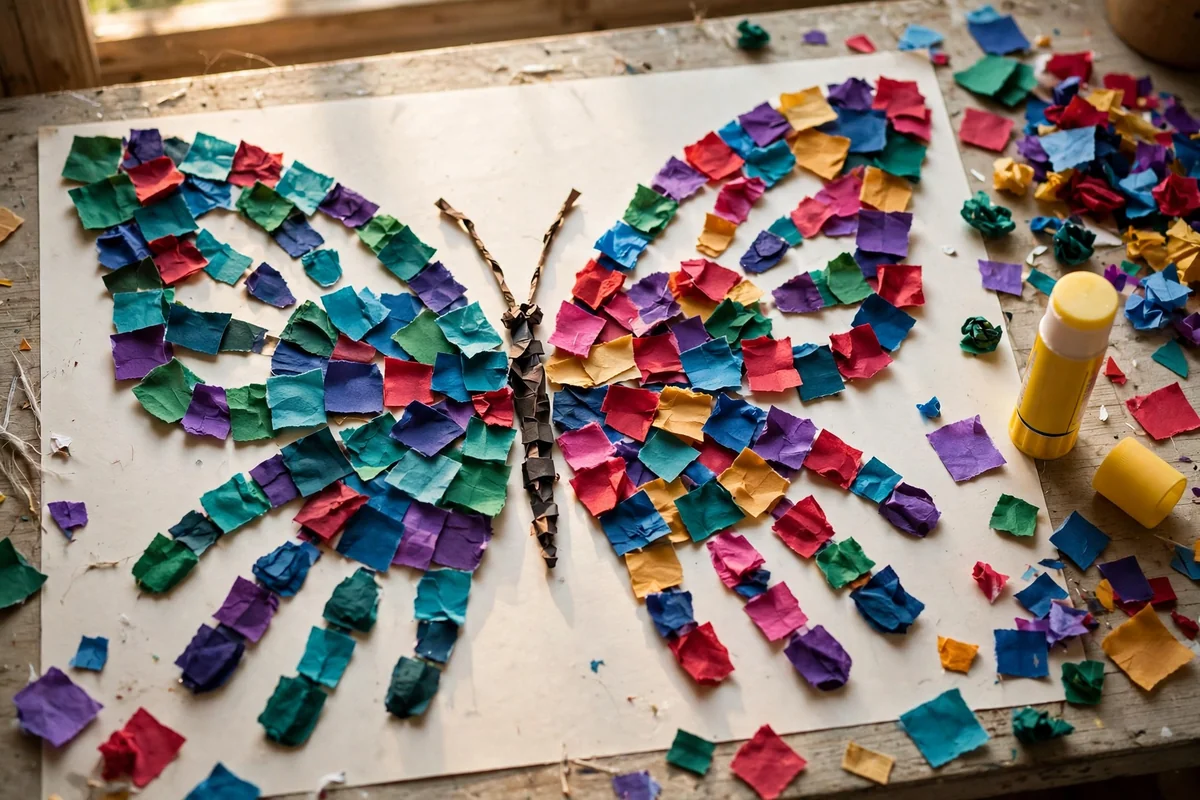
This design layers collage over painting. Start with two plain handprints in one pale base colour, then tear bright tissue paper into rough squares of about two centimetres and glue them across the wings like mosaic tiles. Overlap the pieces slightly and mix two or three shades per wing, so the surface catches the light and shimmers as you move past it.
Tissue work is forgiving and absorbing, which makes it a good choice when attention spans vary. Brush a thin layer of diluted glue over the finished mosaic to seal loose edges and add a gentle sheen. Avoid soaking the tissue, because colours bleed into each other when very wet. Bright jewel tones photograph beautifully, while an all-pastel mosaic suits a quieter nursery wall.
4. Soft Watercolour Wings Edged in Fine Gold Lines
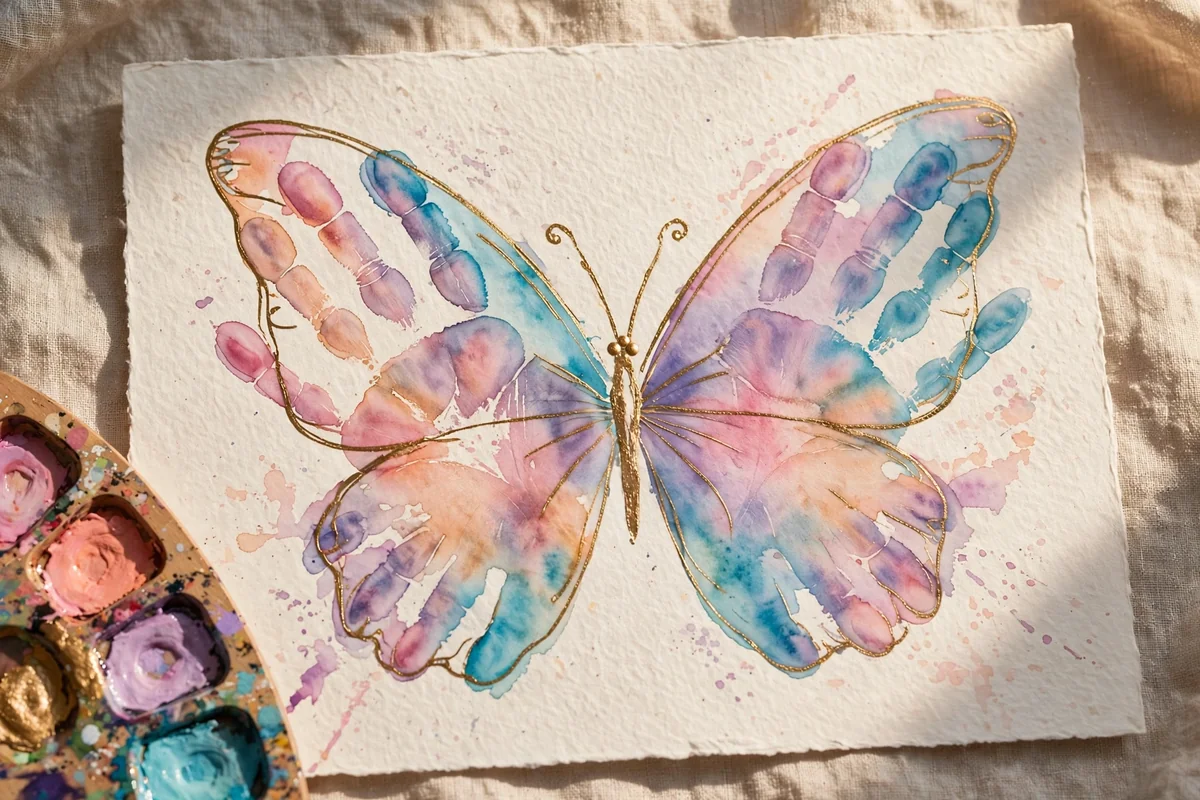
For a lighter, more delicate butterfly, trace around a dried handprint or print with very watery paint, then fill the wing shapes with soft watercolour washes. Blend pink into peach, and lavender into turquoise, letting the colours meet and bloom while wet. Watercolour paper with a slight texture holds the washes without buckling, especially if the edges are taped down while you work.
Once everything is dry, trace the outer edge of each wing with a fine metallic gold pen and add a few tiny white dots near the tips. The gold line tidies the soft edges and gives the piece a refined, almost illustrated finish. This version suits older children and adults who enjoy painting, and it frames beautifully as a calm bedroom print.
5. Leaf-Stamped Veins Over Sage and Terracotta Prints
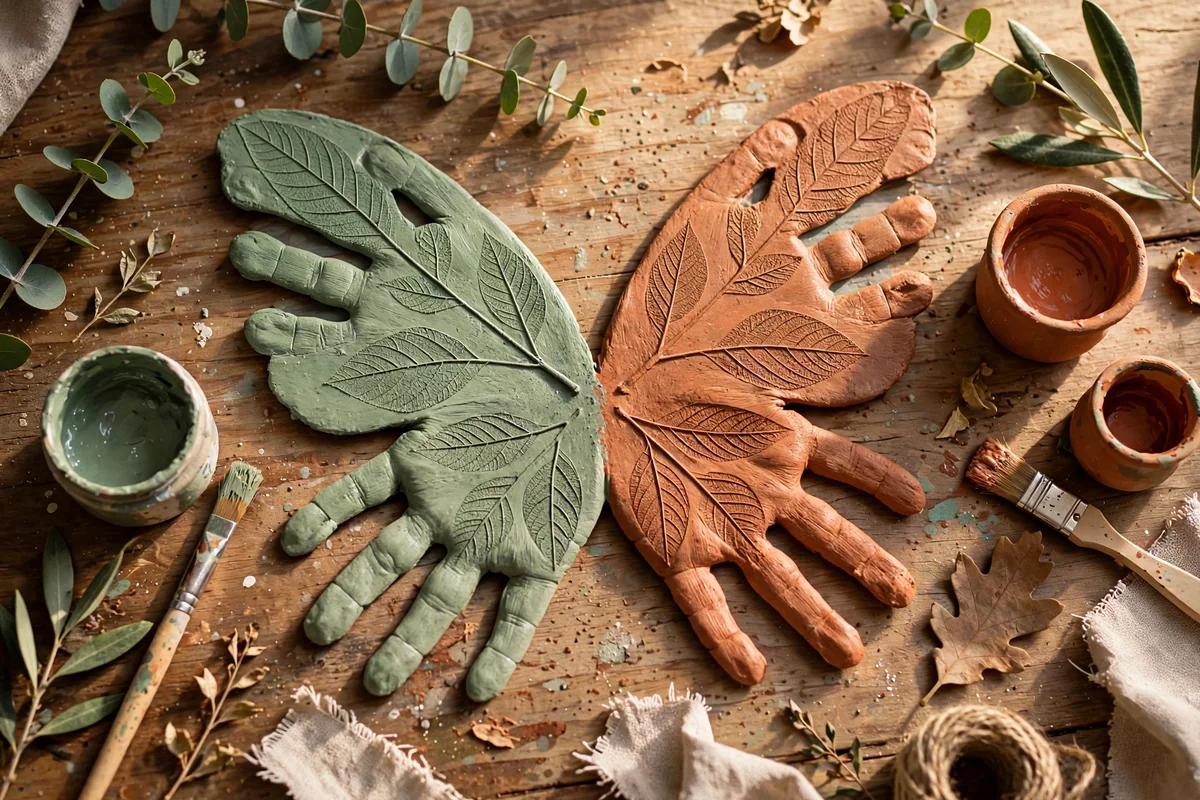
Nature provides the pattern for this earthy design. Print the wings in sage green and warm terracotta, then, while the paint is still tacky, press painted real leaves gently onto the wings and lift them away. The leaf veins stamp delicate lines across the prints, echoing the veins of a real butterfly wing in a way no brush quite manages.
Collect leaves with strong, raised veins, such as oak, fern or rose leaves, and practise on scrap paper first to judge how much paint they need. Too much paint hides the veins; too little leaves a ghost print. Earthy palettes change with the seasons, from fresh spring greens to autumn rust and ochre, so one technique can produce a whole year of distinctly different keepsake butterflies.
6. Midnight Galaxy Wings Speckled With Tiny Stars
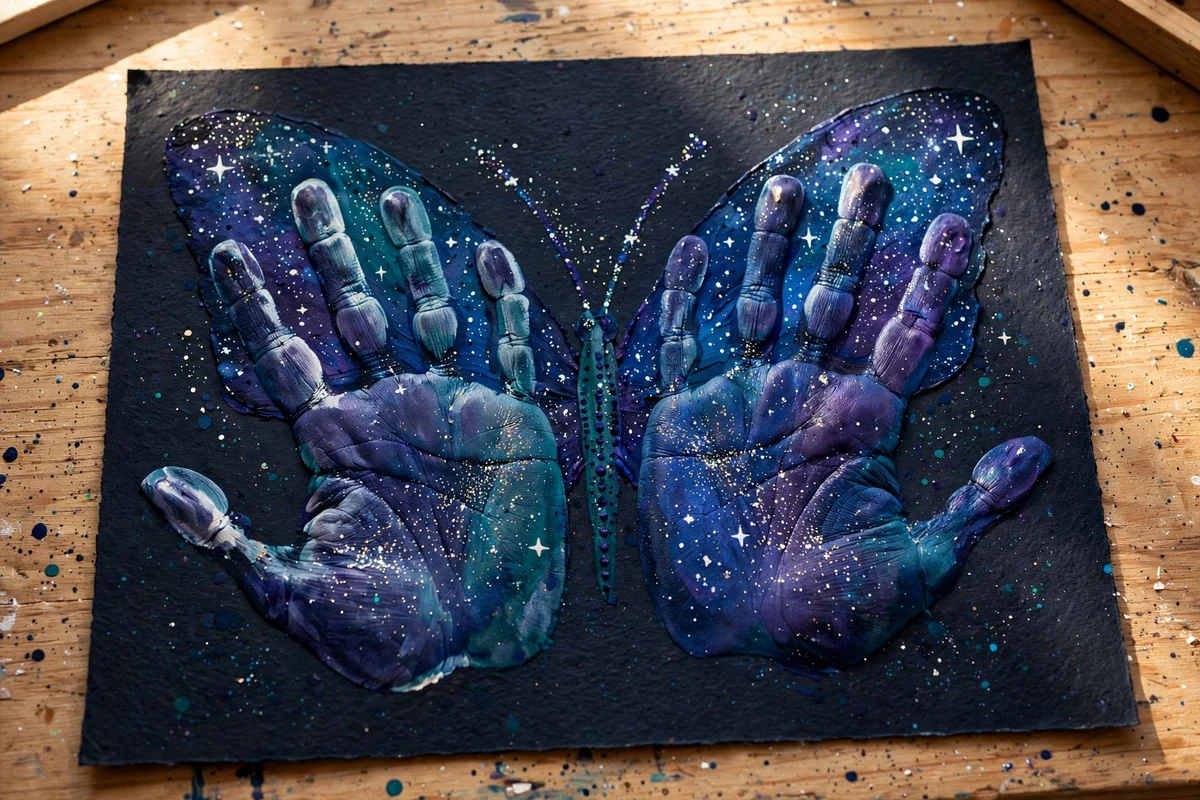
Deep, dreamy colours make this butterfly feel magical. Blend navy, violet, teal and a touch of black across the palms, print onto dark or white paper, then flick tiny white dots across the wings with a dry brush for stars. A whisper of fine iridescent glitter, shaken over while the paint is wet, adds shimmer without hiding the handprint shapes.
Restraint is the secret here. Heavy glitter quickly looks messy, while a light dusting sparkles as the light changes through the day. A thin silver outline around each wing, added with a gel pen after drying, sharpens the silhouette against the dark colours. This design glows on a bedroom wall and pairs well with the sky-wash canvas later in this list.
7. Fingerprint Dots Forming Flowers Across Each Wing
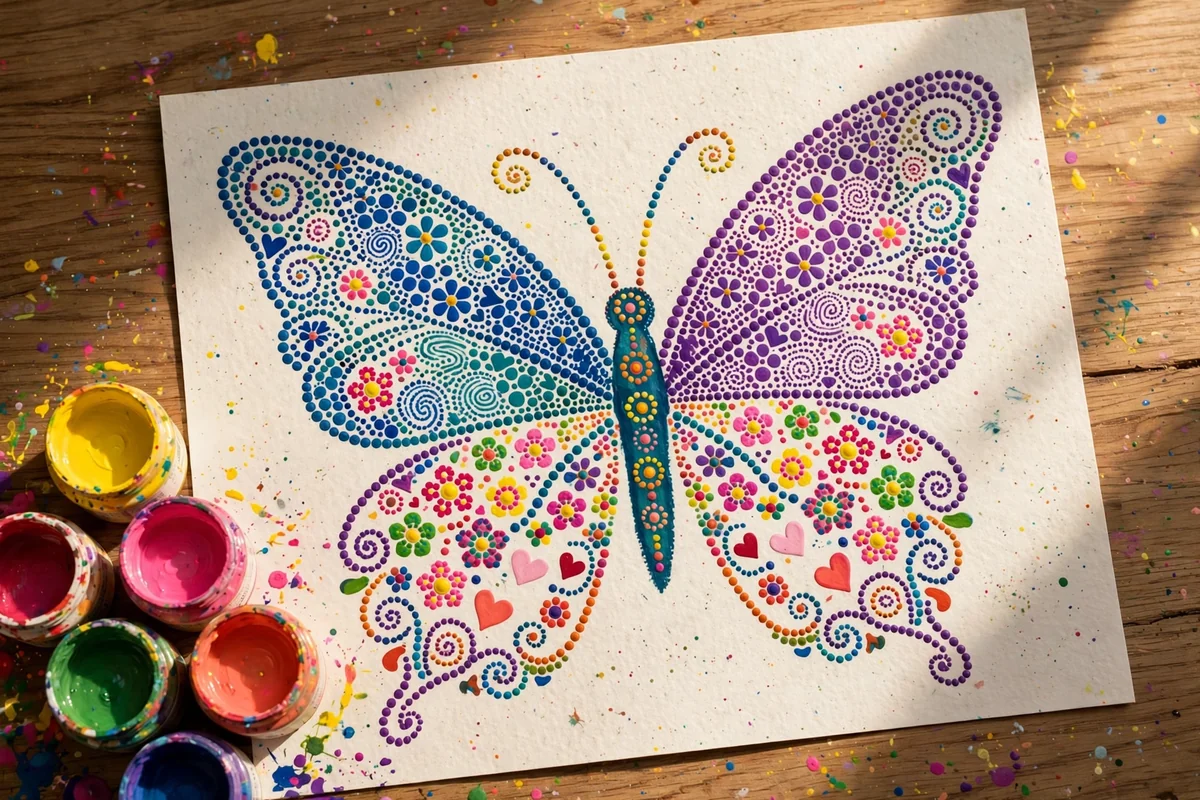
After printing two large wings in a single cheerful colour, decorate them entirely with fingerprints. Five small dots in a circle make a flower, a spiral of dots becomes a swirl, and rows of dots along the edges form a dotted border. Because the decoration uses the same fingers that made the wings, the finished piece records even more of its maker.
Fingerprinting is easy and forgiving, which suits younger children, and small imperfections only add charm. Keep a damp cloth ready so colours stay clean between dips, and press straight down without wiggling for round dots. Symmetry is optional; matching one flower on each wing looks planned, while free patterns look joyful. Seal with a clear craft spray if the piece will be handled often.
8. A Hanging Hoop Mobile of Floating Paper Butterflies
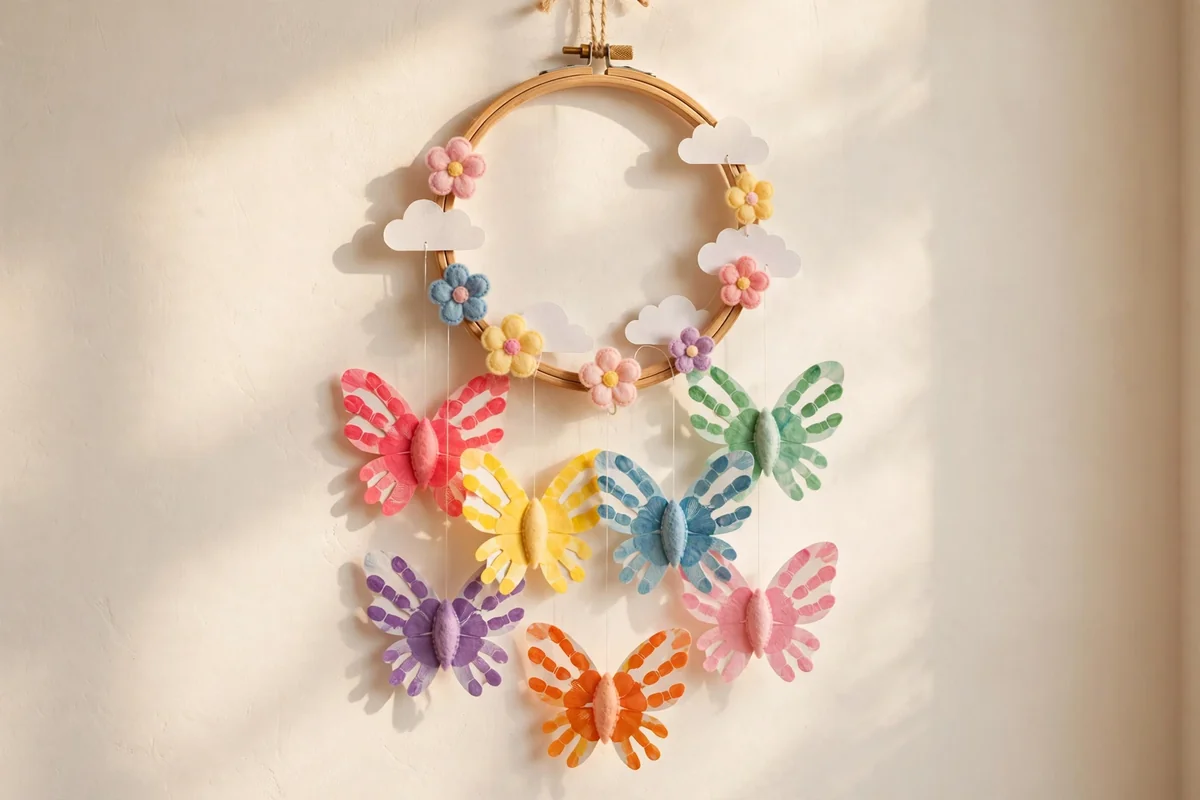
Turn several butterflies into gentle movement by building a mobile. Print butterflies in three or four colours on sturdy cardstock, cut them out when dry, and add simple painted bodies. Punch a small hole at the top of each one and hang them from a wooden embroidery hoop, around 25 centimetres across, using clear fishing line at varied lengths so they float at different heights.
Pastel sets suit a nursery, while rainbow sets cheer a playroom or classroom corner. A few paper clouds, felt flowers or paper leaves tied around the hoop complete the scene without stealing attention. Hang the mobile well out of reach of small children and away from open windows, since the butterflies spin delightfully in the slightest breeze and tangle if the lines are too long.
9. A Folded Keepsake Card With Painted Print Wings
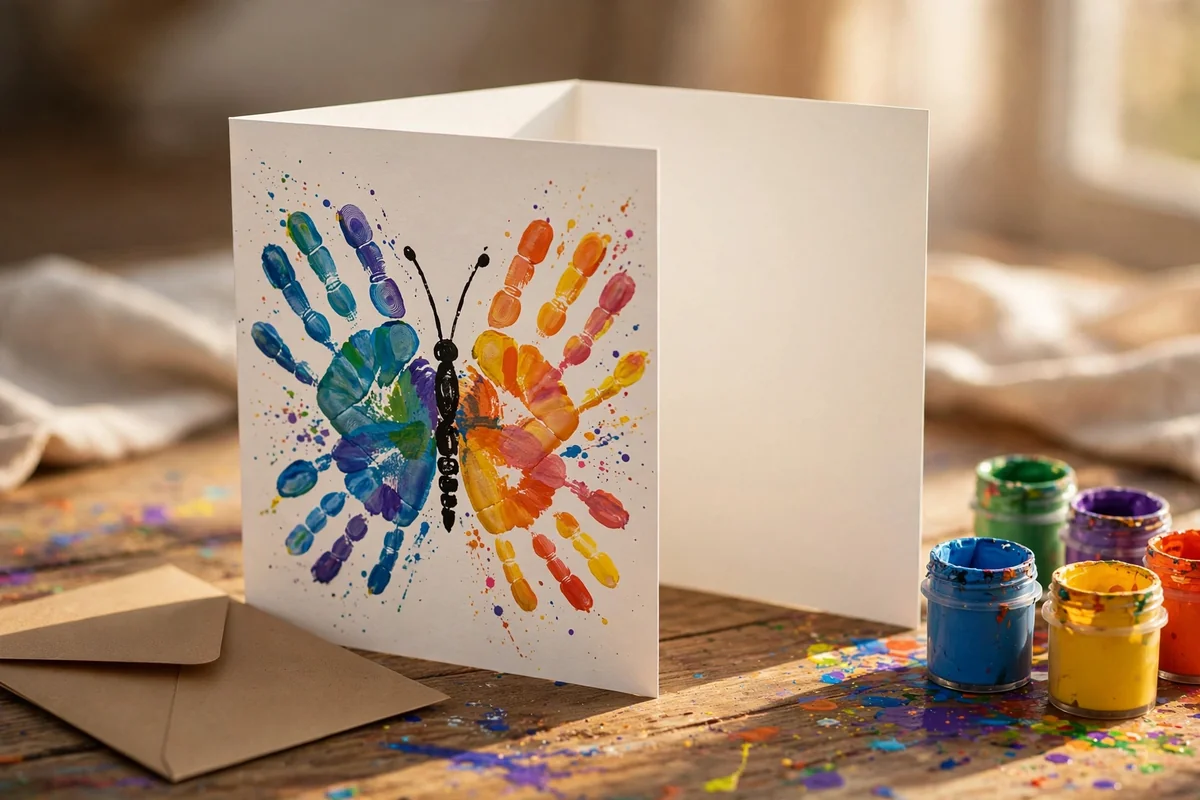
A handprint butterfly turns an ordinary folded card into something the recipient keeps. Fold thick cardstock in half, print small wings on the front cover, sized to leave a border, then paint a simple body and antennae between them. Cards around 13 by 18 centimetres give small hands enough room to print without running off the edge.
Leave the inside mostly empty for a handwritten message, or add small drawn flowers and a sun in the corners. Change the palette and the same design serves birthdays, thank-you notes and spring celebrations alike. Print a batch of wings on a quiet afternoon and store the finished cards flat in a box, ready whenever an occasion appears. Use envelopes slightly larger than the card so painted edges never catch.
10. Dyed Coffee Filter Layers Behind Cut-Out Prints
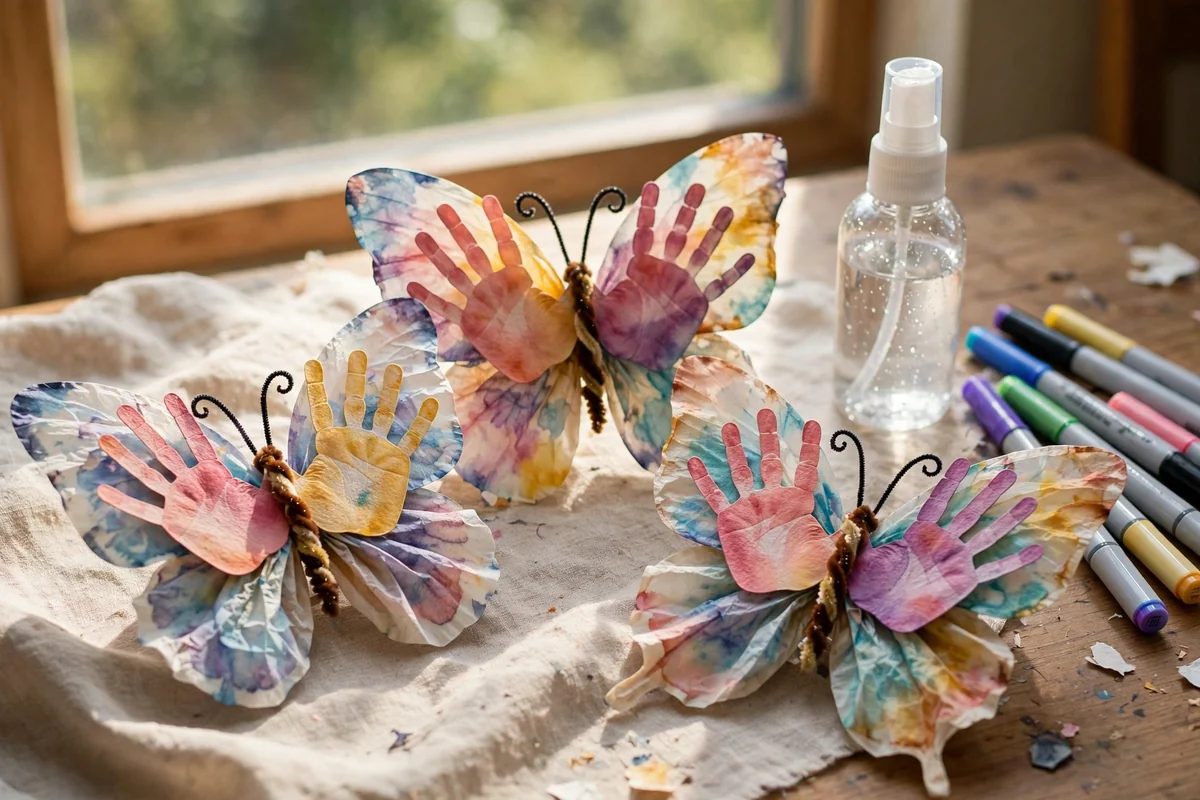
Coffee filters bring a soft, translucent glow to handprint butterflies. Colour plain filters with washable markers, mist them lightly with water, and watch the colours spread into watercolour patterns. When dry, flatten the filters and layer them behind cut-out handprint wings, so a halo of dyed colour extends beyond the painted prints like stained glass.
The layered wings gain real dimension, and they look especially lovely taped lightly to a sunny window where light shines through the filter layer. Use two filters per butterfly for stronger colour. Avoid oversaturating the filters, because very wet filters tear easily; a fine mist is enough. This is an inexpensive design, since filters cost very little and one pack supplies a whole class or family craft session.
11. Translucent Window Butterflies That Glow in Sunlight
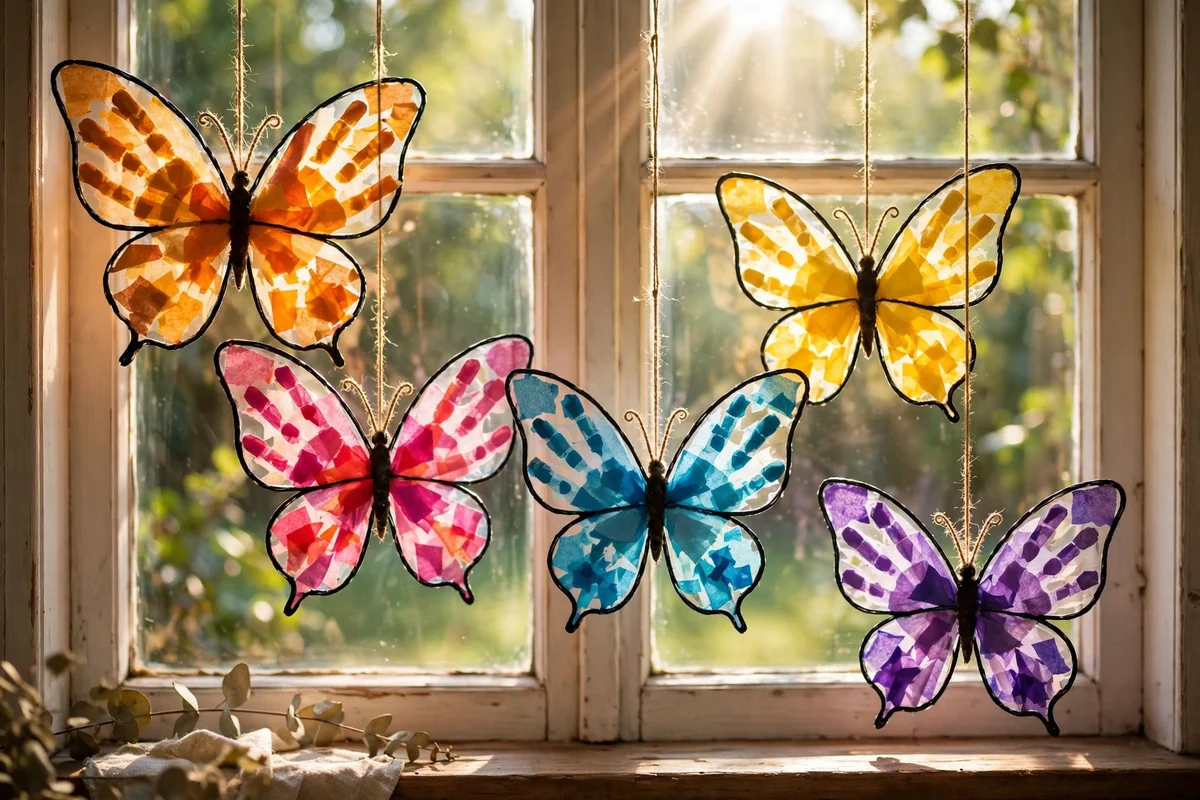
Sun catchers carry the handprint idea onto the glass itself. Trace handprint wing shapes onto clear contact paper, fill them with small pieces of coloured tissue, then seal with a second sheet of contact paper. Trim the outline, add a painted card body in the centre, and press the finished butterfly onto a clean, sunny window.
Sunlight through the tissue fills the room with soft colour, and several butterflies at different heights make a cheerful display that never blocks much light. Tissue in two or three related colours per wing looks richer than a random mix. These peel off cleanly at the end of the season, and they store flat between book pages. Keep them away from steamy bathroom windows, where moisture loosens the seal.
12. A Rainbow Garland Strung Along Twine and Pegs
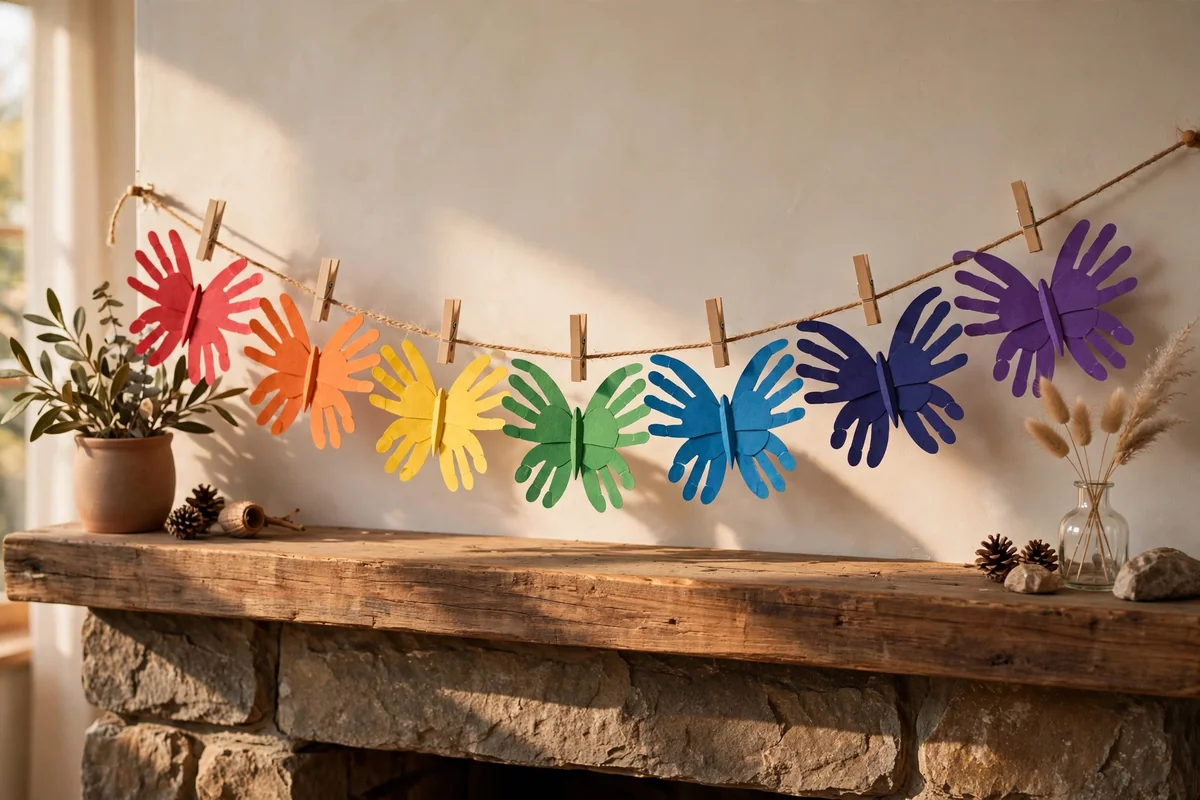
A garland shows off a whole collection at once. Print seven to nine butterflies, cut them out, and clip them along a length of twine with small wooden pegs, leaving about ten centimetres between each one so every design stands out. Arranging them in rainbow order gives the garland a planned, festive rhythm that suits birthdays, classrooms and spring mantels.
Pegs make the display easy to change, since new butterflies can replace older ones in seconds. Glue the pegs to the backs if the garland will hang where it gets bumped. For a calmer look, use one colour family in graduating shades instead of a rainbow. Measure your mantel or window first, and add a little slack so the twine drapes in a gentle curve rather than pulling tight.
13. A Painted Garden Backdrop Around One Large Butterfly
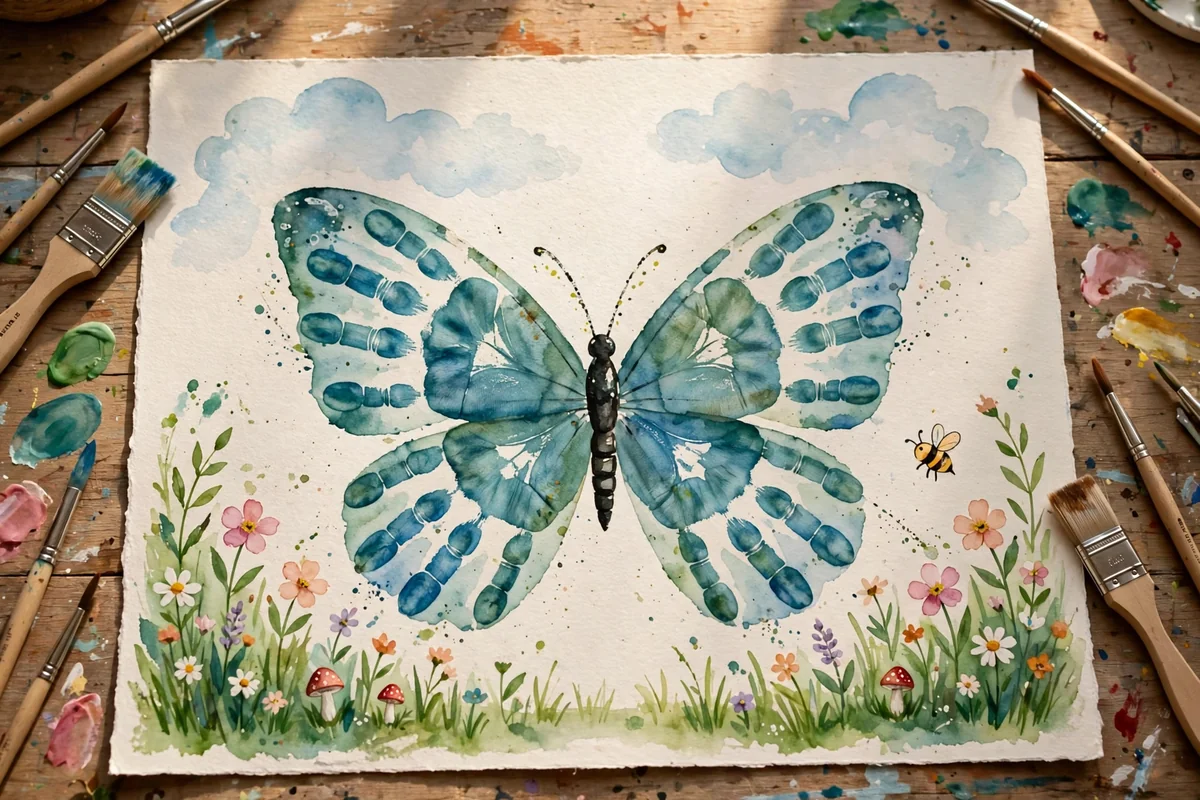
Instead of floating alone, this butterfly lives inside a painted garden. Print large wings near the top of a big sheet, around A3 size, then paint a spring scene beneath and around them: flowers on curving stems, tufts of grass, tiny mushrooms, a small bee and a dragonfly or two, plus soft clouds in a pale sky.
The scene gives children plenty to keep decorating after the prints dry, and every garden turns out differently. Keep the butterfly the largest, brightest shape so it stays the star, and use darker green along the bottom edge to ground the picture. A white border left around the edges makes the whole piece look intentional and ready to frame. This design works well as a group project on one shared sheet.
14. A Layered Butterfly Wreath for a Bedroom Door
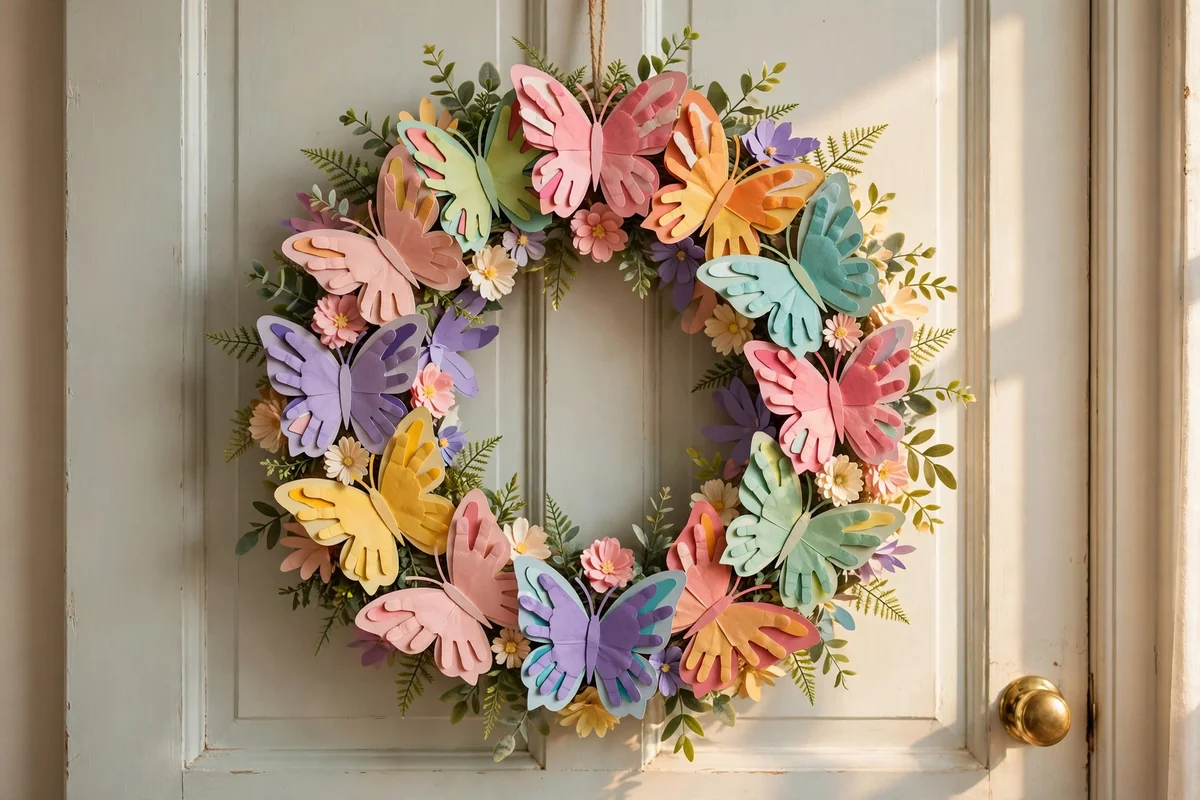
Cut a ring about 30 centimetres across from sturdy cardboard and cover it completely with handprint butterflies in varied colours, overlapping the wings slightly so no cardboard shows. The layered wings create a full, feathered effect, while each individual print stays visible. Tuck small paper flowers, faux greenery sprigs or tiny ribbon bows between the butterflies to add texture and hide any gaps.
Hang the wreath on a bedroom door, classroom wall or entryway with a wide ribbon loop. It looks surprisingly impressive for such simple supplies. Keep the colour palette to three or four shades for a composed result, and glue the first layer flat before adding a raised second layer on foam pads. Store it flat in a large bag between seasons so the wings stay crisp.
15. A Laminated Bookmark Topped With Mini Print Wings
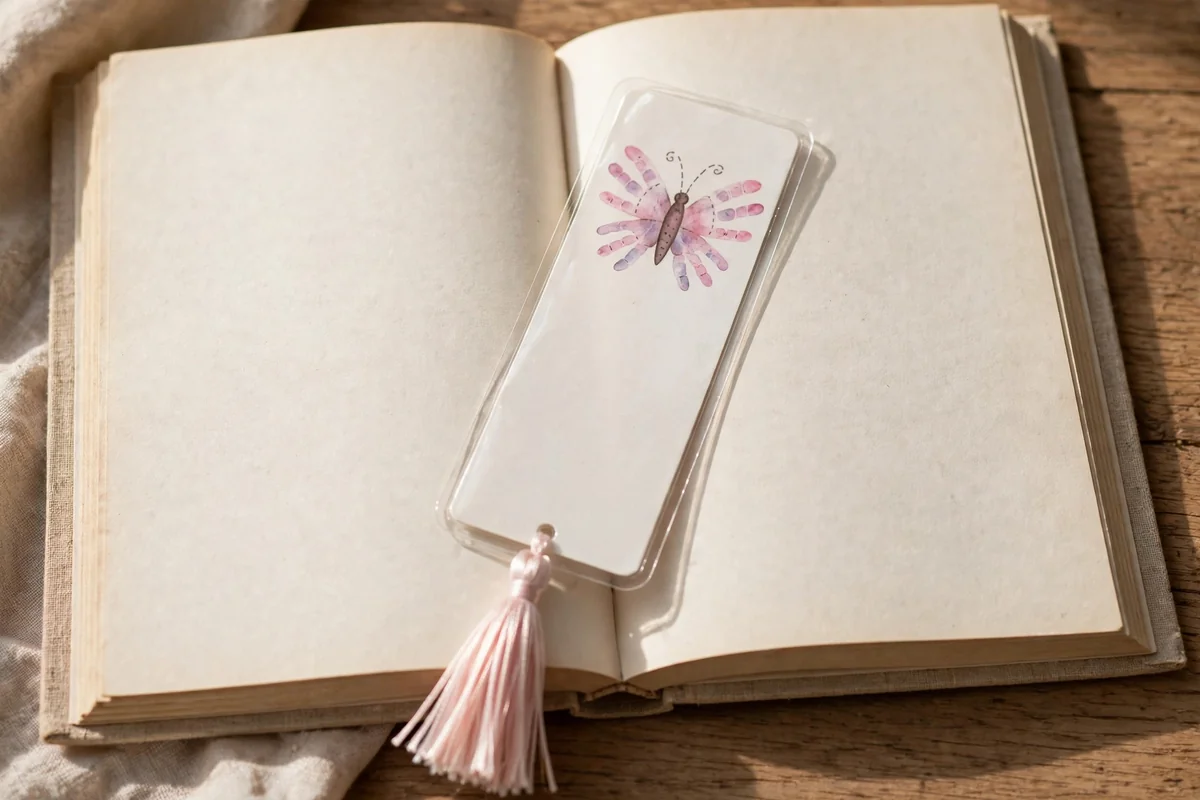
Scale the idea down for readers. Print miniature handprints on sturdy cardstock, trim them into small wings, and mount them at the top of a long bookmark strip about 5 by 18 centimetres, with a slim painted body running down the centre. Laminate the finished piece, or cover it in clear contact film, so it survives daily use between book pages.
A soft ribbon or yarn tassel through a punched hole finishes it sweetly. Decorate the wings with tiny gel pen dots or miniature flower stickers before sealing. These make thoughtful handmade gifts for teachers and grandparents, especially paired with a favourite book. Make several at once in different colourways, because the printing stage is quick and the trimming is the only slow part.
16. Dreamy Sky-Wash Canvas With Soft Cloud Edges
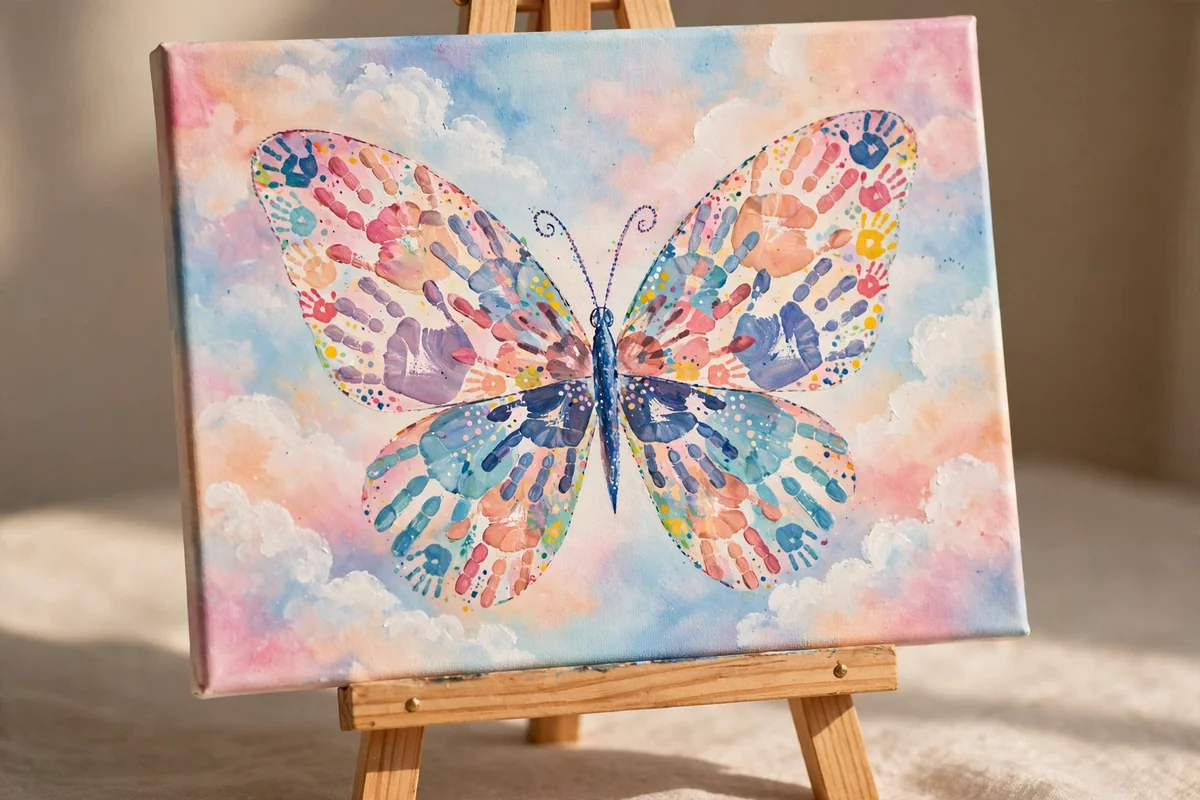
Here the background does half the storytelling. Blend a gentle sky across a canvas using pastel blue, pink, peach and lavender, letting the colours melt into one another while wet. When the sky is fully dry, print the butterfly in the centre in a stronger shade so it stands forward from the soft backdrop, then sponge white paint lightly around the edges for cloud-like highlights.
The result feels like one complete painting rather than a print on a blank ground, and it frames beautifully for a hallway gallery wall. Work on the sky first and be patient about drying, because printing onto damp paint smudges both layers. A canvas around 25 by 30 centimetres suits most hand sizes, and a matte finish keeps the dreamy softness.
17. Rustic Wings Pressed Onto Painted Recycled Cardboard
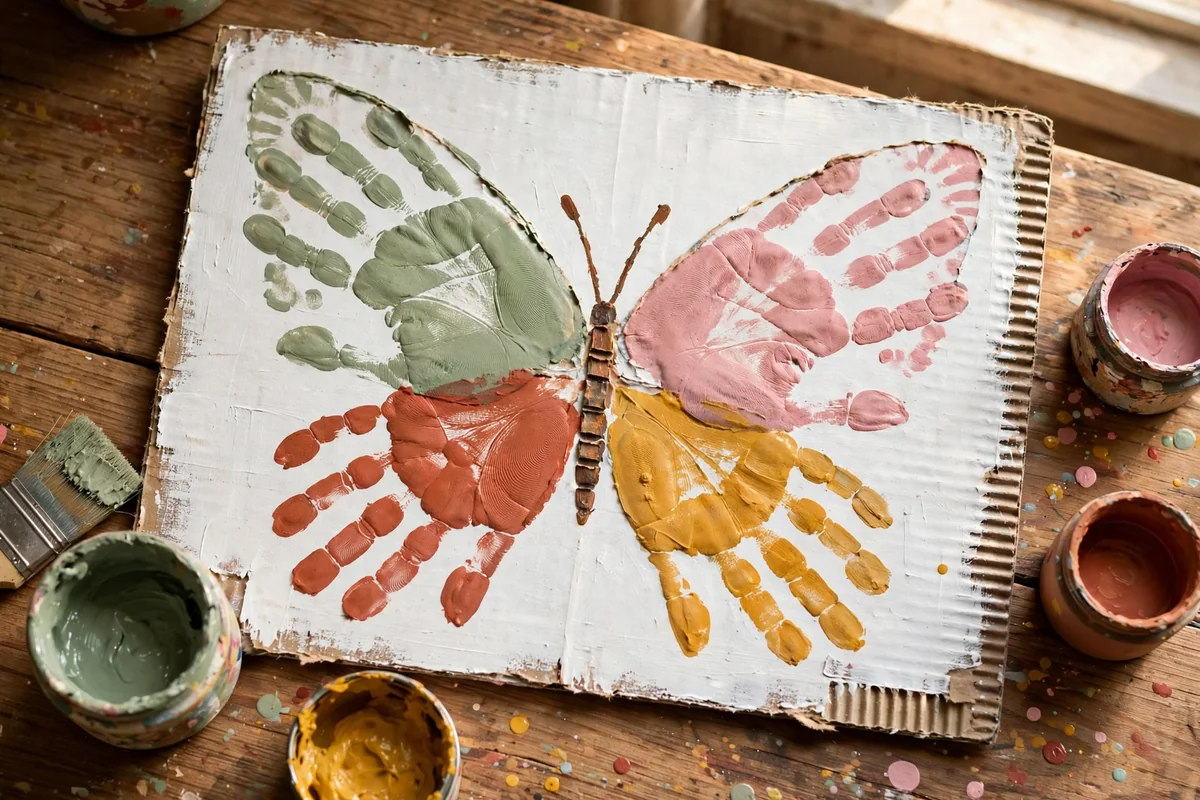
Beautiful crafts do not require expensive supplies. Cut a smooth rectangle from a clean delivery box, paint it with white or cream acrylic to make an even ground, and let it dry. Then print wings in earthy colours such as sage, mustard, terracotta, dusty pink and sky blue. The faint texture of the cardboard shows through and gives the finished piece a rustic, handmade character.
Round the cardboard corners for a softer look, and punch two holes at the top to thread twine for hanging. This design is a gentle way to talk about reusing materials while making something worth keeping. Avoid corrugated edges in the printing area, since ridges break the print; choose the smoothest panel of the box, and seal the finished piece with matte craft sealer.
18. A Scrapbook Page Built Around a Single Bold Butterfly
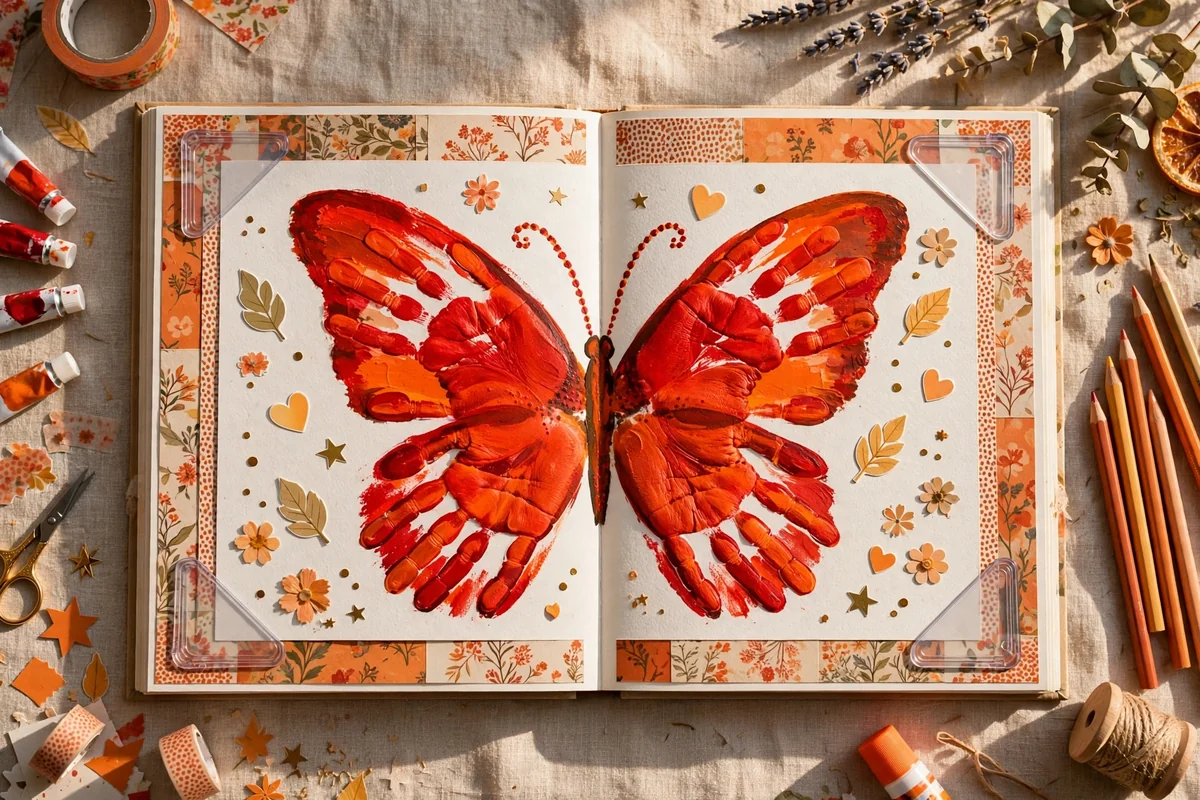
A scrapbook page preserves the print and the memories around it in one place. Print one large, bold butterfly, in a strong colour like deep red or orange, at the centre of a 30 by 30 centimetre page. Build the layout outward with patterned paper borders, washi tape strips, decorative stickers and plain photo corners left ready for pictures to be added.
This page captures both creativity and growth, since the print itself records hand size at that age. Keep the butterfly the biggest element so the page has a clear heart, and use papers that echo its colours rather than competing with them. Write the date and age in a corner with an acid-free pen. Stored in a proper album, the page stays bright and flat for decades.
19. Two-Tone Wings, Warm on One Side and Cool on the Other
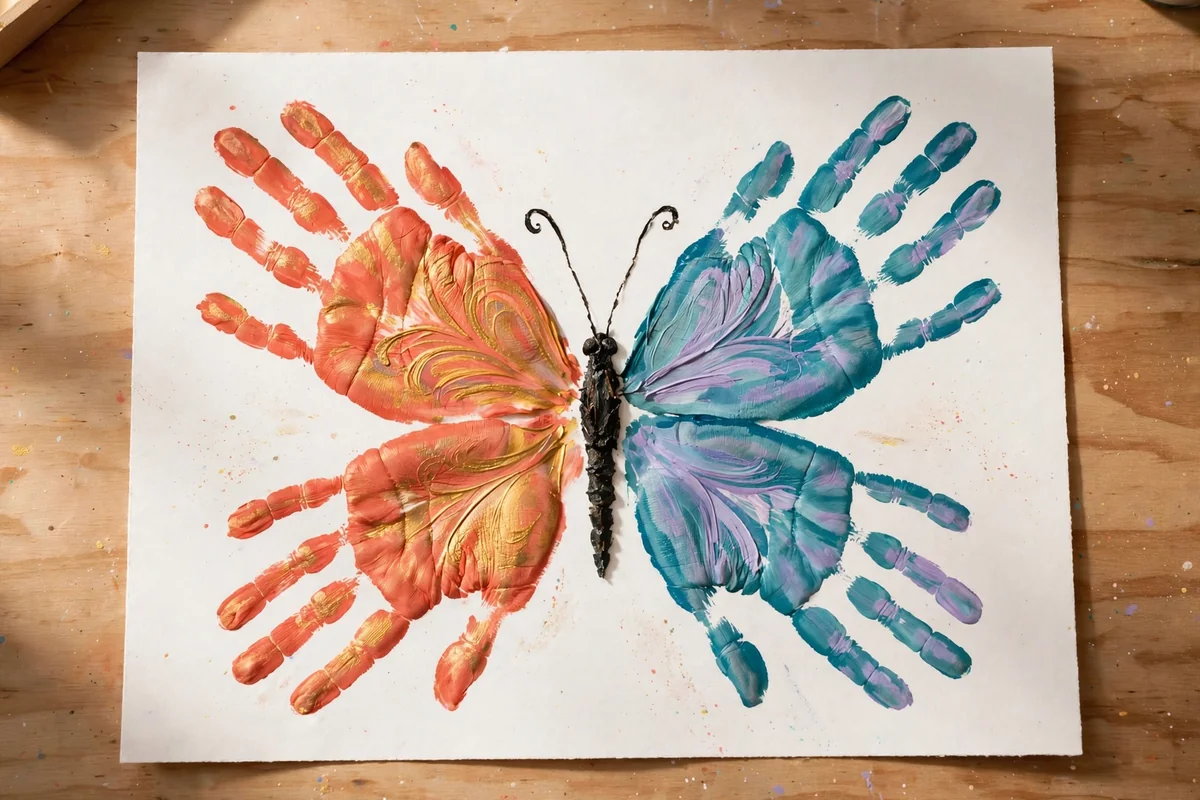
Contrast makes this simple design striking. Paint one hand in warm shades, coral, amber and gold, and the other in cool shades, teal, sky blue and lavender, then print them as mirror images with a dark painted body uniting the two halves. The warm-cool split gives the butterfly energy and makes it a gentle, hands-on way to explore colour families.
Keep the two palettes similar in strength so neither side overwhelms the other; pastel warm against pastel cool, or jewel against jewel. A thin white gap left between the prints makes the contrast cleaner. This design prints beautifully on both white and cream paper, and a series made with different warm and cool pairings creates a ready-made set for a gallery wall or classroom display.
20. Polka Dot Wings Made With Cotton Bud Dots
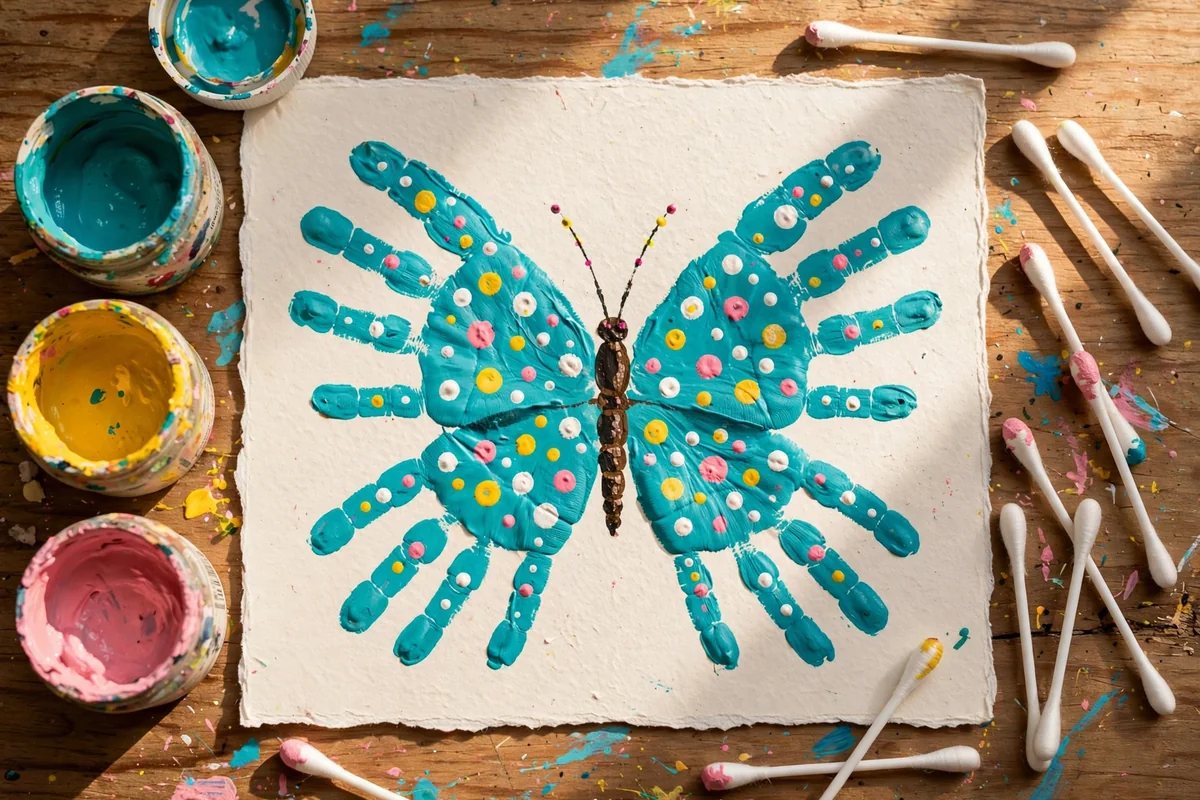
Cotton buds make perfect little paint stamps. Print the wings in a single base colour such as turquoise or coral, let them dry, then dip cotton buds in contrasting paint and dab neat polka dots across the wings. Even spacing looks tailored, while scattered dots of different sizes look playful, and metallic gold dots over a deep base colour feel quietly festive.
Work from the outer edges inward so wet dots are not smudged by resting hands, and swap to a fresh bud when the tip frays and dots lose their roundness. Two dot colours are usually enough; three can turn busy. This is a calm, absorbing design for children who enjoy repetition, and the dotted wings look charming cut out and used on cards or garlands too.
21. Tiny Butterfly Place Cards for a Garden Party Table
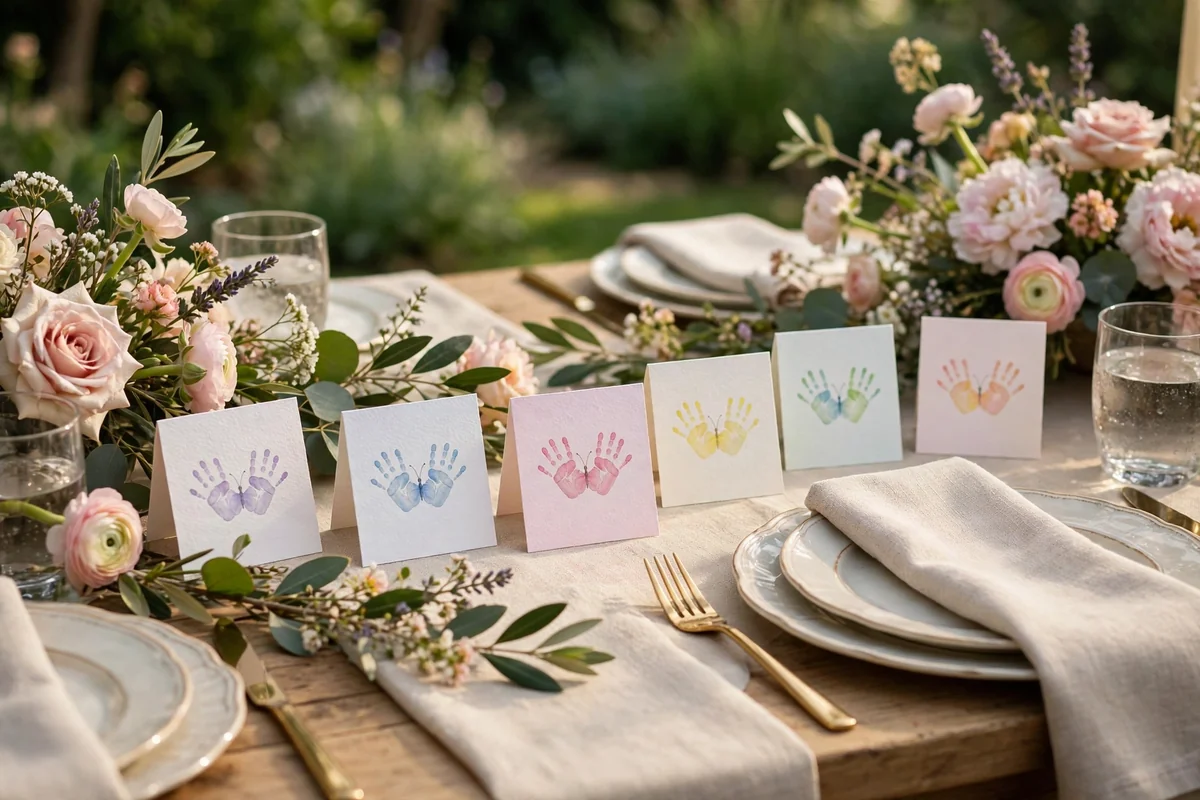
Small prints make delightful table decorations. Print miniature handprint butterflies on folded tent cards, about 9 by 5 centimetres when folded, in colours that match your party palette, then add a tiny painted body. Set one card at each place setting among the plates and flowers, leaving the front space ready for a name to be written in fine pen.
Pastel sets suit spring lunches, while gold and cream feel right for a family celebration dinner. Print the butterflies a day ahead so the paint is fully dry before handling. Guests almost always take these home, which makes them a favour and a decoration in one. Practise the small print size first, since tiny hands must press lightly to keep the finger shapes clear at this scale.
22. Mini Butterflies as Colourful Gift Wrap Toppers
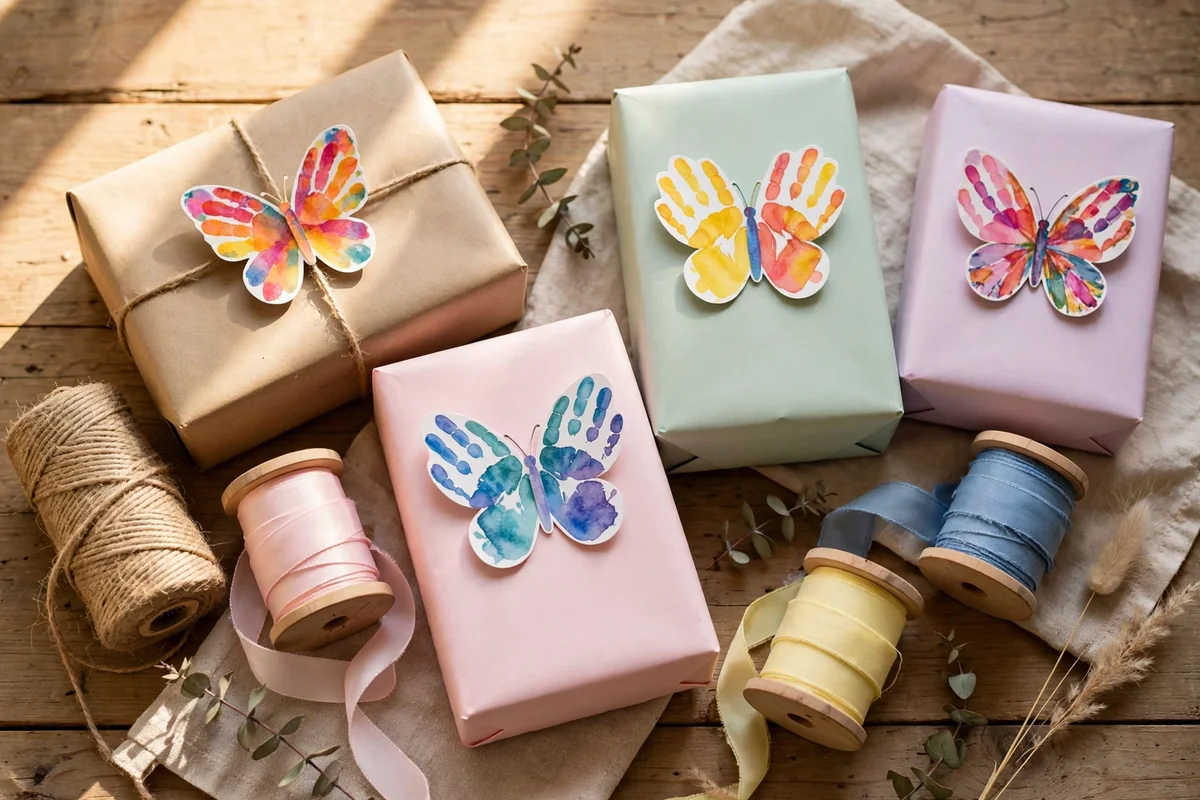
Plain wrapping paper becomes personal when a small handprint butterfly lands on top. Print butterflies on cardstock, cut them out, fold the wings upward slightly along the body line so they sit three-dimensionally, and glue or tape one to each wrapped gift. Kraft paper with a bright butterfly, or pastel paper with a deep-toned one, gives the pleasing contrast that makes the topper stand out.
Add the topper after tying any ribbon, and curve the wings gently with your fingers rather than creasing them flat. These toppers cost almost nothing when made from spare prints left over from other projects in this list. Keep a small box of finished butterflies ready in the wrapping drawer, and every plain parcel through the year can leave the house looking thoughtful.
23. Ombre Wings Blending Pink Into Lavender and Blue
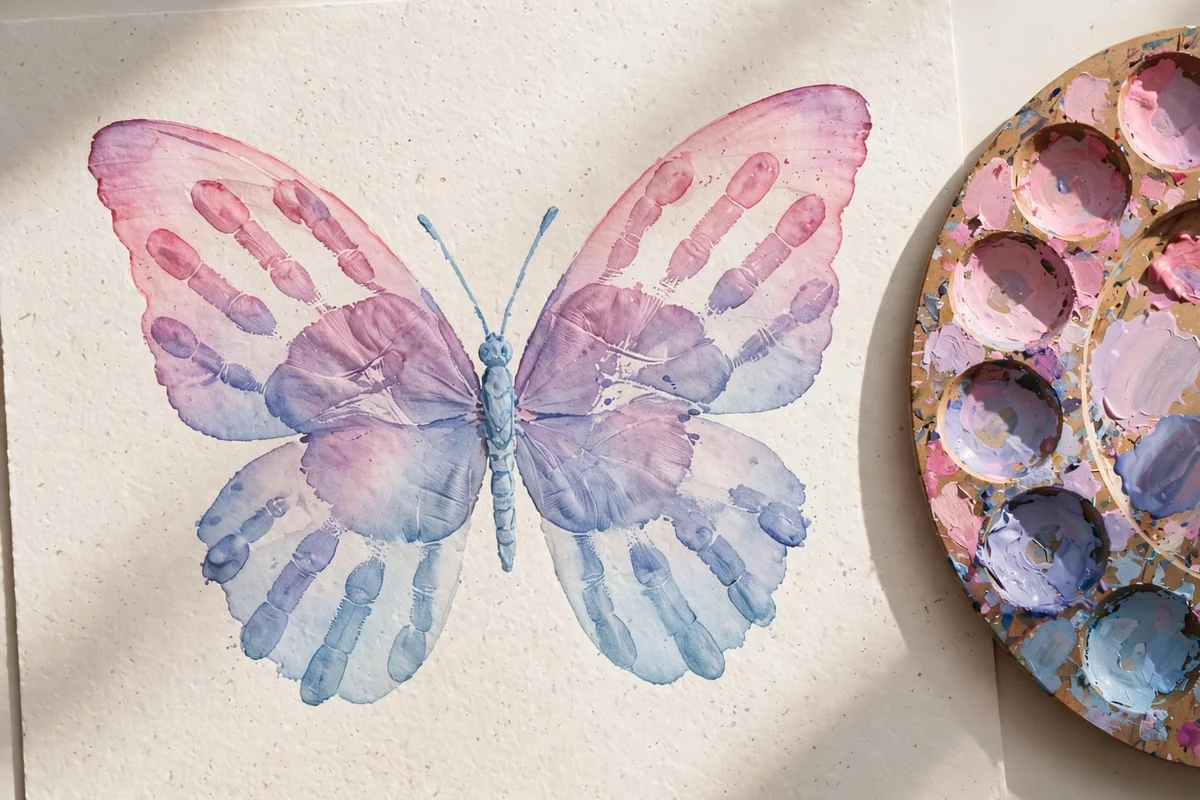
Ombre wings rely on a smooth colour journey. Stripe the palm with horizontal bands of paint, pink across the fingers, lavender through the middle of the palm and soft blue at the heel, blending each boundary with a damp brush before printing. The bands merge in the print to create wings that shade gently from one colour to the next.
Work quickly, because the stripes must still be wet when you print, and press straight down without sliding. One print per palette keeps the effect clean; muddy results usually mean the stripes were too wet or over-blended. This design looks refined on white or pale grey paper, and a matching series using different colour journeys, such as peach to pink to plum, makes a beautiful framed set.
24. A Framed Keepsake With Prints Arranged in Size Order
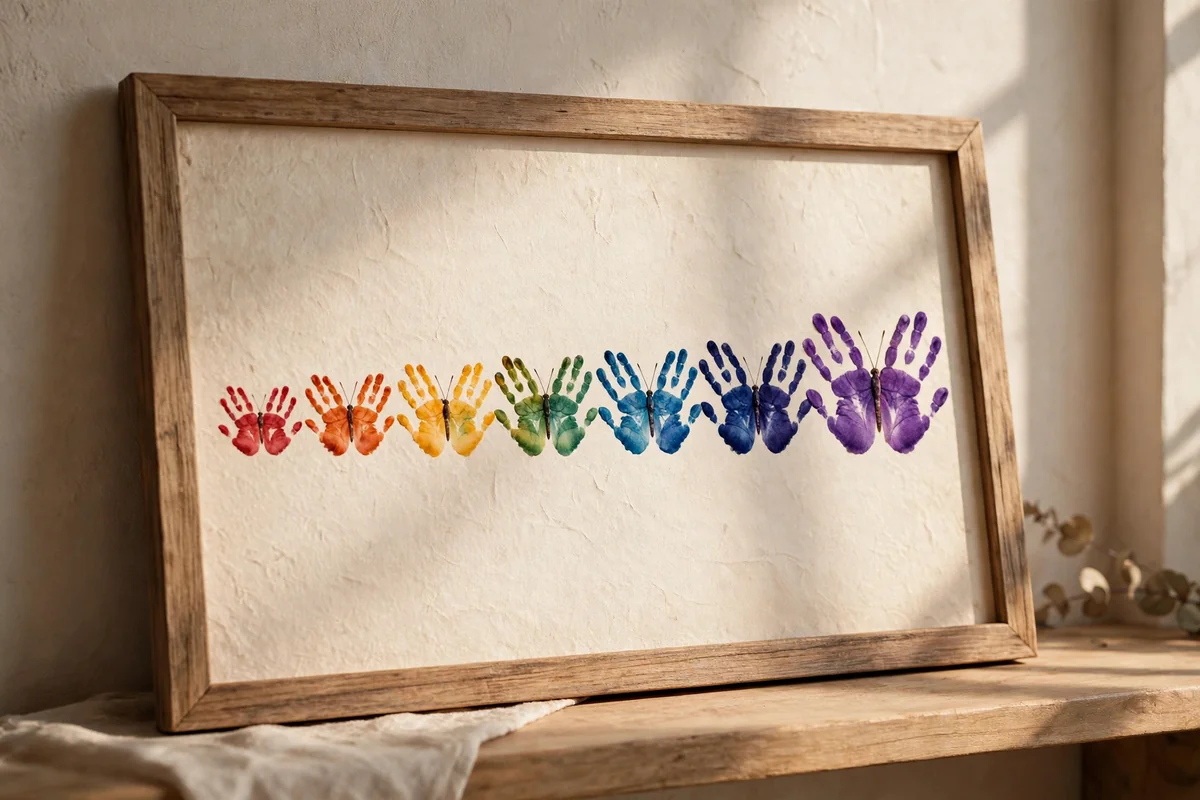
This keepsake tells a growth story in one frame. Print butterflies from every child in the family, or the same child across several years, and arrange them in a row from smallest to largest inside one long frame. Use the same colour for every print, or one shared palette, so the size progression stays the clear and touching focus of the piece.
A frame around 20 by 50 centimetres suits a row of three or four butterflies. Leave even spacing and write names or years in small letters beneath each print with an acid-free pen. This piece works beautifully in a hallway or above a family desk. If you plan yearly prints, leave the frame easy to open, or start with a frame larger than you need and grow into it.
25. A Spring Mantel Display of Leaning Finished Pieces
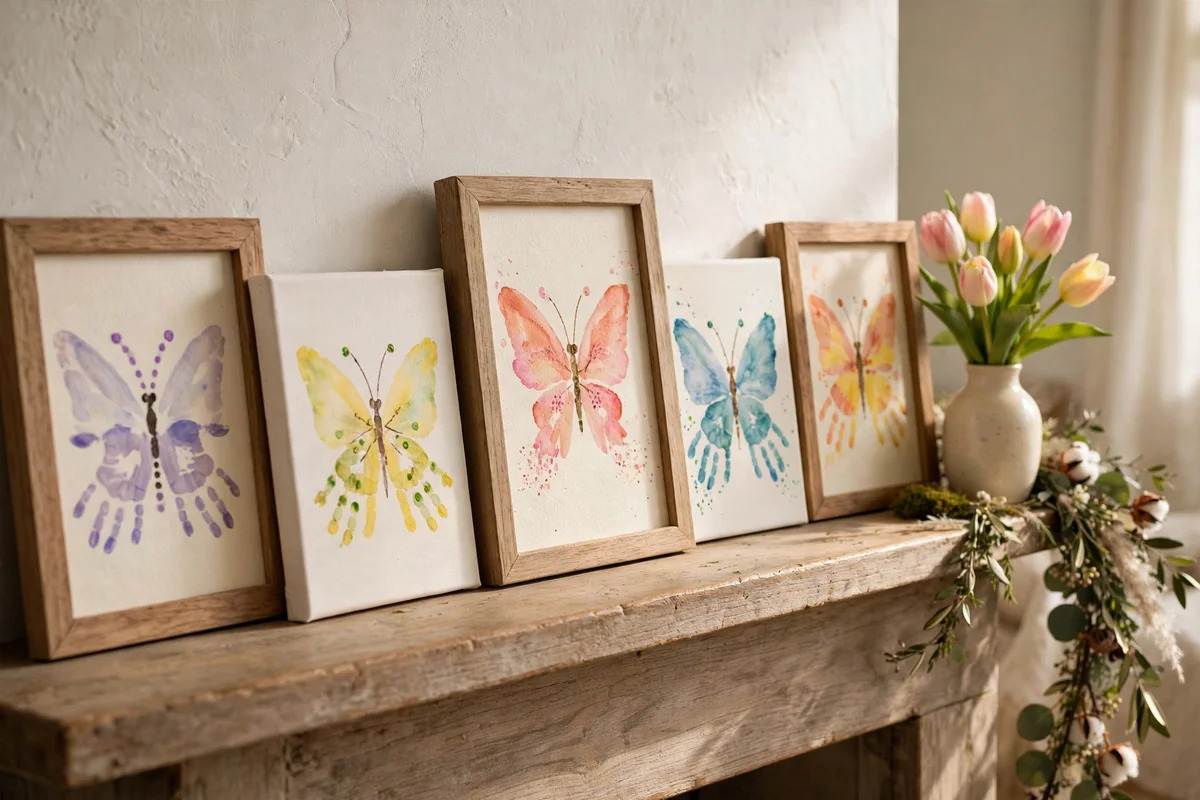
Gather your favourite finished pieces and style them together on a mantel for spring. Lean two or three framed butterflies and small canvases in a relaxed row, overlapping frames slightly, then add a small vase of tulips or daffodils and perhaps a short length of the rainbow garland from earlier in this list draped along the front edge.
Group by one shared colour story so the display feels composed rather than crowded, and vary the heights with a small stack of books under one frame. This is a satisfying way to enjoy crafts that would otherwise sit in a drawer. Keep pieces away from the heat of a working fireplace, and rotate the arrangement every few weeks, swapping in older keepsakes so the whole collection gets its turn in the light.
A Few Final Thoughts
A handprint fades from memory far faster than it fades on paper, which is why these simple butterflies are worth making properly. Choose thick paper, keep paint layers thin, let every stage dry, and display at least a few finished pieces where the family sees them daily. One relaxed printing session can fill a drawer with future cards, gifts and decorations, and each small winged print will quietly record hands that will never be that small again.
Frequently Asked Questions
What paint works best for handprint butterfly crafts?
Washable tempera and child-safe acrylic are the most practical choices, because they give strong, even colour and wash off skin with soap and water. Apply the paint with a sponge brush in a thin layer rather than dipping the hand, which keeps fingers defined. For watercolour versions, use proper watercolour paper so the washes do not wrinkle the sheet, and avoid glitter paints for the base print since the sparkle hides palm detail.
How do I get two handprints to look like butterfly wings?
Print the first hand with fingers pointing upward and angled slightly outward. Then paint the second hand and print it as a mirror image beside the first, so the two thumbs meet in the middle where the body will go. Press straight down, hold for about three seconds, and lift cleanly without sliding. Once dry, paint a slim oval body over the join and add two fine antennae to complete the butterfly.
How can I make handprint crafts last as keepsakes?
Start with acid-free paper, canvas board or cardstock, since acidic paper yellows and weakens over time. Let every layer dry completely before adding the next, and consider a light coat of clear matte sealer for unframed pieces. Framing behind glass gives the best protection of all. Store unframed work flat, between sheets of plain paper, in a dry place away from direct sunlight and damp.
What paper is best for handprint butterflies?
Thicker is better. Cardstock around 250 to 300 gsm, watercolour paper and canvas boards all hold wet paint without buckling and cut out cleanly for garlands, mobiles and toppers. Ordinary copy paper wrinkles and often tears when lifted. For window sun catchers, use clear contact paper with tissue instead. Whatever you choose, test one print on an offcut first to check how the paint behaves on that surface.
How do I display several handprint butterflies together?
Decide on one shared palette first, because coordinated colours make any grouping look intentional. Garlands and hoop mobiles suit large, light collections, while a wreath or a framed row in size order gives smaller sets more presence. On a mantel, lean framed pieces at slightly varied heights and add one natural element, such as a small vase of flowers, to soften the arrangement. Keep displays out of reach of toddlers and away from steam and direct heat.