Crafts
25 Halloween Rock Painting Ideas That Are Friendly, Bright and Easy to Love
By Anna Wells · · 20 min read
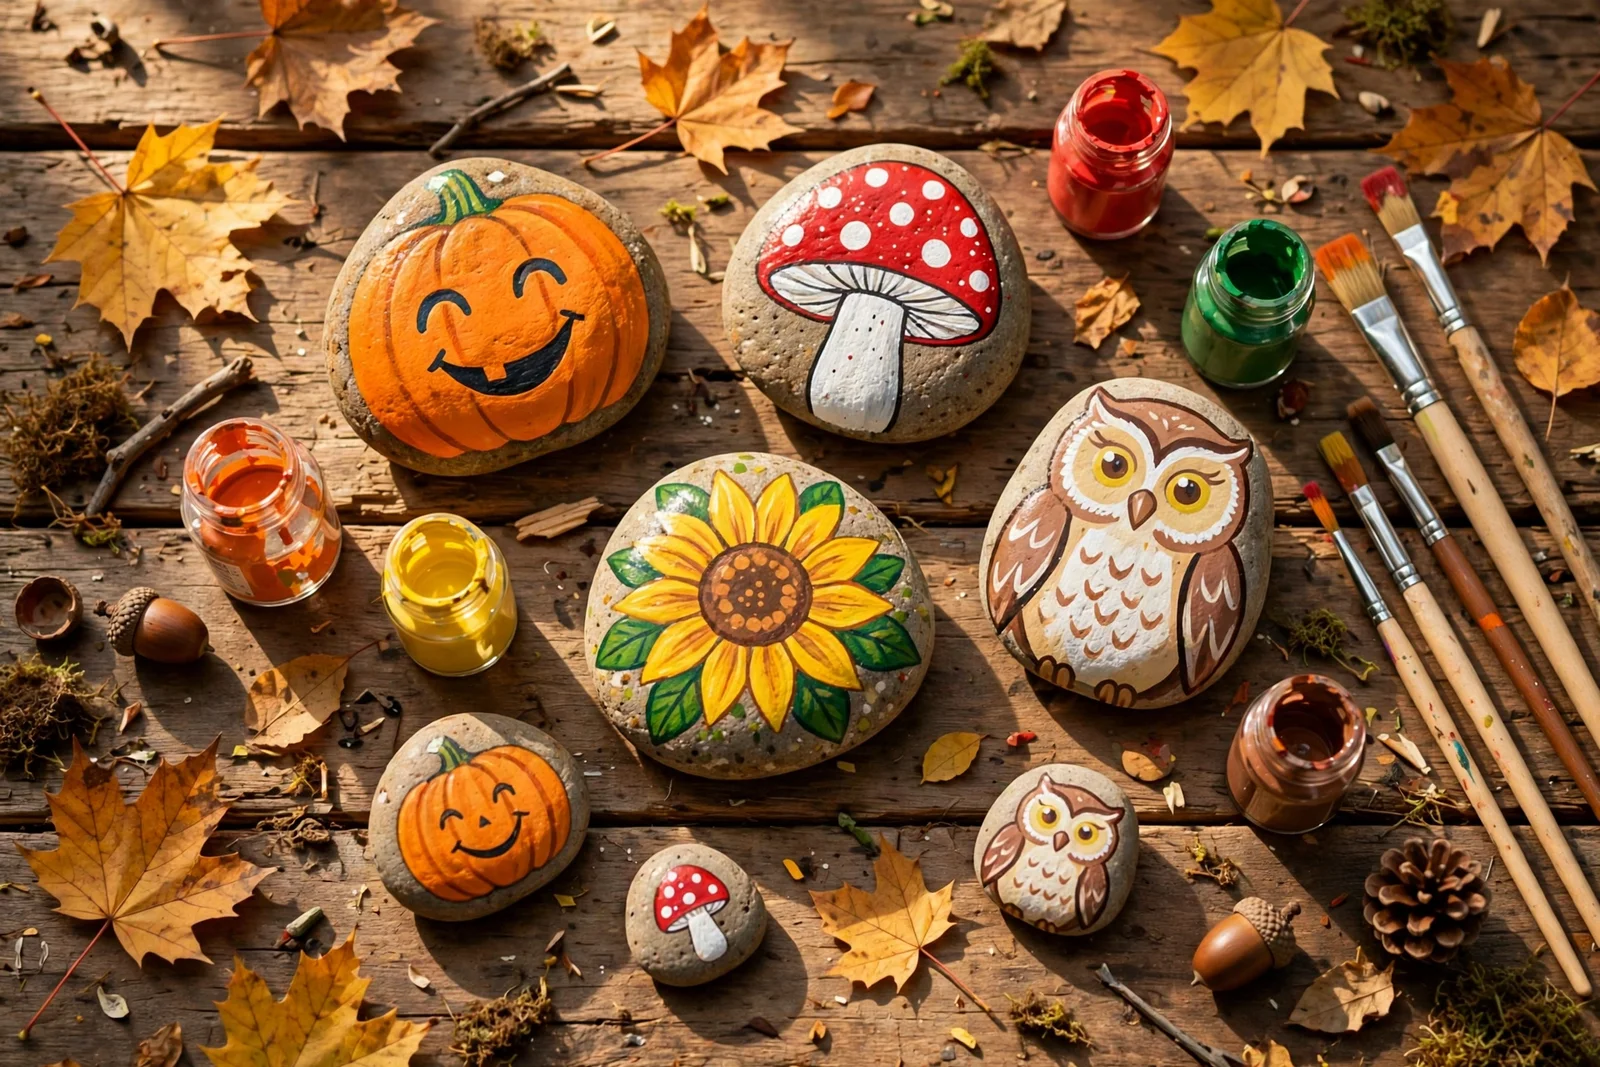
Paint 25 friendly Halloween rocks, from smiling pumpkins to cosy cottages, with easy steps for choosing stones, crisp details and weatherproof sealing.
October afternoons smell of woodsmoke and fallen leaves, and the garden fills with stones the summer left behind. A basket of plain pebbles on the kitchen table is the start of something lovely: an hour of painting, a tray of bright harvest stones, and decorations that cost almost nothing. Rock painting suits autumn perfectly, since every motif, pumpkins, owls, mushrooms, belongs to the season.
These 25 ideas keep everything friendly and bright, with smiling pumpkins, gentle owls and cosy cottages, and nothing frightening for little ones. Each idea names the stone size, the paints and the finish you need, plus one mistake to avoid. Beginners can start with the first three sections and build skills naturally.
By the end you will know how to choose stones, paint crisp details and seal them for the garden, and you will have a shelf or mantel dressed for the season. Pour some tea, lay out newspaper, and let the ideas below guide your brush.
1. Choose Smooth, Palm-Sized Stones With a Flat Underside
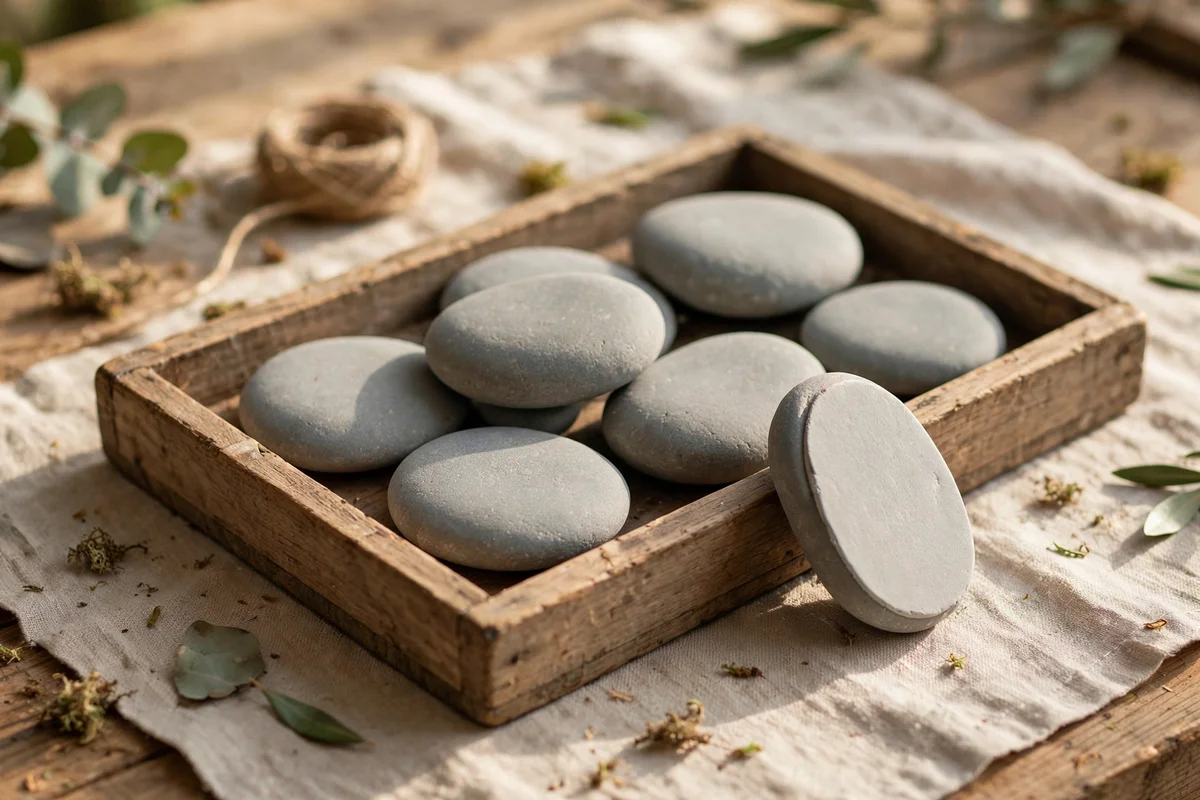
Smooth stones from a garden centre or a riverbank cost little and take paint beautifully. Look for stones roughly 7 to 10 cm across, about the size of your palm, with one flatter side so the finished rock sits without rolling. Avoid pitted or crumbly pieces, since paint soaks into rough surfaces unevenly and flakes later. A small bag of landscaping pebbles from a craft store usually costs under 5 pounds or dollars and gives you plenty to practice on.
Check each stone for a flat underside by setting it on a table; a rock that wobbles will roll off shelves later. Reject stones with deep pits or sandy, crumbly texture, because paint sinks into them and needs five or six coats. The mistake to avoid is gathering from protected beaches or parkland, where removal is often illegal; a bought bag costs little and arrives uniform. Keep your chosen stones in a shallow tray so shapes stay visible when inspiration strikes.
2. Scrub and Sun-Dry Every Stone Before Painting
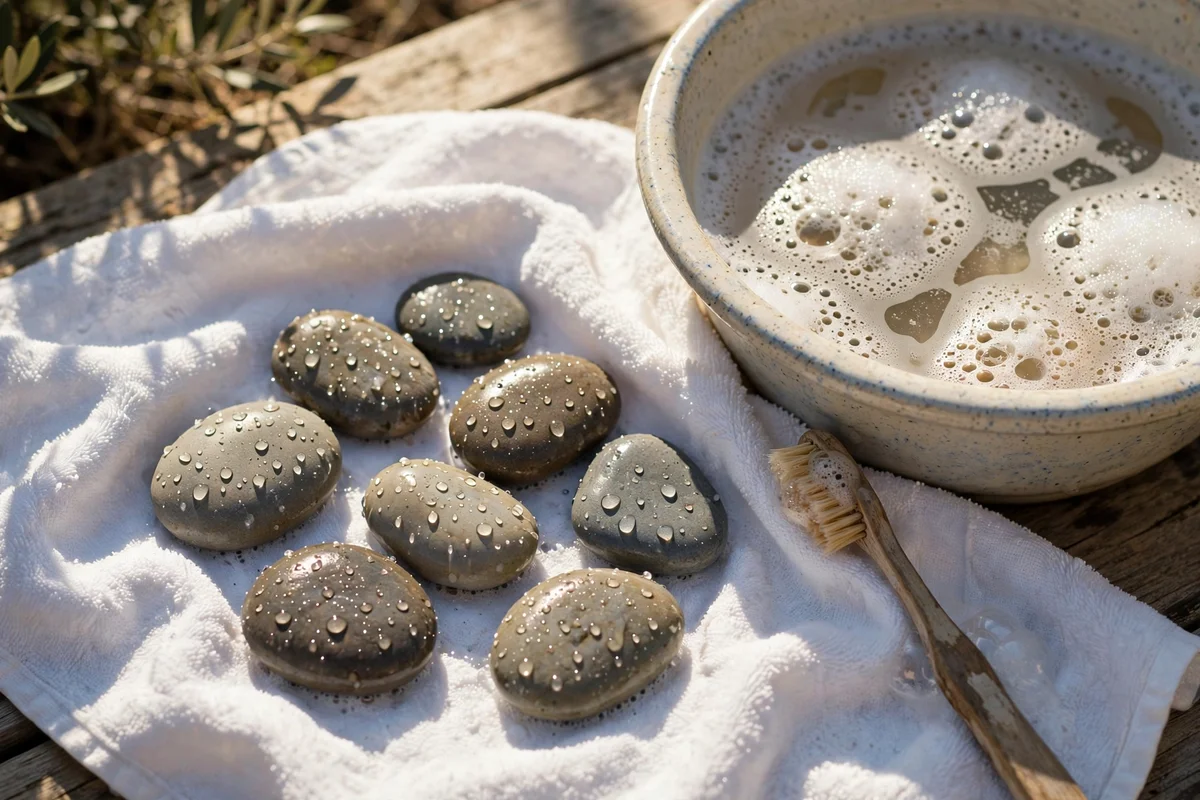
Fill a basin with warm water and a squeeze of washing-up liquid, then scrub every stone with an old toothbrush or nail brush. Work into cracks and crevices where soil hides, because trapped grit shows through thin paint as dark specks. Rinse under clean water until it runs clear. Stones from a shop bag still carry stone dust, so never skip this step even with new pebbles.
Set washed stones on a towel in direct sunlight for at least two hours, turning once so both sides dry. Damp stone traps moisture beneath paint and causes bubbling within days. If rain threatens, finish drying indoors near a radiator, leaving a small gap for air to move. The mistake to avoid is painting stones that feel cool to the cheek; cool means damp. A fully dry stone feels room temperature and takes paint evenly.
3. Lay Two Thin White Base Coats for True Colours
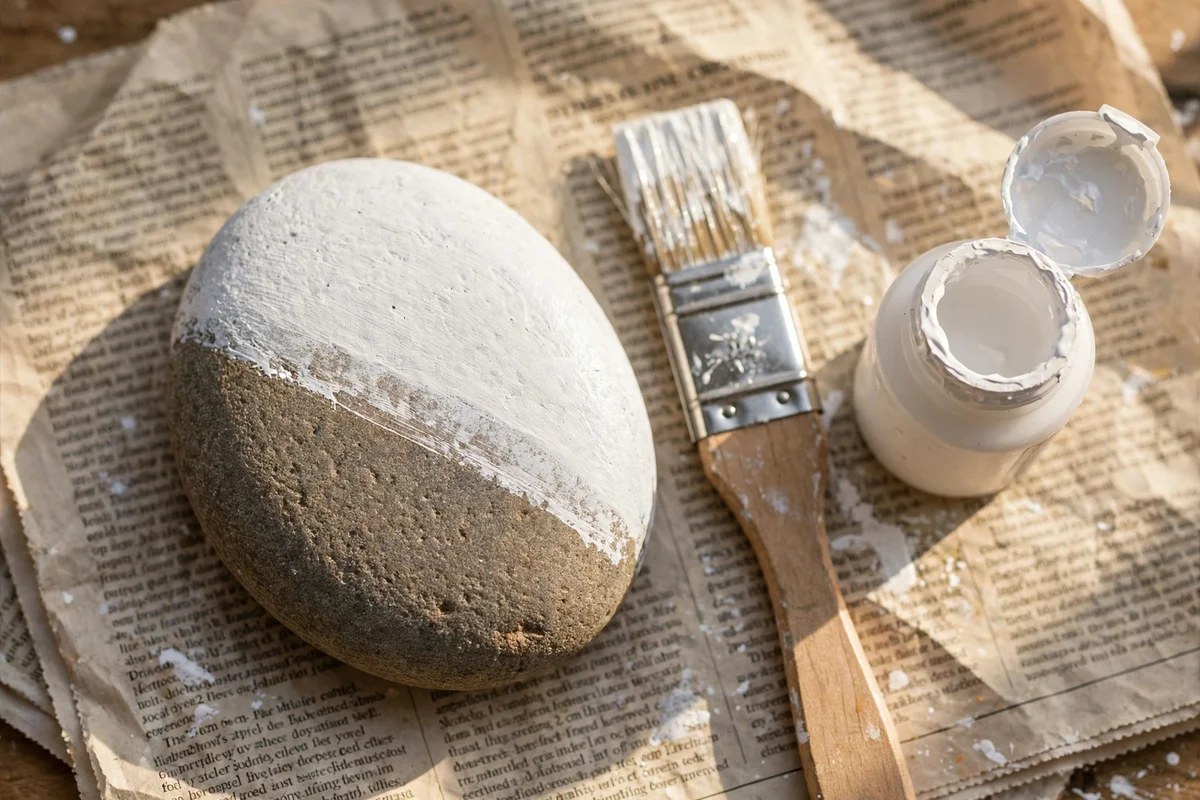
Brush a thin coat of white acrylic over the whole stone and let it dry for 30 minutes before judging coverage. Dark grey stones swallow colour, so two thin base coats beat one thick one, which cracks as it dries. Use a flat brush about 2 cm wide and work in one direction to avoid streaks. A 120 ml bottle of craft acrylic covers around 40 palm-sized stones for roughly 3 to 4 pounds or dollars.
Let the first coat dry completely, then apply the second at right angles to the first so gaps disappear. Hold the stone up to a window; any grey showing through means a third whisper coat is needed. The mistake to avoid is painting colour straight onto dark stone, which turns bright orange into muddy brown. Budget tip: house paint sample pots give excellent white base coverage for pennies when bought on clearance.
4. Paint Friendly Pumpkin Faces on Round Orange Stones

Choose round stones about 8 cm wide and paint the whole stone pumpkin orange with two coats. Once dry, add a short brown stem at the top and two curved green leaves beside it using a small round brush. Keep the face friendly: two oval eyes and a wide smiling mouth in dark brown, never black, so the pumpkin looks cheerful rather than fierce. A set of five makes a charming row along a windowsill.
Vary sizes within the group, from 5 cm minis to 10 cm statement pumpkins, and tilt the stems in different directions for a natural look. Place them on a bed of dried autumn leaves in a shallow wooden tray for instant harvest charm. The mistake to avoid is shiny varnish on the orange; matte sealer keeps the pumpkin looking ripe and real. One bottle of orange craft paint yields roughly 25 pumpkins, so the cost stays tiny.
5. Brush Crisp Vein Lines on Painted Maple Leaves
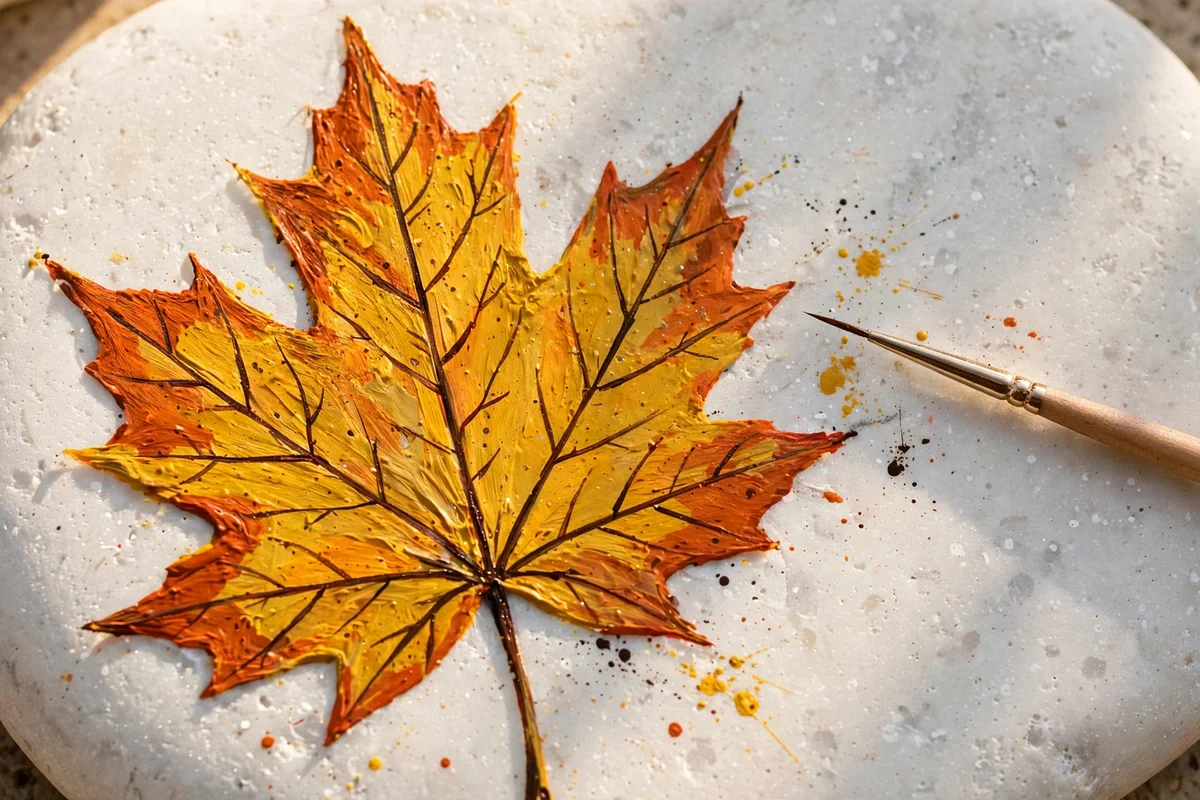
Paint a leaf silhouette in mustard yellow, burnt orange or deep red on a stone with a white base. Let it dry for an hour, then load a fine liner brush with dark brown and draw a central spine from stem tip to leaf tip. Add side veins in pairs, slanting toward the edges, keeping lines thin and steady. Three to four leaf stones grouped together look like a fallen cluster.
Rest your painting hand on the table edge to steady the brush; shaky veins are the most common flaw. If a line wobbles, let it dry and paint over it with the leaf colour, then redraw. The mistake to avoid is using black for veins, which looks harsh; dark brown reads softer and more natural. Display leaf stones tucked among real dried leaves in a glass bowl for a layered autumn centrepiece.
6. Dot a Gentle Tawny Owl With Big Round Eyes

Start with an oval stone painted warm brown, then add a lighter cream oval on the lower half for the belly. Paint two large white circles near the top for eyes, each about 1.5 cm across, and dot smaller dark brown pupils inside. Add a tiny orange triangle beak between and below the eyes, and two small ear tufts with the brush tip. Keep every feature soft and rounded.
Give the owl a woodland home by setting it on a slice of log or beside a small potted fern. The mistake to avoid is angry slanted eyebrows, which turn a friendly owl fierce; round eyes alone read as gentle and wise. Owls suit autumn shelves perfectly, and children love them because nothing about the face frightens. One owl stone takes about 20 minutes of actual painting plus drying time.
7. Paint a Cheerful Hedgehog With a Combed Spine Coat
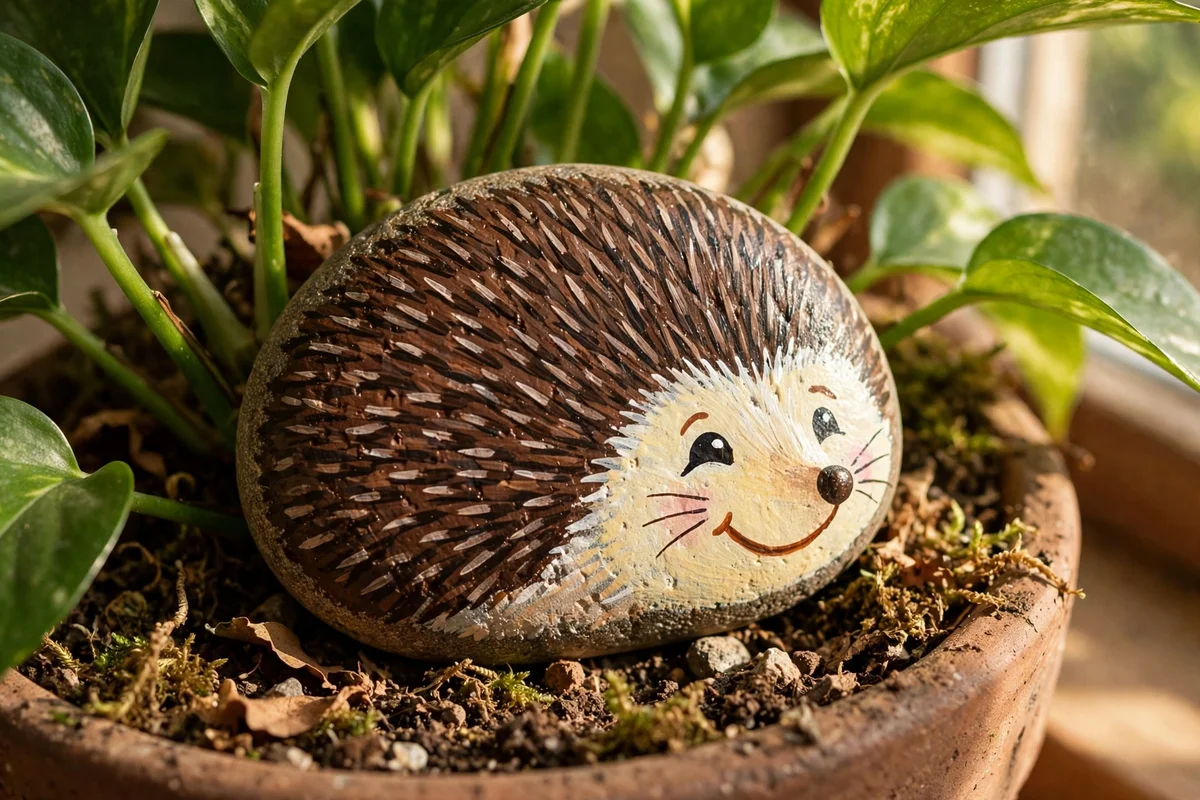
Choose an oval stone and paint the back two thirds chocolate brown, leaving a cream triangle at one end for the face. While the brown is still slightly tacky, drag a dry stiff brush through it in short strokes to suggest spines. Paint two bead eyes and a tiny dark nose on the cream face, plus a small smile. Hedgehogs read as pure autumn and delight every age.
Place hedgehog stones at the base of houseplants, where they peek through leaves like real garden visitors. The mistake to avoid is painting spines with a wet brush, which smears them into a flat brown; the brush must be almost dry. A five-pack of stiff brushes costs under 4 pounds or dollars and lasts dozens of stones. Children can safely join in, since every shape stays soft and friendly.
8. Cap Red Mushroom Stones With Crisp White Dots
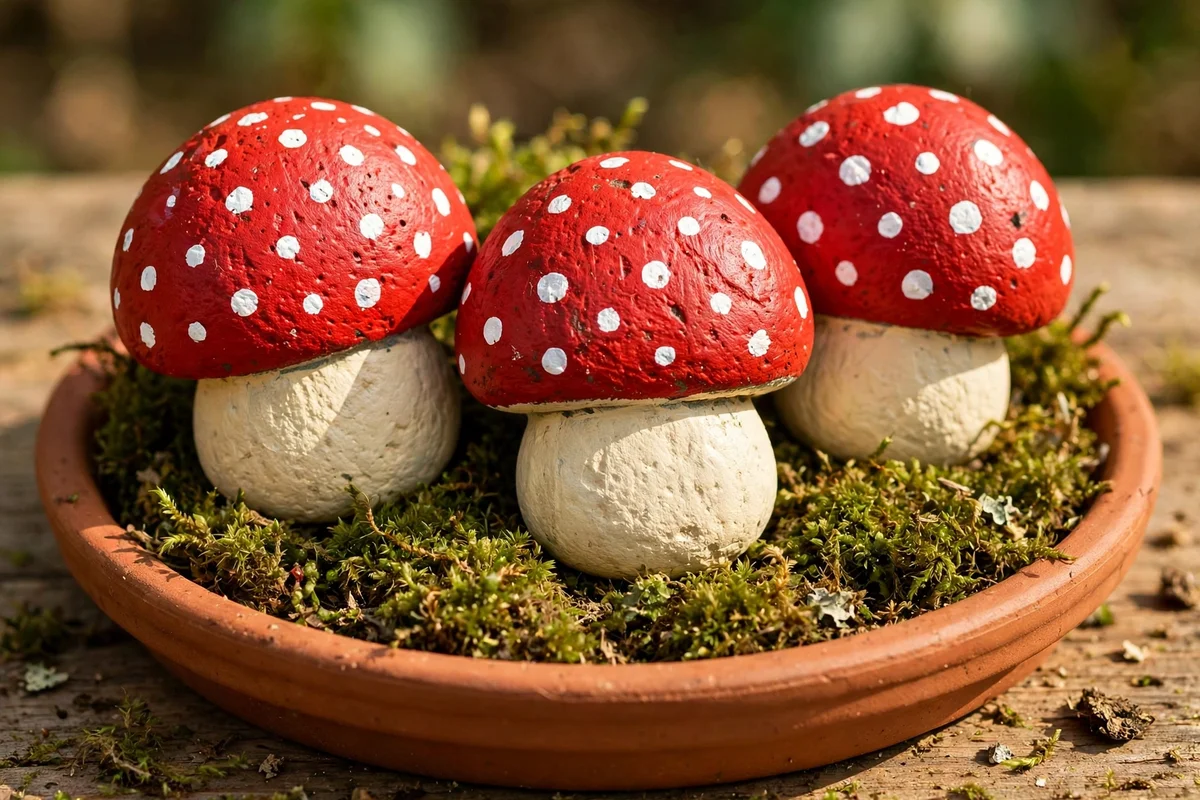
Paint a dome stone bright red for the cap and the underside cream for the stem, meeting in a clean line around the middle. Let the red dry fully, about one hour, then press white dots with the blunt end of a paintbrush handle. Vary dot sizes from 3 mm to 8 mm for a natural toadstool look. A trio of different heights looks like a tiny storybook cluster.
Group mushroom stones in a shallow terracotta saucer filled with moss for a woodland vignette. The mistake to avoid is dotting while the red is wet, which drags pink smears across the cap; patience keeps dots crisp. Seal outdoor mushrooms extra carefully, since red pigment fades fastest in sun. One red bottle and one white bottle paint around 30 mushrooms for under 8 pounds or dollars total.
9. Tuck a Painted Acorn Pair Into a Harvest Bowl
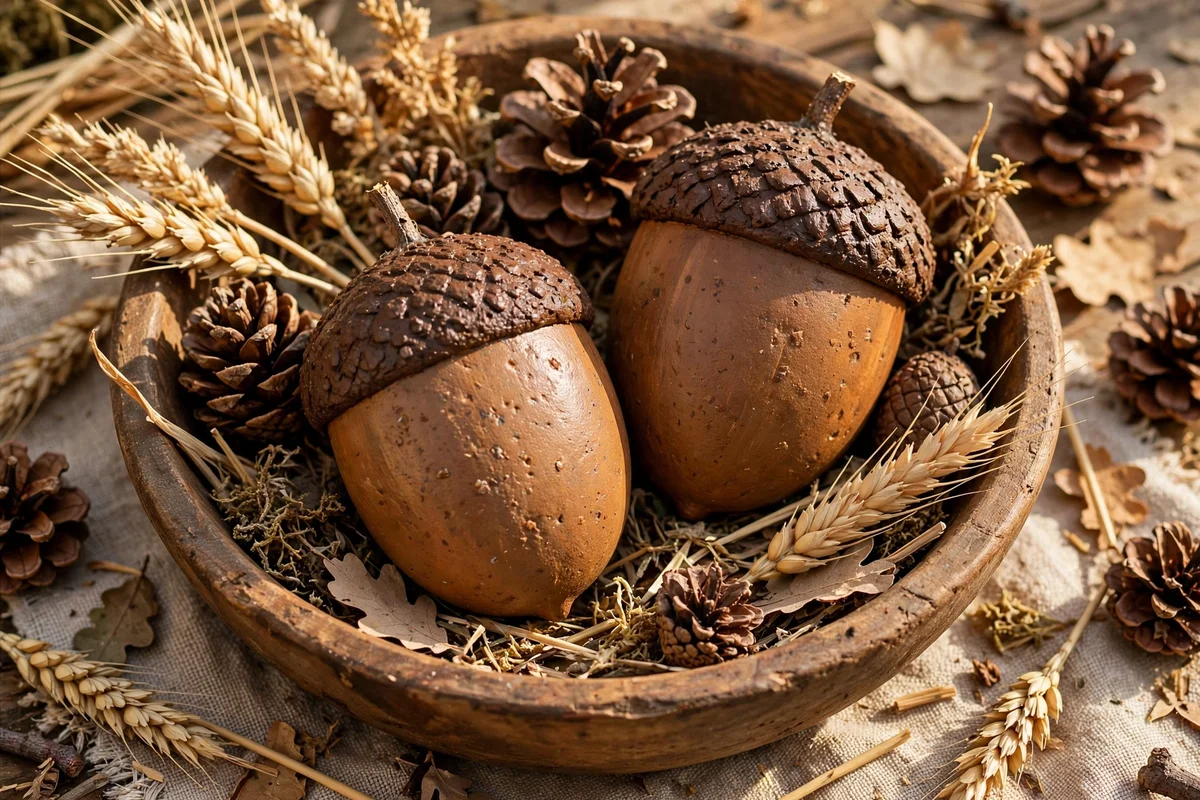
Paint two egg-shaped stones warm tan for the nut and cap the top third in textured brown for the acorn cup. Crosshatch the brown cap with fine lines to suggest the real acorn texture, and add a tiny stem nub with a dab of dark brown. Keep the pair slightly different sizes, about 4 cm and 5 cm, so they look naturally gathered. Acorns anchor any autumn display.
Nestle the acorns in a wooden bowl with pinecones, dried wheat stems and a few painted leaf stones. The mistake to avoid is painting the cap smooth brown without texture; the crosshatch is what reads as acorn at a glance. This bowl makes a lovely hallway centrepiece through October and November. Total cost stays under 10 pounds or dollars if you forage the pinecones and wheat yourself.
10. Centre a Golden Sunflower on a Tall Flat Stone
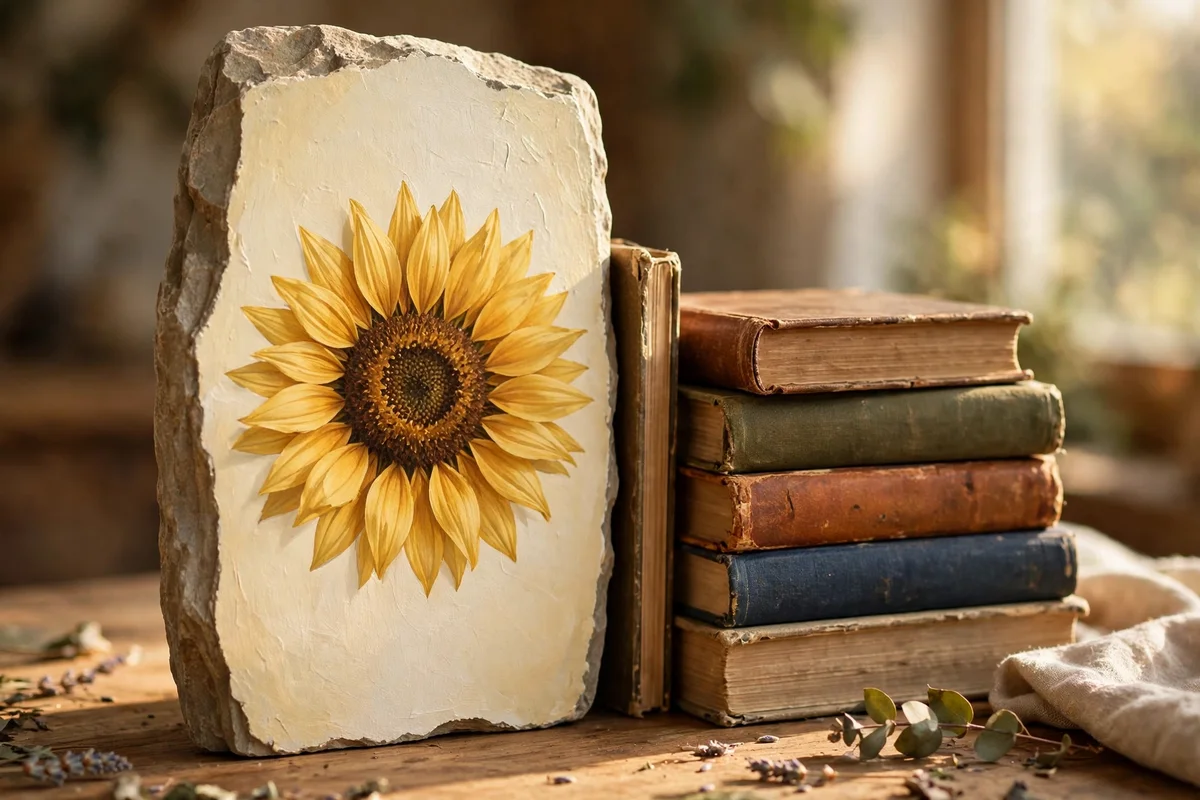
Choose a flat stone about 12 cm tall and paint the background soft sky blue or warm cream. Paint a brown circle centre 4 cm across, then add two rings of golden yellow petals with a flat brush, each petal about 2 cm long. Outline petal tips in deeper amber for definition. One bold sunflower stone becomes a cheerful bookend against a stack of autumn reads.
Stand the stone upright between books so the flower faces the room. The mistake to avoid is a muddy brown centre; paint it in two shades, dark brown ring with golden dots, for a seed-head look. Sunflower stones also brighten a kitchen windowsill in late autumn when real flowers fade. Seal with matte varnish to keep the yellow glowing rather than glossy.
11. Cluster Painted Harvest Fruit Along a Window Ledge
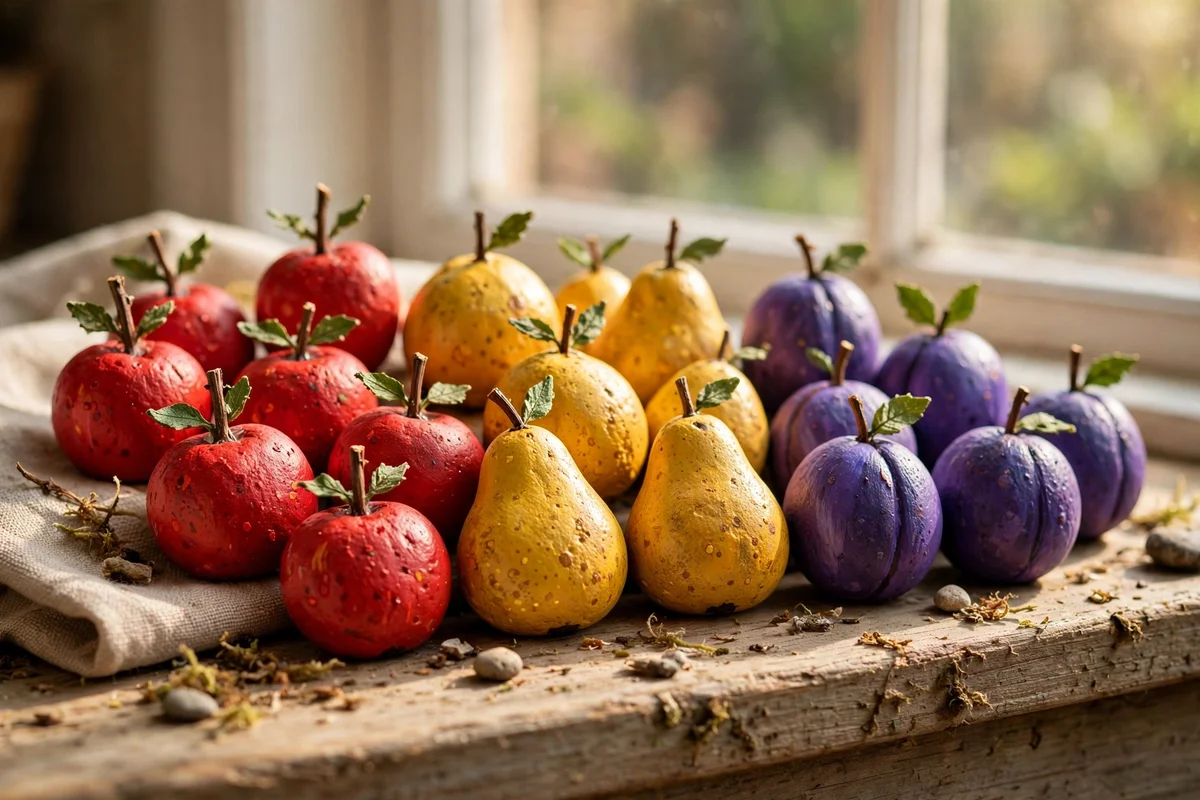
Paint small round stones as apples, pears and plums: red and green for apples, golden yellow for pears, deep purple for plums. Add a tiny brown stem and one green leaf to each with a detail brush. Keep fruit between 4 and 6 cm so the cluster looks abundant rather than bulky. Five or six fruits lined along a kitchen window ledge catch the light beautifully.
Mix real and painted fruit in a shallow basket for a playful harvest display guests will inspect twice. The mistake to avoid is glossy fruit; real apples have a soft sheen, so use satin sealer rather than high gloss. Wash hands after handling if children play with them, since sealer is not food safe. A fruit cluster takes one relaxed afternoon and costs under 6 pounds or dollars.
12. Brush a Cosy Cottage Door and Tiny Windows on Square Stones
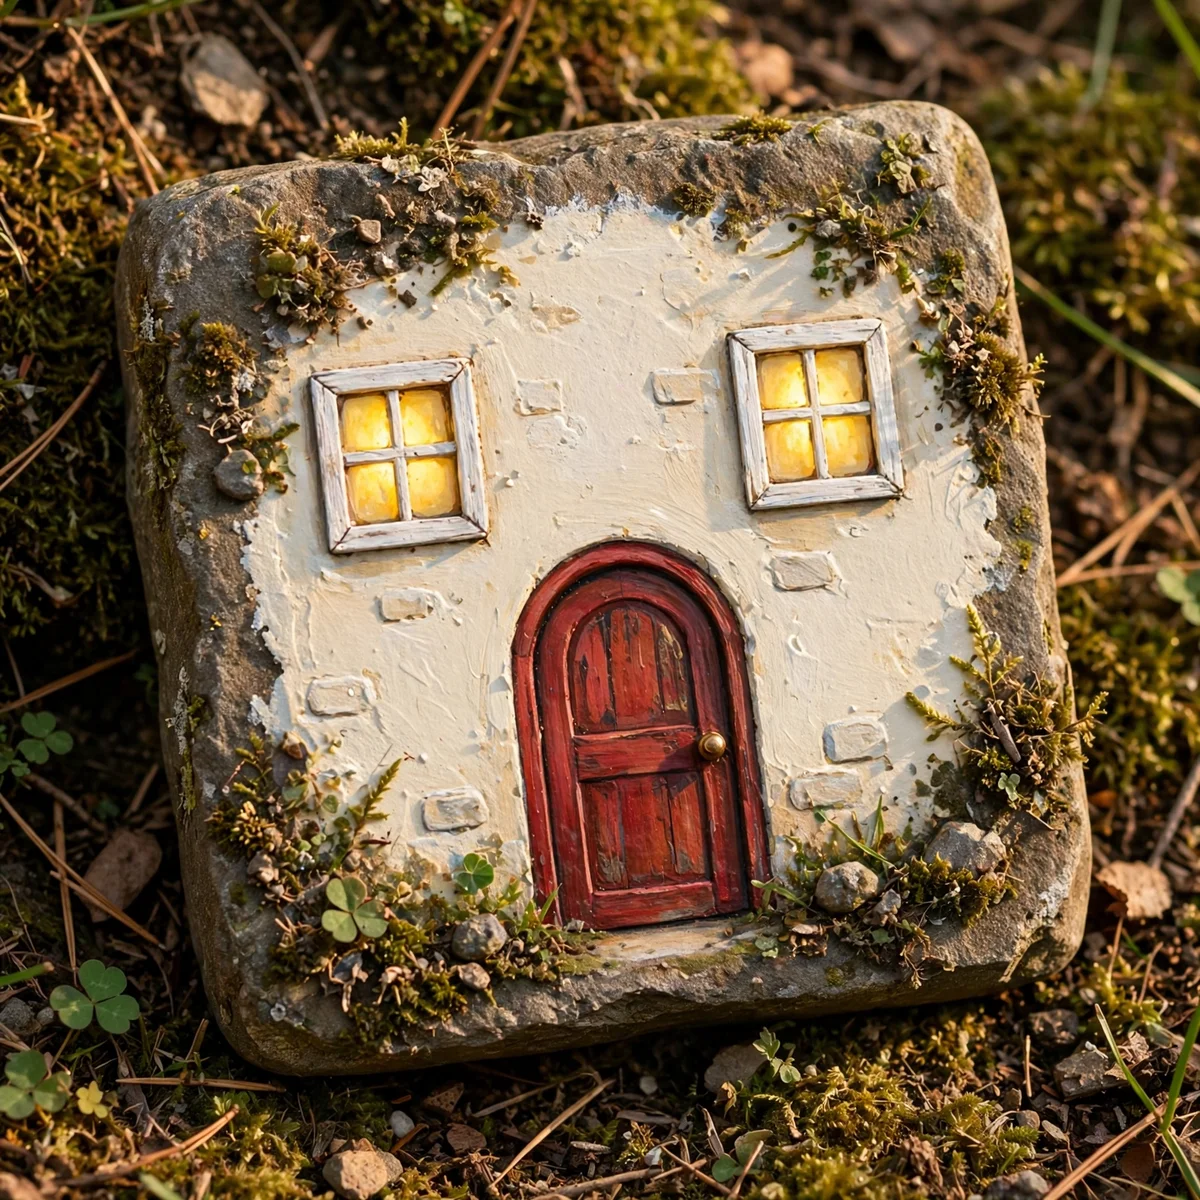
Pick squarish stones with a flat face and paint the background cream or soft sage for the cottage wall. Paint a centred arched door in warm red or forest green, about 5 cm tall, with a tiny brass knob dot. Add two small windows with cream frames and warm yellow panes that suggest lamplight. A stone cottage feels like a storybook keepsake.
Stand cottage stones on a mantel beside a small lantern for a glowing evening vignette. The mistake to avoid is overcrowding the face; leave plain wall space around the door so the cottage breathes. Paint window panes last, after frames dry, for crisp edges. These make thoughtful housewarming gifts, especially for friends who have just moved into a new home.
13. Reach for Acrylic Paint Pens for Crisp Lettering

Acrylic paint pens give clean lines without brush control struggles, perfect for words and outlines on stone. Choose a set with 1 mm and 3 mm tips; the fine tip handles lettering while the broad tip fills small areas. Shake each pen for 30 seconds and test on paper first, since the first squeeze often floods. A 24 pen set costs about 10 to 14 pounds or dollars and lasts many projects.
Store pens horizontally with caps on so tips stay primed and even. The mistake to avoid is pressing hard for darker colour; extra pressure dents tips and ruins the line, while a second pass darkens cleanly. Pens work beautifully over a sealed base coat, giving the smoothest glide. Children find pens far easier than brushes, making family painting sessions much calmer.
14. Layer Light Colours First, Then Dark Details
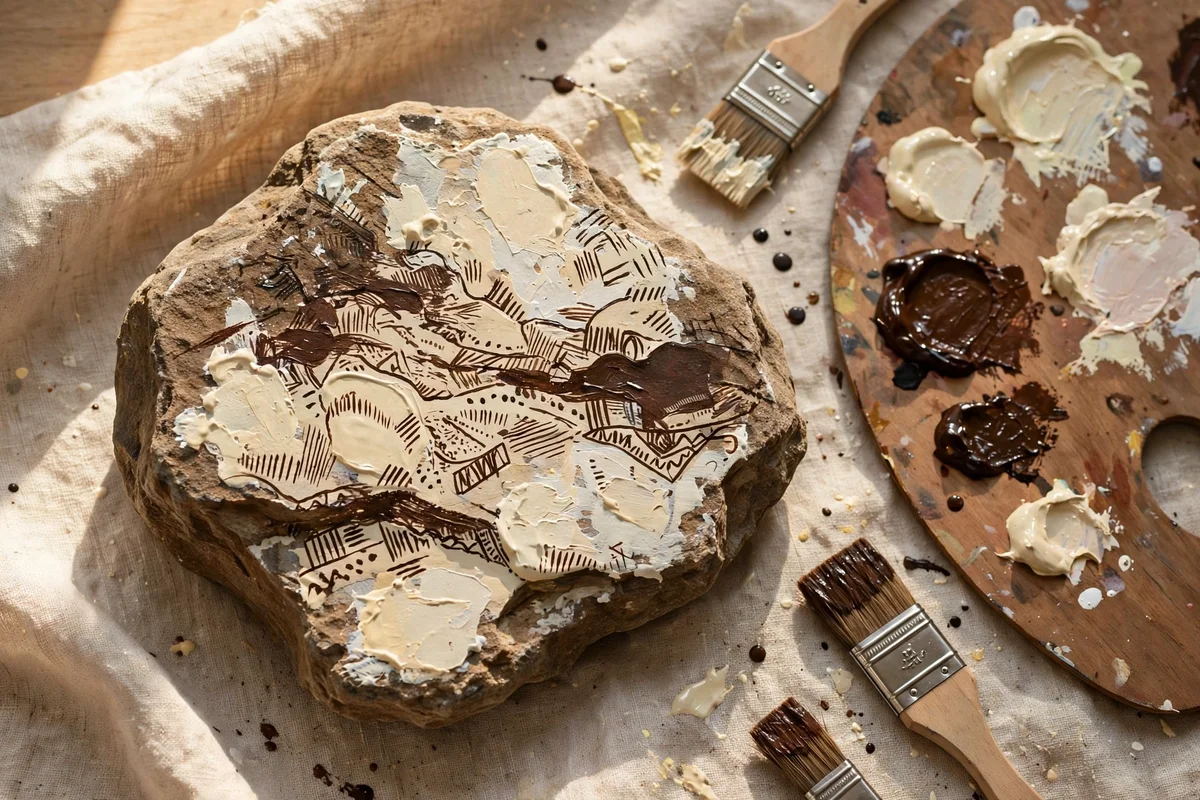
Paint large pale areas first, such as cream bellies, white dots and yellow petals, and let each dry for at least 30 minutes. Dark lines and features go on last, sitting crisply on top of the dry pale layers. This order prevents dark paint bleeding into light areas, the most common cause of muddy looking stones. Plan the order before starting by sketching the design on paper.
Keep a hairdryer on its cool setting nearby to speed drying between layers on damp days. The mistake to avoid is rushing; a tacky base layer lifts and smears when the next colour touches it. Test dryness by touching an edge, not the centre, so fingerprints stay hidden. Three thin layers always beat one thick coat for smooth, professional looking stones.
15. Keep a Fine Detail Brush Just for Faces and Whiskers

Reserve one small liner brush, size 0 or 00, exclusively for faces, whiskers and tiny outlines. Rinse it in clean water after every colour and reshape the tip with your fingers before it dries. A dedicated detail brush stays sharp for months, while a brush used for base coats frays quickly. Good detail brushes cost 2 to 3 pounds or dollars each and repay the price in crisp work.
Never leave the detail brush sitting in water, since the tip bends and never recovers. The mistake to avoid is loading the brush too full; wipe one side on the jar rim so only the tip carries paint. Practice whiskers and smiles on paper first to build muscle memory. Ten minutes of paper practice saves an hour of repainting stones.
16. Seal Outdoor Stones With Two Coats of Clear Varnish
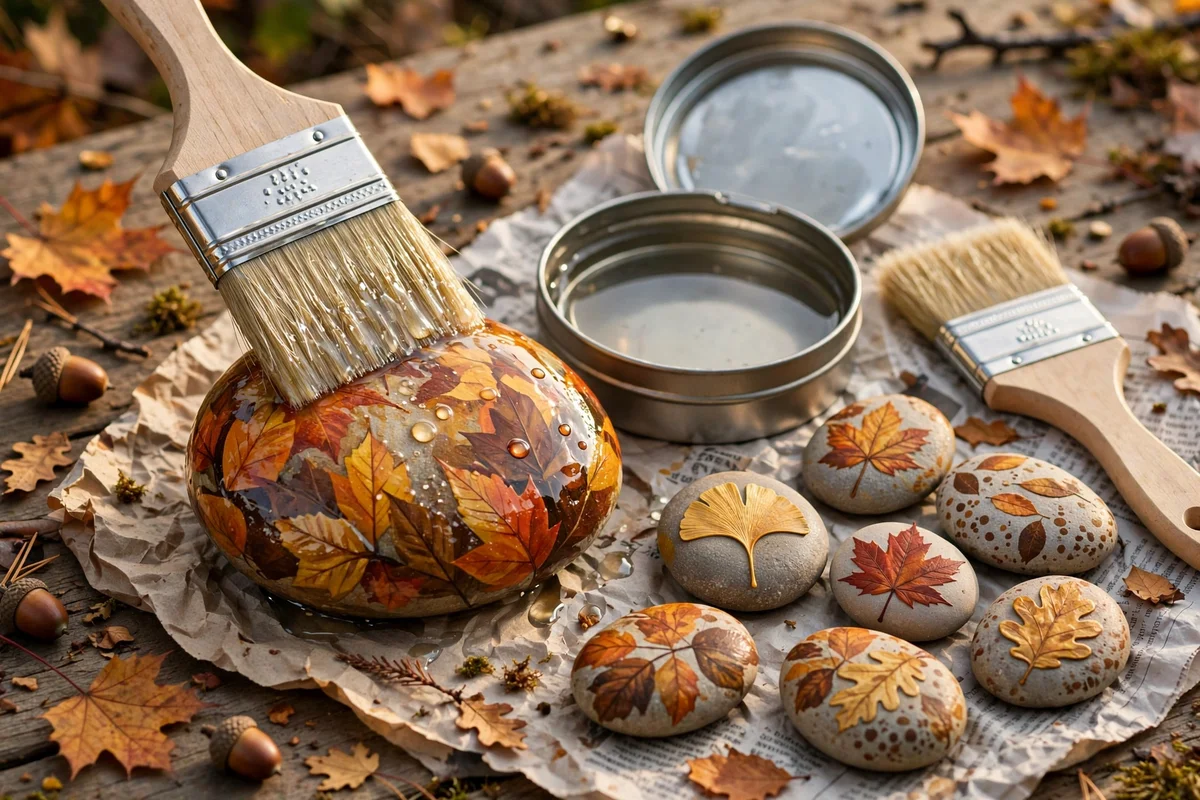
Outdoor stones need a weatherproof sealer or rain will soften acrylic within weeks. Choose a clear water based exterior varnish in matte or satin, and brush on a thin first coat after the paint has cured for 24 hours. Let it dry for two hours, then apply the second coat for full protection. A 250 ml tin seals around 60 stones and costs 6 to 9 pounds or dollars.
Seal the underside too, since ground moisture wicks up through unsealed stone. The mistake to avoid is sealing in direct sun, which dries varnish too fast and leaves bubbles; work in shade on a dry day. Reapply sealer each autumn to keep garden stones fresh for years. Indoor display stones need only one light coat, so one tin stretches across many seasons.
17. Tuck a Painted Rock Along a Garden Path as a Kind Surprise
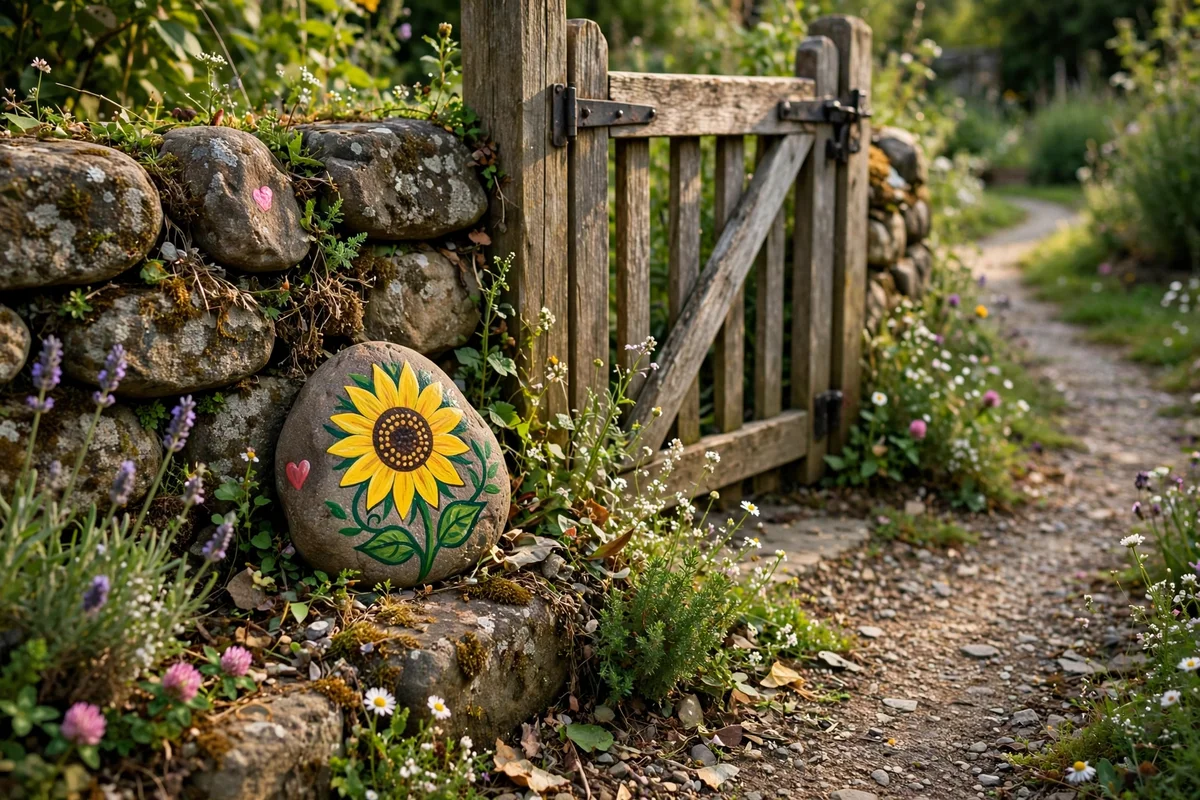
Place a sealed, cheerful stone where a neighbour or child will spot it: beside a garden gate, on a low wall, or at the edge of a path. Choose bright designs like sunflowers or smiling pumpkins that lift a stranger’s day. Keep the stone small, under 8 cm, so it feels like a gift rather than clutter. This simple kindness costs nothing and often starts lovely conversations.
Never hide rocks inside national parks or nature reserves, where leaving objects disturbs wildlife and breaks rules. The mistake to avoid is placing stones where mowers or strimmers run; tucked at a wall base stays safe. Paint a small heart on the back so finders know it was left with love. Children adore both hiding and finding, making this a perfect family weekend ritual.
18. Line Painted Stones Along the Edge of a Flower Bed
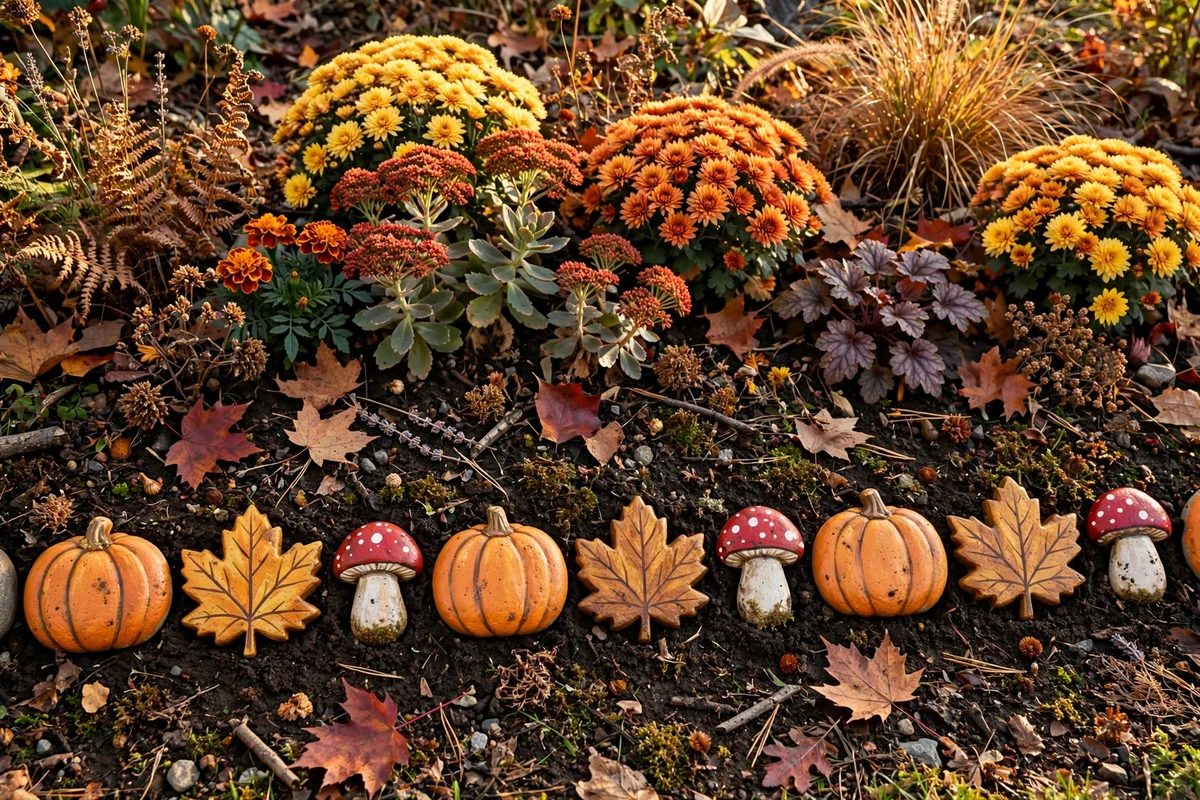
Set sealed stones in a neat row along the front edge of a flower bed, spacing them 15 to 20 cm apart. Alternate designs, pumpkin, leaf, mushroom, so the border feels playful rather than repetitive. Push each stone a third of its depth into the soil so it stays put through wind and rain. A bed 3 metres long needs about 15 to 18 stones for a full border.
Choose designs that echo the planting: leaf stones near shrubs, mushroom stones under trees. The mistake to avoid is unsealed stones here; soil moisture destroys unprotected paint in one season. Refresh the border each October as part of autumn garden tidying. This edging costs far less than bought border stones and brings handmade character no shop can match.
19. Stage a Row of Painted Rocks on a Mantel or Shelf
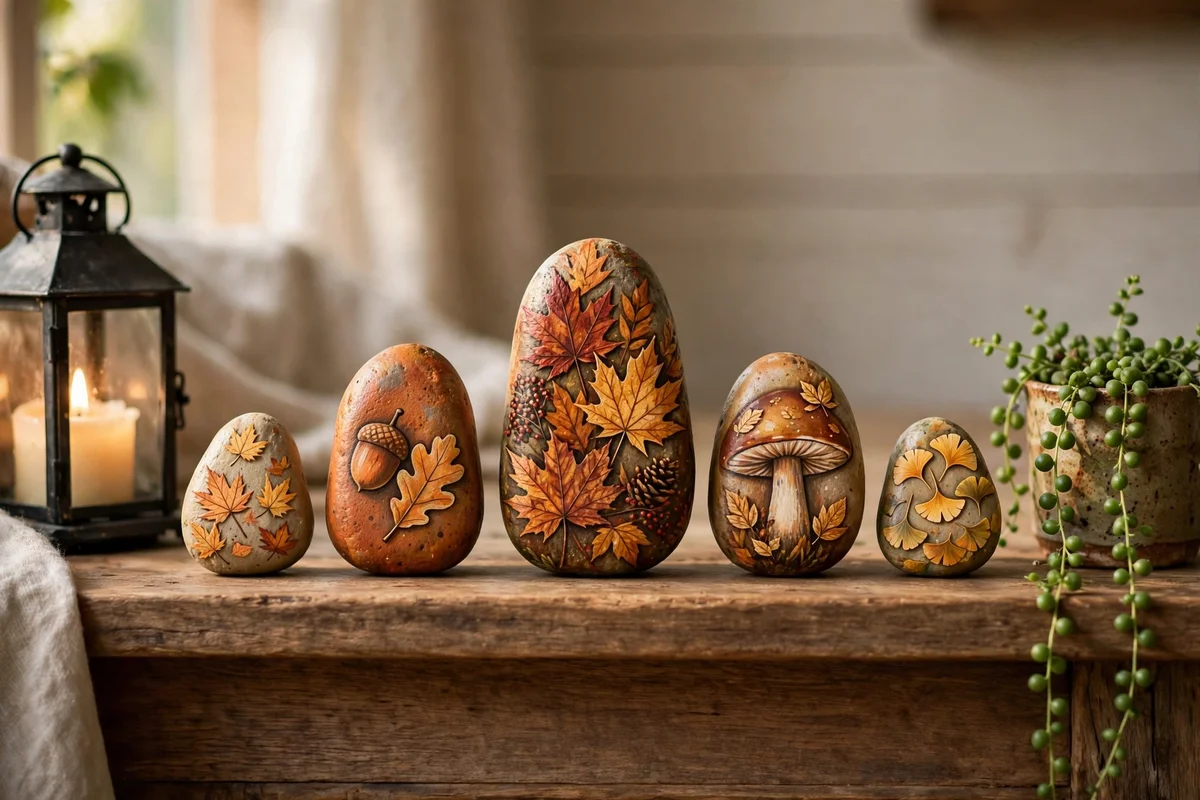
Arrange five to seven stones along a mantel or shelf, tallest in the middle and smaller ones stepping down each side. Leave 5 to 8 cm of breathing space between stones so each design reads clearly. Place a small trailing plant or a candle lantern at one end to complete the scene. This arrangement takes five minutes and transforms a plain shelf into an autumn display.
Dust stones monthly with a soft dry cloth; sealed paint wipes clean easily. The mistake to avoid is stacking stones, which scratches paint and topples at the slightest knock. Rotate designs with the seasons, storing off-season stones wrapped in tissue. A mantel row is the easiest display of all, needing no fixings, no hooks and no wall damage.
20. Gift a Painted Stone in a Kraft Box With a Ribbon

Nestle a finished stone in tissue inside a small kraft gift box about 10 cm square, and tie it with raffia or gingham ribbon in autumn tones. Tuck in a handwritten card explaining the design, since the story doubles the gift’s charm. Painted stones make thoughtful presents for teachers, neighbours and hosts. The whole gift costs under 3 pounds or dollars yet feels deeply personal.
Choose the design for the recipient: owls for book lovers, sunflowers for optimists, cottages for new homeowners. The mistake to avoid is gifting an unsealed stone that will fade; seal every gift stone even if it stays indoors. Make three or four at once in an evening and keep a small gift stash ready. Few handmade gifts are this quick, this cheap and this warmly received.
21. Mix Terracotta and Cream Tones for an Autumn Palette
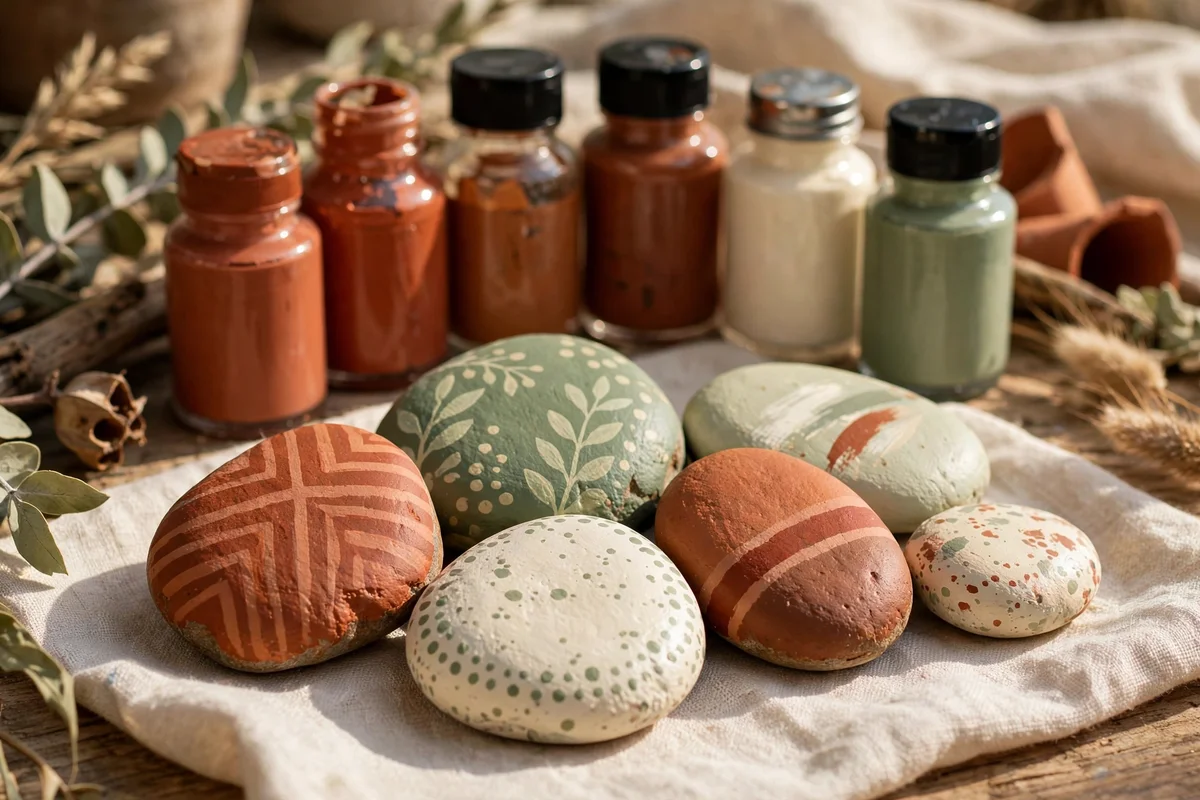
Limit your palette to terracotta, burnt sienna, warm cream and soft sage for a cohesive harvest look. Paint backgrounds in cream and motifs in terracotta, or reverse it for variety across the set. A restricted palette makes even simple designs look designed and intentional. Buy the four colours as a starter bundle, usually 8 to 12 pounds or dollars, and they will cover dozens of stones.
Test colour pairs on paper before committing paint to stone; terracotta beside sage sings, while terracotta beside orange clashes. The mistake to avoid is adding a random bright blue or neon that breaks the harmony; keep brights for separate, playful stones. A unified palette photographs beautifully for sharing with friends. Display the set together so the colour story reads as one.
22. Paint a Woodland Scene Across Three Matching Stones
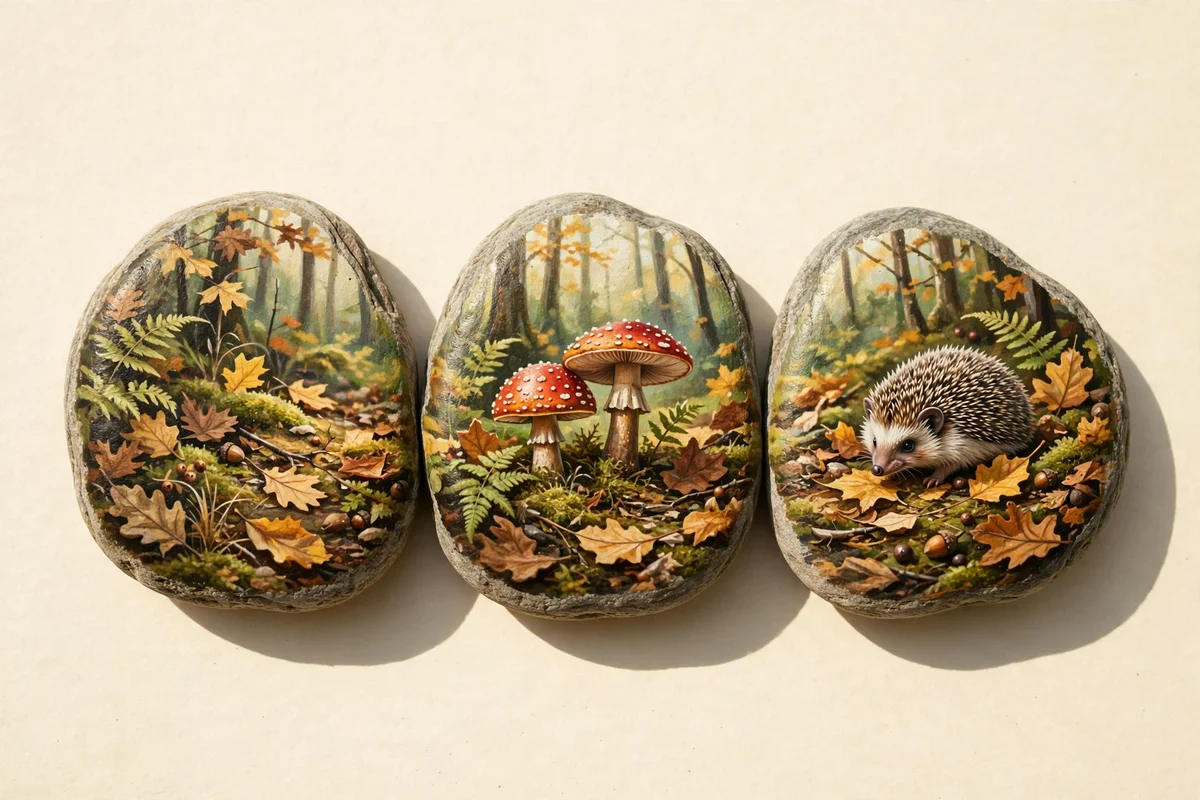
Choose three flat stones of similar size and paint one continuous woodland scene across them: a mushroom on the first, a hedgehog on the second, autumn leaves on the third. Keep the background colour identical on all three, such as soft cream, so they read as a set. Line them up touching on a shelf to reveal the full scene. Triptychs feel special and gift beautifully.
Sketch the scene on paper first, marking where each stone’s edge falls so motifs sit correctly. The mistake to avoid is painting each stone separately without planning; the scene must flow across the joins. Number the backs 1, 2, 3 so the order never gets mixed. A woodland triptych takes one cosy evening and becomes a keepsake rather than just decor.
23. Paint a Warm Harvest Word on a Smooth Flat Stone
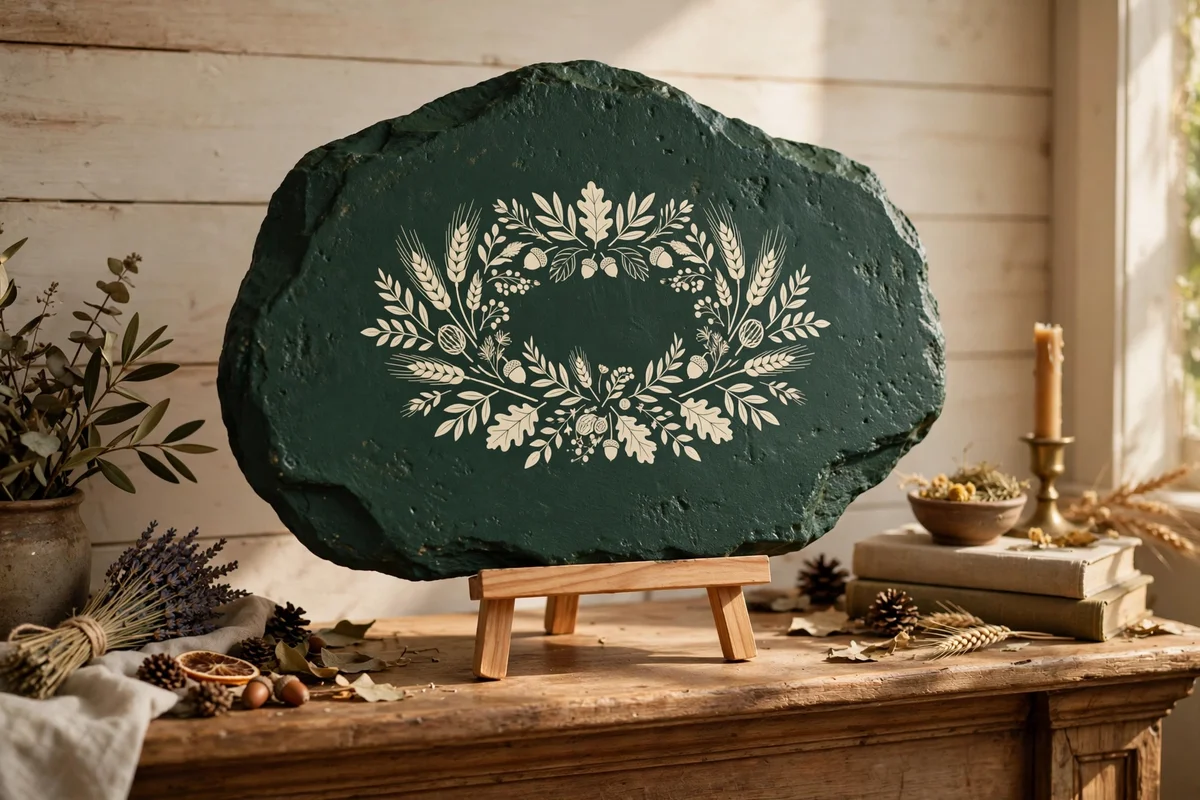
Choose a large flat stone, at least 12 cm wide, and paint the background deep forest green or warm plum. Letter a single word in cream with a 3 mm paint pen: Gather, Thankful, Harvest or Home. Centre the word carefully, leaving equal margins on all sides. Word stones add meaning to a display and take only minutes once the base is dry.
Prop the word stone on a small easel on the mantel so the message faces the room. The mistake to avoid is lettering on a bumpy stone; smoothness is essential for readable words. Practice the word on paper three times before touching the stone. These stones make lovely table centrepieces for autumn family meals and harvest gatherings.
24. Refresh Chipped Stones With a Quick Touch-Up Kit
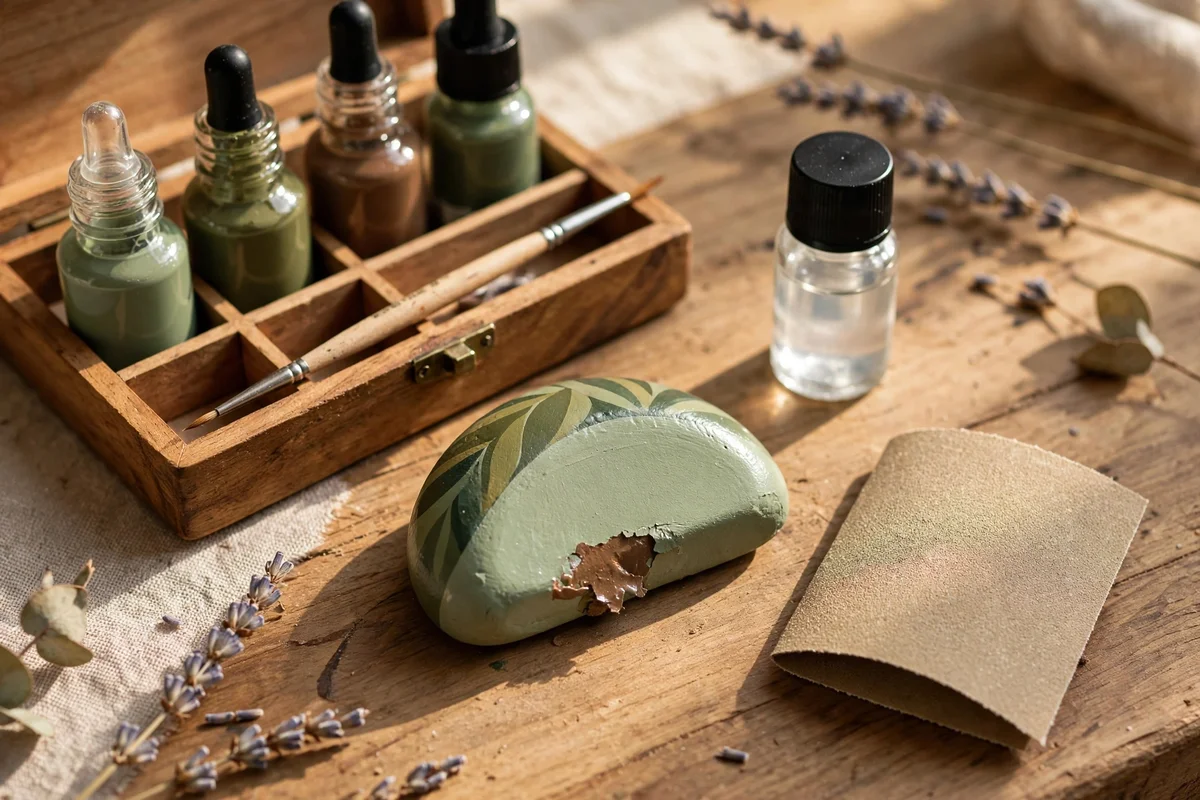
Keep a small kit with your most used colours, one fine brush and a mini sealer bottle for repairs. Each spring, inspect garden stones and dab matching paint onto chips, then reseal the spot once dry. Touch-ups take minutes and extend a stone’s life by years. Storing the kit in a labelled zip bag means repairs happen instead of being postponed.
Sand rough chips lightly with fine sandpaper before repainting so the new paint sits flush. The mistake to avoid is painting over flaking old paint; loose flakes must come off first or the repair fails within weeks. Wipe sanding dust away with a damp cloth and let dry. A yearly ten minute check keeps every stone looking freshly painted.
25. Store Finished Rocks in a Lined Box Between Seasons
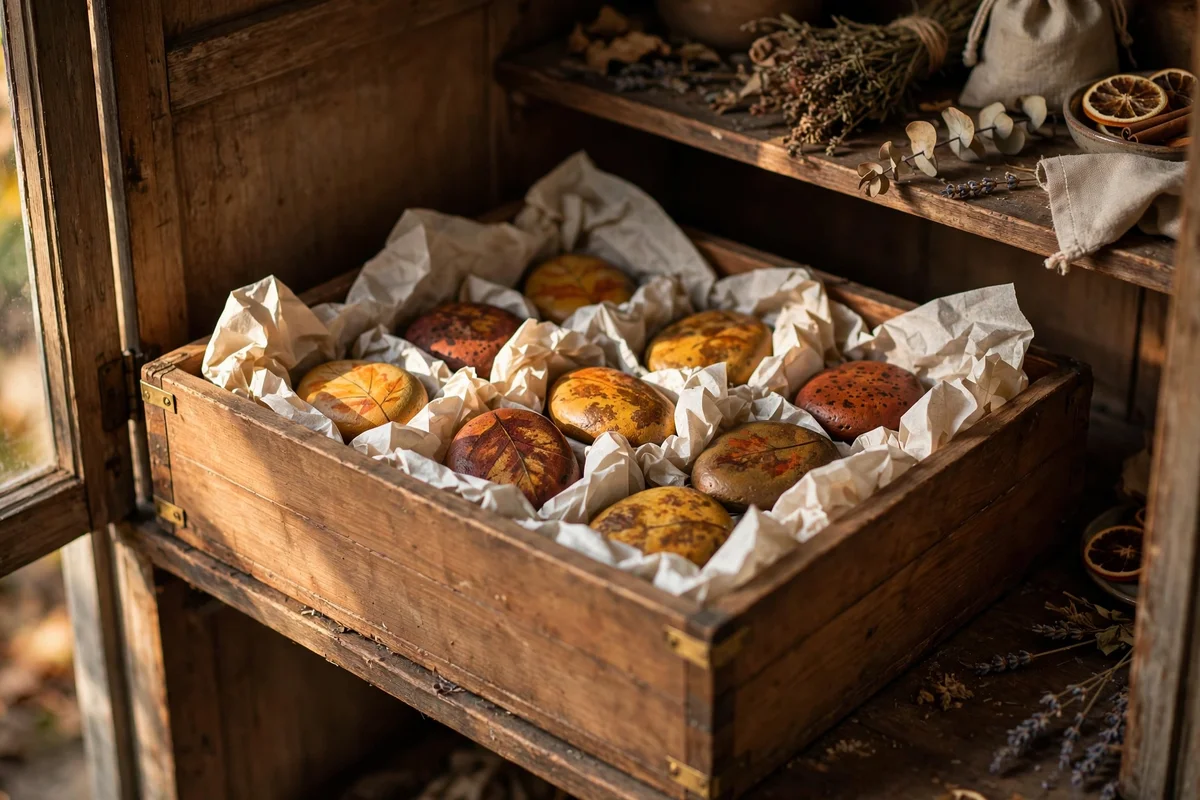
Line a sturdy box with tissue paper and nestle stones in a single layer, with crumpled tissue between neighbours. Never stack painted faces together, since pressure and rubbing dull the finish even through sealer. Label the box by season so October stones are easy to find next autumn. Proper storage keeps colours bright for many years.
Keep the box in a dry cupboard away from radiators, since heat softens varnish over time. The mistake to avoid is a damp shed or garage; moisture creeps into boxes and lifts paint within months. Photograph each stone before packing so you remember the collection. Unpacking last year’s stones each autumn feels like greeting old friends.
Friendly painted stones bring the brightest parts of autumn indoors: harvest colour, woodland creatures and cosy cottage charm, all for the price of a few paint bottles. Start this week with the simplest win, a smiling pumpkin stone on the windowsill, and let one success pull you toward the next. Before long your shelves, garden beds and gift boxes will carry a little of the season’s warmth, made entirely by your own hand.
Frequently Asked Questions
What kind of paint works best on rocks?
Acrylic craft paint is the best choice for rocks: it sticks well, dries fast and comes in every colour. Use two thin coats rather than one thick one, and finish outdoor stones with a clear exterior varnish. Acrylic paint pens are ideal for lettering and fine details. Avoid watercolours and washable kids’ paints, since both rinse straight off stone in the first rain.
How do I stop my painted rocks from fading outside?
Seal every outdoor stone with two thin coats of clear exterior varnish, including the underside, after the paint has cured for 24 hours. Matte or satin finishes protect colour without looking plasticky. Red and yellow pigments fade fastest, so give those stones an extra coat. Reapply sealer each autumn, and bring precious stones indoors for winter to keep them bright for years.
Where can I find good stones for painting?
Garden centres and craft shops sell bags of smooth landscaping pebbles for under 5 pounds or dollars, and these are the easiest reliable source. Riverbanks and beaches also offer beautiful stones, but check local rules first, since removing stones is illegal in many protected areas. Choose palm-sized stones, 7 to 10 cm, with one flat side so they sit steadily.
Can young children join in with rock painting?
Yes, rock painting is a wonderful family craft. Give children acrylic paint pens rather than brushes for easier control, and choose simple designs like dots, stripes and smiling pumpkins. Cover the table with newspaper and use washable aprons, since acrylic stains clothes. Keep the designs in this article friendly and bright, with no scary faces, so little ones feel happy, not frightened.
How much does it cost to start painting rocks?
A starter setup costs about 15 to 25 pounds or dollars: a bag of stones, four or five bottles of acrylic paint, two brushes and a small bottle of sealer. Paint pens add around 10 to 14 pounds or dollars but make lettering much easier. Each finished stone then costs pennies, since one paint bottle covers 25 to 40 stones. It is one of the cheapest crafts per finished piece.