Kitchen
20 Coffee Corner Ideas Every Coffee Lover Will Want to Copy
By Anna Wells · · 21 min read
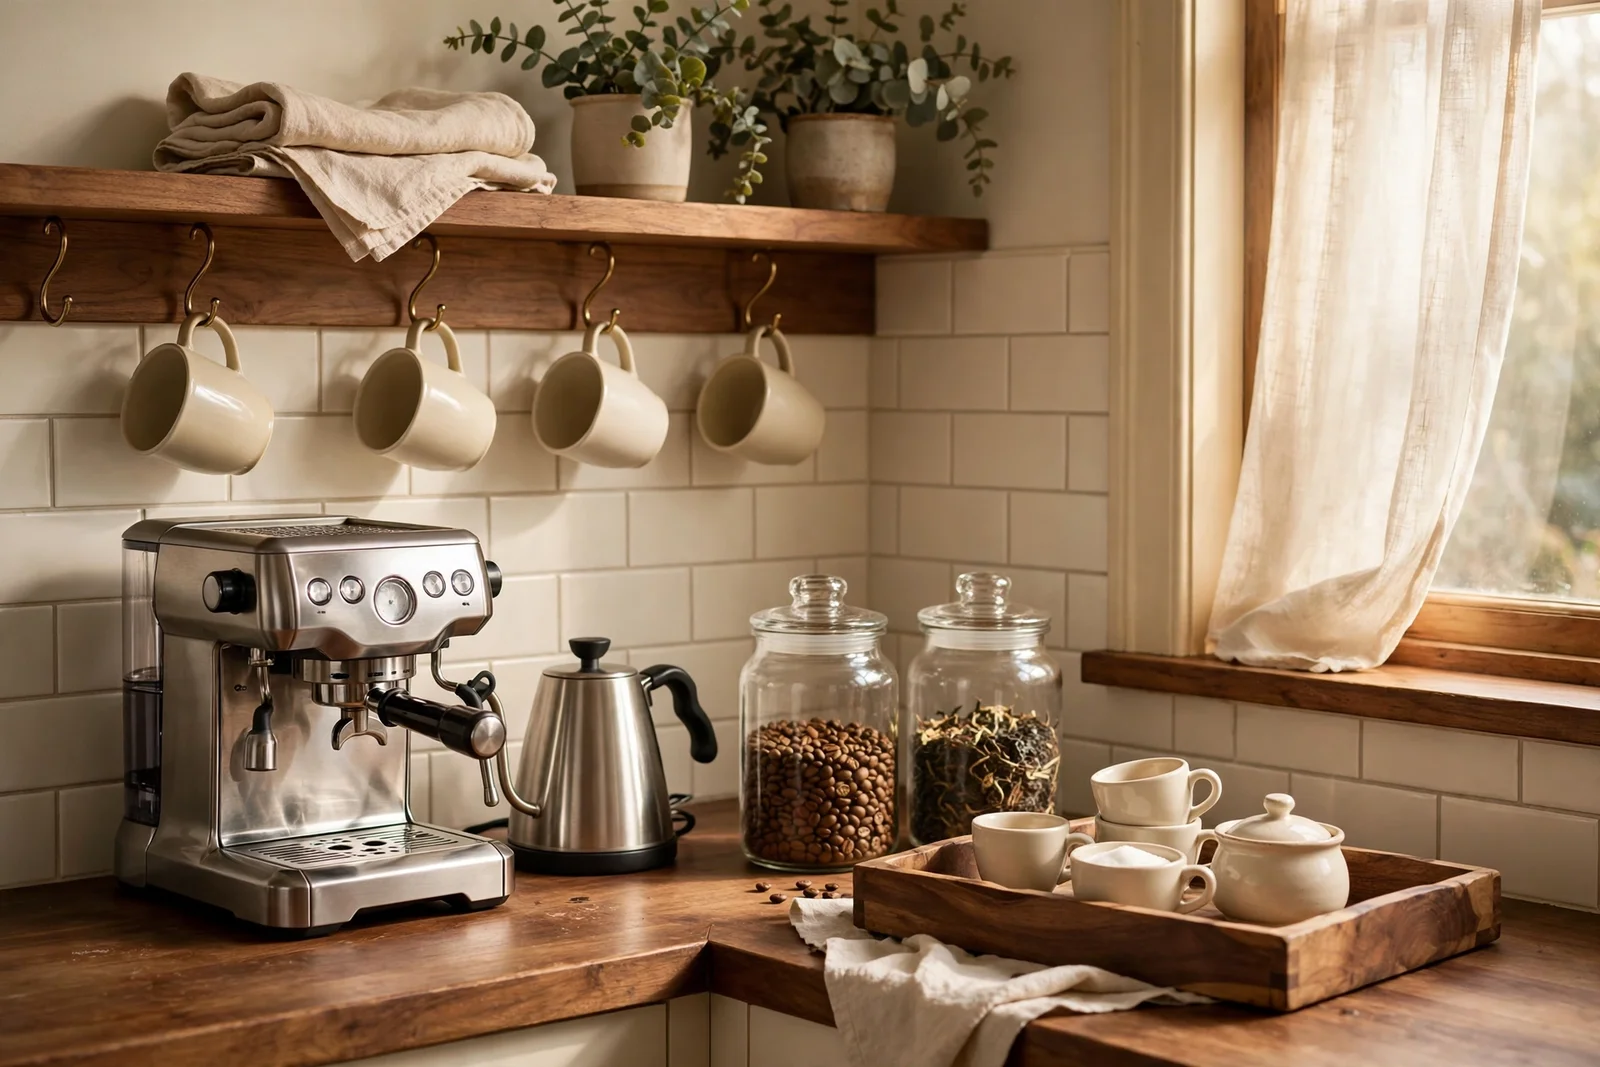
A warm guide to creating a dedicated coffee and tea corner at home, with twenty practical styling and storage ideas for every kitchen size.
There is a particular quiet to the first ten minutes of the morning, when the house is still dim and the day has not yet asked anything of anyone. In that hush, the kettle clicks on and the smell of ground coffee begins to rise, and the small corner where it all happens starts to feel like the kindest room in the house. A coffee corner does not need to be grand to earn that title.
A dedicated spot for coffee and tea turns a daily habit into a small ritual the whole household can enjoy. Instead of appliances scattered across the counter and mugs hunting for space, everything lives in one calm place: the machine and kettle side by side, jars of beans and loose tea within reach, cups hanging ready, and a tray set for guests who stay a little longer. It is part kitchen organisation, part hospitality.
Below you will find twenty concrete ideas that build such a corner from the ground up, whether you have a generous stretch of counter or a single cupboard-sized alcove. Each one names materials, sizes and placements you can copy directly, with budget tiers and the mistakes worth avoiding. Work through them in order, or steal the three or four that suit your kitchen best, and let the corner grow at its own pace.
Start with the simplest change, a tray that gathers everything into one zone, and notice how quickly mornings feel steadier. By the time you reach the last idea, the corner will have a rhythm of its own: cables hidden, jars lined up, the kettle exactly where your hand expects it. Pour yourself something warm and read on.
1. Set the Coffee Machine and Kettle on a Dedicated Corner Counter With Hidden Cable Routing
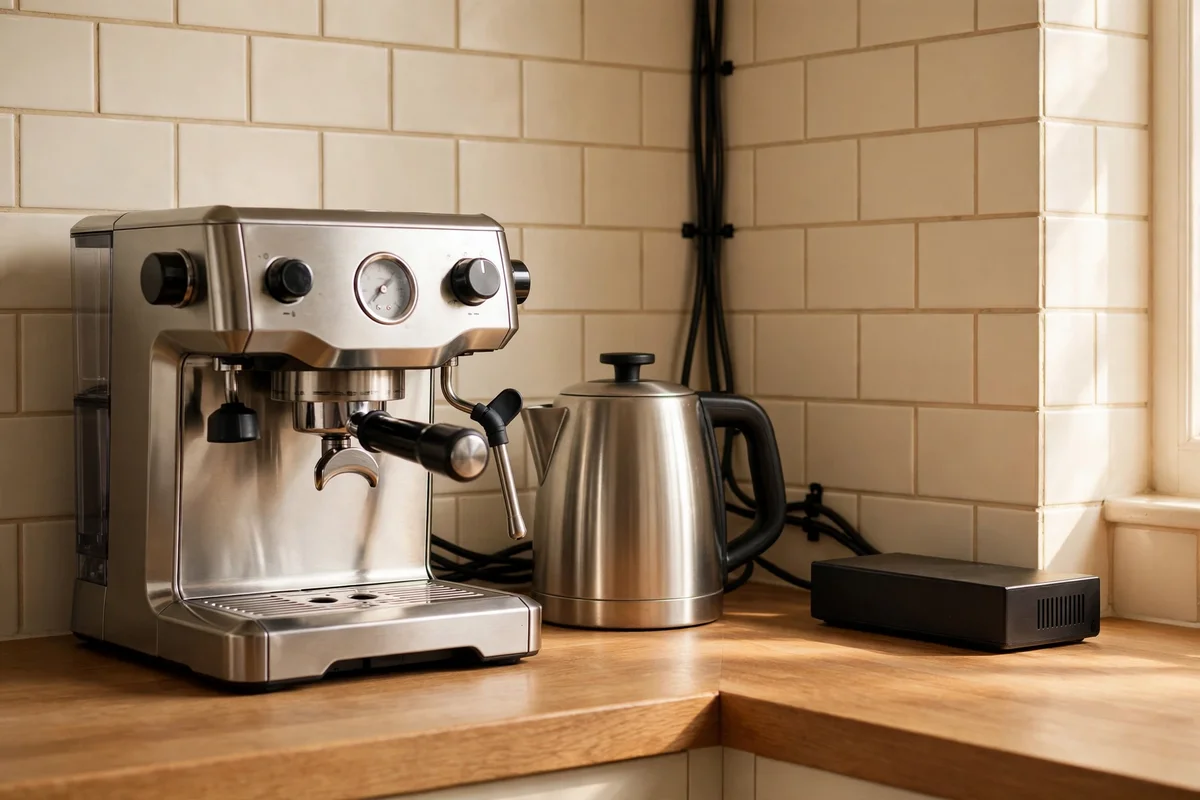
Give the machine and kettle one permanent address, ideally a corner stretch of counter 60 to 90 cm wide, so the daily ritual never drifts across the kitchen. Place the machine to the left and the kettle to the right if you are right-handed, keeping the heaviest item closest to the wall for stability. Run both cables behind the appliances to a single slim extension lead tucked against the splashback, and clip the leads together with two adhesive cable clips so no wire crosses the worktop.
A short cable sleeve or a small wooden cable box, about 20 cm long, keeps the lead from looking messy and protects it from splashes. Keep plugs above counter height where possible, and leave 5 cm of air around the machine’s sides so heat escapes safely. The mistake to avoid is trailing cables past the sink edge, where water and steam wear them down. A pack of adhesive clips and a sleeve usually costs under 10 pounds or dollars, which makes this the cheapest upgrade in the whole set.
2. Corral Everything on One Large Wooden Tray for a Tidy Footprint
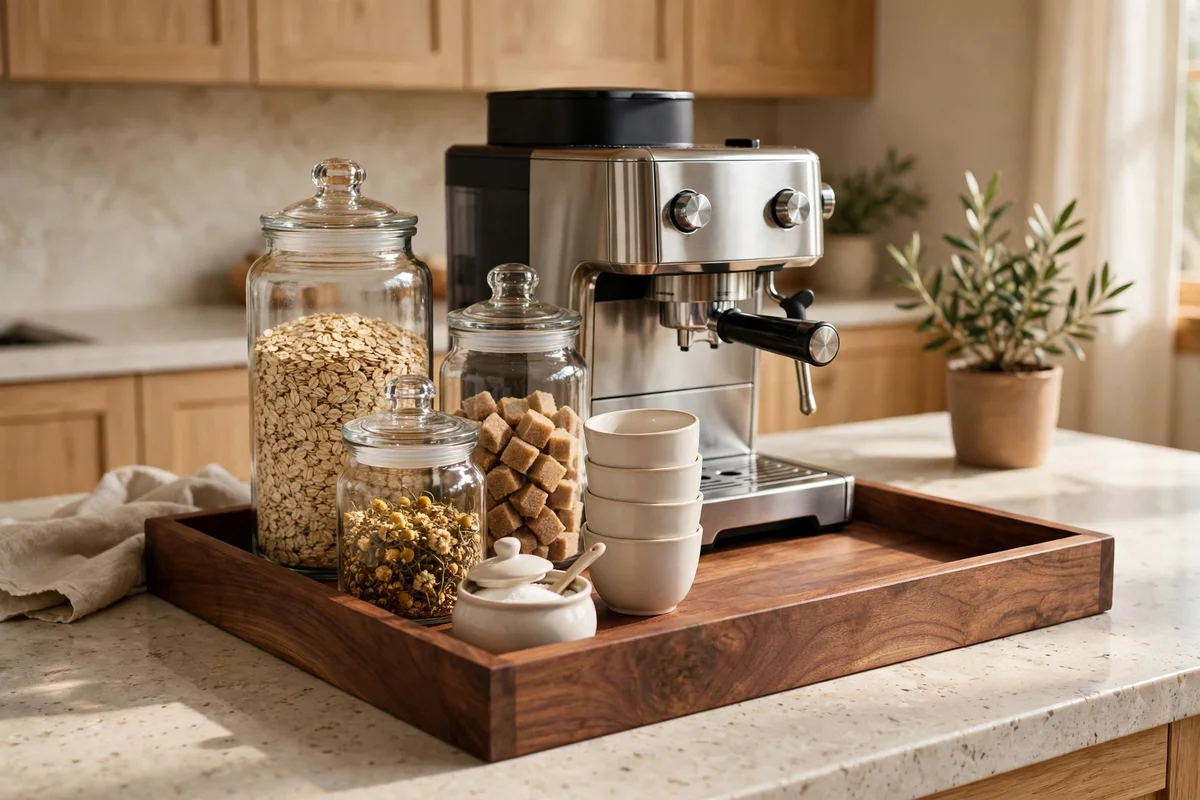
A tray turns six scattered items into one deliberate island. Choose a wooden tray 45 to 60 cm long and 30 to 35 cm deep, with a 4 cm rim so sugar jars and spoons stay put when the tray slides. Set it under the machine end of the station and arrange items back to front by height: tall jars and the kettle at the rear, the cup stack and small sugar bowl at the front, where short hands reach easily. Acacia, oak or walnut all suit warm kitchens.
The tray also makes cleaning a two-minute job, because crumbs and drips land on wood instead of the counter, and the whole island lifts away for a proper wipe. Line it with a thin cork mat if you want extra grip, and re-oil wooden trays once every few months with food-safe mineral oil. Avoid trays with tall handles that catch sleeves, and never park the tray directly beside the hob, where heat dries the wood. A solid wood tray at this size is a mid-tier purchase, usually 25 to 50 pounds or dollars.
3. Hang Mugs on a Wall-Mounted Hook Rail Above the Station
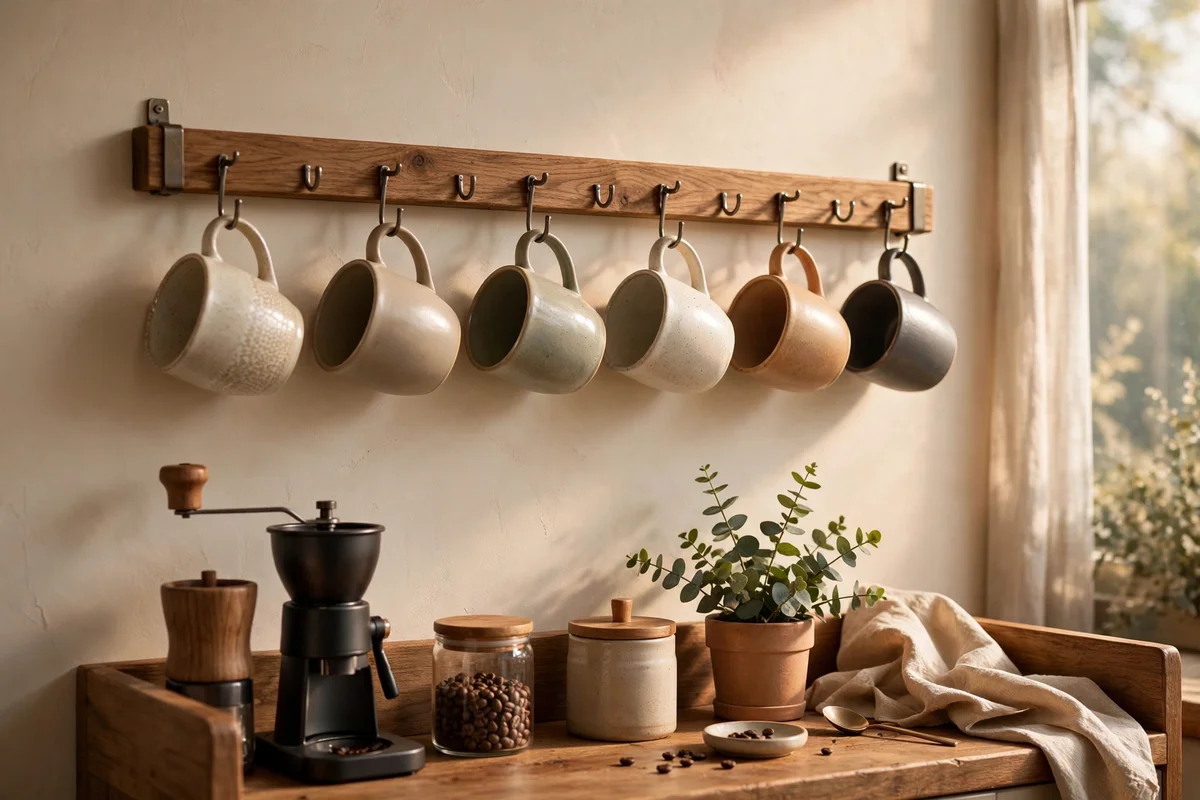
A hook rail puts everyday mugs within arm’s reach and frees a full shelf of cupboard space. Mount a wooden or metal rail 50 to 70 cm long on the wall 20 to 25 cm above the counter, into studs or with anchors rated for at least 10 kg, since six stoneware mugs weigh close to 3 kg. Space the hooks 12 to 15 cm apart so mugs swing without knocking, and hang the heaviest cups nearest the brackets. Keep one empty hook for the guest cup.
Choose hooks with a soft curve rather than sharp points so cup handles slide on and off without chipping. If drilling is not allowed, a rail with strong removable adhesive mounts holds four to five light ceramic mugs, provided the wall is smooth tile or glass. Wipe the rail monthly, because steam from the kettle leaves a fine film. The mistake to avoid is hanging mugs directly above the machine’s steam vent, where constant heat dulls glaze over time. Budget rails start under 15 pounds or dollars.
4. Fit One Short Open Shelf for Cups, Jars and the Kettle Lid
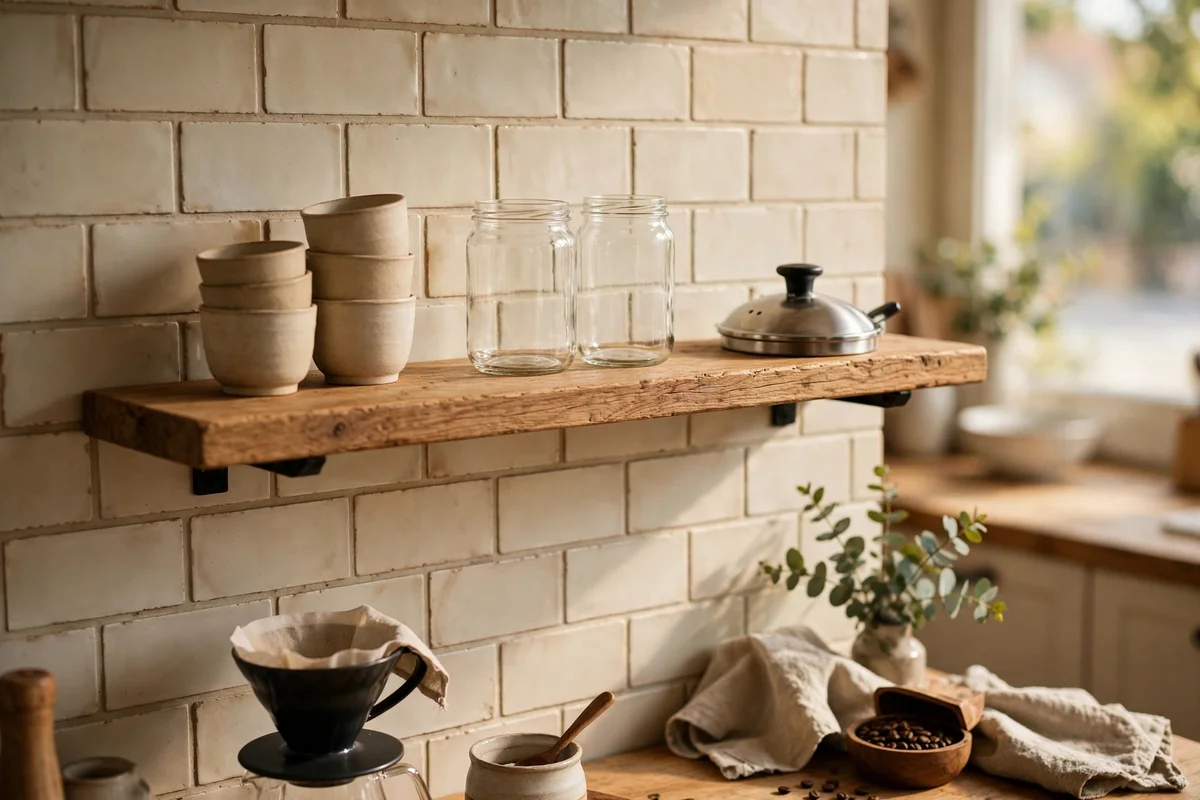
One open shelf, 60 to 80 cm long and 20 to 25 cm deep, holds the overflow that will not fit on the tray: spare cups, the tea jar, and the kettle lid between brews. Mount it 40 to 45 cm above the counter so a tall glass jar of 22 cm still slides underneath with room to spare. Fix it into wall studs or use anchors rated for 15 kg, since jars of beans are heavier than they look. Paint or stain the shelf to match the kitchen woodwork for a built in feel.
Style the shelf in three quiet groups: a stack of cups on the left, two jars in the middle, and the kettle lid or a small plant on the right. Leave 10 cm of clear space at each end so the shelf breathes and dusting stays easy. Do not stack jars two deep, because the back row gets forgotten and beans go stale. A solid timber shelf with two brackets is a small investment, usually 20 to 40 pounds or dollars, and many stores cut timber to length for free.
5. Decant Beans and Tea Into Plain Glass Jars With Airtight Lids

Clear glass jars turn ingredients into decoration while keeping beans and tea genuinely fresher. Choose jars of 500 ml to 1 litre with silicone-sealed wooden or metal lids, one for beans, one for ground coffee, and one or two for loose tea. Fill each jar no more than three-quarters full so the seal closes on air you can press out, and keep them out of direct sun, ideally in the shadow of the upper shelf. Plain glass with no readable labels keeps the look calm and photographs beautifully.
Whole beans stay lively for two to three weeks in a sealed jar, while ground coffee is best used within one week, so buy in small bags and refill often. Rinse jars with hot water and dry them fully before each refill, because trapped moisture dulls flavour fast. The mistake to avoid is storing jars beside the oven or in a sunny window, where heat and light age coffee in days. Three good jars cost 12 to 25 pounds or dollars, a small price for coffee that tastes the way it should.
6. Build the Station on a Rolling Cart for Small or Shared Kitchens
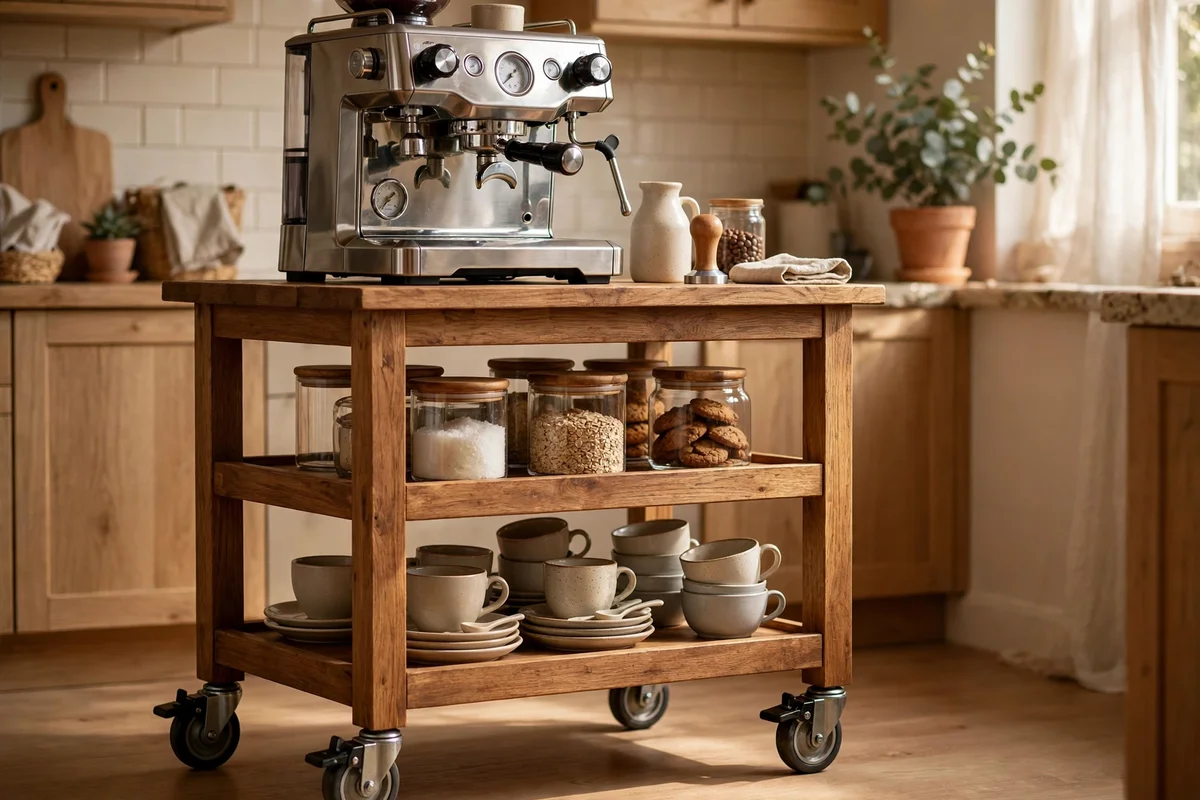
When counter space is scarce, a rolling cart becomes the coffee corner, and it tucks away when guests need the room. Choose a cart 40 to 50 cm wide with two or three tiers and a top that sits 75 to 90 cm high, matching counter height so pouring feels natural. Lockable castors are essential, because a cart carrying a full kettle can weigh over 8 kg and must not drift mid-pour. Keep the machine on top and jars and cups on the lower shelves.
Park the cart in a corner of the kitchen or the end of a hallway, and wheel it to the table when serving a crowd. Add a small hook on the cart’s side for the dust cloth and a tiny bin underneath for grounds. The mistake to avoid is overloading the top shelf, because a top-heavy cart tips when it hits a rug edge, so keep heavy jars low. Sturdy metal or wood carts run 35 to 80 pounds or dollars, far cheaper than fitting extra cabinetry.
7. Convert an Unused Alcove Into a Built In Coffee Nook
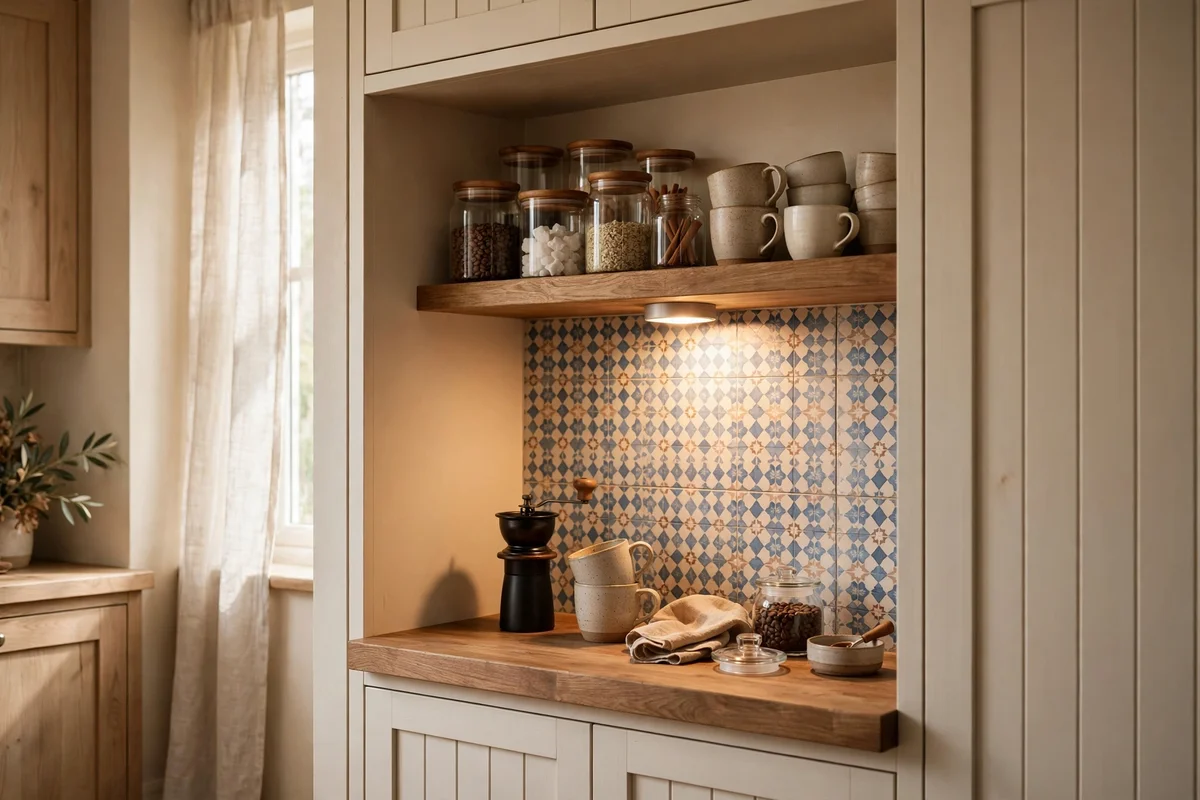
An awkward alcove between cupboards or beside the fridge can become a proper coffee nook with almost no building work. Measure the space, then fit a timber shelf 60 to 75 cm wide at counter height to act as the worksurface, and a second shelf 40 cm above it for jars and cups. Line the back wall with washable peel-and-stick tiles in a soft pattern, which protects plaster from steam and wipes clean. Add a small warm lamp or a battery puck light if the alcove sits in shadow.
Because the nook sits off the main worktop, the kitchen keeps its cooking space while the coffee gear gains a permanent home. Run a short cable from the nearest socket through a clip-on trunking channel so the machine lead stays neat along the wall. The mistake to avoid is skipping ventilation, because an enclosed alcove traps steam and musty smells, so leave the front fully open. Timber, tiles and a light usually total 60 to 120 pounds or dollars, a modest spend for a fitted look.
8. Keep Water Fresh With a Filtered Carafe Beside the Machine
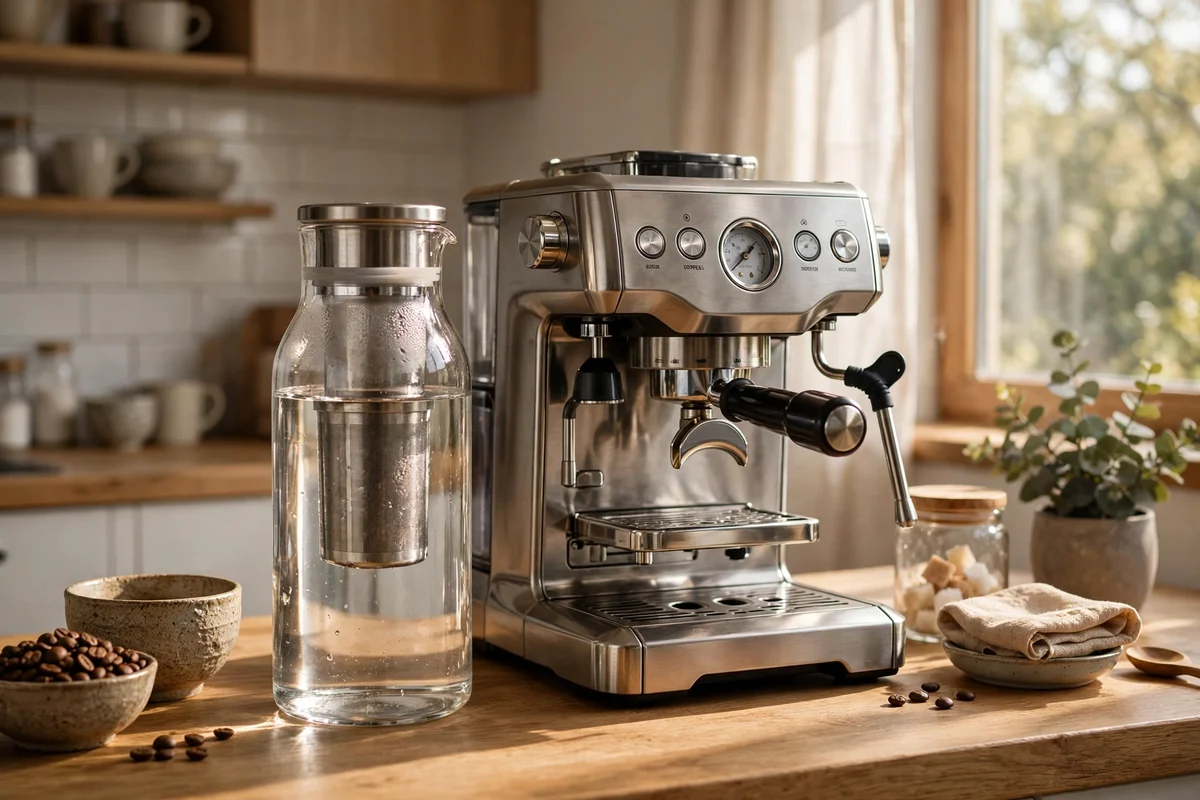
Coffee is mostly water, so a filtered carafe beside the machine lifts every cup with almost no effort. Choose a 1 to 1.5 litre glass carafe with a replaceable carbon filter, and park it on the tray’s right side so refilling the machine is one smooth move. Change the filter every four to six weeks, or sooner if the water tastes flat, and wash the carafe weekly with hot soapy water to stop any film building up. Room temperature water brews fine in most machines.
If tap water is hard, filtered water also slows limescale inside the machine, which keeps heating fast and descaling rare. Descale every two to three months anyway with a citric acid solution, following the machine’s manual. The mistake to avoid is letting filtered water sit for more than two days, because still water picks up kitchen smells, so refill the carafe fresh each morning. A carafe with a year of filters costs 25 to 45 pounds or dollars, and the taste difference shows within the first week.
9. Store Milk Right With a Small Fridge Jug and a Daily Fresh Rule
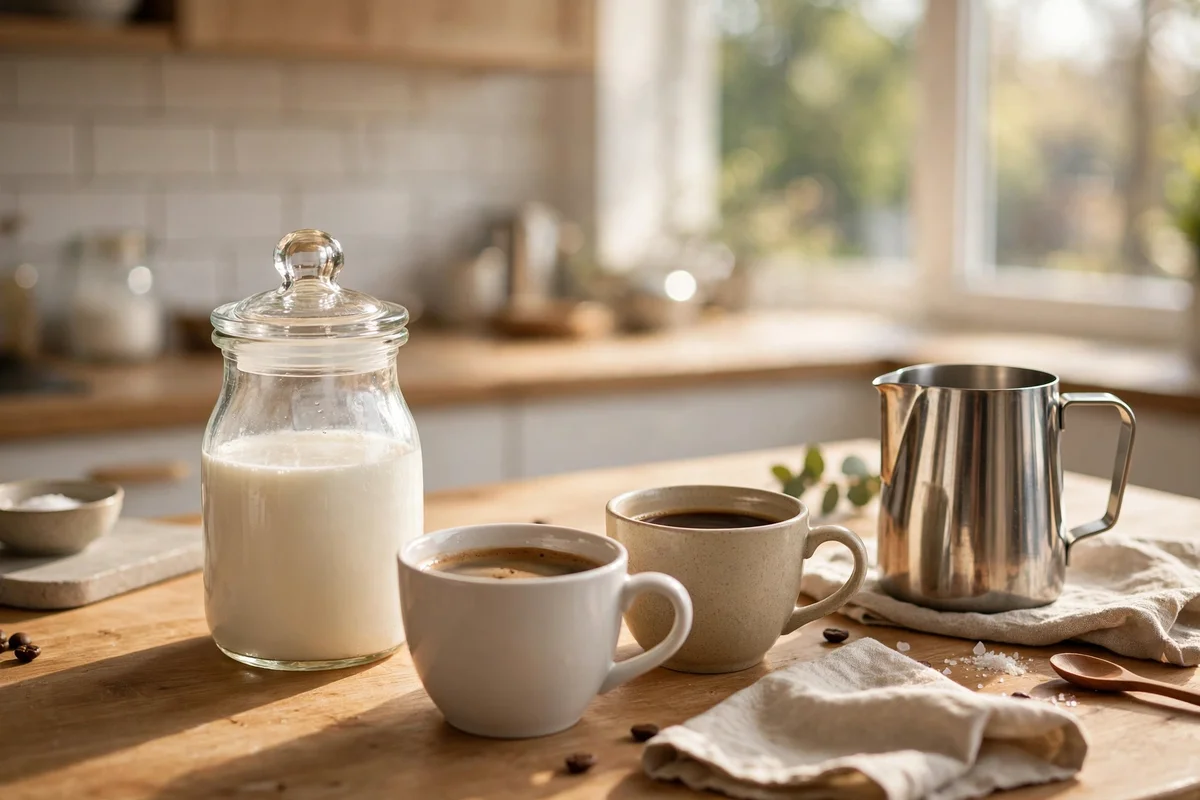
Milk deserves the same care as the coffee, because warm milk flattens froth and sours fast. Keep a lidded glass or steel jug of 500 ml in the fridge door for daily use, and pour only what each cup needs so the main bottle stays cold. Whole milk froths thickest, while oat milk steams well if you choose a barista blend made for heat. Rinse the jug with cold water right after pouring, since hot water bakes milk protein onto the surface.
For the station itself, a tiny countertop milk cooler is a luxury, but most households do fine with a small insulated flask that keeps milk cool for two hours during a long breakfast. Smell milk before each use and follow the printed date strictly, because coffee hides sour notes until the cup cools. The mistake to avoid is leaving the jug on the counter through a warm afternoon, which turns milk in hours. A good lidded jug costs under 12 pounds or dollars, a simple, lasting upgrade.
10. Set Out a Guest Tray With Cups, Dates and Biscuits
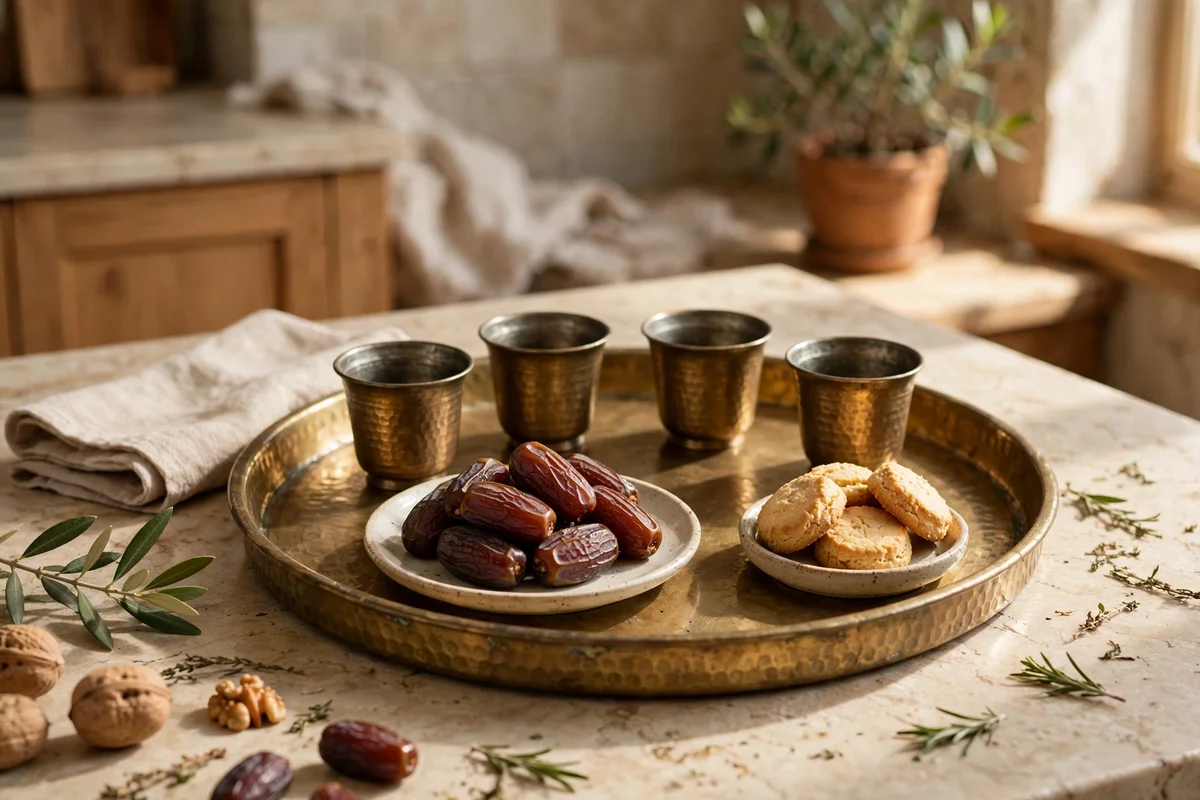
A guest tray turns the coffee corner into a welcome, ready before anyone knocks. Choose a round tray 35 to 40 cm across and set it with four small cups, a plate of dates, and a small dish of plain biscuits. Dates pair beautifully with Arabic coffee and with strong black tea, and their natural sweetness means less sugar on the table. Keep the tray on the station’s lower shelf or in a cupboard, fully dressed, so serving takes one lift.
Refresh the dates weekly and keep biscuits in a sealed tin so they stay crisp, because a stale biscuit undoes the whole gesture. Add a small jug of warm milk and a bowl of sugar cubes beside the cups, and you have covered every common preference. The mistake to avoid is setting out the tray only after guests arrive, which keeps everyone waiting while you hunt for cups. A brass or wooden round tray costs 15 to 30 pounds or dollars and lasts for years.
11. Add a Manual Grinder and a Pour Over Dripper for Slow Mornings
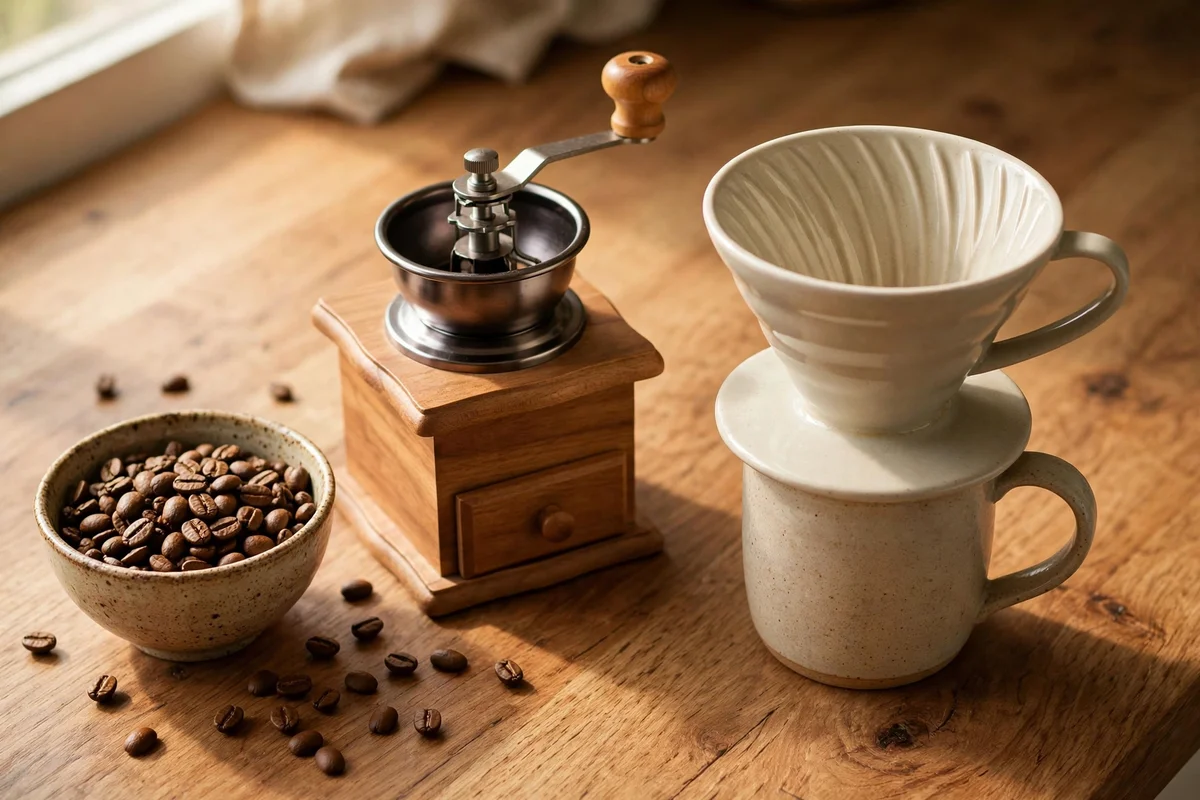
A manual grinder and a simple pour over dripper bring a slower, hands-on ritual to the corner for weekends and quiet evenings. Choose a burr hand grinder with steel burrs, which grinds 20 g of beans in about one minute, and a ceramic dripper that sits on any standard mug. Grind medium-fine for pour over, roughly the texture of sand, and use a ratio of 1:15, which means 20 g of coffee to 300 ml of water. The pair needs no electricity and almost no space.
Store the grinder in a small linen bag to keep dust out of the burrs, and rinse the dripper with hot water right after brewing so oils never build up. A gooseneck kettle, covered later in this guide, makes pouring circles far easier. The mistake to avoid is buying pre-ground coffee for a dripper and expecting bright flavour, because ground coffee stales within days while whole beans hold for weeks. A good hand grinder and ceramic dripper together cost 30 to 60 pounds or dollars.
12. Keep a Gooseneck Kettle for Precise Pouring and Even Brewing
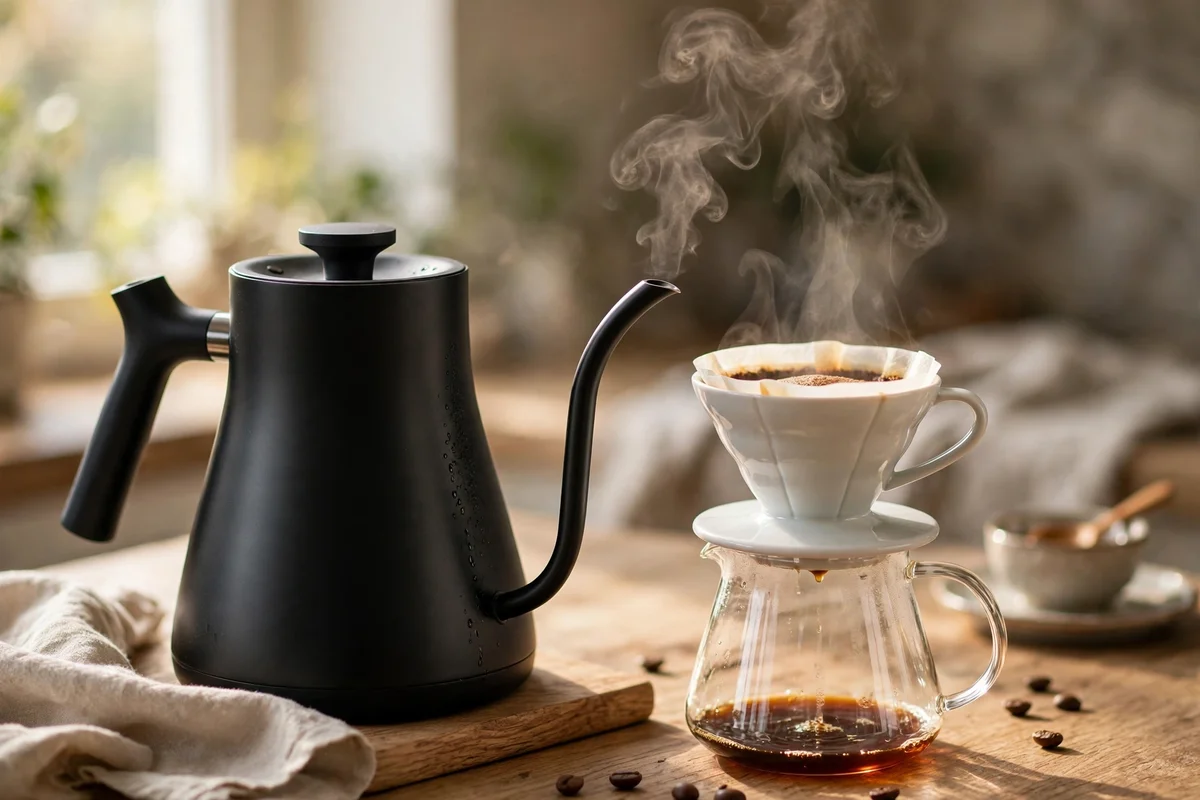
A gooseneck kettle, with its long thin spout, gives the slow steady pour that manual brewing needs. Choose a 0.9 to 1 litre model in matte black steel or brushed steel, which suits most kitchen palettes and resists fingerprints. Fill it to 500 ml for a two-cup brew, heat to just off the boil, around 92 to 96 degrees, and pour in slow circles from the centre outward. The narrow spout keeps water flow at a calm 4 to 6 ml per second.
Electric gooseneck kettles with temperature control remove the guesswork and hold heat while you grind, though a stovetop model costs less and lasts for years. Descale monthly with a half-and-half mix of water and white vinegar, then boil one fresh batch and pour it away. The mistake to avoid is filling past the max line, because a full gooseneck pours heavily and the whole point is control. Electric models run 40 to 90 pounds or dollars, stovetop versions 25 to 50.
13. Line a Shallow Drawer With Dividers for Filters, Pods and Spoons
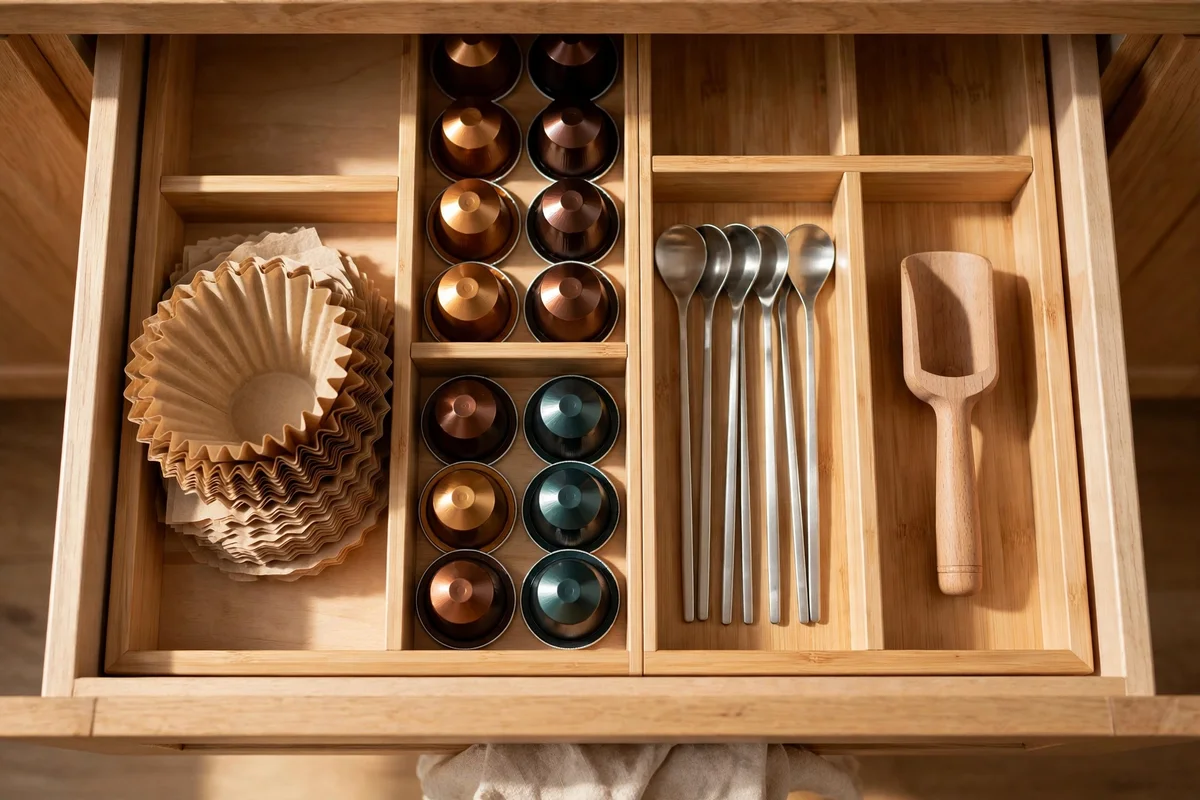
A shallow drawer beneath or beside the station swallows the small clutter that ruins a calm corner. Fit an adjustable bamboo or beech divider set, which expands to fit drawers 35 to 55 cm wide, and give every item its own bay: paper filters upright in one, pods or capsules in another, long spoons and the coffee scoop in a third. Keep the scoop, which measures about 10 g per level spoon, beside the filters so dosing happens in one motion. Label nothing; the bays stay obvious.
Line the drawer base with a washable non-slip mat cut to size, which stops jars rattling and wipes clean in seconds. Keep a small box of spare descaling sachets and cleaning tablets at the drawer’s back so maintenance supplies never wander. The mistake to avoid is cramming the drawer full, because an overstuffed drawer jams and the dividers shift, so leave one bay empty for growth. Adjustable divider sets cost 12 to 25 pounds or dollars, a tidy spend for daily calm.
14. Light the Corner With a Warm Under Shelf Strip for Early Mornings
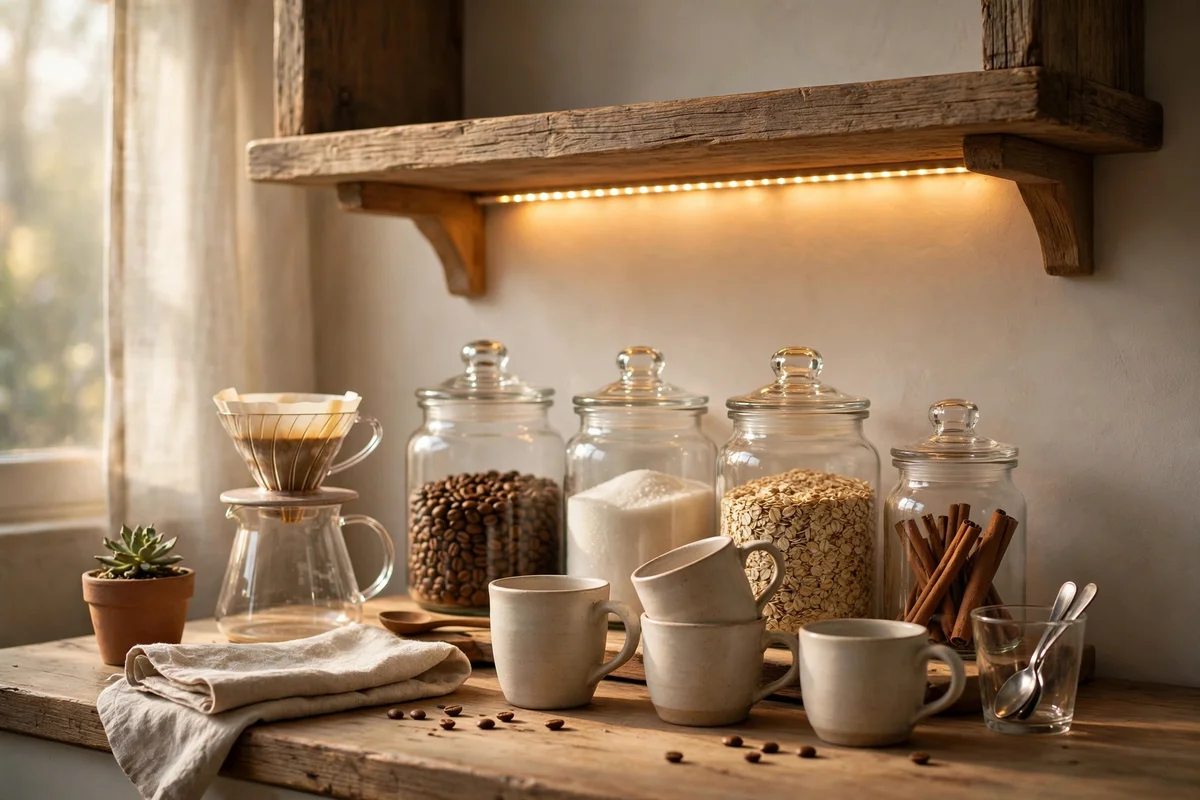
A warm light strip under the open shelf turns the station into a gentle beacon on dark mornings. Choose a USB or battery LED strip in 2700K warm white, 60 to 80 cm long to match the shelf, with a motion sensor or a small inline switch. Stick it 3 cm back from the shelf’s front edge so the light washes down over jars and cups without glaring into eyes. The glow makes measuring and pouring safer before the main kitchen light goes on.
Battery strips need new cells every two to three months with daily use, while USB models run from a small power bank hidden behind a jar. Keep the strip’s brightness low, because the aim is calm, not a spotlight, and dimmable models cost only a little more. The mistake to avoid is cool white 5000K light, which makes coffee look grey and the corner feel clinical. Warm strips run 10 to 25 pounds or dollars, one of the kindest upgrades for winter mornings.
15. Lay a Washable Runner Under the Station to Catch Drips
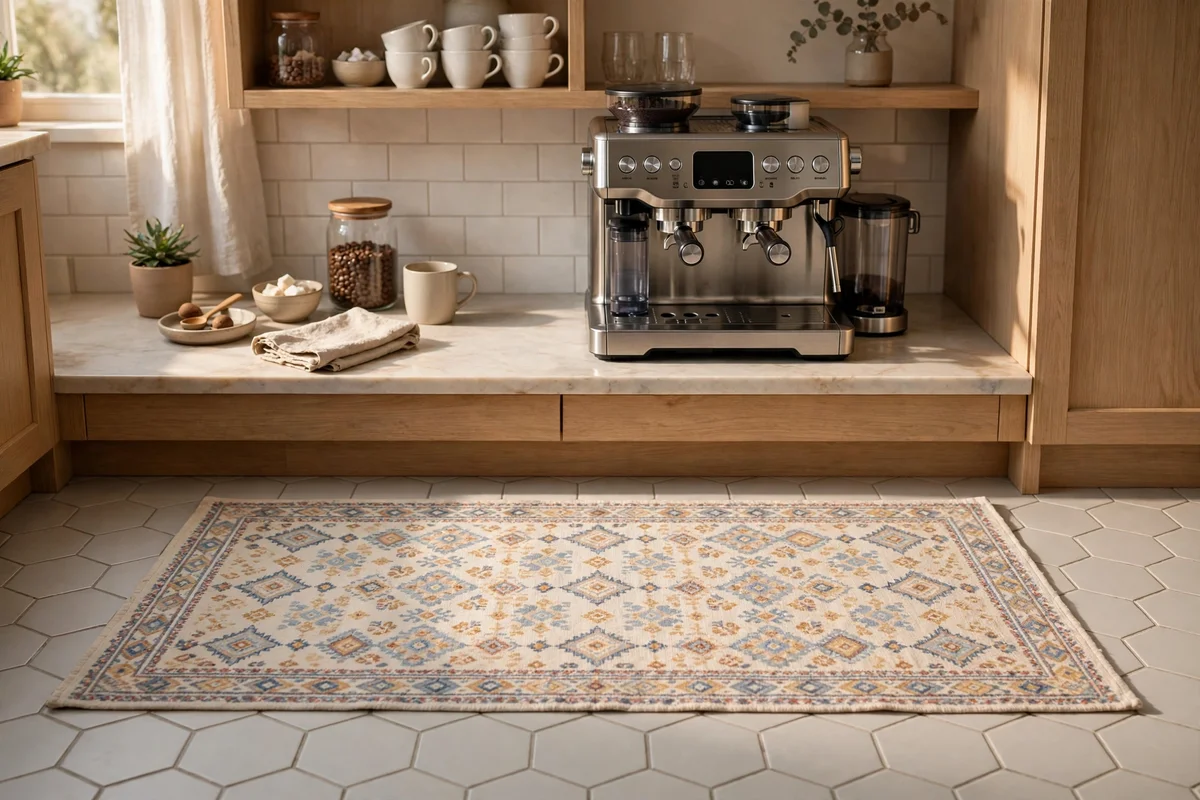
A low runner under the station catches the drips, grounds and splashes that daily brewing always produces. Choose a washable cotton or flatweave runner 60 to 90 cm long and 40 to 50 cm wide, in a pattern that forgives coffee stains, such as a small Persian-style print or a warm stripe. Lay it flat with no curled edges, and add a thin non-slip underlay if the floor is tile. Machine-wash it monthly on a cool cycle and it stays fresh for years.
Treat spills the same day, because dried coffee sets into fibres and dulls even dark patterns. A quick blot with a damp cloth handles most splashes, while a paste of baking soda and water lifts older marks before washing. The mistake to avoid is a thick shaggy rug, which traps grounds deep in its pile and never fully releases them. Washable runners cost 15 to 35 pounds or dollars, and they protect flooring worth far more.
16. Style a Framed Print and a Small Plant Beside the Station
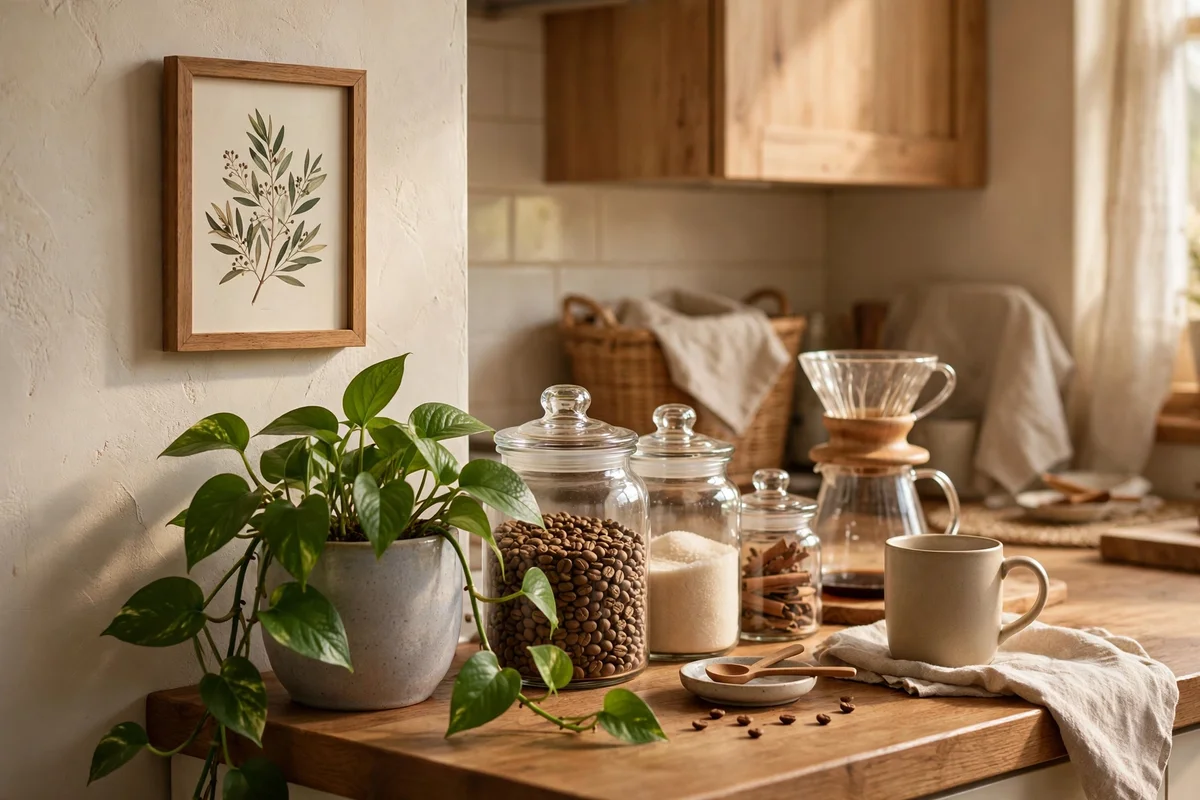
One framed print and one small plant give the station a finished, homely feel without stealing worktop space. Choose a print 20 to 30 cm tall in a slim oak or black frame, hung 15 cm above the splashback or leaned against the wall, with a calm motif like a botanical sketch or a simple landscape. Beside it, set a small trailing plant such as pothos in a 10 cm pot, placed where kettle steam will not scorch its leaves. Two items are plenty.
Wipe the frame glass monthly, since kitchen steam leaves a light haze, and water the plant only when the top 2 cm of soil feel dry, usually once a week. If the corner gets little daylight, choose a hardy plant like a snake plant in a small pot, which tolerates shade and neglect. The mistake to avoid is crowding the station with five or six decorations, because the corner must stay a working space first. A print and a healthy plant together cost 15 to 30 pounds or dollars.
17. Dedicate One Shelf to a Dallah or Ibrik for Arabic Coffee Rituals

A dallah or ibrik gives the corner a heritage heart and honours the way many households truly serve coffee. Dedicate one shelf or one end of the tray to a brass dallah of 500 ml to 1 litre, or a copper ibrik of 240 to 360 ml, beside a small bowl of green cardamom pods. Brew by simmering finely ground coffee with water and two or three crushed pods, then rest the pot two minutes so the grounds settle. Serve in small handleless cups.
Hand-wash brass and copper by hand with warm water and a soft cloth, drying at once so no water spots form, and never put them in the dishwasher. Keep ground coffee for the ibrik finer than table salt, because coarse grounds brew thin and bitter in these pots. The mistake to avoid is boiling hard, which pushes bitter foam over the rim, so lift the pot the moment it foams. A solid ibrik costs 15 to 35 pounds or dollars, a dallah 40 to 90.
18. Set a Small Bin and Cloth Station for Grounds and Quick Wipes
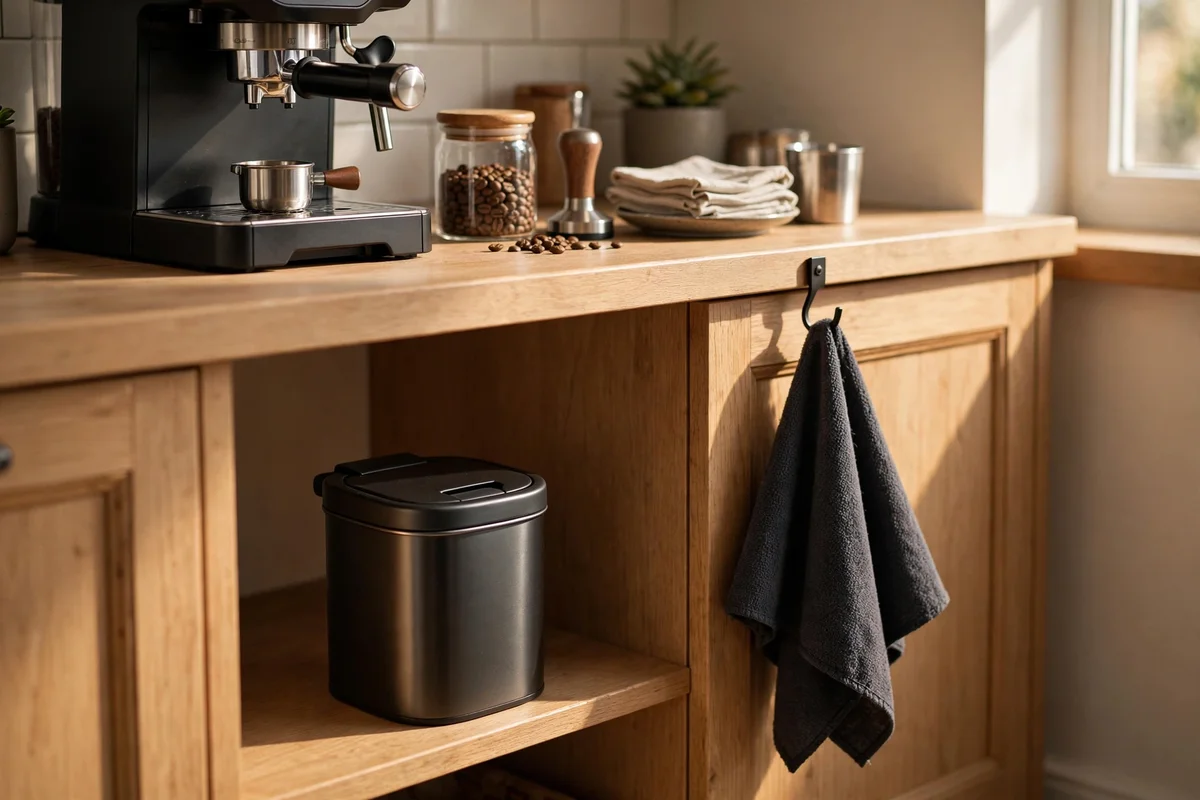
A tiny bin and a dedicated cloth keep the station spotless with almost no effort. Tuck a 3 to 5 litre lidded bin under the counter or on the cart’s lowest shelf for used grounds and paper filters, and empty it every one or two days so it never smells. Hang one dark microfibre cloth on a small hook beside the machine for drips, and keep a second dry cloth for polishing jars. Used grounds make excellent garden compost or a gentle scrub for plant pots.
Wash the cloths twice a week at 40 degrees with no fabric softener, because softener coats fibres and ruins absorbency. Wipe the machine’s drip tray daily and the counter weekly with a mild spray, and the corner stays welcoming. The mistake to avoid is tossing damp grounds into an open bin, which grows mould within days, so the lid matters more than the size. A small lidded bin and two cloths cost under 15 pounds or dollars combined.
19. Match the Station Palette to the Kitchen for a Calm Look
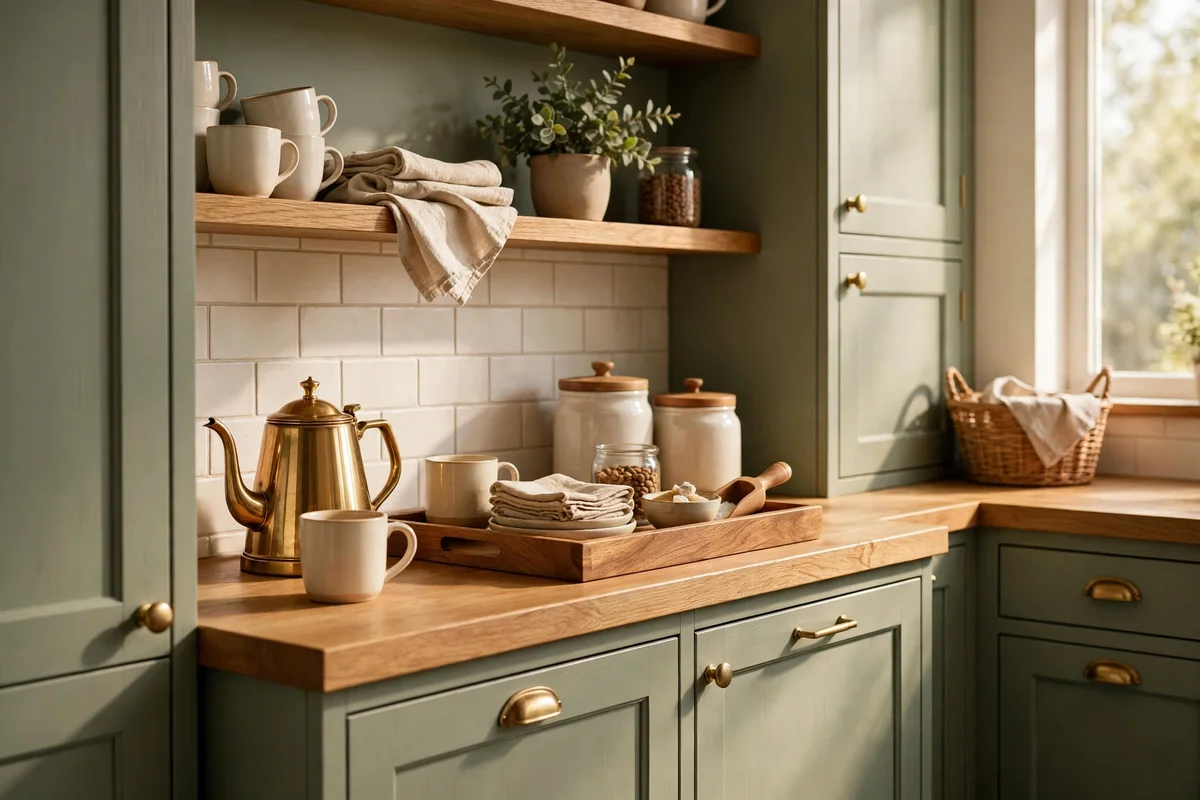
A coffee corner feels settled when its colours echo the kitchen around it. Pick two main tones from the room, for example warm white and oak, or sage green and walnut, and repeat them in the tray, the jars’ lids and the mug rail. Keep metals to one finish, brushed steel or brass, so the kettle, hooks and rail read as one family. Three tones at most keeps the eye calm, while a fourth colour usually starts to look busy.
If the kitchen is cool grey or white, warm wood and brass add the cosiness a coffee corner needs, while a timber kitchen welcomes black steel and stoneware. Test the palette by gathering the tray, one jar and one mug together before buying anything new, because small swatches lie and real objects tell the truth. The mistake to avoid is matching everything too perfectly, which looks staged, so let one piece, perhaps the plant pot, break the rule gently.
20. Keep the Whole Corner Renter Friendly With Freestanding Pieces
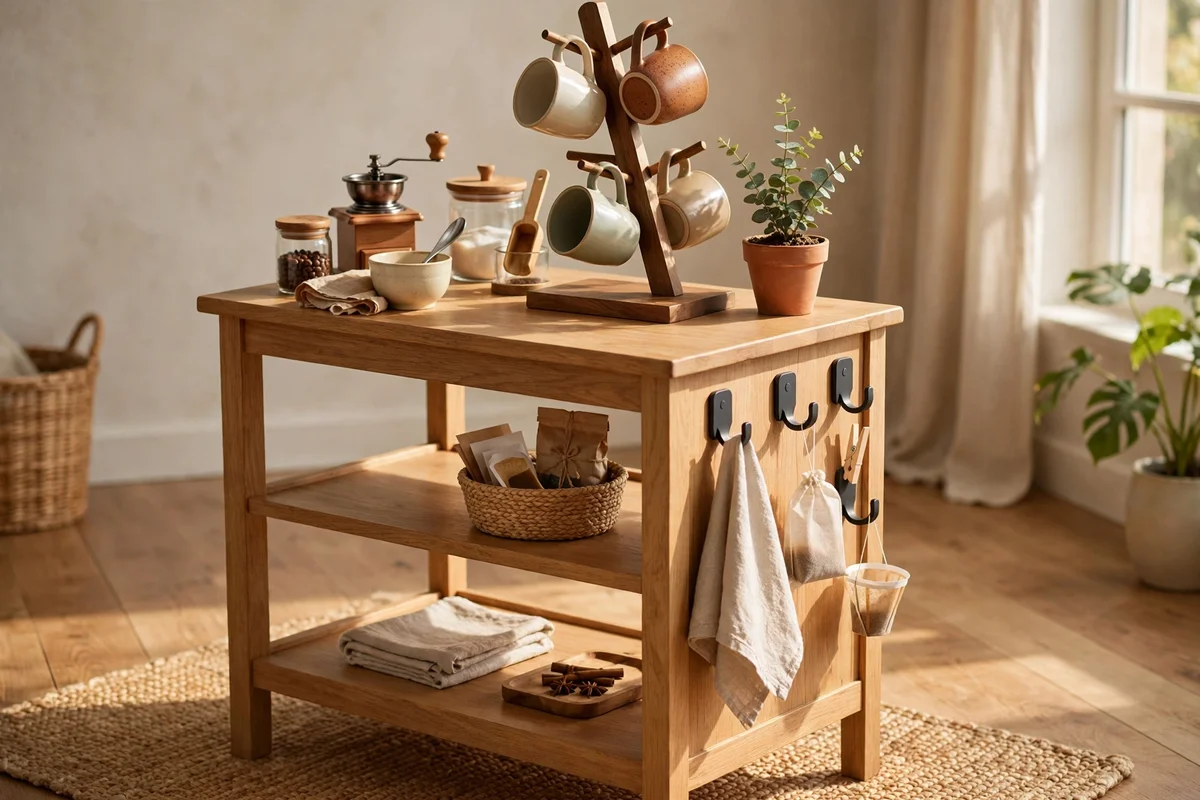
Renters can build a full coffee corner without drilling a single hole. Choose a freestanding shelf unit or a sturdy side table 60 to 80 cm wide as the base, a leaning mug tree instead of a wall rail, and a tension-rod shelf inside an alcove where walls allow. Strong removable adhesive hooks hold light rails and cable clips on smooth tile, and they peel away cleanly on moving day. Keep the landlord’s fixtures untouched and the whole station moves with you.
Photograph the walls before you start, so any mark can be proved old at checkout, and keep original fixings in a labelled bag inside a cupboard. Freestanding pieces also suit homeowners who like to rearrange, because the corner can shift with the seasons. The mistake to avoid is cheap suction hooks, which drop mugs at the worst moment, so spend a little more on rated adhesive mounts. A side table, mug tree and hooks usually total 50 to 90 pounds or dollars.
Twenty ideas, one calm corner. The thread running through all of them is simple: give every item a home, hide what you do not need to see, and let warm materials do the decorating. A tray, a rail, a few glass jars and a light strip will carry most of the transformation, and the rest can arrive slowly, one thoughtful purchase at a time.
This week, start with the easiest win of all: gather everything onto one tray. It takes ten minutes, costs nothing if you borrow a tray from elsewhere in the house, and it shows you instantly what belongs in the corner and what does not. Once that rhythm feels natural, add the hook rail or the jars next. Small steps, warm coffee, a corner that finally feels like yours.
Frequently Asked Questions
How much does a home coffee station cost to set up?
A tidy corner starts around 60 to 100 pounds or dollars for a tray, jars and hooks if you already own the machine and kettle. Adding a shelf, a light strip and a rolling cart lifts the budget to 150 to 250. Buy the tray and jars first, live with them for two weeks, then decide what the corner still needs.
Can I build a coffee corner in a very small kitchen?
Yes. A rolling cart of 40 to 50 cm wide holds the whole station and parks in a corner or hallway when not in use. Alternatively, claim one 60 cm stretch of counter with a tray that corrals everything into a single footprint. Wall hooks and one open shelf add storage without using counter space. Keep only daily items out and store the rest in a cupboard.
How do I keep coffee beans fresh once the bag is open?
Decant beans into an airtight glass jar with a silicone seal and keep it away from heat and sunlight. Whole beans stay lively for two to three weeks, while ground coffee fades within a week, so buy small bags and refill often. Never store jars beside the oven or in a sunny window. Rinse and fully dry the jar before each refill to keep flavours clean.
Is a coffee corner renter friendly?
Completely, if you skip the drill. Use a freestanding shelf or side table as the base, a leaning mug tree instead of a wall rail, and strong removable adhesive hooks rated for the weight on smooth tile. Keep cables tidy with adhesive clips that peel away cleanly. Photograph walls before you start and store original fixings in a bag for moving day.
How do I stop the coffee corner from looking cluttered?
Limit the palette to two or three tones and one metal finish so everything reads as one family. Corral small items onto a single tray, hang mugs on a rail instead of stacking them, and keep only daily tools on show. Store backup supplies in a drawer or cupboard. Leave clear space at the shelf ends, because breathing room is what makes a corner look calm.