Kitchen
22 Kitchen Corner Ideas That Put Dead Space to Work
By Anna Wells · · 18 min read
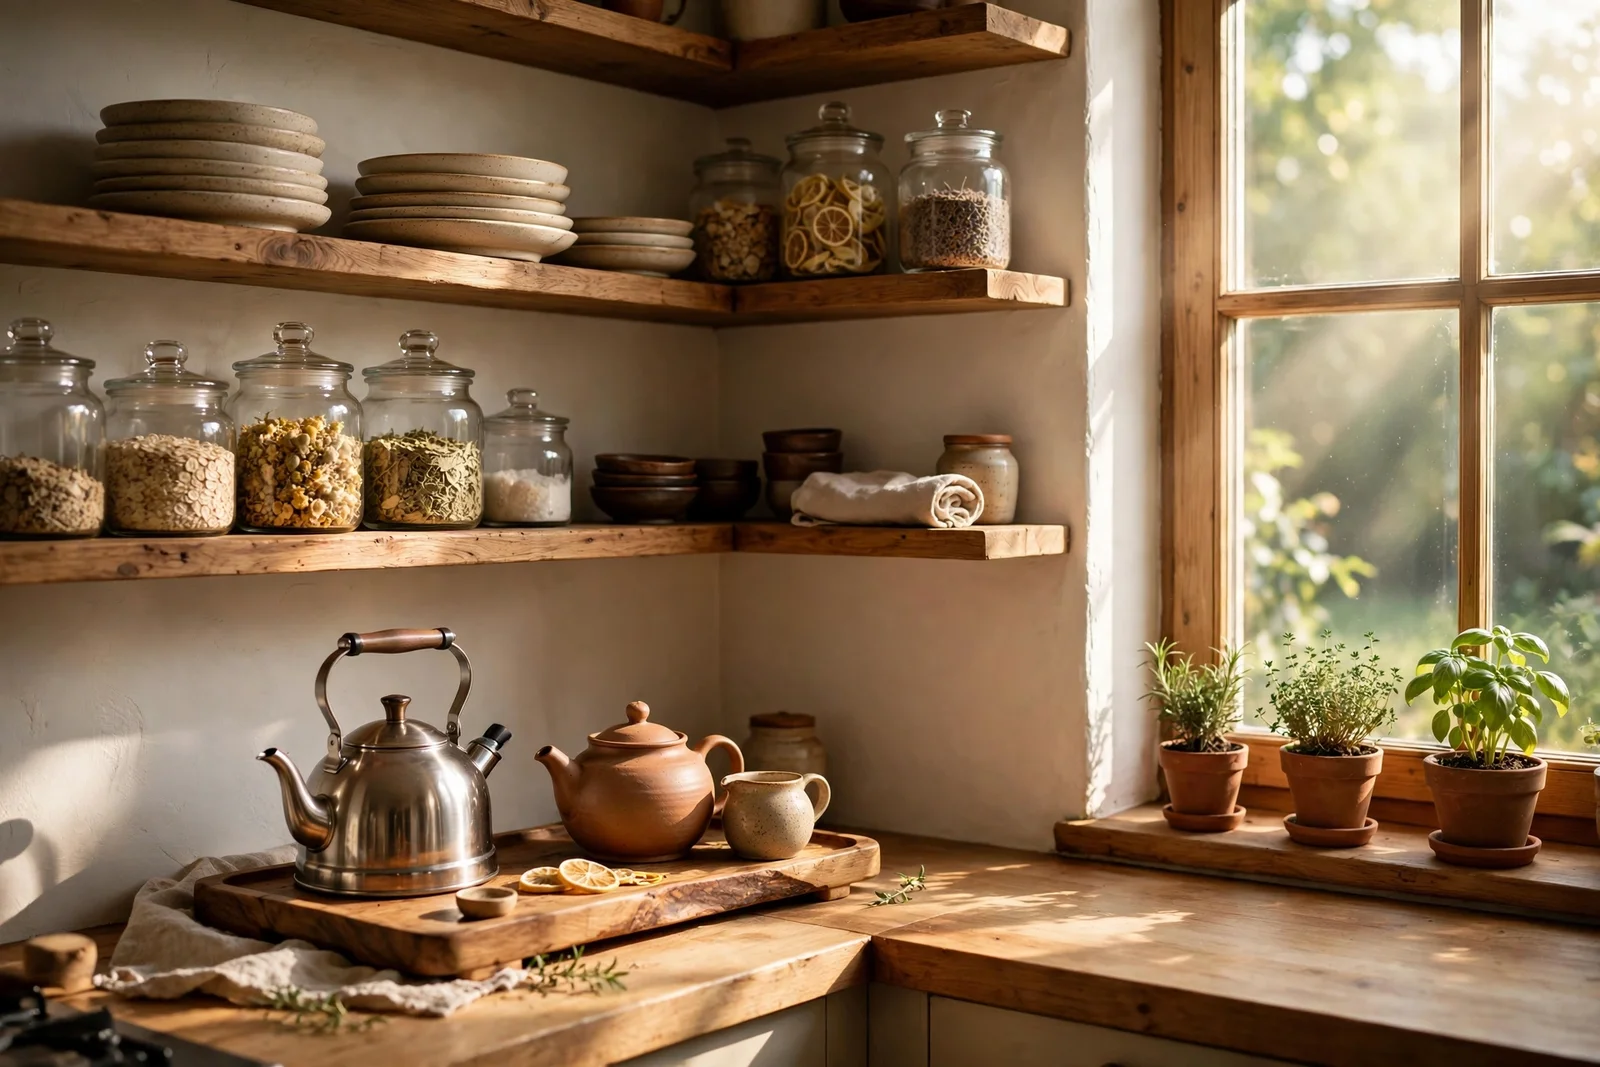
22 practical ways to turn empty kitchen corners into shelving, seating, tea stations and clever storage.
Morning light slides along the worktop and stops at the corner, where the toaster used to sit and gather crumbs. Every kitchen has that one angle where good intentions go to rest: too deep to reach, too dark to love, too awkward to plan around.
But corners are generous when you treat them honestly. They hold the steadiest shelves, the cosiest bench, the tidiest tea tray. This is the story of dead space turned into the hardest working square metre of the room.
Below are 22 concrete kitchen corner ideas, each with sizes, materials and costs, so you can pick one and start this weekend. They suit rented kitchens and owned ones alike, and every one keeps the look calm, classic and family friendly.
Begin with the easiest win, the corner tray station, then let the bigger projects follow one at a time. A tidy corner changes how the whole kitchen feels.
1. Run Open Shelves Around the Corner on Matching Brackets
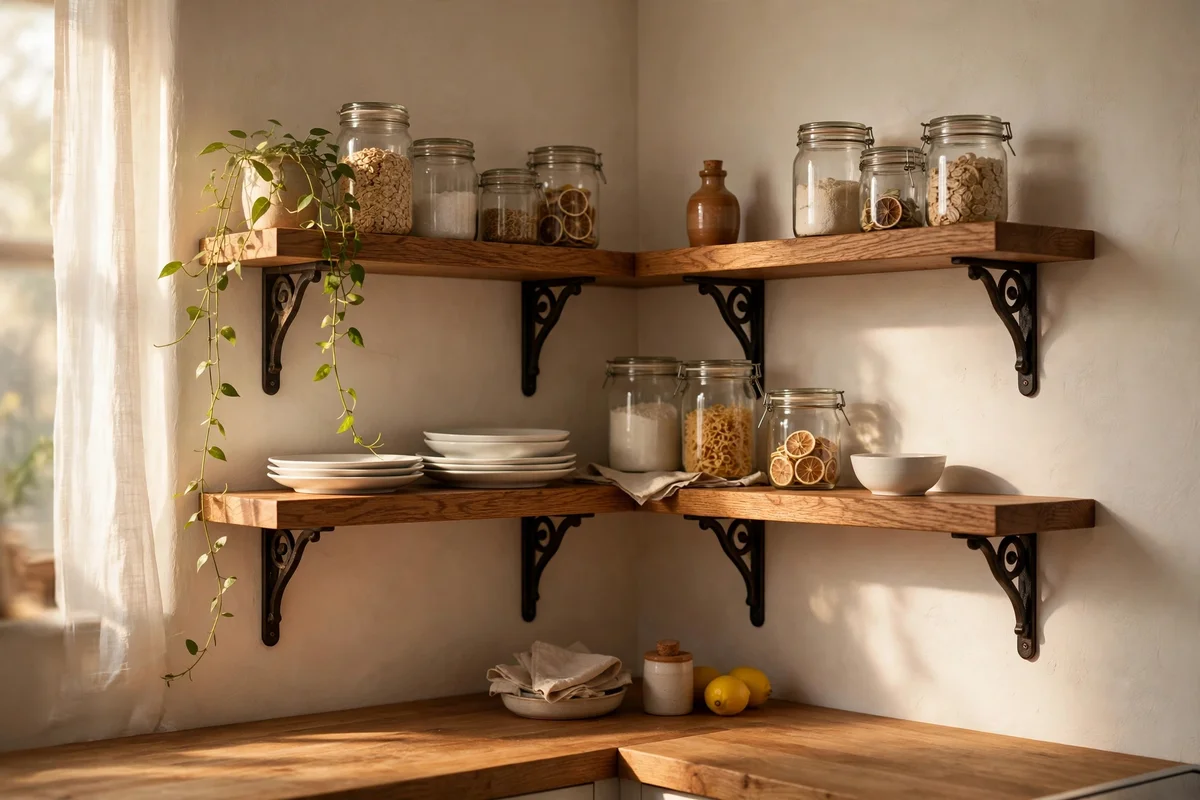
Two shelves that wrap the corner turn the most awkward junction in the kitchen into its busiest storage. Use solid pine or oak boards 22 cm deep, about 9 inches, so everyday plates and jars sit back from the edge. Fix each run with two brackets per wall into studs or masonry, and leave 30 to 35 cm between the shelves so stacked bowls clear easily. Sand the front edges smooth and finish with food-safe oil for a warm, wipeable surface.
Keep the display honest: daily crockery on the lower shelf, pretty jars and a trailing plant up top. The common mistake is loading both shelves with rarely used gadgets, which makes the corner heavy and hard to clean. Wipe the boards weekly, since kitchens gather grease fast. Budget tip: two stained pine boards with four cast-iron brackets usually costs 35 to 60 pounds or dollars.
2. Build a Tea and Coffee Station on a Corner Tray
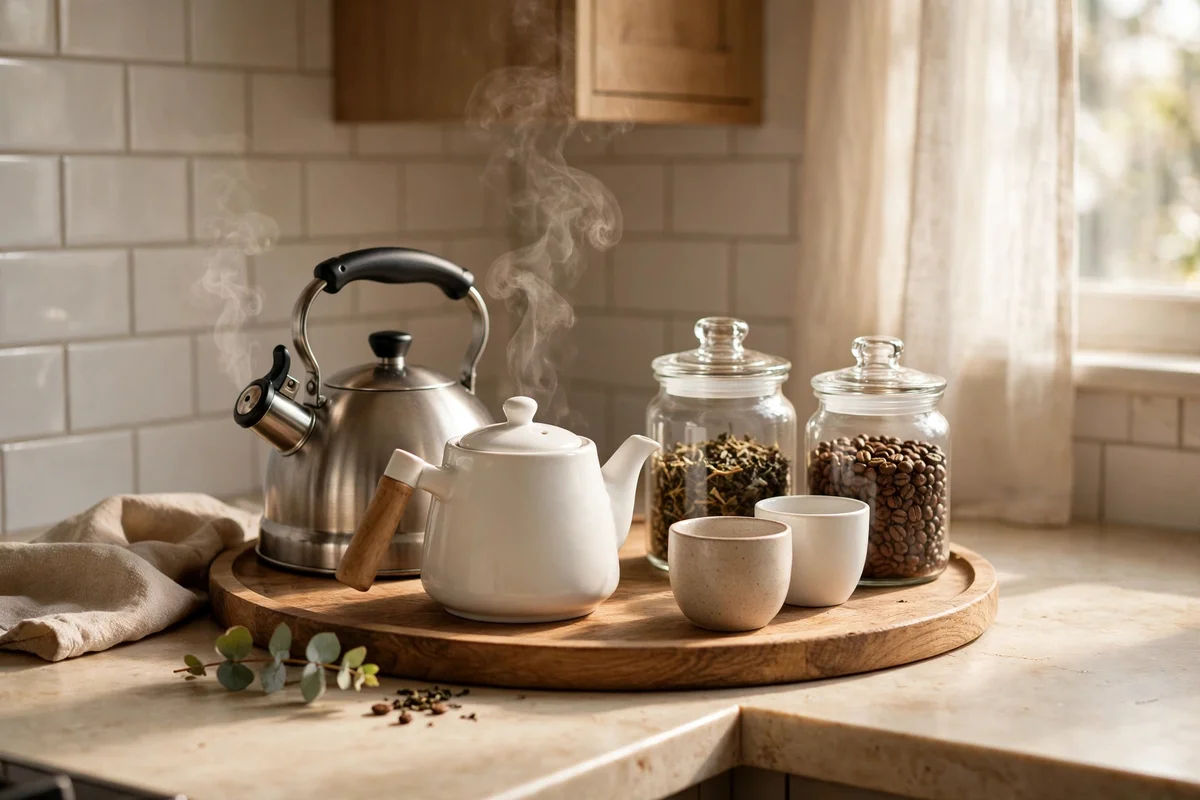
A single tray in the corner gathers the kettle, teapot, cups and jars into one calm zone, and mornings suddenly run themselves. Choose an oval or round wooden tray about 45 cm across so the kettle sits steady and nothing slides. Place the kettle at the back near the socket, the teapot and a small milk jug beside it, and two or three cups at the front for easy grabbing. Add two glass jars for tea leaves and coffee grounds.
Keep a folded cloth under the teapot to catch drips, and refresh the jars weekly so tea stays fragrant. The mistake to avoid is spreading the station across two worktop zones, which recreates the clutter you wanted to fix. A wooden tray, two glass jars and a plain teapot usually total 25 to 50 pounds or dollars, and everything lifts away in seconds when you need the counter back.
3. Fit a Small Corner Bench With Cushions Under the Window
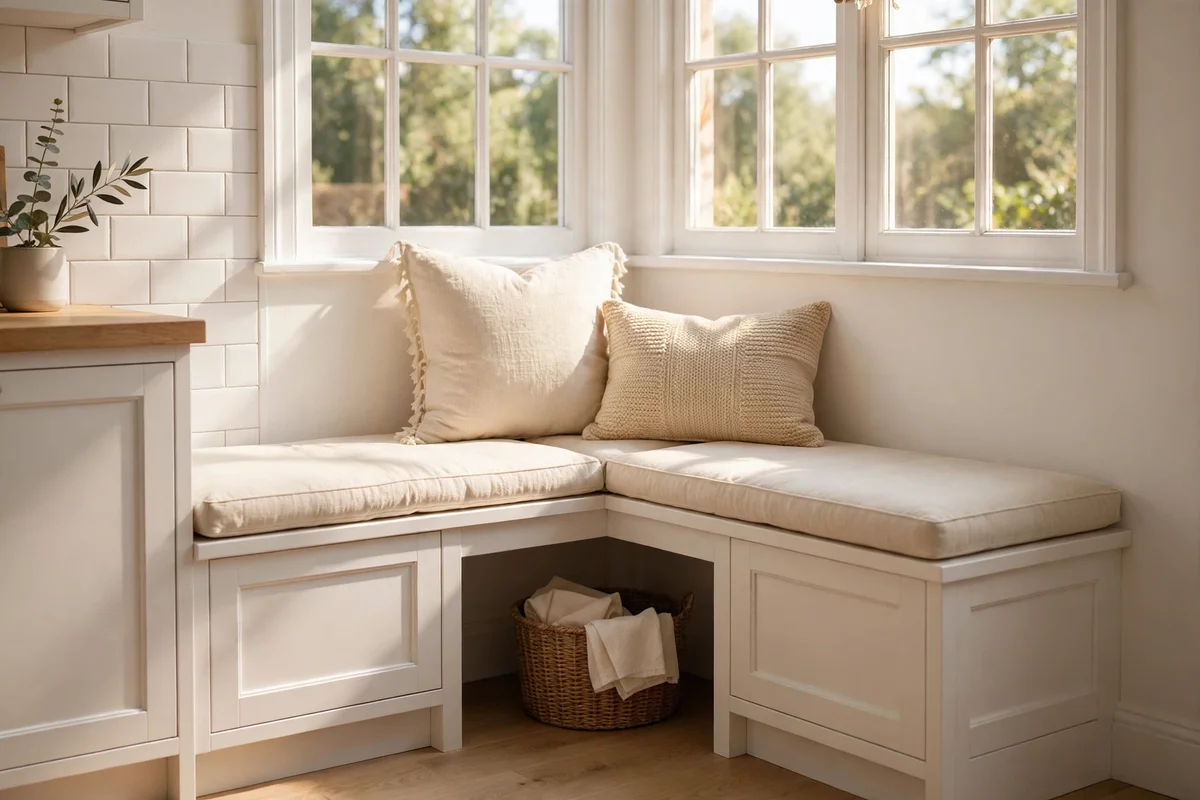
A low bench tucked into the corner under the window makes a reading spot, a waiting seat and a breakfast perch in one piece of furniture. Build or buy a bench 90 to 110 cm long and 40 cm deep, about 45 cm high, which is standard dining height. Paint it the same colour as the skirting boards so it melts into the room, and screw it to the wall for a solid, rattle-free feel.
Top it with a 5 cm foam cushion cut to fit, covered in washable cotton or linen, plus two throw pillows for back support. Keep a small basket underneath for slippers or recipe books. The mistake to avoid is choosing a bench so tall that little ones cannot climb on safely. A simple pine bench with cushions usually costs 60 to 120 pounds or dollars if you build it yourself.
4. Install a Carousel Shelf in a Deep Corner Base Cupboard
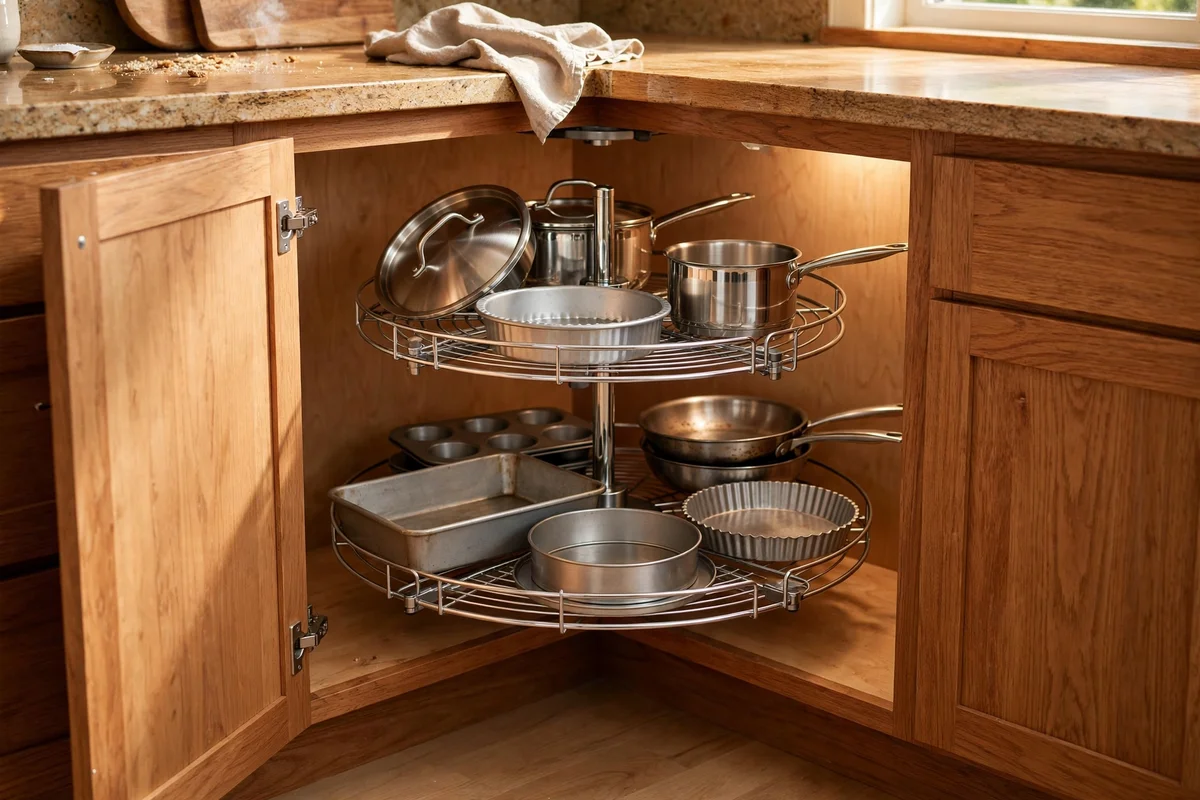
A two-tier rotating carousel finally reaches the dark back of a deep corner cupboard, where pots and pans usually disappear. Measure the cupboard opening first: most full-round carousels need a clear 60 cm diameter and a door at least 40 cm wide. Choose a model with a sturdy centre pole that bolts to the cupboard floor and shelf, and load heavier pans low so the spin stays balanced and smooth.
Group like with like on each tier, for example baking tins above and saucepans below, so one spin brings the right shelf around. The honest cost is the catch: a decent two-tier carousel plus fixings runs 70 to 150 pounds or dollars, and a fitter may charge another hour of labour. The mistake to avoid is overloading beyond the rated weight, usually 12 to 15 kg per shelf, which strains the bearing.
5. Choose Swing-Out Shelves When a Carousel Will Not Fit
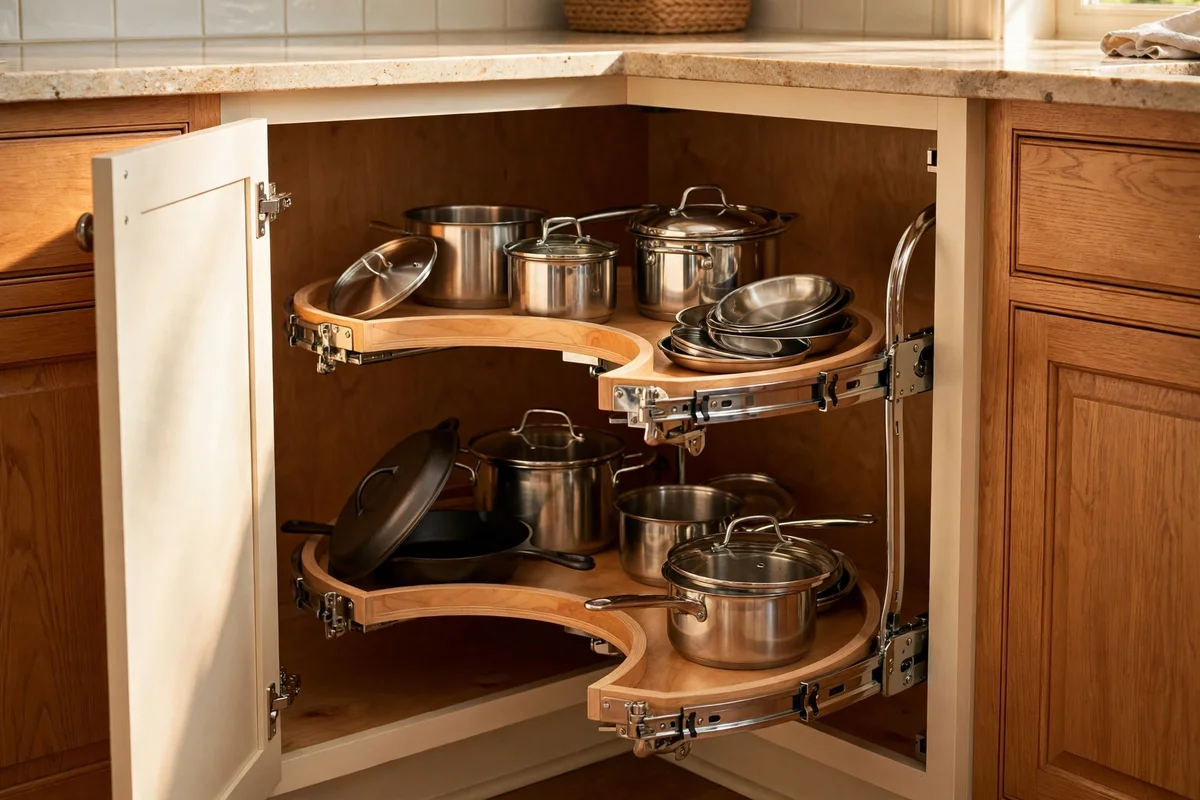
When the cupboard door is too narrow for a full carousel, swing-out shelves still bring the blind corner to you. These half-moon or kidney-shaped trays pivot out of the door on sturdy hinges, so everything slides into view with one pull. Measure the clear opening height and width, then pick a two or three tier unit that matches; most suit 90 cm wide corner cupboards.
Store the daily cooking pots on the front swing tier and backup stock on the back one. The real cost sits a little higher than a carousel: quality swing-out sets range from 120 to 220 pounds or dollars, and fitting needs careful alignment, so many people hire a fitter for an hour. The mistake to avoid is slamming the trays shut, which loosens hinges over time; guide them closed gently.
6. Grow a Herb Planter Along the Corner Windowsill
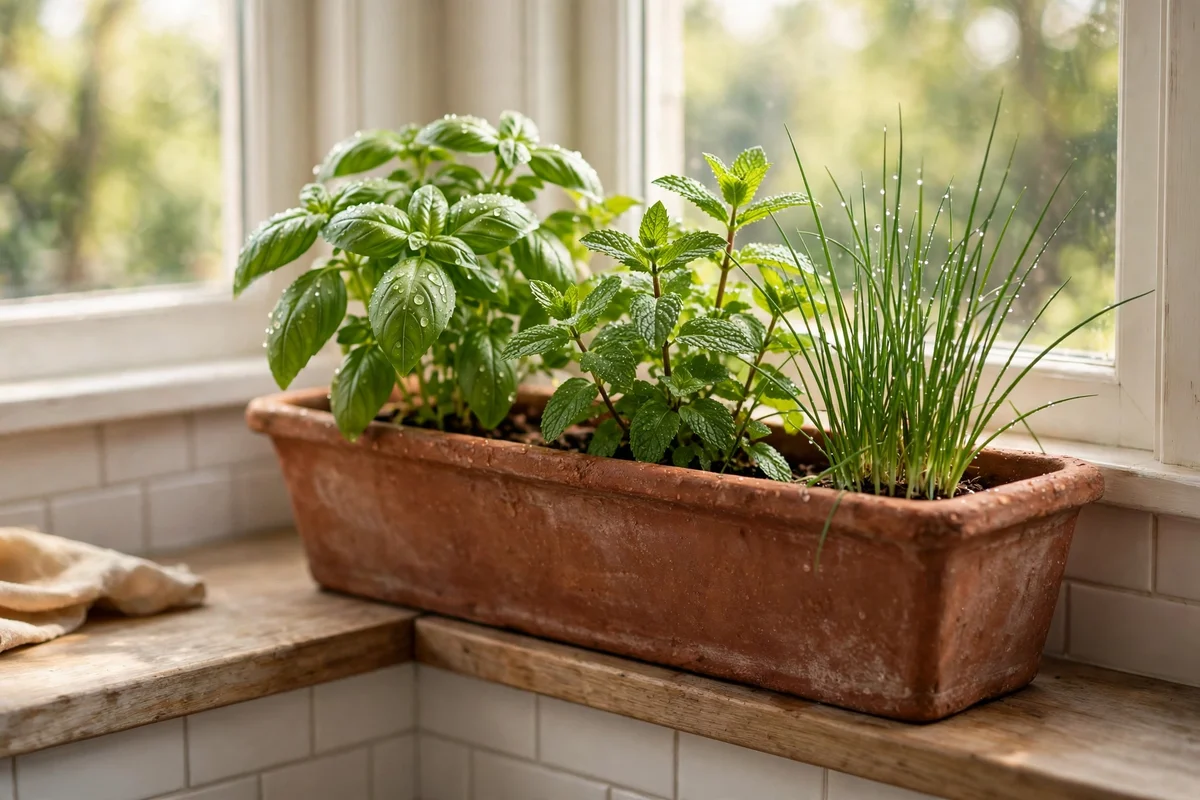
A long, shallow planter on the corner windowsill keeps basil, mint and chives within arm’s reach of the chopping board. Choose a trough 60 to 80 cm long and at least 12 cm deep with drainage holes, set on a saucer or tray to protect the sill. Fill it with peat-free compost mixed with a handful of grit for drainage, and plant the sun lovers at the bright end.
Water little and often, roughly every two days in summer, and snip herbs from the top so the plants bush out instead of going leggy. The mistake to avoid is crowding six pots into one trough; three strong plants outgrow a crowded six every time. A terracotta trough, compost and three starter plants usually cost 20 to 35 pounds or dollars.
7. Style a Corner Sink With a Wooden Board and Plain Soap Dish
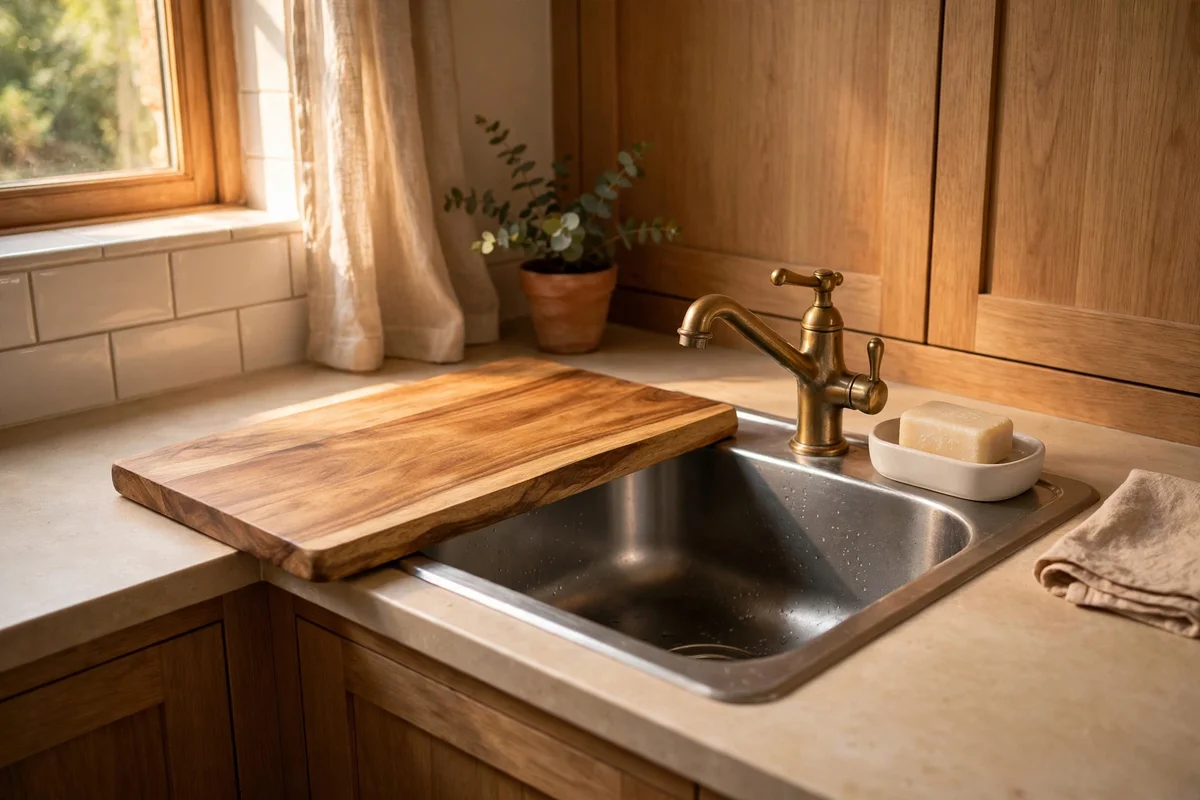
A corner sink looks instantly calmer when the worktop around it is dressed with just two objects. Rest a chopping board in acacia or beech, about 40 by 30 cm, across one side of the sink as a draining board or a handy prep ledge. Beside the tap, set a plain ceramic or stone soap dish with a simple bar of soap instead of a clutter of plastic bottles.
Oil the board monthly with food-safe mineral oil so it resists water rings, and let the soap dish dry between uses to stop scum building up. The mistake to avoid is leaving a wet sponge on the board, which stains the wood fast; hang it on a small hook inside the cupboard door. A good wooden board and soap dish together usually cost 20 to 40 pounds or dollars.
8. Mount a Plate Rack Across Both Walls of the Corner
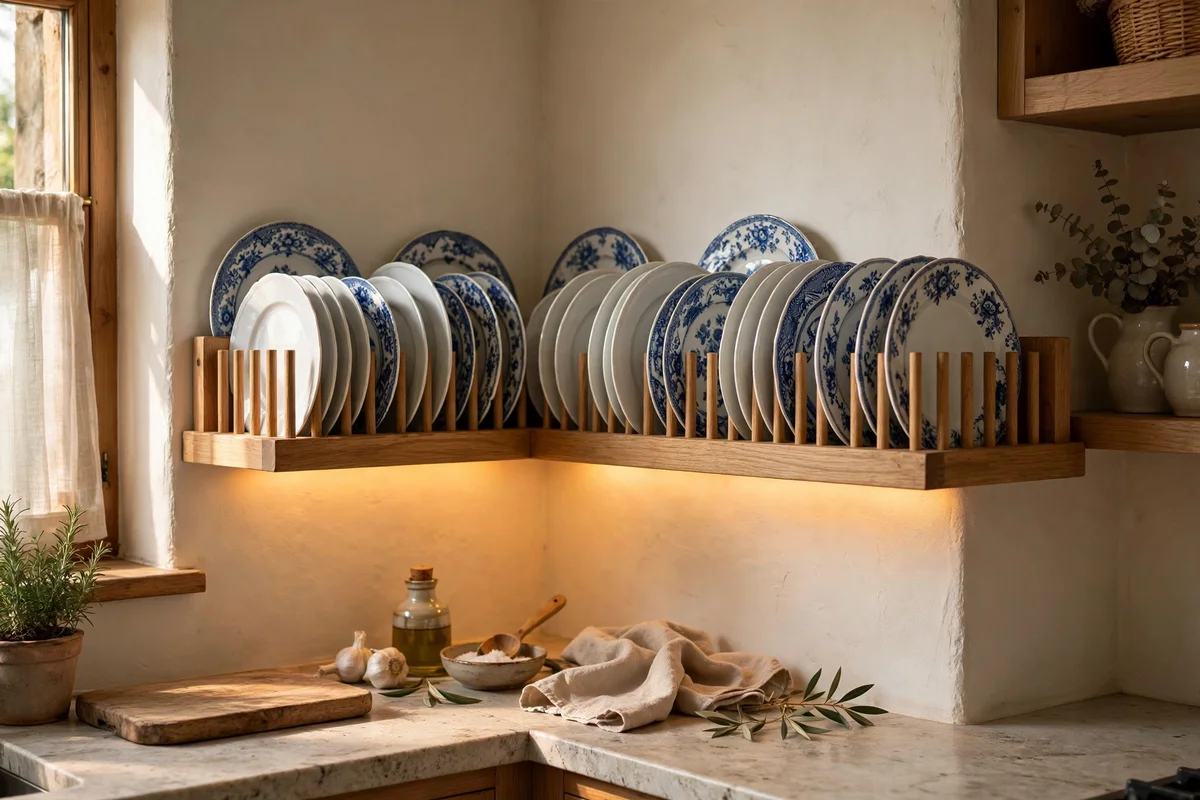
A plate rack that bends around the corner shows off everyday crockery while freeing an entire cupboard shelf. Mount a wooden rack with plate grooves 8 cm deep on each wall, meeting neatly at the angle, and keep the lowest groove at least 40 cm above the worktop so there is room to slide platters in. Check the wall with a stud finder and use proper anchors, since a full rack of plates is heavy.
Group plates by size, largest at the back of each run, and leave one groove empty for the plate you are using today. The mistake to avoid is overloading a rack fixed only to plasterboard; spread fixings across at least two studs. A painted pine plate rack spanning two 60 cm runs usually costs 50 to 100 pounds or dollars, more in oak.
9. Double Up Corner Shelves for Daily Cups and Bowls
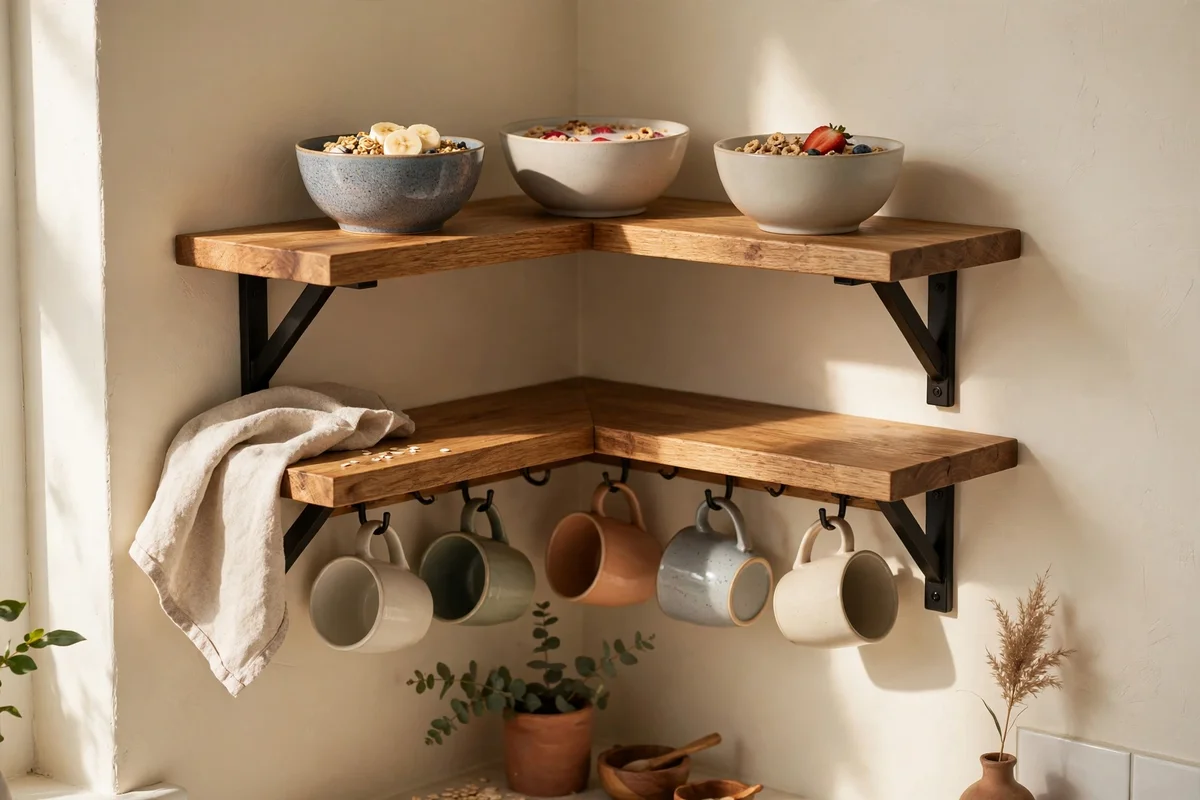
One corner shelf fills up fast, so plan two from the start for cups below and bowls above. Keep the lower shelf at 150 cm from the floor, about shoulder height, so mugs are grabbed without stretching, and set the upper shelf 30 cm higher for cereal and serving bowls. Use the same timber and bracket style on both runs so the pair reads as one deliberate design.
Hang four to six mugs on small hooks under the lower shelf to double its capacity, leaving the shelf surface for bowls. The mistake to avoid is mixing bracket styles between the two walls, which makes the corner look cobbled together. Two matched shelf kits with brackets usually cost 40 to 70 pounds or dollars.
10. Hang a Pendant Light Over the Corner Work Zone
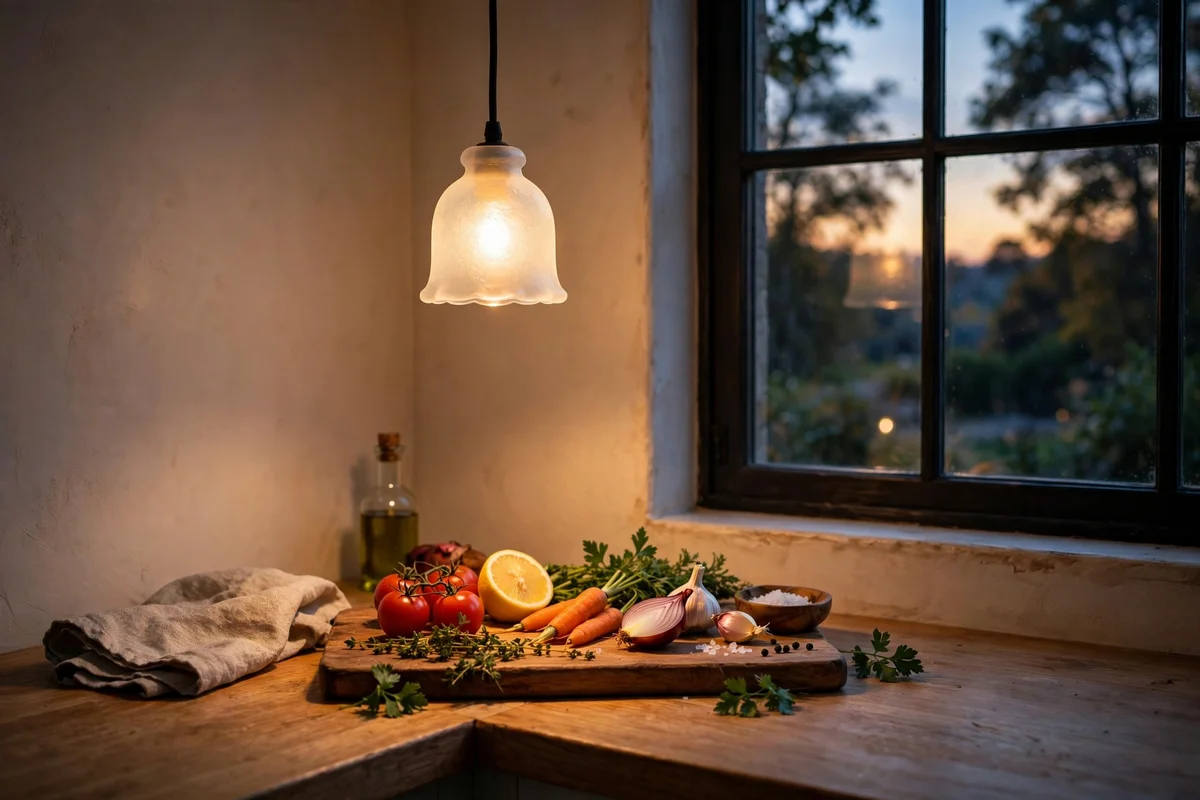
A small pendant hung over the corner worktop ends the dark-angle problem in one stroke. Hang the shade 75 to 80 cm above the worktop surface, measured from the underside of the shade, so it lights the chopping zone without shining in your eyes. Choose a shade 20 to 25 cm across in opal glass or woven rattan, which spreads a soft, even pool of warm light.
Fit a warm 2700K LED bulb and put the pendant on its own switch or a plug-in timer so it glows in the evening even when the main lights are off. The mistake to avoid is hanging the shade so low that tall family members bump it; 75 cm is the safe minimum. A wired pendant usually costs 40 to 90 pounds or dollars, plus an electrician’s hour if no outlet exists.
11. Line Up Spices on a Tiered Corner Riser
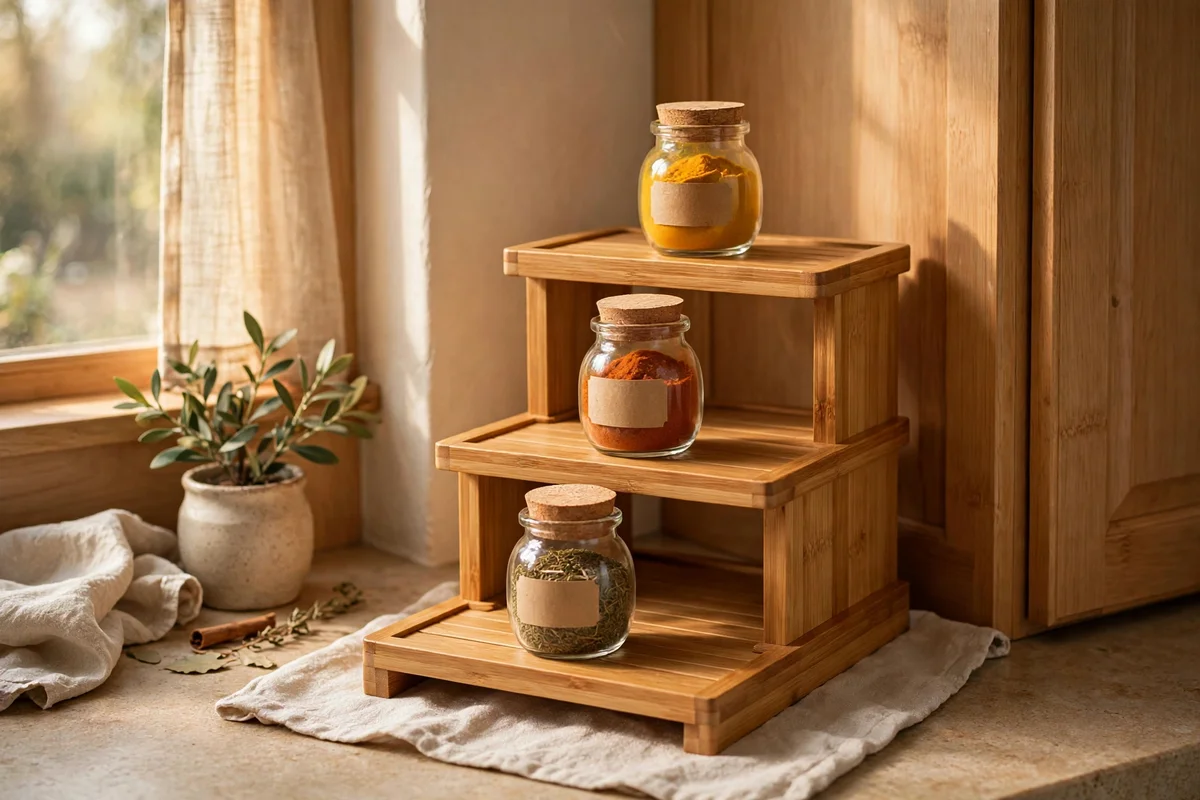
A three-tier stepped riser in the corner turns a jumble of spice jars into a tidy display you can read at a glance. Choose a riser 30 cm wide with steps about 8 cm deep so standard spice jars sit securely without tipping. Place everyday spices on the front step, cooking blends in the middle and baking spices at the back, labels facing out.
Decant into matching small glass jars with plain labels so the colours of turmeric, paprika and dried mint show through. The mistake to avoid is keeping spices near the hob, where steam and heat fade their flavour; the cool corner is far better. A bamboo or acacia three-tier riser usually costs 15 to 30 pounds or dollars.
12. Rest Cookbooks Along a Slim Corner Ledge
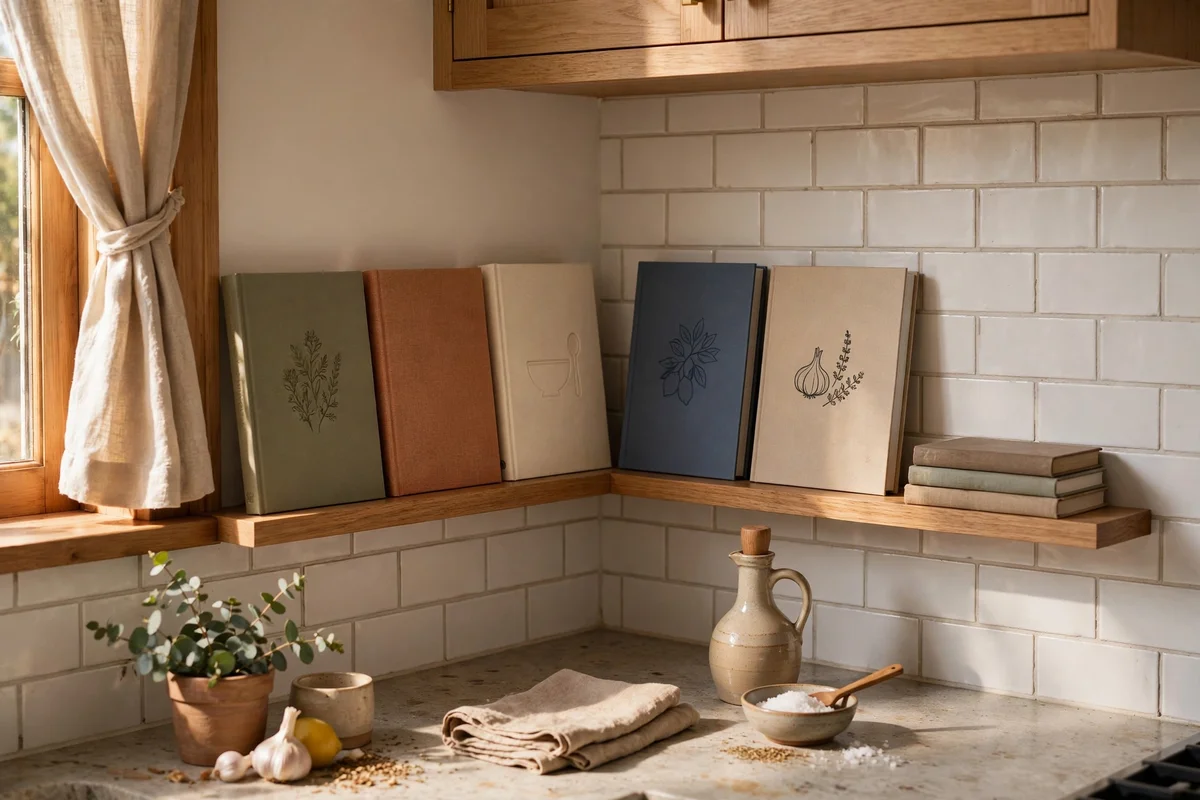
A narrow picture ledge wrapped around the corner keeps favourite cookbooks upright and on show without eating cupboard space. Fix a ledge 8 to 10 cm deep at eye level, around 150 cm from the floor, and run it along both walls of the corner for a continuous display. Fronted ledges with a small lip stop books sliding when the nearby cupboard door slams.
Show five or six well-loved books with covers facing out, and stack two more flat at the end of the run. The mistake to avoid is shelving every cookbook you own; rotate seasonally and store the rest elsewhere. A pair of 60 cm wooden ledges with fixings usually costs 20 to 40 pounds or dollars.
13. Set a Tiered Fruit Stand in the Kitchen Corner
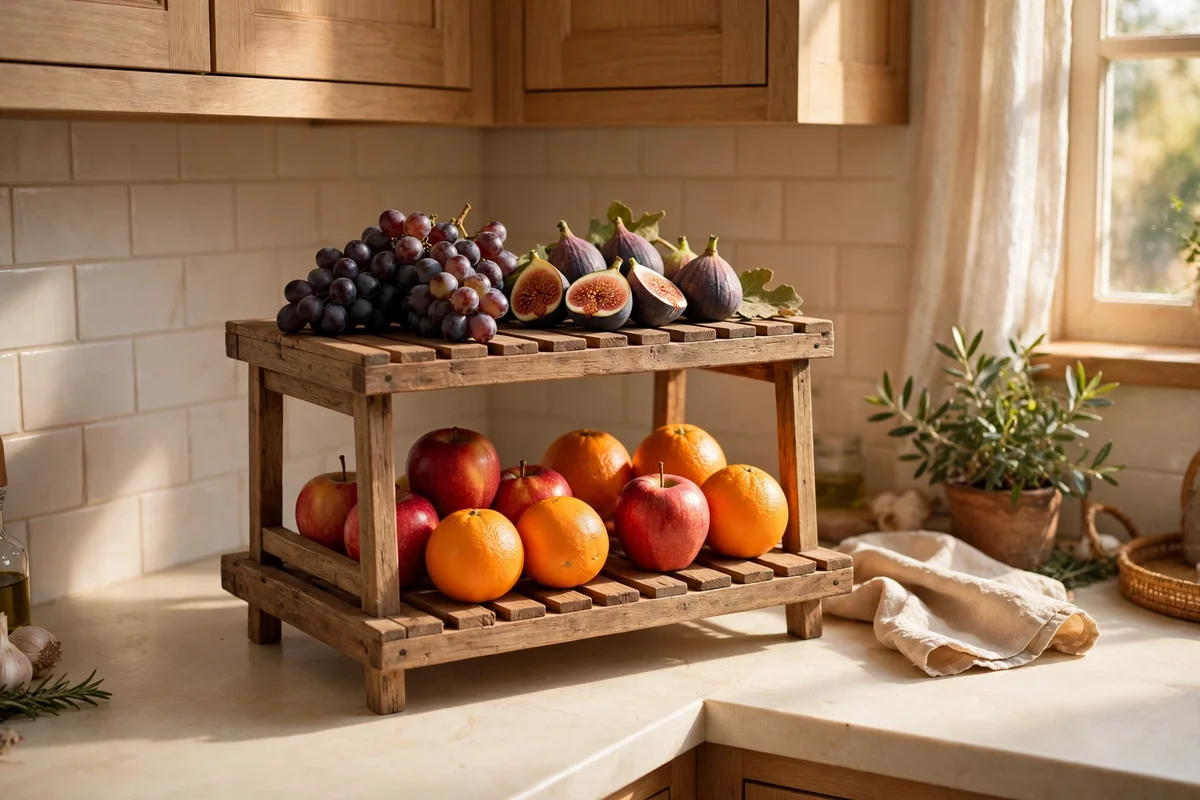
A two or three tier stand in the corner lifts fruit off the worktop and keeps it visible so it actually gets eaten. Choose a stand 40 to 50 cm tall with tiers 25 to 30 cm across, in wood, ceramic or wire, and place heavier fruit like apples and oranges low with delicate figs and grapes up top. Set it a hand’s breadth from the wall so air moves around the tiers.
Wash fruit before it goes on the stand and remove anything bruised promptly, since one spoiled piece hurries the rest along. The mistake to avoid is piling fruit more than two deep, which hides the bottom layer until it spoils. A sturdy two-tier wooden stand usually costs 20 to 45 pounds or dollars.
14. Gather Utensils in Crocks at the Back of the Corner
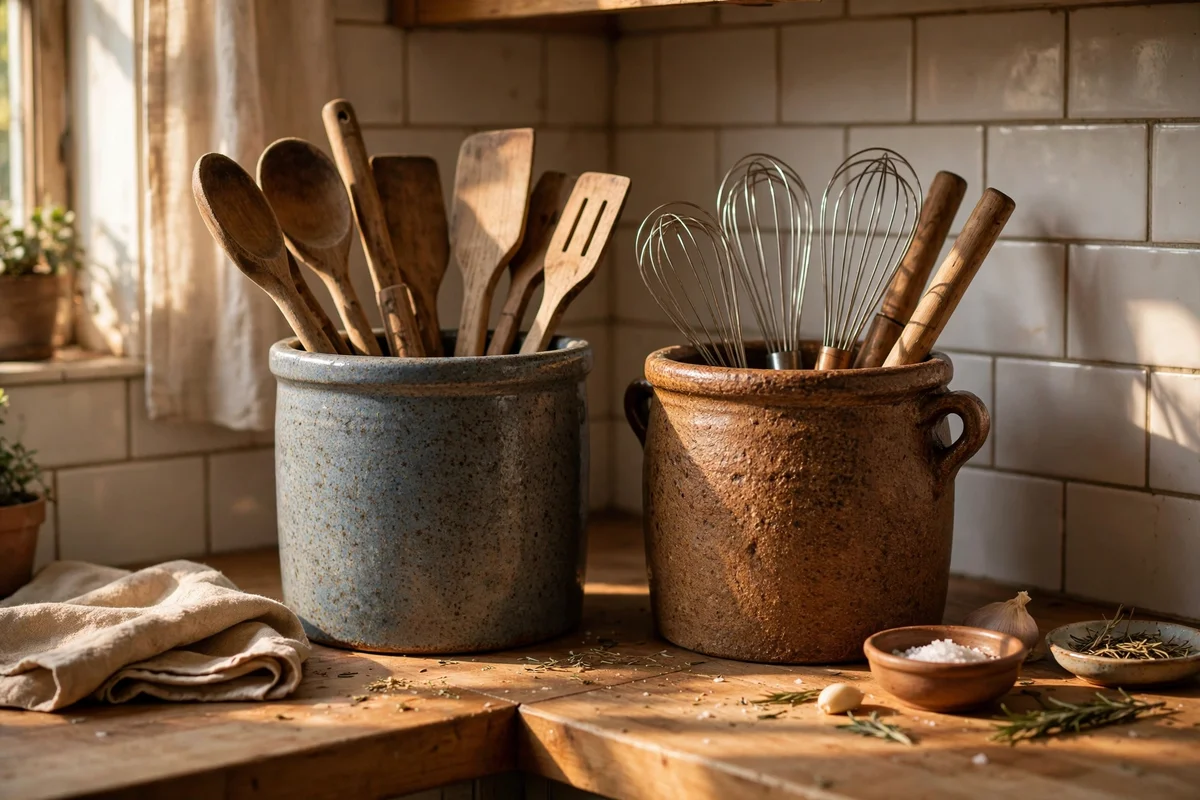
Two sturdy crocks at the very back of the corner worktop gather wooden spoons, spatulas and whisks where they are easy to grab mid-cooking. Choose heavy stoneware or glazed ceramic crocks 15 to 18 cm tall so tall utensils stand upright without toppling. Keep cooking tools in one crock and baking tools in the other, and resist adding a third unless you truly need it.
Wash the crocks monthly, since flour dust and grease settle inside, and trim the collection to tools you use weekly. The mistake to avoid is parking the crocks right beside the kettle, where steam stains handles; give them the cooler half of the corner. Two stoneware crocks usually cost 20 to 40 pounds or dollars.
15. Add a Corner Drawer Bank for Tools and Linens
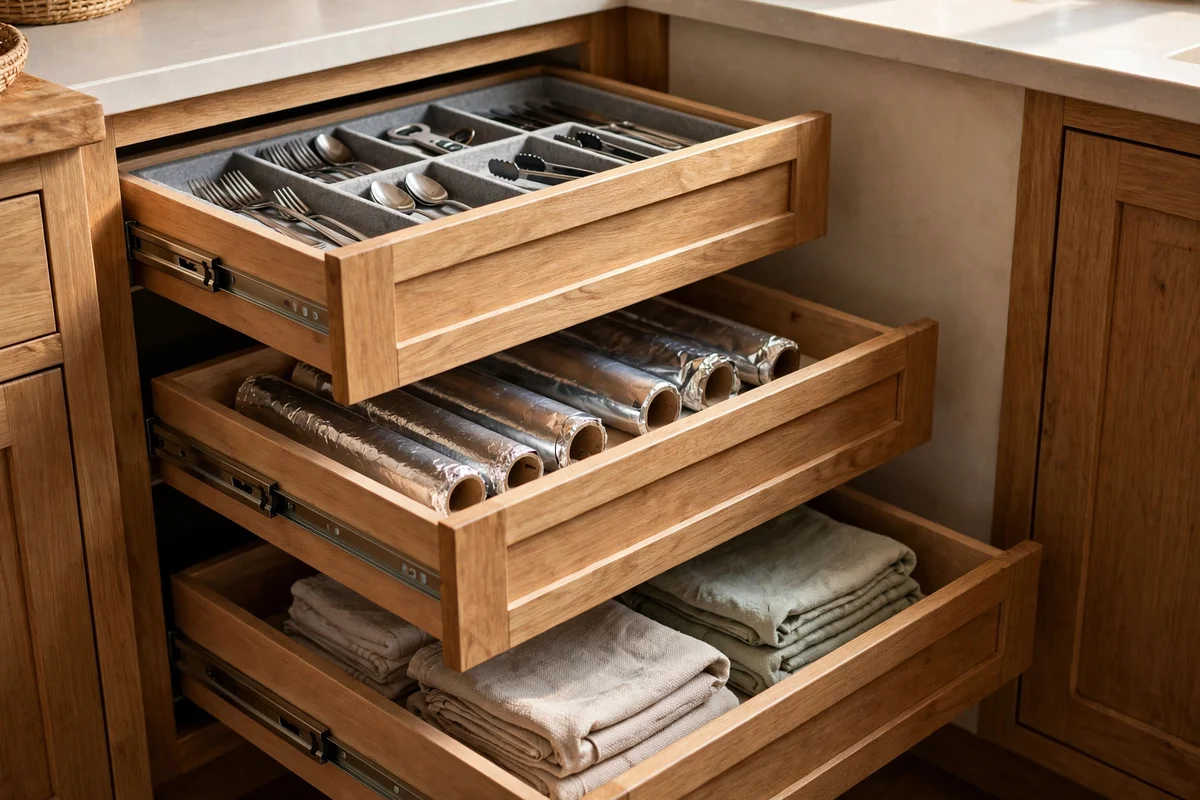
A bank of three or four shallow drawers fitted into the corner base unit beats a deep cupboard for everyday tools. Shallow drawers 10 to 12 cm deep hold cutlery trays, foil, wraps and tea towels without the digging a deep drawer demands. Fit full-extension runners so the back 20 cm opens fully, which is exactly the depth where corner drawers earn their keep.
Use simple dividers in the top drawer and keep one drawer purely for linens so cloths never tangle with gadgets. The honest cost: a made-to-measure corner drawer unit runs 150 to 300 pounds or dollars fitted, versus a basic cupboard, but it gets used ten times a day. The mistake to avoid is skipping soft-close runners, which rattles every time a drawer slams.
16. Hang a Drying Rack Inside a Corner Wall Cupboard
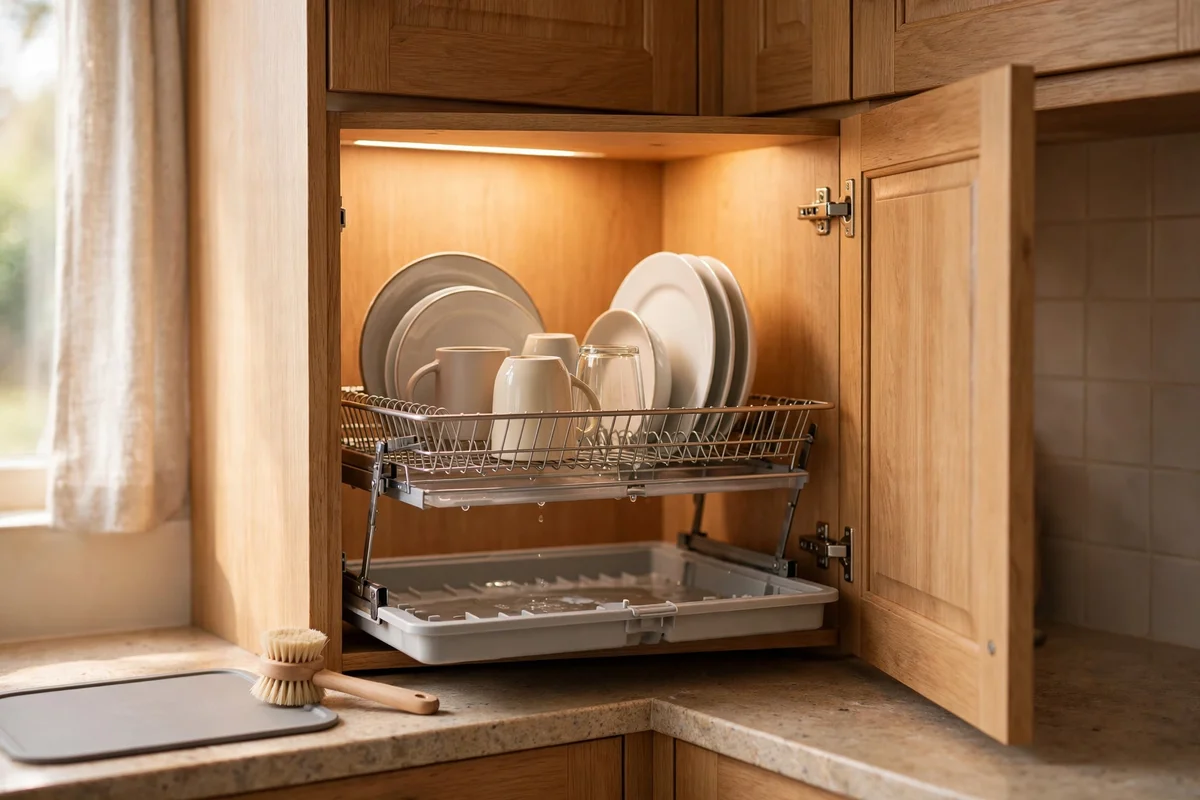
A fold-down drying rack fixed inside a corner wall cupboard keeps the worktop clear and dishes out of sight. Mount the rack on the inside of the cupboard door or the cupboard side wall, choosing a model that folds flat when empty. Line the cupboard base with a washable tray to catch drips, and leave the door ajar for an hour after washing so air circulates.
Load plates upright and cups upside down so water runs off, and wipe the drip tray weekly to stop musty smells. The mistake to avoid is closing wet dishes into a sealed cupboard overnight, which invites mildew; ventilation matters more than neatness. A folding wall-mounted rack with a drip tray usually costs 25 to 50 pounds or dollars.
17. Store Chopping Boards Upright in a Corner Slot
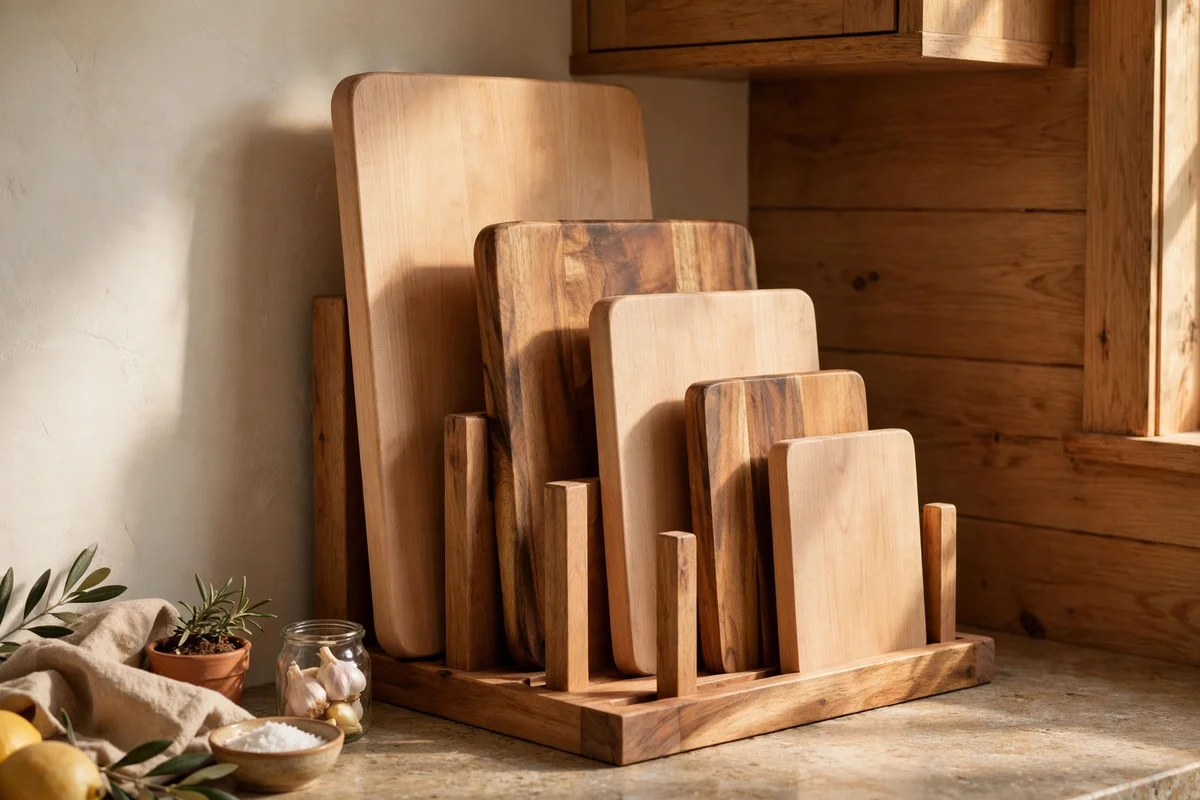
A simple vertical slot divider at the back of the corner stores chopping boards upright, so you never lever the wrong one out of a stack. Make or buy a divider with slots 3 to 4 cm wide and 25 cm deep, sized to fit a 30 cm board standing on edge. Place it against the corner wall or inside a deep base cupboard near the prep zone.
Stand boards with the largest at the back and smallest at the front, and let them dry fully upright after washing to stop warping. The mistake to avoid is wedging boards into slots narrower than 3 cm, which chips edges and traps moisture. A wooden slot divider usually costs 15 to 35 pounds or dollars, or an afternoon of scrap timber.
18. Keep a Kettle and Mug Shelf Above the Corner Counter
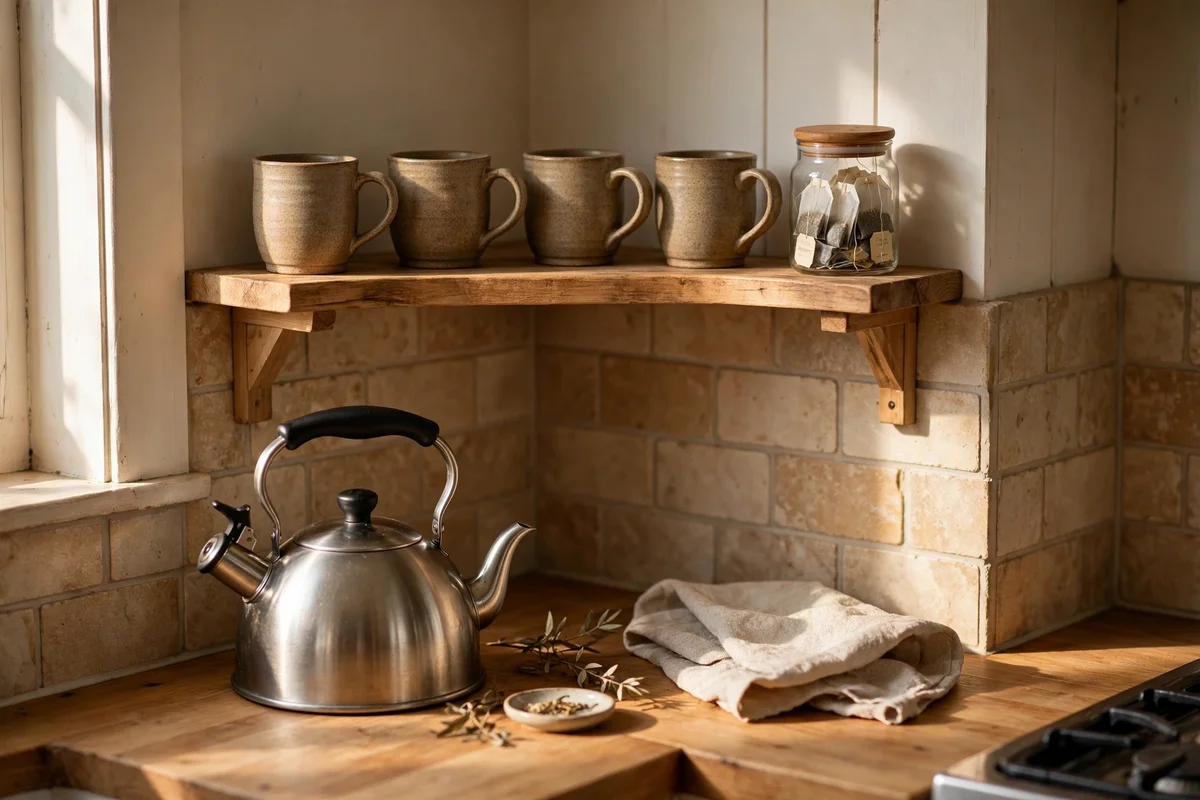
A short shelf mounted just above the corner worktop keeps the kettle plugged in below and mugs lined up above. Fix a sturdy shelf 40 to 50 cm above the counter, about 20 cm deep, directly over the kettle’s socket so the flex stays short and tidy. Use brackets rated for at least 10 kg, since a full kettle and six stoneware mugs add up.
Line up four to six everyday mugs with handles all facing the same way, and keep a small jar of teabags or ground coffee at one end. The mistake to avoid is stacking mugs two high, which chips rims; one neat row is safer and looks calmer. A 60 cm shelf with two strong brackets usually costs 20 to 40 pounds or dollars.
19. Sort Recycling Inside a Corner Cupboard With Bins
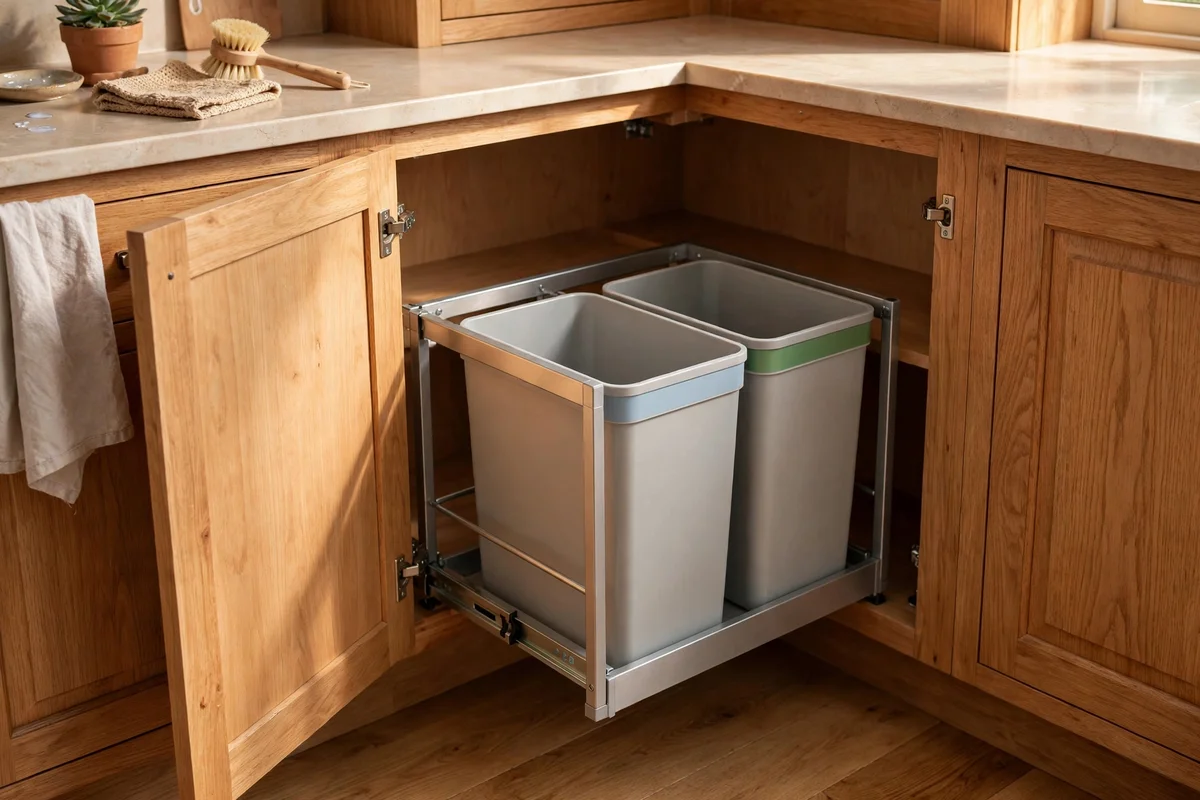
A pull-out frame with two or three slim bins turns the corner base cupboard into a tidy sorting station for paper, plastics and food waste. Choose bins 20 to 25 cm wide that match your local collection rules, and mount them on a pull-out runner so the whole frame glides out for bag changes. Label each bin plainly on the rim.
Line the bins with bags that fit snugly and rinse food containers before they go in to keep smells down. The mistake to avoid is buying bins before measuring the door opening; frames come in fixed widths and a 2 cm miss means a return trip. A two-bin pull-out frame usually costs 60 to 120 pounds or dollars.
20. Fit Task Lighting Under the Corner Wall Cabinets
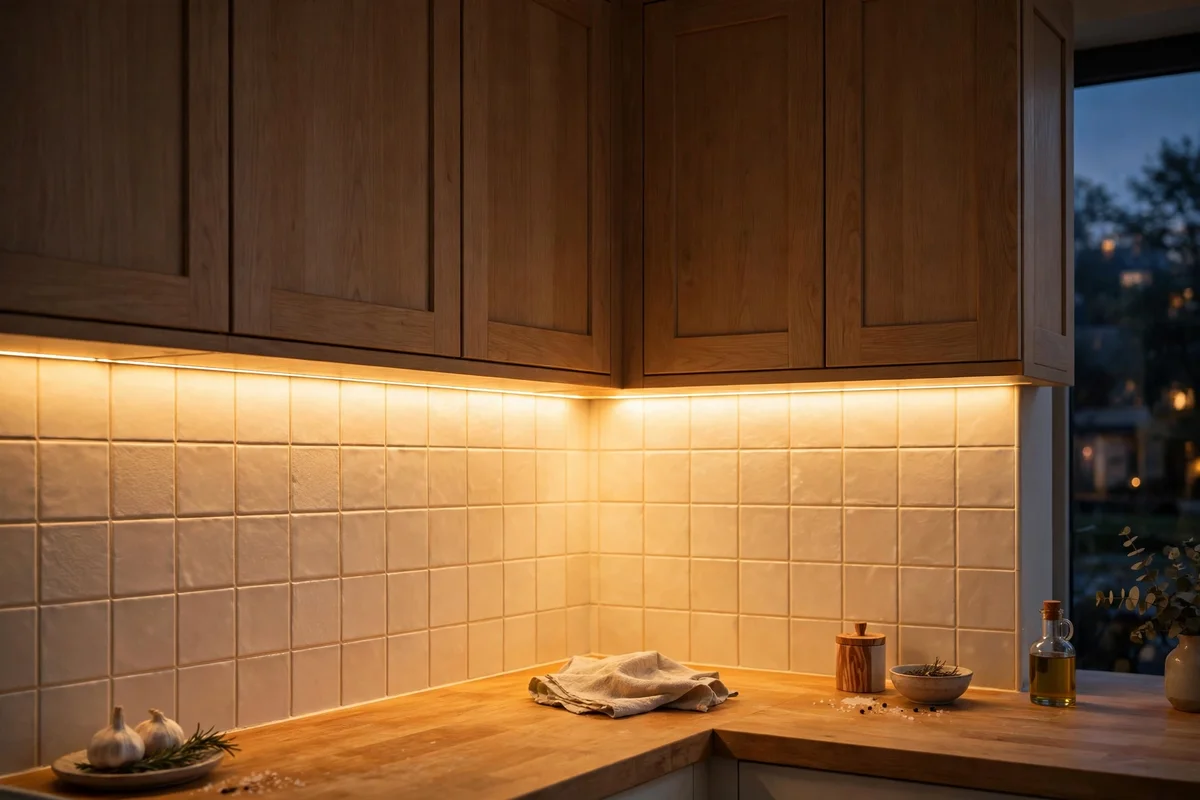
A strip of warm LED lighting under the corner wall cabinets wipes out the shadows that make corners feel gloomy. Choose a self-adhesive or screwed aluminium-channel strip in 2700K, cut to span both walls of the corner, and set it 2 to 3 cm back from the cabinet front edge so the light washes down the splashback. A plug-in driver keeps it renter friendly.
Run the strip through a small dimmer switch so bright prep light can soften to evening glow. The mistake to avoid is cool white 5000K strips, which make food and wood tones look grey and harsh. A 2 metre warm LED kit with driver and dimmer usually costs 25 to 50 pounds or dollars.
21. Make a Two-Person Breakfast Bar in the Corner
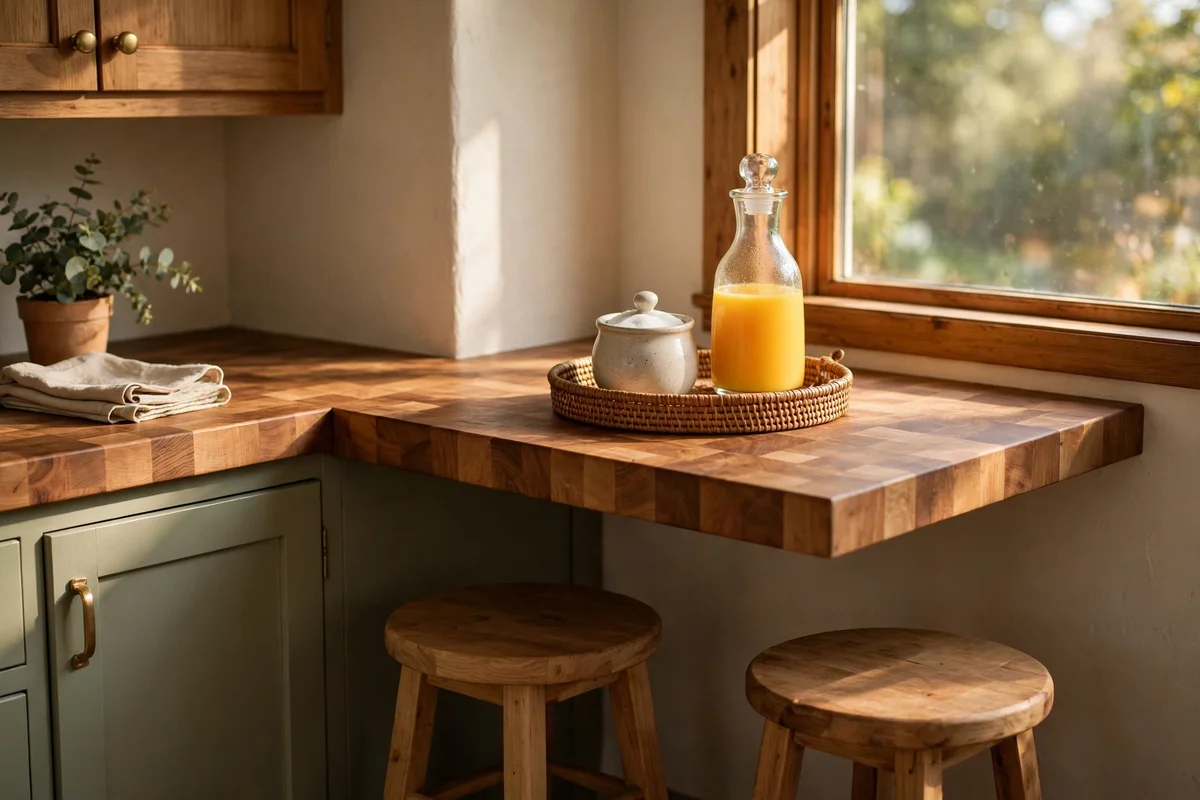
A small bar top bridging the corner turns wasted floor space into a breakfast spot for two. Fix a solid wood or butcher-block top 90 by 60 cm at 90 cm height across the angle, supported by two wall cleats and one leg at the outer corner. Leave 25 cm of knee room under the top so chairs tuck in without scraping shins.
Pair it with two backless stools 65 cm high that slide fully underneath when not in use. Keep a small tray with the sugar bowl and a juice carafe on the bar so mornings start set. The mistake to avoid is a top narrower than 55 cm, which leaves no room for a plate and a cup side by side. A simple bar top with stools usually costs 120 to 250 pounds or dollars.
22. Display Copper Pots on a Rail Across the Corner
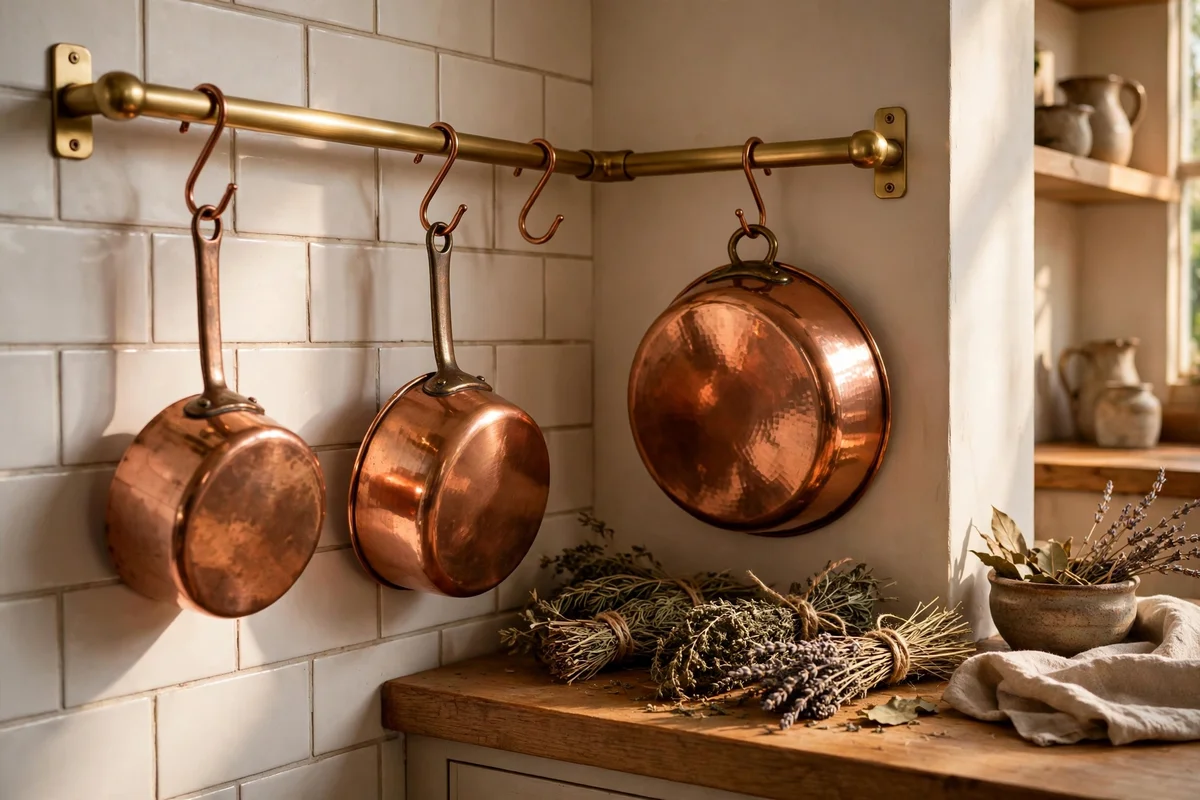
A metal rail bent around the corner hangs copper and cast-iron pots where they are both handy and beautiful. Use a stainless steel or brushed brass rail 60 to 80 cm per side, mounted 20 cm below the wall cabinets on solid fixings, since loaded pots can weigh over 5 kg. Space S-hooks 12 cm apart so handles hang without clanking together.
Hang the two or three pots you use weekly at the front and keep rarely used ones stored elsewhere, so the display stays honest. Wipe pots dry before hanging to stop drip marks on the worktop below. The mistake to avoid is hanging above the kettle’s steam path, which dulls copper fast; pick the drier wall. A corner rail with hooks usually costs 30 to 60 pounds or dollars.
The loveliest corners are the ones that earn their keep quietly: a tray that keeps the tea things together, shelves that turn the angle into storage, a bench that invites someone to sit with a cup while dinner simmers. You do not need to do all twenty-two; choose the ideas that answer a real frustration in your kitchen and let the rest wait. Small, honest changes outlast grand ones, and a corner done well changes how the whole room feels each morning.
If you try only one thing this week, make it the corner tray station, because it costs little, takes ten minutes and proves the corner can work. Clear the angle, set down a tray, arrange the kettle, teapot and cups, and notice how the rest of the counter suddenly breathes. From there the bigger projects feel easy: shelves next month, the bench when a free weekend comes. Start small, stay consistent, and enjoy the corner you used to ignore.
Frequently Asked Questions
How can I use kitchen corner space in a rented flat?
Stick to removable fixes: freestanding shelf units, a tray station, tension-rod lighting and adhesive LED strips. Keep original fixings in a bag for move-out day. A corner riser, tiered fruit stand and utensil crocks need no drilling at all. Most renters can transform a dead corner for 40 to 90 pounds or dollars without touching the landlord’s walls.
What is the cheapest way to add corner kitchen shelves?
Two stained pine boards with basic metal brackets cost 30 to 50 pounds or dollars and fit in an afternoon. Fix into studs or masonry for safety, keep shelves 22 cm deep and 30 to 35 cm apart. Wipe them weekly, since kitchen grease settles on open shelves fast. Start with one wall before committing to the full corner wrap.
How much does corner cupboard storage really cost?
A two-tier carousel costs 70 to 150 pounds or dollars plus an hour of fitting labour. Swing-out shelves run 120 to 220 pounds or dollars and need careful alignment. A made-to-measure corner drawer bank costs 150 to 300 pounds fitted. Measure your door opening before buying anything, since a 2 cm miss turns into a return trip.
How do I keep a corner tea station tidy?
Contain everything on one tray about 45 cm across so the station has a clear border. Limit it to the kettle, teapot, two or three cups and two jars. Keep a folded cloth under the teapot for drips and refresh tea and coffee weekly. When the counter is needed, the whole tray lifts away in one move, which is the whole point.
Can I put open shelves in a corner near the cooker?
Keep open shelves at least 60 cm from the hob edge and never directly above it, since grease and steam stain boards and dull finishes fast. A cooler corner near the sink or window suits open storage far better. If the only corner is near the cooker, use closed cupboards or washable glass shelves there instead.